LEXUS LS430 2003 Factory Repair Manual
Manufacturer: LEXUS, Model Year: 2003,
Model line: LS430,
Model: LEXUS LS430 2003
Pages: 4500, PDF Size: 87.45 MB
LEXUS LS430 2003 Factory Repair Manual
LS430 2003
LEXUS
LEXUS
https://www.carmanualsonline.info/img/36/57050/w960_57050-0.png
LEXUS LS430 2003 Factory Repair Manual
Trending: wheel bolts, Speedometer, driver seat adjustment, brake pads, steering interlock cable, fog light, ground clearance
Page 1161 of 4500
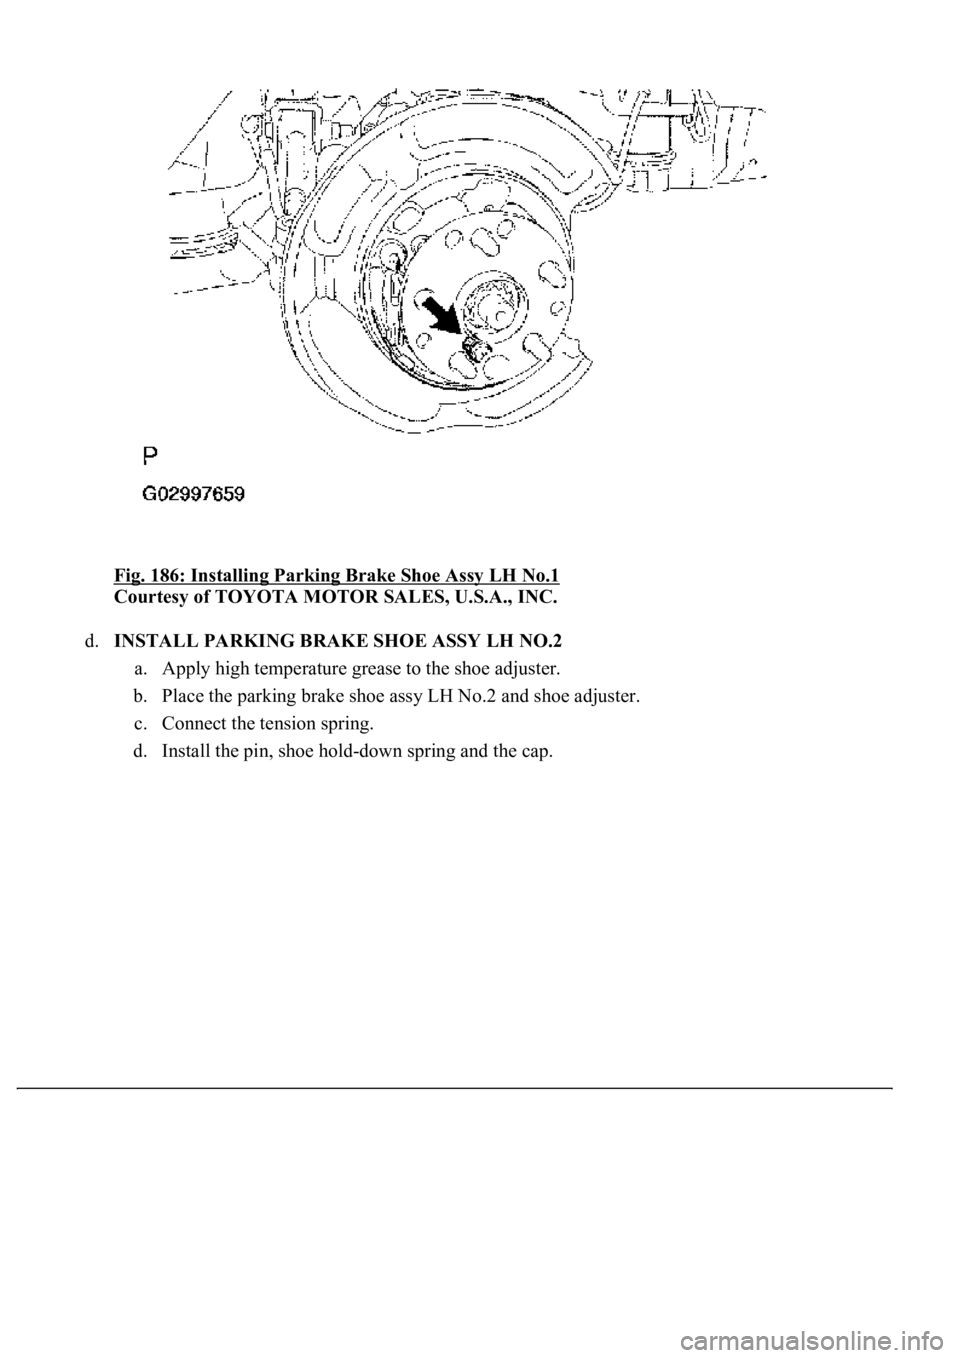
Fig. 186: Installing Parking Brake Shoe Assy LH No.1
Courtesy of TOYOTA MOTOR SALES, U.S.A., INC.
d.INSTALL PARKING BRAKE SHOE ASSY LH NO.2
a. Apply high temperature grease to the shoe adjuster.
b. Place the parking brake shoe assy LH No.2 and shoe adjuster.
c. Connect the tension spring.
d. Install the pin, shoe hol
d-down spring and the cap.
Page 1162 of 4500
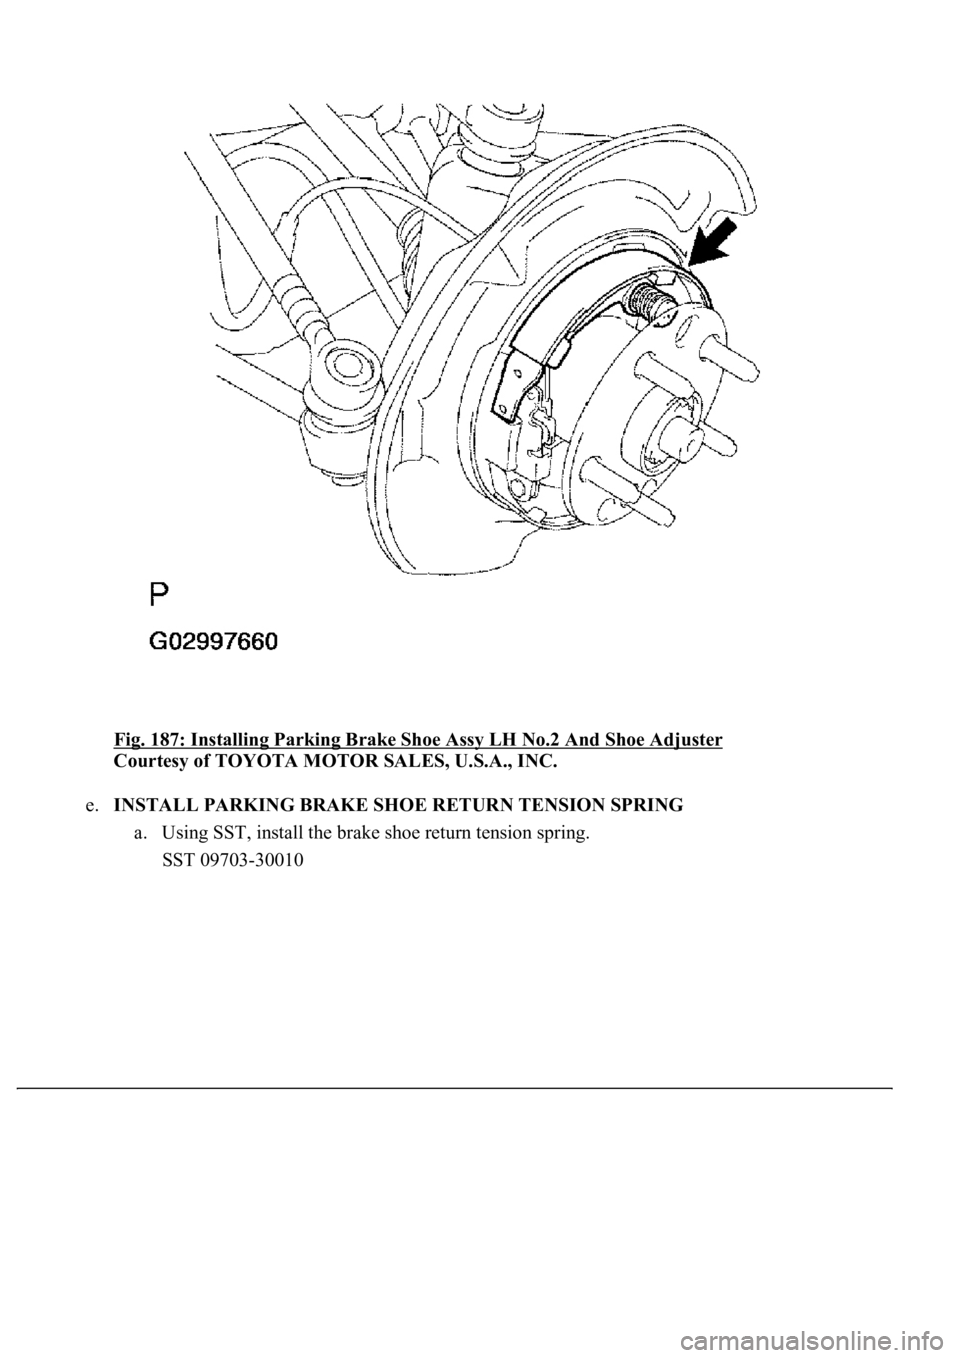
Fig. 187: Installing Parking Brake Shoe Assy LH No.2 And Shoe Adjuster
Courtesy of TOYOTA MOTOR SALES, U.S.A., INC.
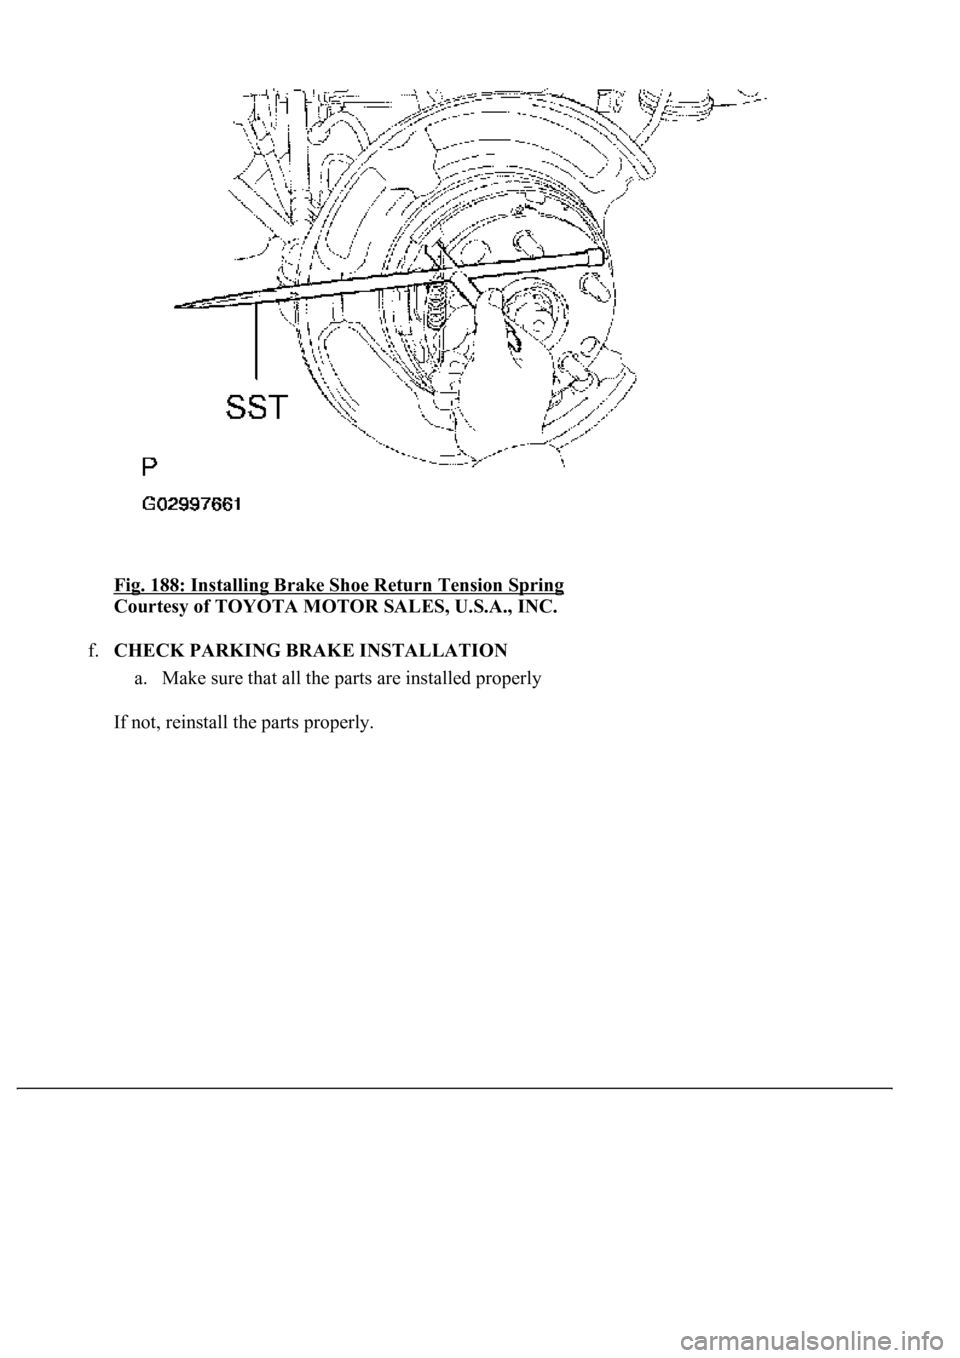
e.INSTALL PARKING BRAKE SHOE RETURN TENSION SPRING
a. Using SST, install the brake shoe return tension spring.
SST 09703-30010
Page 1163 of 4500
Fig. 188: Installing Brake Shoe Return Tension Spring
Courtesy of TOYOTA MOTOR SALES, U.S.A., INC.
f.CHECK PARKING BRAKE INSTALLATION
a. Make sure that all the parts are installed properly
If not, reinstall the parts properly.
Page 1164 of 4500
Fig. 189: Checking Parking Brake Installation
Courtesy of TOYOTA MOTOR SALES, U.S.A., INC.
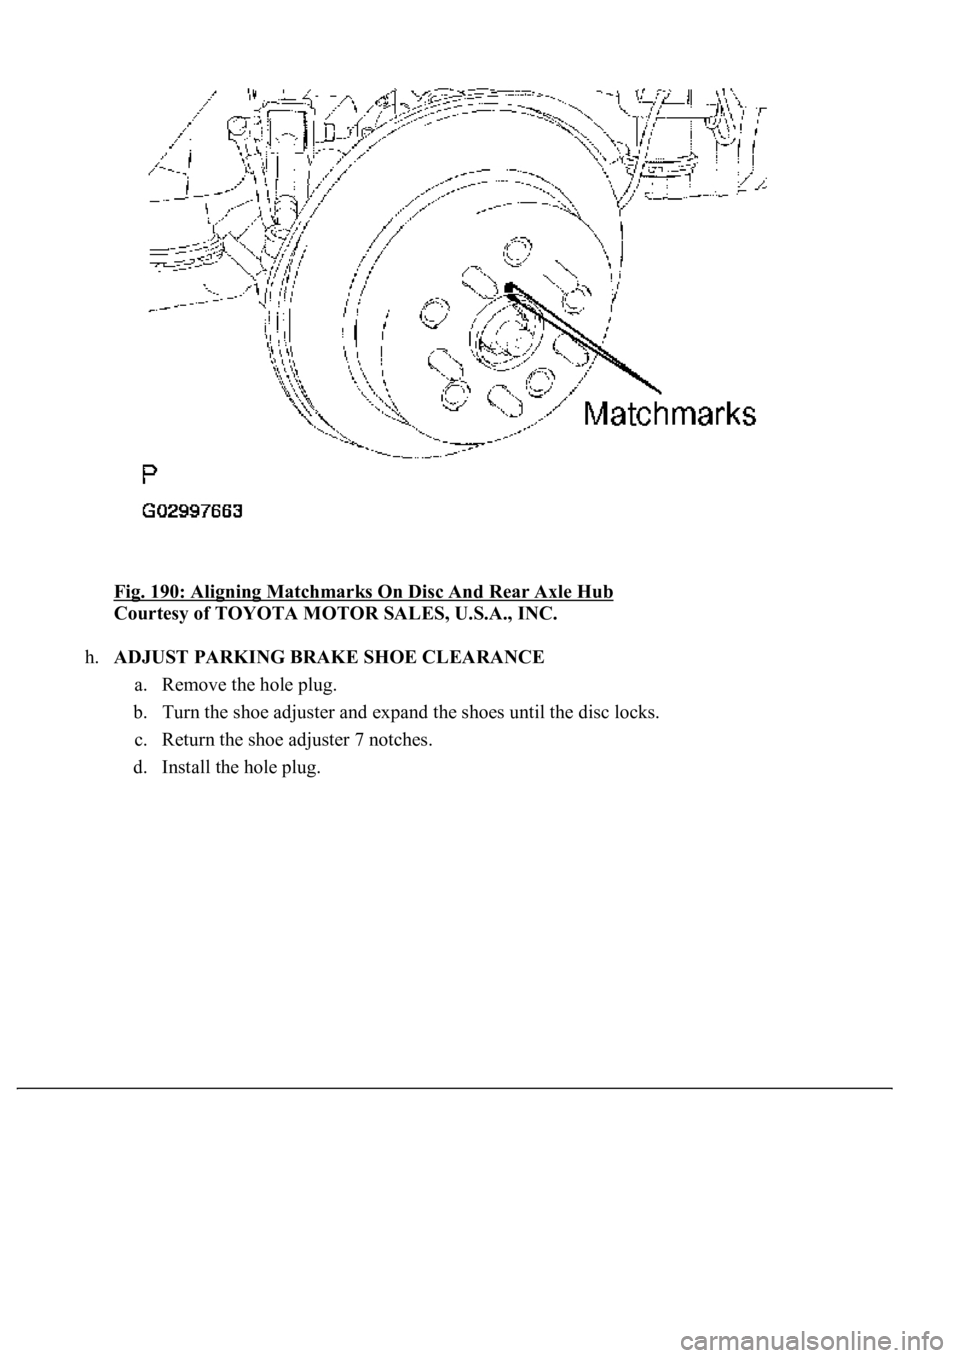
g.INSTALL REAR DISC
a. Ali
gn the matchmarks on the disc and rear axle hub.
Page 1165 of 4500
Fig. 190: Aligning Matchmarks On Disc And Rear Axle Hub
Courtesy of TOYOTA MOTOR SALES, U.S.A., INC.
h.ADJUST PARKING BRAKE SHOE CLEARANCE
a. Remove the hole plug.
b. Turn the shoe adjuster and expand the shoes until the disc locks.
c. Return the shoe adjuster 7 notches.
d. Install the hole plug.
Page 1166 of 4500
Fig. 191: Installing Hole Plug
Courtesy of TOYOTA MOTOR SALES, U.S.A., INC.
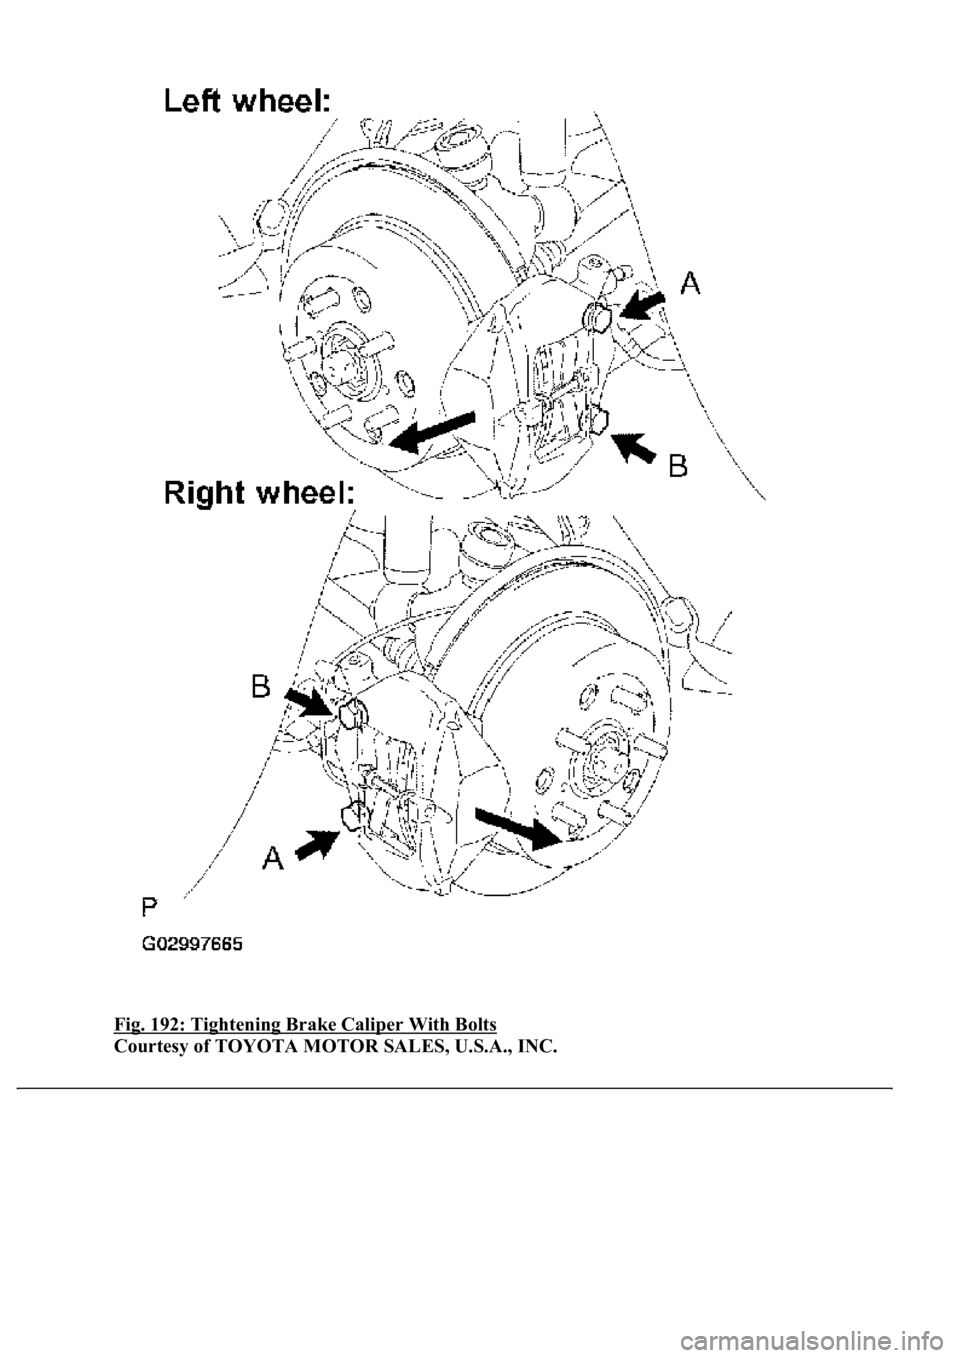
i.INSTALL REAR DISC BRAKE CALIPER ASSY LH
a. Temporarily tighten the brake caliper with the 2 new bolts.
b. Pulling the brake caliper towards the outer side of the vehicle and tighten bolt A first then
bolt B.
Torque: 78 N.m (800 kgf.cm, 58 ft.lbf)
Page 1167 of 4500
Fig. 192: Tightening Brake Caliper With Bolts
Courtesy of TOYOTA MOTOR SALES, U.S.A., INC.
Page 1168 of 4500
j.INSTALL REAR WHEEL
Torque: 103 N.m (1,050 kgf.cm, 76 ft.lbf)
k.INSTALL FRONT FLOOR HEAT INSULATOR NO.1 (SEE REPLACEMENT
)
l.INSTALL EXHAUST PIPE ASSY (SEE REPLACEMENT
)
m.INSTALL OXYGEN SENSOR (SEE REPLACEMENT
)
n.SETTLING PARKING BRAKE SHOES AND DISC
a. Drive the vehicle at approximately 50 km/h (31 mph) on a safe, level and dry road.
b. Depress the parking brake pedal with a force of 150 N (15 kgf.cm, 34 lbf).
c. Drive the vehicle for approximately 400 meters (0.25 mile) in this condition.
d. Repeat this procedure 2 or 3 times.
o.CHECK PARKING BRAKE PEDAL TRAVEL (SEE ADJUSTMENT
)
p.ADJUST PARKING BRAKE PEDAL TRAVEL (SEE ADJUSTMENT
)
COMPONENTS
Page 1169 of 4500
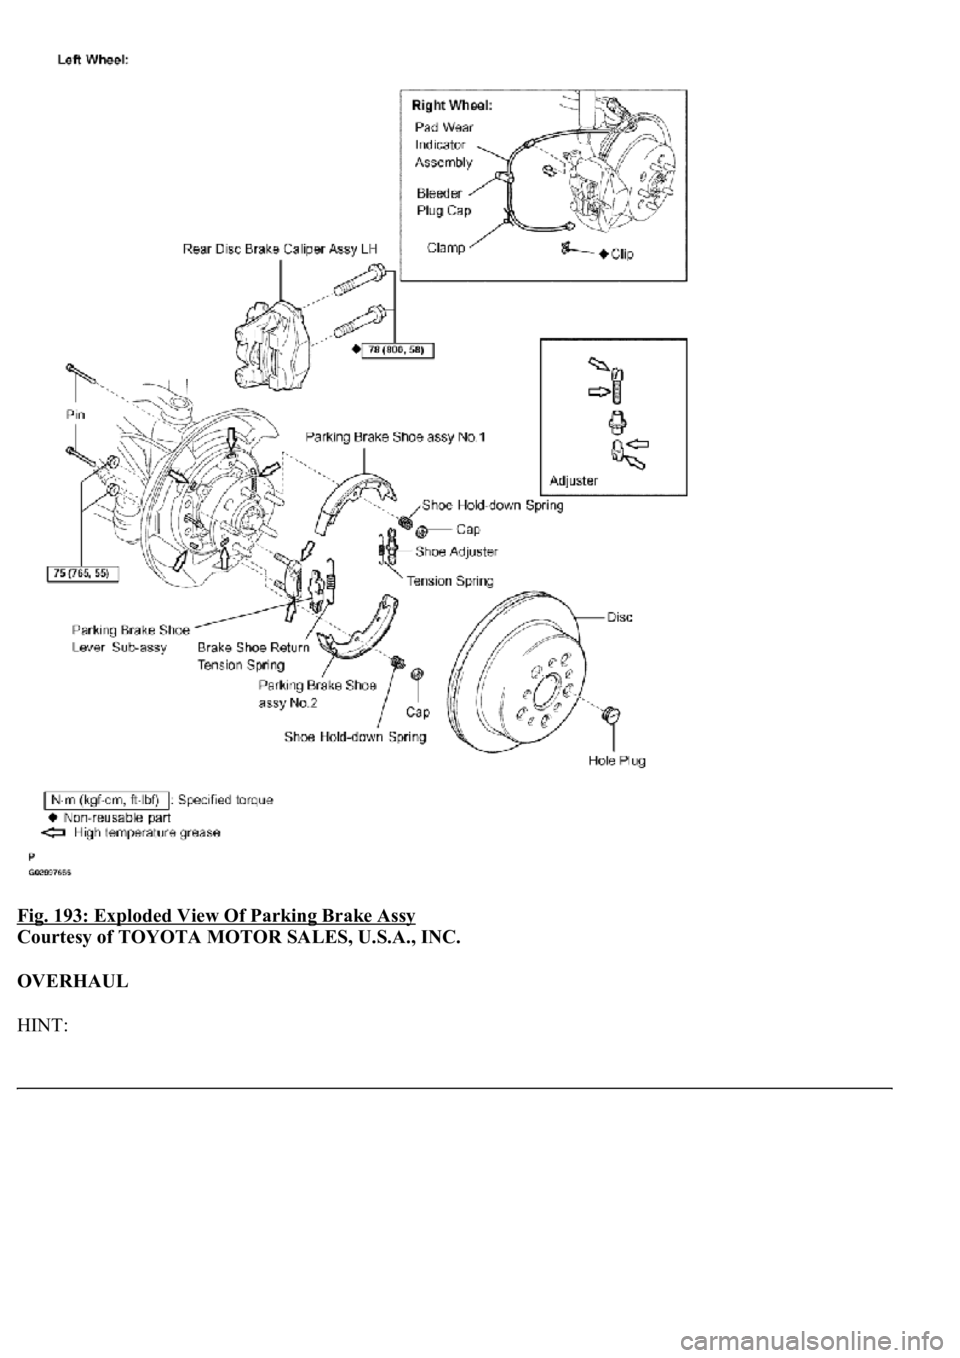
Fig. 193: Exploded View Of Parking Brake Assy
Courtesy of TOYOTA MOTOR SALES, U.S.A., INC.
OVERHAUL
HINT:
Page 1170 of 4500
Use the same procedures for the RH side and LH side.
The procedures listed below are for the LH side.
1.REMOVE REAR WHEEL
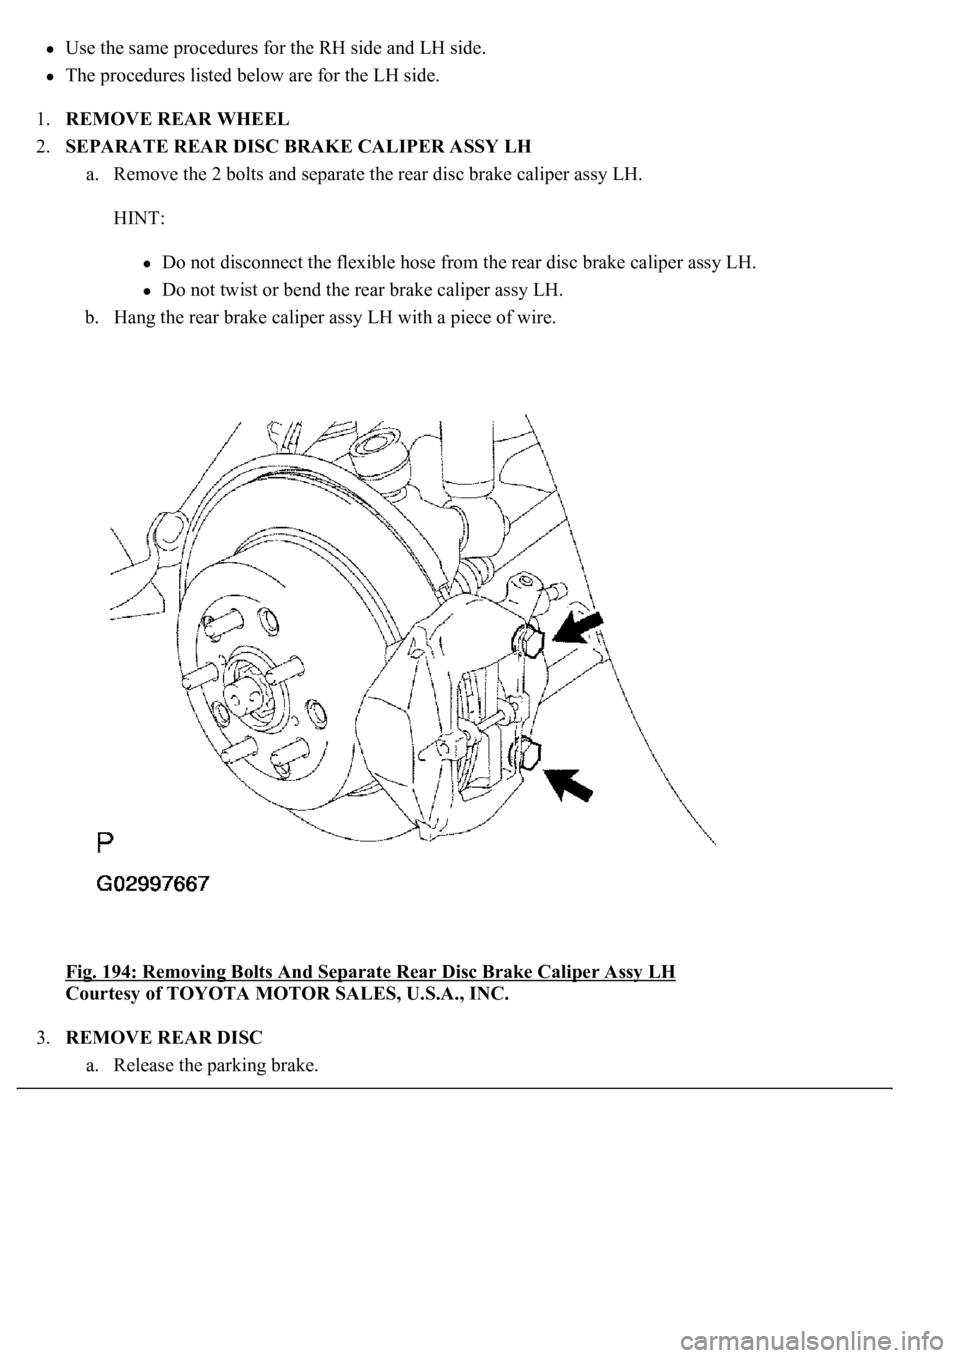
2.SEPARATE REAR DISC BRAKE CALIPER ASSY LH
a. Remove the 2 bolts and separate the rear disc brake caliper assy LH.
HINT:
Do not disconnect the flexible hose from the rear disc brake caliper assy LH.
Do not twist or bend the rear brake caliper assy LH.
b. Hang the rear brake caliper assy LH with a piece of wire.
Fig. 194: Removing Bolts And Separate Rear Disc Brake Caliper Assy LH
Courtesy of TOYOTA MOTOR SALES, U.S.A., INC.
3.REMOVE REAR DISC
a. Release the parkin
g brake.
Trending: instrument panel, low beam, engine mechanical, check engine, fuel, brake sensor, ignition
