LEXUS LS430 2003 Factory Repair Manual
Manufacturer: LEXUS, Model Year: 2003,
Model line: LS430,
Model: LEXUS LS430 2003
Pages: 4500, PDF Size: 87.45 MB
LEXUS LS430 2003 Factory Repair Manual
LS430 2003
LEXUS
LEXUS
https://www.carmanualsonline.info/img/36/57050/w960_57050-0.png
LEXUS LS430 2003 Factory Repair Manual
Trending: fuel consumption, automatic transmission, Expansion Valve, park, torque, oil change, cruise control
Page 1731 of 4500
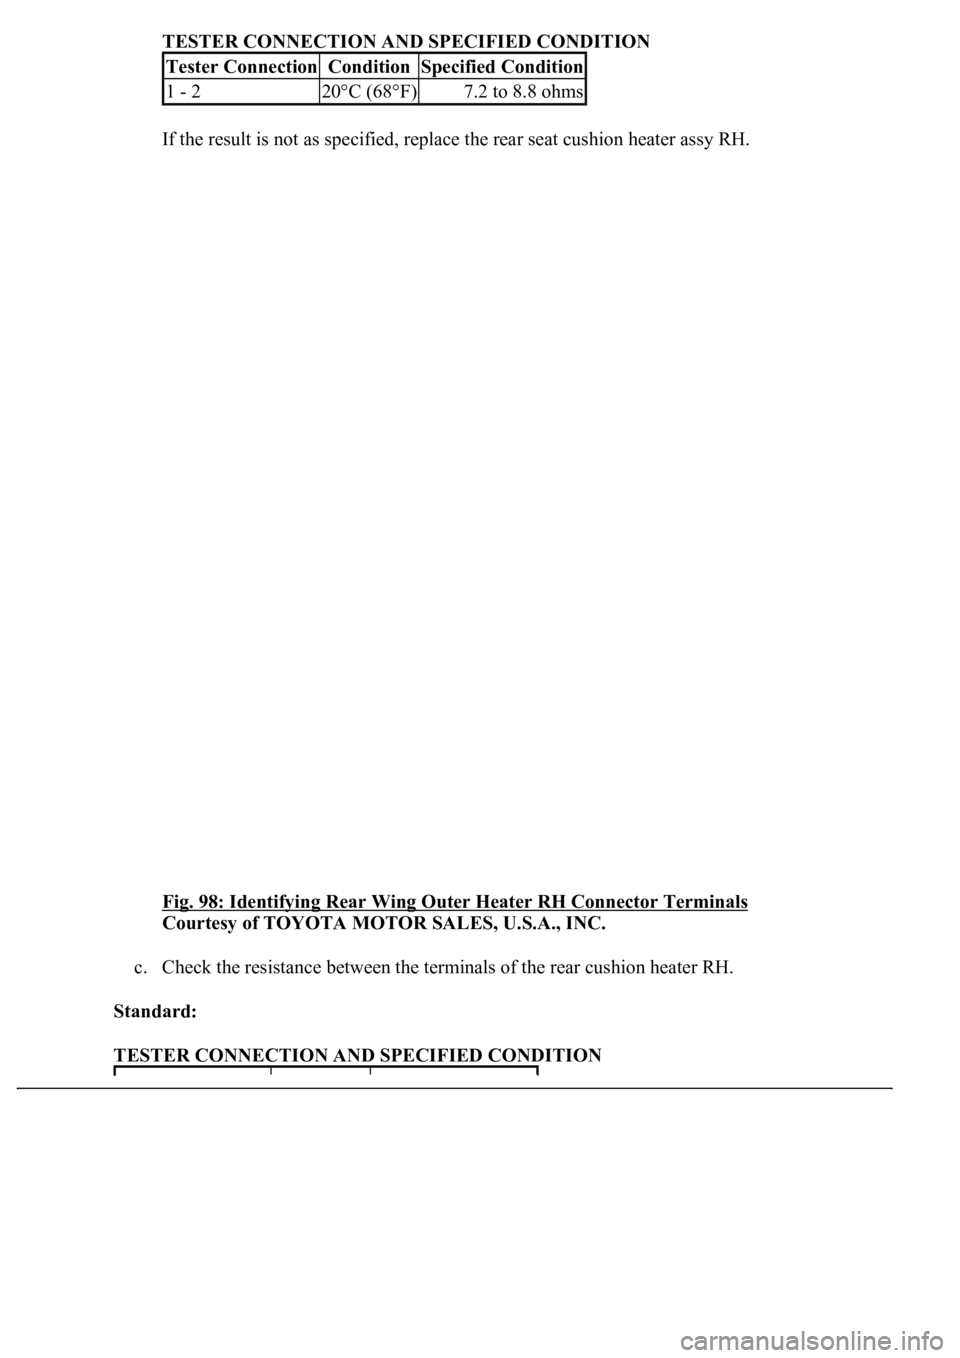
TESTER CONNECTION AND SPECIFIED CONDITION
If the result is not as specified, replace the rear seat cushion heater assy RH.
Fig. 98: Identifying Rear Wing Outer Heater RH Connector Terminals
Courtesy of TOYOTA MOTOR SALES, U.S.A., INC.
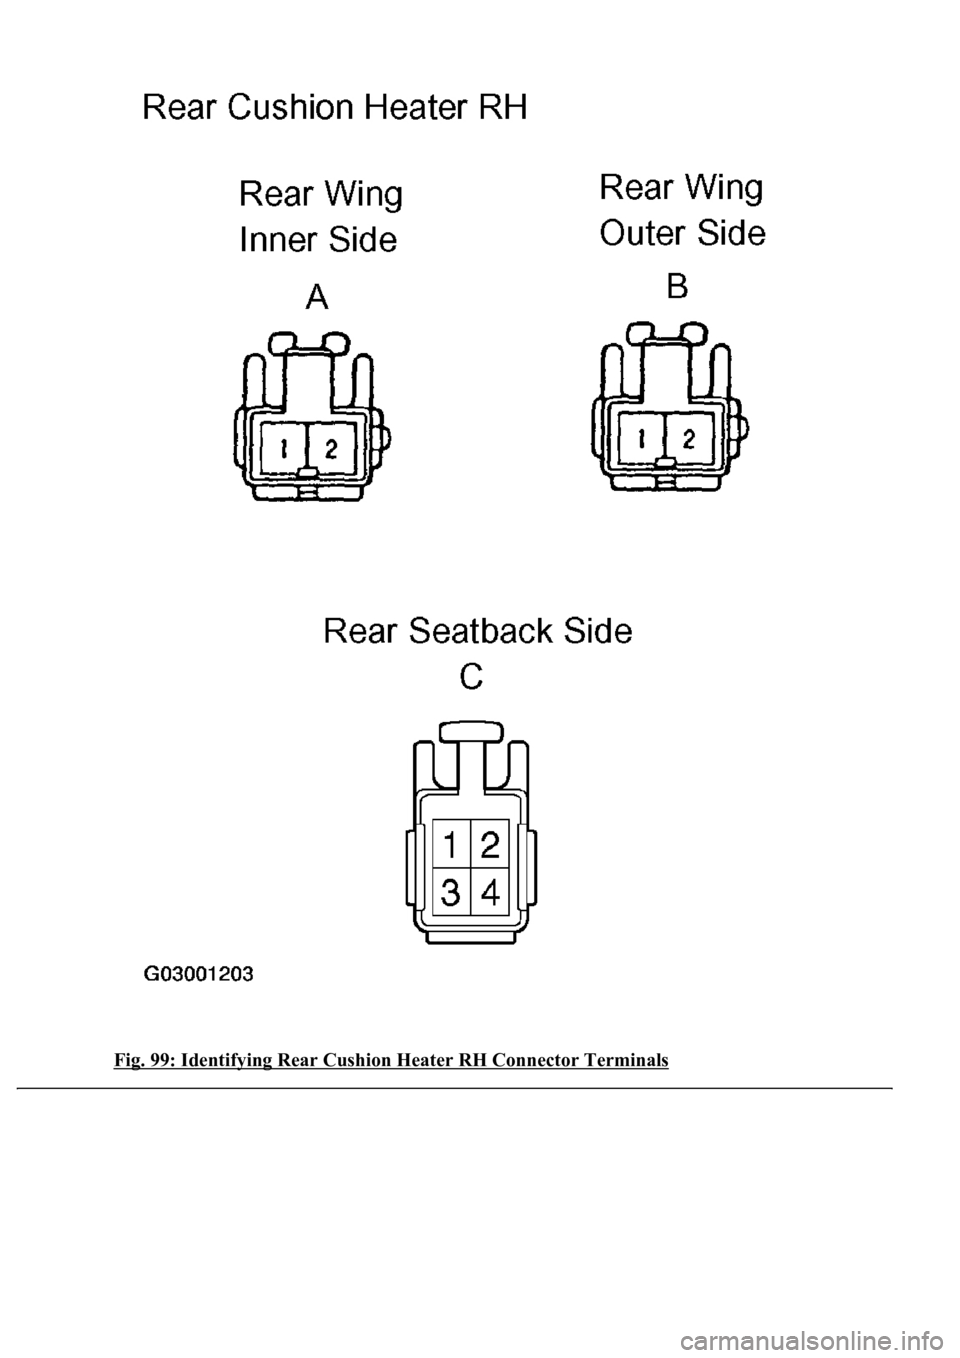
c. Check the resistance between the terminals of the rear cushion heater RH.
Standard:
TESTER CONNECTION AND SPECIFIED CONDITION
Tester ConnectionConditionSpecified Condition
1 - 220°C (68°F)7.2 to 8.8 ohms
Page 1732 of 4500
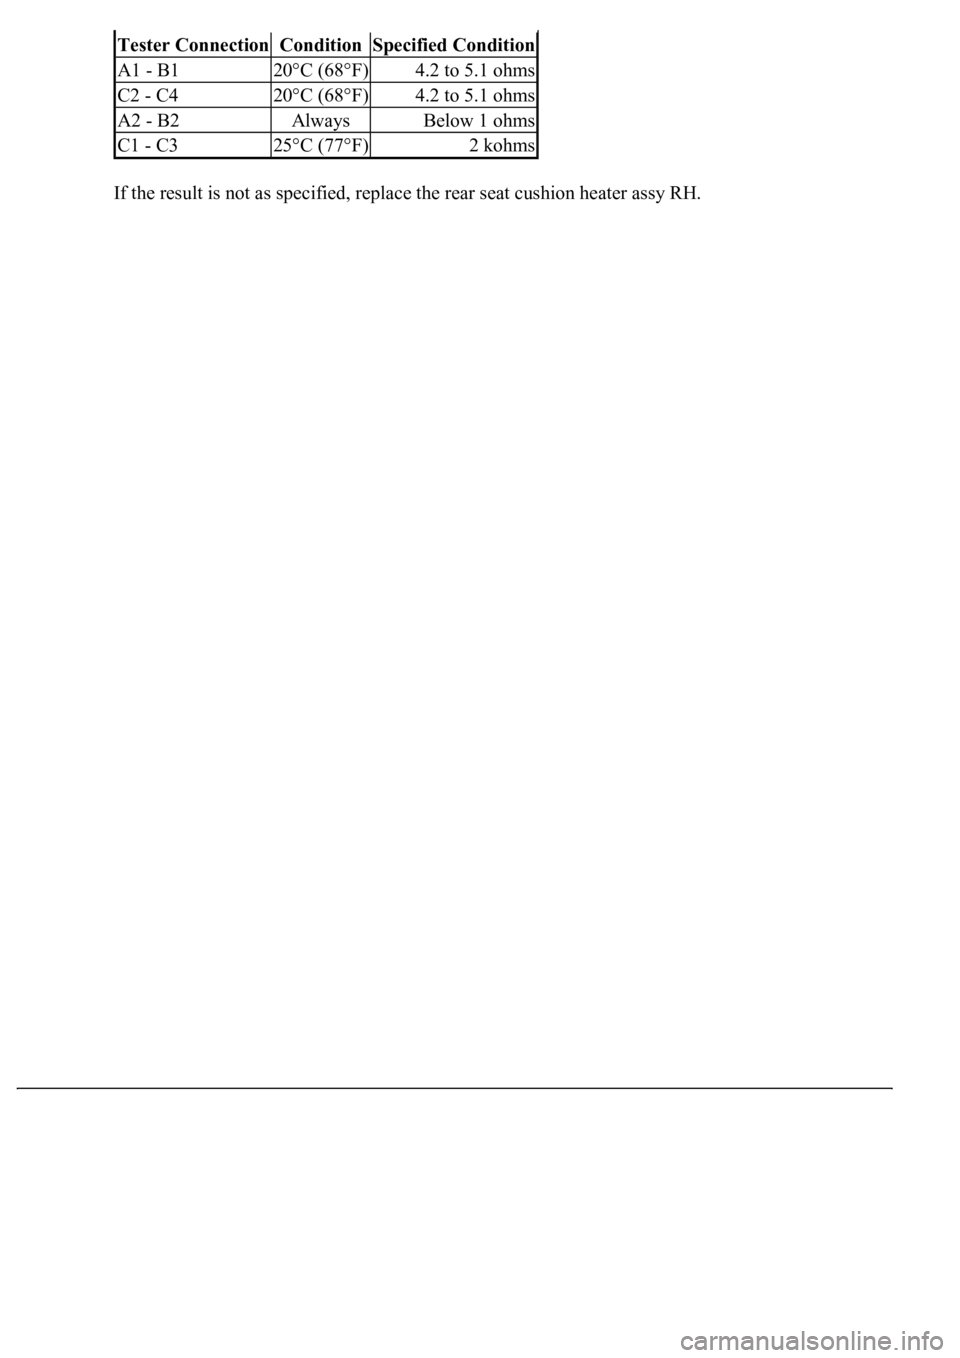
If the result is not as specified, replace the rear seat cushion heater assy RH.
Tester ConnectionConditionSpecified Condition
A1 - B120°C (68°F)4.2 to 5.1 ohms
C2 - C420°C (68°F)4.2 to 5.1 ohms
A2 - B2AlwaysBelow 1 ohms
C1 - C325°C (77°F)2 kohms
Page 1733 of 4500
Fig. 99: Identifying Rear Cushion Heater RH Connector Terminals
Page 1734 of 4500
Courtesy of TOYOTA MOTOR SALES, U.S.A., INC.
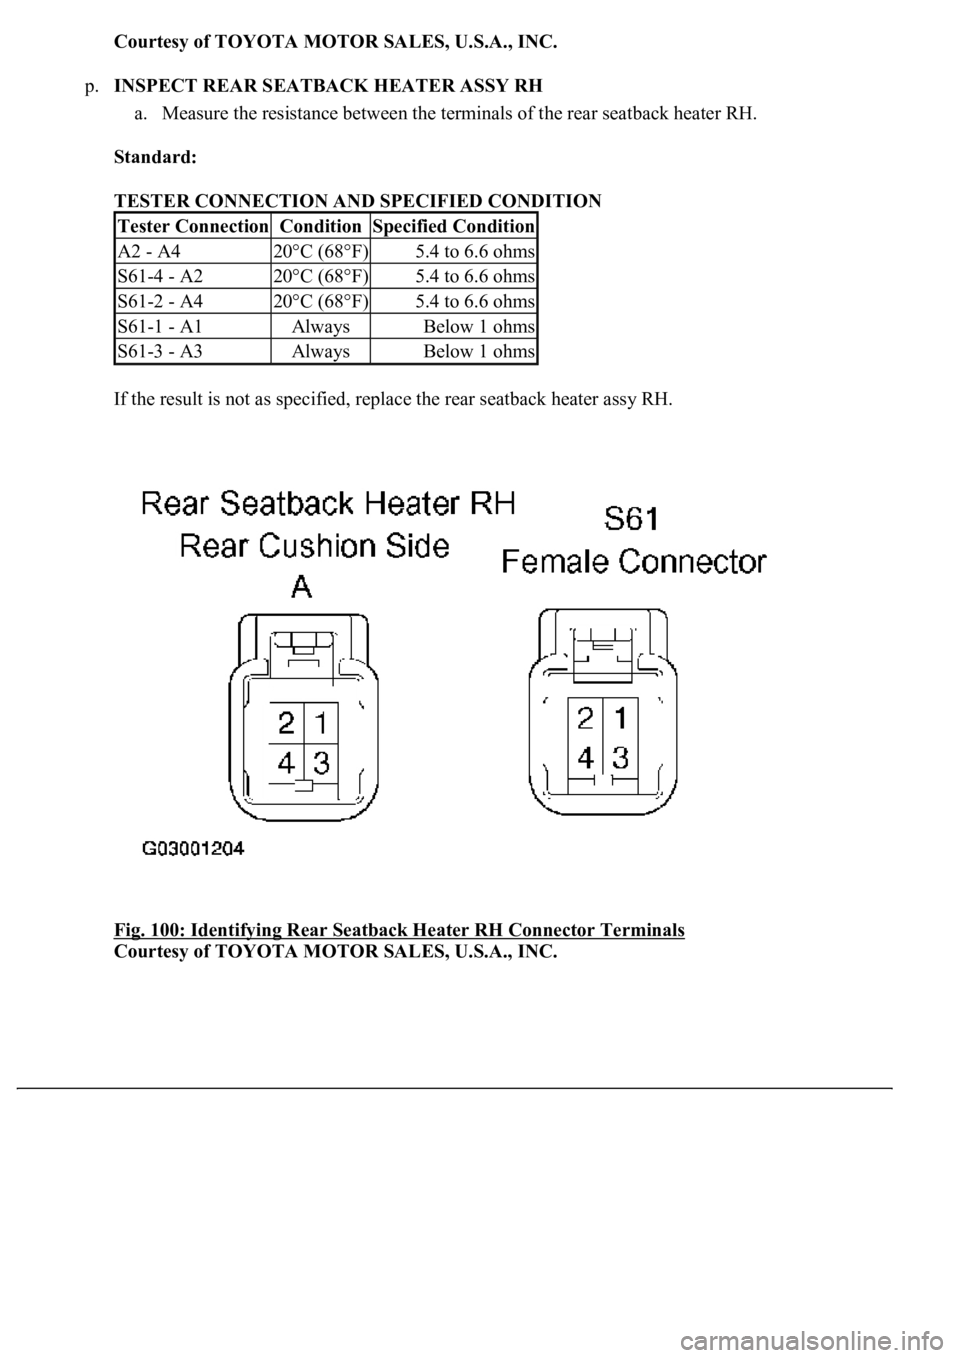
p.INSPECT REAR SEATBACK HEATER ASSY RH
a. Measure the resistance between the terminals of the rear seatback heater RH.
Standard:
TESTER CONNECTION AND SPECIFIED CONDITION
If the result is not as specified, replace the rear seatback heater assy RH.
Fig. 100: Identifying Rear Seatback Heater RH Connector Terminals
Courtesy of TOYOTA MOTOR SALES, U.S.A., INC.
Tester ConnectionConditionSpecified Condition
A2 - A420°C (68°F)5.4 to 6.6 ohms
S61-4 - A220°C (68°F)5.4 to 6.6 ohms
S61-2 - A420°C (68°F)5.4 to 6.6 ohms
S61-1 - A1AlwaysBelow 1 ohms
S61-3 - A3AlwaysBelow 1 ohms
Page 1735 of 4500
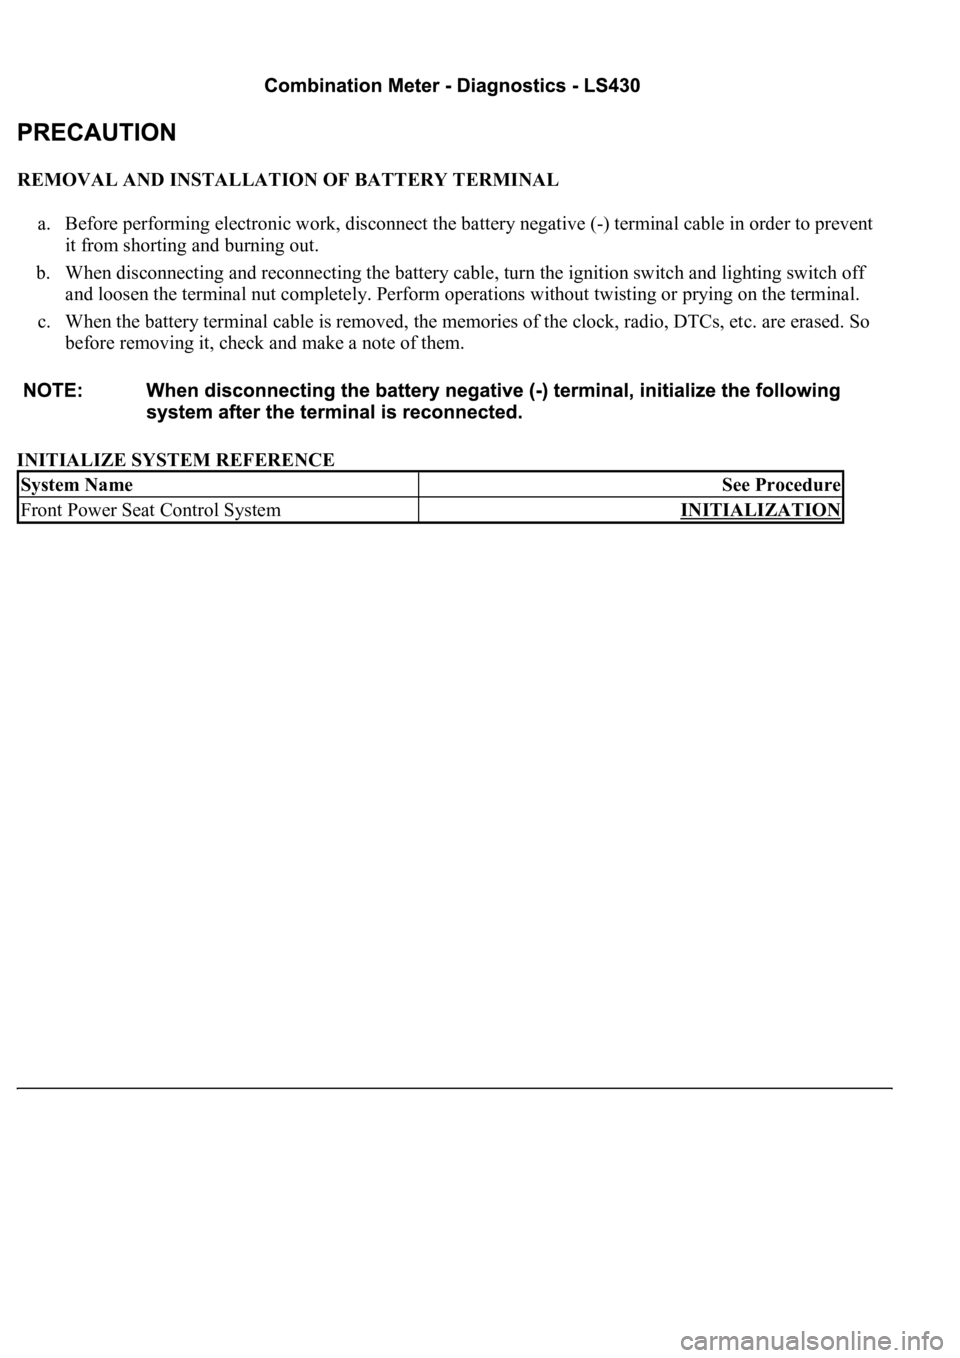
REMOVAL AND INSTALLATION OF BATTERY TERMINAL
a. Before performing electronic work, disconnect the battery negative (-) terminal cable in order to prevent
it from shorting and burning out.
b. When disconnecting and reconnecting the battery cable, turn the ignition switch and lighting switch off
and loosen the terminal nut completely. Perform operations without twisting or prying on the terminal.
c. When the battery terminal cable is removed, the memories of the clock, radio, DTCs, etc. are erased. So
before removing it, check and make a note of them.
INITIALIZE SYSTEM REFERENCE
System NameSee Procedure
Front Power Seat Control SystemINITIALIZATION
Page 1736 of 4500
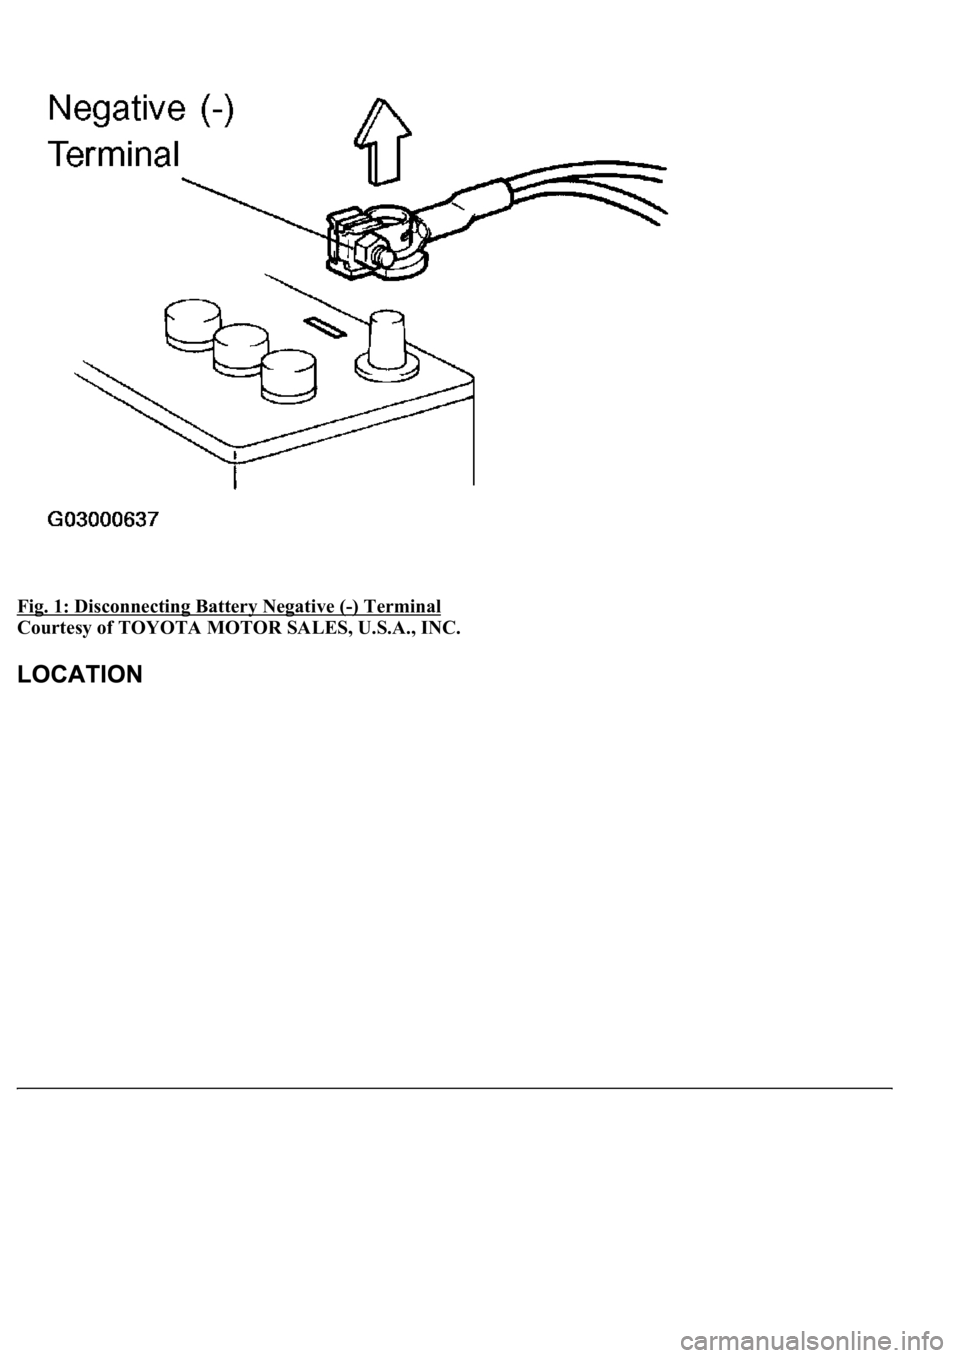
Fig. 1: Disconnecting Battery Negative (-) Terminal
Courtesy of TOYOTA MOTOR SALES, U.S.A., INC.
Page 1737 of 4500
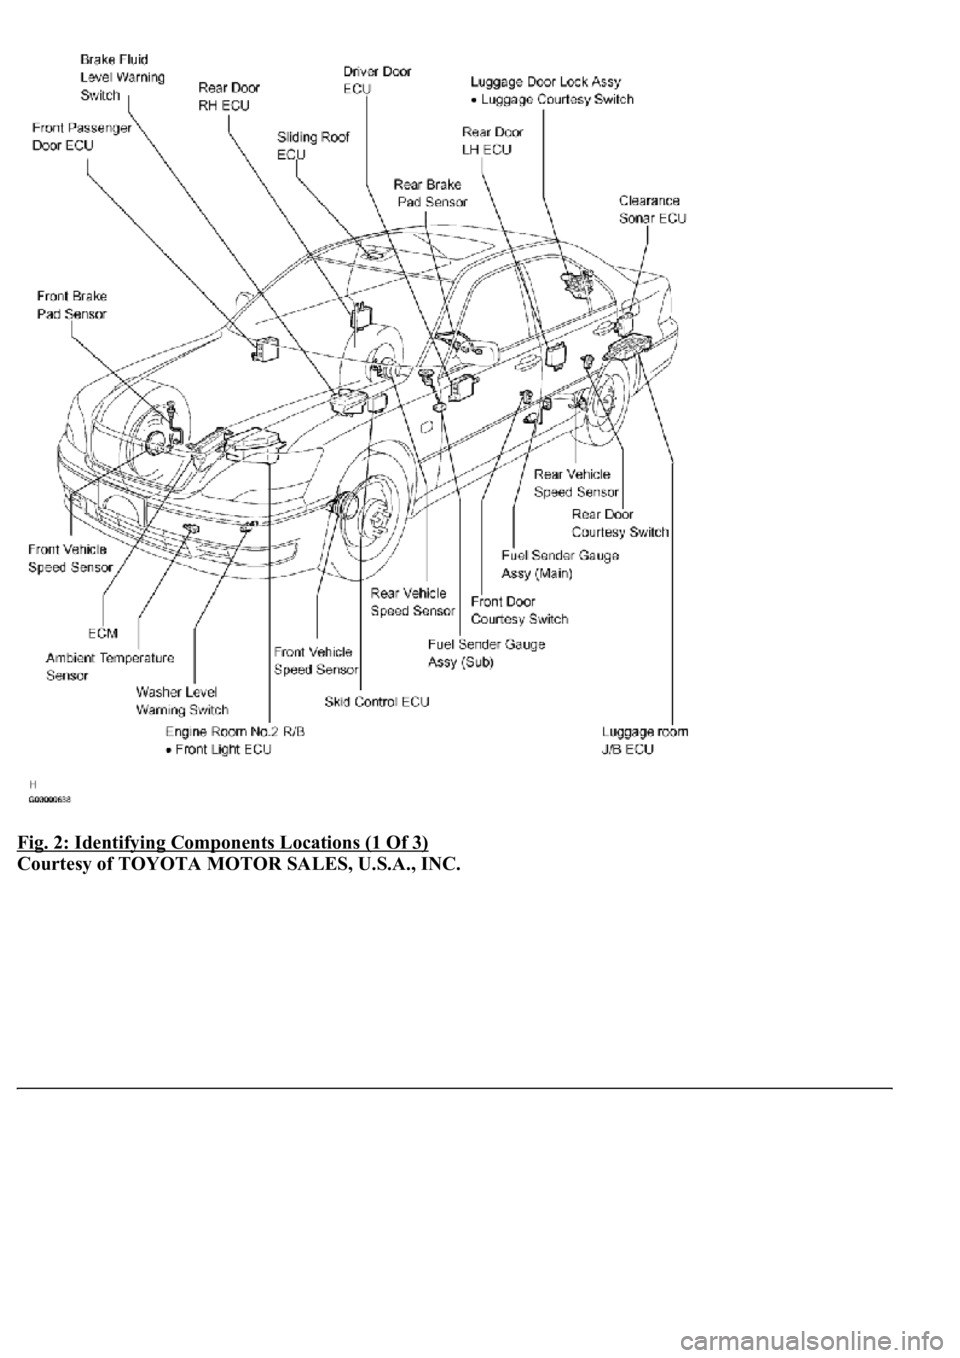
Fig. 2: Identifying Components Locations (1 Of 3)
Courtesy of TOYOTA MOTOR SALES, U.S.A., INC.
Page 1738 of 4500
Fig. 3: Identifying Components Locations (2 Of 3)
Courtesy of TOYOTA MOTOR SALES, U.S.A., INC.
Page 1739 of 4500
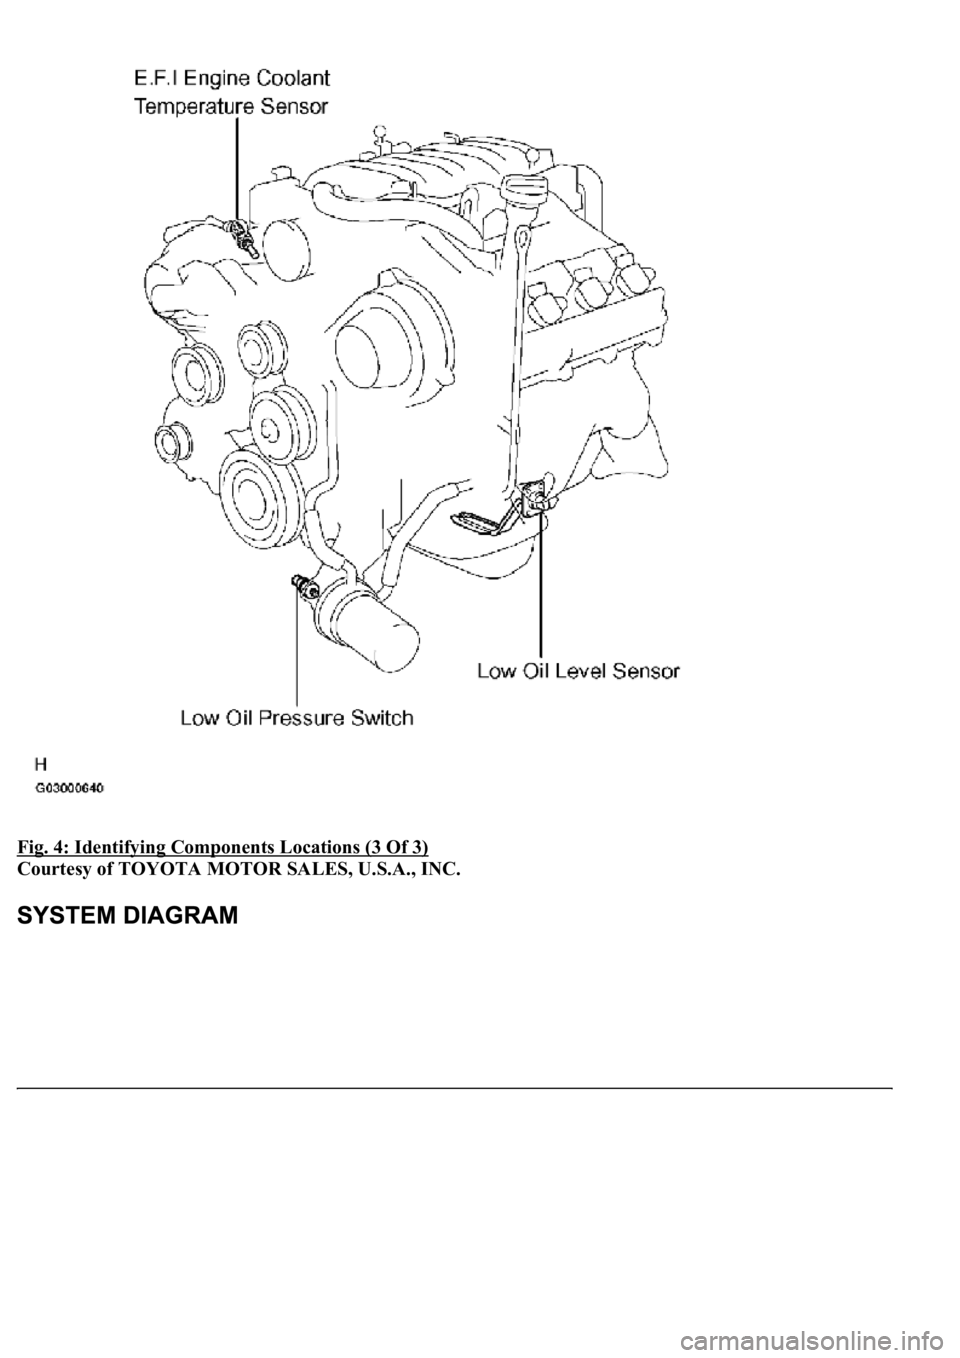
Fig. 4: Identifying Components Locations (3 Of 3)
Courtesy of TOYOTA MOTOR SALES, U.S.A., INC.
Page 1740 of 4500
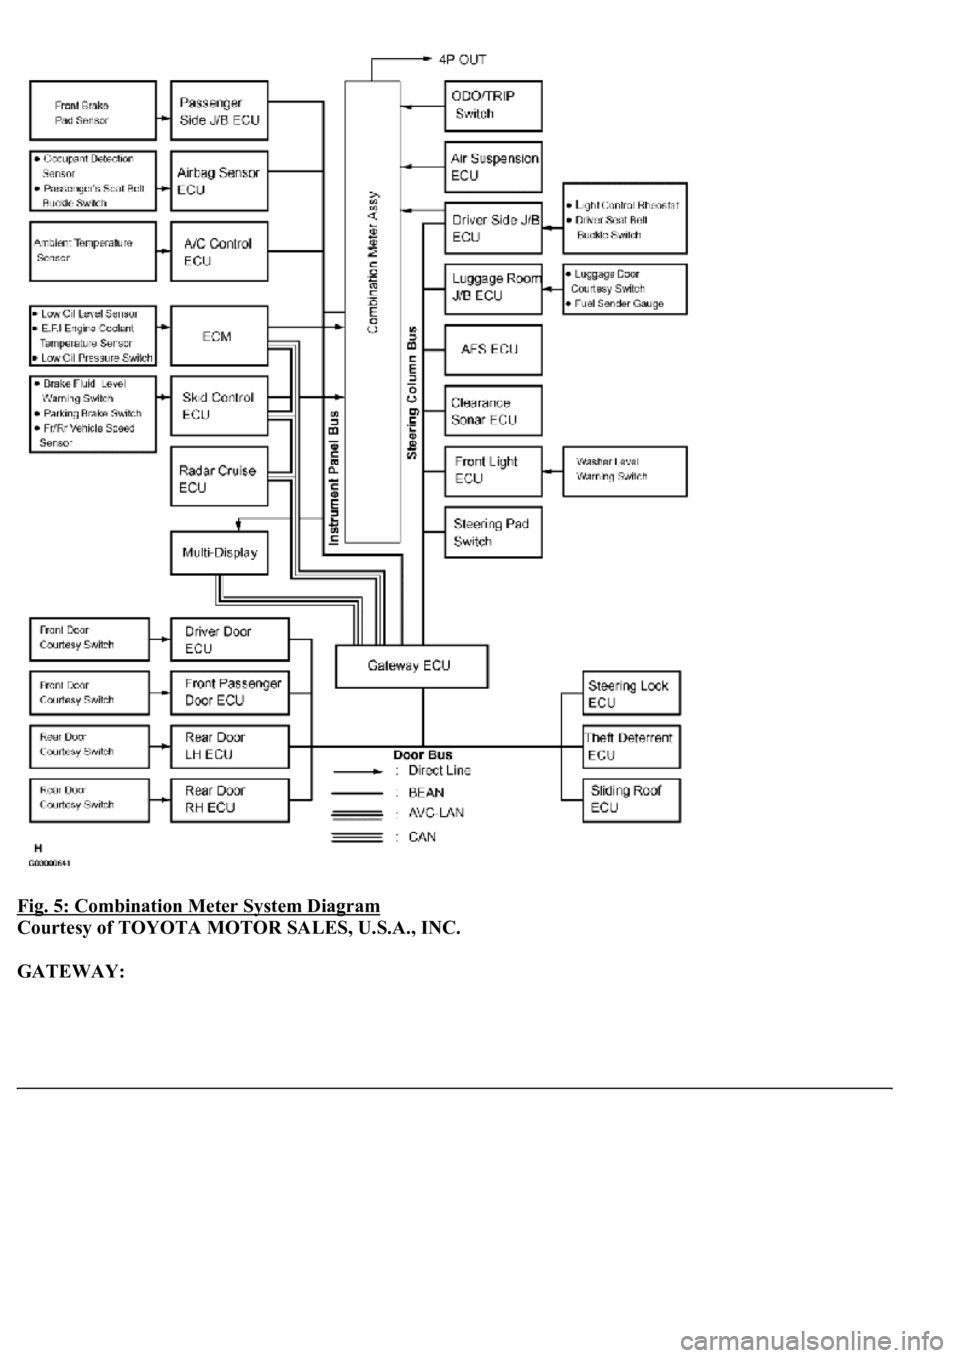
Fig. 5: Combination Meter System Diagram
Courtesy of TOYOTA MOTOR SALES, U.S.A., INC.
GATEWAY:
Trending: wheel bolts, Rear suspension, parking brake, immobilizer, evaporator removal, park assist, wheel bolt torque
