LEXUS LS430 2003 Factory Repair Manual
Manufacturer: LEXUS, Model Year: 2003,
Model line: LS430,
Model: LEXUS LS430 2003
Pages: 4500, PDF Size: 87.45 MB
LEXUS LS430 2003 Factory Repair Manual
LS430 2003
LEXUS
LEXUS
https://www.carmanualsonline.info/img/36/57050/w960_57050-0.png
LEXUS LS430 2003 Factory Repair Manual
Trending: airbag, brake light, fuse, maintenance reset, cylinder head, length, change key battery
Page 3891 of 4500
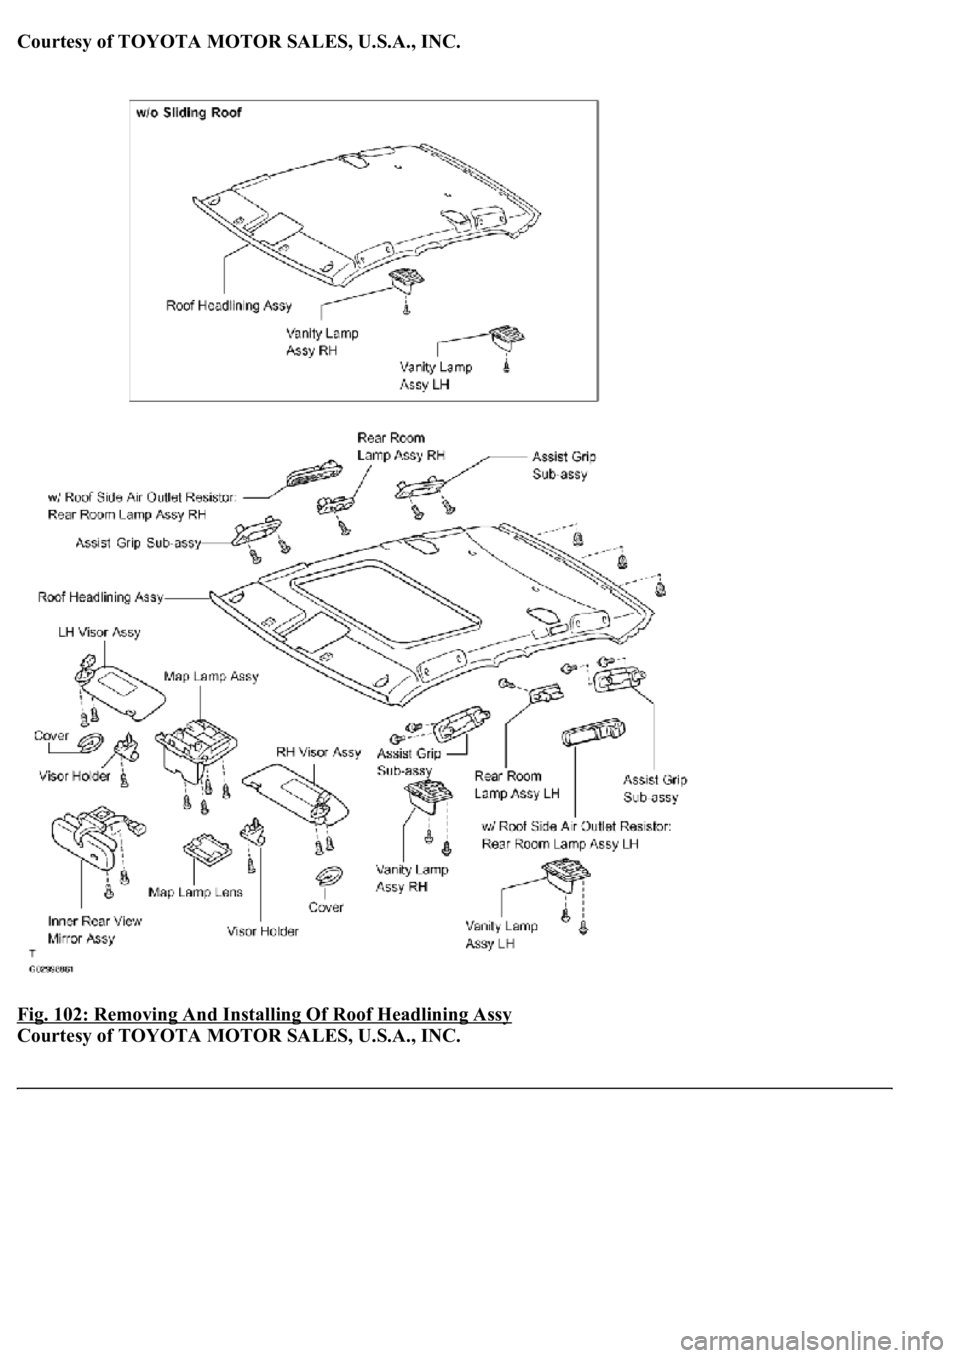
Courtesy of TOYOTA MOTOR SALES, U.S.A., INC.
Fig. 102: Removing And Installing Of Roof Headlining Assy
Courtesy of TOYOTA MOTOR SALES, U.S.A., INC.
Page 3892 of 4500
REPLACEMENT
HINT:
The installation procedures are the removal procedures in reverse order.
A bolt without a torque specification is shown in the standard bolt chart (see SPECIFIED TORQUE
FOR STANDARD BOLTS ).
1.REMOVE FRONT SEAT ASSY LH (See OVERHAUL
)
2.REMOVE FRONT SEAT ASSY RH (See OVERHAUL
)
3.REMOVE REAR SEAT CUSHION ASSY (FIXED TYPE REAR SEAT) (See OVERHAUL
)
4.REMOVE REAR SEATBACK ASSY (FIXED TYPE REAR SEAT) (See step 4 in OVERHAUL
)
5.REMOVE REAR SEAT CUSHION ASSY LH (POWER ADJUSTER TYPE) (See OVERHAUL
)
6.REMOVE REAR SEAT CUSHION ASSY RH (POWER ADJUSTER TYPE) (See OVERHAUL
)
7.REMOVE REAR SEAT ASSY LH (POWER ADJUSTER TYPE) (See OVERHAUL
)
8.REMOVE REAR SEATBACK ASSY (POWER ADJUSTER TYPE) (See OVERHAUL
)
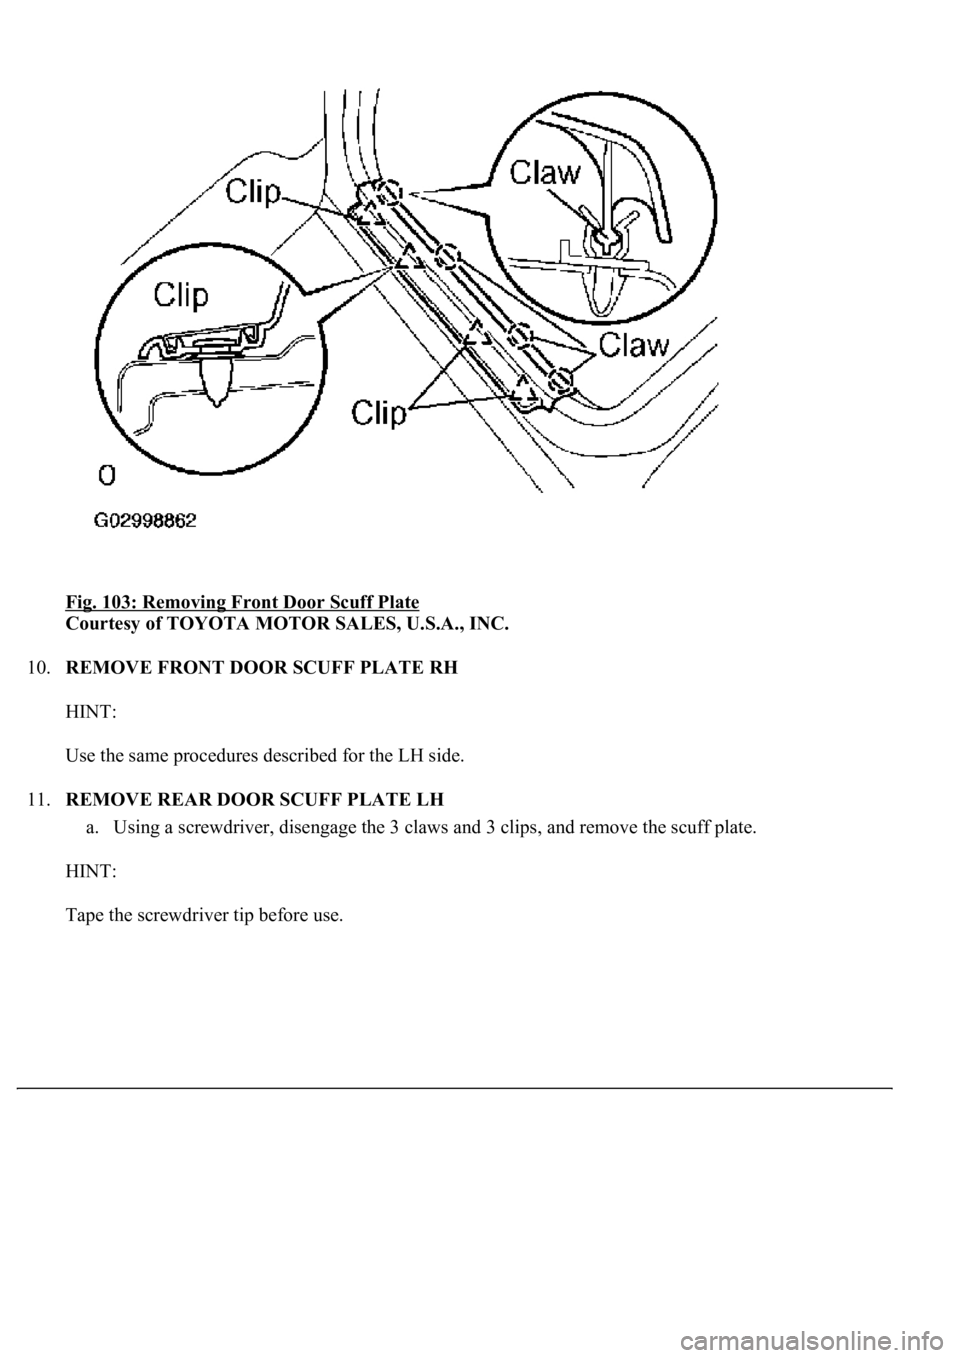
9.REMOVE FRONT DOOR SCUFF PLATE LH
a. Using a screwdriver, disengage the 4 claws and 4 clips, and remove the scuff plate.
HINT:
Tape the screwdriver tip before use.
Page 3893 of 4500
Fig. 103: Removing Front Door Scuff Plate
Courtesy of TOYOTA MOTOR SALES, U.S.A., INC.
10.REMOVE FRONT DOOR SCUFF PLATE RH
HINT:
Use the same procedures described for the LH side.
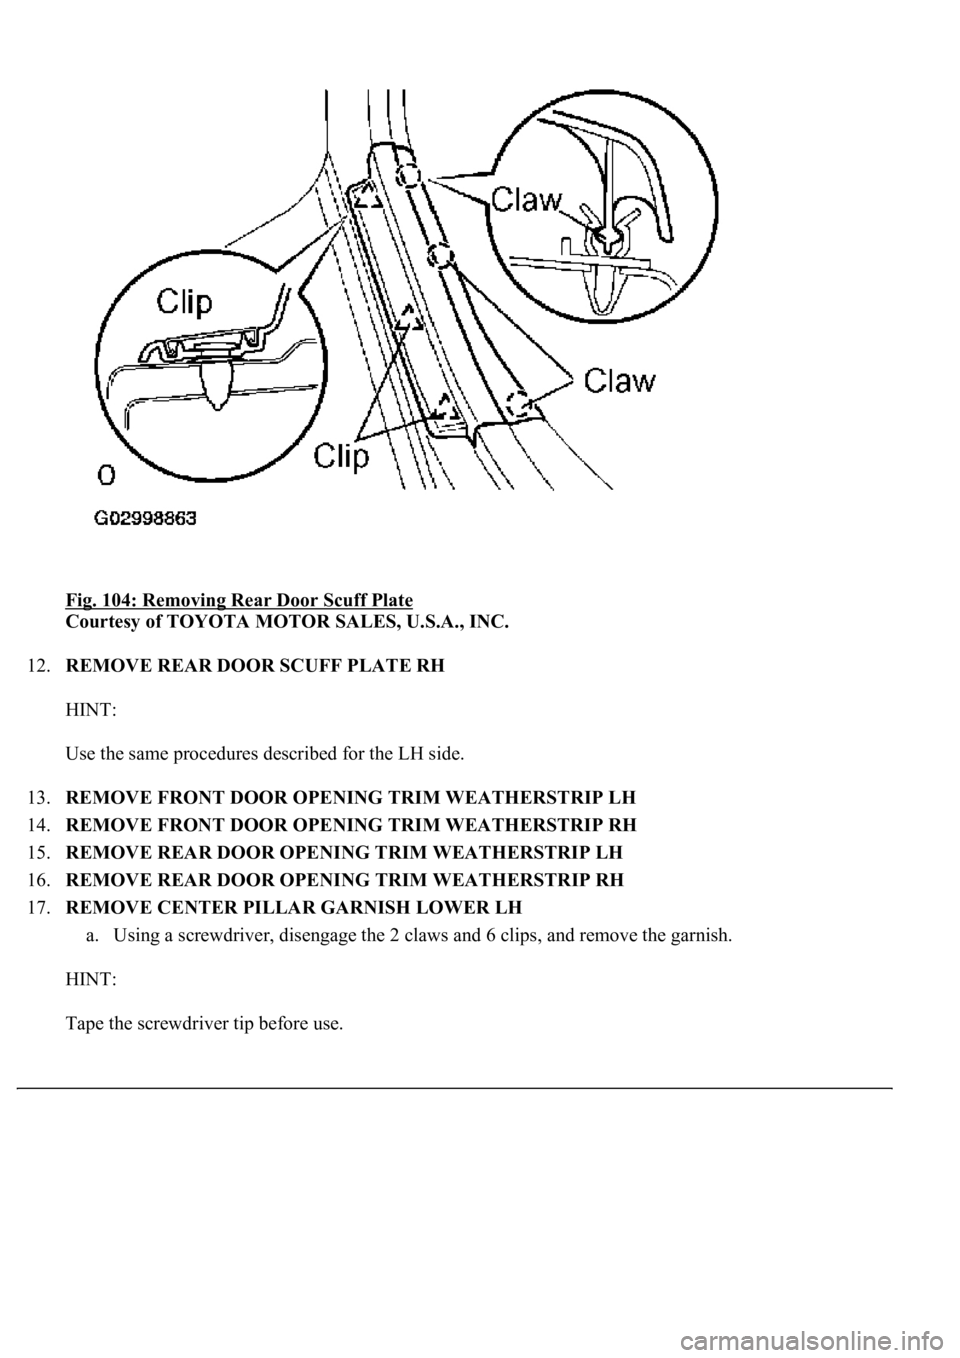
11.REMOVE REAR DOOR SCUFF PLATE LH
a. Using a screwdriver, disengage the 3 claws and 3 clips, and remove the scuff plate.
HINT:
Tape the screwdriver tip before use.
Page 3894 of 4500
Fig. 104: Removing Rear Door Scuff Plate
Courtesy of TOYOTA MOTOR SALES, U.S.A., INC.
12.REMOVE REAR DOOR SCUFF PLATE RH
HINT:
Use the same procedures described for the LH side.
13.REMOVE FRONT DOOR OPENING TRIM WEATHERSTRIP LH
14.REMOVE FRONT DOOR OPENING TRIM WEATHERSTRIP RH
15.REMOVE REAR DOOR OPENING TRIM WEATHERSTRIP LH
16.REMOVE REAR DOOR OPENING TRIM WEATHERSTRIP RH
17.REMOVE CENTER PILLAR GARNISH LOWER LH
a. Using a screwdriver, disengage the 2 claws and 6 clips, and remove the garnish.
HINT:
Tape the screwdriver tip before use.
Page 3895 of 4500
Fig. 105: Removing Center Pillar Garnish Lower
Courtesy of TOYOTA MOTOR SALES, U.S.A., INC.
18.REMOVE CENTER PILLAR GARNISH LOWER RH
HINT:
Use the same procedures described for the LH side.
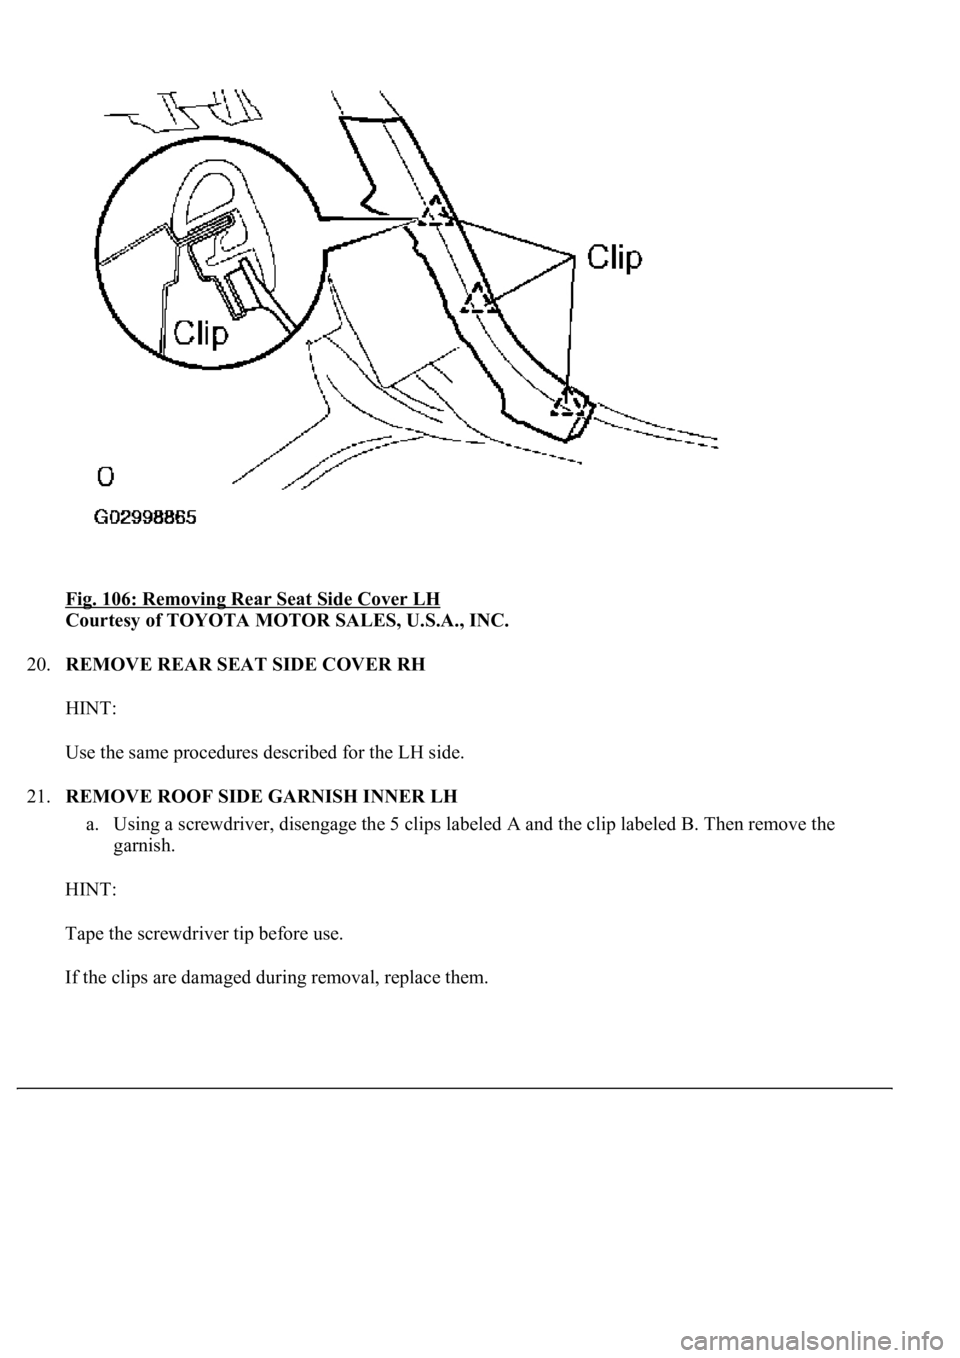
19.REMOVE REAR SEAT SIDE COVER LH
a. Using a screwdriver, disengage the 3 clips and remove the side cover.
HINT:
Tape the screwdriver tip before use.
Page 3896 of 4500
Fig. 106: Removing Rear Seat Side Cover LH
Courtesy of TOYOTA MOTOR SALES, U.S.A., INC.
20.REMOVE REAR SEAT SIDE COVER RH
HINT:
Use the same procedures described for the LH side.
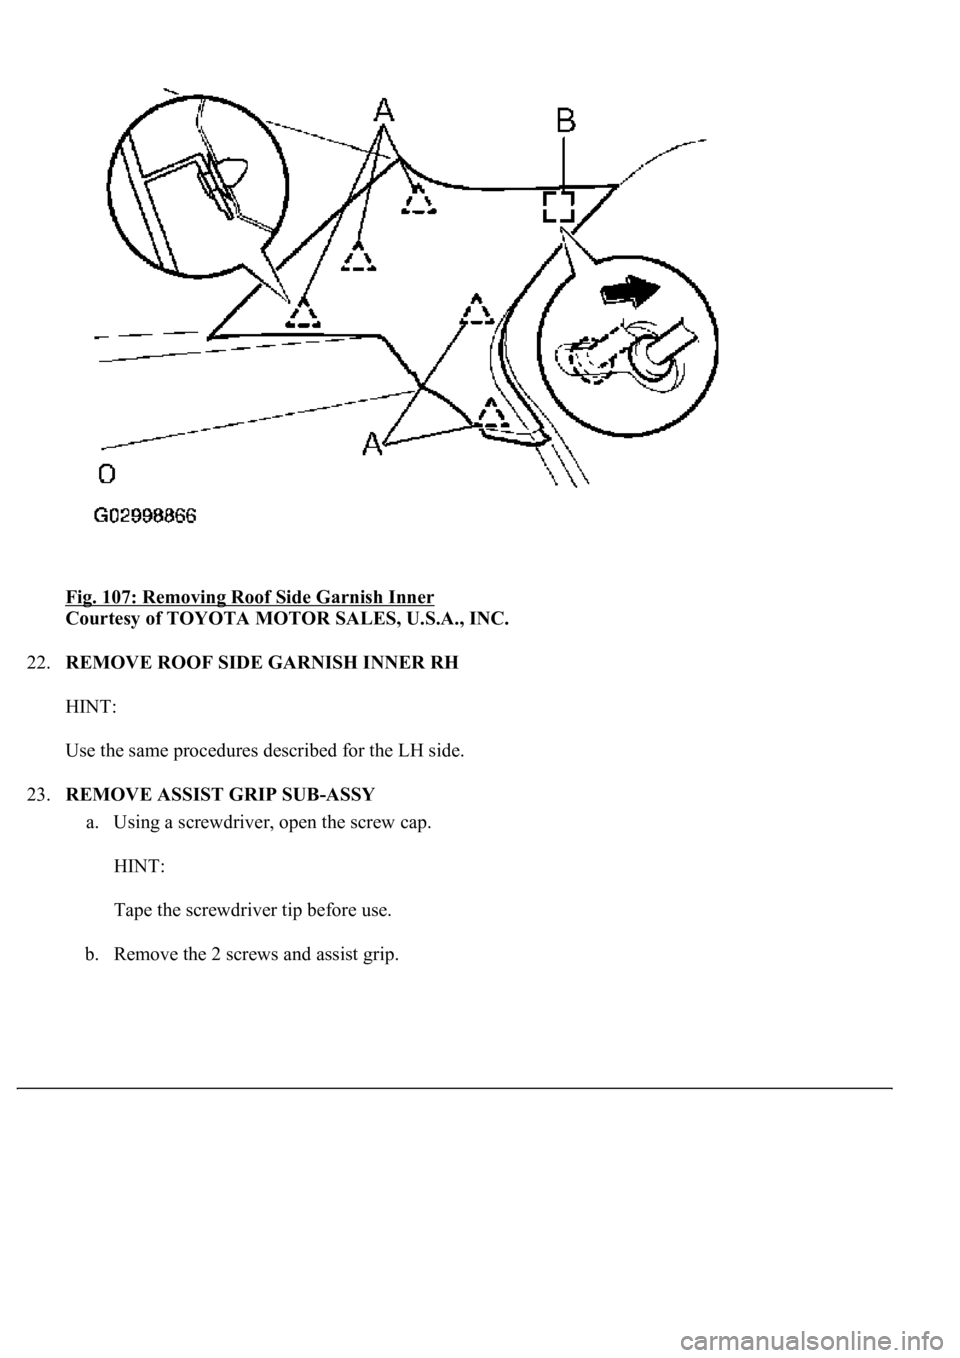
21.REMOVE ROOF SIDE GARNISH INNER LH
a. Using a screwdriver, disengage the 5 clips labeled A and the clip labeled B. Then remove the
garnish.
HINT:
Tape the screwdriver tip before use.
If the clips are dama
ged during removal, replace them.
Page 3897 of 4500
Fig. 107: Removing Roof Side Garnish Inner
Courtesy of TOYOTA MOTOR SALES, U.S.A., INC.
22.REMOVE ROOF SIDE GARNISH INNER RH
HINT:
Use the same procedures described for the LH side.
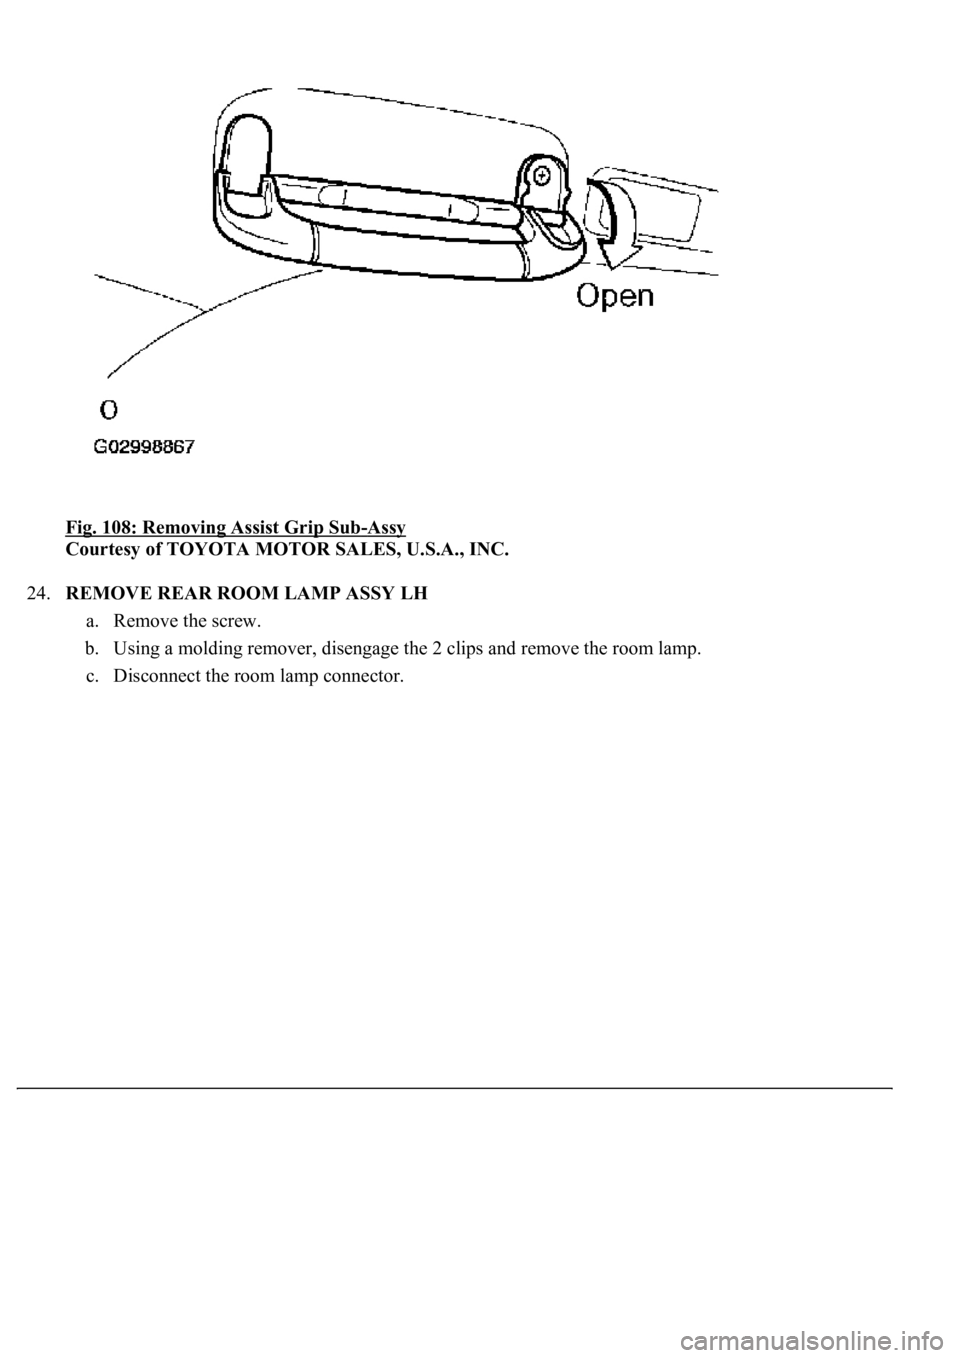
23.REMOVE ASSIST GRIP SUB-ASSY
a. Using a screwdriver, open the screw cap.
HINT:
Tape the screwdriver tip before use.
b. Remove the 2 screws and assist grip.
Page 3898 of 4500
Fig. 108: Removing Assist Grip Sub-Assy
Courtesy of TOYOTA MOTOR SALES, U.S.A., INC.
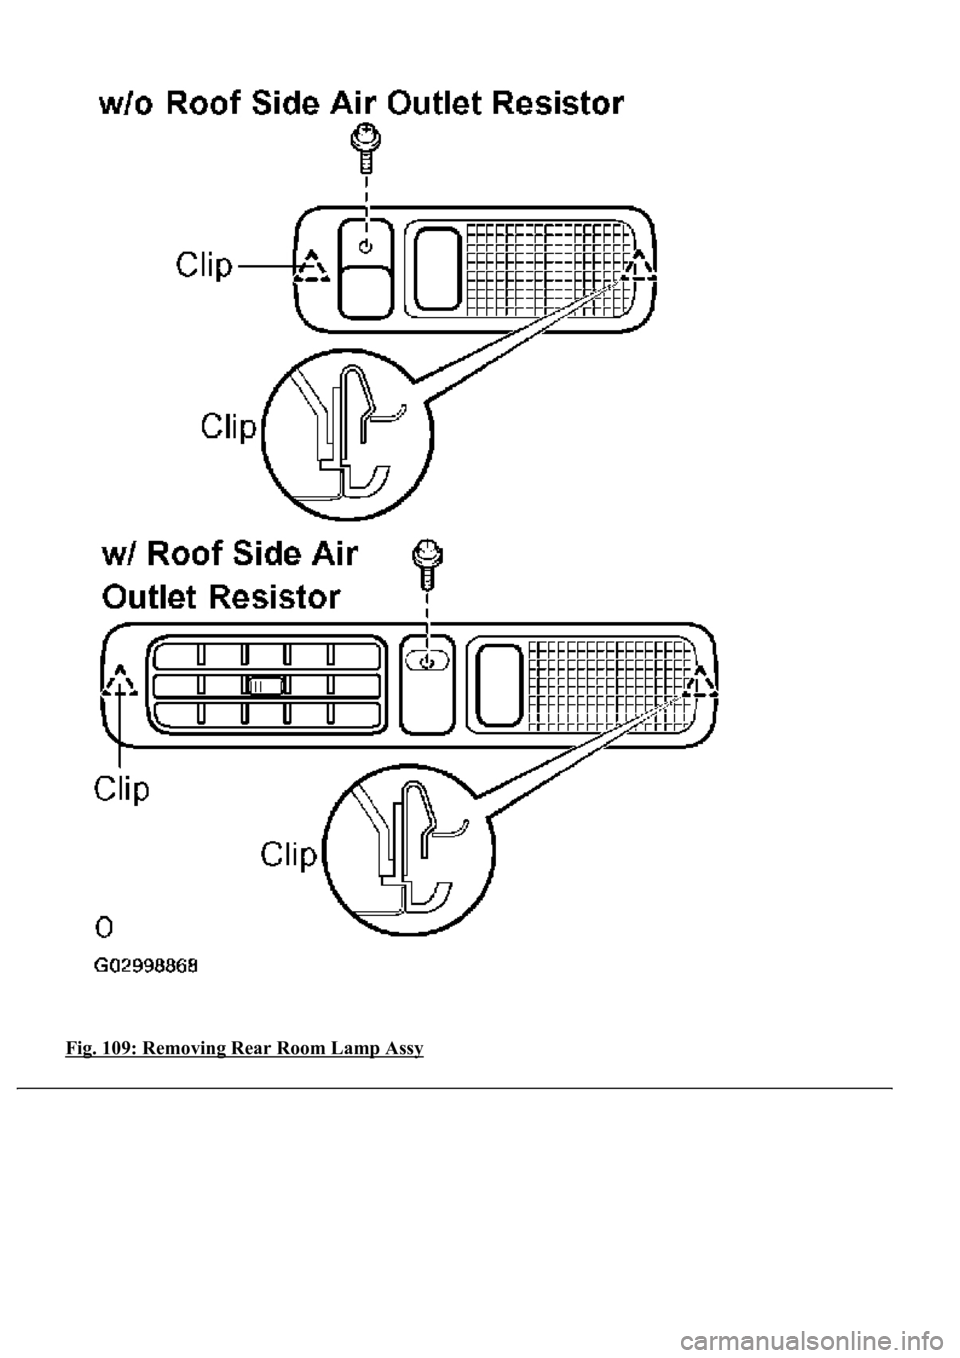
24.REMOVE REAR ROOM LAMP ASSY LH
a. Remove the screw.
b. Using a molding remover, disengage the 2 clips and remove the room lamp.
c. Disconnect the room lamp connector.
Page 3899 of 4500
Fig. 109: Removing Rear Room Lamp Assy
Page 3900 of 4500
Courtesy of TOYOTA MOTOR SALES, U.S.A., INC.
25.REMOVE REAR ROOM LAMP ASSY RH
HINT:
Use the same procedures described for the LH side.
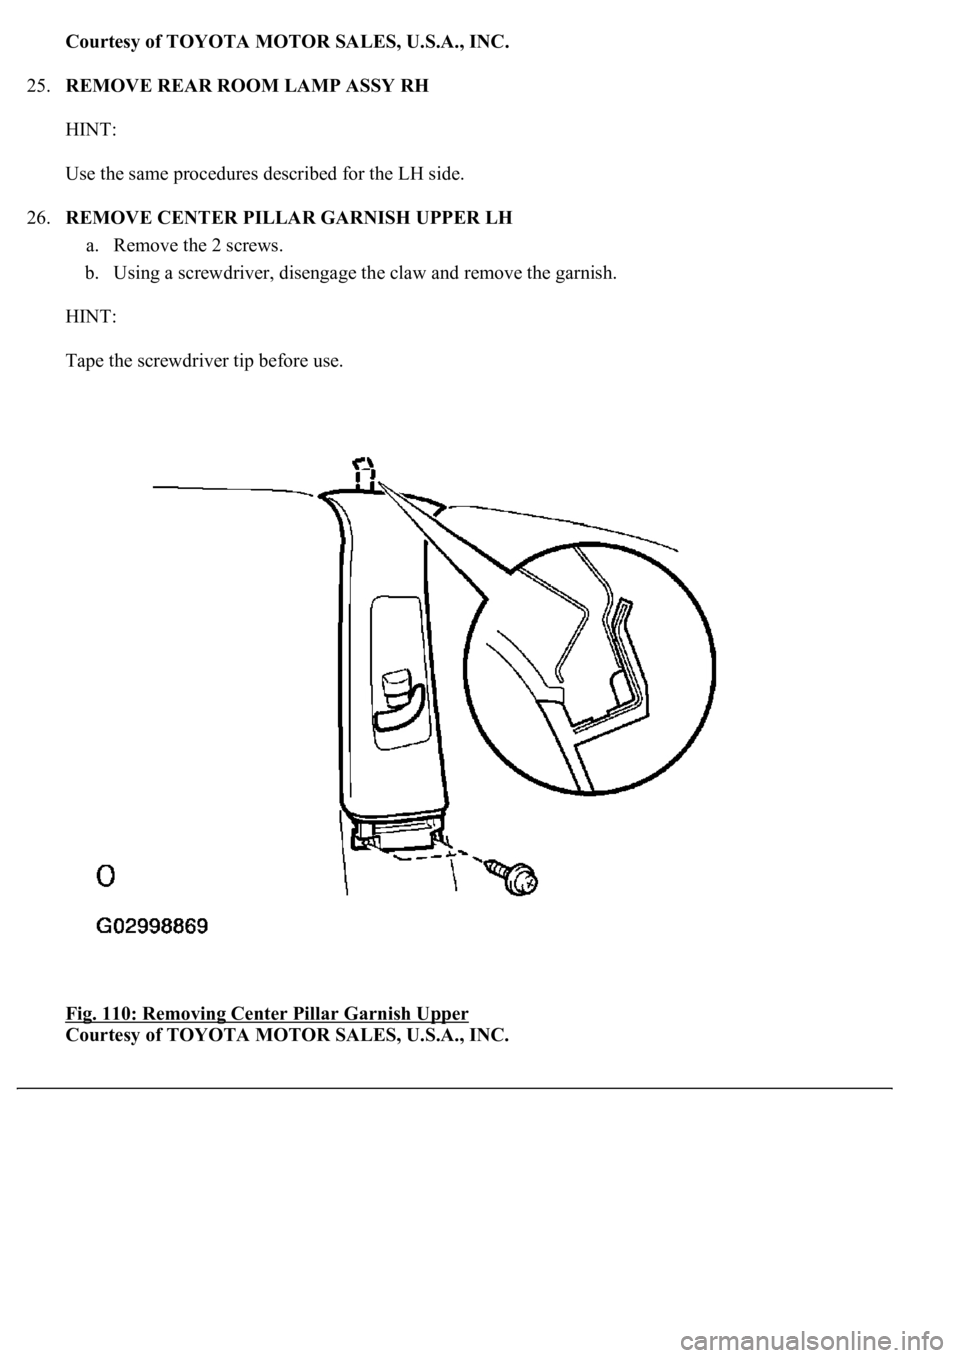
26.REMOVE CENTER PILLAR GARNISH UPPER LH
a. Remove the 2 screws.
b. Using a screwdriver, disengage the claw and remove the garnish.
HINT:
Tape the screwdriver tip before use.
Fig. 110: Removing Center Pillar Garnish Upper
Courtesy of TOYOTA MOTOR SALES, U.S.A., INC.
Trending: Air Conditioning Compressor, keys, service schedule, brake light, maintenance, tow bar, valve assy
