LEXUS LS430 2003 Factory Repair Manual
Manufacturer: LEXUS, Model Year: 2003,
Model line: LS430,
Model: LEXUS LS430 2003
Pages: 4500, PDF Size: 87.45 MB
LEXUS LS430 2003 Factory Repair Manual
LS430 2003
LEXUS
LEXUS
https://www.carmanualsonline.info/img/36/57050/w960_57050-0.png
LEXUS LS430 2003 Factory Repair Manual
Trending: oil pressure, Diagram AC, AC Compressor control valve, engine overheat, Expansion Valve, B2799, immobilizer
Page 3901 of 4500
27.REMOVE CENTER PILLAR GARNISH UPPER RH
HINT:
Use the same procedures described for the LH side.
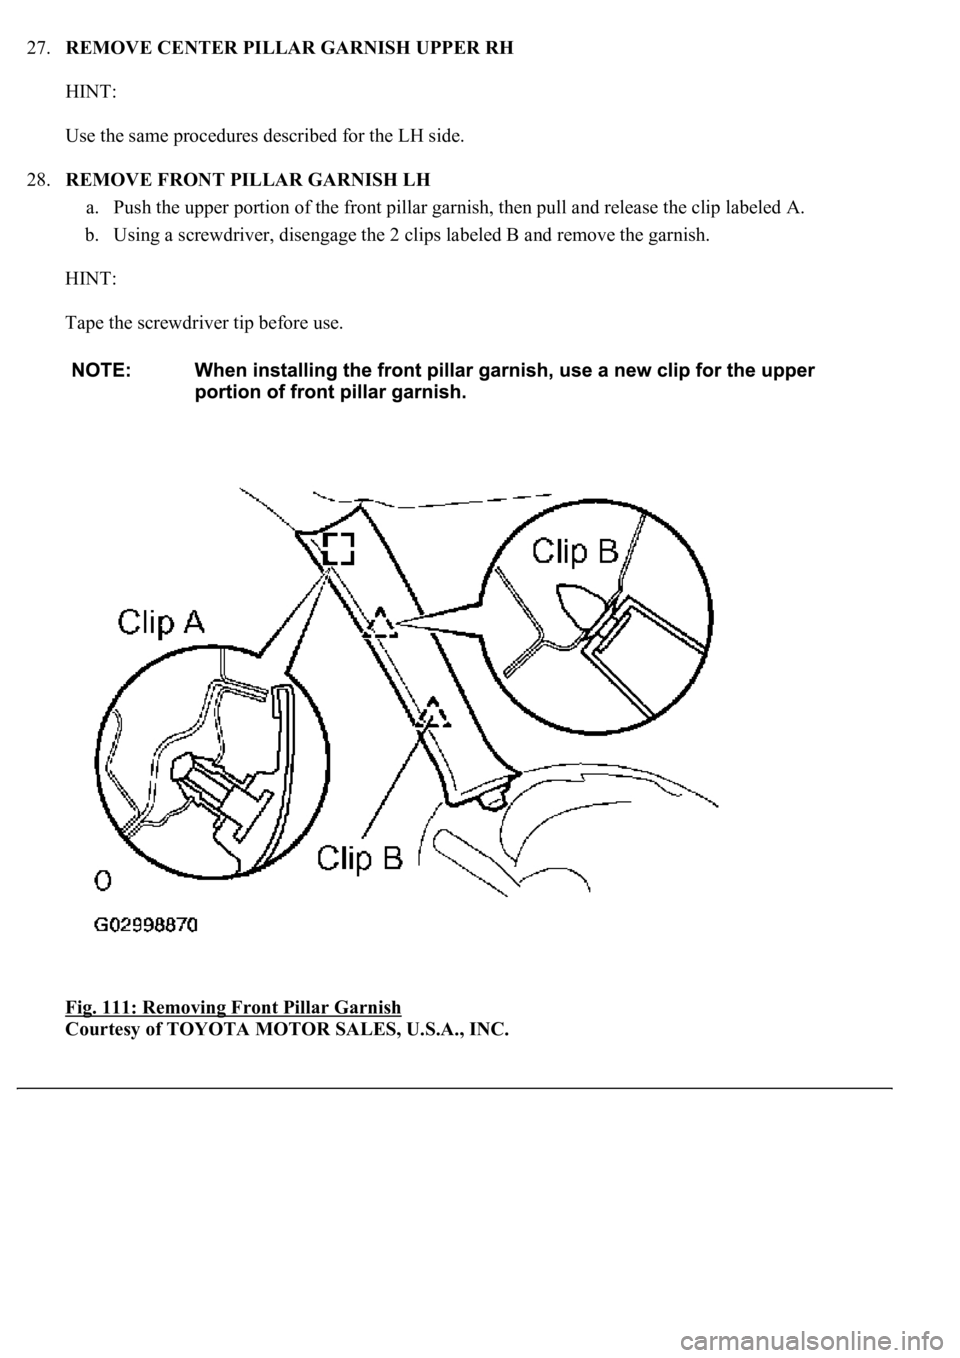
28.REMOVE FRONT PILLAR GARNISH LH
a. Push the upper portion of the front pillar garnish, then pull and release the clip labeled A.
b. Using a screwdriver, disengage the 2 clips labeled B and remove the garnish.
HINT:
Tape the screwdriver tip before use.
Fig. 111: Removing Front Pillar Garnish
Courtesy of TOYOTA MOTOR SALES, U.S.A., INC.
Page 3902 of 4500
29.REMOVE FRONT PILLAR GARNISH RH
HINT:
Use the same procedures described for the LH side.
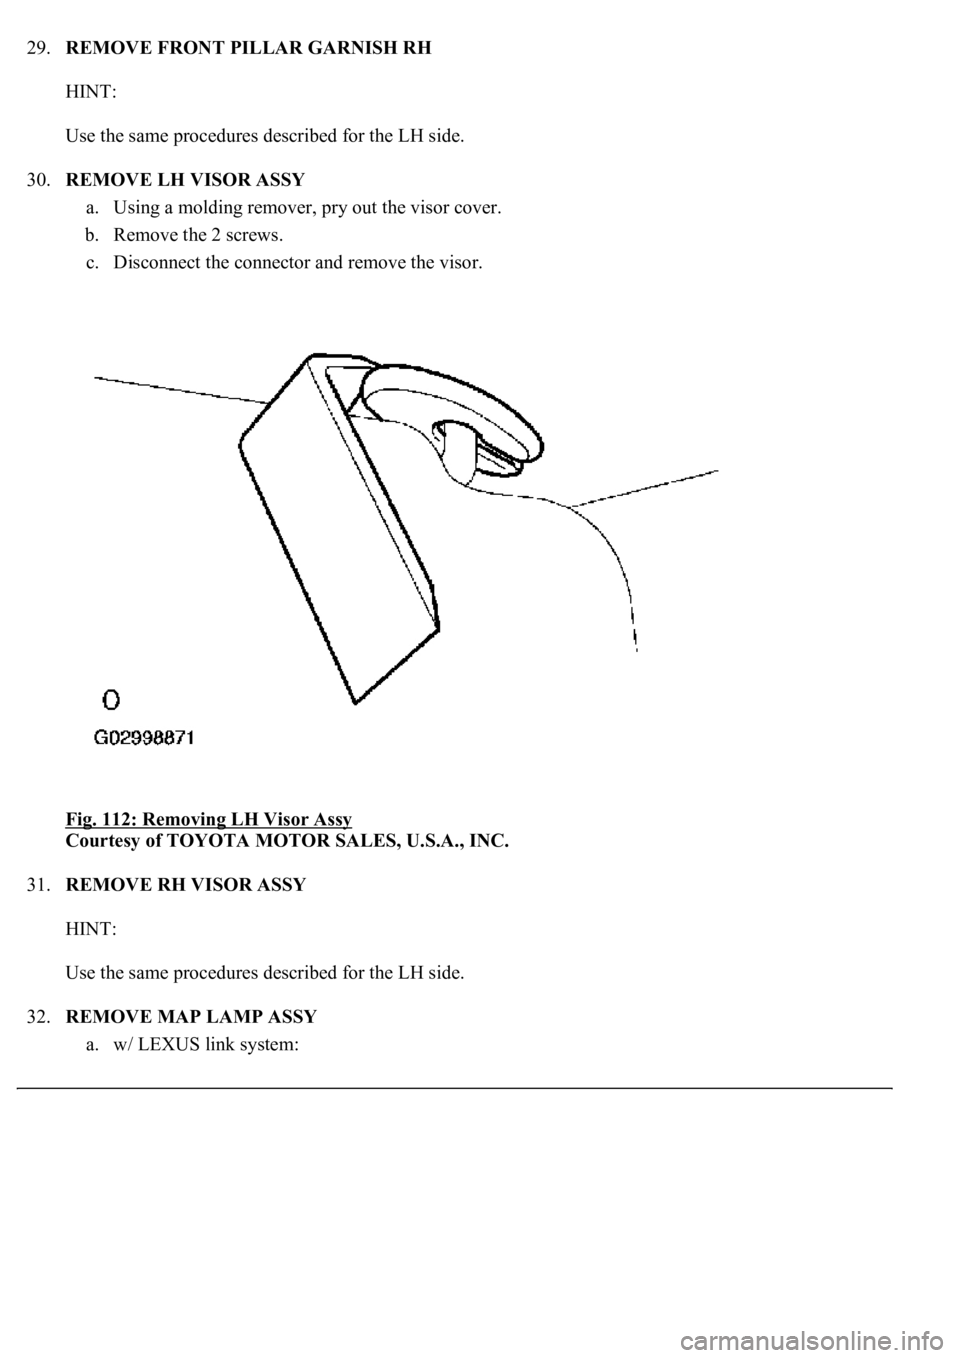
30.REMOVE LH VISOR ASSY
a. Using a molding remover, pry out the visor cover.
b. Remove the 2 screws.
c. Disconnect the connector and remove the visor.
Fig. 112: Removing LH Visor Assy
Courtesy of TOYOTA MOTOR SALES, U.S.A., INC.
31.REMOVE RH VISOR ASSY
HINT:
Use the same procedures described for the LH side.
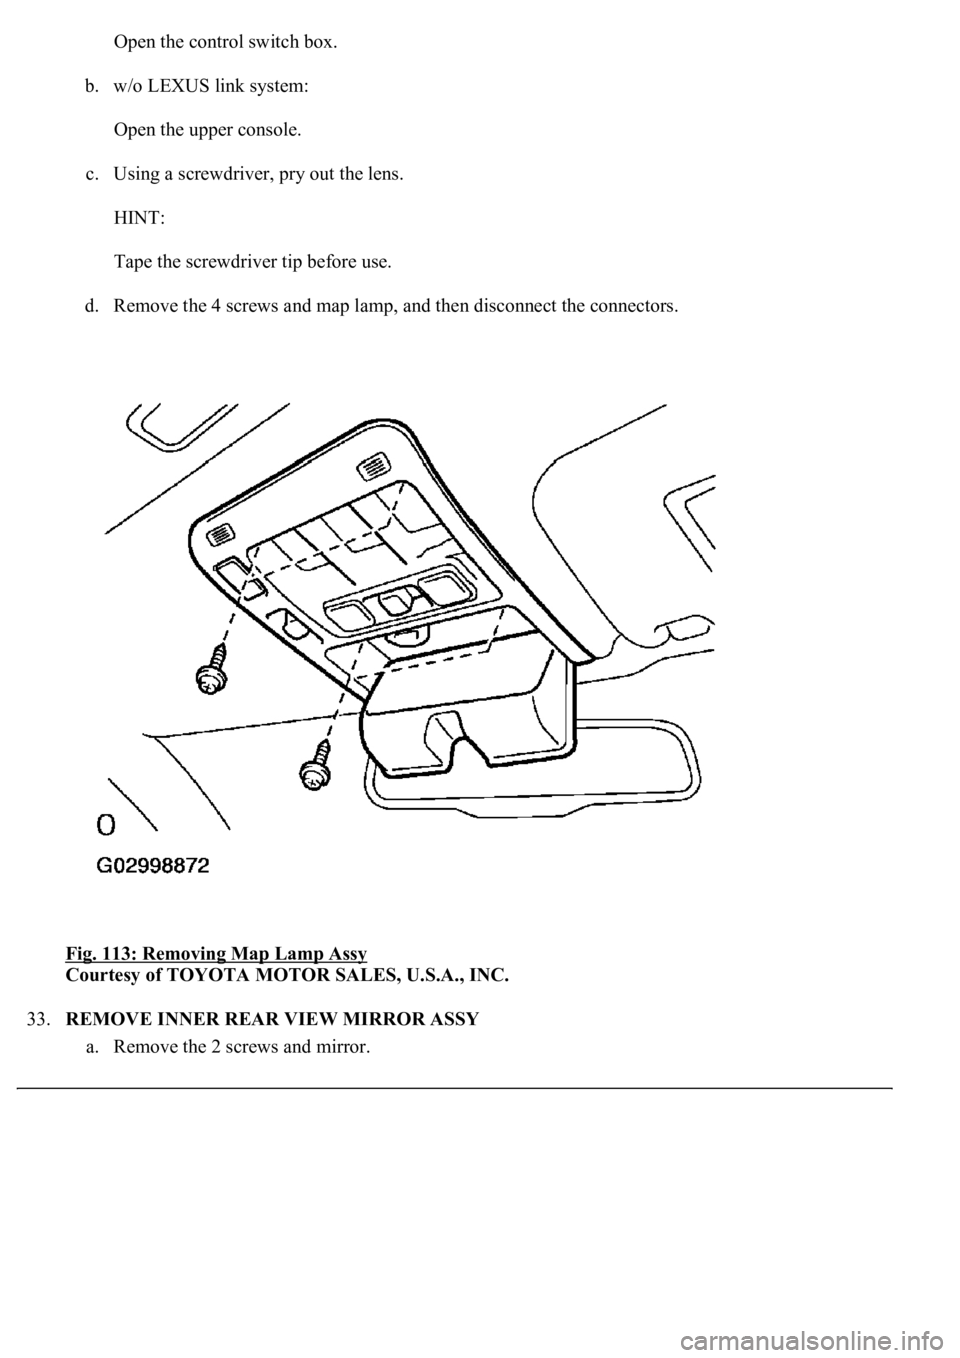
32.REMOVE MAP LAMP ASSY
a. w/ LEXUS link s
ystem:
Page 3903 of 4500
Open the control switch box.
b. w/o LEXUS link system:
Open the upper console.
c. Using a screwdriver, pry out the lens.
HINT:
Tape the screwdriver tip before use.
d. Remove the 4 screws and map lamp, and then disconnect the connectors.
Fig. 113: Removing Map Lamp Assy
Courtesy of TOYOTA MOTOR SALES, U.S.A., INC.
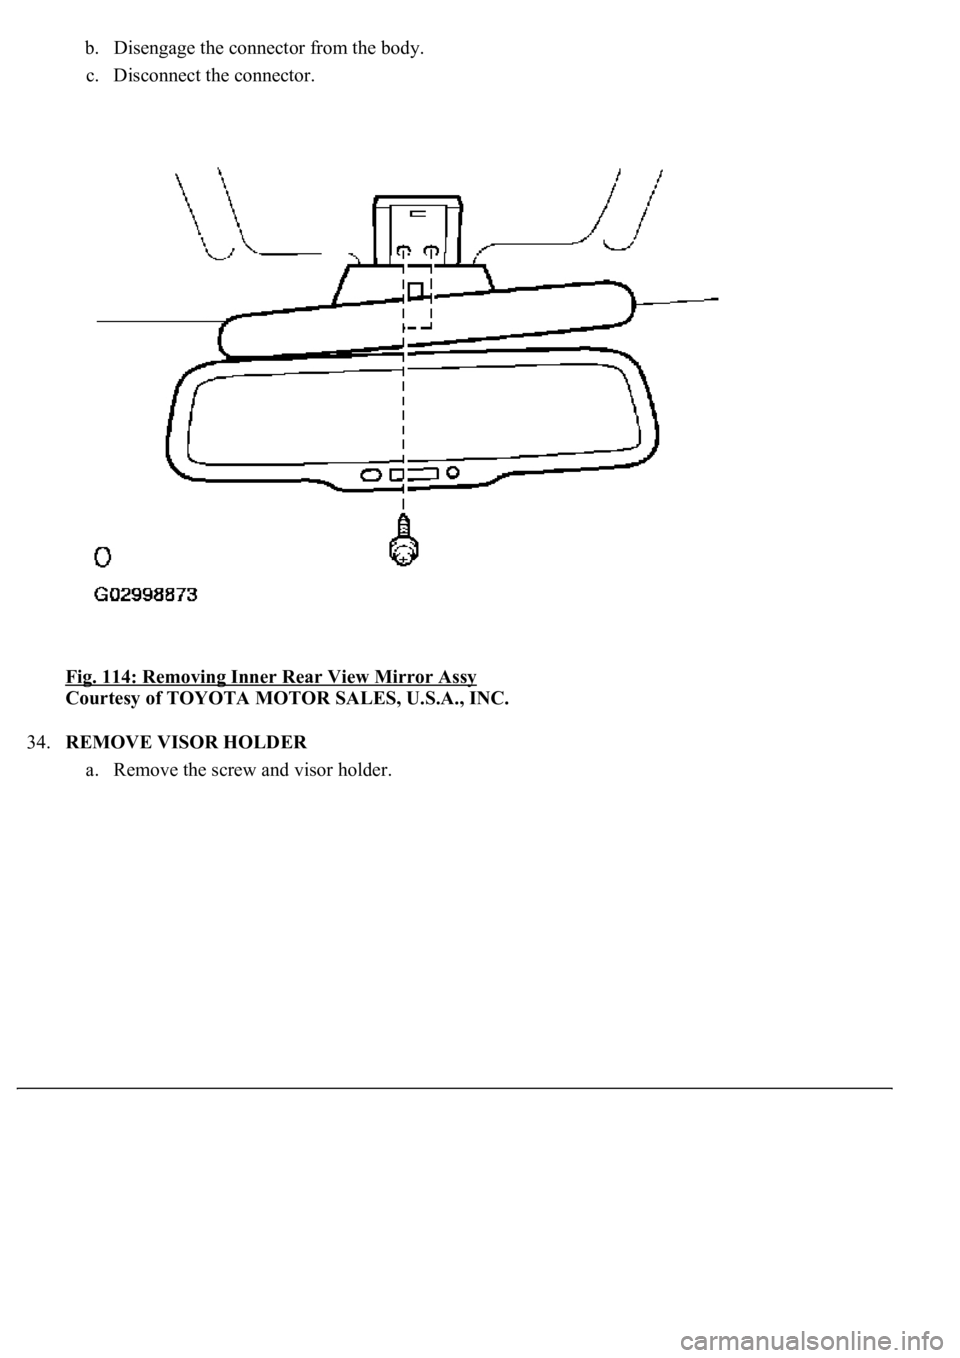
33.REMOVE INNER REAR VIEW MIRROR ASSY
a. Remove the 2 screws and mirror.
Page 3904 of 4500
b. Disengage the connector from the body.
c. Disconnect the connector.
Fig. 114: Removing Inner Rear View Mirror Assy
Courtesy of TOYOTA MOTOR SALES, U.S.A., INC.
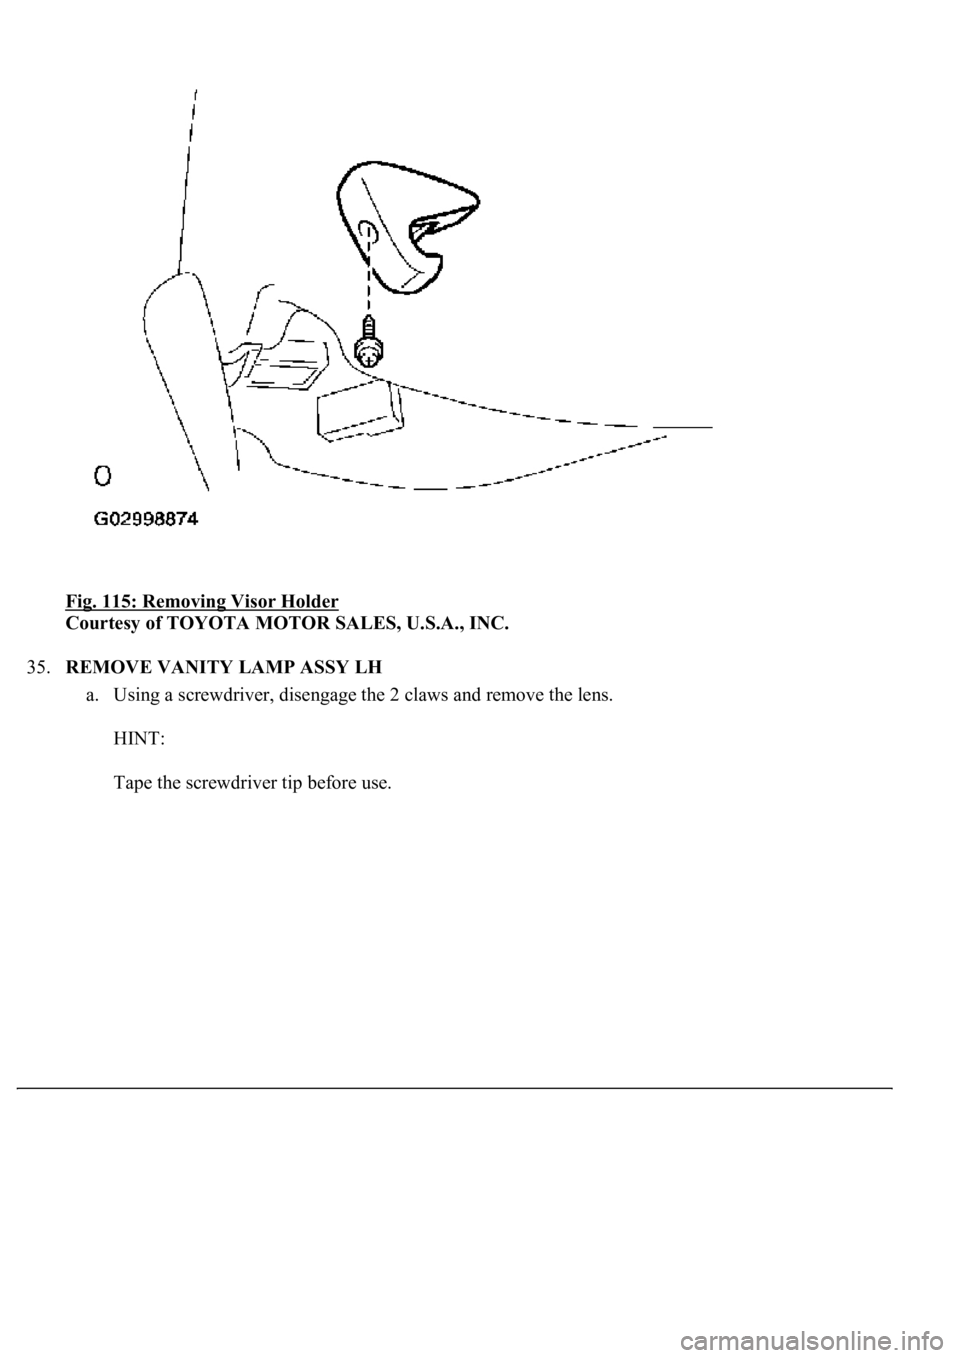
34.REMOVE VISOR HOLDER
a. Remove the screw and visor holder.
Page 3905 of 4500
Fig. 115: Removing Visor Holder
Courtesy of TOYOTA MOTOR SALES, U.S.A., INC.
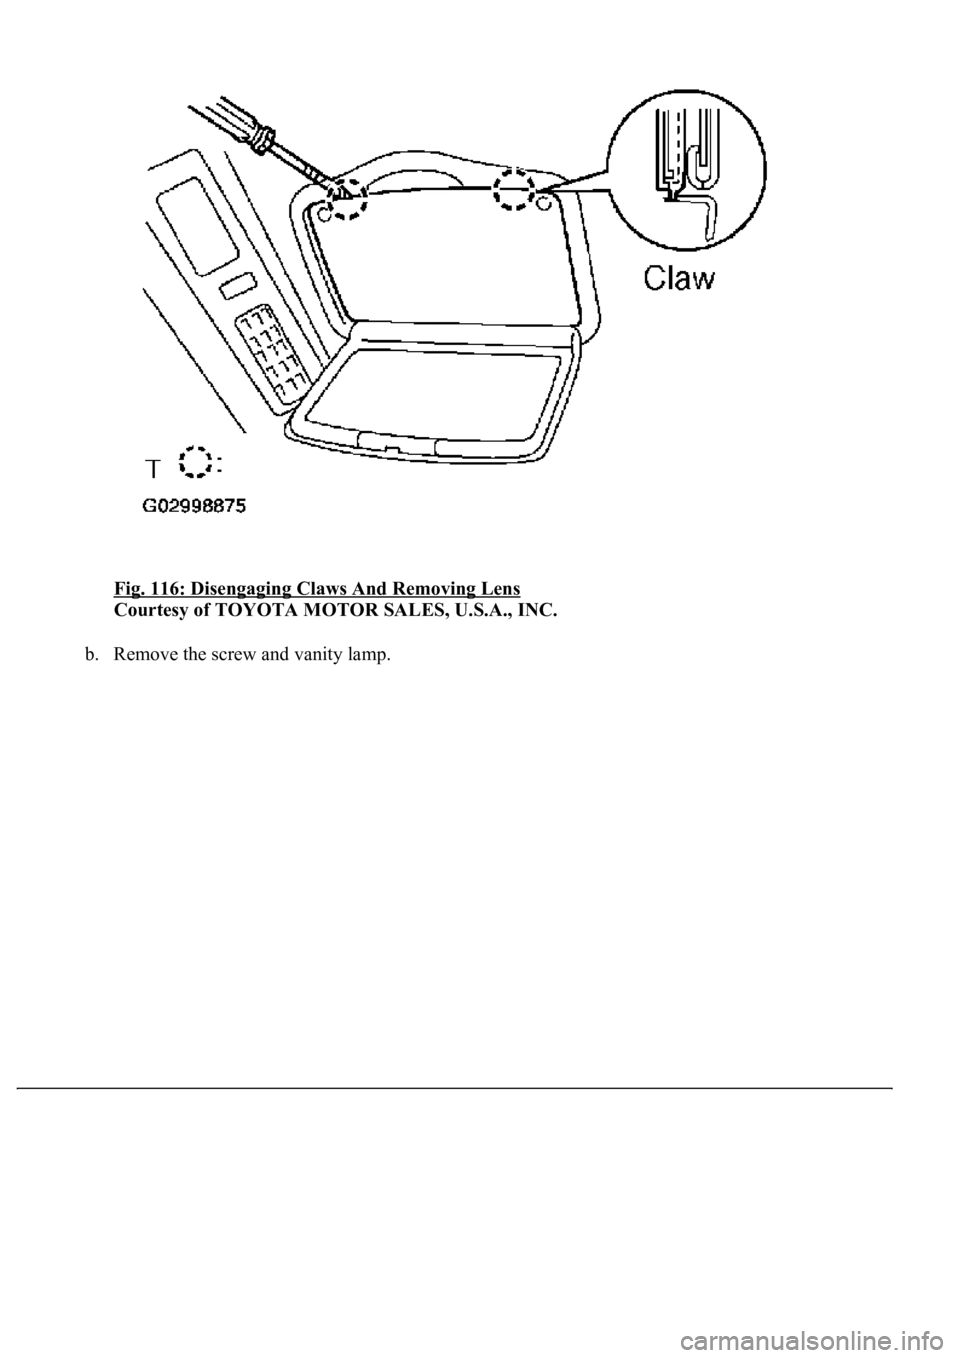
35.REMOVE VANITY LAMP ASSY LH
a. Using a screwdriver, disengage the 2 claws and remove the lens.
HINT:
Tape the screwdriver tip before use.
Page 3906 of 4500
Fig. 116: Disengaging Claws And Removing Lens
Courtesy of TOYOTA MOTOR SALES, U.S.A., INC.
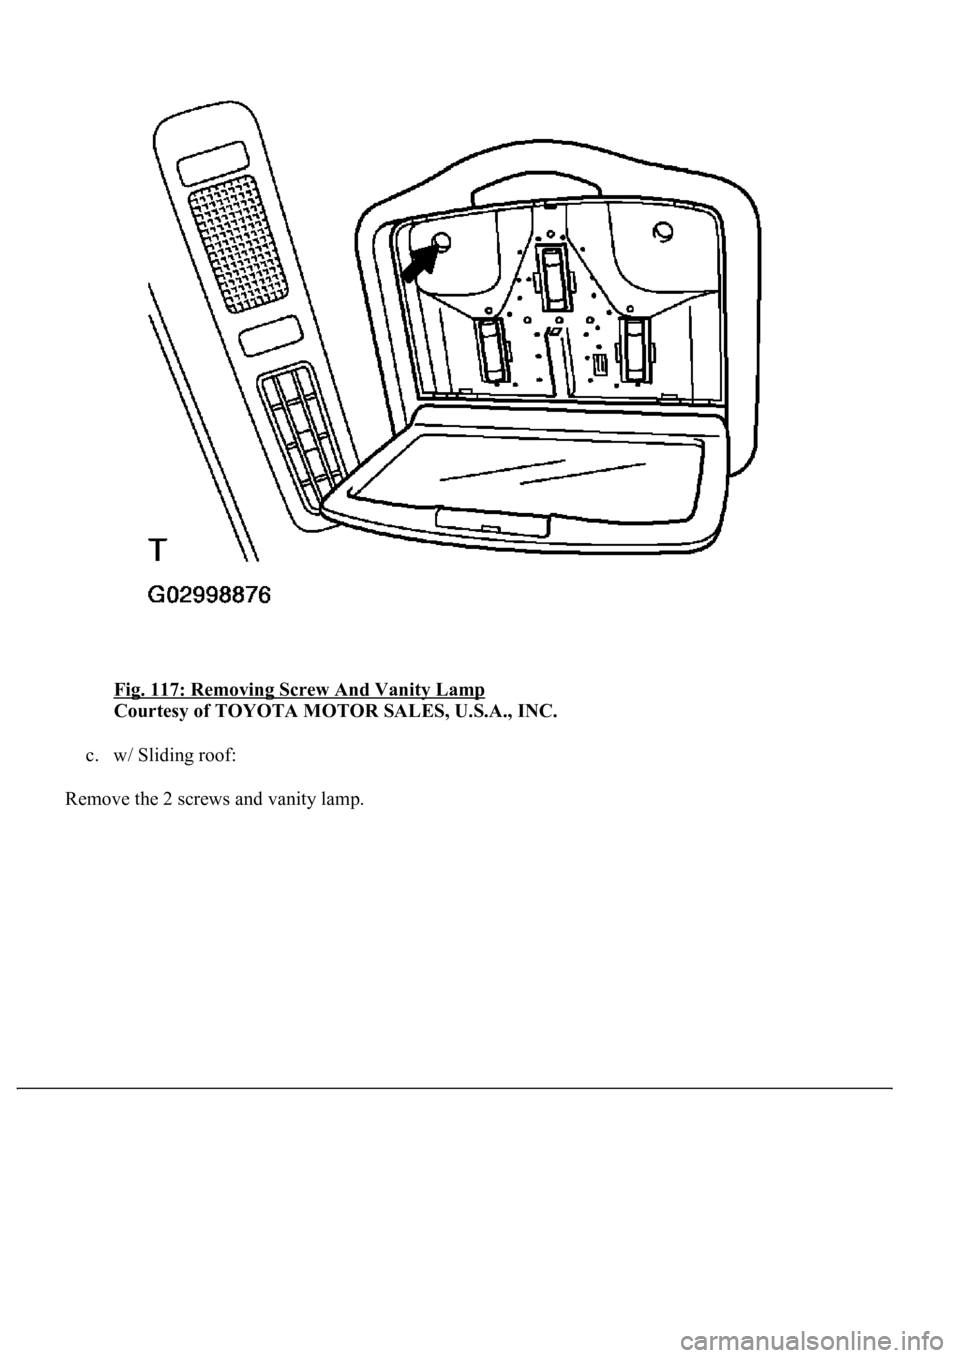
b. Remove the screw and vanity lamp.
Page 3907 of 4500
Fig. 117: Removing Screw And Vanity Lamp
Courtesy of TOYOTA MOTOR SALES, U.S.A., INC.
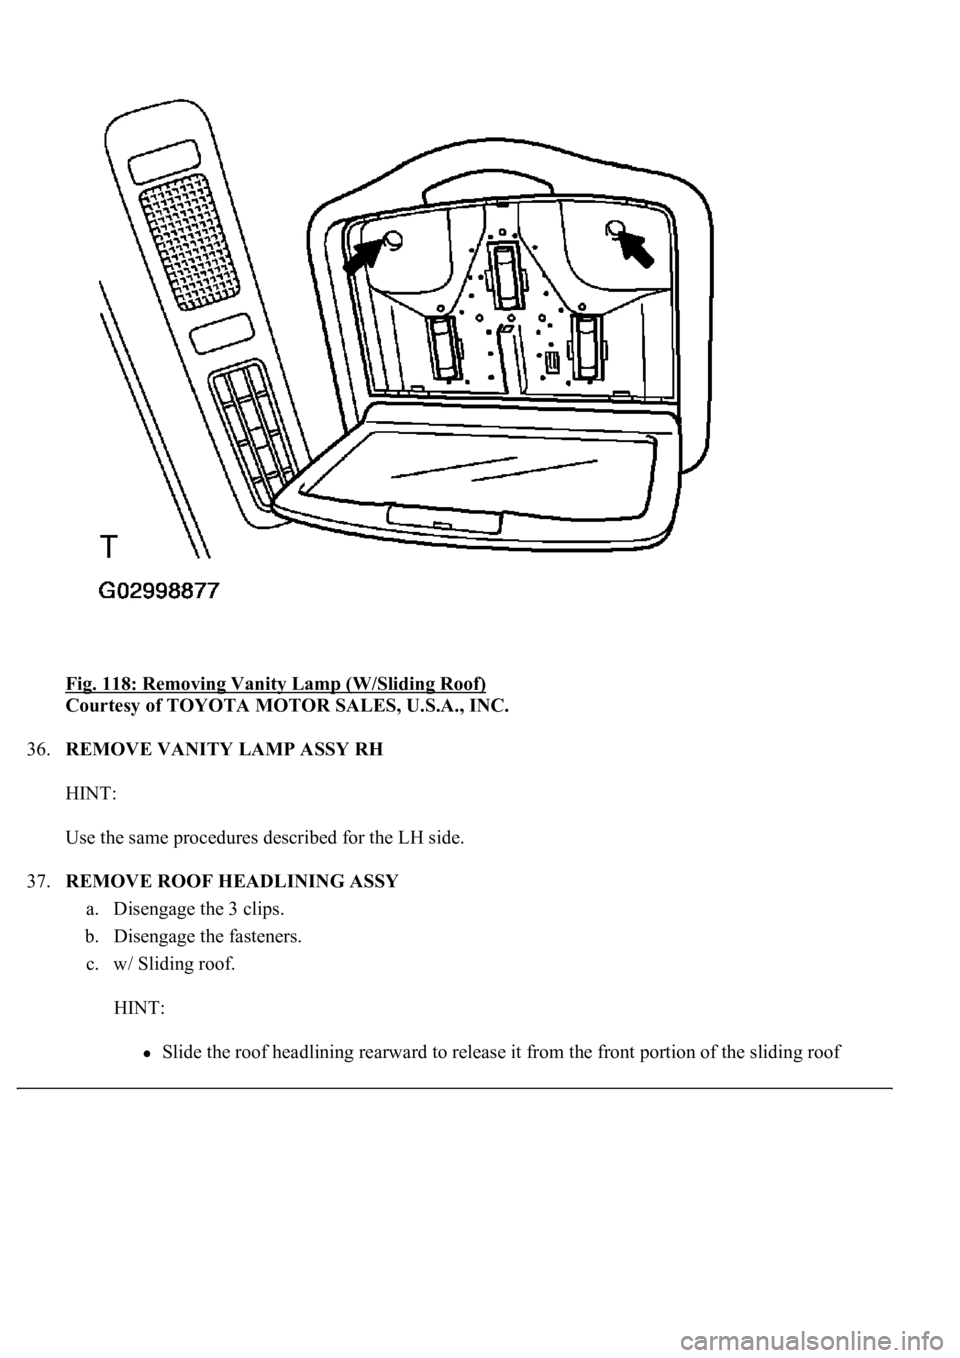
c. w/ Sliding roof:
Remove the 2 screws and vanit
y lamp.
Page 3908 of 4500
Fig. 118: Removing Vanity Lamp (W/Sliding Roof)
Courtesy of TOYOTA MOTOR SALES, U.S.A., INC.
36.REMOVE VANITY LAMP ASSY RH
HINT:
Use the same procedures described for the LH side.
37.REMOVE ROOF HEADLINING ASSY
a. Disengage the 3 clips.
b. Disengage the fasteners.
c. w/ Sliding roof.
HINT:
Slide the roof headlining rearward to release it from the front portion of the sliding roof
Page 3909 of 4500
housing.
Slide the roof headlining forward to release it from the rear portion of the sliding roof
housing.
d. Pull the roof headlinin
g down to remove it.
Page 3910 of 4500
Fig. 119: Removing Roof Headlining Assy
Courtesy of TOYOTA MOTOR SALES, U.S.A., INC.
Trending: Suspension control, oil reset, coolant reservoir, actuator, Expansion Valve, lane assist, stop start
