LEXUS LS430 2003 Factory Repair Manual
Manufacturer: LEXUS, Model Year: 2003,
Model line: LS430,
Model: LEXUS LS430 2003
Pages: 4500, PDF Size: 87.45 MB
LEXUS LS430 2003 Factory Repair Manual
LS430 2003
LEXUS
LEXUS
https://www.carmanualsonline.info/img/36/57050/w960_57050-0.png
LEXUS LS430 2003 Factory Repair Manual
Trending: alarm, trip computer, C1752, bluetooth, cooling, removing v belt tensioner, c1725
Page 681 of 4500
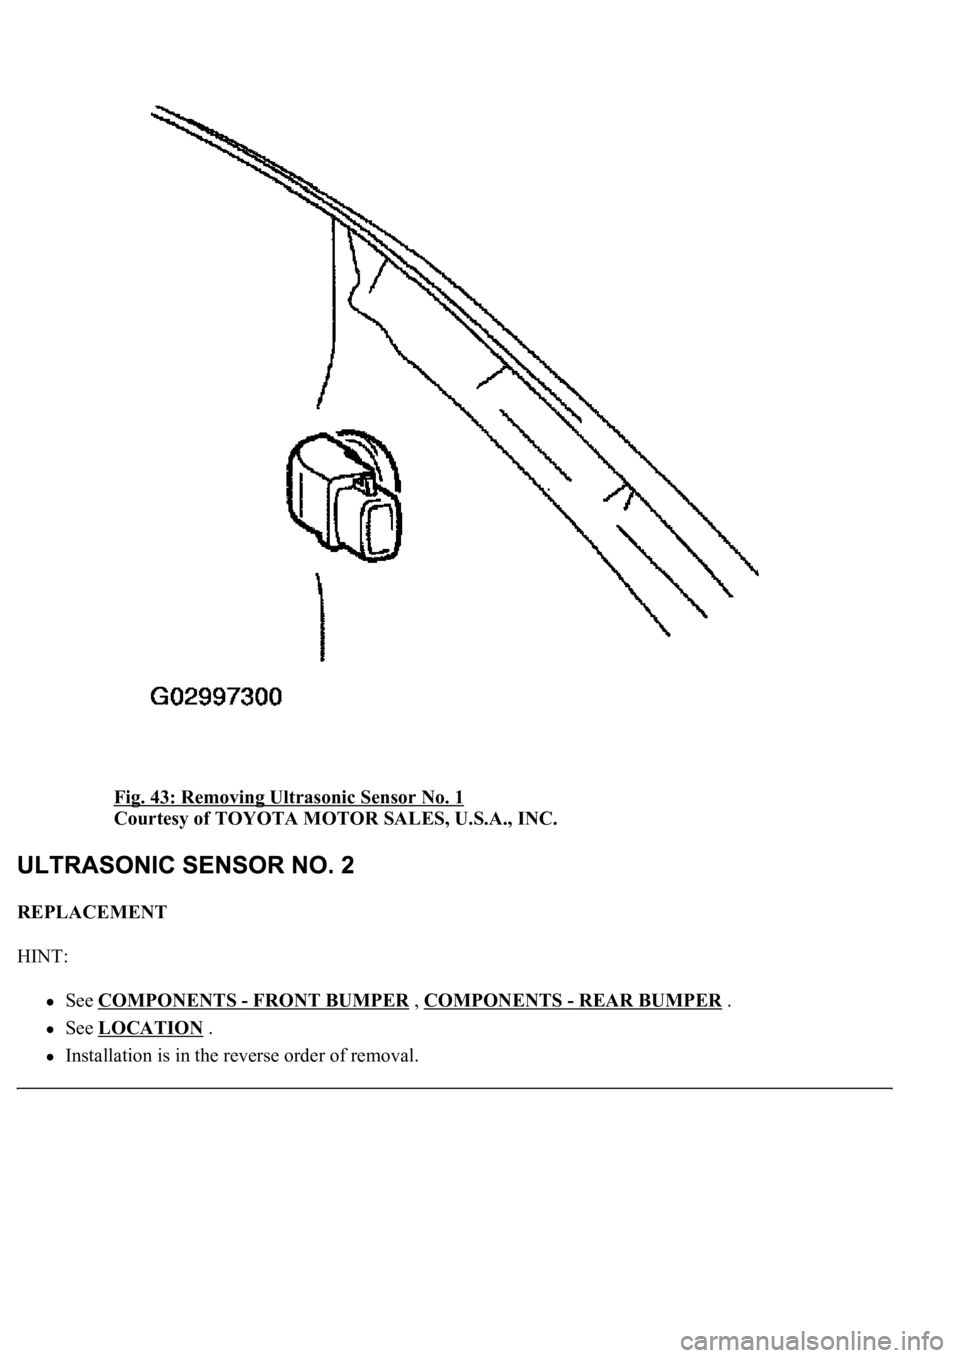
Fig. 43: Removing Ultrasonic Sensor No. 1
Courtesy of TOYOTA MOTOR SALES, U.S.A., INC.
REPLACEMENT
HINT:
See COMPONENTS - FRONT BUMPER , COMPONENTS - REAR BUMPER .
See LOCATION .
Installation is in the reverse order of removal.
Page 682 of 4500
1.REMOVE FRONT BUMPER COVER (See step 5 on REPLACEMENT )
2.REMOVE REAR BUMPER COVER (See step 12 on REPLACEMENT
)
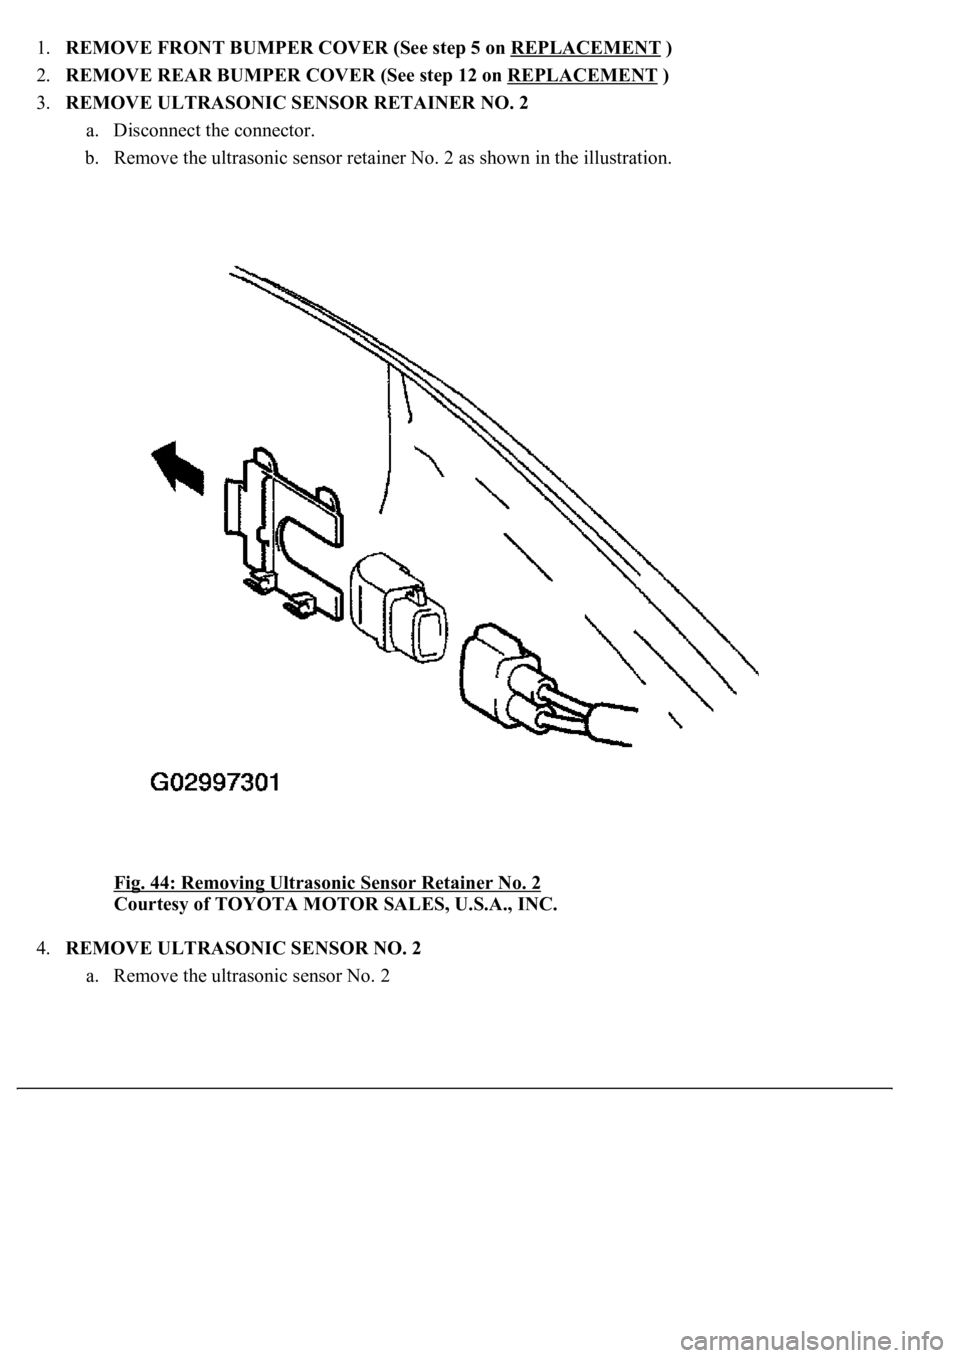
3.REMOVE ULTRASONIC SENSOR RETAINER NO. 2
a. Disconnect the connector.
b. Remove the ultrasonic sensor retainer No. 2 as shown in the illustration.
Fig. 44: Removing Ultrasonic Sensor Retainer No. 2
Courtesy of TOYOTA MOTOR SALES, U.S.A., INC.
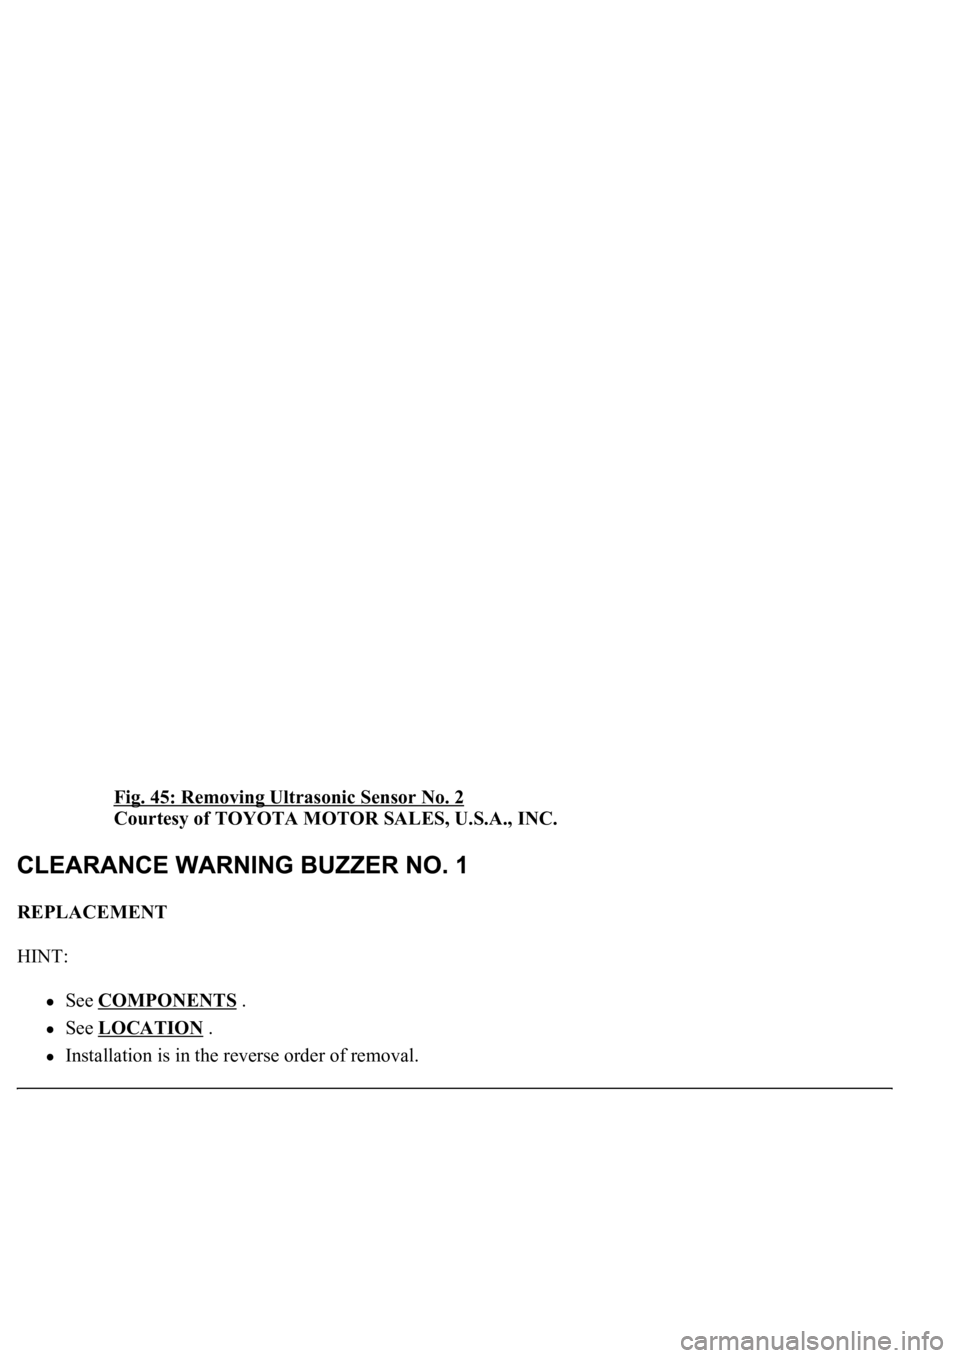
4.REMOVE ULTRASONIC SENSOR NO. 2
a. Remove the ultrasonic sensor No. 2
Page 683 of 4500
Fig. 45: Removing Ultrasonic Sensor No. 2
Courtesy of TOYOTA MOTOR SALES, U.S.A., INC.
REPLACEMENT
HINT:
See COMPONENTS .
See LOCATION .
Installation is in the reverse order of removal.
Page 684 of 4500
1.REMOVE SWITCH BASE HOLE COVER (See REPLACEMENT )
2.REMOVE INSTRUMENT PANEL SAFETY PAD SUB-ASSY NO. 1 (See step 19 on
REPLACEMENT
)
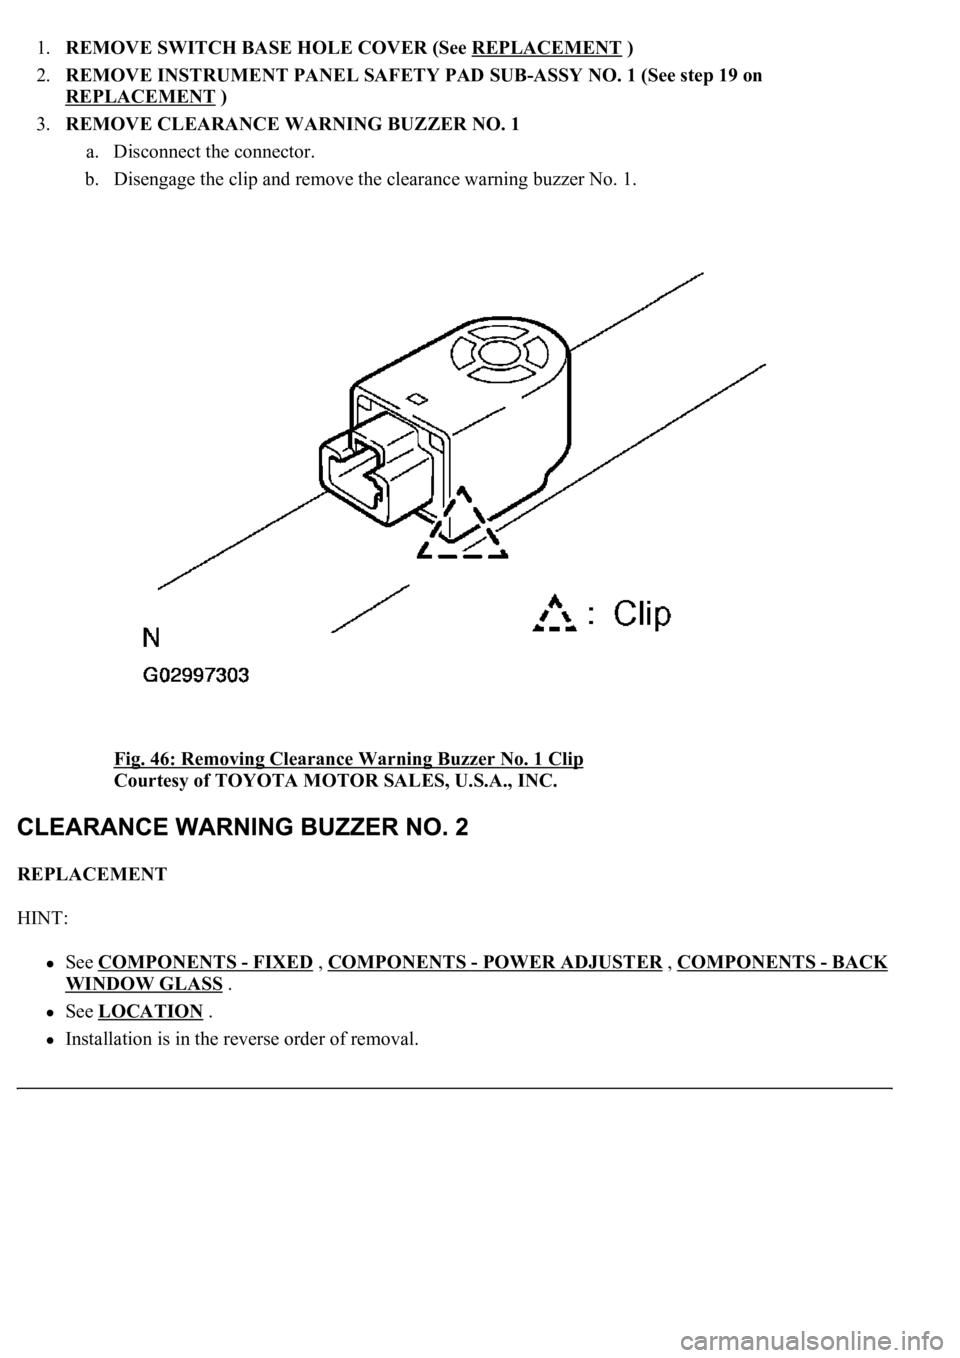
3.REMOVE CLEARANCE WARNING BUZZER NO. 1
a. Disconnect the connector.
b. Disengage the clip and remove the clearance warning buzzer No. 1.
Fig. 46: Removing Clearance Warning Buzzer No. 1 Clip
Courtesy of TOYOTA MOTOR SALES, U.S.A., INC.
REPLACEMENT
HINT:
See COMPONENTS - FIXED , COMPONENTS - POWER ADJUSTER , COMPONENTS -BACK
WINDOW GLASS .
See LOCATION .
Installation is in the reverse order of removal.
Page 685 of 4500
1.REMOVE REAR SEAT CUSHION ASSY RH (See OVERHAUL - FIXED , OVERHAUL -
POWER SEAT ADJUSTER
)
2.REMOVE REAR SEAT CUSHION ASSY LH (See OVERHAUL
- FIXED , OVERHAUL -
POWER SEAT ADJUSTER
)
3.REMOVE REAR SEAT BACK ASSY LH (See OVERHAUL
- FIXED , OVERHAUL - POWER
SEAT ADJUSTER )
4.REMOVE REAR SEAT BACK ASSY RH (See OVERHAUL
- FIXED , OVERHAUL - POWER
SEAT ADJUSTER )
5.REMOVE REAR DOOR SCUFF PLATE RH (See REPLACEMENT
)
6.REMOVE REAR DOOR SCUFF PLATE LH (See REPLACEMENT
)
7.REMOVE REAR DOOR OPENING TRIM WEATHERSTRIP RH (See REPLACEMENT
)
8.REMOVE REAR DOOR OPENING TRIM WEATHERSTRIP LH (See REPLACEMENT
)
9.REMOVE REAR SEAT SIDE COVER RH (See REPLACEMENT
)
10.REMOVE REAR SEAT SIDE COVER LH (See REPLACEMENT
)
11.REMOVE ROOF SIDE GARNISH INNER RH (See REPLACEMENT
)
12.REMOVE ROOF SIDE GARNISH INNER LH (See REPLACEMENT
)
13.REMOVE CENTER STOP LAMP ASSY (See REPLACEMENT
)
14.REMOVE REAR SPEAKER GRILLE SUB-ASSY (See REPLACEMENT
)
15.PACKAGE TRAY TRIM PANEL ASSY (See REPLACEMENT
)
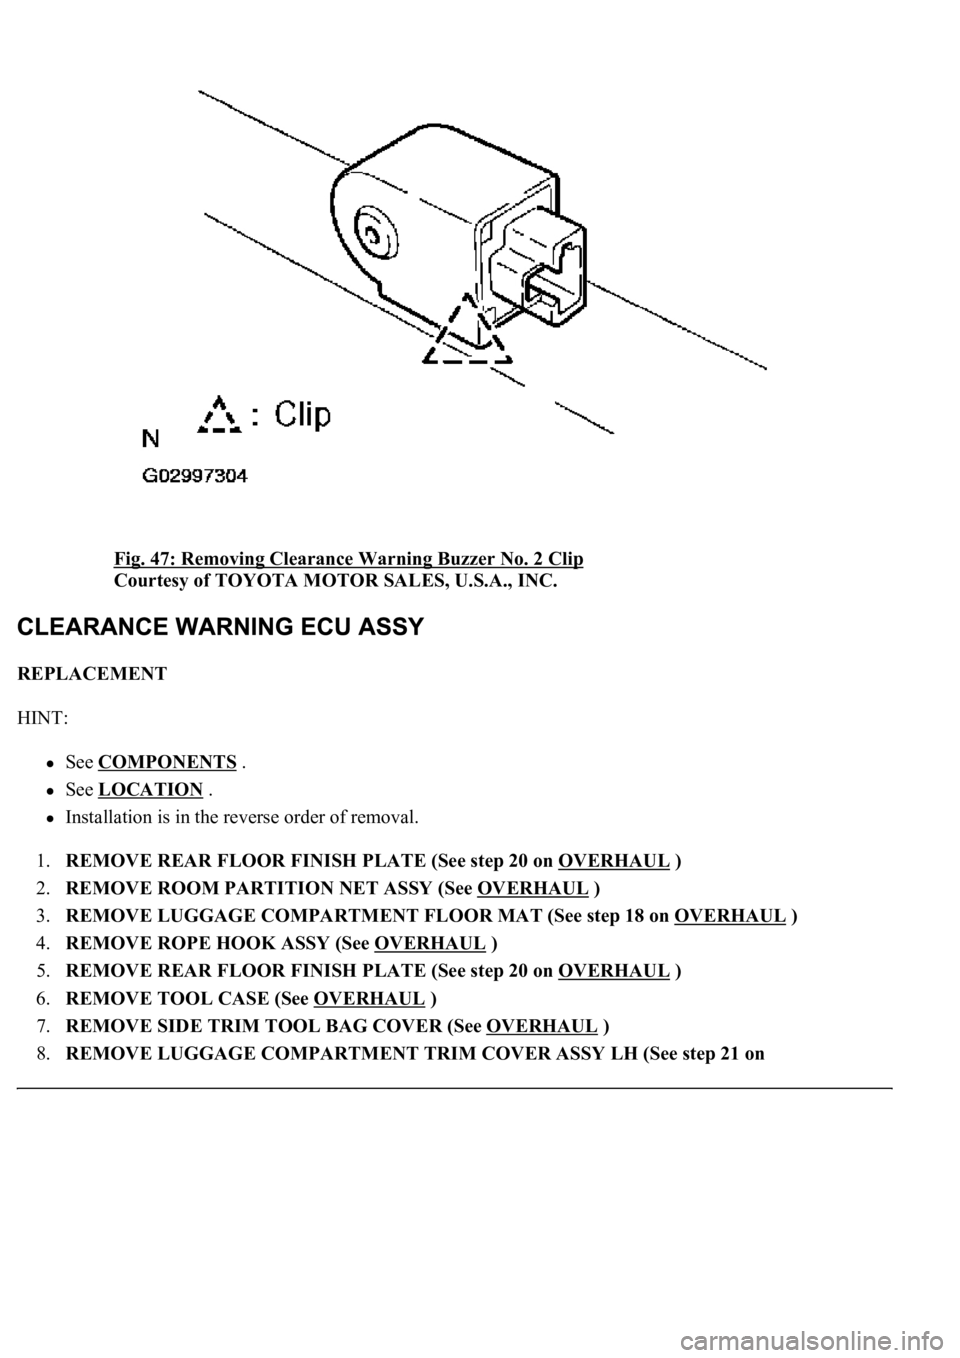
16.REMOVE CLEARANCE WARNING BUZZER NO. 2
a. Disconnect the connector.
b. Disengage the clip and remove the clearance warning buzzer No. 2.
Page 686 of 4500
Fig. 47: Removing Clearance Warning Buzzer No. 2 Clip
Courtesy of TOYOTA MOTOR SALES, U.S.A., INC.
REPLACEMENT
HINT:
See COMPONENTS .
See LOCATION .
Installation is in the reverse order of removal.
1.REMOVE REAR FLOOR FINISH PLATE (See step 20 on OVERHAUL
)
2.REMOVE ROOM PARTITION NET ASSY (See OVERHAUL
)
3.REMOVE LUGGAGE COMPARTMENT FLOOR MAT (See step 18 on OVERHAUL
)
4.REMOVE ROPE HOOK ASSY (See OVERHAUL
)
5.REMOVE REAR FLOOR FINISH PLATE (See step 20 on OVERHAUL
)
6.REMOVE TOOL CASE (See OVERHAUL
)
7.REMOVE SIDE TRIM TOOL BAG COVER (See OVERHAUL
)
8.REMOVE LUGGAGE COMPARTMENT TRIM COVER ASSY LH (See step 21 on
Page 687 of 4500
OVERHAUL )
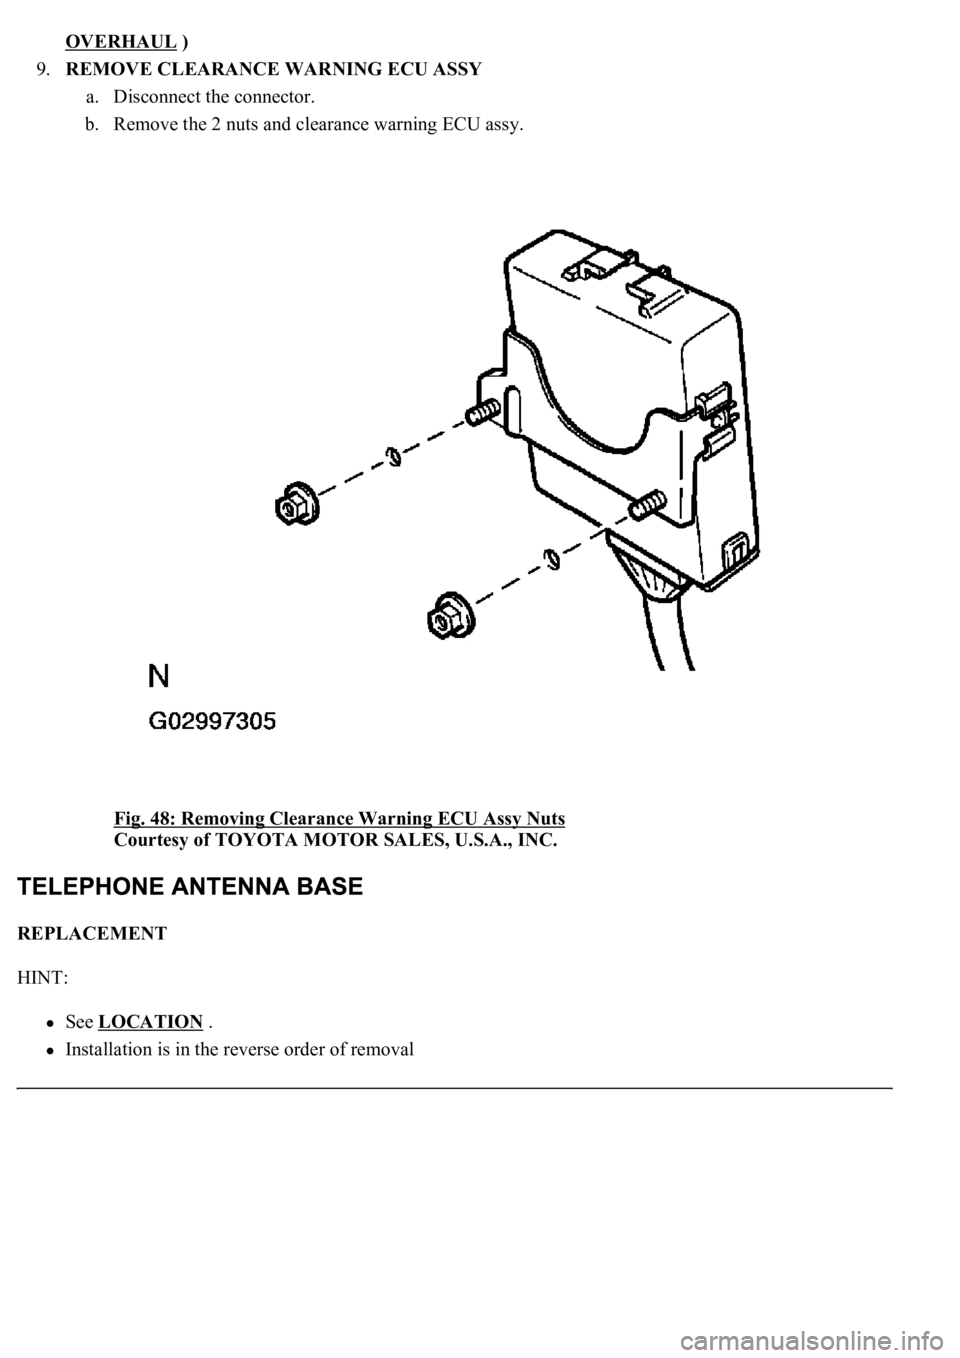
9.REMOVE CLEARANCE WARNING ECU ASSY
a. Disconnect the connector.
b. Remove the 2 nuts and clearance warning ECU assy.
Fig. 48: Removing Clearance Warning ECU Assy Nuts
Courtesy of TOYOTA MOTOR SALES, U.S.A., INC.
REPLACEMENT
HINT:
See LOCATION .
Installation is in the reverse order of removal
Page 688 of 4500
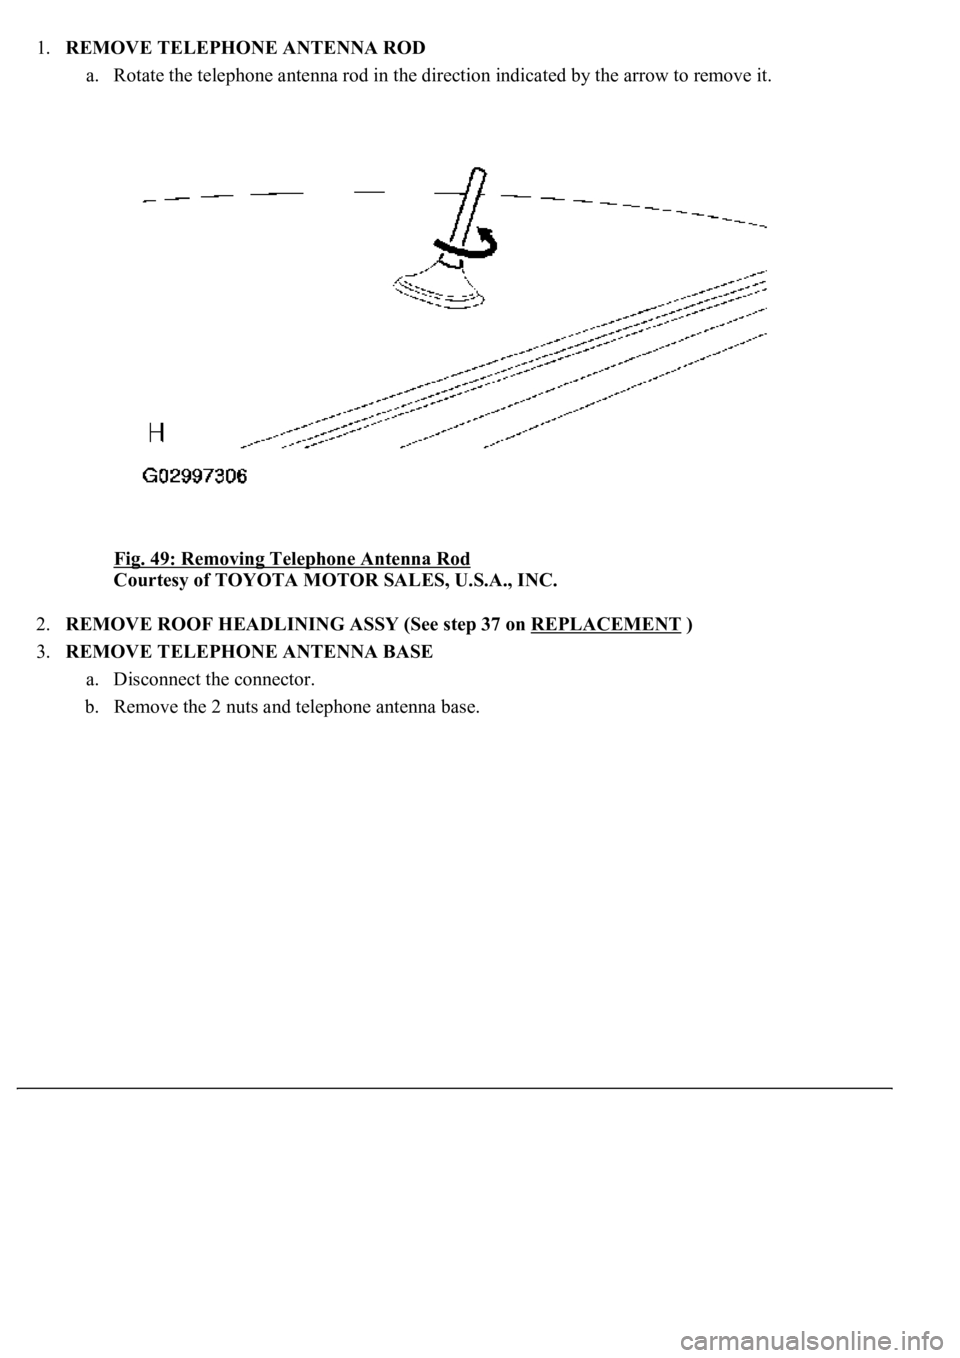
1.REMOVE TELEPHONE ANTENNA ROD
a. Rotate the telephone antenna rod in the direction indicated by the arrow to remove it.
Fig. 49: Removing Telephone Antenna Rod
Courtesy of TOYOTA MOTOR SALES, U.S.A., INC.
2.REMOVE ROOF HEADLINING ASSY (See step 37 on REPLACEMENT
)
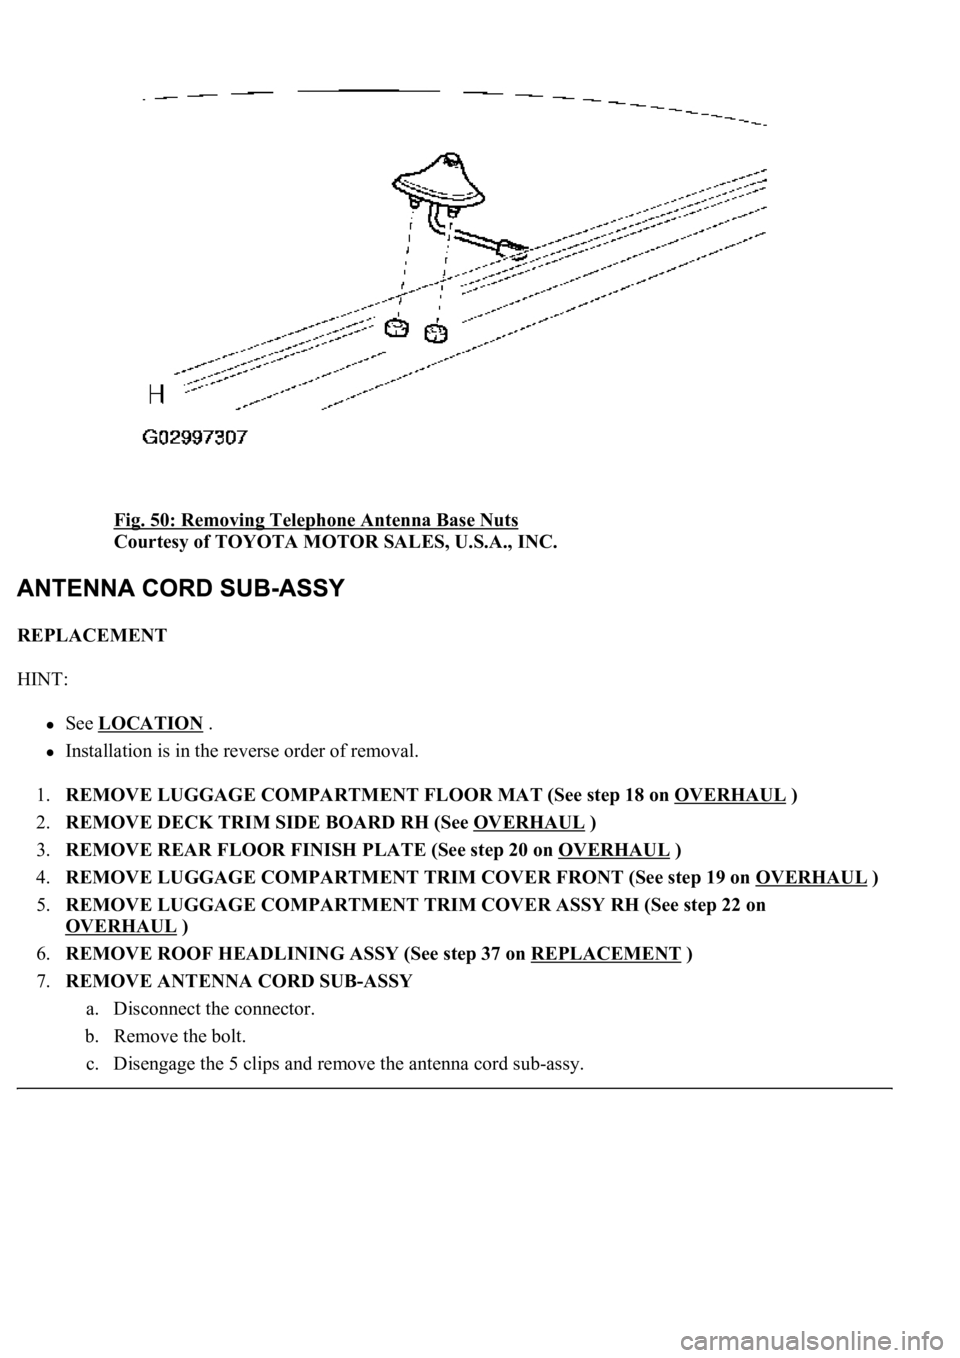
3.REMOVE TELEPHONE ANTENNA BASE
a. Disconnect the connector.
b. Remove the 2 nuts and telephone antenna base.
Page 689 of 4500
Fig. 50: Removing Telephone Antenna Base Nuts
Courtesy of TOYOTA MOTOR SALES, U.S.A., INC.
REPLACEMENT
HINT:
See LOCATION .
Installation is in the reverse order of removal.
1.REMOVE LUGGAGE COMPARTMENT FLOOR MAT (See step 18 on OVERHAUL
)
2.REMOVE DECK TRIM SIDE BOARD RH (See OVERHAUL
)
3.REMOVE REAR FLOOR FINISH PLATE (See step 20 on OVERHAUL
)
4.REMOVE LUGGAGE COMPARTMENT TRIM COVER FRONT (See step 19 on OVERHAUL
)
5.REMOVE LUGGAGE COMPARTMENT TRIM COVER ASSY RH (See step 22 on
OVERHAUL
)
6.REMOVE ROOF HEADLINING ASSY (See step 37 on REPLACEMENT
)
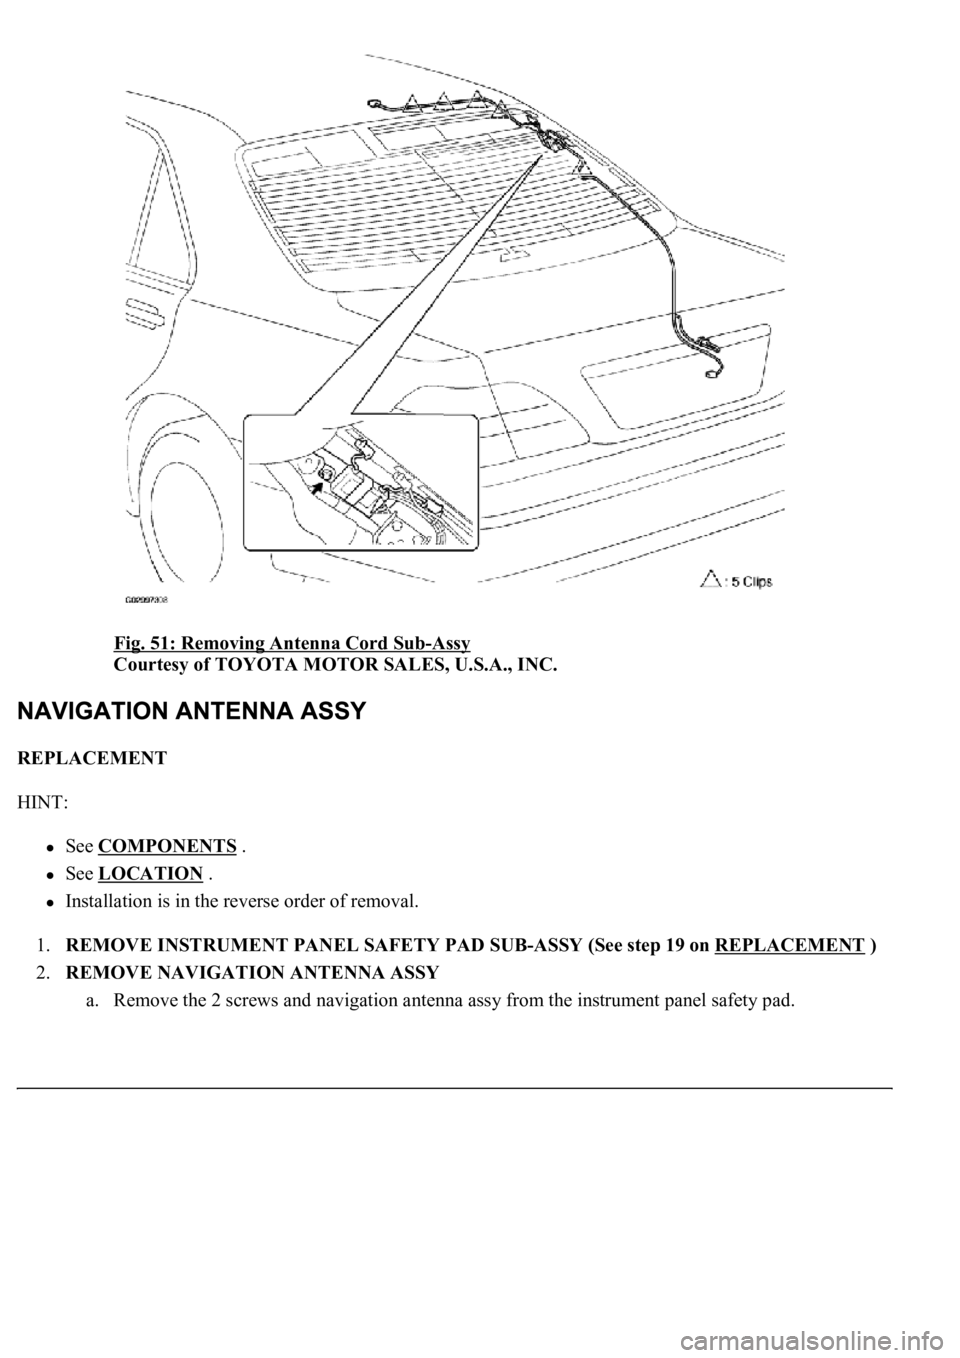
7.REMOVE ANTENNA CORD SUB-ASSY
a. Disconnect the connector.
b. Remove the bolt.
c. Disengage the 5 clips and remove the antenna cord sub-assy.
Page 690 of 4500
Fig. 51: Removing Antenna Cord Sub-Assy
Courtesy of TOYOTA MOTOR SALES, U.S.A., INC.
REPLACEMENT
HINT:
See COMPONENTS .
See LOCATION .
Installation is in the reverse order of removal.
1.REMOVE INSTRUMENT PANEL SAFETY PAD SUB-ASSY (See step 19 on REPLACEMENT
)
2.REMOVE NAVIGATION ANTENNA ASSY
a. Remove the 2 screws and navigation antenna assy from the instrument panel safety pad.
Trending: fuel filter, actuator, Ecm, fuel consumption, spark plugs, rear view mirror, Compressor control valve
