MERCEDES-BENZ CL COUPE 2009 Owners Manual
Manufacturer: MERCEDES-BENZ, Model Year: 2009, Model line: CL COUPE, Model: MERCEDES-BENZ CL COUPE 2009Pages: 421, PDF Size: 10.78 MB
Page 181 of 421
Opening and closing
Key
The key centrally locks/unlocks:
R the doors
R the boot lid
R the fuel filler flap G
Risk of accident
If children are left unsupervised in the vehicle,
they could:
R open a door from the inside at any time,
even if it has been locked
R start the vehicle using a key which has been
left in the vehicle
R release the parking brake
They could thereby endanger themselves and
others. Never leave children unsupervised in
the vehicle. Always take the key with you
when leaving the vehicle, even if you are only
leaving it for a short time. :
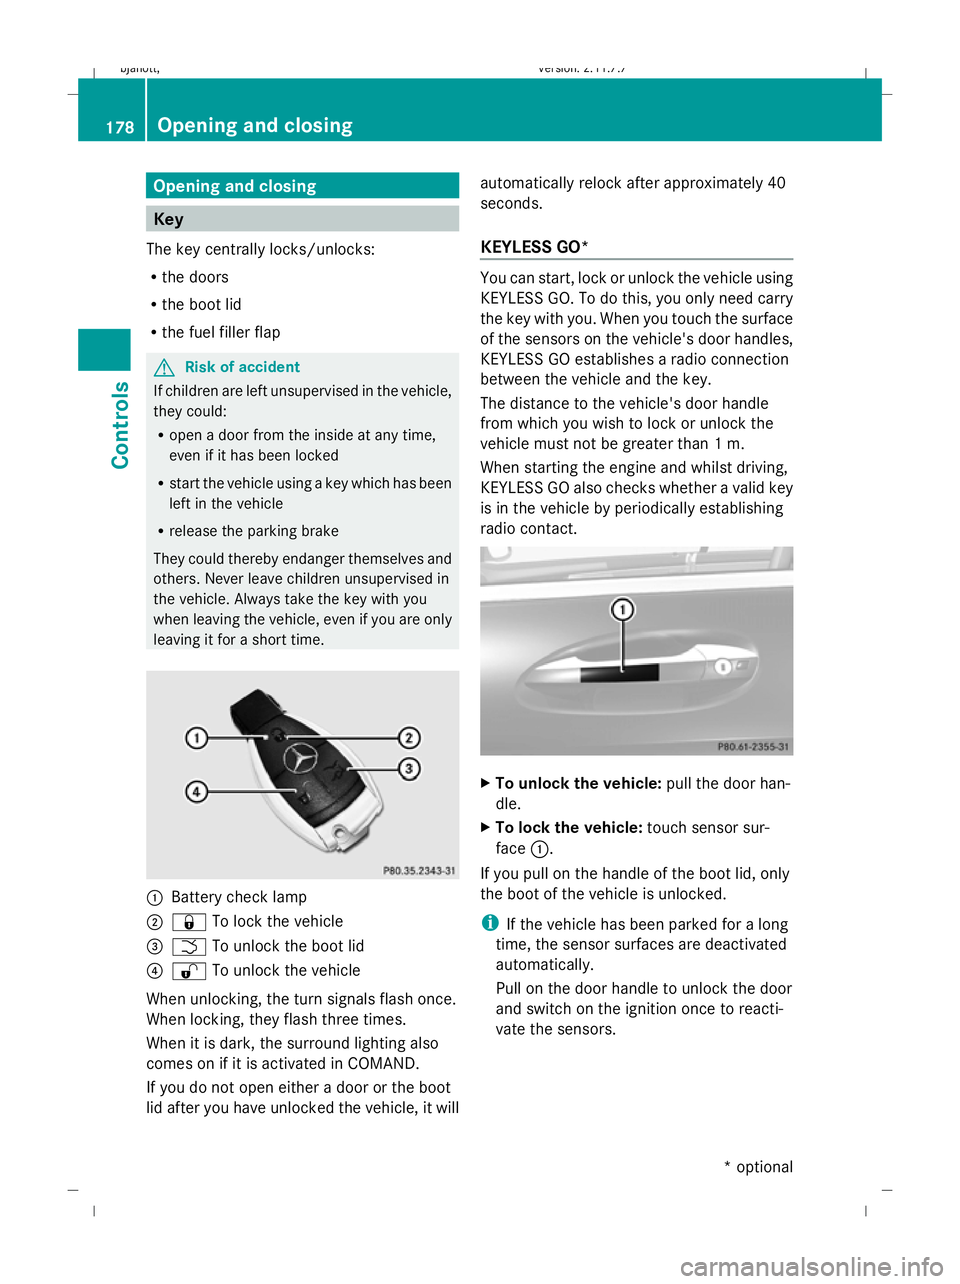
Battery check lamp
; & To lock the vehicle
= F To unlock the boot lid
? % To unlock the vehicle
When unlocking, the turn signals flash once.
When locking, they flash three times.
When it is dark, the surround lighting also
comes on if it is activated in COMAND.
If you do not open either a door or the boot
lid after you have unlocked the vehicle, it will automatically relock after approximately 40
seconds.
KEYLESS GO* You can start, lock or unlock the vehicle using
KEYLESS GO. To do this, you only need carry
the key with you. When you touch the surface
of the sensors on the vehicle's door handles,
KEYLESS GO establishes a radio connection
between the vehicle and the key.
The distance to the vehicle's door handle
from which you wish to lock or unlock the
vehicle must not be greater than 1 m.
When starting the engine and whilst driving,
KEYLESS GO also checks whether a valid key
is in the vehicle by periodically establishing
radio contact. X
To unlock the vehicle: pull the door han-
dle.
X To lock the vehicle: touch sensor sur-
face :.
If you pull on the handle of the boot lid, only
the boot of the vehicle is unlocked.
i If the vehicle has been parked for a long
time, the sensor surfaces are deactivated
automatically.
Pull on the door handle to unlock the door
and switch on the ignition once to reacti-
vate the sensors. 178
Opening and closingControls
* optional
216_AKB; 2; 3, en-GB
bjanott,
Version: 2.11.7.7 2009-02-27T14:54:17+01:00 - Seite 178
Dateiname: 6515230602_buchblock.pdf; erzeugt am 04. Mar 2009 11:15:36; WK
Page 182 of 421
Individual settings
You can change the setting of the locking
system in such a way that only the driver's
door and the fuel filler flap are unlocked. This
could be useful if you frequently travel on your
own.
X To change the setting: press the%
and & buttons simultaneously for
approximately six seconds until the battery
check lamp flashes twice.
The key now functions as follows:
X To unlock the driver's door: press the
% button once.
X To unlock centrally: press the%but-
ton twice.
X To lock centrally: press the&button.
The KEYLESS GO* function is changed as fol-
lows:
X To unlock the driver's door : pull the door
handle on the driver's door.
X To unlock centrally: pull the door handle
on the front-passenger door or on the rear
doors.
X To lock centrally: touch sensor sur-
face :on one of the door handles.
Restoring the factory settings X
Press the %and& buttons simulta-
neously for approximately six seconds until
the battery check lamp flashes twice.
Additional information R
Convenience opening (Y page 201)
R Convenience closing (Y page 201)
R Opening and closing in an emergency
(Y page 365) Opening the doors from the inside
X
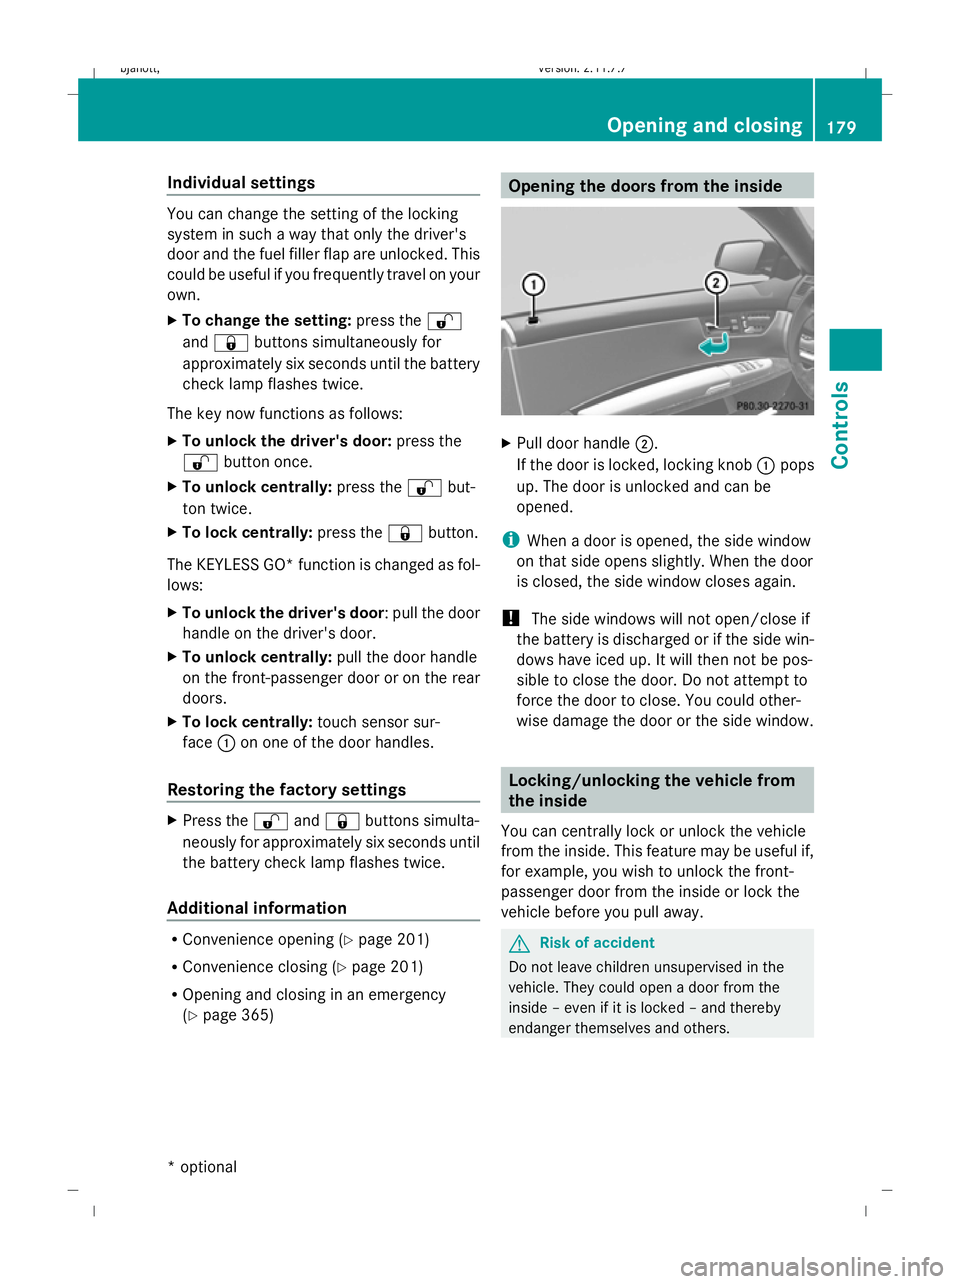
Pull door handle ;.
If the door is locked, locking knob :pops
up. The door is unlocked and can be
opened.
i When a door is opened, the side window
on that side opens slightly. When the door
is closed, the side window closes again.
! The side windows will not open/close if
the battery is discharged or if the side win-
dows have iced up. It will then not be pos-
sible to close the door. Do not attempt to
force the door to close. You could other-
wise damage the door or the side window. Locking/unlocking the vehicle from
the inside
You can centrally lock or unlock the vehicle
from the inside. This feature may be useful if,
for example, you wish to unlock the front-
passenger door from the inside or lock the
vehicle before you pull away. G
Risk of accident
Do not leave children unsupervised in the
vehicle. They could open a door from the
inside – even if it is locked – and thereby
endanger themselves and others. Opening and closing
179Controls
* option al
216_AKB; 2; 3, en-GB
bjanott
,V ersion: 2.11.7.7
2009-02-27T14:54:17+01:00 - Seite 179 Z
Dateiname: 6515230602_buchblock.pdf; erzeugt am 04. Mar 2009 11:15:36; WK
Page 183 of 421
X
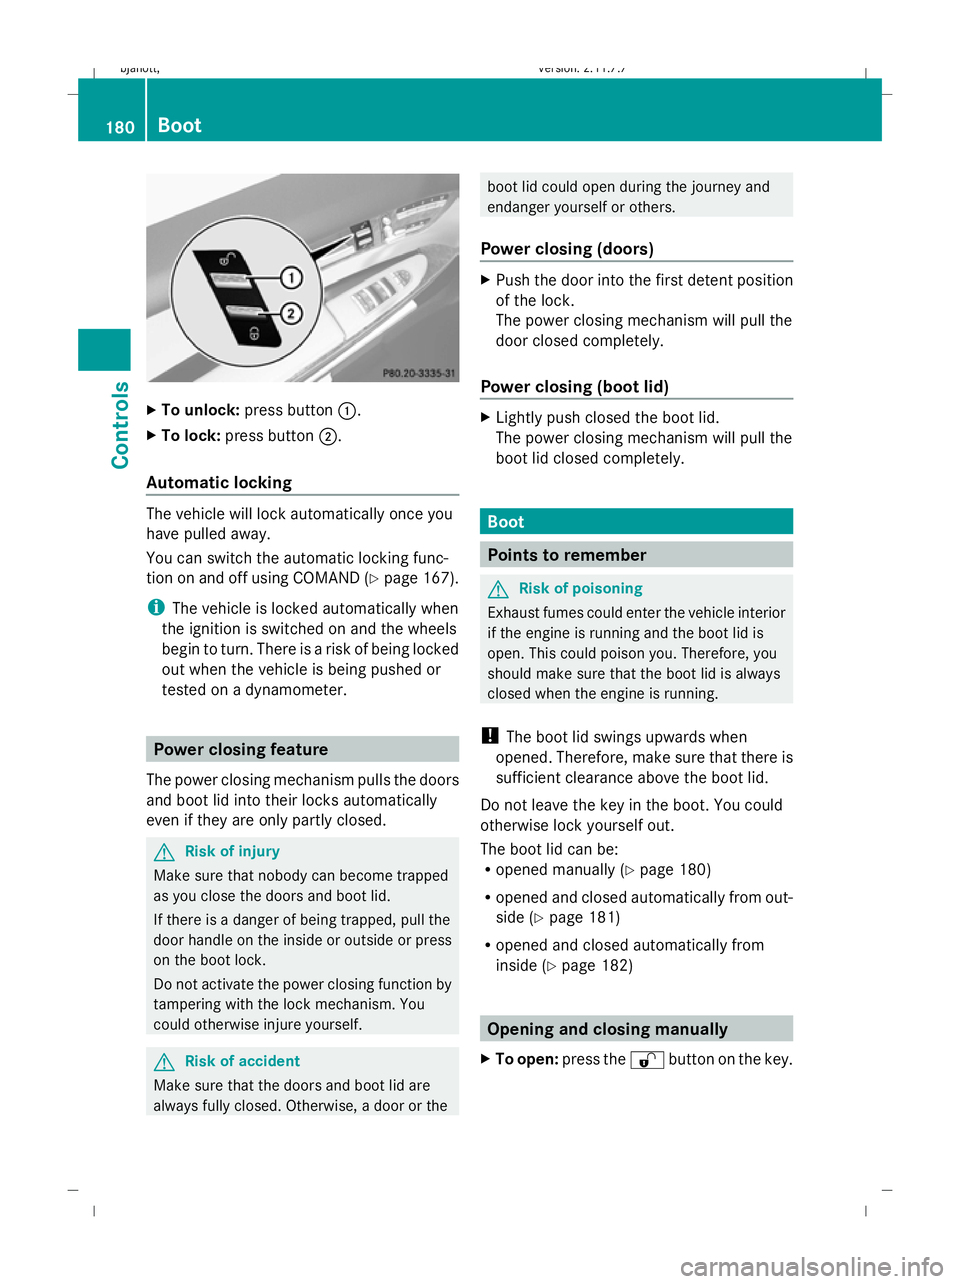
To unlock: press button :.
X To lock: press button ;.
Automatic locking The vehicle will lock automatically once you
have pulled away.
You can switch the automatic locking func-
tion on and off using COMAND (Y page 167).
i The vehicle is locked automatically when
the ignition is switched on and the wheels
begin to turn. There is a risk of being locked
out when the vehicle is being pushed or
tested on a dynamometer. Power closing feature
The power closing mechanism pulls the doors
and boot lid into their locks automatically
even if they are only partly closed. G
Risk of injury
Make sure that nobody can become trapped
as you close the doors and boot lid.
If there is a danger of being trapped, pull the
door handle on the inside or outside or press
on the boot lock.
Do not activate the power closing function by
tampering with the lock mechanism. You
could otherwise injure yourself. G
Risk of accident
Make sure that the doors and boot lid are
always fully closed. Otherwise, a door or the boot lid could open during the journey and
endanger yourself or others.
Power closing (doors) X
Push the door into the first detent position
of the lock.
The power closing mechanism will pull the
door closed completely.
Power closing (boot lid) X
Lightly push closed the boot lid.
The power closing mechanism will pull the
boot lid closed completely. Boot
Points to remember
G
Risk of poisoning
Exhaust fumes could enter the vehicle interior
if the engine is running and the boot lid is
open. This could poison you. Therefore, you
should make sure that the boot lid is always
closed when the engine is running.
! The boot lid swings upwards when
opened. Therefore, make sure that there is
sufficient clearance above the boot lid.
Do not leave the key in the boot. You could
otherwise lock yourself out.
The boot lid can be:
R opened manually (Y page 180)
R opened and closed automatically from out-
side (Y page 181)
R opened and closed automatically from
inside (Y page 182) Opening and closing manually
X To open: press the %button on the key. 180
BootControls
216_AKB; 2; 3, en-GB
bjanott,
Version: 2.11.7.7 2009-02-27T14:54:17+01:00 - Seite 180
Dateiname: 6515230602_buchblock.pdf; erzeugt am 04. Mar 2009 11:15:36; WK
Page 184 of 421
X
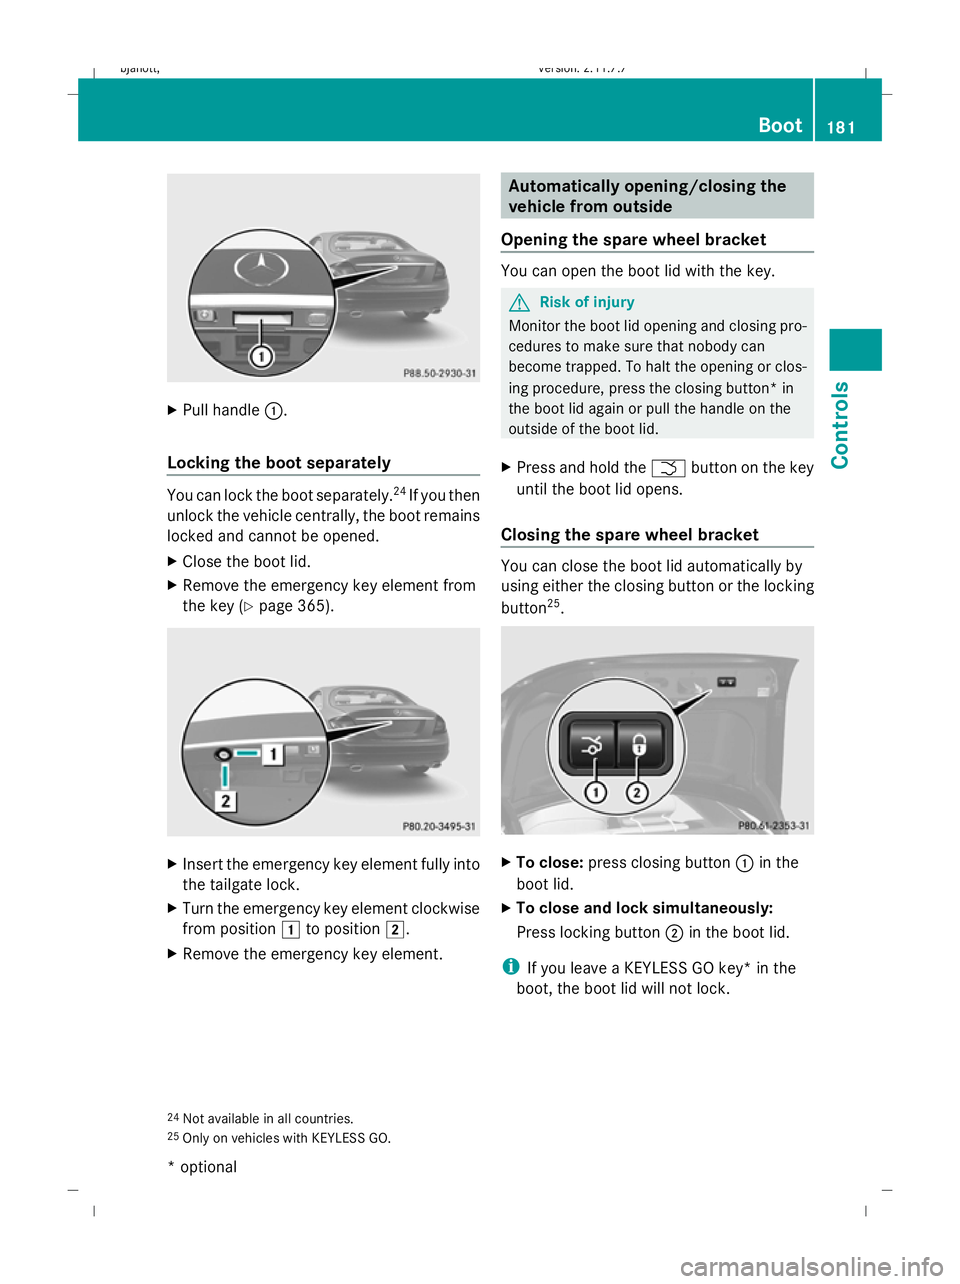
Pull handle :.
Locking the boot separately You can lock the boot separately.
24
If you then
unlock the vehicle centrally, the boot remains
locked and cannot be opened.
X Close the boot lid.
X Remove the emergency key element from
the key (Y page 365). X
Insert the emergency key element fully into
the tailgate lock.
X Turn the emergency key element clockwise
from position 1to position 2.
X Remove the emergency key element. Automatically opening/closing the
vehicle from outside
Opening the spare wheel bracket You can open the boot lid with the key.
G
Risk of injury
Monitor the boot lid opening and closing pro-
cedures to make sure that nobody can
become trapped. To halt the opening or clos-
ing procedure, press the closing button* in
the boot lid again or pull the handle on the
outside of the boot lid.
X Press and hold the Fbutton on the key
until the boot lid opens.
Closing the spare wheel bracket You can close the boot lid automatically by
using either the closing button or the locking
button
25
. X
To close: press closing button :in the
boot lid.
X To close and lock simultaneously:
Press locking button ;in the boot lid.
i If you leave a KEYLESS GO key* in the
boot, the boot lid will not lock.
24 Not available in all countries.
25 Only on vehicles with KEYLESS GO. Boot
181Controls
* optional
216_AKB; 2; 3, en-GB
bjanott,
Version: 2.11.7.7
2009-02-27T14:54:17+01:00 - Seite 181 Z
Dateiname: 6515230602_buchblock.pdf; erzeugt am 04. Mar 2009 11:15:37; WK
Page 185 of 421
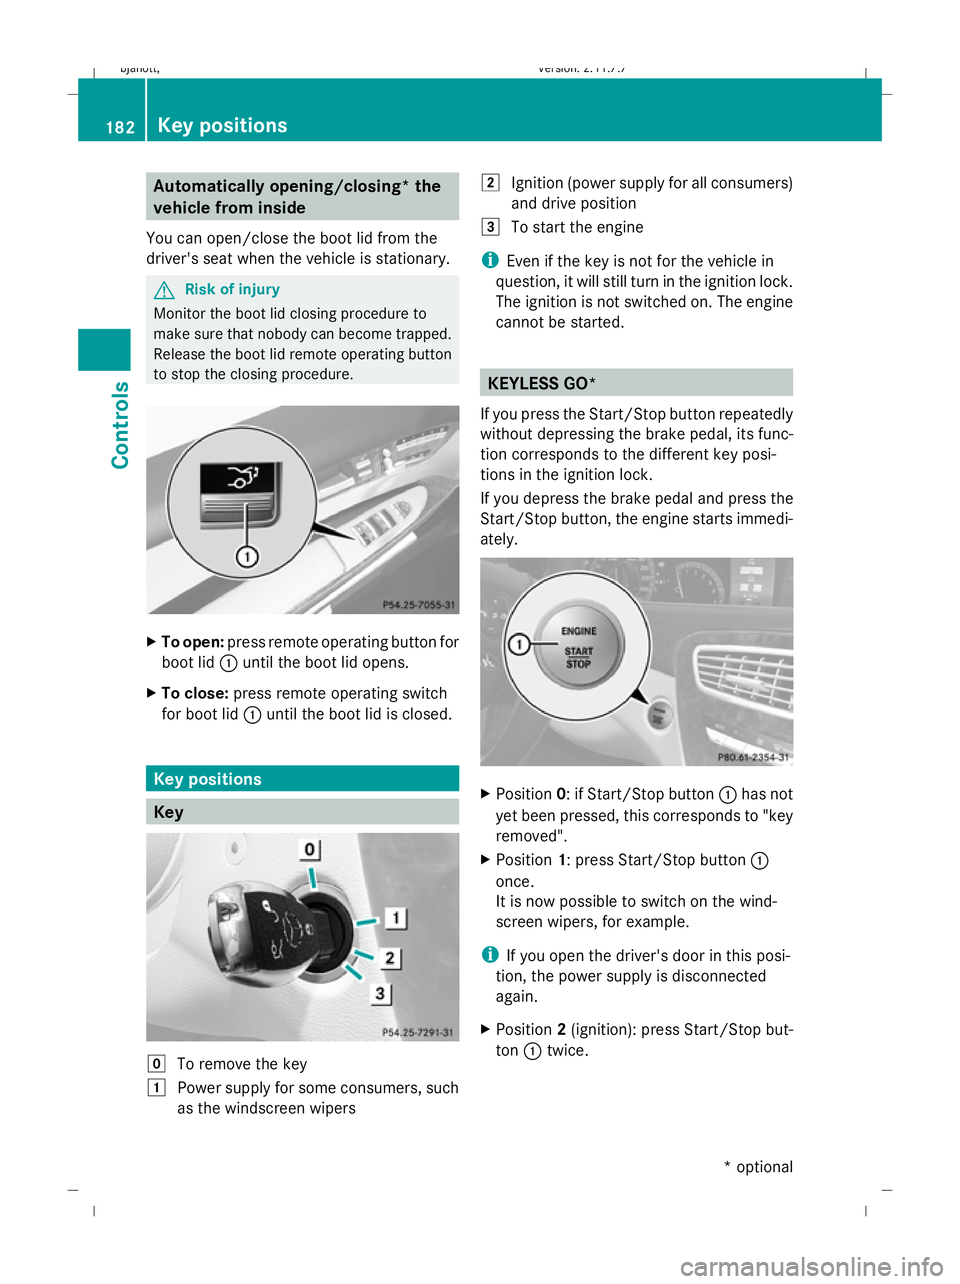
Automatically opening/closing* the
vehicle from inside
You can open/close the boot lid from the
driver's seat when the vehicle is stationary. G
Risk of injury
Monitor the boot lid closing procedure to
make sure that nobody can become trapped.
Release the boot lid remote operating button
to stop the closing procedure. X
To open: press remote operating button for
boot lid :until the boot lid opens.
X To close: press remote operating switch
for boot lid :until the boot lid is closed. Key positions
Key
g
To remove the key
1 Power supply for some consumers, such
as the windscreen wipers 2
Ignition (power supply for all consumers)
and drive position
3 To start the engine
i Even if the key is not for the vehicle in
question, it will still turn in the ignition lock.
The ignition is not switched on. The engine
cannot be started. KEYLESS GO*
If you press the Start/Stop button repeatedly
without depressing the brake pedal, its func-
tion corresponds to the different key posi-
tions in the ignition lock.
If you depress the brake pedal and press the
Start/Stop button, the engine starts immedi-
ately. X
Position 0: if Start/Stop button :has not
yet been pressed, this corresponds to "key
removed".
X Position 1: press Start/Stop button :
once.
It is now possible to switch on the wind-
screen wipers, for example.
i If you open the driver's door in this posi-
tion, the power supply is disconnected
again.
X Position 2(ignition): press Start/Stop but-
ton :twice. 182
Key positionsCont
rols
* option al
216_AKB; 2; 3, en-GB
bjanott
,V ersion: 2.11.7.7
2009-02-27T14:54:17+01:00 - Seite 182
Dateiname: 6515230602_buchblock.pdf; erzeugt am 04. Mar 2009 11:15:38; WK
Page 186 of 421
i
If you press Start/Stop button :in this
position once and the driver's door is open,
the power supply is disconnected again.
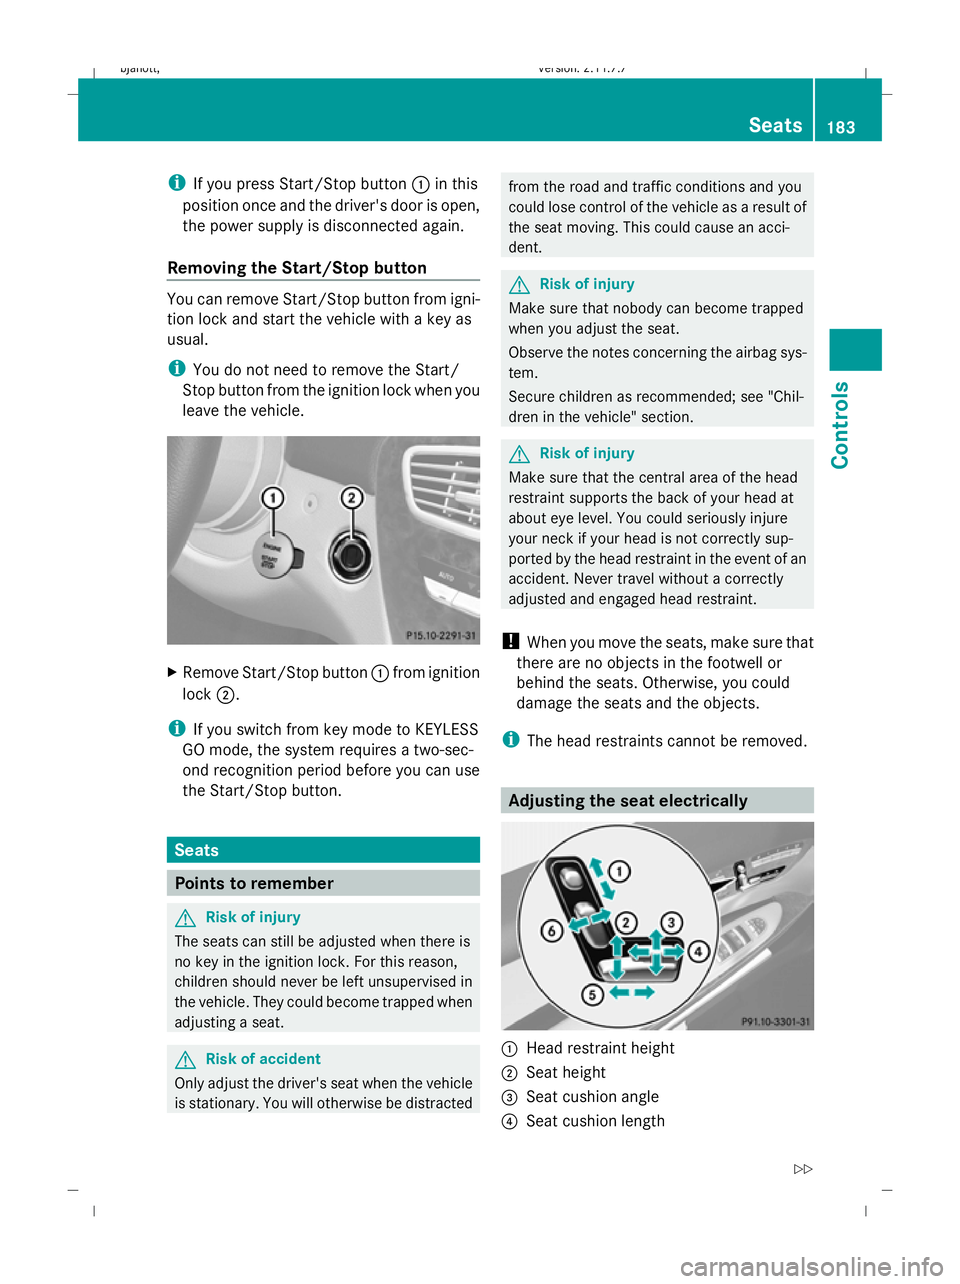
Removing the Start/Stop button You can remove Start/Stop button from igni-
tion lock and start the vehicle with a key as
usual.
i
You do not need to remove the Start/
Stop button from the ignition lock when you
leave the vehicle. X
Remove Start/Stop button :from ignition
lock ;.
i If you switch from key mode to KEYLESS
GO mode, the system requires a two-sec-
ond recognition period before you can use
the Start/Stop button. Seats
Points to remember
G
Risk of injury
The seats can still be adjusted when there is
no key in the ignition lock. For this reason,
children should never be left unsupervised in
the vehicle. They could become trapped when
adjusting a seat. G
Risk of accident
Only adjust the driver's seat when the vehicle
is stationary. You will otherwise be distracted from the road and traffic conditions and you
could lose control of the vehicle as a result of
the seat moving. This could cause an acci-
dent. G
Risk of injury
Make sure that nobody can become trapped
when you adjust the seat.
Observe the notes concerning the airbag sys-
tem.
Secure children as recommended; see "Chil-
dren in the vehicle" section. G
Risk of injury
Make sure that the central area of the head
restraint supports the back of your head at
about eye level. You could seriously injure
your neck if your head is not correctly sup-
ported by the head restraint in the event of an
accident. Never travel without a correctly
adjusted and engaged head restraint.
! When you move the seats, make sure that
there are no objects in the footwell or
behind the seats. Otherwise, you could
damage the seats and the objects.
i The head restraints cannot be removed. Adjusting the seat electrically
:
Head restraint height
; Seat height
= Seat cushion angle
? Seat cushion length Seats
183Controls
216_AKB; 2; 3, en-GB
bjanott, Version: 2.11.7.7 2009-02-27T14:54:17+01:00 - Seite 183 Z
Dateiname: 6515230602_buchblock.pdf; erzeugt am 04. Mar 2009 11:15:38; WK
Page 187 of 421
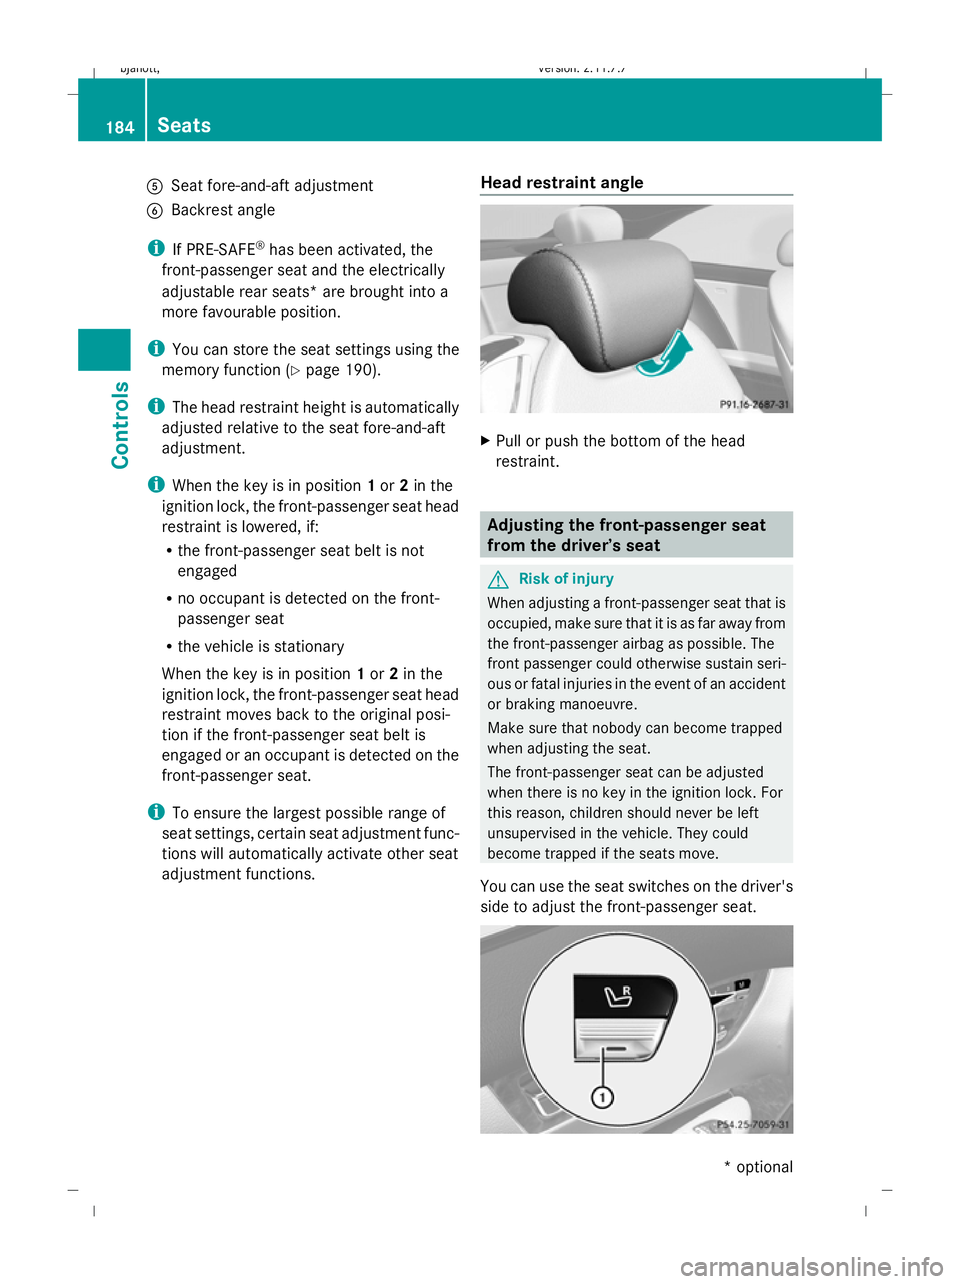
A
Seat fore-and-aft adjustment
B Backrest angle
i If PRE-SAFE ®
has been activated, the
front-passenger seat and the electrically
adjustable rear seats* are brought into a
more favourable position.
i You can store the seat settings using the
memory function (Y page 190).
i The head restraint height is automatically
adjusted relative to the seat fore-and-aft
adjustment.
i When the key is in position 1or 2in the
ignition lock, the front-passenger seat head
restraint is lowered, if:
R the front-passenger seat belt is not
engaged
R no occupant is detected on the front-
passenger seat
R the vehicle is stationary
When the key is in position 1or 2in the
ignition lock, the front-passenger seat head
restraint moves back to the original posi-
tion if the front-passenger seat belt is
engaged or an occupant is detected on the
front-passenger seat.
i To ensure the largest possible range of
seat settings, certain seat adjustment func-
tions will automatically activate other seat
adjustment functions. Head restraint angle X
Pull or push the bottom of the head
restraint. Adjusting the front-passenger seat
from the driver’s seat
G
Risk of injury
When adjusting a front-passenger seat that is
occupied, make sure that it is as far away from
the front-passenger airbag as possible. The
front passenger could otherwise sustain seri-
ous or fatal injuries in the event of an accident
or braking manoeuvre.
Make sure that nobody can become trapped
when adjusting the seat.
The front-passenger seat can be adjusted
when there is no key in the ignition lock. For
this reason, children should never be left
unsupervised in the vehicle. They could
become trapped if the seats move.
You can use the seat switches on the driver's
side to adjust the front-passenger seat. 184
SeatsControls
* optional
216_AKB; 2; 3, en-GB
bjanott,
Version: 2.11.7.7 2009-02-27T14:54:17+01:00 - Seite 184
Dateiname: 6515230602_buchblock.pdf; erzeugt am 04. Mar 2009 11:15:39; WK
Page 188 of 421
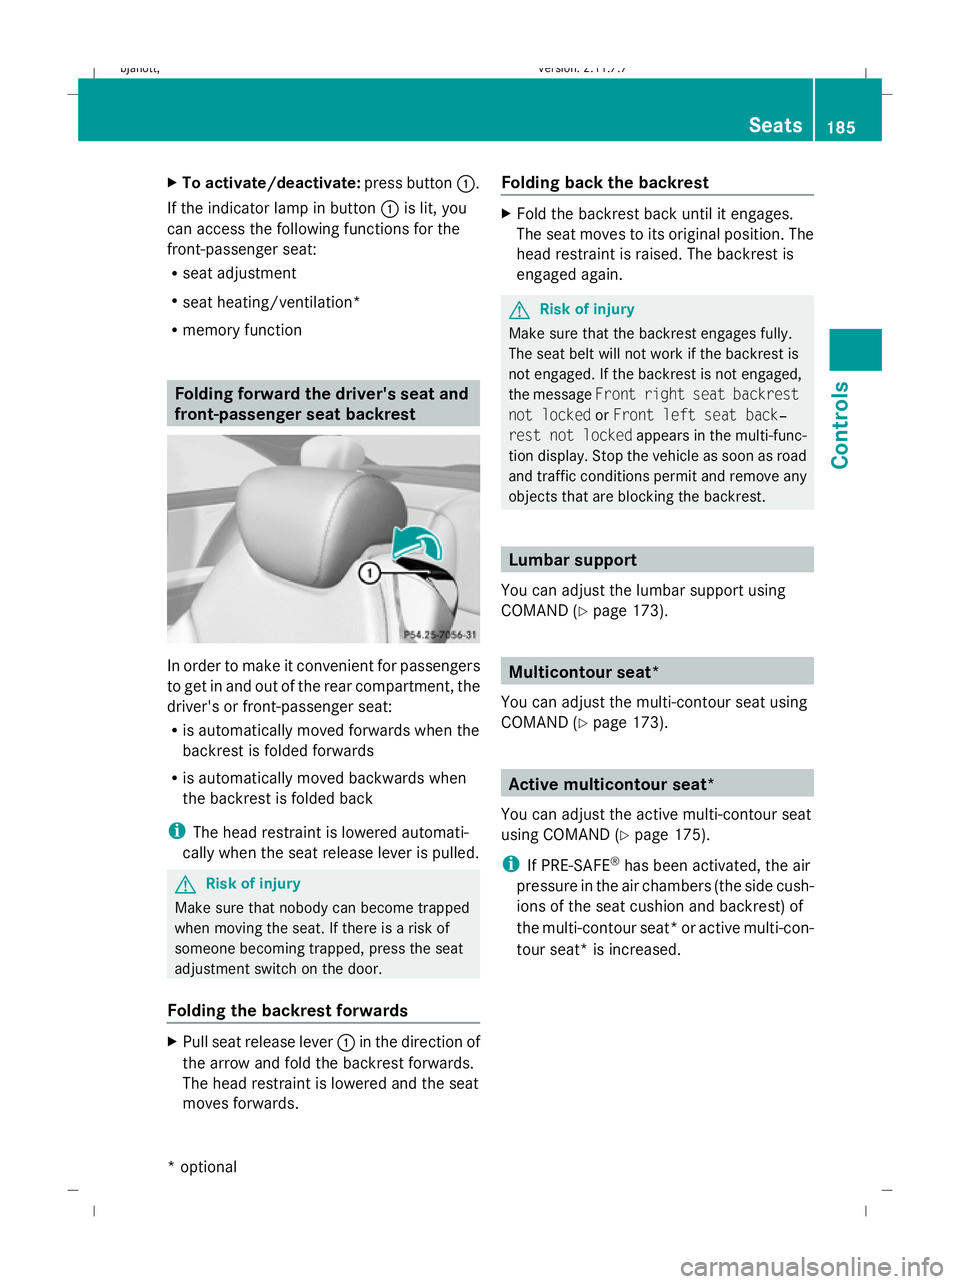
X
To activate/deactivate: press button1.
If the indicator lamp in button 1is lit, you
can access the following functions for the
front-passenger seat:
R seat adjustment
R seat heating/ventilation*
R memory function Folding forward the driver's seat and
front-passenger seat backrest
In order to make it convenient for passengers
to get in and out of the rear compartment, the
driver's or front-passenger seat:
R is automatically moved forwards when the
backrest is folded forwards
R is automatically moved backwards when
the backrest is folded back
i The head restraint is lowered automati-
cally when the seat release lever is pulled. G
Risk of injury
Make sure that nobody can become trapped
when moving the seat. If there is a risk of
someone becoming trapped, press the seat
adjustment switch on the door.
Folding the backrest forwards X
Pull seat release lever 1in the direction of
the arrow and fold the backrest forwards.
The head restraint is lowered and the seat
moves forwards. Folding back the backrest X
Fold the backrest back until it engages.
The seat moves to its original position. The
head restraint is raised. The backrest is
engaged again. G
Risk of injury
Make sure that the backrest engages fully.
The seat belt will not work if the backrest is
not engaged. If the backrest is not engaged,
the message Front right seat backrest
not locked orFront left seat back‐
rest not locked appears in the multi-func-
tion display. Stop the vehicle as soon as road
and traffic conditions permit and remove any
objects that are blocking the backrest. Lumbar support
You can adjust the lumbar support using
COMAND (Y page 173). Multicontour seat*
You can adjust the multi-contour seat using
COMAND (Y page 173). Active multicontour seat*
You can adjust the active multi-contour seat
using COMAND (Y page 175).
i If PRE-SAFE ®
has been activated, the air
pressure in the air chambers (the side cush-
ions of the seat cushion and backrest) of
the multi-contour seat* or active multi-con-
tour seat* is increased. Seats
185Controls
* optional
216_AKB; 2; 3, en-GB
bjanott,
Version: 2.11.7.7 2009-02-27T14:54:17+01:00 - Seite 185 Z
Dateiname: 6515230602_buchblock.pdf; erzeugt am 04. Mar 2009 11:15:39; WK
Page 189 of 421
Rear seats
Head restraints in the rear compart-
ment G
Risk of injury
On a seat which is occupied, pull the head
restraint up into the upright position. This
reduces the risk of injury to the passenger in
the event of an accident. G
Risk of injury
Make sure that nobody can become trapped
when folding the head restraints up or back.
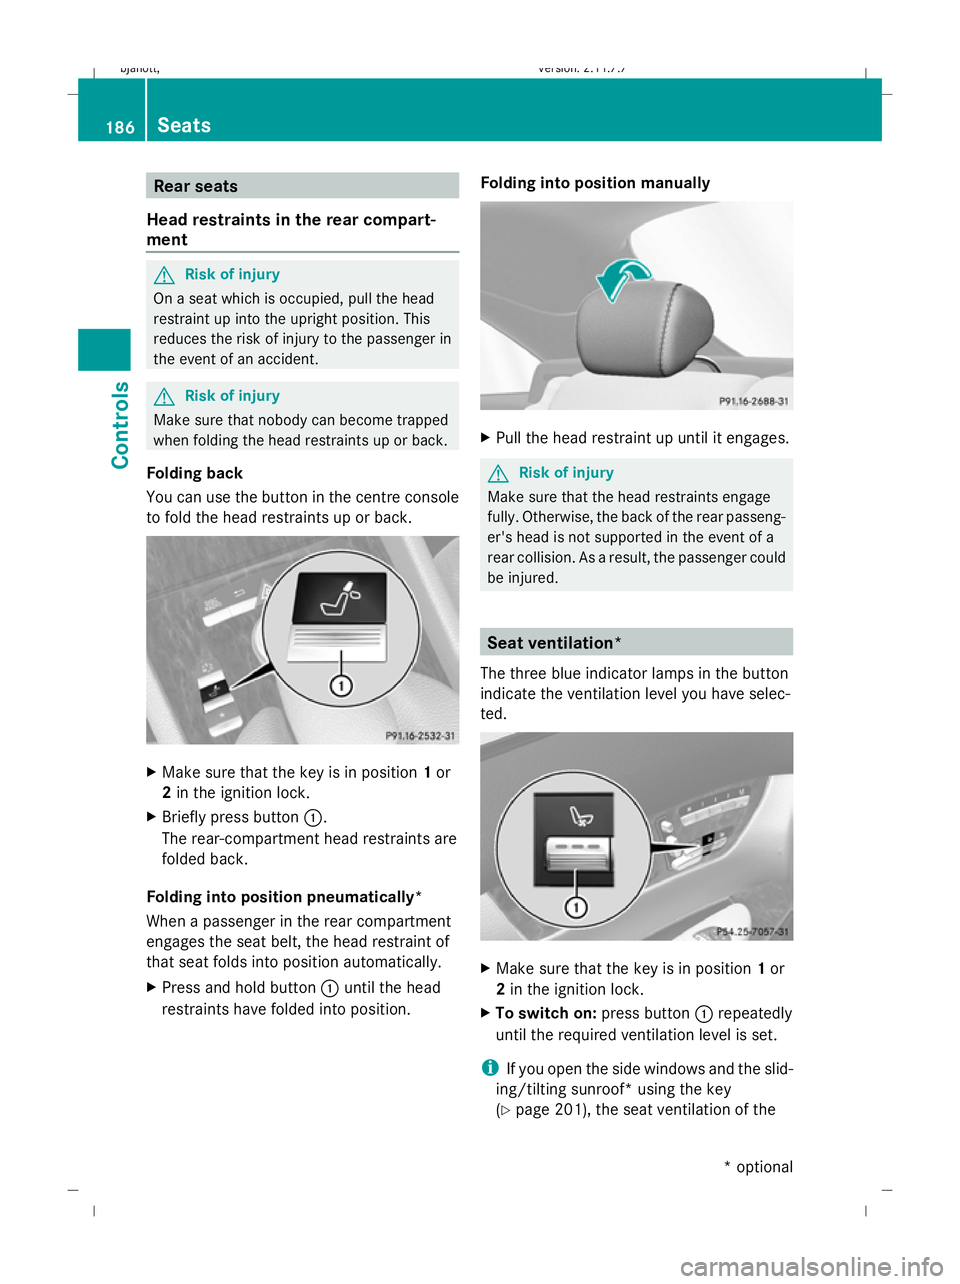
Folding back
You can use the button in the centre console
to fold the head restraints up or back. X
Make sure that the key is in position 1or
2 in the ignition lock.
X Briefly press button :.
The rear-compartment head restraints are
folded back.
Folding into position pneumatically*
When a passenger in the rear compartment
engages the seat belt, the head restraint of
that seat folds into position automatically.
X Press and hold button :until the head
restraints have folded into position. Folding into position manually X
Pull the head restraint up until it engages. G
Risk of injury
Make sure that the head restraints engage
fully. Otherwise, the back of the rear passeng-
er's head is not supported in the event of a
rear collision. As a result, the passenger could
be injured. Seat ventilation*
The three blue indicator lamps in the button
indicate the ventilation level you have selec-
ted. X
Make sure that the key is in position 1or
2 in the ignition lock.
X To switch on: press button:repeatedly
until the required ventilation level is set.
i If you open the side windows and the slid-
ing/tilting sunroof* using the key
(Y page 201), the seat ventilation of the 186
SeatsControls
* optional
216_AKB; 2; 3, en-GB
bjanott,
Version: 2.11.7.7 2009-02-27T14:54:17+01:00 - Seite 186
Dateiname: 6515230602_buchblock.pdf; erzeugt am 04. Mar 2009 11:15:40; WK
Page 190 of 421
driver's seat automatically switches to the
highest level.
X To switch off: press button:repeatedly
until all indicator lamps go out.
i If the battery voltage is too low, the seat
ventilation may switch off. Seat heating
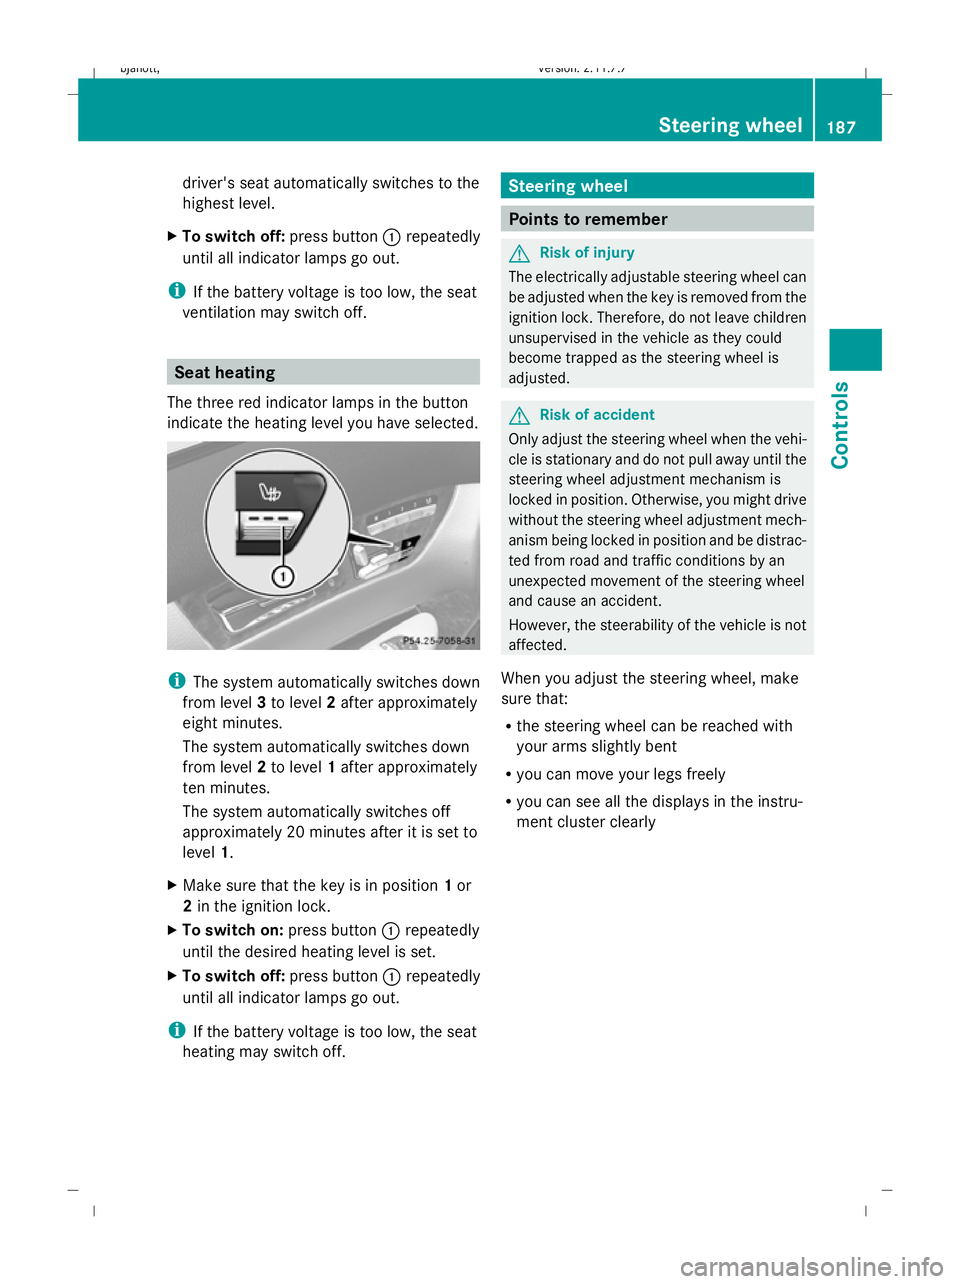
The three red indicator lamps in the button
indicate the heating level you have selected. i
The system automatically switches down
from level 3to level 2after approximately
eight minutes.
The system automatically switches down
from level 2to level 1after approximately
ten minutes.
The system automatically switches off
approximately 20 minutes after it is set to
level 1.
X Make sure that the key is in position 1or
2 in the ignition lock.
X To switch on: press button:repeatedly
until the desired heating level is set.
X To switch off: press button:repeatedly
until all indicator lamps go out.
i If the battery voltage is too low, the seat
heating may switch off. Steering wheel
Points to remember
G
Risk of injury
The electrically adjustable steering wheel can
be adjusted when the key is removed from the
ignition lock. Therefore, do not leave children
unsupervised in the vehicle as they could
become trapped as the steering wheel is
adjusted. G
Risk of accident
Only adjust the steering wheel when the vehi-
cle is stationary and do not pull away until the
steering wheel adjustment mechanism is
locked in position. Otherwise, you might drive
without the steering wheel adjustment mech-
anism being locked in position and be distrac-
ted from road and traffic conditions by an
unexpected movement of the steering wheel
and cause an accident.
However, the steerability of the vehicle is not
affected.
When you adjust the steering wheel, make
sure that:
R the steering wheel can be reached with
your arms slightly bent
R you can move your legs freely
R you can see all the displays in the instru-
ment cluster clearly Steering wheel
187Controls
216_AKB; 2; 3, en-GB
bjanott,V ersion: 2.11.7.7
2009-02-27T14:54:17+01:00 - Seite 187 Z
Dateiname: 6515230602_buchblock.pdf; erzeugt am 04. Mar 2009 11:15:40; WK