MITSUBISHI ENDEAVOR 2004 Service Repair Manual
ENDEAVOR 2004
MITSUBISHI
MITSUBISHI
https://www.carmanualsonline.info/img/19/57105/w960_57105-0.png
MITSUBISHI ENDEAVOR 2004 Service Repair Manual
Trending: change time, Transmission oil change, heated oxygen, coolant capacity, clock light, Oxygen O2 sensor, transmission control
Page 1921 of 3870
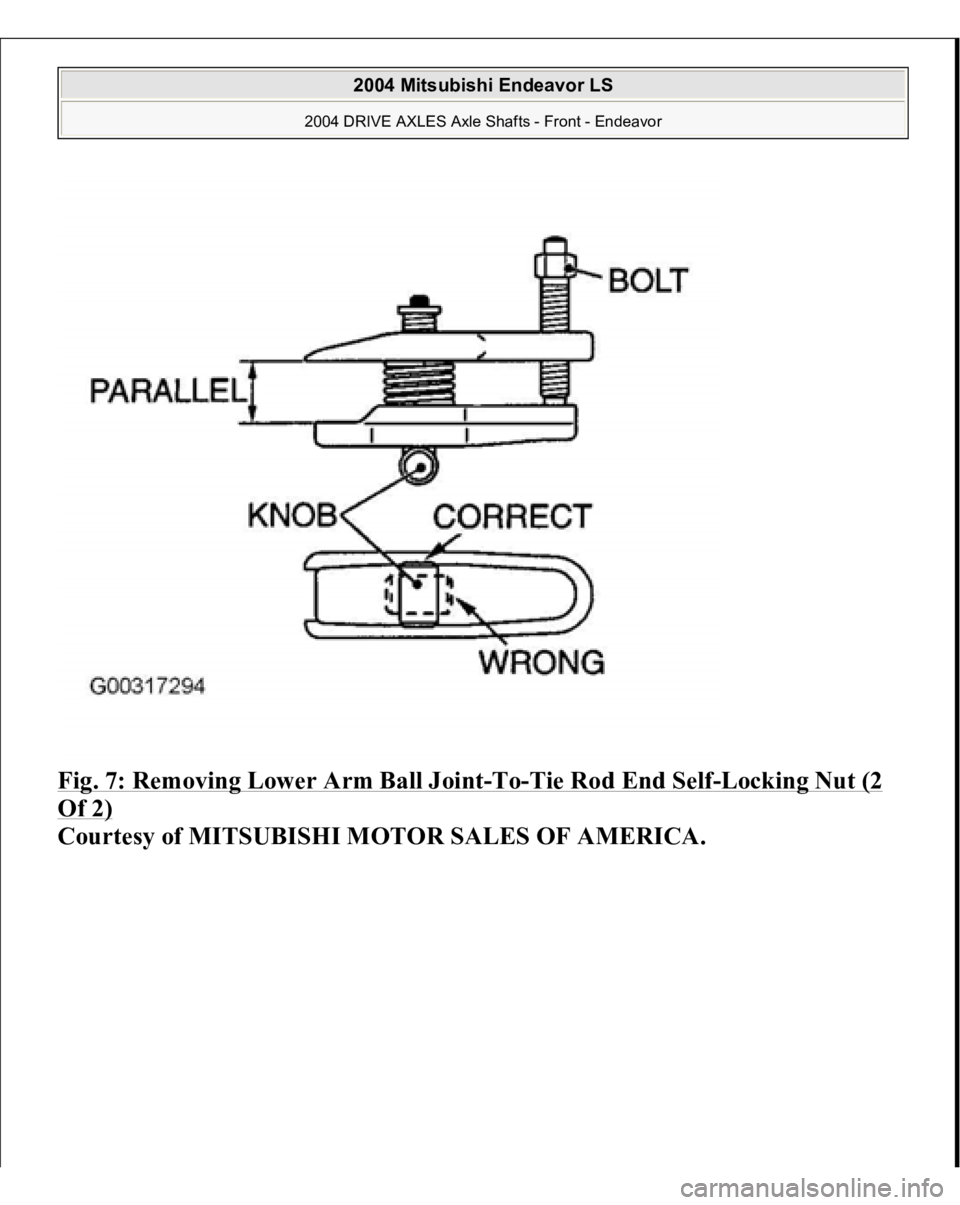
Fig. 7:
Removing Lower Arm Ball Joint
-To
-Tie Rod End Self
-Locking Nut (2
Of 2)
Courtesy of MITSUBISHI MOTOR SALES OF AMERICA.
2004 Mitsubishi Endeavor LS
2004 DRIVE AXLES Axle Shafts - Front - Endeavor
Page 1922 of 3870
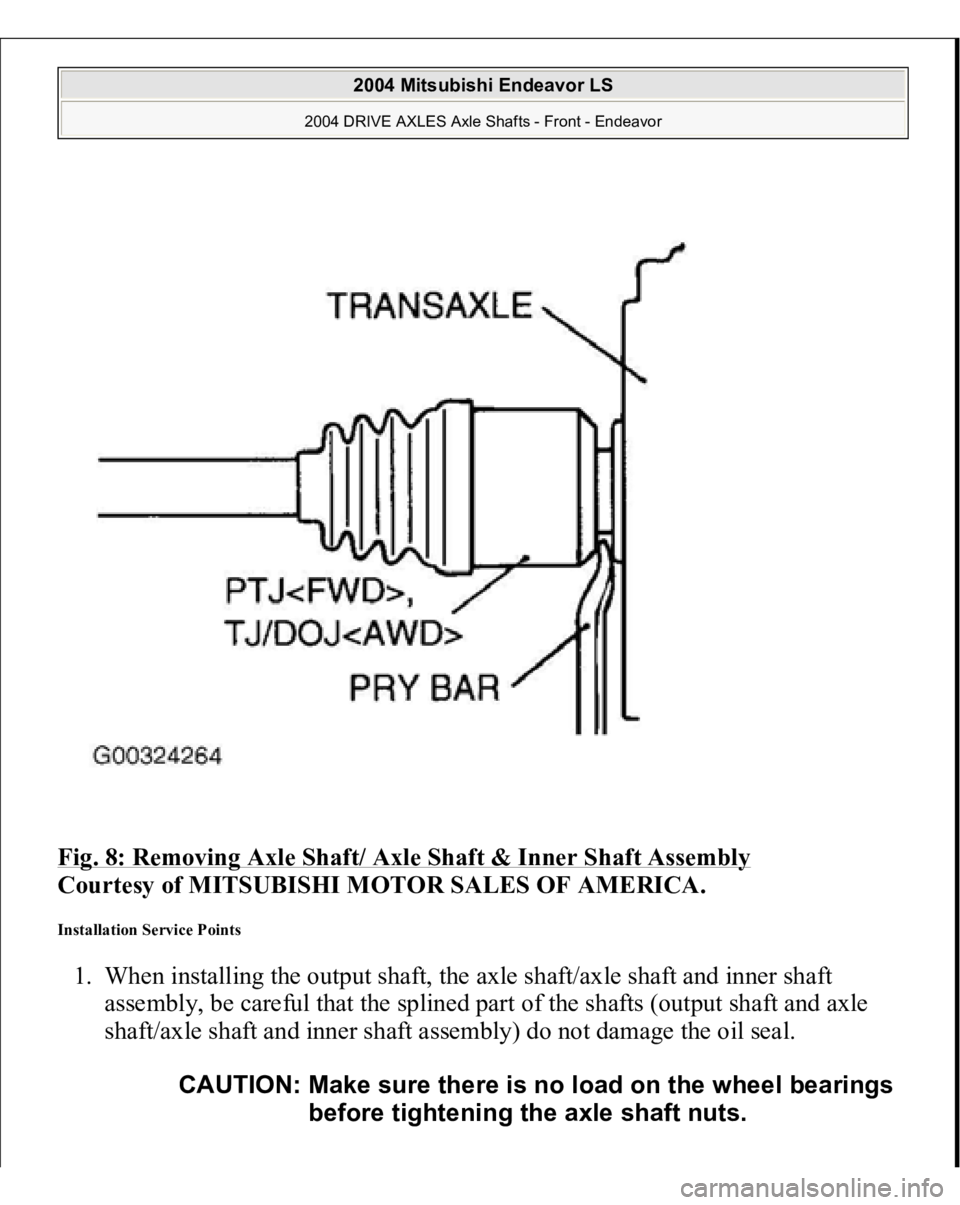
Fig. 8: Removing Axle Shaft/ Axle Shaft & Inner Shaft Assembly
Courtesy of MITSUBISHI MOTOR SALES OF AMERICA.
Installation Service Points 1. When installing the output shaft, the axle shaft/axle shaft and inner shaft
assembly, be careful that the splined part of the shafts (output shaft and axle
shaft/axle shaft and inner shaft assembly) do not damage the oil seal.
CAUTION: Make sure there is no load on the wheel bearings
before tightening the axle shaft nuts.
2004 Mitsubishi Endeavor LS
2004 DRIVE AXLES Axle Shafts - Front - Endeavor
Page 1923 of 3870
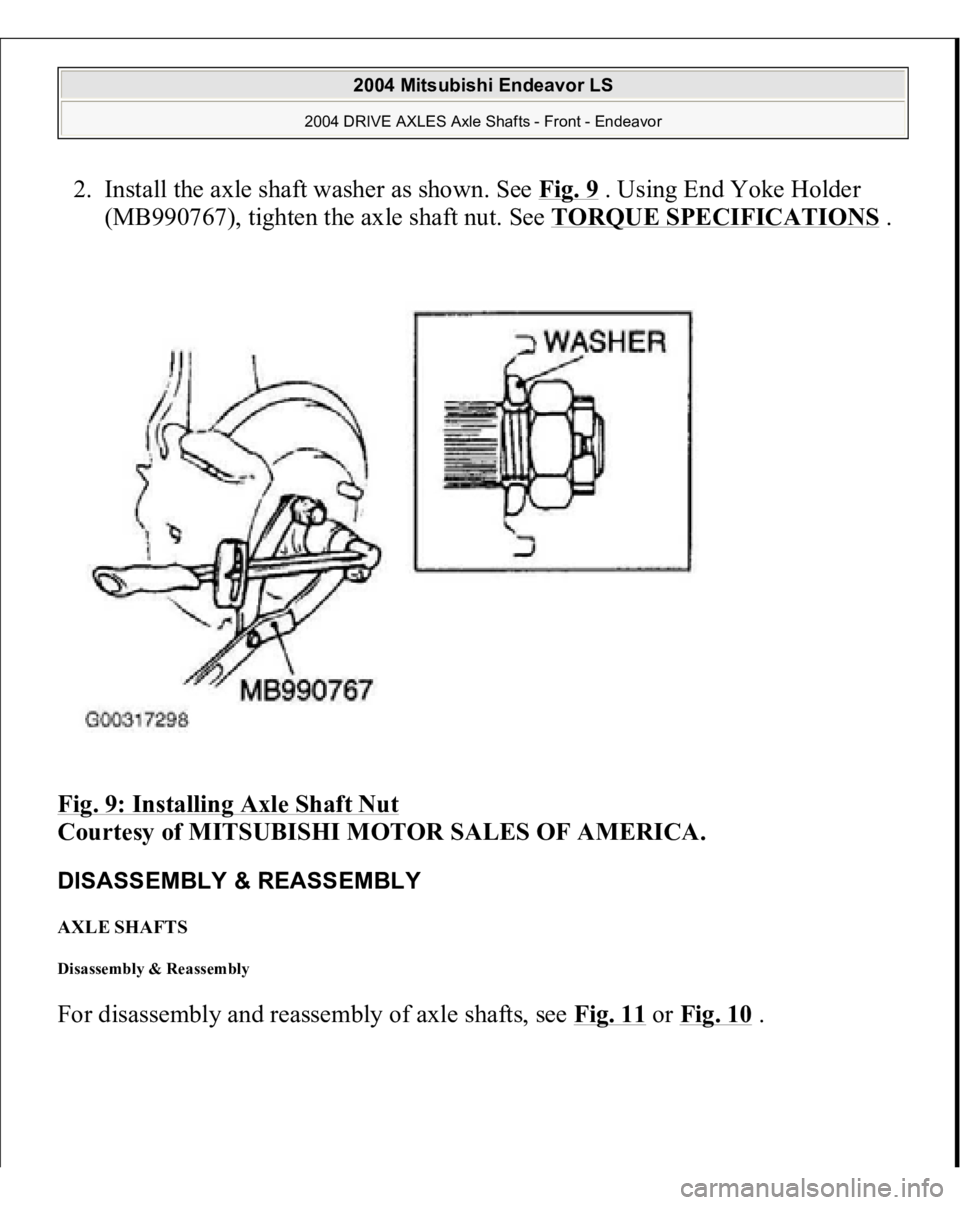
2. Install the axle shaft washer as shown. See Fig. 9
. Using End Yoke Holder
(MB990767), tighten the axle shaft nut. See TORQUE SPECIFICATIONS
.
Fig. 9: Installing Axle Shaft Nut
Courtesy of MITSUBISHI MOTOR SALES OF AMERICA.
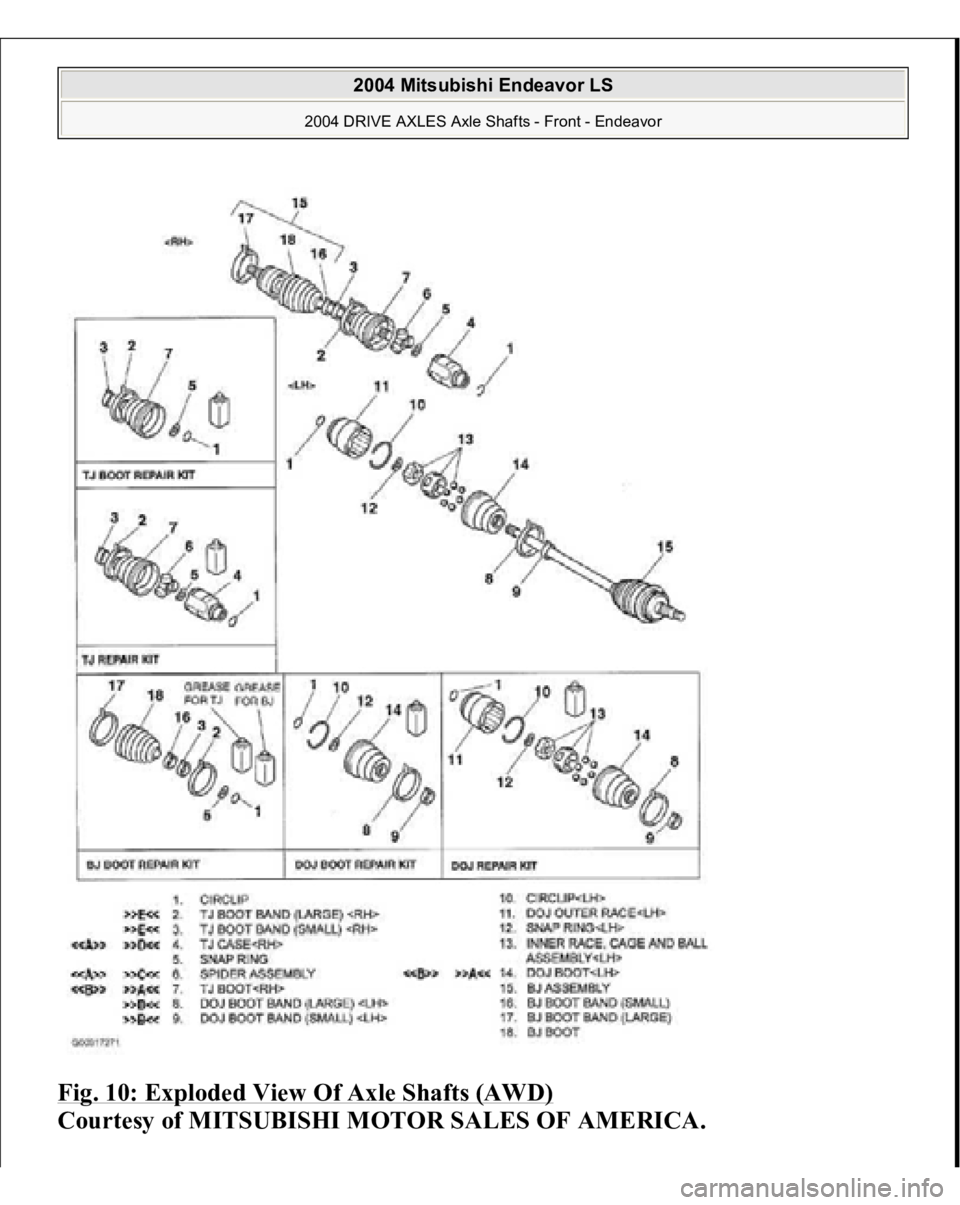
DISASSEMBLY & REASSEMBLY AXLE SHAFTS Disassembly & Reassembly For disassembl
y and reassembl
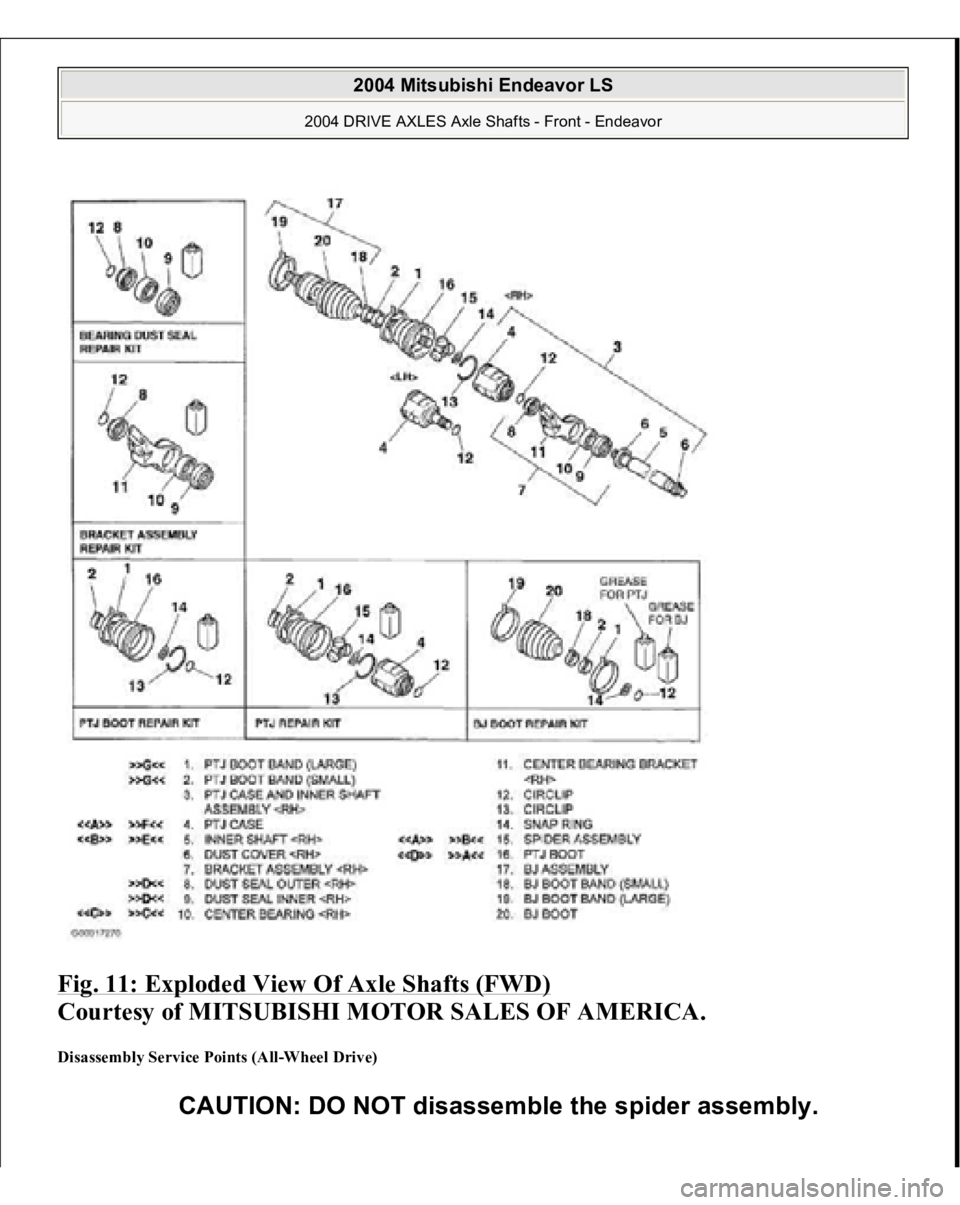
y of axle shafts, see Fig. 11
or Fig. 10
.
2004 Mitsubishi Endeavor LS
2004 DRIVE AXLES Axle Shafts - Front - Endeavor
Page 1924 of 3870
Fig. 10: Exploded View Of Axle Shafts (AWD)
Courtesy of MITSUBISHI MOTOR SALES OF AMERICA.
2004 Mitsubishi Endeavor LS
2004 DRIVE AXLES Axle Shafts - Front - Endeavor
Page 1925 of 3870
Fig. 11: Exploded View Of Axle Shafts (FWD)
Courtesy of MITSUBISHI MOTOR SALES OF AMERICA.
Disassembly Service Points (All-Wheel Drive)
CAUTION: DO NOT disassemble the spider assembly.
2004 Mitsubishi Endeavor LS
2004 DRIVE AXLES Axle Shafts - Front - Endeavor
Page 1926 of 3870
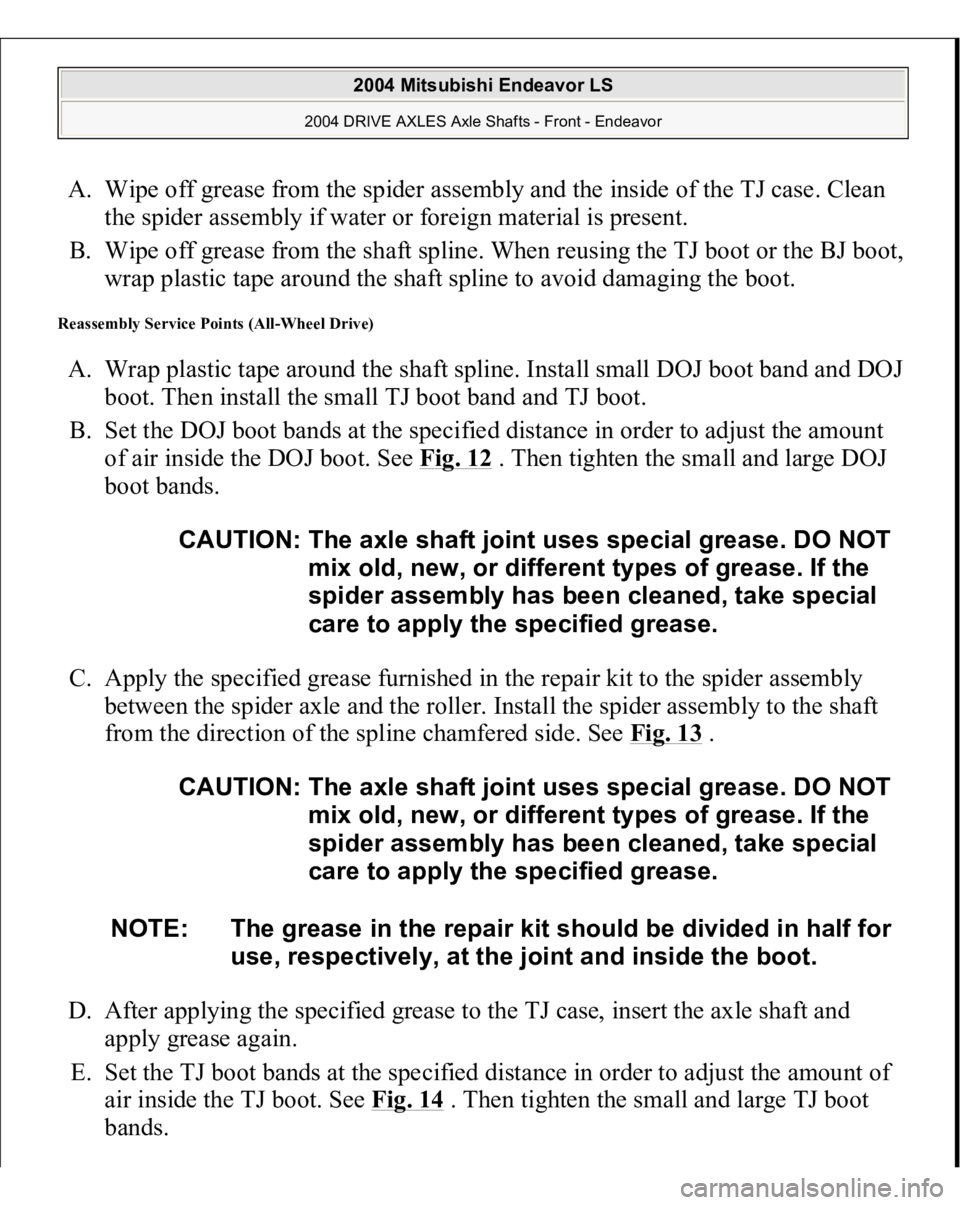
A. Wipe off grease from the spider assembly and the inside of the TJ case. Clean
the spider assembly if water or foreign material is present.
B. Wipe off grease from the shaft spline. When reusing the TJ boot or the BJ boot,
wrap plastic tape around the shaft spline to avoid damaging the boot. Reassembly Service Points (All-Wheel Drive) A. Wrap plastic tape around the shaft spline. Install small DOJ boot band and DOJ
boot. Then install the small TJ boot band and TJ boot.
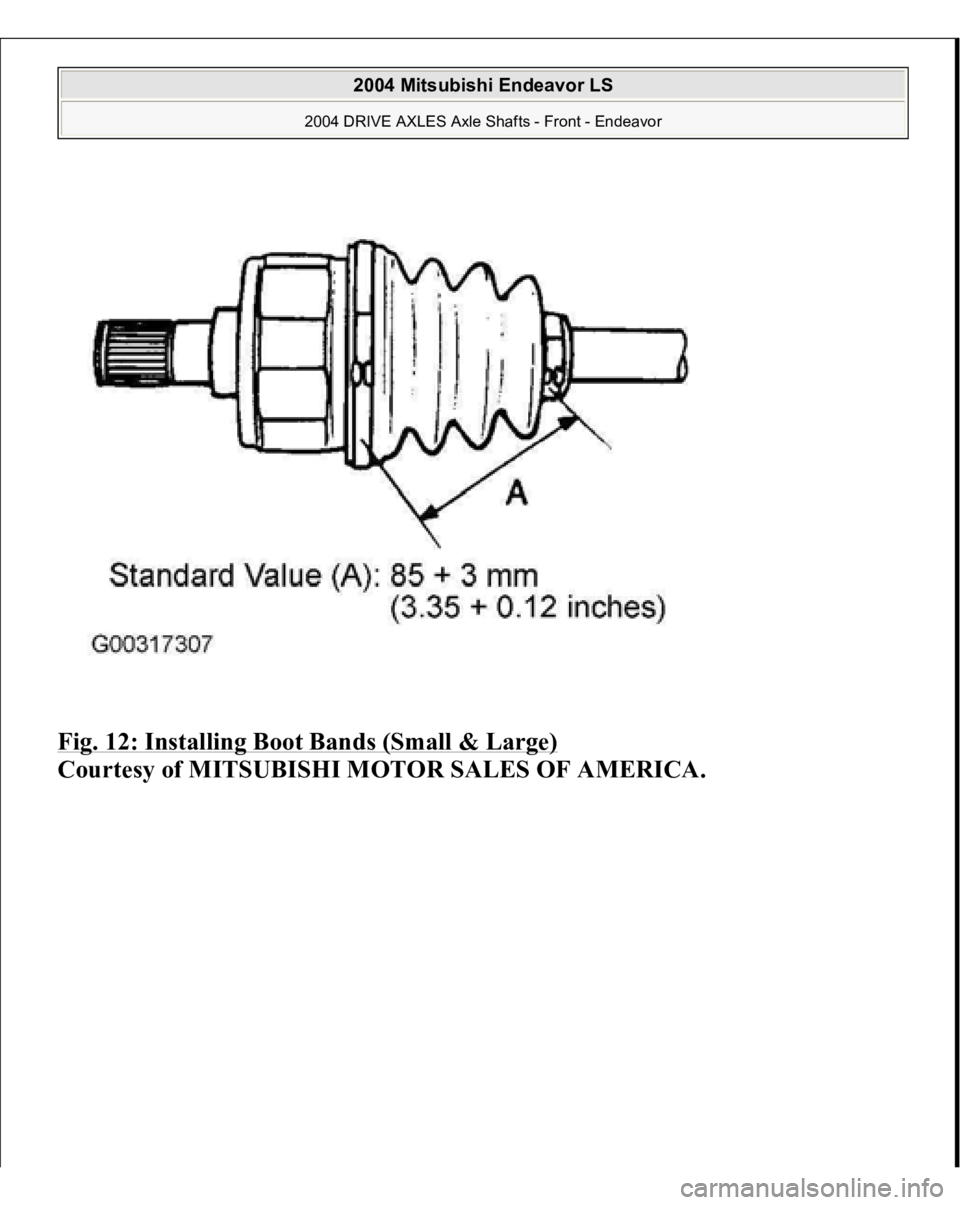
B. Set the DOJ boot bands at the specified distance in order to adjust the amount
of air inside the DOJ boot. See Fig. 12
. Then tighten the small and large DOJ
boot bands.
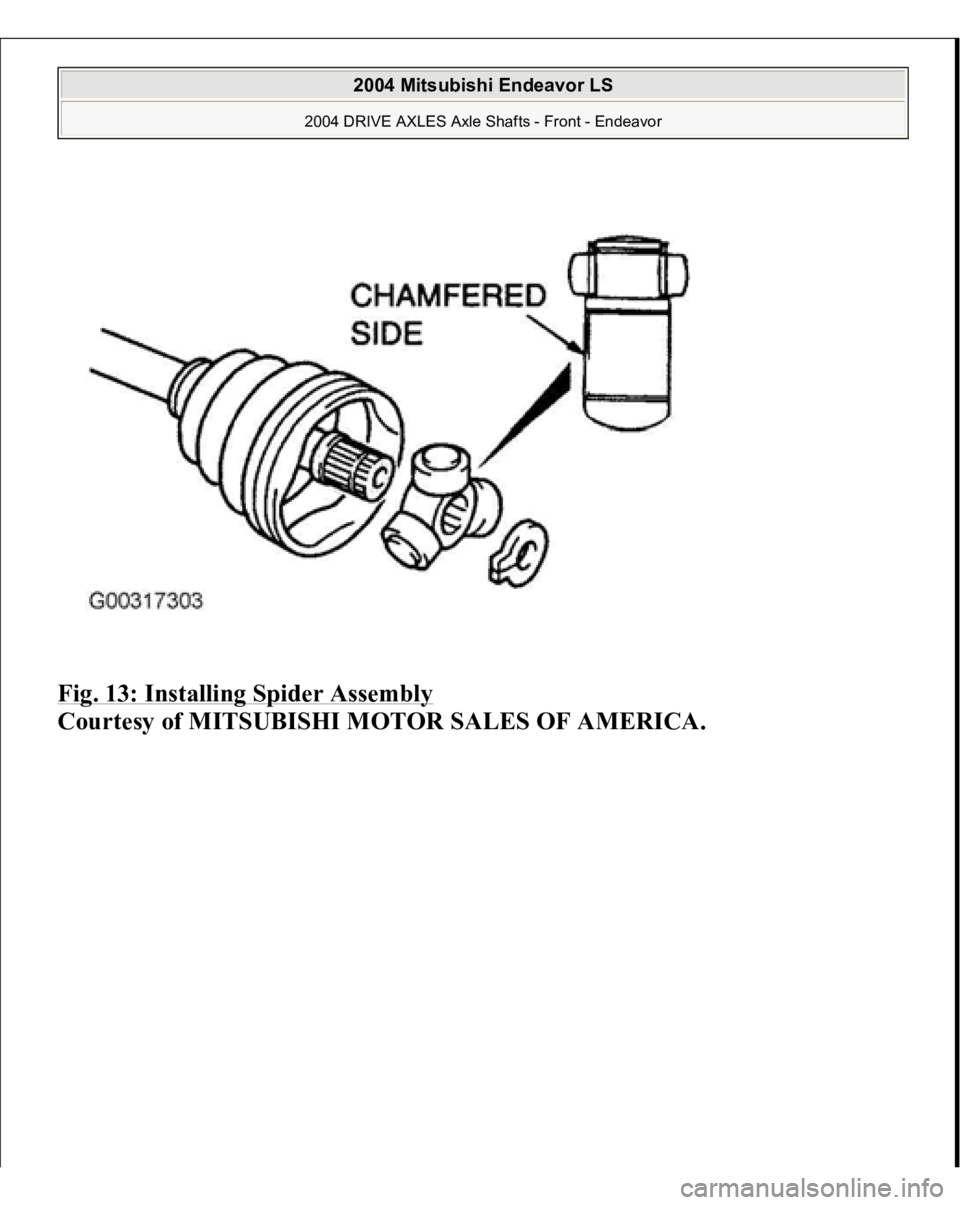
C. Apply the specified grease furnished in the repair kit to the spider assembly
between the spider axle and the roller. Install the spider assembly to the shaft
from the direction of the spline chamfered side. See Fig. 13
.
D. After applying the specified grease to the TJ case, insert the axle shaft and
apply grease again.
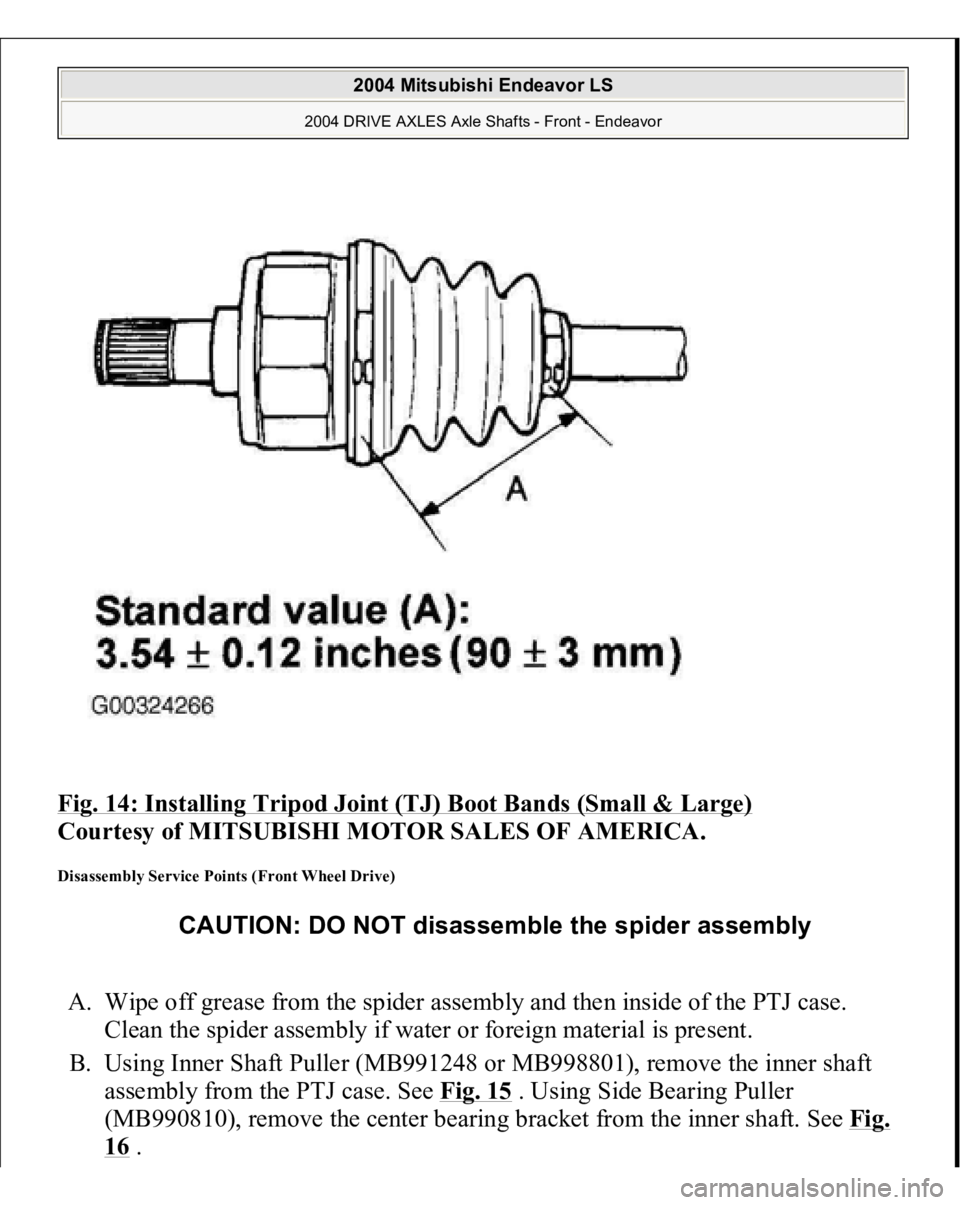
E. Set the TJ boot bands at the specified distance in order to adjust the amount of
air inside the TJ boot. See Fig. 14
. Then tighten the small and large TJ boot
bands.
CAUTION: The axle shaft joint uses special grease. DO NOT
mix old, new, or different types of grease. If the
spider assembly has been cleaned, take special
care to apply the specified grease.
CAUTION: The axle shaft joint uses special grease. DO NOT
mix old, new, or different types of grease. If the
spider assembly has been cleaned, take special
care to apply the specified grease.
NOTE: The grease in the repair kit should be divided in half for
use, respectively, at the joint and inside the boot.
2004 Mitsubishi Endeavor LS
2004 DRIVE AXLES Axle Shafts - Front - Endeavor
Page 1927 of 3870
Fig. 12: Installing Boot Bands (Small & Large)
Courtes
y of MITSUBISHI MOTOR SALES OF AMERICA
.
2004 Mitsubishi Endeavor LS
2004 DRIVE AXLES Axle Shafts - Front - Endeavor
Page 1928 of 3870
Fig. 13: Installing Spider Assembly
Courtesy of MITSUBISHI MOTOR SALES OF AMERICA.
2004 Mitsubishi Endeavor LS
2004 DRIVE AXLES Axle Shafts - Front - Endeavor
Page 1929 of 3870
Fig. 14: Installing Tripod Joint (TJ) Boot Bands (Small & Large)
Courtesy of MITSUBISHI MOTOR SALES OF AMERICA.
Disassembly Service Points (Front Wheel Drive) A. Wipe off grease from the spider assembly and then inside of the PTJ case.
Clean the spider assembly if water or foreign material is present.
B. Using Inner Shaft Puller (MB991248 or MB998801), remove the inner shaft
assembly from the PTJ case. See Fig. 15
. Using Side Bearing Puller
(MB990810), remove the center bearing bracket from the inner shaft. See Fig.
16 .
CAUTION: DO NOT disassemble the spider assembly
2004 Mitsubishi Endeavor LS
2004 DRIVE AXLES Axle Shafts - Front - Endeavor
Page 1930 of 3870
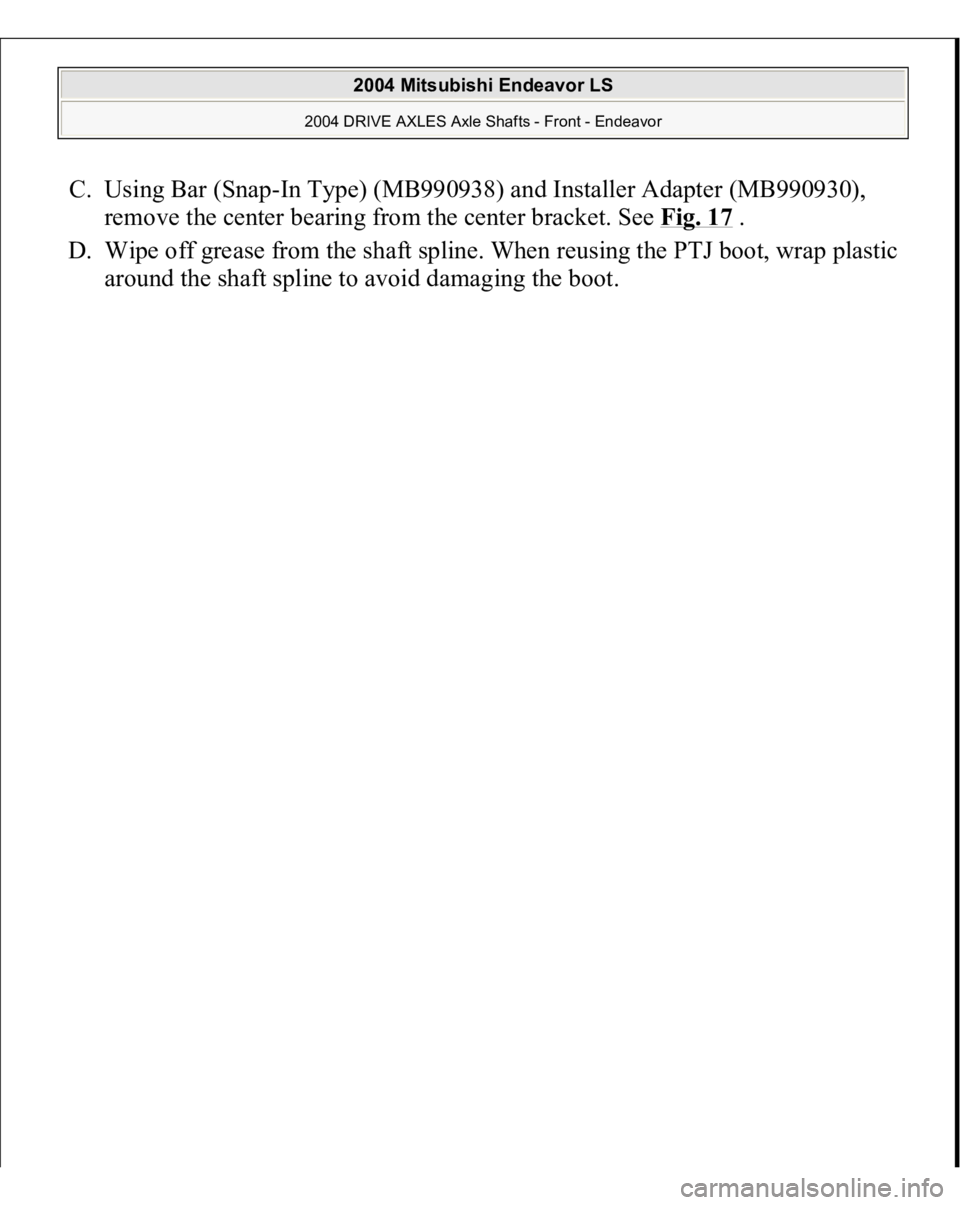
C. Using Bar (Snap-In Type) (MB990938) and Installer Adapter (MB990930),
remove the center bearing from the center bracket. See Fig. 17
.
D. Wipe off grease from the shaft spline. When reusing the PTJ boot, wrap plastic
around the shaft s
pline to avoid dama
ging the boot.
2004 Mitsubishi Endeavor LS
2004 DRIVE AXLES Axle Shafts - Front - Endeavor
Trending: turn off alarm, recommended oil, caution lights, keyless entry, service reset, Rear end, air filter
