MITSUBISHI ENDEAVOR 2004 Service Repair Manual
ENDEAVOR 2004
MITSUBISHI
MITSUBISHI
https://www.carmanualsonline.info/img/19/57105/w960_57105-0.png
MITSUBISHI ENDEAVOR 2004 Service Repair Manual
Trending: fuel pressure, brake pads replacement, bulb, heated oxygen, change key battery, Service engine light, Fuel pump relay
Page 1931 of 3870
2004 Mitsubishi Endeavor LS
2004 DRIVE AXLES Axle Shafts - Front - Endeavor
Page 1932 of 3870
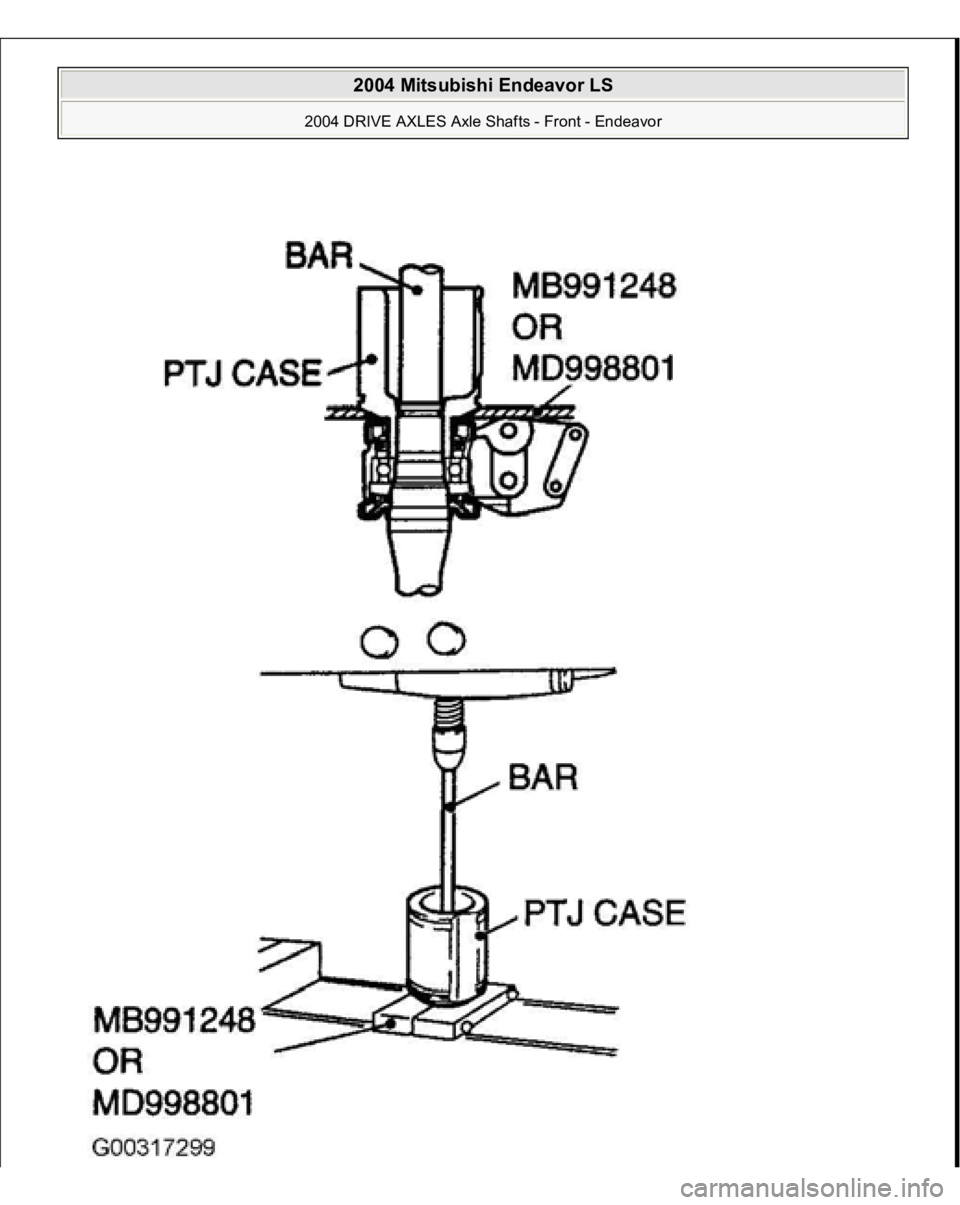
Fig. 15: Identifying Inner Shaft Remover (MB991248 Or MB998801)
Courtesy of MITSUBISHI MOTOR SALES OF AMERICA.
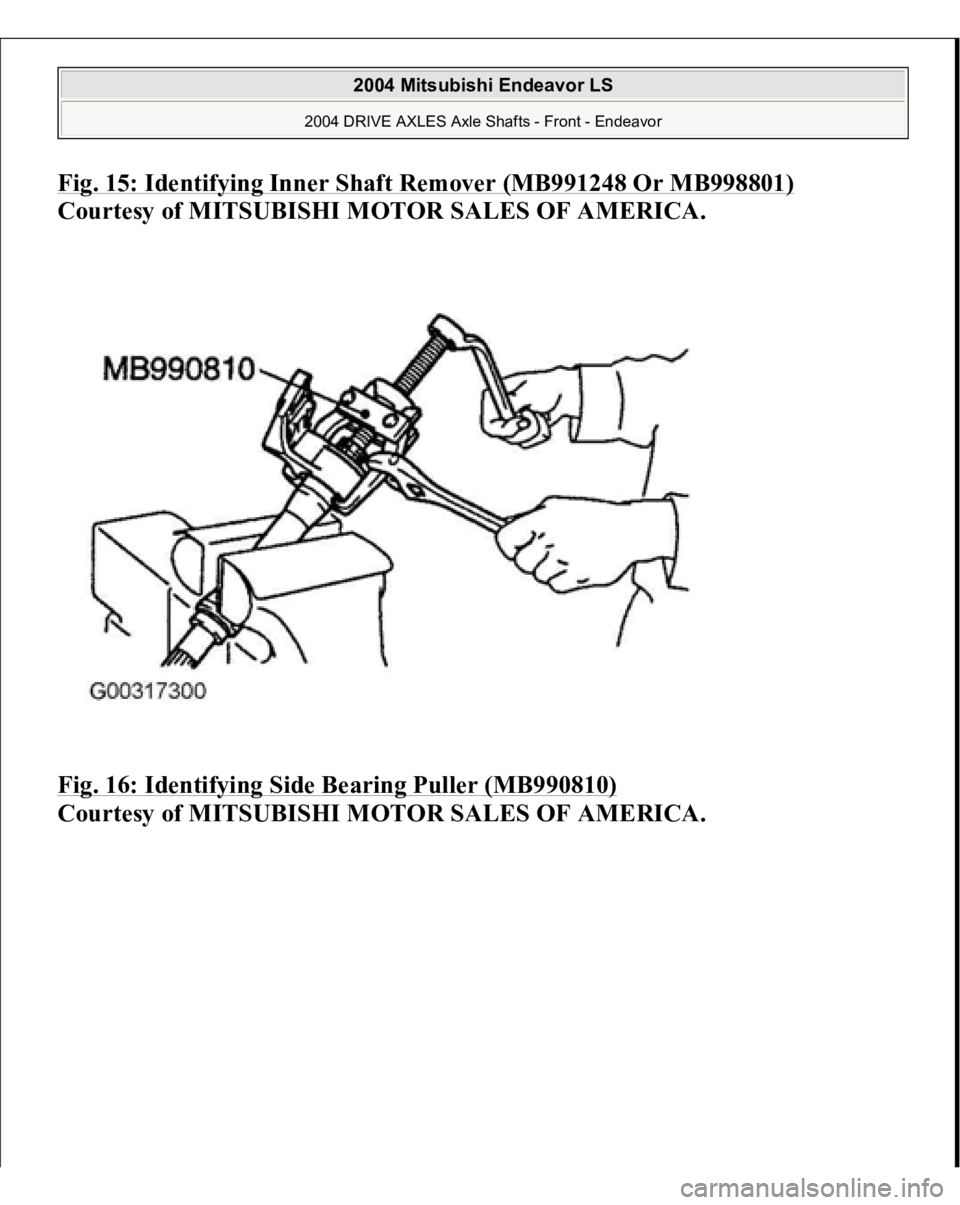
Fig. 16: Identifying Side Bearing Puller (MB990810)
Courtesy of MITSUBISHI MOTOR SALES OF AMERICA.
2004 Mitsubishi Endeavor LS
2004 DRIVE AXLES Axle Shafts - Front - Endeavor
Page 1933 of 3870
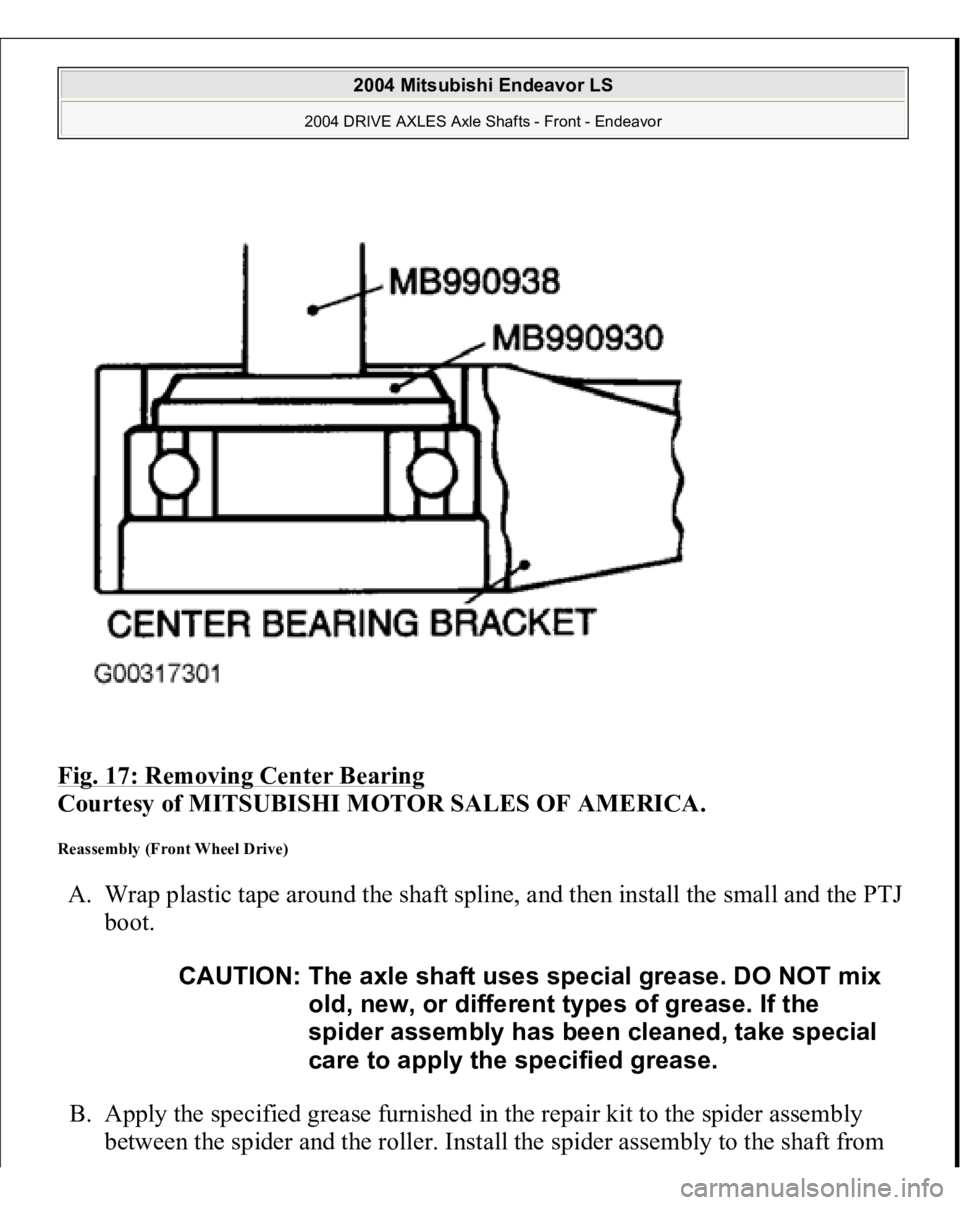
Fig. 17: Removing Center Bearing
Courtesy of MITSUBISHI MOTOR SALES OF AMERICA.
Reassembly (Front Wheel Drive) A. Wrap plastic tape around the shaft spline, and then install the small and the PTJ
boot.
B. Apply the specified grease furnished in the repair kit to the spider assembly
between the s
pider and the roller. Install the s
pider assembl
y to the shaft from
CAUTION: The axle shaft uses special grease. DO NOT mix
old, new, or different types of grease. If the
spider assembly has been cleaned, take special
care to apply the specified grease.
2004 Mitsubishi Endeavor LS
2004 DRIVE AXLES Axle Shafts - Front - Endeavor
Page 1934 of 3870
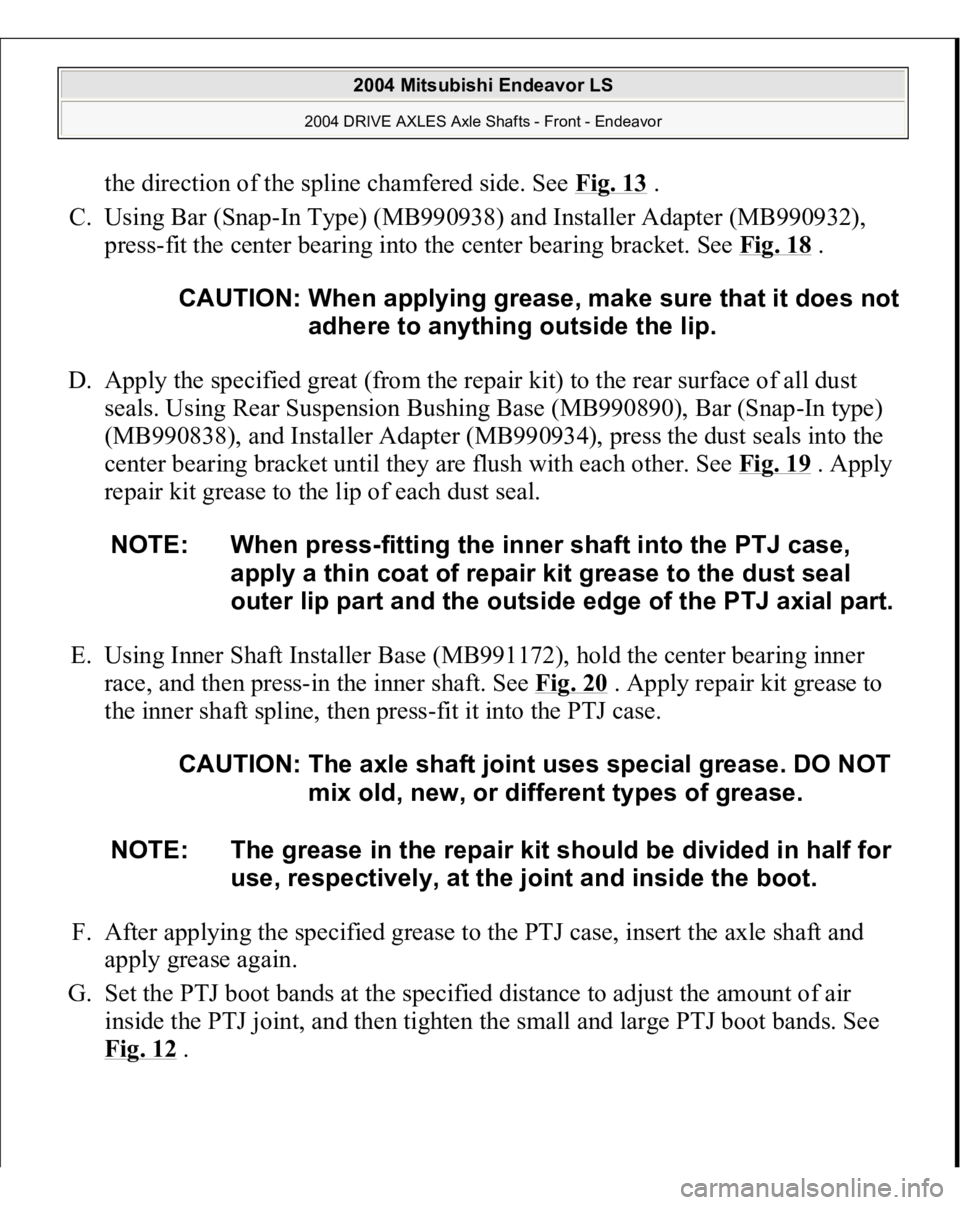
the direction of the spline chamfered side. See Fig. 13
.
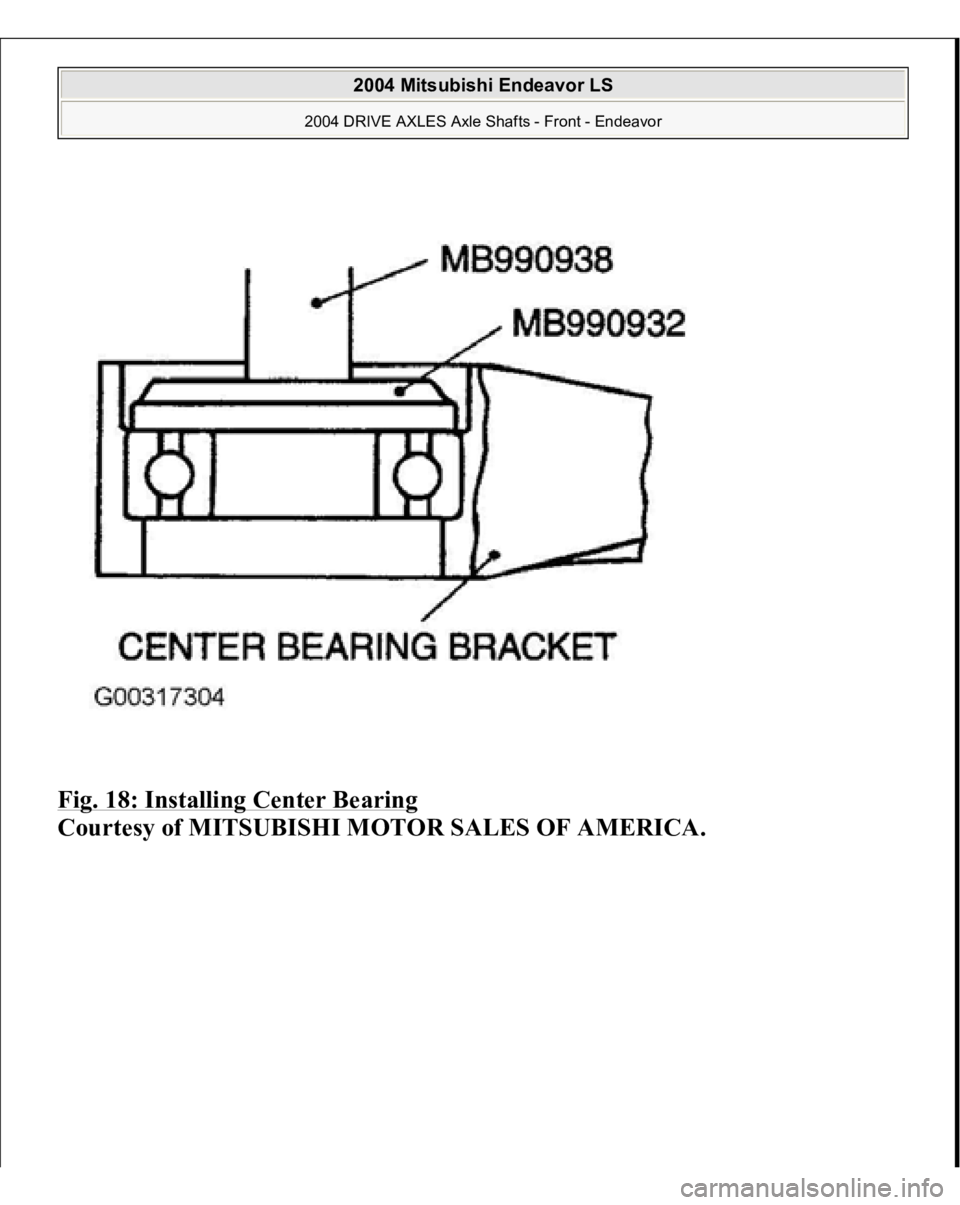
C. Using Bar (Snap-In Type) (MB990938) and Installer Adapter (MB990932),
press-fit the center bearing into the center bearing bracket. See Fig. 18
.
D. Apply the specified great (from the repair kit) to the rear surface of all dust
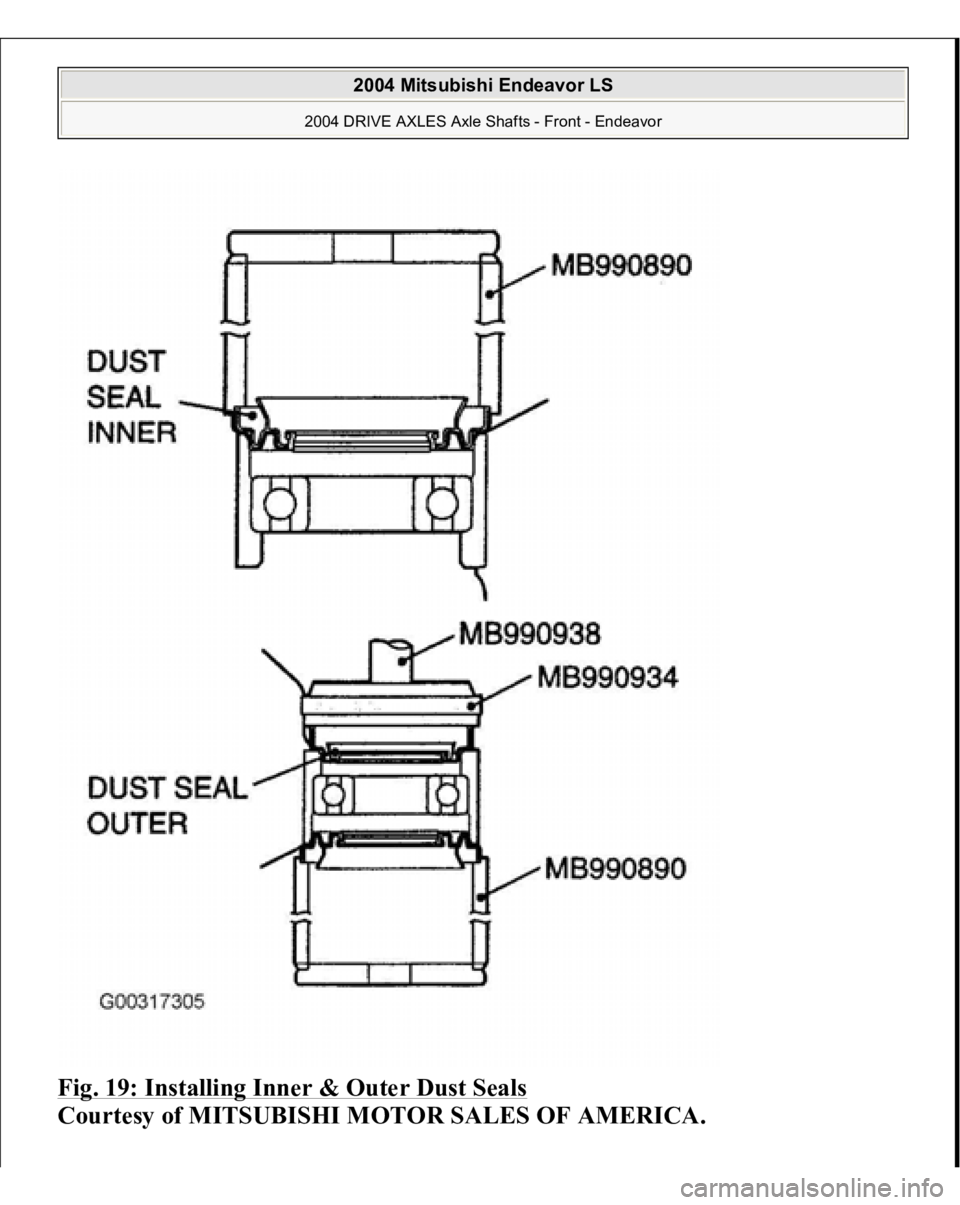
seals. Using Rear Suspension Bushing Base (MB990890), Bar (Snap-In type)
(MB990838), and Installer Adapter (MB990934), press the dust seals into the
center bearing bracket until they are flush with each other. See Fig. 19 . Apply
repair kit grease to the lip of each dust seal.
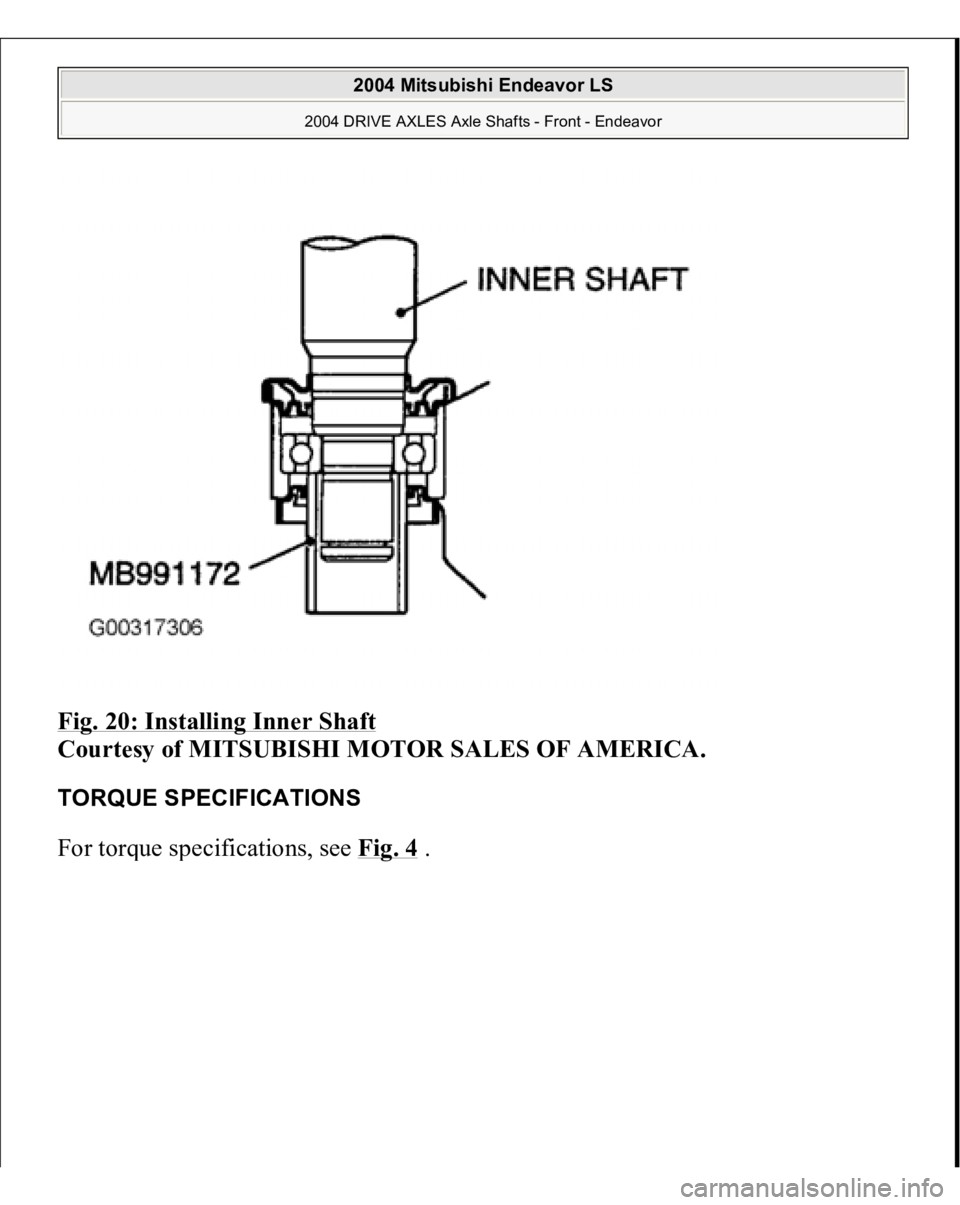
E. Using Inner Shaft Installer Base (MB991172), hold the center bearing inner
race, and then press-in the inner shaft. See Fig. 20
. Apply repair kit grease to
the inner shaft spline, then press-fit it into the PTJ case.
F. After applying the specified grease to the PTJ case, insert the axle shaft and
apply grease again.
G. Set the PTJ boot bands at the specified distance to adjust the amount of air
inside the PTJ joint, and then tighten the small and large PTJ boot bands. See
Fi
g. 12
. CAUTION: When applying grease, make sure that it does not
adhere to anything outside the lip.
NOTE: When press-fitting the inner shaft into the PTJ case,
apply a thin coat of repair kit grease to the dust seal
outer lip part and the outside edge of the PTJ axial part.
CAUTION: The axle shaft joint uses special grease. DO NOT
mix old, new, or different types of grease.
NOTE: The grease in the repair kit should be divided in half for
use, respectively, at the joint and inside the boot.
2004 Mitsubishi Endeavor LS
2004 DRIVE AXLES Axle Shafts - Front - Endeavor
Page 1935 of 3870
Fig. 18: Installing Center Bearing
Courtes
y of MITSUBISHI MOTOR SALES OF AMERICA
.
2004 Mitsubishi Endeavor LS
2004 DRIVE AXLES Axle Shafts - Front - Endeavor
Page 1936 of 3870
Fig. 19: Installing Inner & Outer Dust Seals
Courtesy of MITSUBISHI MOTOR SALES OF AMERICA.
2004 Mitsubishi Endeavor LS
2004 DRIVE AXLES Axle Shafts - Front - Endeavor
Page 1937 of 3870
Fig. 20: Installing Inner Shaft
Courtesy of MITSUBISHI MOTOR SALES OF AMERICA.
TORQUE SPECIFICATIONS For tor
que s
pecifications, see Fig. 4
.
2004 Mitsubishi Endeavor LS
2004 DRIVE AXLES Axle Shafts - Front - Endeavor
Page 1938 of 3870
2004 SUSPENSION
Front - Endeavor
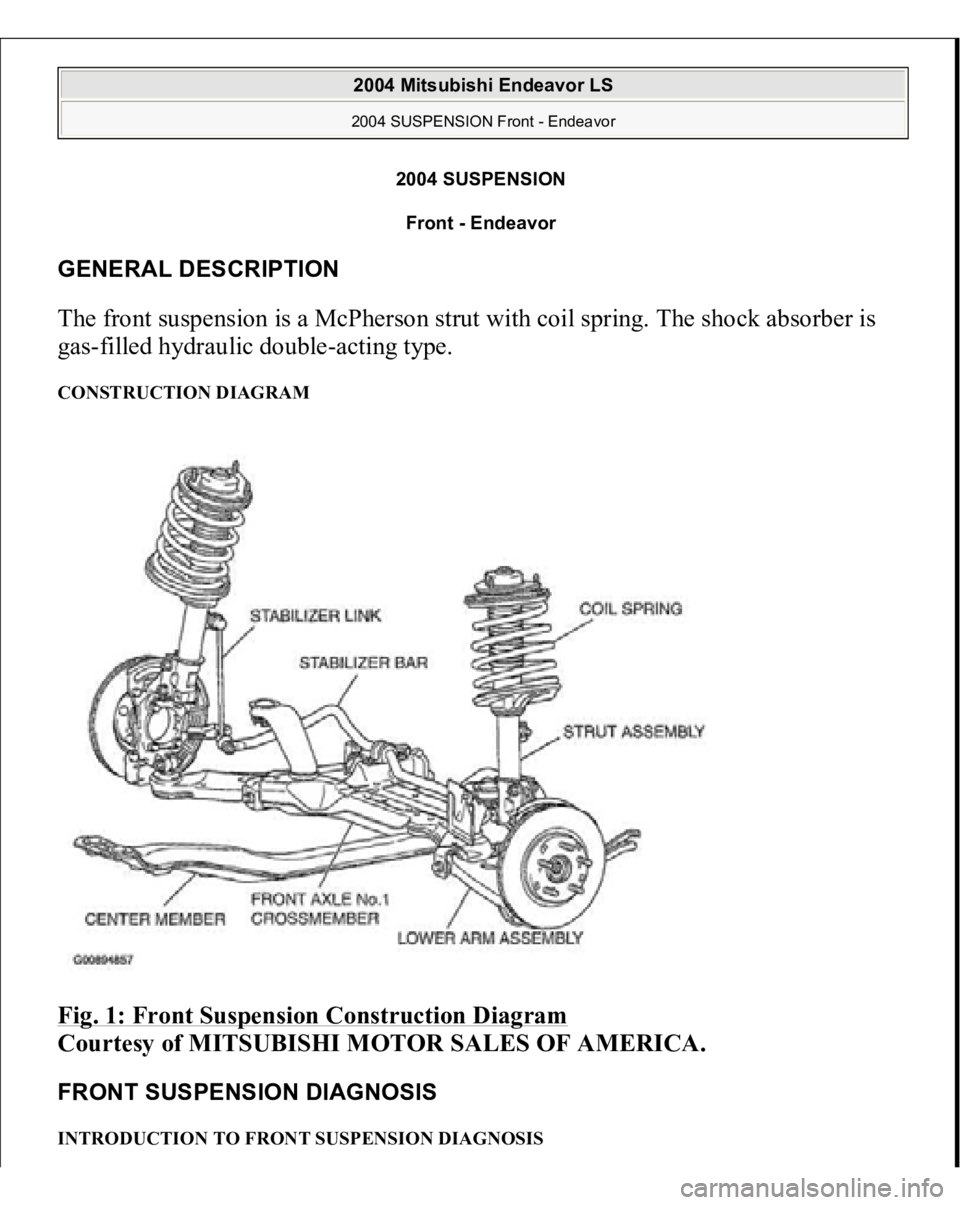
GENERAL DESCRIPTION The front suspension is a McPherson strut with coil spring. The shock absorber is
gas-filled hydraulic double-acting type. CONSTRUCTION DIAGRAM Fig. 1: Front Suspension Construction Diagram
Courtesy of MITSUBISHI MOTOR SALES OF AMERICA.
FRONT SUSPENSION DIAGNOSIS INTRODUCTION TO FRONT SUSPENSION DIAGNOSIS
2004 Mitsubishi Endeavor LS 2004 SUSPENSION Front - Endeavor
2004 Mitsubishi Endeavor LS 2004 SUSPENSION Front - Endeavor
Page 1939 of 3870
If the front suspension is faulty, the vehicle will not run straightforward or noise
will occur. Incorrect wheel alignment, malfunction of strut assembly, stabilizer bar,
coil spring, or worn or out-of-balance tires can cause these problems. FRONT SUSPENSION DIAGNOSIS TROUBLESHOOTING STRATEGY Use these steps to plan your diagnostic strategy. If you follow them carefully, you
will be sure that you have exhausted most of the possible ways to find a front
suspension fault.
1. Gather information from the customer.
2. Verify that the condition described by the customer exists.
3. Find and repair the malfunction by following the Symptom Chart and
Symptom Procedures.
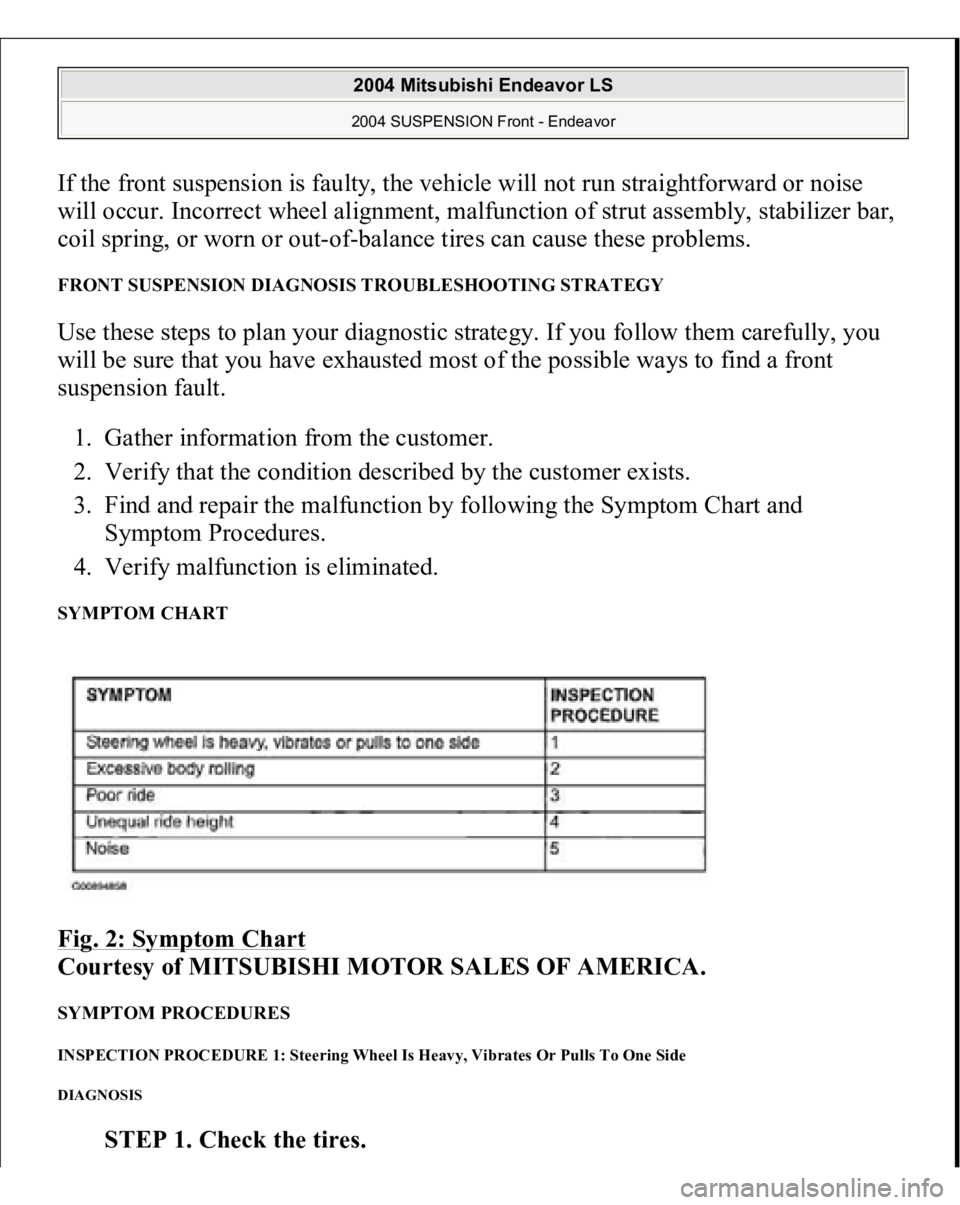
4. Verify malfunction is eliminated. SYMPTOM CHART Fig. 2: Symptom Chart
Courtesy of MITSUBISHI MOTOR SALES OF AMERICA.
SYMPTOM PROCEDURES INSPECTION PROCEDURE 1: Steering Wheel Is Heavy, Vibrates Or Pulls To One Side DIAGNOSIS
STEP 1. Check the tires.
2004 Mitsubishi Endeavor LS 2004 SUSPENSION Front - Endeavor
Page 1940 of 3870
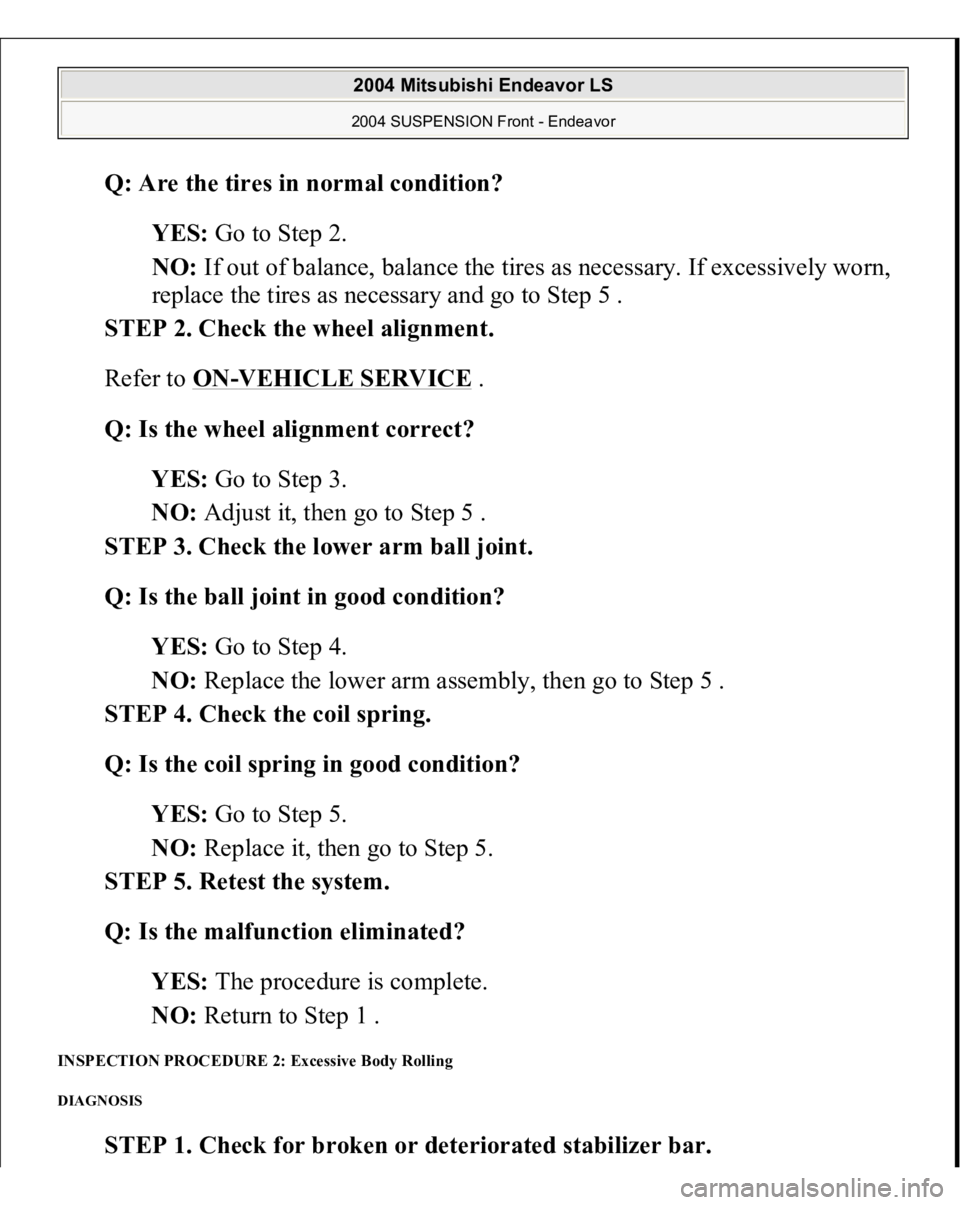
Q: Are the tires in normal condition?
YES: Go to Step 2.
NO: If out of balance, balance the tires as necessary. If excessively worn,
replace the tires as necessary and go to Step 5 .
STEP 2. Check the wheel alignment.
Refer to ON
-VEHICLE SERVICE
.
Q: Is the wheel alignment correct?
YES: Go to Step 3.
NO: Adjust it, then go to Step 5 .
STEP 3. Check the lower arm ball joint.
Q: Is the ball joint in good condition?
YES: Go to Step 4.
NO: Replace the lower arm assembly, then go to Step 5 .
STEP 4. Check the coil spring.
Q: Is the coil spring in good condition?
YES: Go to Step 5.
NO: Replace it, then go to Step 5.
STEP 5. Retest the system.
Q: Is the malfunction eliminated?
YES: The procedure is complete.
NO: Return to Step 1 .
INSPECTION PROCEDURE 2: Excessive Body Rolling DIAGNOSIS
STEP 1. Check for broken or deteriorated stabilizer bar
.
2004 Mitsubishi Endeavor LS 2004 SUSPENSION Front - Endeavor
Trending: tightening bolts, hood open, turn signal, Windows, crankshaft pulley, brake pads, air bleeding
