MITSUBISHI SPYDER 1990 Service Repair Manual
SPYDER 1990
MITSUBISHI
MITSUBISHI
https://www.carmanualsonline.info/img/19/57345/w960_57345-0.png
MITSUBISHI SPYDER 1990 Service Repair Manual
Trending: turn signal, brake sensor, trunk, radiator cap, horn, water pump, fuel type
Page 1231 of 2103
A U T O M A T I C T R A N S A X L E
OVERHAUL
I
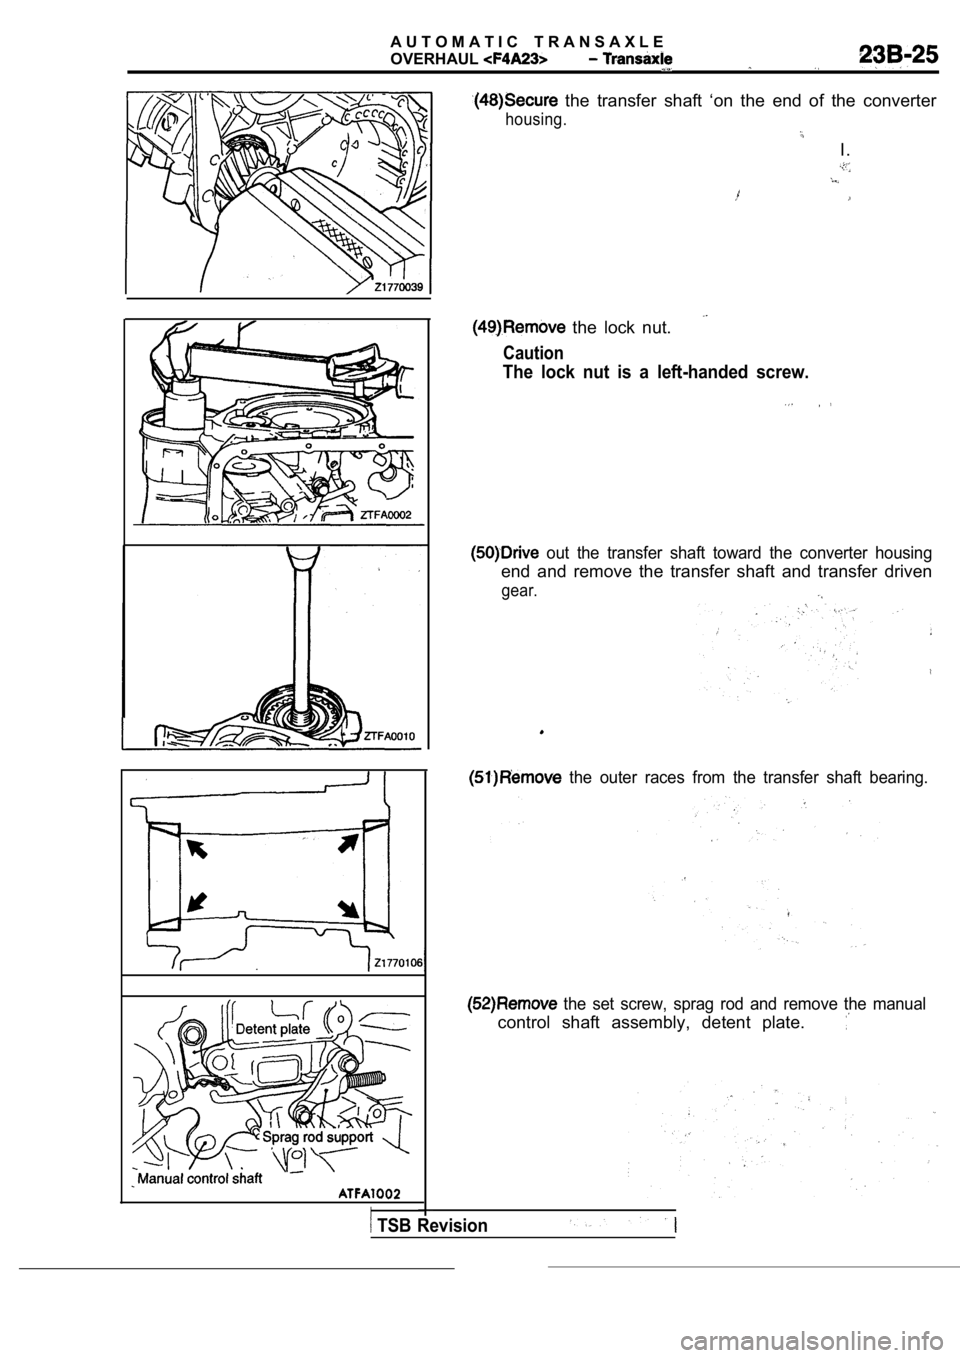
the transfer shaft ‘on the end of the converter
housing.
I .
the lock nut.
Caution
The lock nut is a left-handed screw.
out the transfer shaft toward the converter housing
end and remove the transfer shaft and transfer driv en
gear.
the outer races from the transfer shaft bearing.
the set screw, sprag rod and remove the manual
control shaft assembly, detent plate.
TSB Revision
Page 1232 of 2103
A U T O M A T I C T R A N S A X L E
OVERHAUL
Oil pump side
Pressure spring
REASSEMBLY
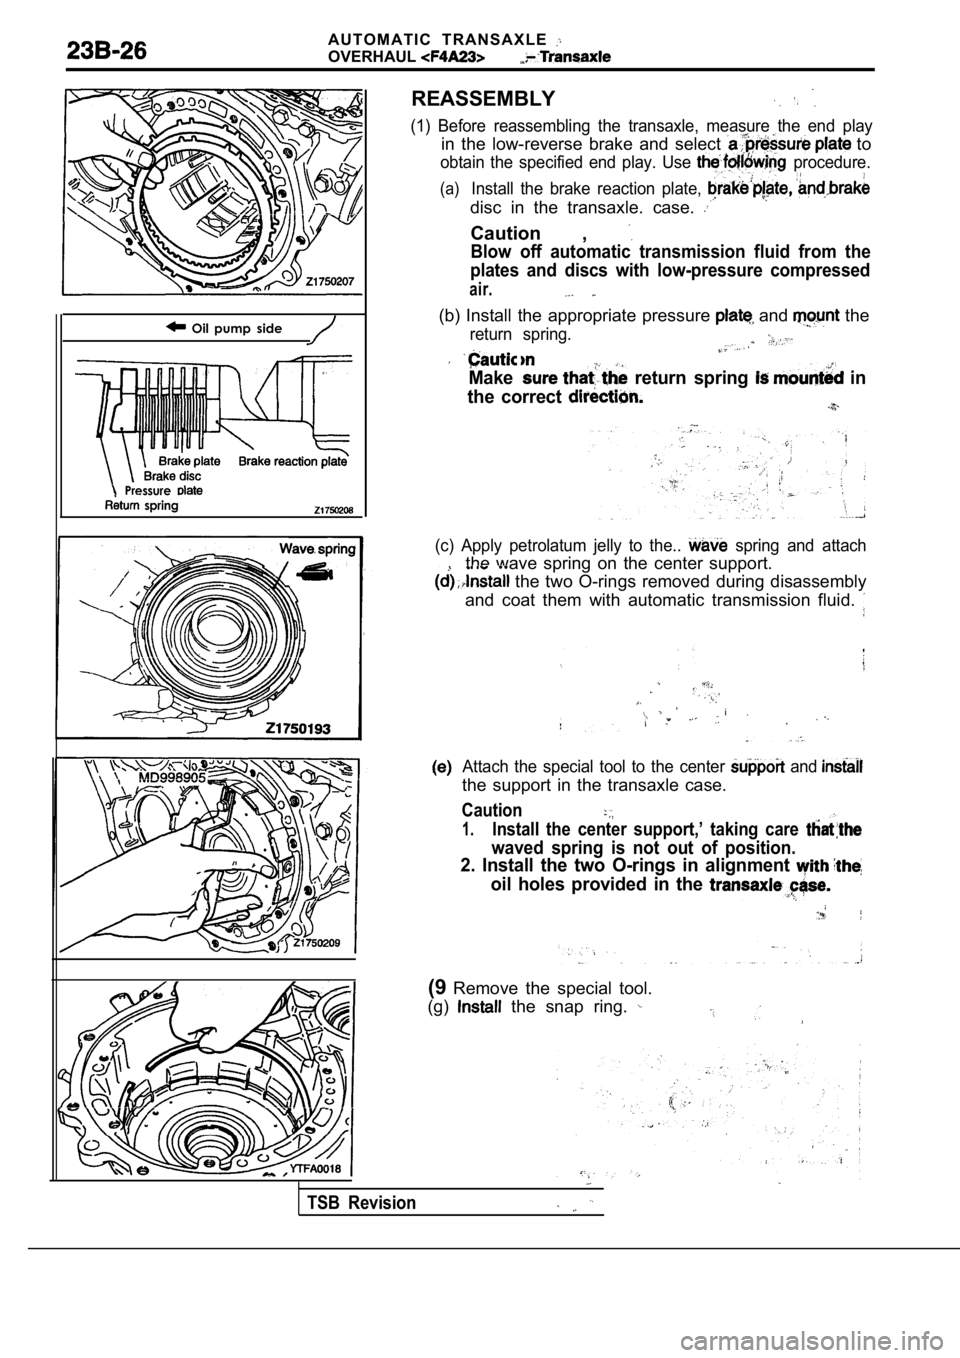
(1) Before reassembling the transaxle, measure the end play
in the low-reverse brake and select to
obtain the specified end play. Use procedure.
(a)Install the brake reaction plate,
disc in the transaxle. case.
Caution ,
Blow off automatic transmission fluid from the
plates and discs with low-pressure compressed
air.
(b) Install the appropriate pressure and the
return spring.
Make return spring in
the correct
(c) Apply petrolatum jelly to the.. spring and attach
the wave spring on the center support.
the two O-rings removed during disassembly
and coat them with automatic transmission fluid.
i .
Attach the special tool to the center and
the support in the transaxle case.
Caution
1.Install the center support,’ taking care
waved spring is not out of position.
2. Install the two O-rings in alignment
oil holes provided in the
(9 Remove the special tool.
(g)
the snap ring.
TSB Revision
Page 1233 of 2103
A U T O M A T I C
OVERHAUL
8
Idler
shaft
hole 3
Brake
reaction
plate
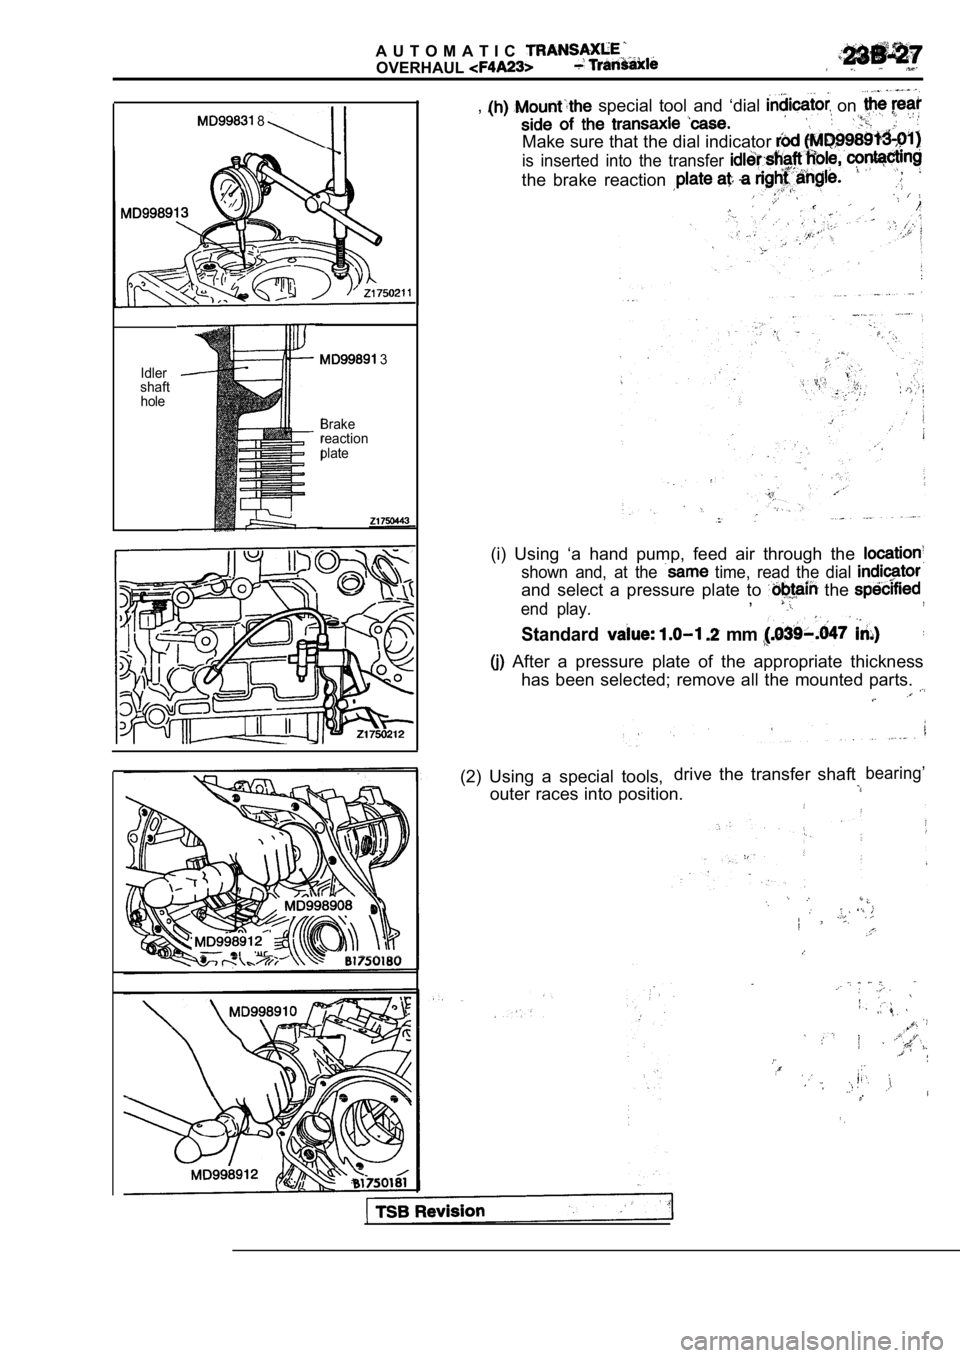
, special tool and ‘dial on
Make sure that the dial indicator
is inserted into the transfer
the brake reaction
(i) Using ‘a hand pump, feed air through the
shown and, at the time, read the dial
and select a pressure plate to the
end play.,
Standard mm
After a pressure plate of the appropriate thicknes s
has been selected; remove all the mounted parts.
(2) Using a special tools, drive the transfer shaftbearing’
outer races into position.
Page 1234 of 2103
AUTOMATIC TRANSAXLEOVERHAUL Transaxle
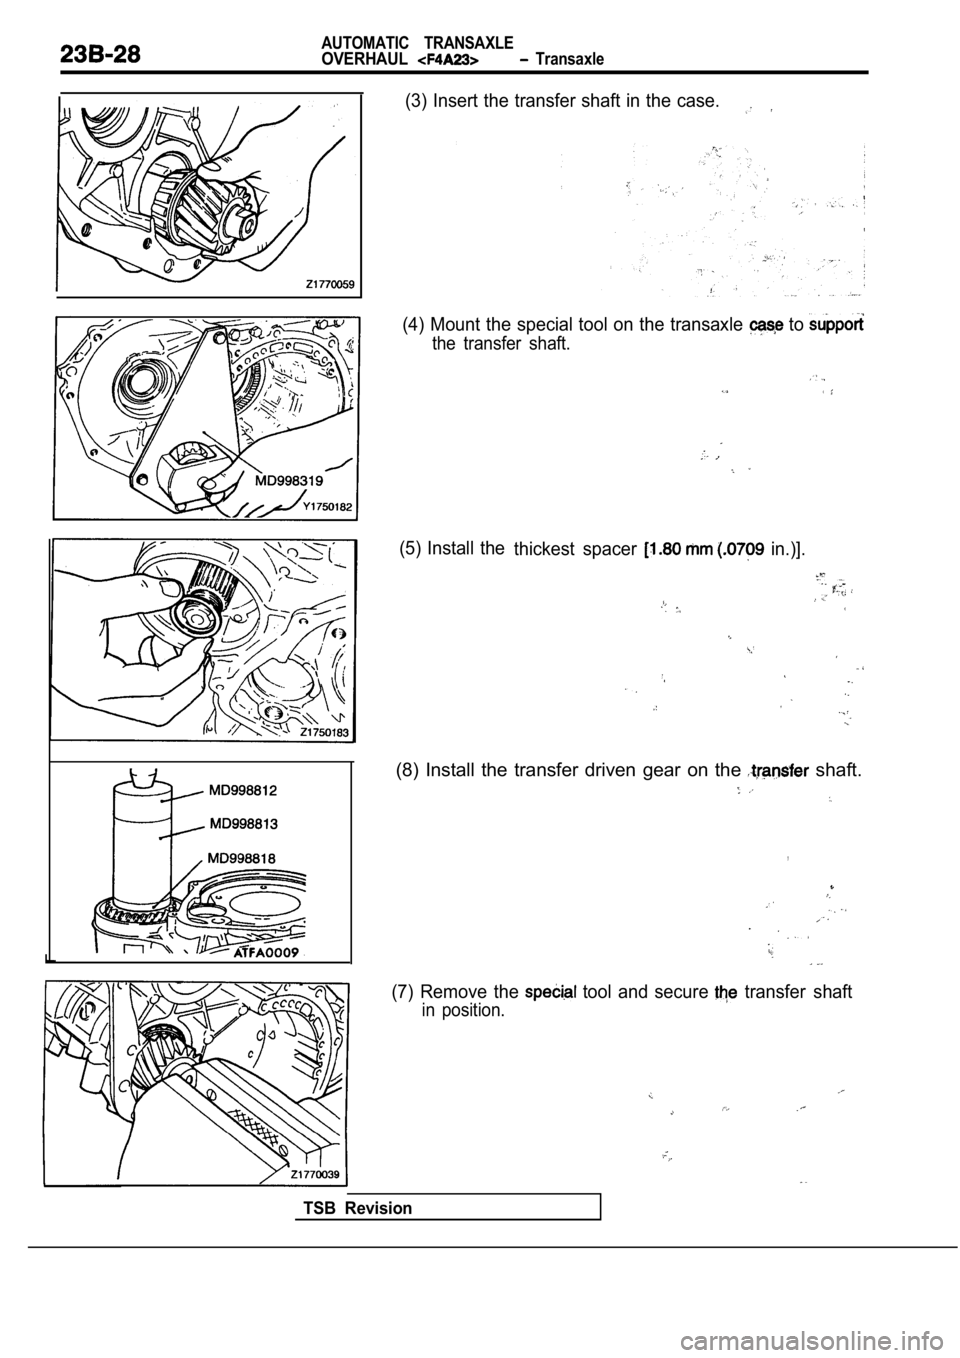
(3) Insert the transfer shaft in the case.
(4) Mount the special tool on the transaxle to
the transfer shaft.
(5) Install thethickest spacer in.)].
(8) Install the transfer driven gear on the shaft.
,
(7) Remove the tool and secure transfer shaft
in position.
TSB Revision
Page 1235 of 2103
AUTOMATIC TRANSAXLE
O V E R H A U L
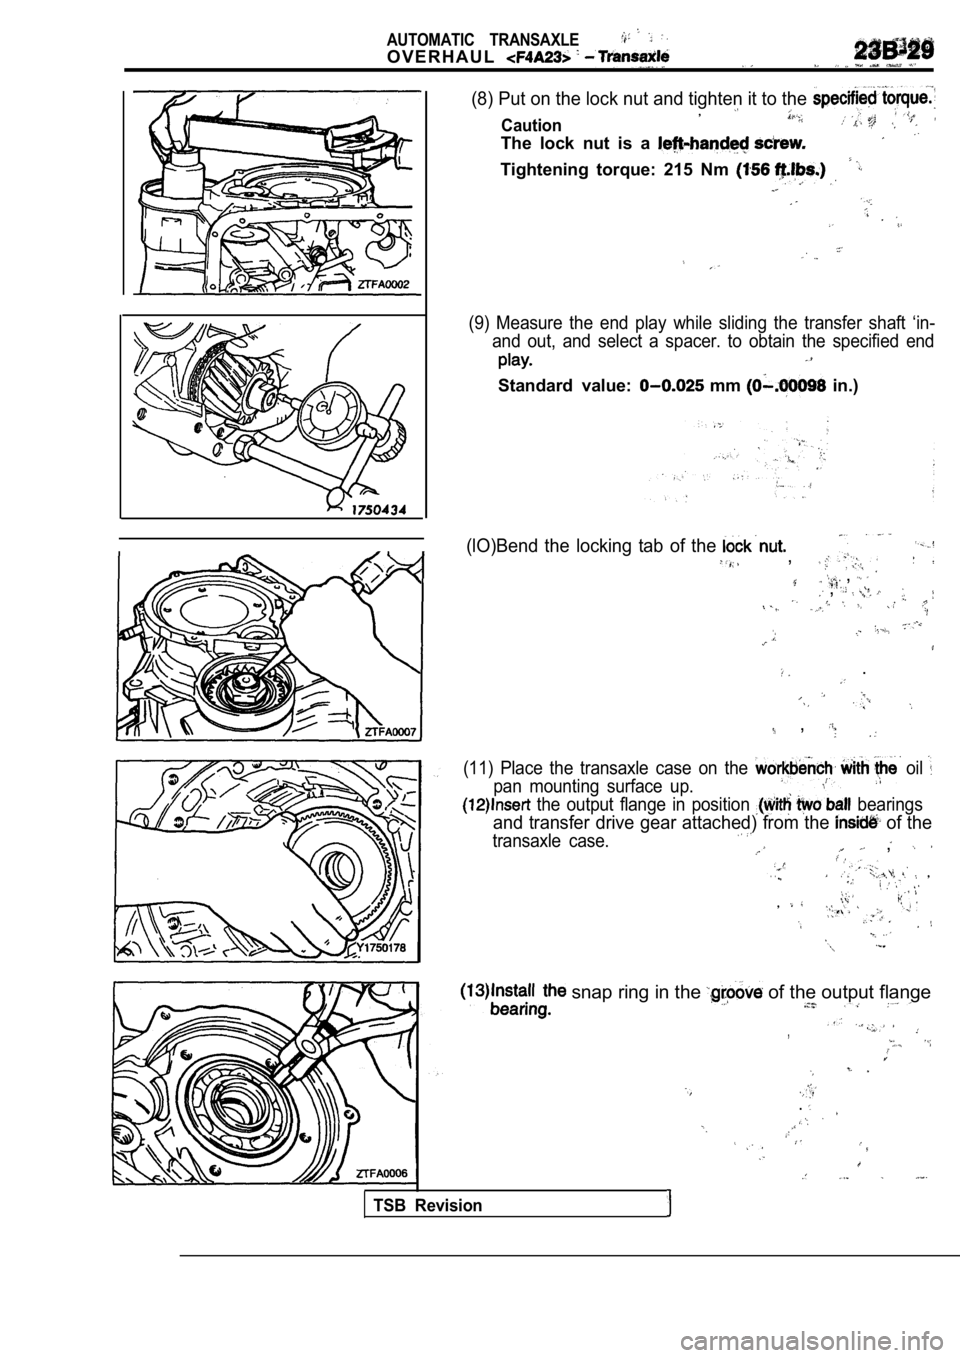
(8) Put on the lock nut and tighten it to the
Caution,
The lock nut is a
Tightening torque: 215 Nm
(9) Measure the end play while sliding the transfer shaft ‘in-
and out, and select a spacer. to obtain the specifi ed end
Standard value: mm in.)
(lO)Bend the locking tab of the ,
, ,
.
,
(11) Place the transaxle case on the oil
pan mounting surface up.
the output flange in position bearings
and transfer drive gear attached) from the of the
transaxle case. ,
. . ,
,
snap ring in the of the output flange
.
,
.
TSB Revision
Page 1236 of 2103
A U T O M A T I C T R A N S A X L E
OVERHAUL Transaxle
Torque converter side
GrooveInner raceOuter race
ransfer idler gear
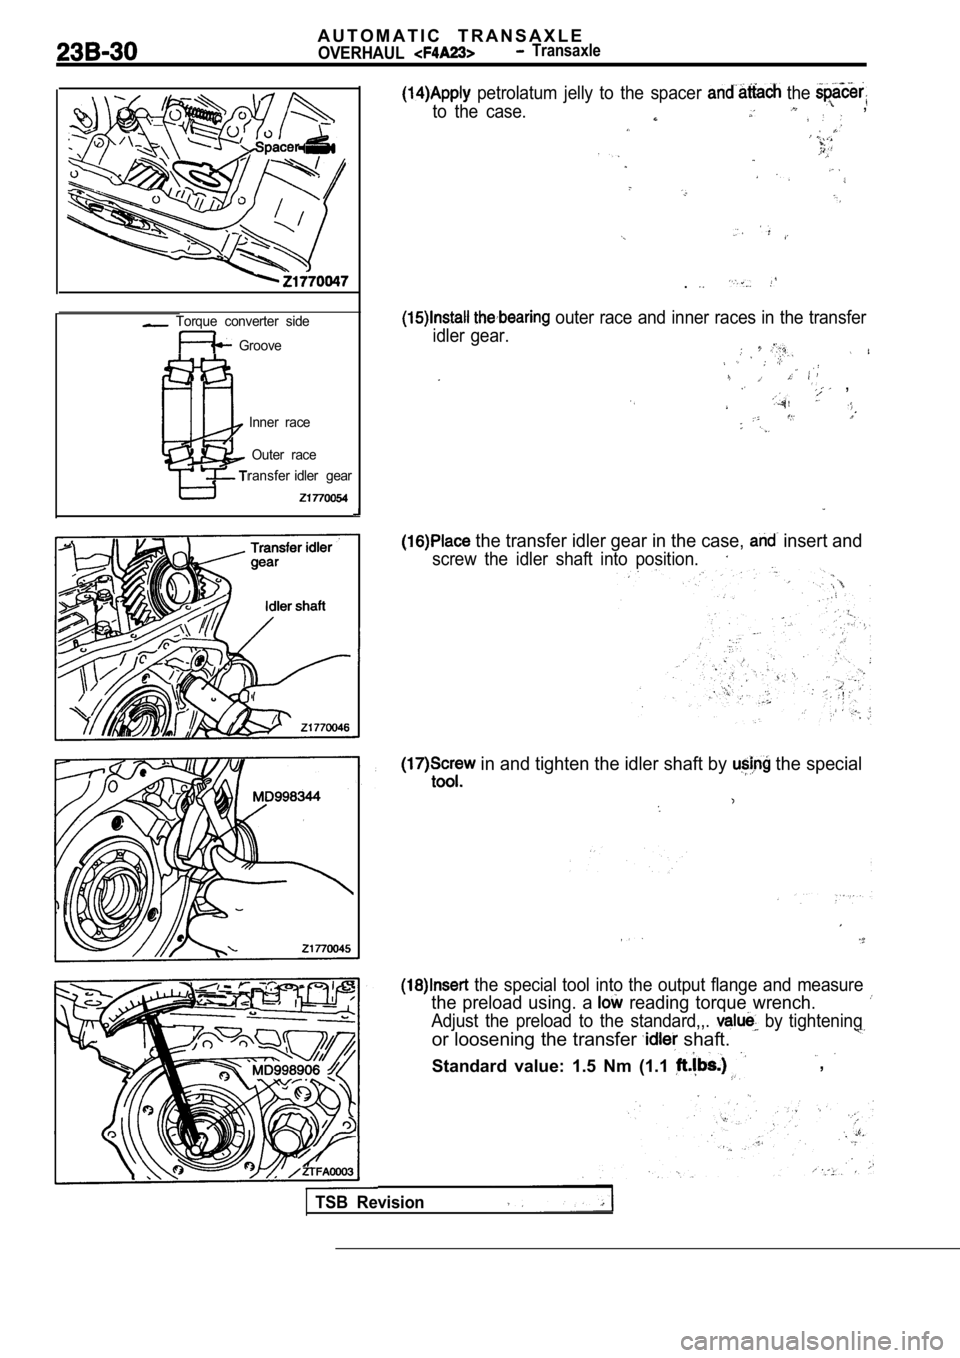
petrolatum jelly to the spacer the
to the case. ,
.
outer race and inner races in the transfer
idler gear.
,
the transfer idler gear in the case, insert and
screw the idler shaft into position.
in and tighten the idler shaft by the special
the special tool into the output flange and measur e
the preload using. a reading torque wrench.
Adjust the preload to the standard,,. by tightening
or loosening the transfer shaft.
Standard value: 1.5 Nm (1.1 ,
TSB Revision
Page 1237 of 2103
OVERHAUL.
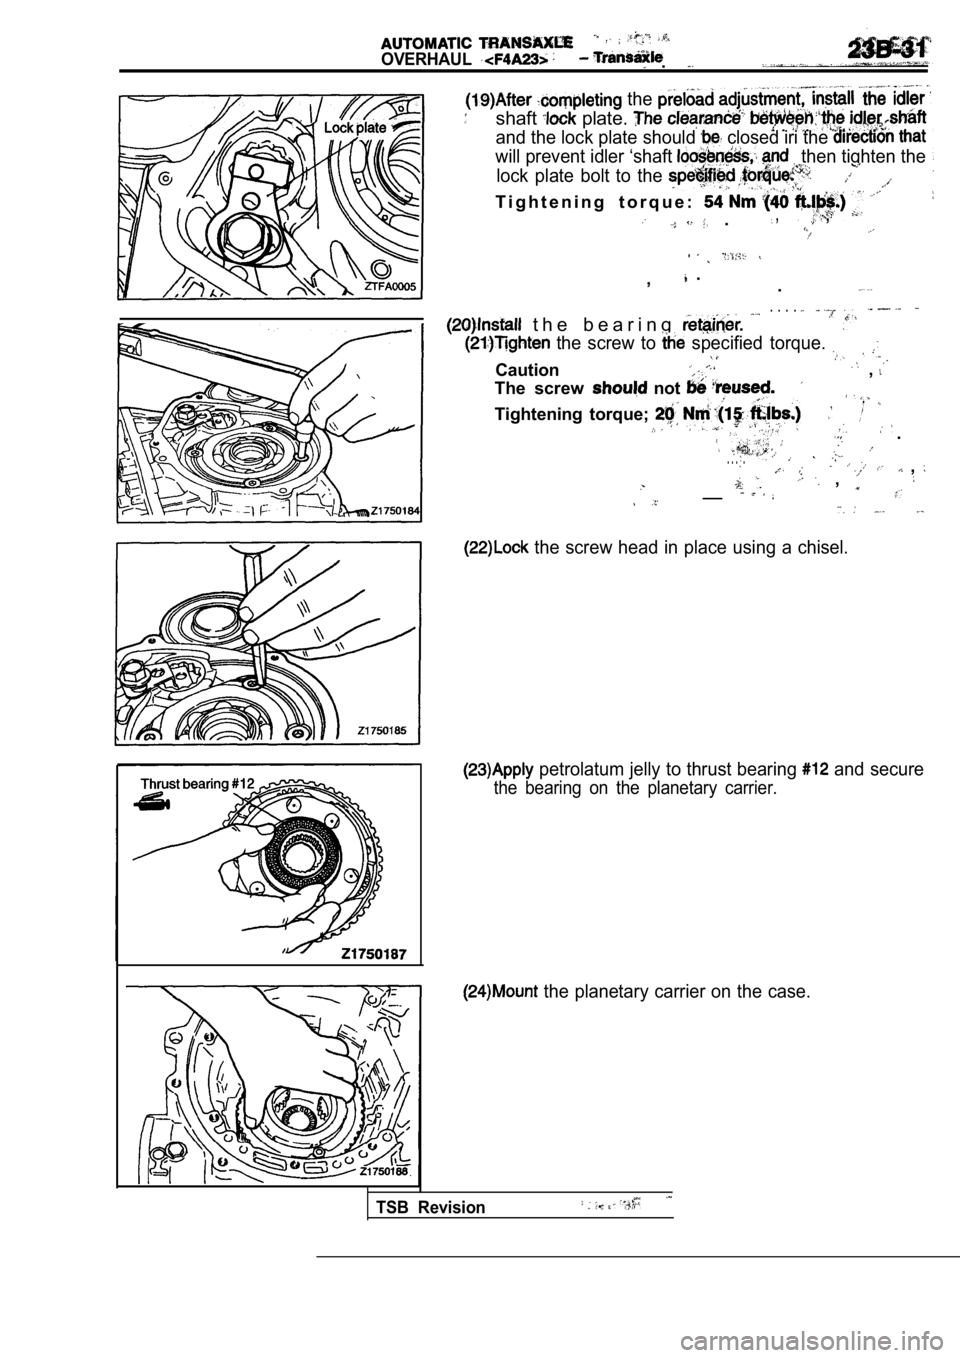
the
shaft plate.
and the lock plate should closed iri the
will prevent idler ‘shaft then tighten the
lock plate bolt to the
T i g h t e n i n g t o r q u e :
. , ,
, . .
t h e b e a r i n g
. . . .
the screw to specified torque.
Caution,
The screw not
Tightening torque;
.
. . . . , , __
the screw head in place using a chisel.
petrolatum jelly to thrust bearing and secure
the bearing on the planetary carrier.
the planetary carrier on the case.
TSB Revision
Page 1238 of 2103
A U T O M A T I C T R A N S A X L E
OVERHAUL -Transaxle,
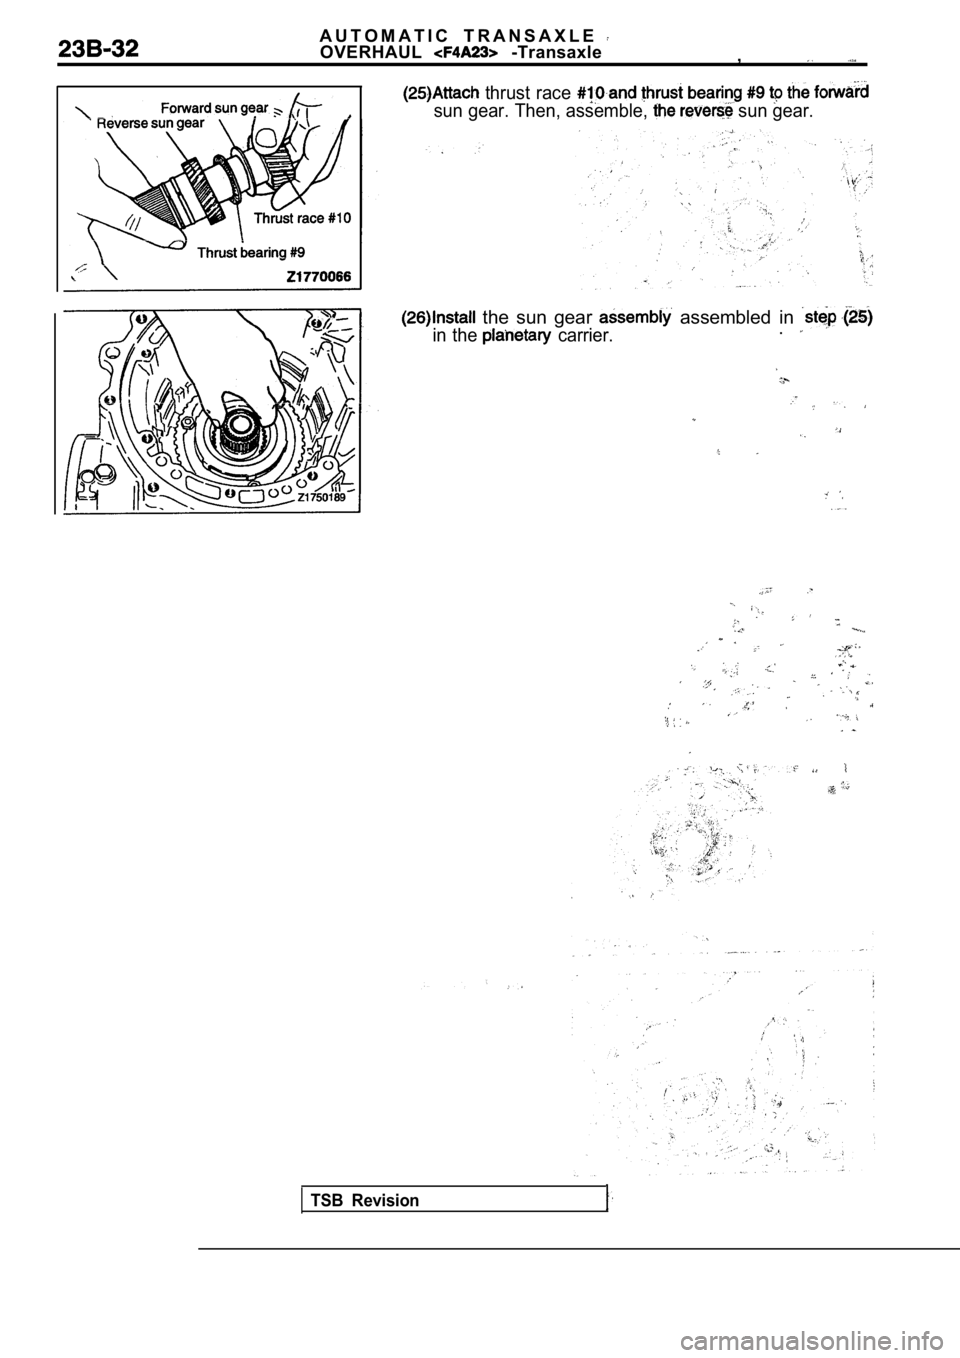
thrust race
sun gear. Then, assemble, sun gear.
the sun gear assembled in
in the carrier..
TSB Revision
Page 1239 of 2103
AUTOMATIC TRANSAXLE
OVERHAUL
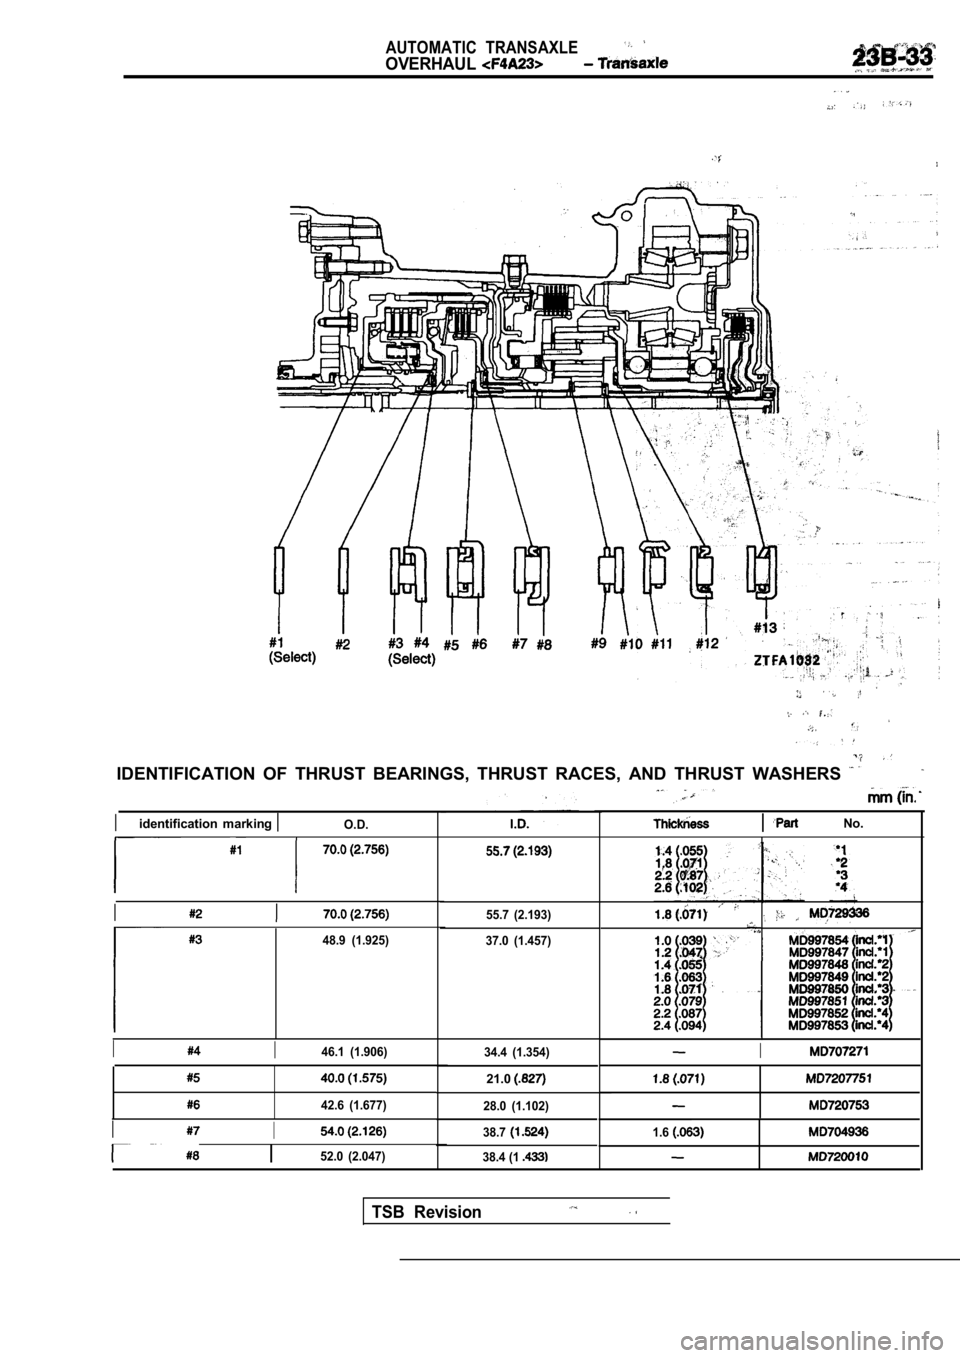
IDENTIFICATION OF THRUST BEARINGS, THRUST RACES, AND THRUST WASHERS
Iidentification marking O.D.
I
48.9 (1.925)
II46.1 (1.906)
42.6 (1.677)
II
I52.0 (2.047)55.7 (2.193)
37.0 (1.457)
34.4 (1.354)
21.0
28.0 (1.102)
38.7
38.4 (1
No.
I
1.6
TSB Revision
Page 1240 of 2103
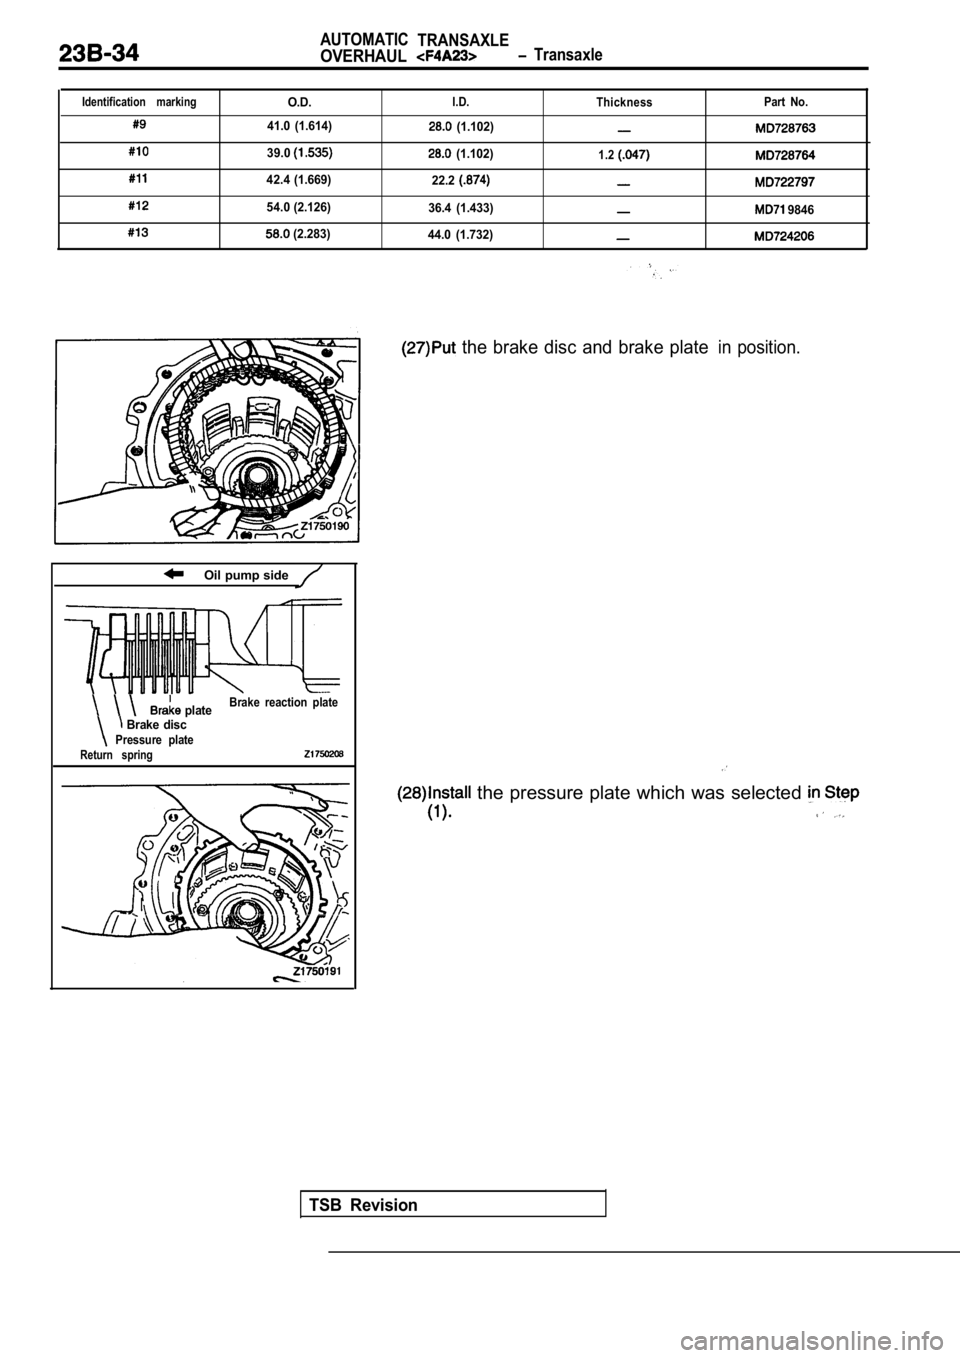
Identification marking
AUTOMATICTRANSAXLE
OVERHAUL Transaxle
O.D.I.D. Thickness Part No.
41.0 (1.614) (1.102)
39.0 (1.102)1.2
42.4 (1.669)
22.2
54.0 (2.126)36.4 (1.433) 9846
(2.283)44.0 (1.732)
Oil pump side
plateBrake reaction plate
Brake discPressure plateReturn spring
the brake disc and brake platein position.
the pressure plate which was selected
TSB Revision
Trending: wipers, hood open, door lock, heater, cruise control, child lock, open hood
