MITSUBISHI SPYDER 1990 Service Repair Manual
Manufacturer: MITSUBISHI, Model Year: 1990, Model line: SPYDER, Model: MITSUBISHI SPYDER 1990Pages: 2103, PDF Size: 68.98 MB
Page 251 of 2103
Piston,
ENGINE and Cylinder
Rearcrankshaft seal
metal caseEngine
Engine block
crankshaft seal
crankshaft seal
dust lip
PISTON, CONNECTING ROD
CYLINDER BLOCK
REMOVAL
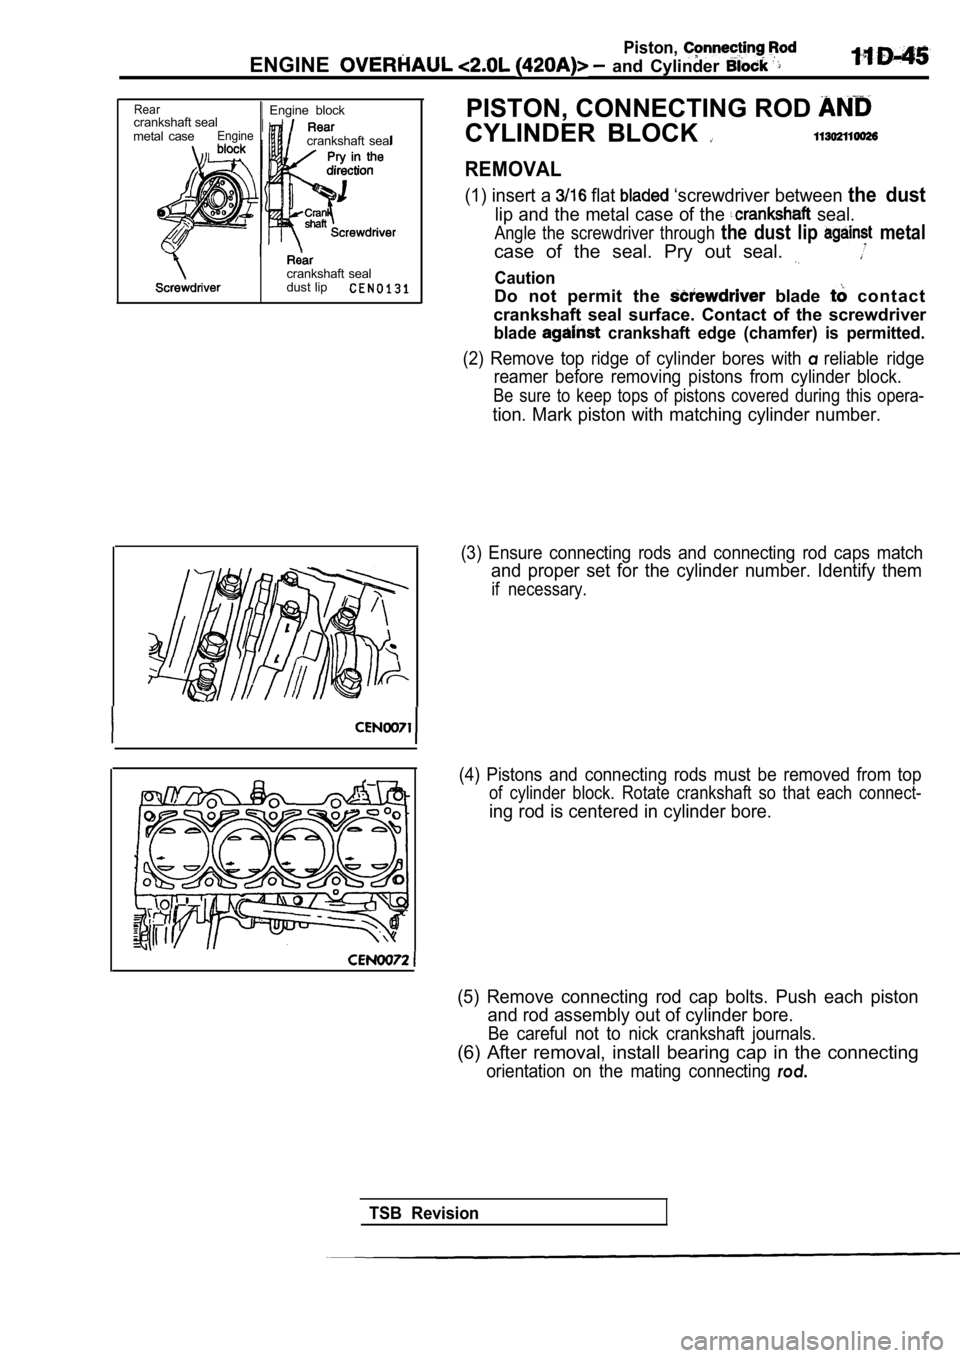
(1) insert a flat ‘screwdriver between the dust
lip and the metal case of the seal.
Angle the screwdriver through the dust lip metal
case of the seal. Pry out seal.
Caution
Do not permit the blade c o n t a c t
crankshaft seal surface. Contact of the screwdriver
blade crankshaft edge (chamfer) is permitted.
(2) Remove top ridge of cylinder bores with areliable ridge
reamer before removing pistons from cylinder block.
Be sure to keep tops of pistons covered during this opera-
tion. Mark piston with matching cylinder number.
(3) Ensure connecting rods and connecting rod caps match
and proper set for the cylinder number. Identify them
if necessary.
(4) Pistons and connecting rods must be removed fro m top
of cylinder block. Rotate crankshaft so that each connect-
ing rod is centered in cylinder bore.
(5) Remove connecting rod cap bolts. Push each pist on
and rod assembly out of cylinder bore.
Be careful not to nick crankshaft journals.
(6) After removal, install bearing cap in the conne cting
orientation on the mating connecting rod.
TSB Revision
Page 252 of 2103
11ENGINE OVERHAUL and
Piston, Rod
D I S A S S E M B L Y
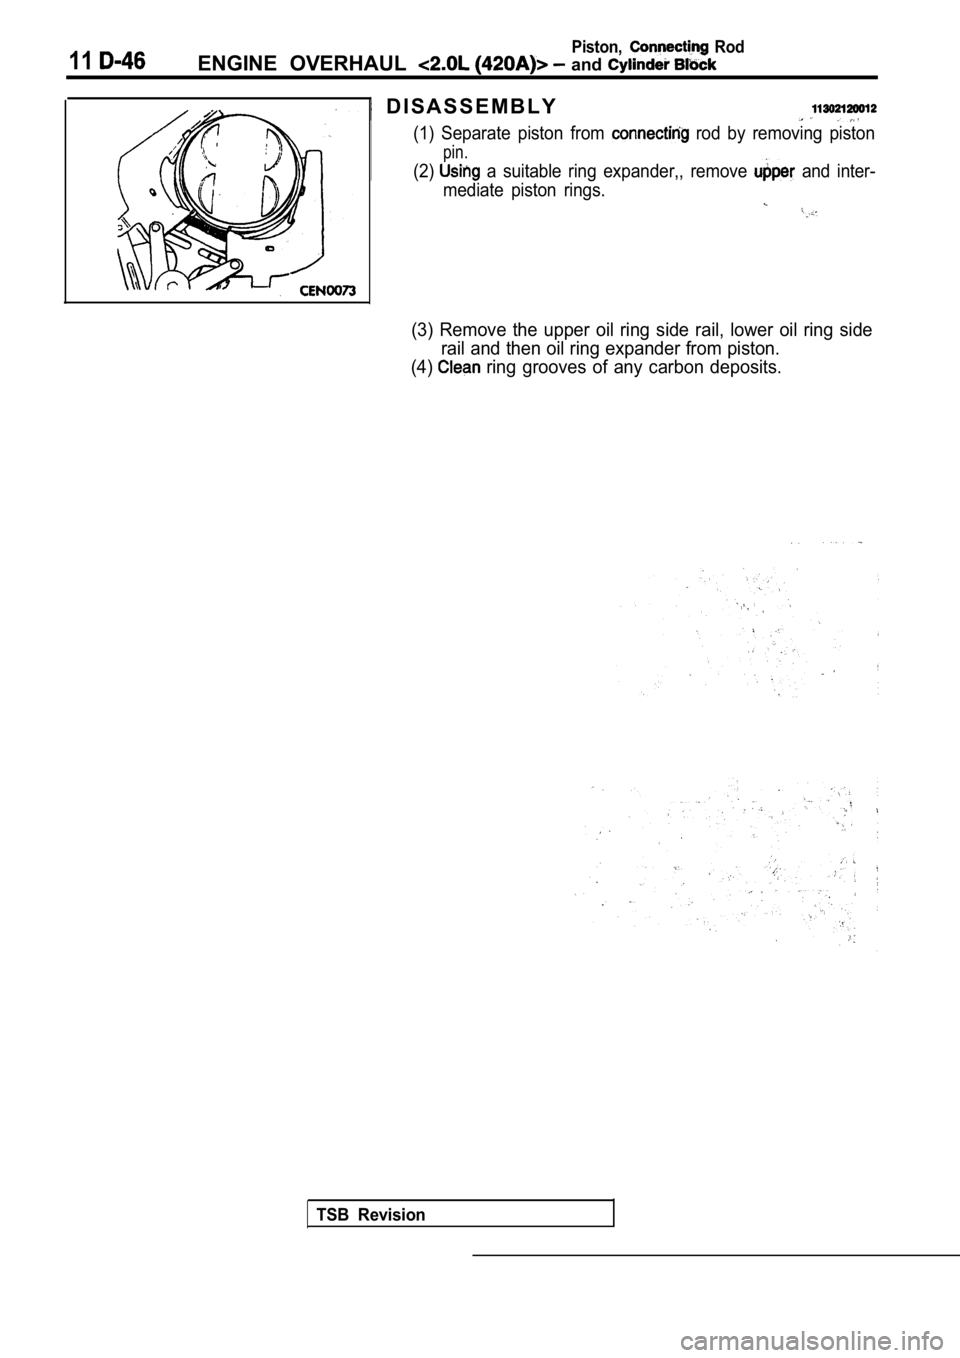
(1) Separate piston from rod by removing piston
pin.
(2) a suitable ring expander,, remove and inter-
mediate piston rings.
(3) Remove the upper oil ring side rail, lower oil ring side
rail and then oil ring expander from piston.
(4)
ring grooves of any carbon deposits.
TSB Revision
Page 253 of 2103
Rod
ENGINE and Cylinder
I
Front of engine
REASSEMBLY
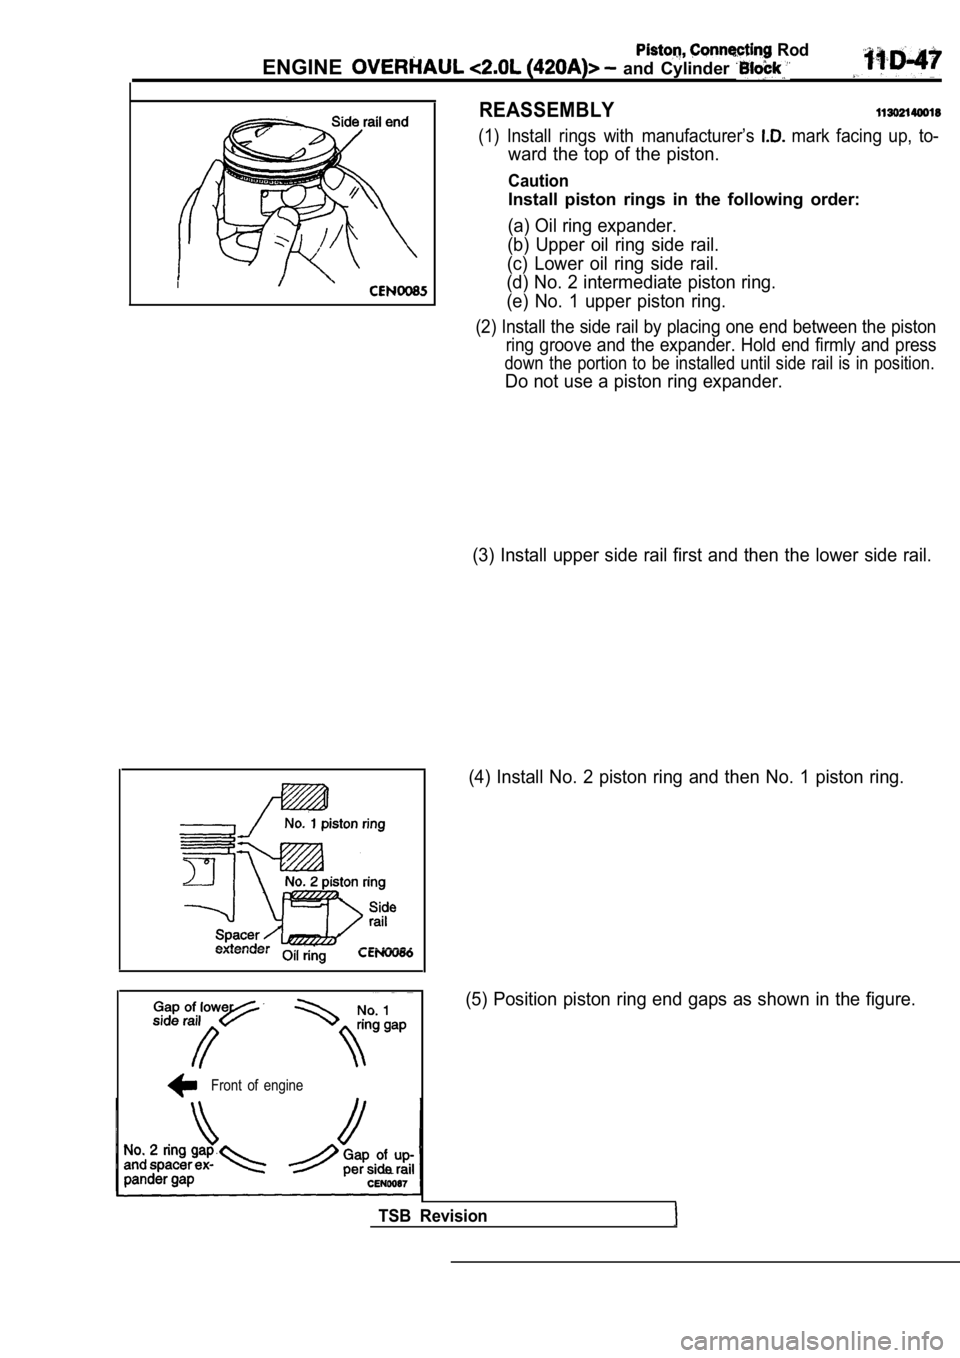
(1) Install rings with manufacturer’s mark facing up, to-
ward the top of the piston.
Caution
Install piston rings in the following order:
(a) Oil ring expander.
(b) Upper oil ring side rail.
(c) Lower oil ring side rail.
(d) No. 2 intermediate piston ring.
(e) No. 1 upper piston ring.
(2) Install the side rail by placing one end betwee n the piston
ring groove and the expander. Hold end firmly and p ress
down the portion to be installed until side rail is in position.
Do not use a piston ring expander.
(3) Install upper side rail first and then the lowe r side rail.
(4) Install No. 2 piston ring and then No. 1 piston ring.
(5) Position piston ring end gaps as shown in the f igure.
TSB Revision
Page 254 of 2103
Piston,ENGINE OVERHAUL and Cylinder
(6) Position ring expander at 45
the side gaps but ‘on the pin canter
on the thrust direction. Staggering important
for
control.
TSB Revision
Page 255 of 2103
piston,
ENGINE
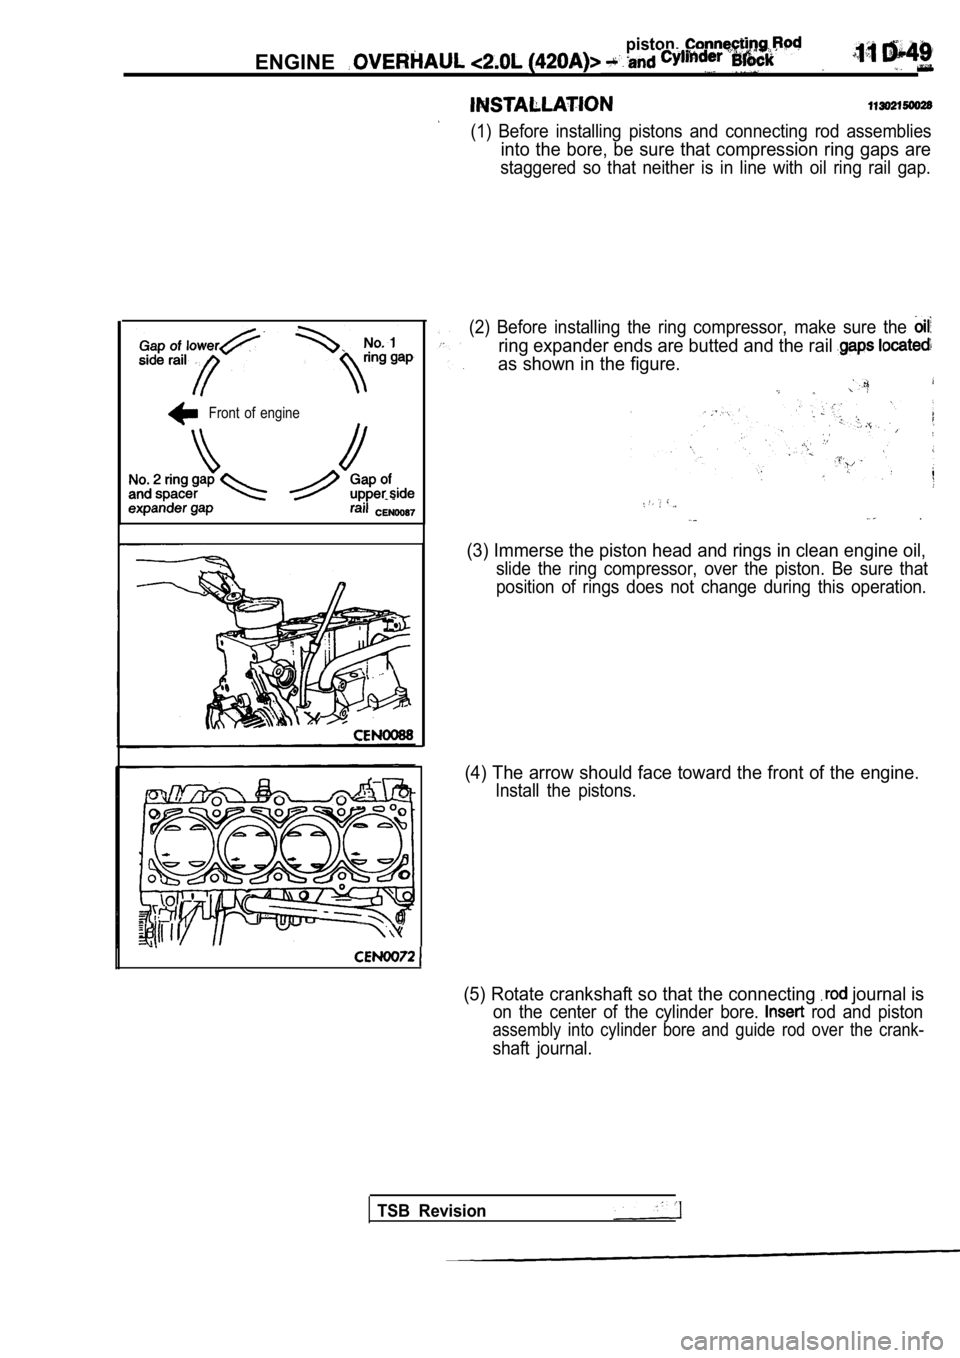
(1) Before installing pistons and connecting rod assemblies
into the bore, be sure that compression ring gaps a re
staggered so that neither is in line with oil ring rail gap.
Front of engine
(2) Before installing the ring compressor, make sur e the
ring expander ends are butted and the rail
as shown in the figure.
.
(3) Immerse the piston head and rings in clean engine oil,
slide the ring compressor, over the piston. Be sure that
position of rings does not change during this opera tion.
(4) The arrow should face toward the front of the engine.
Install the pistons.
(5) Rotate crankshaft so that the connecting journal is
on the center of the cylinder bore. rod and piston
assembly into cylinder bore and guide rod over the crank-
shaft journal.
TSB Revision
Page 256 of 2103
Piston, ConnectingENGINE OVERHAUL and
(6) Tap the piston down in cylinder bore, using a hammer
handle. At the same time, guide connecting rod into
position on connecting rod journal.
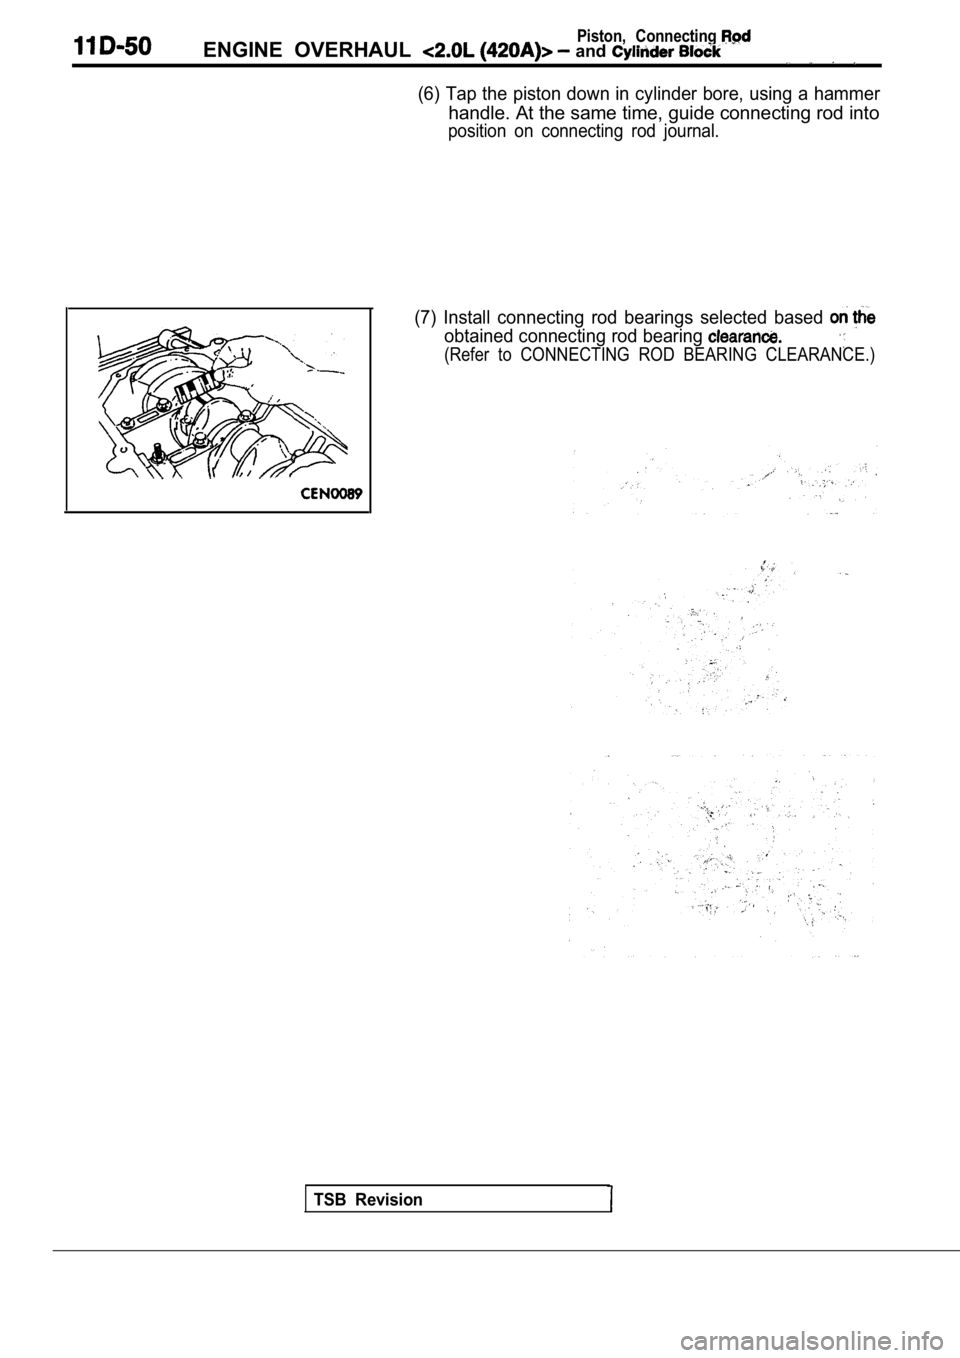
(7) Install connecting rod bearings selected based
obtained connecting rod bearing
(Refer to CONNECTING ROD BEARING CLEARANCE.)
TSB Revision
Page 257 of 2103
Rod
a n d
(8) Install each bolt finger tight then alternately torque each
nut to. assemble the cap properly.
(9) Tighten the bolts to 27.0 Nm PLUS turn (20
PLUS turn). Do not use a torque wrench for last
step.
Oil seal
95059
seal
8995060
I
(lO)Using a feeler gauge, check connecting rod’ sid e clear-’
Standard value: mm in.)
Limit 0.37 mm
in.)
Caution
If burr’or scratch is present on the edge
(chamfer), cleanup with 400 grit paper to prevent
seal damage during’
new’
NOTE
When installing seal, no lube on seal is needed.
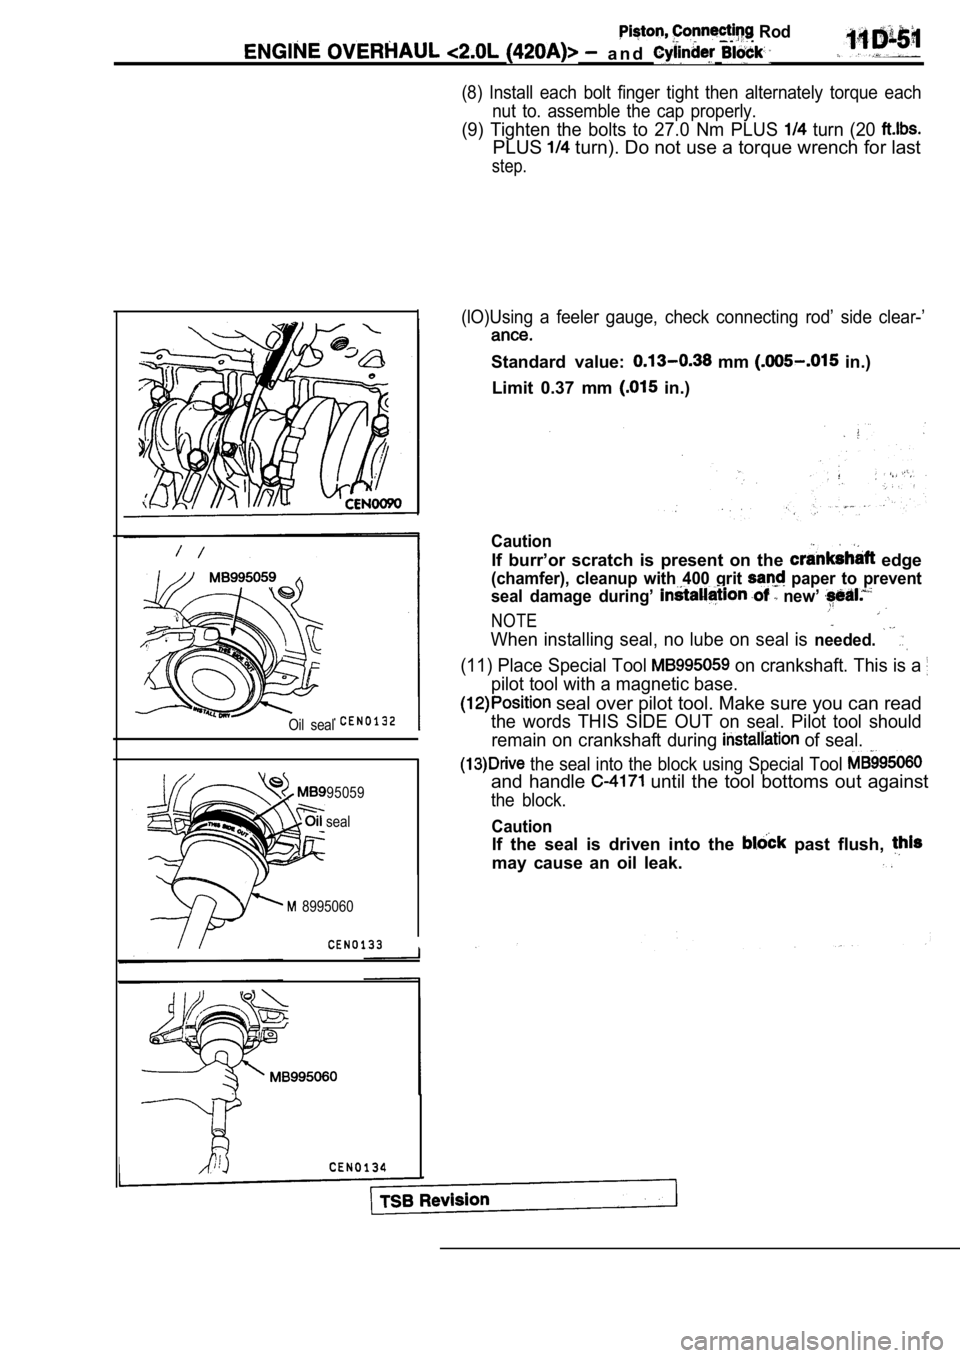
(11) Place Special Tool on crankshaft. This is a
pilot tool with a magnetic base.
seal over pilot tool. Make sure you can read
the words THIS SIDE OUT on seal. Pilot tool should
remain on crankshaft during
of seal.
the seal into the block using Special Tool
and handle until the tool bottoms out against
the block.
Caution
If the seal is driven into the past flush,
may cause an oil leak.
Page 258 of 2103
11
Piston, Connecting Rod
ENGINE OVERHAUL and
INSPECTION
BLOCK
(1) Clean cylinder block thoroughly and check all core hole
plugs for evidence of leaking.
(2) Examine block and cylinder bores for cracks or fractures.
Front
A
CYLINDER BORE
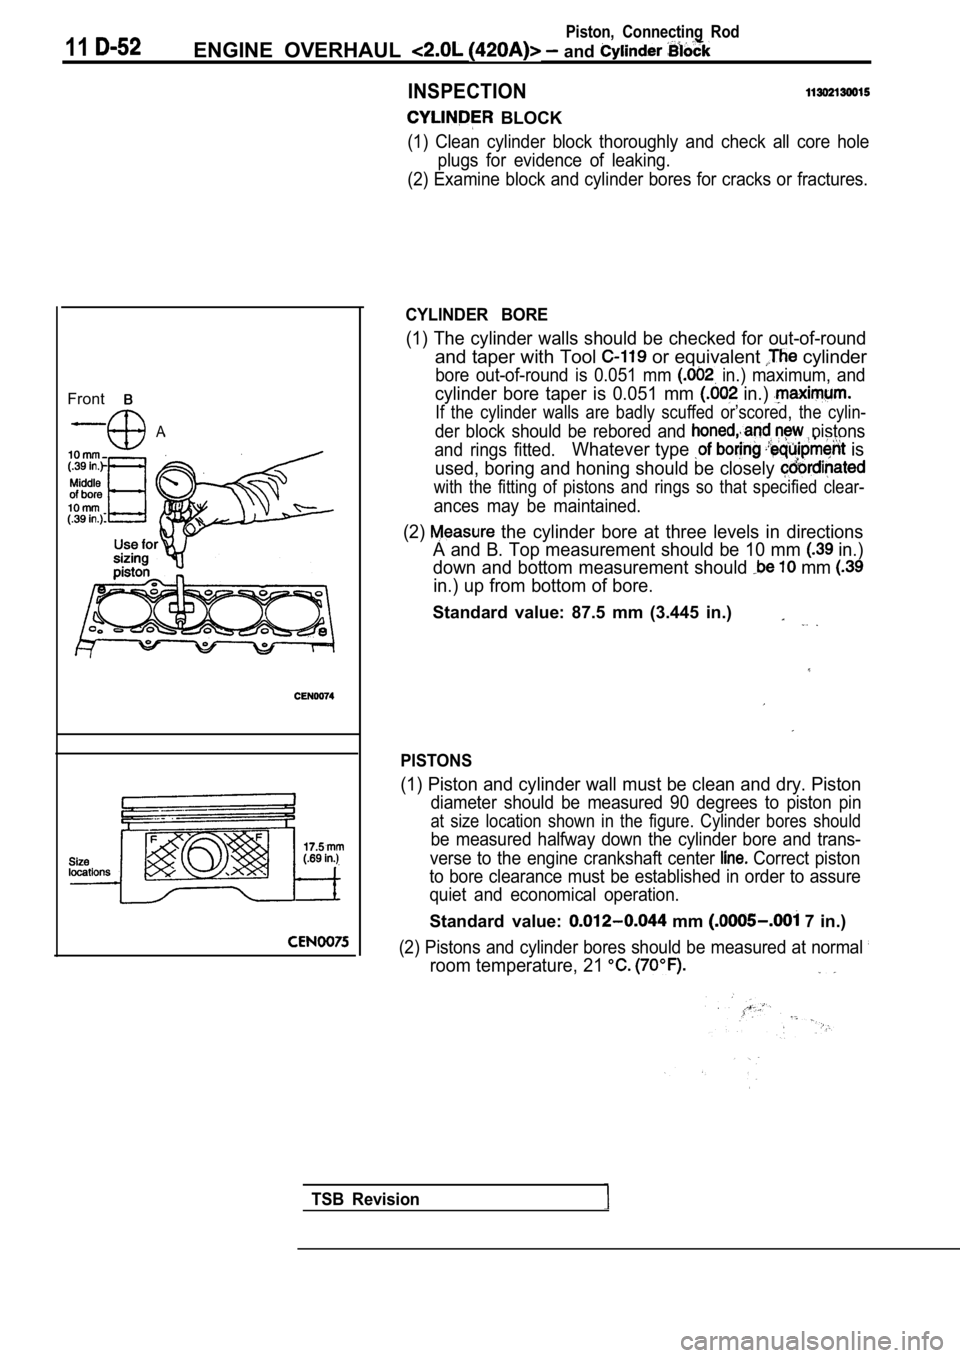
(1) The cylinder walls should be checked for out-of-round
and taper with Tool or equivalent cylinder
bore out-of-round is 0.051 mm in.) maximum, and
cylinder bore taper is 0.051 mm in.)
If the cylinder walls are badly scuffed or’scored, the cylin-
der block should be rebored and pistons
and rings fitted.
Whatever type is
used, boring and honing should be closely
with the fitting of pistons and rings so that speci fied clear-
ances may be maintained.
(2) the cylinder bore at three levels in directions
A and B. Top measurement should be 10 mm
in.)
down and bottom measurement should
mm
in.) up from bottom of bore.
Standard value: 87.5 mm (3.445 in.)
PISTONS
(1) Piston and cylinder wall must be clean and dry. Piston
diameter should be measured 90 degrees to piston pi n
at size location shown in the figure. Cylinder bores should
be measured halfway down the cylinder bore and tran s-
verse to the engine crankshaft center
Correct piston
to bore clearance must be established in order to a ssure
quiet and economical operation.
Standard value: mm 7 in.)
(2) Pistons and cylinder bores should be measured a t normal
room temperature, 21
TSB Revision
Page 259 of 2103
Piston,
E N G I N E
PISTON RING
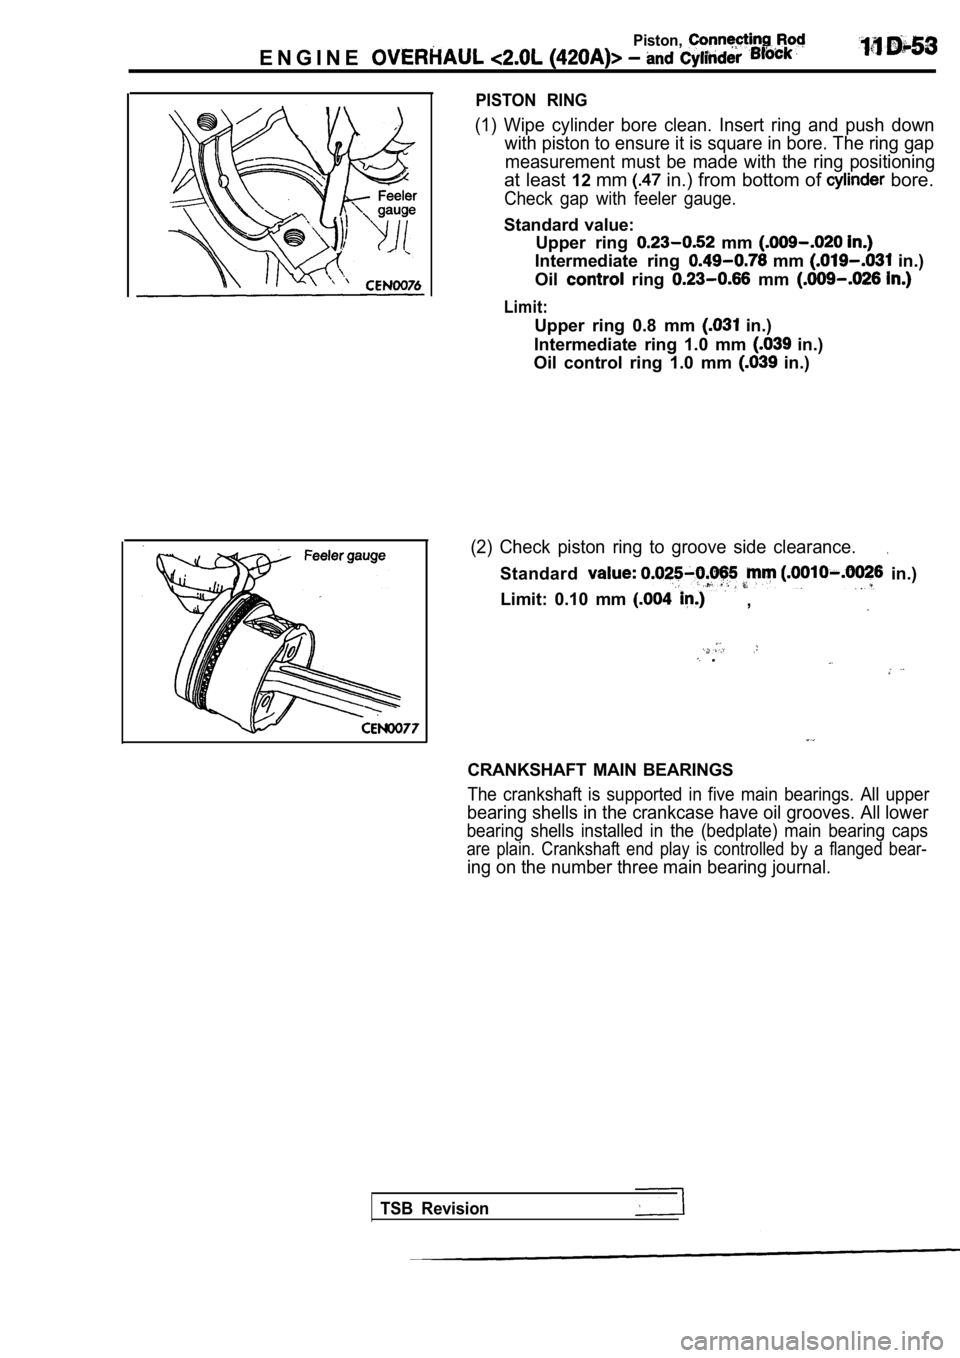
(1) Wipe cylinder bore clean. Insert ring and push down
with piston to ensure it is square in bore. The rin g gap
measurement must be made with the ring positioning
at least 12mm in.) from bottom of bore.
Check gap with feeler gauge.
Standard value:
Upper ring
mm
Intermediate ring mm in.)
Oil
ring mm
Limit:
Upper ring 0.8 mm in.)
Intermediate ring 1.0 mm
in.)
Oil control ring 1.0 mm
in.)
(2) Check piston ring to groove side clearance..
Standard in.)
Limit: 0.10 mm
,
.
CRANKSHAFT MAIN BEARINGS
The crankshaft is supported in five main bearings. All upper
bearing shells in the crankcase have oil grooves. All lower
bearing shells installed in the (bedplate) main bea ring caps
are plain. Crankshaft end play is controlled by a flanged bear-
ing on the number three main bearing journal.
TSB Revision
Page 260 of 2103
piston,
ENGINE OVERHAUL Cylinder Block
CONNECTING BEARING
(1) Place a piece of Plastigage across the, width of
bearing in the cap 6.35
mm off center and away -from the hole.
suspect areas can be checked, by placing in
the suspect area.
(2) Before assembling the rod with in place;
‘the crankshaft must be rotated the connecting rod
being checked starts moving toward the top of the e ngine.,
Only then should the cap be and torqued
to the specification.
Do not rotate the crankshaft while assembling the cap
or the Plastigage may be smeared, giving inaccurate re-
sults.
(3) Remove the bearing cap and compare the width of the
flattened Plastigage with the metric scale provided on
the package.
Standard value: mm in.)
Limit: 0.075 mm
in.)
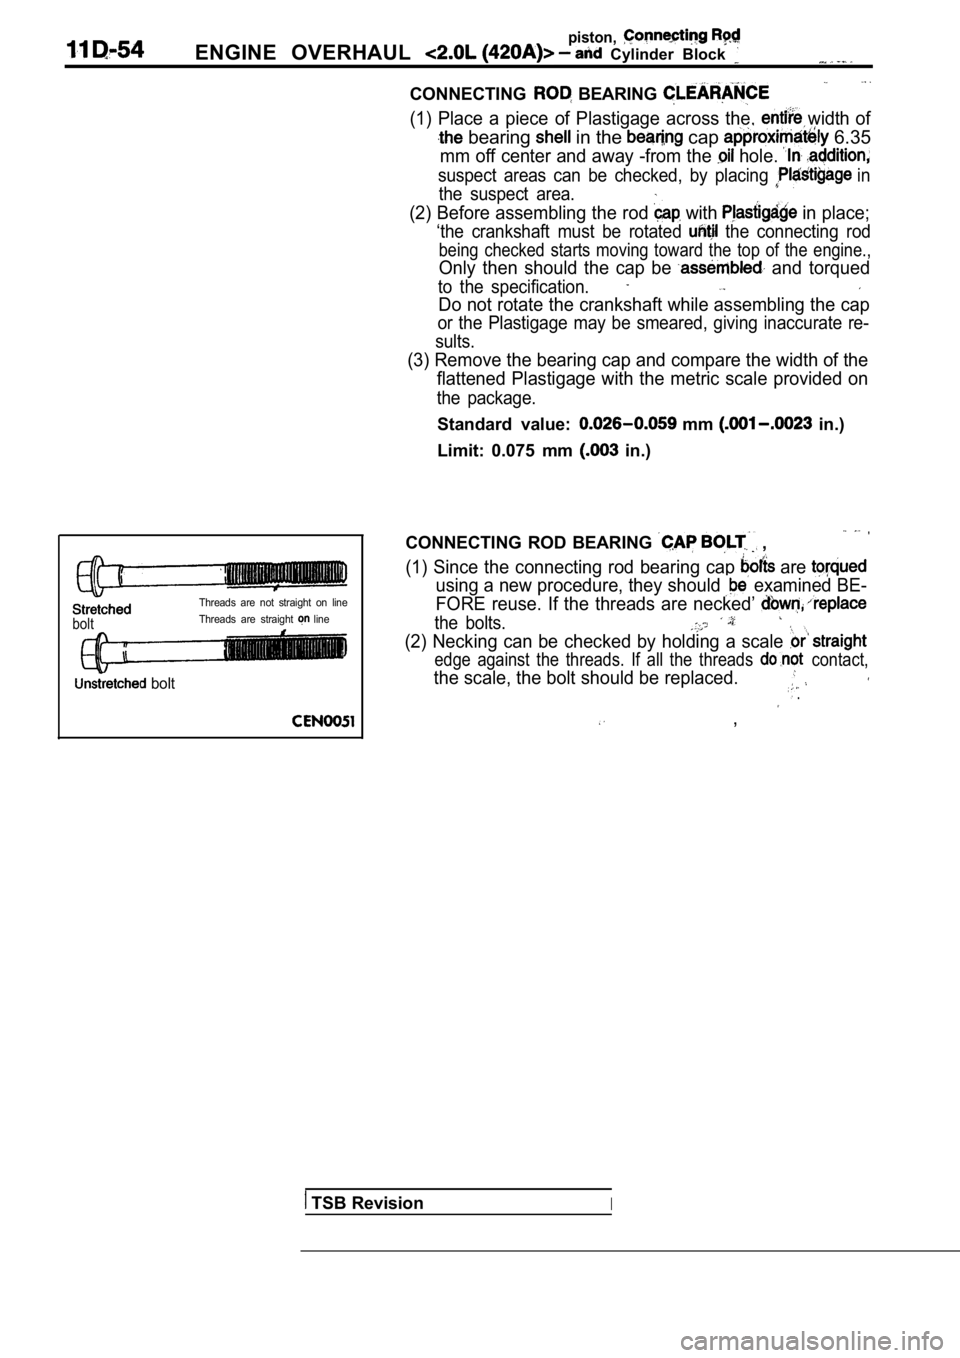
bolt
Threads are not straight on line
Threads are straight
line,
bolt
CONNECTING ROD BEARING ,
(1) Since the connecting rod bearing cap are
using a new procedure, they should examined BE-
FORE reuse. If the threads are necked’
the bolts.
(2) Necking can be checked by holding a scale
edge against the threads. If all the threads contact,
the scale, the bolt should be replaced. .
,
TSB RevisionI