MITSUBISHI SPYDER 1990 Service Repair Manual
Manufacturer: MITSUBISHI, Model Year: 1990, Model line: SPYDER, Model: MITSUBISHI SPYDER 1990Pages: 2103, PDF Size: 68.98 MB
Page 261 of 2103
OVERHAUL
CRANKSHAFT
REMOVAL
Procedures after removing crankshaft sprocket, oil pan, pis-
tons and connecting rods.
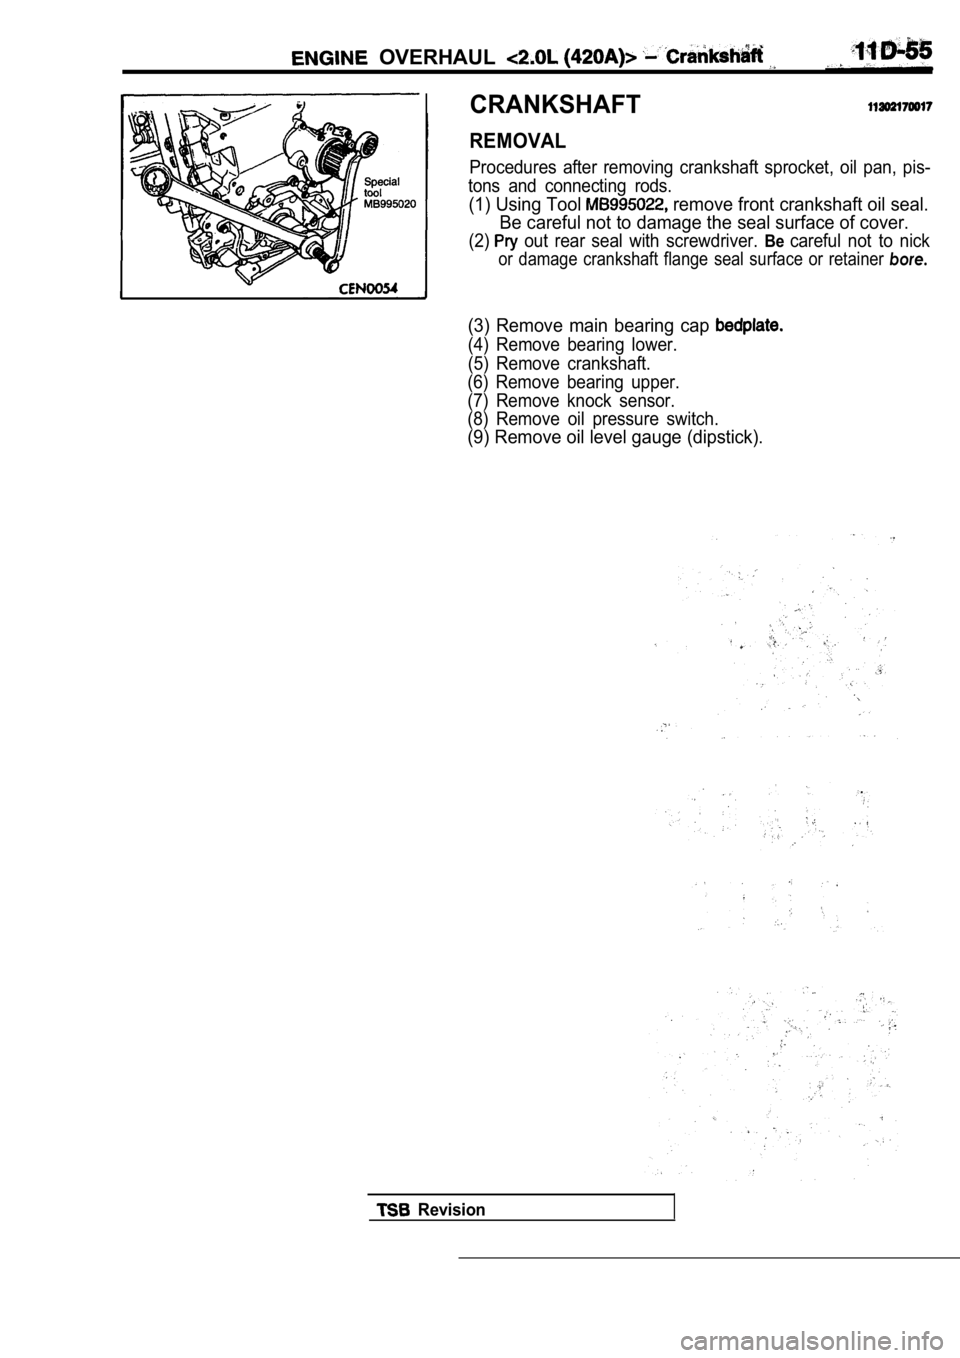
(1) Using Tool remove front crankshaft oil seal.
Be careful not to damage the seal surface of cover.
(2) out rear seal with screwdriver. Becareful not to nick
or damage crankshaft flange seal surface or retaine r bore.
(3) Remove main bearing cap
(4) Remove bearing lower.
(5) Remove crankshaft.
(6) Remove bearing upper.
(7) Remove knock sensor.
(8) Remove oil pressure switch.
(9) Remove oil level gauge (dipstick).
Revision
Page 262 of 2103
ENGINE Crankshaft
Oil holes
I N S T A L L A T I O N
(1) Install oil level gauge (dipstick).
(2) Install oil pressure switch.
,
,
(3) Install knock sensor. Tighten knock sensor to 10 Nm
(7 torque. Over or under tightening effects knock
sensor performance, possibly causing improper spark con-
t r o l .
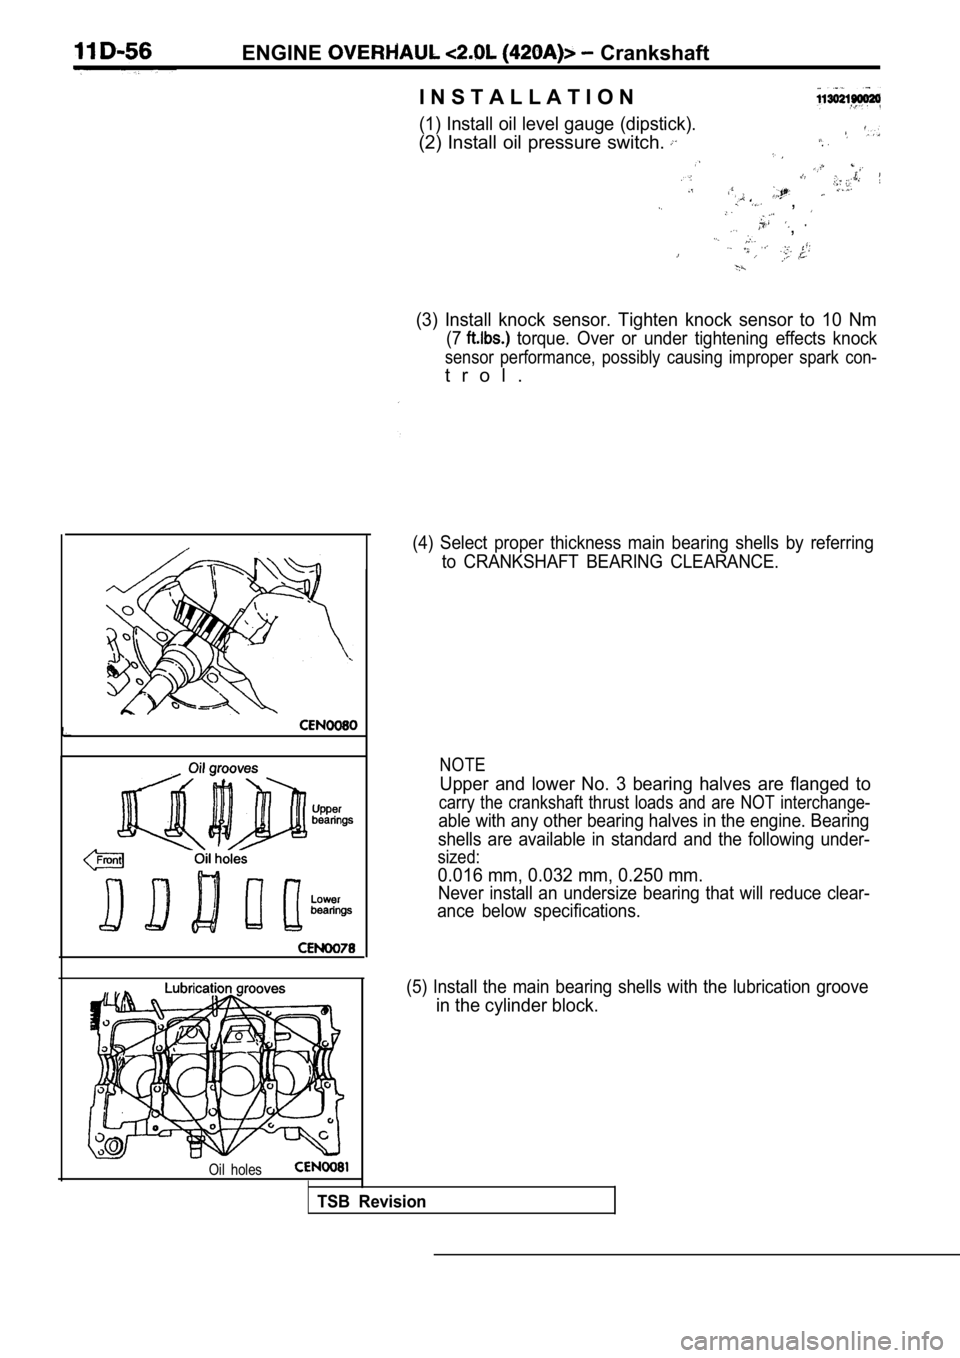
(4) Select proper thickness main bearing shells by referring
to CRANKSHAFT BEARING CLEARANCE.
NOTE
Upper and lower No. 3 bearing halves are flanged to
carry the crankshaft thrust loads and are NOT inter change-
able with any other bearing halves in the engine. Bearing
shells are available in standard and the following under-
sized:
0.016 mm, 0.032 mm, 0.250 mm.
Never install an undersize bearing that will reduce clear-
ance below specifications.
(5) Install the main bearing shells with the lubric ation groove
in the cylinder block.
TSB Revision
Page 263 of 2103
ENGINE OVERHAUL
NOTE
All upper bearing
in the crankcase have oil grooves.
All lower bearing shells installed in the (bedplate ) main
bearing caps are plain. Crankshaft end play is cont rolled
by a flanged bearing on the number three main beari ng
journal.
(6) Make certain oil holes in block line up with oi l hole in
bearings and bearing tabs seat in the
tab slots.
(7) Oil the bearings and, journals and install cran kshaft.
Caution
D o get oil on
If may effect the sealer ability the
to cylinder block.
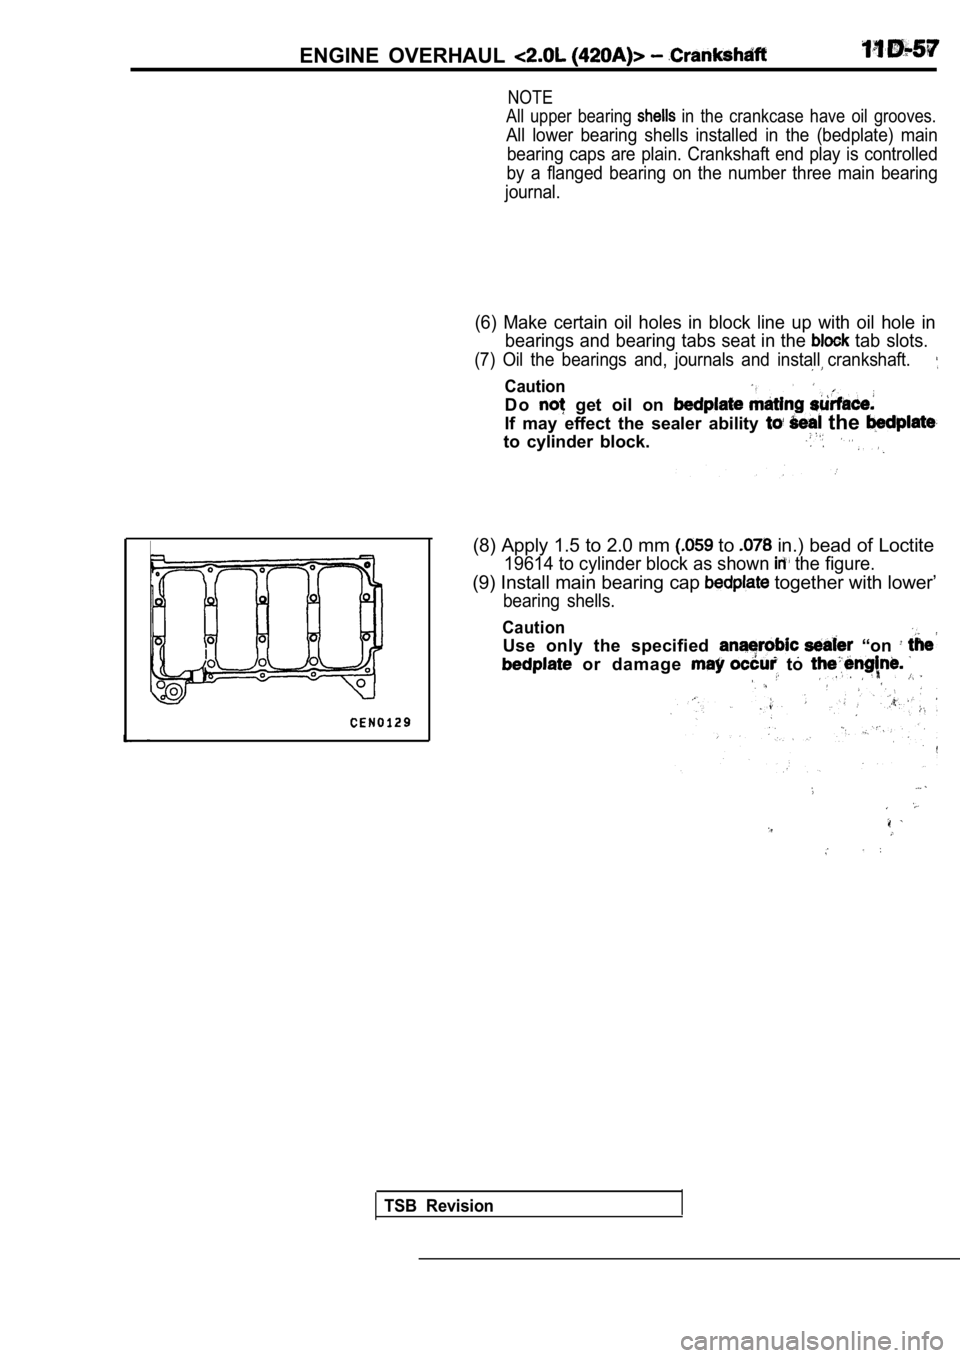
(8) Apply 1.5 to 2.0 mm to in.) bead of Loctite
19614 to cylinder block as shown the figure.
(9) Install main bearing cap together with lower’
bearing shells.
Caution
Use only the specified “on
or damage to
TSB Revision
Page 264 of 2103
11E N G I N E.
installing the bolts, the threads should be oiled
with engine oil.
Crankcasebaffle
TSB Revision
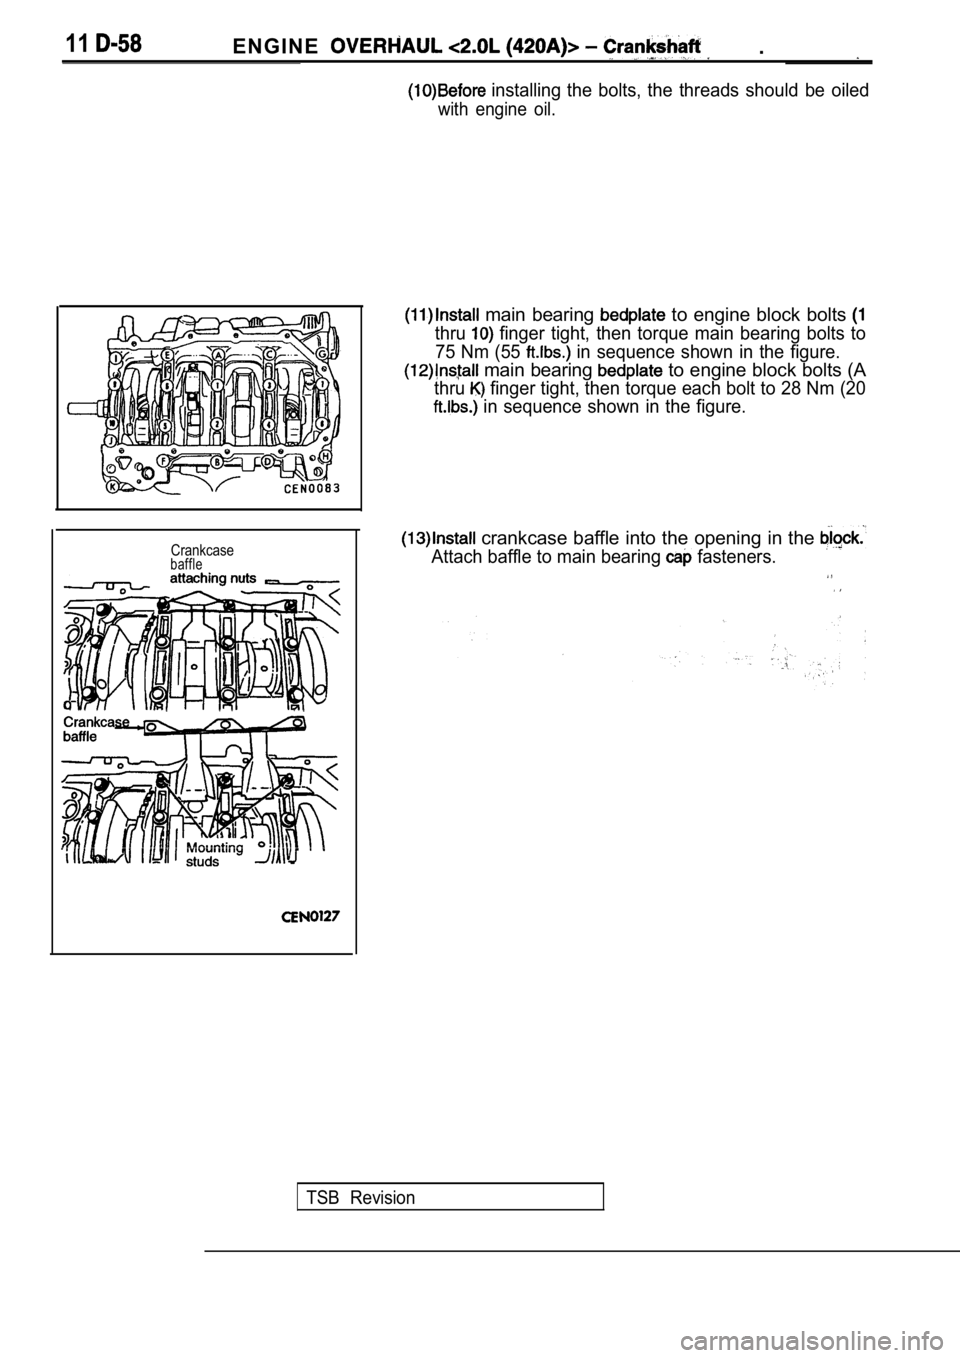
main bearing to engine block bolts
thru finger tight, then torque main bearing bolts to
75 Nm (55
in sequence shown in the figure.
main bearing to engine block bolts (A
thru finger tight, then torque each bolt to 28 Nm (20
in sequence shown in the figure.
crankcase baffle into the opening in the
Attach baffle to main bearing fasteners.
Page 265 of 2103
ENGINE OVERHAUL
2
Oil seal
95059
seal
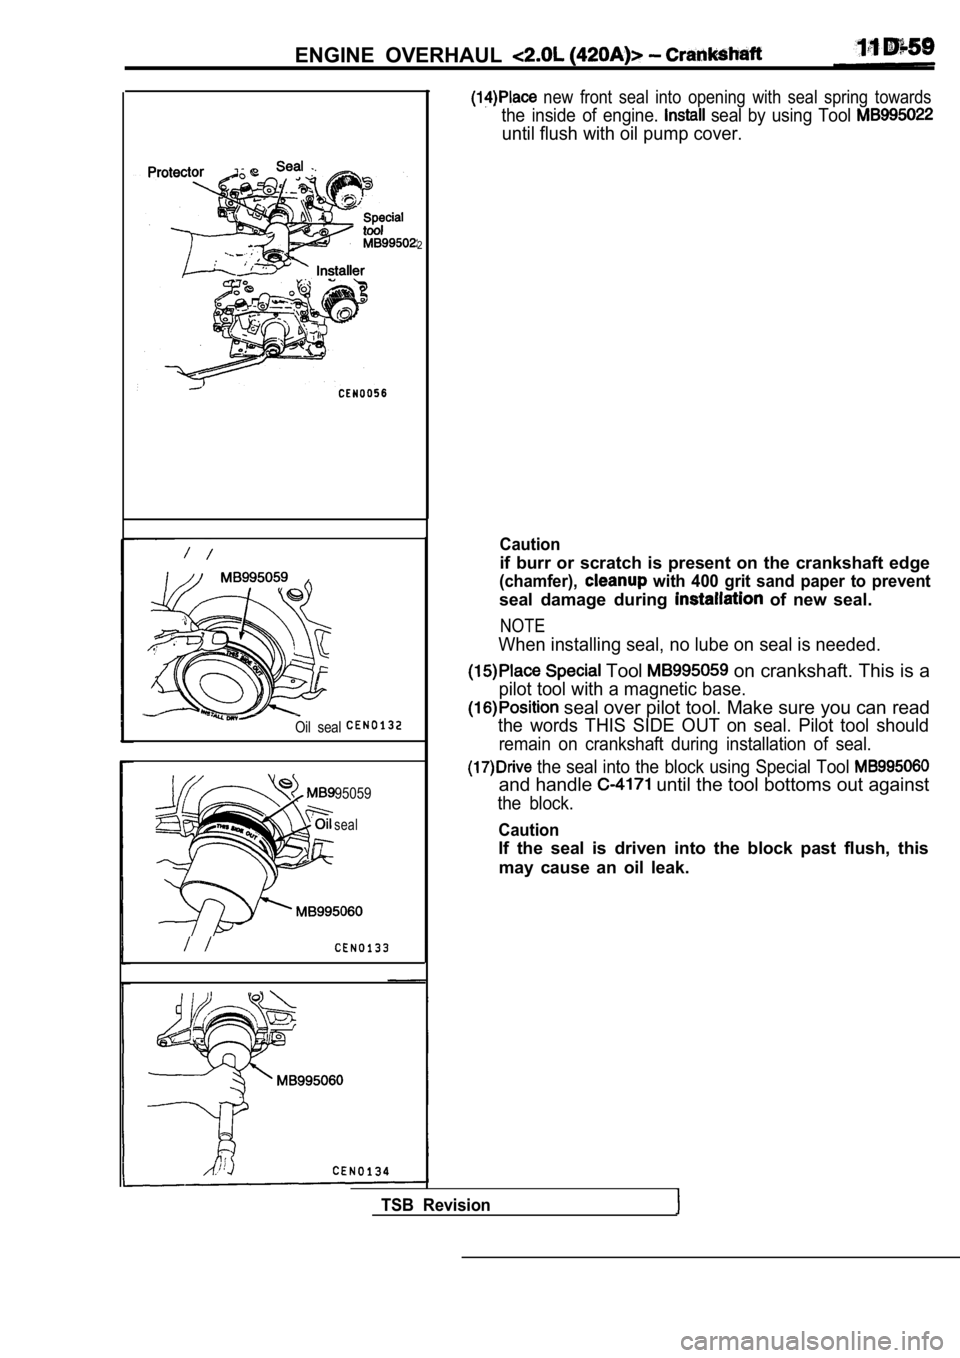
new front seal into opening with seal spring towards
the inside of engine. seal by using Tool
until flush with oil pump cover.
Caution
if burr or scratch is present on the crankshaft edge
(chamfer), with 400 grit sand paper to prevent
seal damage during of new seal.
NOTE
When installing seal, no lube on seal is needed.
Tool on crankshaft. This is a
pilot tool with a magnetic base.
seal over pilot tool. Make sure you can read
the words THIS SIDE OUT on seal. Pilot tool should
remain on crankshaft during installation of seal.
the seal into the block using Special Tool
and handle until the tool bottoms out against
the block.
Caution
If the seal is driven into the block past flush, this
may cause an oil leak.
TSB Revision
Page 266 of 2103
11E N G I N E. .
INSPECTION
CRANKSHAFT MAIN JOURNALS
The crankshaft journals should be checked for excessive
wear, taper and scoring. Limits of taper or
on any crankshaft journals should be held. to mm.
in.). Journal grinding should not exceed 0.305 mm
in.) under the standard Do NOT
grind thrust faces of 3 journal. Do NOT
nick crank pin or journal fillets. After grinding, remove
rough edges from crankshaft oil holes and clean out all
passages.,
Caution.
With the nodular cast iron
tant that the final paper or journal
regrind be in the same direction as normal rotation’
in the engine.
TSB Revision
Page 267 of 2103
ENGINE
BEARING CLEARANCE
(1) The. total: clearance of the main bearings can only be
determined by removing the weight of the crankshaft .
This is accomplished by having the engine turned upside
down on the engine stand. This will remove all the crank-
weight off the bearing surface.
(2) Place, a piece of Plastigage across the entire width of
the bearing shell in the approximately 6.35 mm
in.) off center and away from the oil holes. In addition,
suspect areas can be checked by placing the Plastig age
in the suspect area.
Torque the
bolts of the bearing being checked
to the proper specifications.
Caution
Do not rotate crankshaft, or the Plastigage may be
smeared.
(3) Remove the and compare the width of the flat-
tened Plastigage with the metric scale provided on the
package.
Standard value: mm in.)
Stretched
boltThreads are straight on line,
Unstretched bolt
MAIN BEARING BOLTS
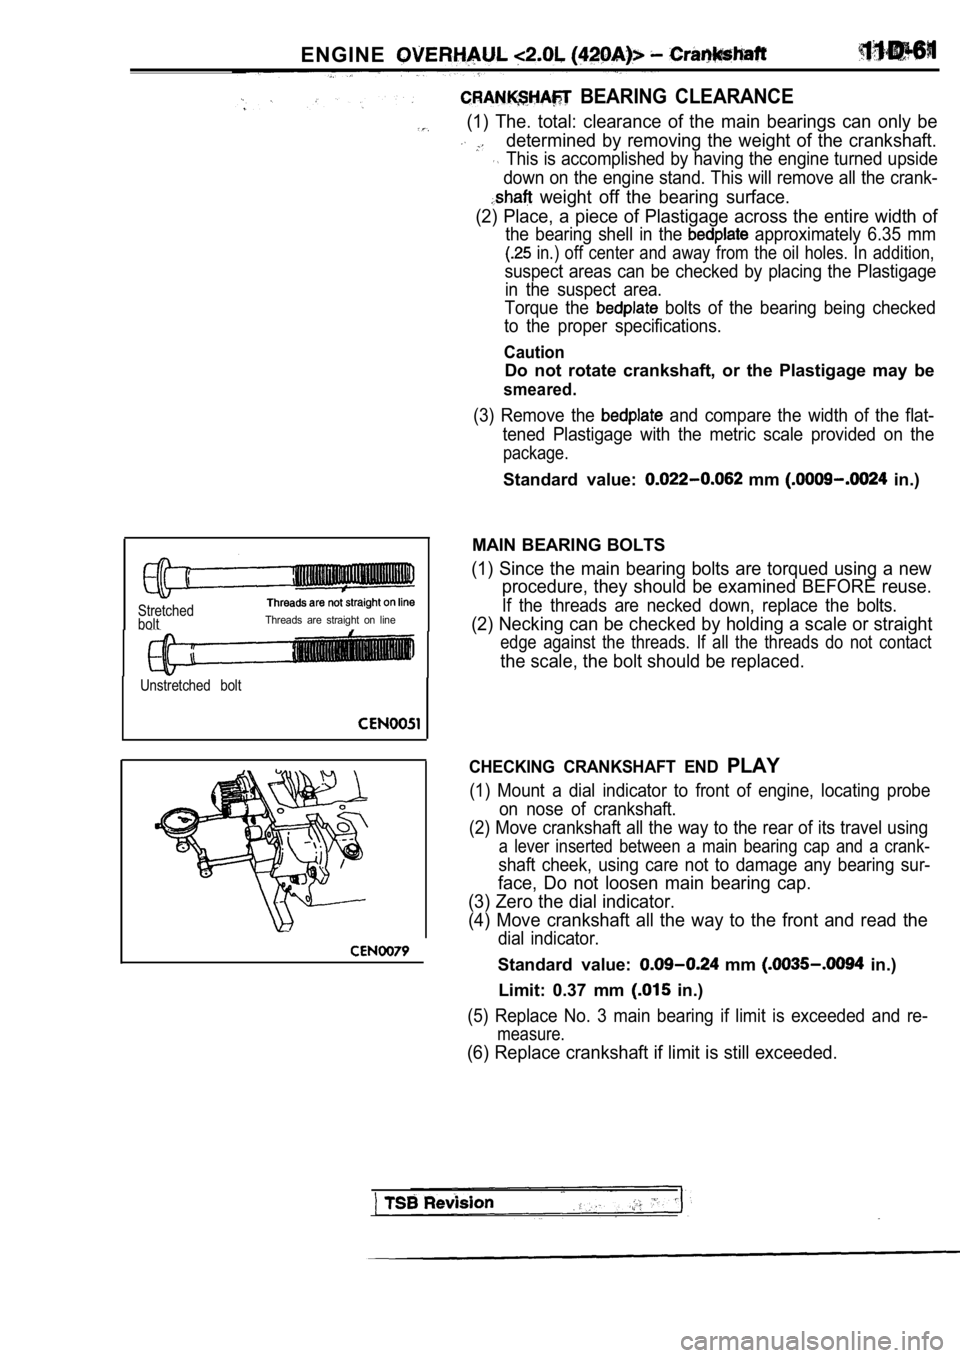
(1) Since the main bearing bolts are torqued using a new
procedure, they should be examined BEFORE reuse.
If the threads are necked down, replace the bolts.
(2) Necking can be checked by holding a scale or st raight
edge against the threads. If all the threads do not contact
the scale, the bolt should be replaced.
CHECKING CRANKSHAFT END PLAY
(1) Mount a dial indicator to front of engine, locating probe
on nose of crankshaft.
(2) Move crankshaft all the way to the rear of its travel using
a lever inserted between a main bearing cap and a c rank-
shaft cheek, using care not to damage any bearing sur-
face, Do not loosen main bearing cap.
(3) Zero the dial indicator.
(4) Move crankshaft all the way to the front and re ad the
dial indicator.
Standard value: mm in.)
Limit: 0.37 mm
in.)
(5) Replace No. 3 main bearing if limit is exceeded and re-
measure.
(6) Replace crankshaft if limit is still exceeded.
Page 268 of 2103
11ENGINE OVERHAUL
OPTIONAL CRANKSHAFT END PLAY CHECK
(1) Move crankshaft all the way to the rear of its travel using
a lever inserted between a main bearing cap and a c rank-
shaft cheek, using care not to damage any bearing sur-
face. Do not loosen main bearing cap.
(2) Use a feeler gauge between number three thrust bearing
and machined crankshaft surface to determine end pl ay.
Revision
Page 269 of 2103
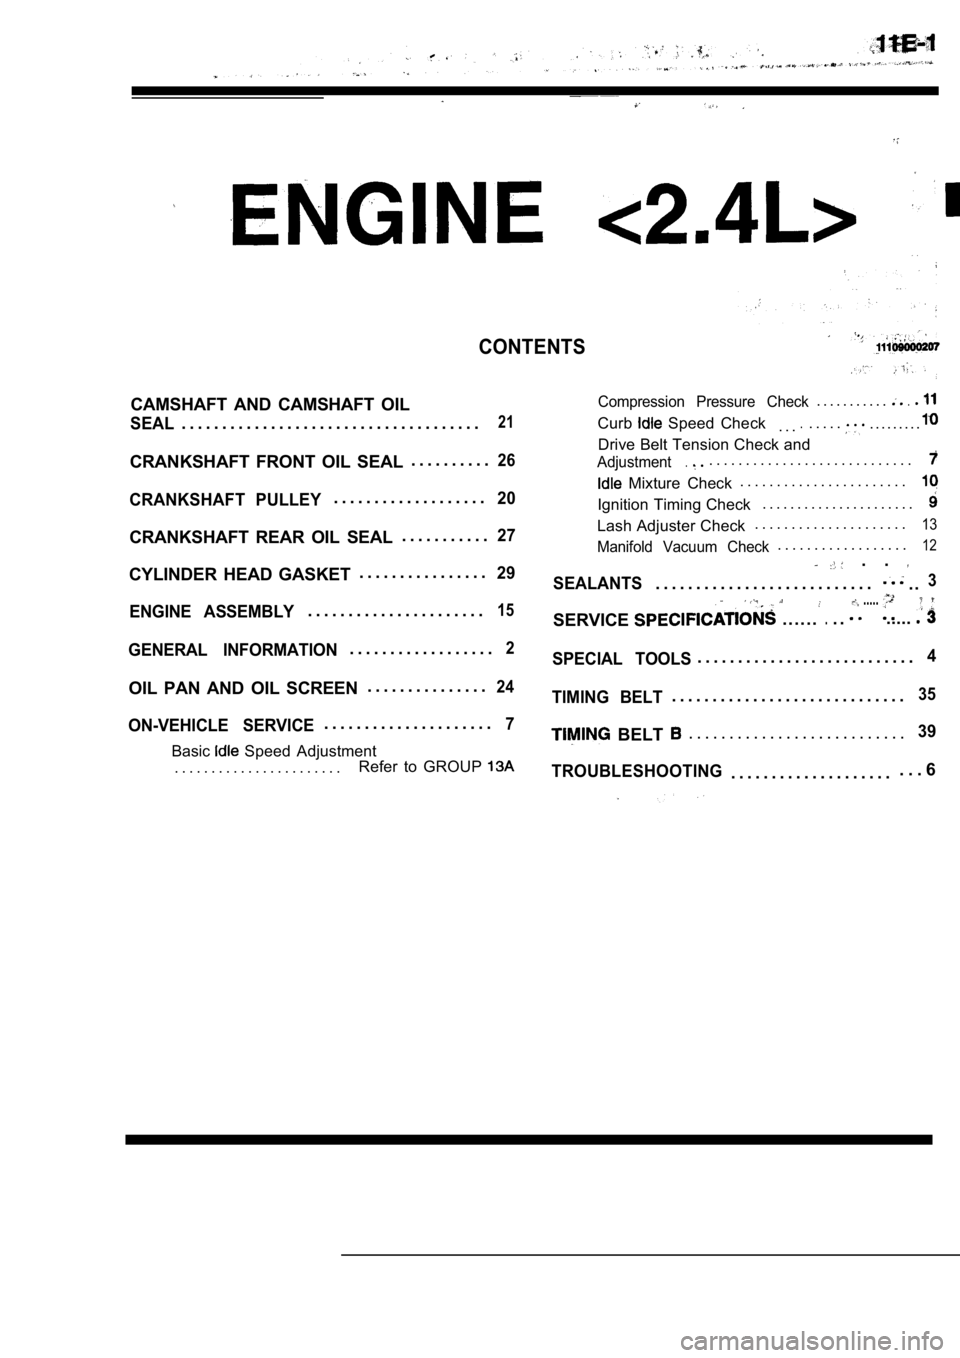
CONTENTS
CAMSHAFT AND CAMSHAFT OILCompression Pressure Check. . . . . . . . . . ..
SEAL. . . . . . . . . . . . . . . . . . . . . . . . . . . . . . . . . . . . .21Curb Speed Check. . ... . . . .. . . . . . . . .
Drive Belt Tension Check and
CRANKSHAFT FRONT OIL SEAL. . . . . . . . . .26Adjustment.. . . . . . . . . . . . . . . . . . . . . . . . . . . .
Mixture Check . . . . . . . . . . . . . . . . . . . . . . .
CRANKSHAFT PULLEY. . . . . . . . . . . . . . . . . . .20Ignition Timing Check
. . . . . . . . . . . . . . . . . . . . . .
. . . . . . . . . . . . . . . . . . . . .13CRANKSHAFT REAR OIL SEAL27Lash Adjuster Check
. . . . . . . . . . .
Manifold Vacuum Check. . . . . . . . . . . . . . . . . .12
CYLINDER HEAD GASKET . . . . . . . . . . . . . . . .29 . .
SEALANTS. . . . . . . . . . . . . . . . . . . . . . . . . . .. .3
ENGINE ASSEMBLY. . . . . . . . . . . . . . . . . . . . . .15SERVICE. . . . . ... .
.....
.....
GENERAL INFORMATION. . . . . . . . . . . . . . . . . .2SPECIAL TOOLS. . . . . . . . . . . . . . . . . . . . . . . . . . .4
OIL PAN AND OIL SCREEN . . . . . . . . . . . . . . .24
ON-VEHICLE SERVICE. . . . . . . . . . . . . . . . . . . . .7
Basic Speed Adjustment
. . . . . . . . . . . . . . . . . . . . . . . Refer to GROUP
TIMING BELT. . . . . . . . . . . . . . . . . . . . . . . . . . . . .35
BELT . . . . . . . . . . . . . . . . . . . . . . . . . . .39
TROUBLESHOOTING
. . . . . . . . . . . . . . . . . . . . . . . 6
Page 270 of 2103
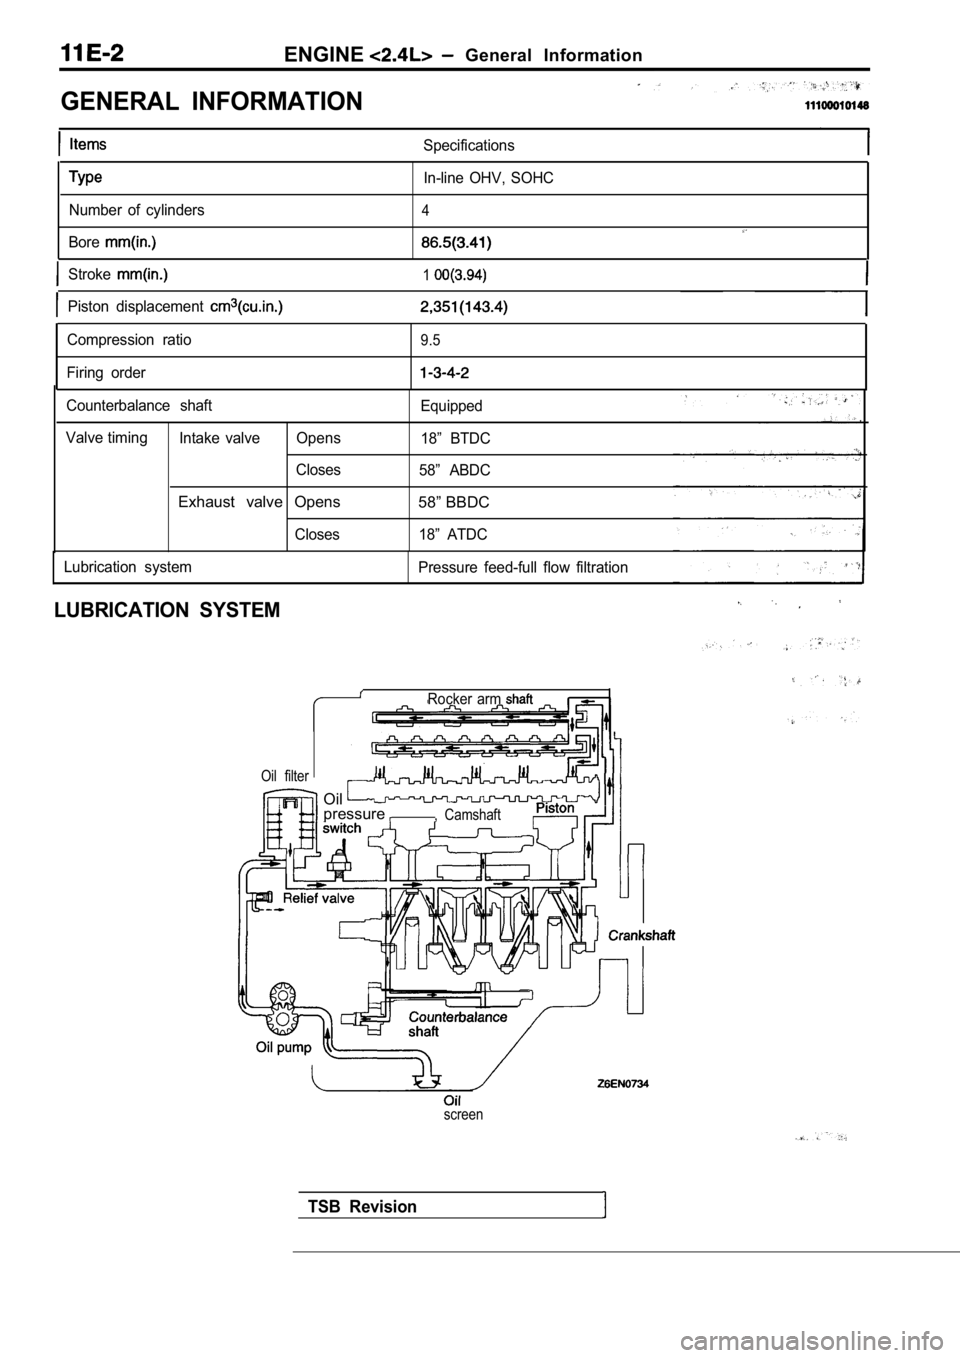
ENGINE General Information
GENERAL INFORMATION
Specifications
Number of cylinders
Bore
In-line OHV, SOHC
4
Stroke1
Piston displacement
Compression ratio9.5
Firing order
Counterbalance shaft Valve timing Intake valve Opens
Closes
Exhaust valve Opens
Closes Equipped
18” BTDC
58” ABDC
58” BBDC
18” ATDC
Lubrication system Pressure feed-full flow filtration
LUBRICATION SYSTEM
Rocker arm
Oil filter
TSB Revision
Oilpressure, Camshaft
screen