MITSUBISHI SPYDER 1990 Service Repair Manual
SPYDER 1990
MITSUBISHI
MITSUBISHI
https://www.carmanualsonline.info/img/19/57345/w960_57345-0.png
MITSUBISHI SPYDER 1990 Service Repair Manual
Trending: differential, maintenance schedule, service reset, air condition, oil filter, headlight bulb, low oil pressure
Page 981 of 2103
MANUAL TRANSAXLE
blockerassemblyI
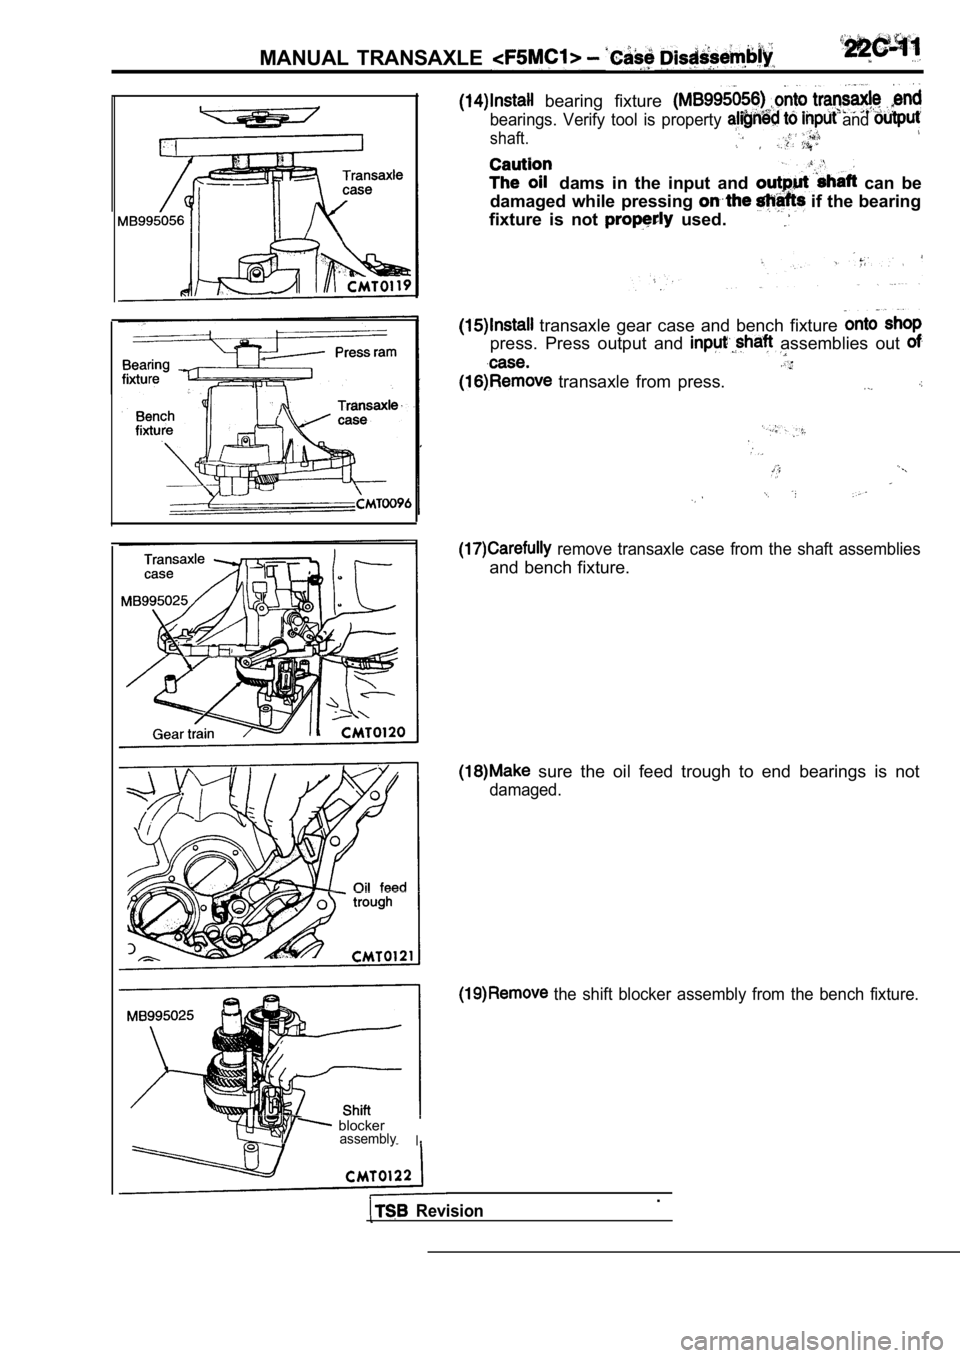
bearing fixture
bearings. Verify tool is property and
shaft.
dams in the input and can be
damaged while pressing
if the bearing
fixture is not
used.
transaxle gear case and bench fixture
press. Press output and assemblies out
transaxle from press.
remove transaxle case from the shaft assemblies
and bench fixture.
sure the oil feed trough to end bearings is not
damaged.
the shift blocker assembly from the bench fixture.
Revision.
Page 982 of 2103
MANUAL TRANSAXLE Case Disassembly
and
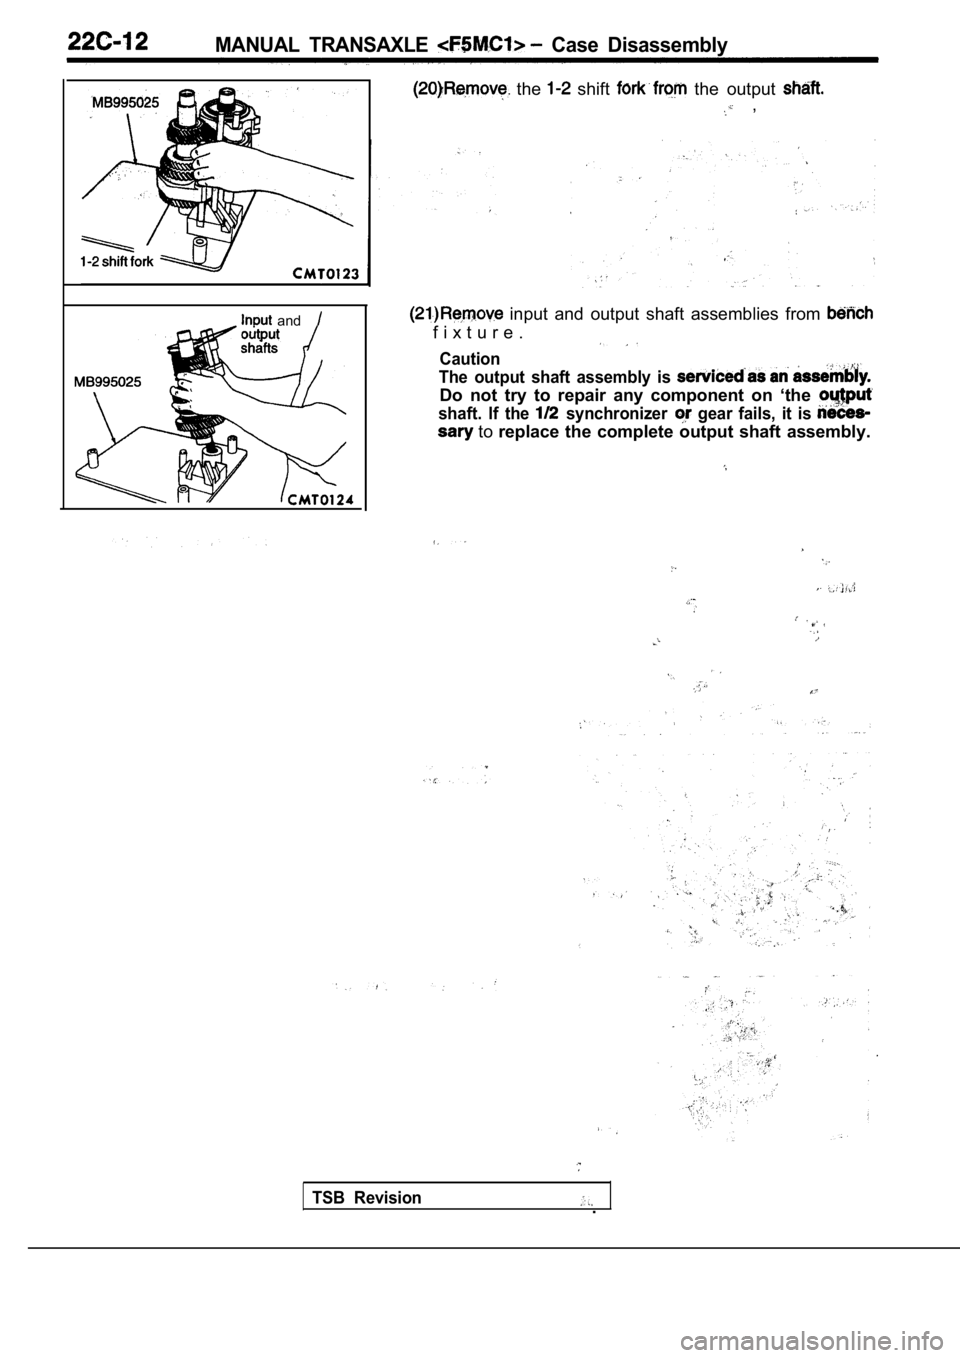
the shift the output ,
input and output shaft assemblies from
f i x t u r e .
Caution
The output shaft assembly is
Do not try to repair any component on ‘the
shaft. If the synchronizer gear fails, it is
to replace the complete output shaft assembly.
TSB Revision.
Page 983 of 2103
M A N U A L T R A N S A X L E
speed
speed
Sleeve speed
gearStop ring gear
Caged
INPUT SHAFT
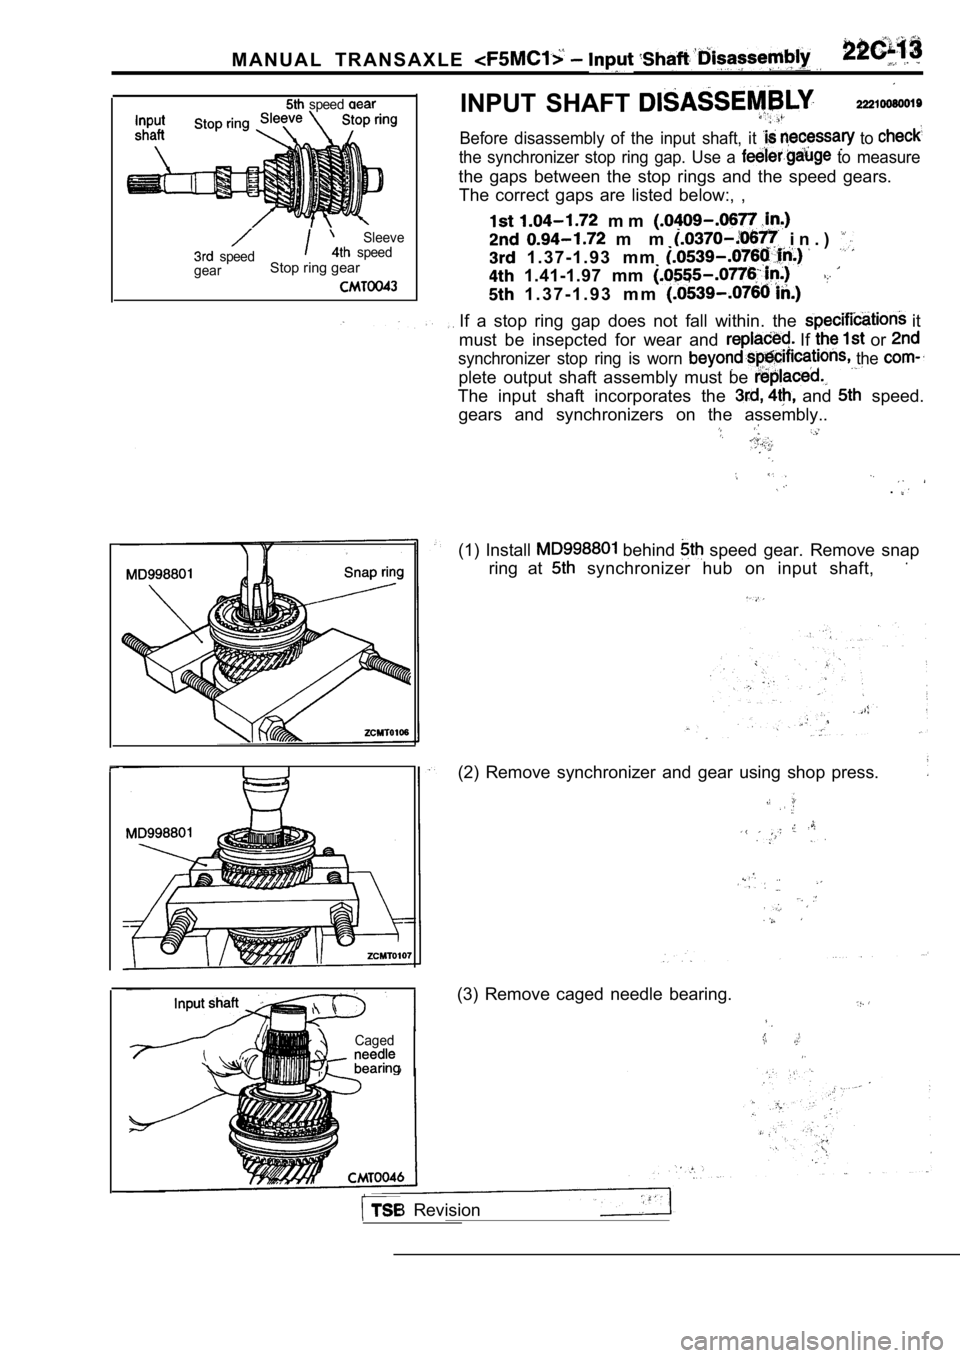
Before disassembly of the input shaft, it to
the synchronizer stop ring gap. Use a to measure
the gaps between the stop rings and the speed gears .
The correct gaps are listed below:, ,
m m
m m i n . )
1 . 3 7 - 1 . 9 3 m m
1.41-1.97 mm
1 . 3 7 - 1 . 9 3 m m
If a stop ring gap does not fall within. the it
must be insepcted for wear and
If or
synchronizer stop ring is worn the
plete output shaft assembly must be
The input shaft incorporates the and speed.
gears and synchronizers on the assembly..
.
(1) Install behind speed gear. Remove snap
ring at
synchronizer hub on input shaft,
(2) Remove synchronizer and gear using shop press.
(3) Remove caged needle bearing.
TSB Revision
Page 984 of 2103
MANUAL TRANSAXLE Shaft Disassembly
Thrust washerInput shaft
Separation pinInput shaft
Input shaft
gear
Caged needle
bearing
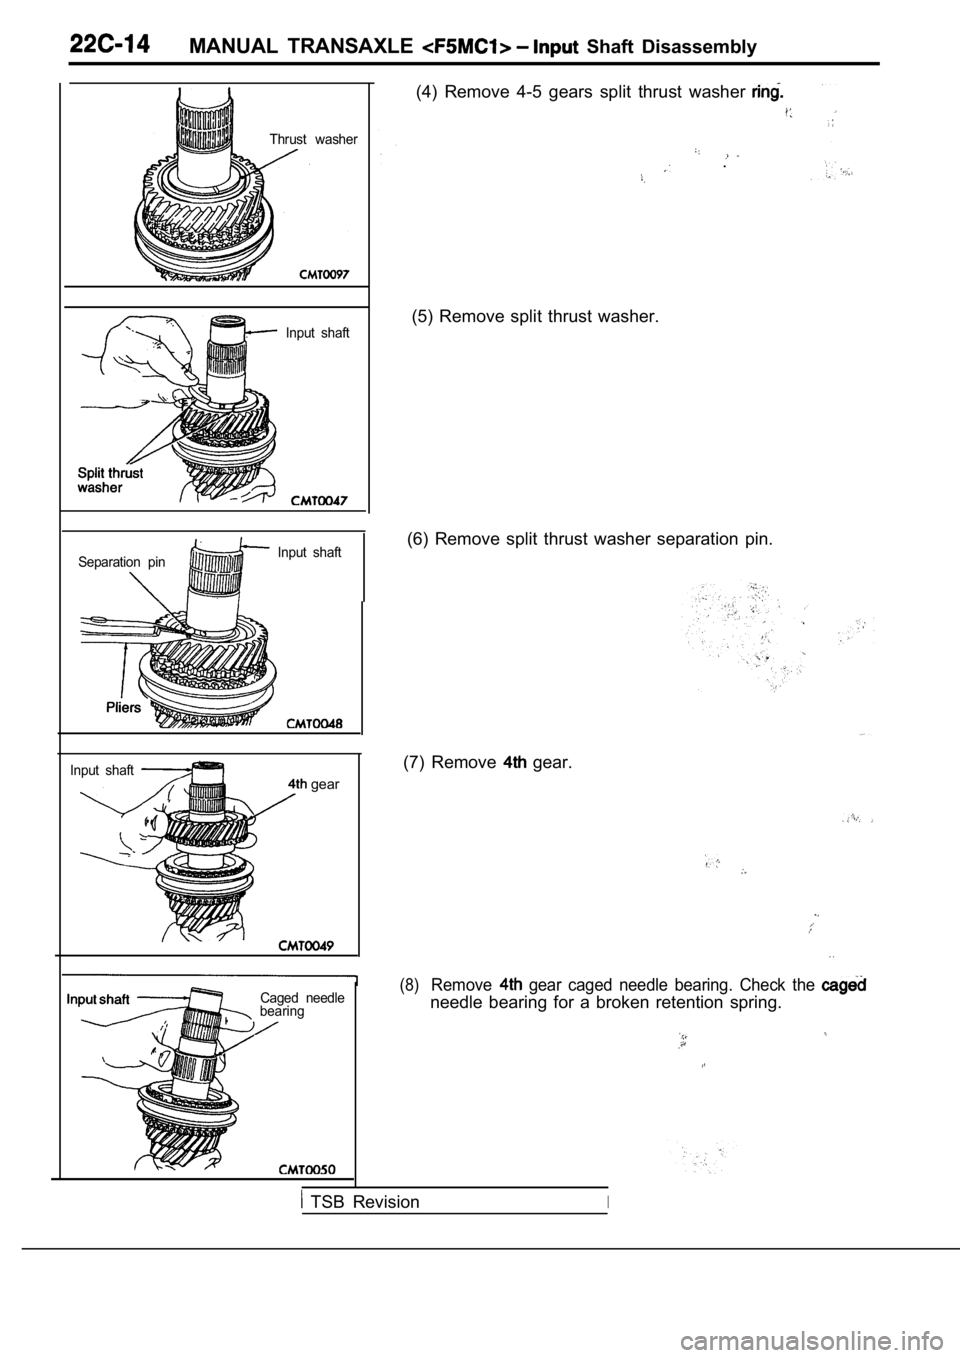
(4) Remove 4-5 gears split thrust washer
.
(5) Remove split thrust washer.
(6) Remove split thrust washer separation pin.
(7) Remove
gear.
(8)Remove gear caged needle bearing. Check the
needle bearing for a broken retention spring.
TSB RevisionI
Page 985 of 2103
MANUAL TRANSAXLE
Snap ring .pliers
shaft
caged
needle bearing
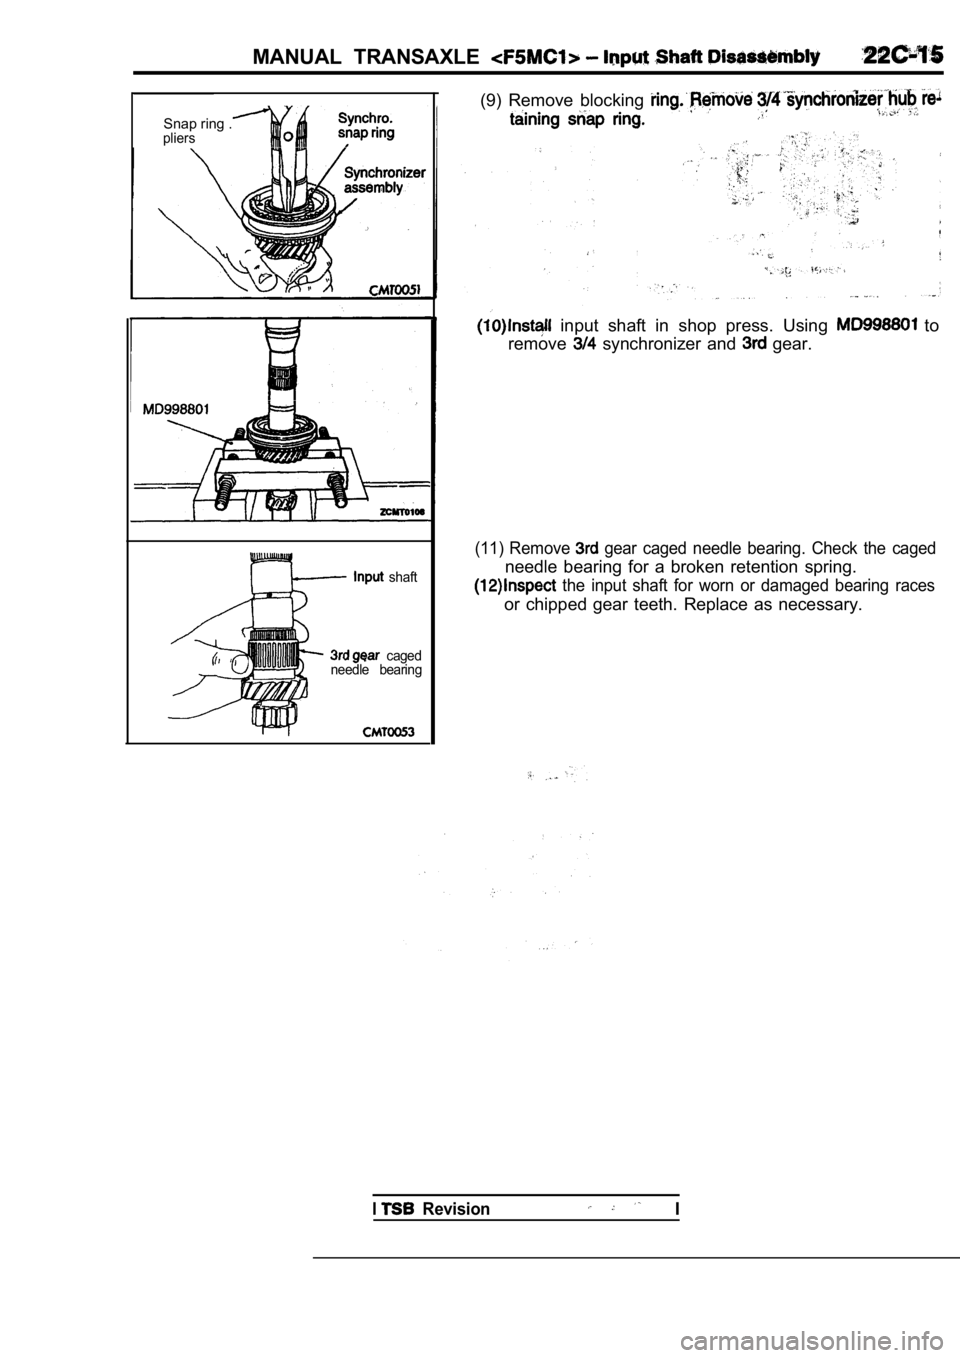
(9) Remove blocking
input shaft in shop press. Using to
remove
synchronizer and gear.
(11) Remove gear caged needle bearing. Check the caged
needle bearing for a broken retention spring.
the input shaft for worn or damaged bearing races
or chipped gear teeth. Replace as necessary.
I Revision I
Page 986 of 2103
Output Disassembly/
MANUAL TRANSAXLE
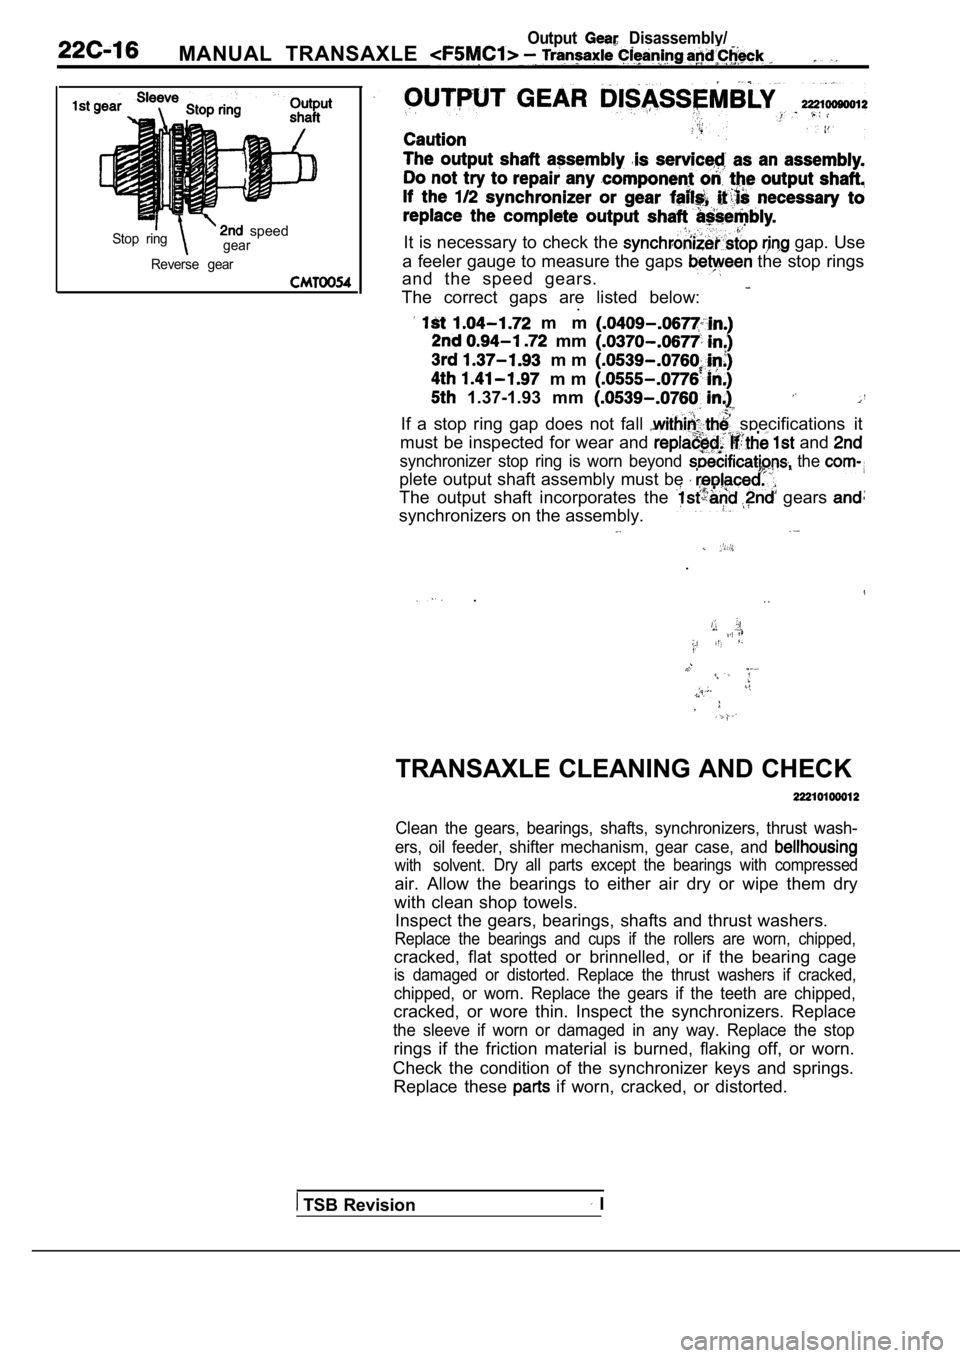
Stop ring speedgear
Reverse gearIt is necessary to check the gap. Use
a feeler gauge to measure the gaps
the stop rings
and the speed gears.
The correct gaps are listed below:
.
m m
mm
m m
m m
1.37-1.93 mm .If a stop ring gap does not fall specifications it
must be inspected for wear and
and
synchronizer stop ring is worn beyond the
plete output shaft assembly must be
The output shaft incorporates the gears
synchronizers on the assembly.
.
.. .
TRANSAXLE CLEANING AND CHECK
Clean the gears, bearings, shafts, synchronizers, t hrust wash-
ers, oil feeder, shifter mechanism, gear case, and
with solvent. Dry all parts except the bearings with compressed
air. Allow the bearings to either air dry or wipe t
hem dry
with clean shop towels. Inspect the gears, bearings, shafts and thrust wash ers.
Replace the bearings and cups if the rollers are wo rn, chipped,
cracked, flat spotted or brinnelled, or if the bearing cage
is damaged or distorted. Replace the thrust washers if cracked,
chipped, or worn. Replace the gears if the teeth are chipped,
cracked, or wore thin. Inspect the synchronizers. R eplace
the sleeve if worn or damaged in any way. Replace t he stop
rings if the friction material is burned, flaking off, or worn.
Check the condition of the synchronizer keys and sp rings.
Replace these
if worn, cracked, or distorted.
TSB Revision I
Page 987 of 2103
Differentialassembly
25
gear bolts
Soeedometer
Pinion shaftDifferential
. . ,
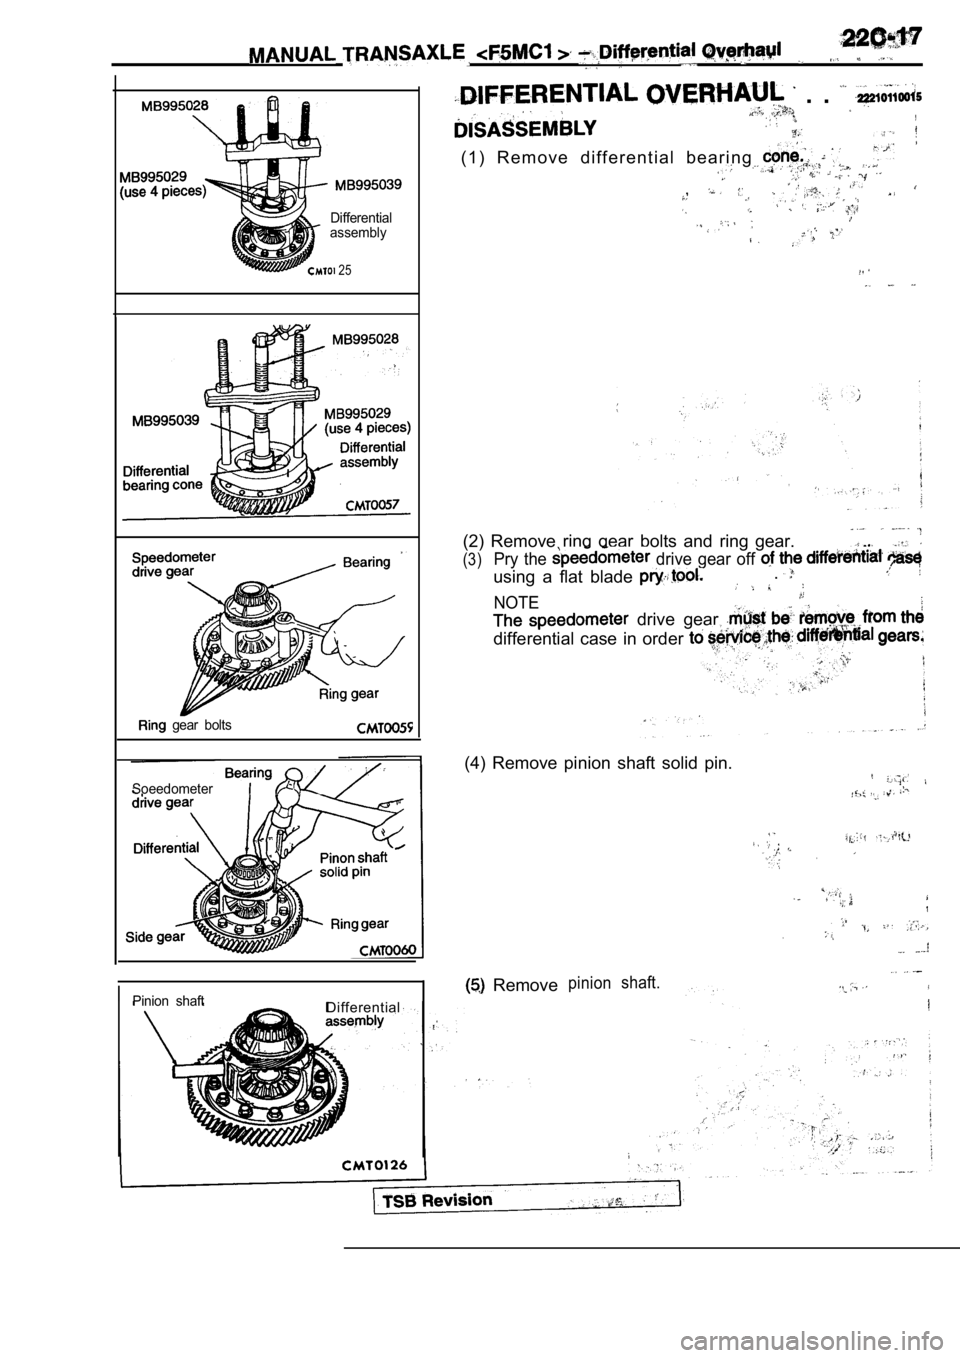
( 1 ) R e m o v e d i f f e r e n t i a l b e a r i n g ,,
(2) Remove ring gear bolts and ring gear.
(3)Pry the drive gear off
using a flat blade .
NOTE
drive gear
differential case in order
(4) Remove pinion shaft solid pin.
,
.,
Removepinionshaft.
Page 988 of 2103
MANUAL TRANSAXLE
DifferentialassemblySide,
Pinion
wash
Pinion
Ring gear
thrust washer
Pinion shaft
Speedometer
drive gear
gear
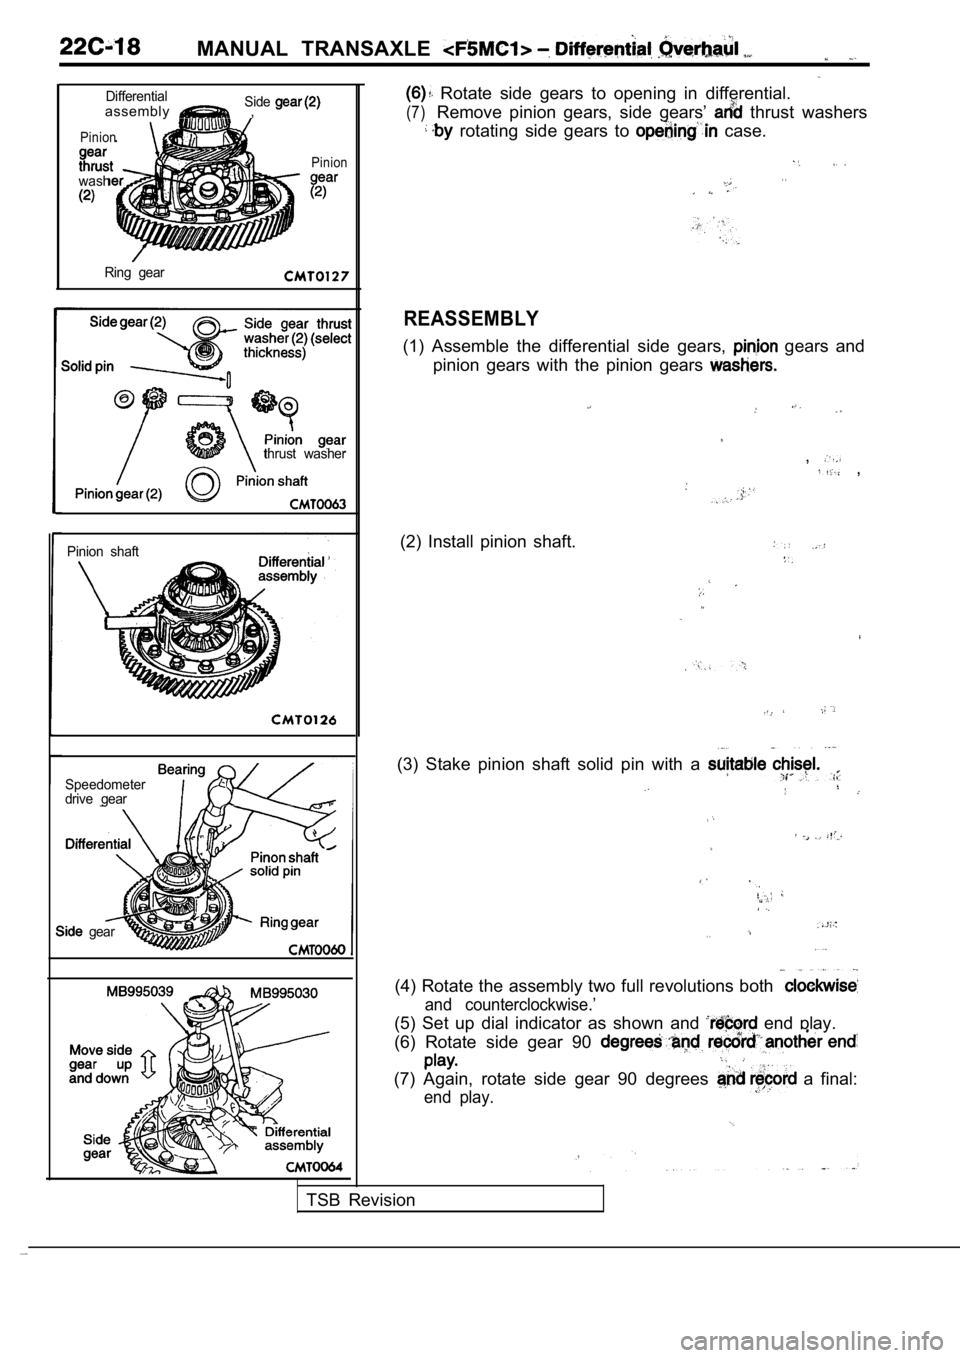
Rotate side gears to opening in differential.
(7)Remove pinion gears, side gears’ thrust washers
rotating side gears to case.
. .
REASSEMBLY
(1) Assemble the differential side gears, gears and
pinion gears with the pinion gears
, ,
(2) Install pinion shaft.
(3) Stake pinion shaft solid pin with a
. .
(4) Rotate the assembly two full revolutions both
and counterclockwise.’
(5) Set up dial indicator as shown and end play.
(6) Rotate side gear 90
(7) Again, rotate side gear 90 degrees a final:
end play.
TSB Revision
Page 989 of 2103
MANUAL TRANSAXLE . .
Move sideg e a r u pand down
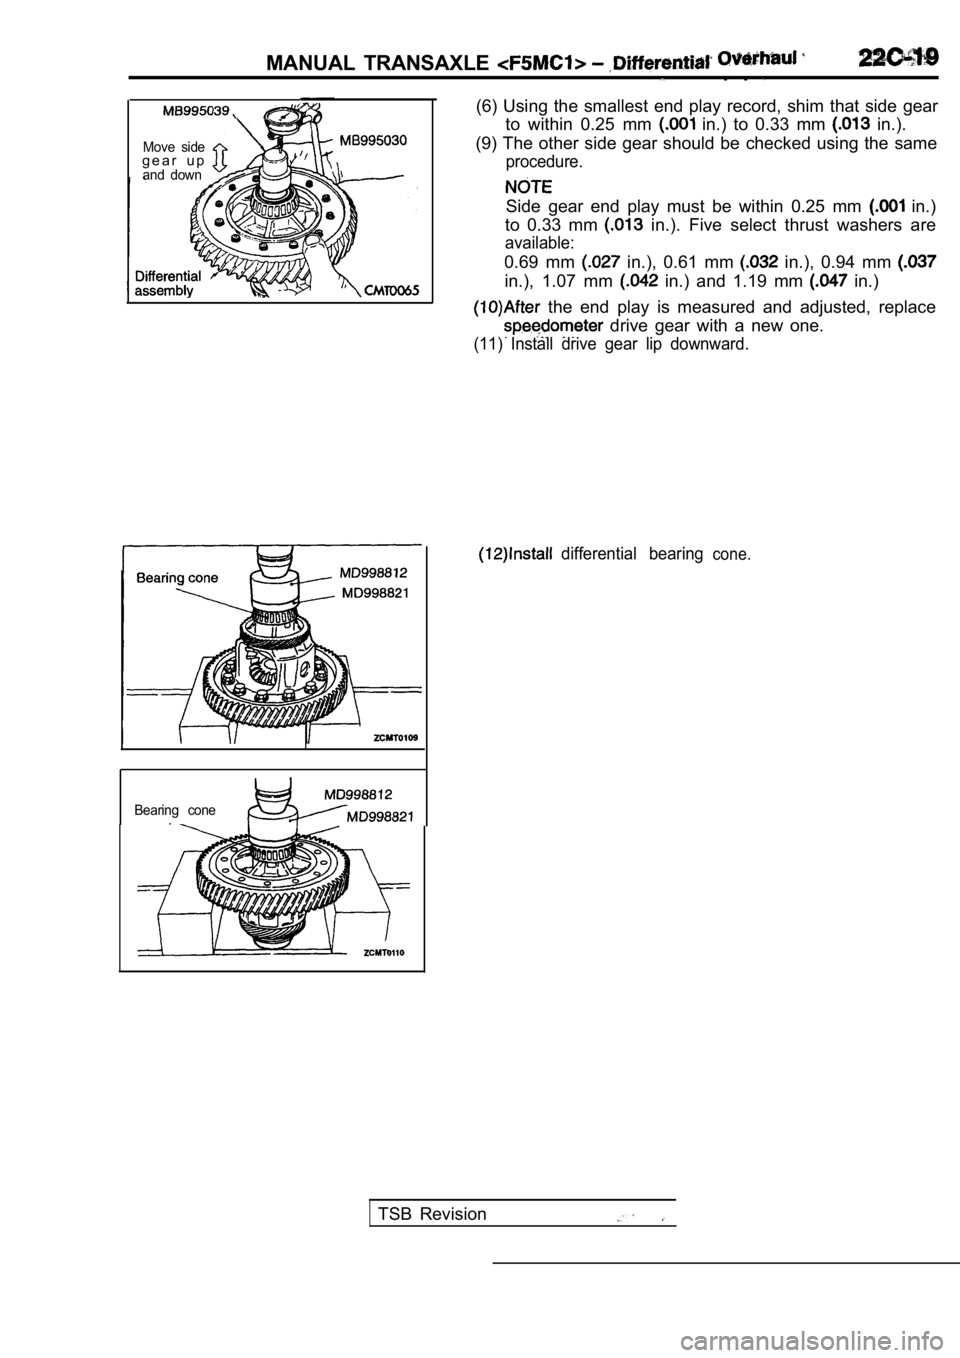
Bearing cone.(6) Using the smallest end play record, shim that s
ide gear
to within 0.25 mm
in.) to 0.33 mm in.).
(9) The other side gear should be checked using the same
procedure.
Side gear end play must be within 0.25 mm in.)
to 0.33 mm
in.). Five select thrust washers are
available:
0.69 mm in.), 0.61 mm in.), 0.94 mm
in.), 1.07 mm in.) and 1.19 mm in.)
the end play is measured and adjusted, replace
drive gear with a new one.
(11) Install drive gear lip downward.
differential bearingcone.
TSB Revision
Page 990 of 2103
MANUAL TRANSAXLE Synchronizer
DISASSEMBLY
Place synchronizer in a clean shop,, towel Wrap. Press
on inner hub. Carefully open up shop. towel and remove
springs, balls, keys, hub, and sleeve.
CLEAN
Do not attempt to clean the blocking rings in solve nt. The
friction material will become contaminated. Place synchronizer
components in a suitable holder and clean with solv ent. Then
let them air, dry.
TSBRevision
Trending: oil level, maintenance reset, engine oil, brake pads, oil change, rims, fuel tank removal
