NISSAN SENTRA 2006 B15 / 5.G Navigation Manual
SENTRA 2006 B15 / 5.G
NISSAN
NISSAN
https://www.carmanualsonline.info/img/5/699/w960_699-0.png
NISSAN SENTRA 2006 B15 / 5.G Navigation Manual
Page 1 of 272
Thank you for purchasing a NISSAN vehicle.
This user’s manual is for the navigation system
only. This manual contains operating instructions
for the NISSAN Navigation System offered in
your NISSAN vehicle.
Please read this manual carefully to ensure safe
operation of the navigation system.
.Because of possible specification changes
and optional equipment, sections of this
manual may not apply to your vehicle.
. All information, specifications and illustra-
tions in this manual are those in effect at the
time of printing. NISSAN reserves the right
to change specifications or design at any
time without notice.
. Do not remove this manual from the vehicle
when selling this vehicle. The next user of
this navigation system may need the manual.FOREWORD
Page 9 of 272
NAI0402
CONTROL PANEL
Armada, Maxima, Murano, Pathfinder,
Quest, Titan&1<
> (DAY/NIGHT):
Push to switch between the day screen and
the night screen.
&2/ :
Push to return to the previous screen. In a
settings screen, this button can also be used to apply the setting.
&3JOYSTICK and
:
Push to highlight an item on the screen,
select the highlighted item, move on the
map, etc.
&4 :
Push to access the system settings.
&5 :
Push to display the vehicle information.
Refer to the Owner’s Manual of your vehicle.
&6 :
Push to enter a destination. Various methods
for entering a destination are available.“4. Setting a destination”.
&7 :
Push to access guidance control functions
(guidance cancellation, route priority, way-
point setting on the route, etc.) .
&8
Page 10 of 272
NAI0403
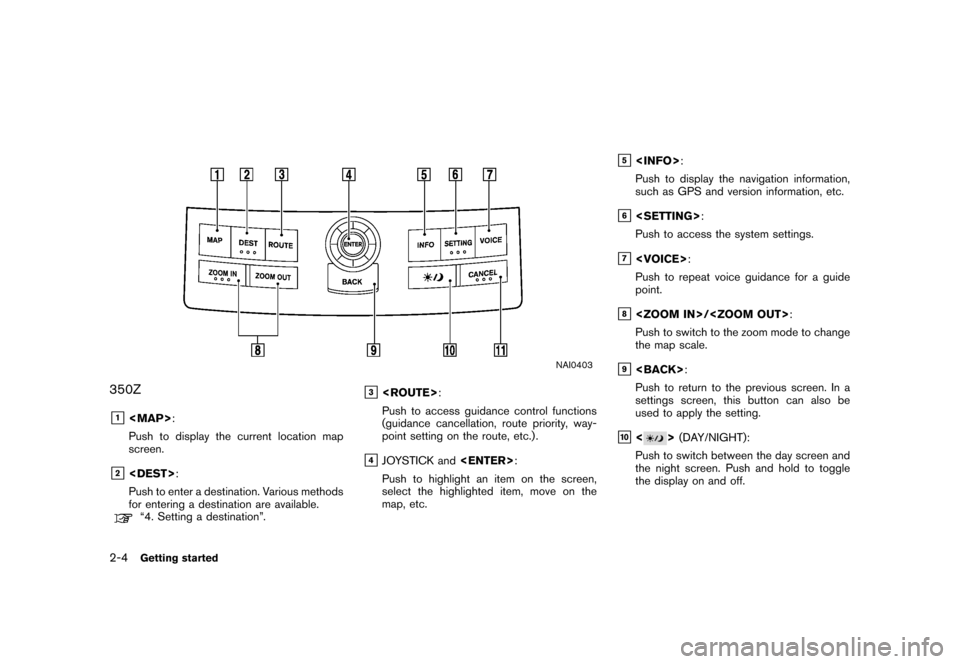
350Z&1
Page 15 of 272
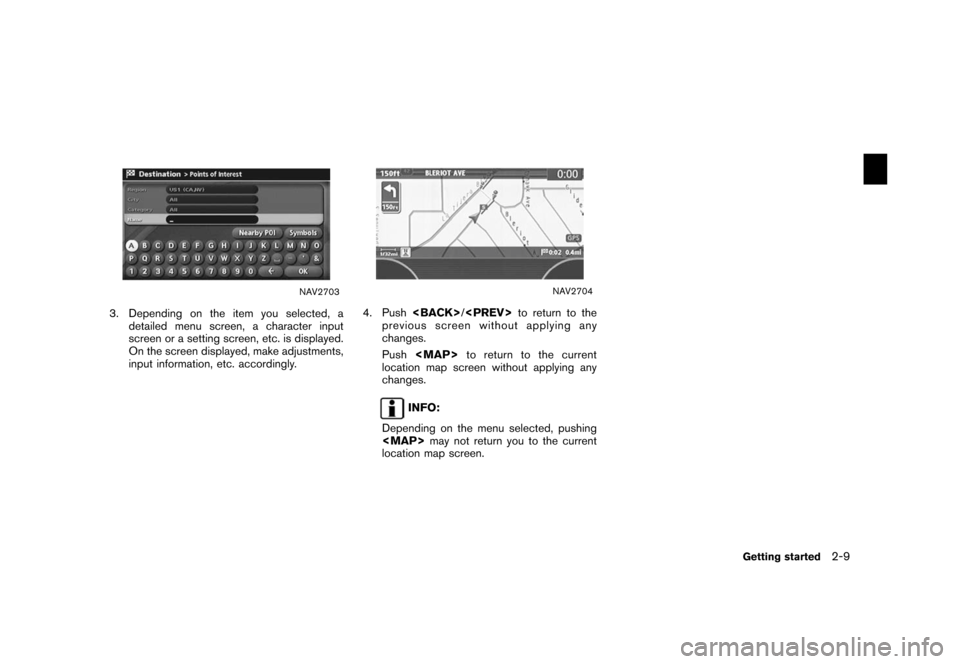
NAV2703
3. Depending on the item you selected, adetailed menu screen, a character input
screen or a setting screen, etc. is displayed.
On the screen displayed, make adjustments,
input information, etc. accordingly.
NAV2704
4. Push /
to return to the
previous screen without applying any
changes.
Push
Page 16 of 272
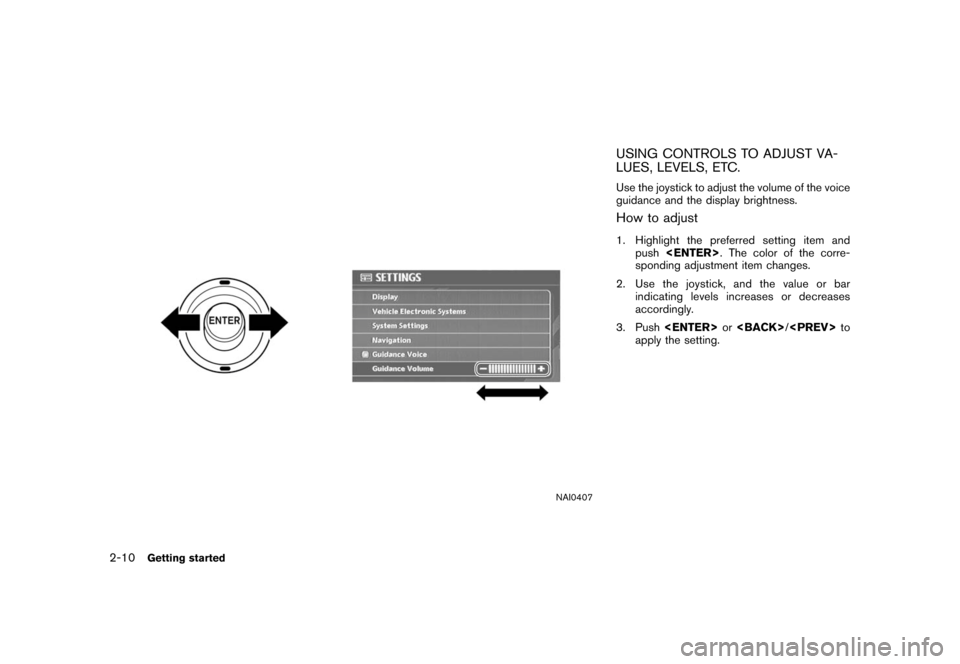
NAI0407
USING CONTROLS TO ADJUST VA-
LUES, LEVELS, ETC.Use the joystick to adjust the volume of the voice
guidance and the display brightness.How to adjust1. Highlight the preferred setting item andpush . The color of the corre-
sponding adjustment item changes.
2. Use the joystick, and the value or bar indicating levels increases or decreases
accordingly.
3. Push or
/
to
apply the setting.
2-10
Getting started
Page 26 of 272
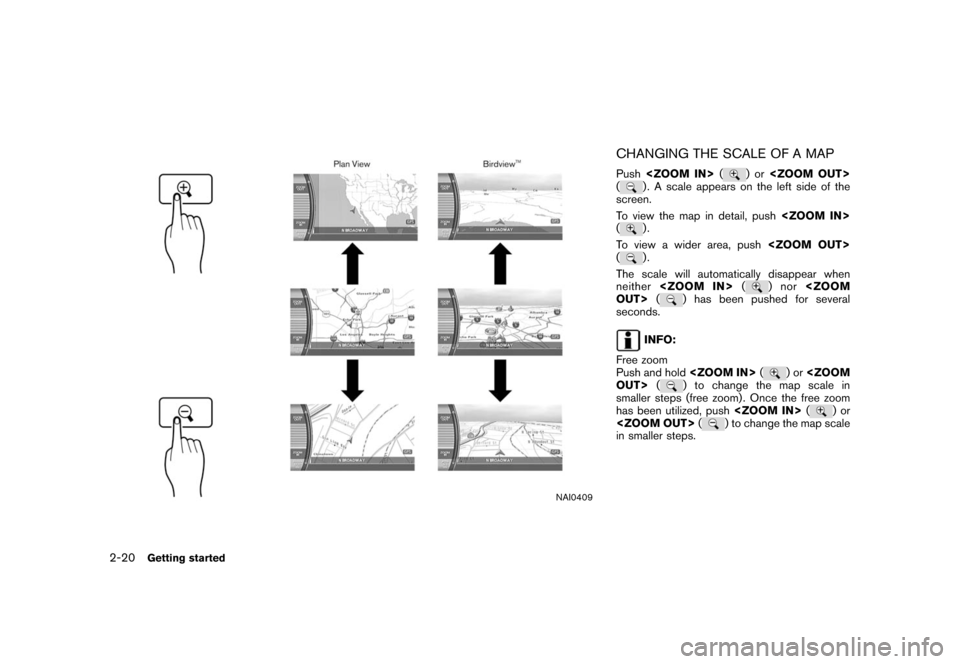
NAI0409
CHANGING THE SCALE OF A MAPPush (
)or
(
) . A scale appears on the left side of the
screen.
To view the map in detail, push
().
To view a wider area, push
().
The scale will automatically disappear when
neither (
)nor
OUT> (
) has been pushed for several
seconds.
INFO:
Free zoom
Push and hold (
)or
OUT> (
) to change the map scale in
smaller steps (free zoom) . Once the free zoom
has been utilized, push (
)or
(
) to change the map scale
in smaller steps.
2-20
Getting started
Page 39 of 272
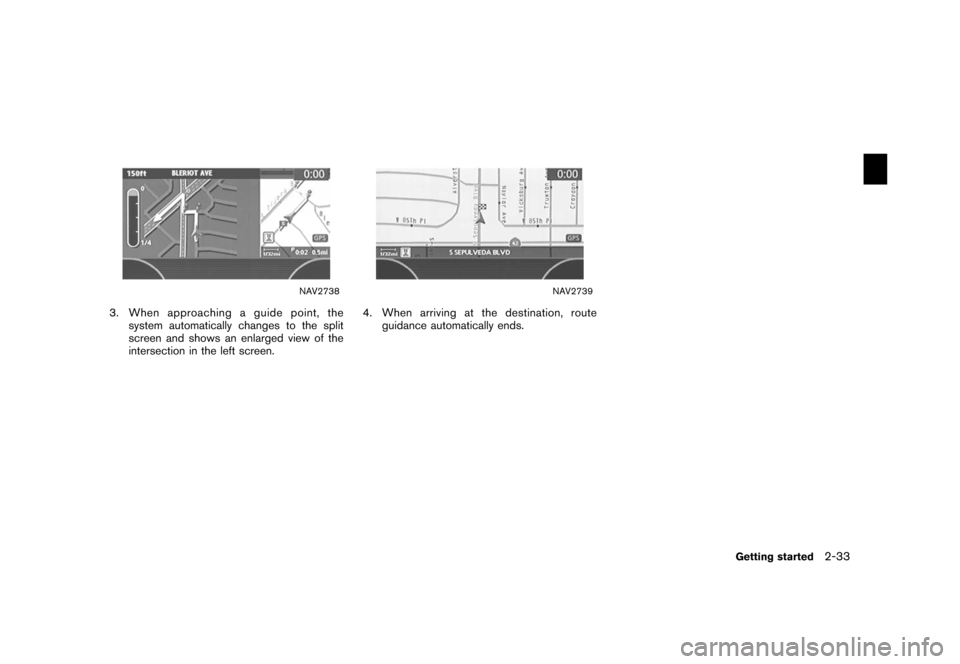
NAV2738
3. When approaching a guide point, thesystem automatically changes to the split
screen and shows an enlarged view of the
intersection in the left screen.
NAV2739
4. When arriving at the destination, routeguidance automatically ends.
Getting started
2-33
Page 41 of 272
NAV2741
3. A confirmation message is displayed. High-light [Yes] and push .
INFO:
If a route is cancelled, [Cancel Route Guidance]
changes to [Resume Route Guidance].
Highlight [Resume Route Guidance] and push
to reactivate the cancelled route.
This is available only until a new route is set.
NAI0412
Delete the route using (only
for 350Z)1. Push .
NAV3024
2. A confirmation message is displayed. High-
light [Yes] and push .
Getting started
2-35
Page 50 of 272
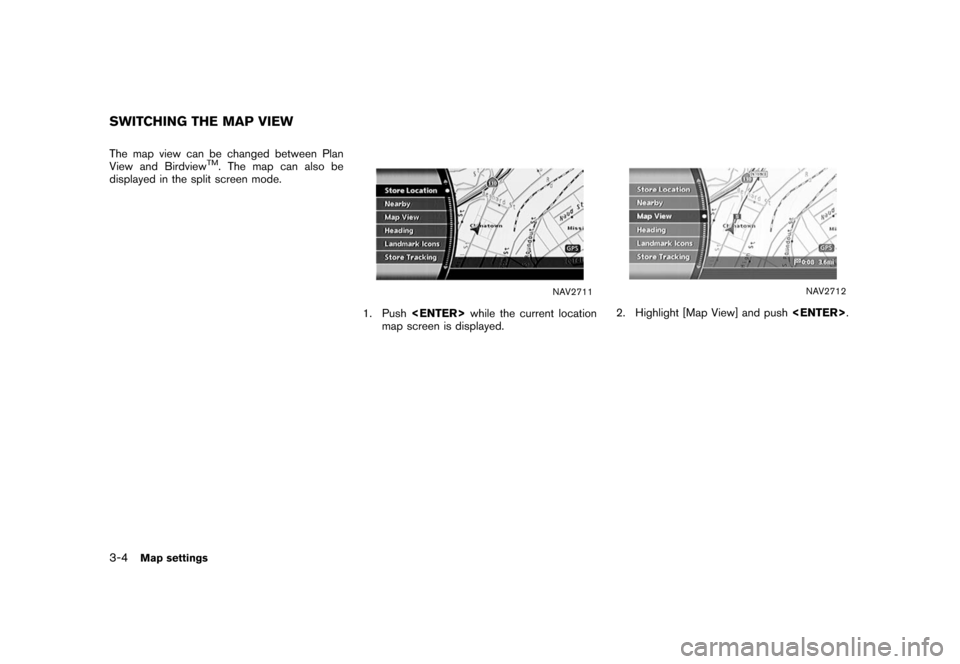
The map view can be changed between Plan
View and Birdview
TM. The map can also be
displayed in the split screen mode.
NAV2711
1. Push while the current location
map screen is displayed.
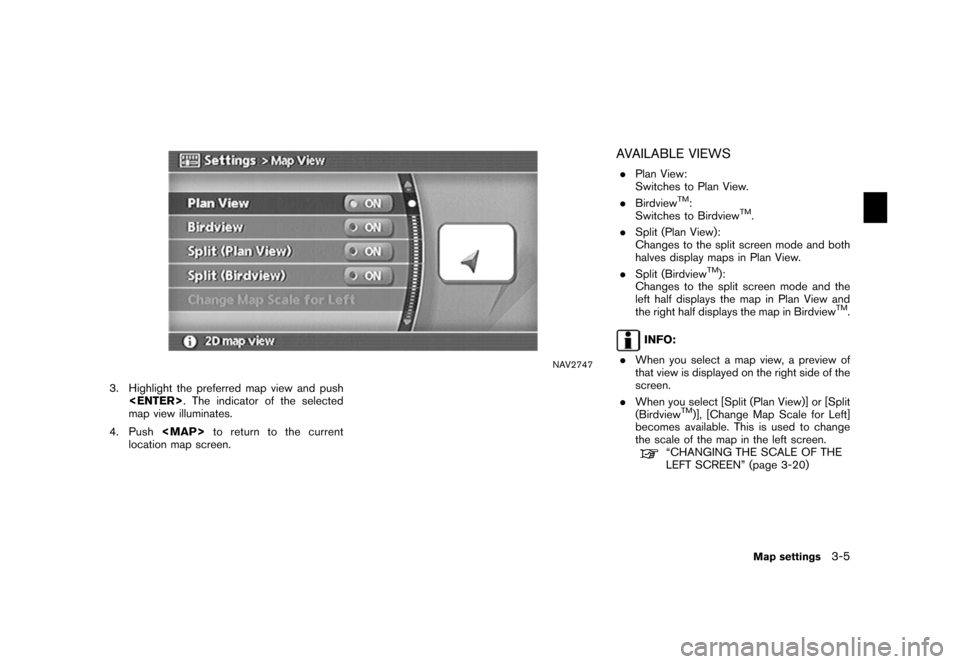
NAV2712
2. Highlight [Map View] and push
.
SWITCHING THE MAP VIEW3-4
Map settings
Page 51 of 272
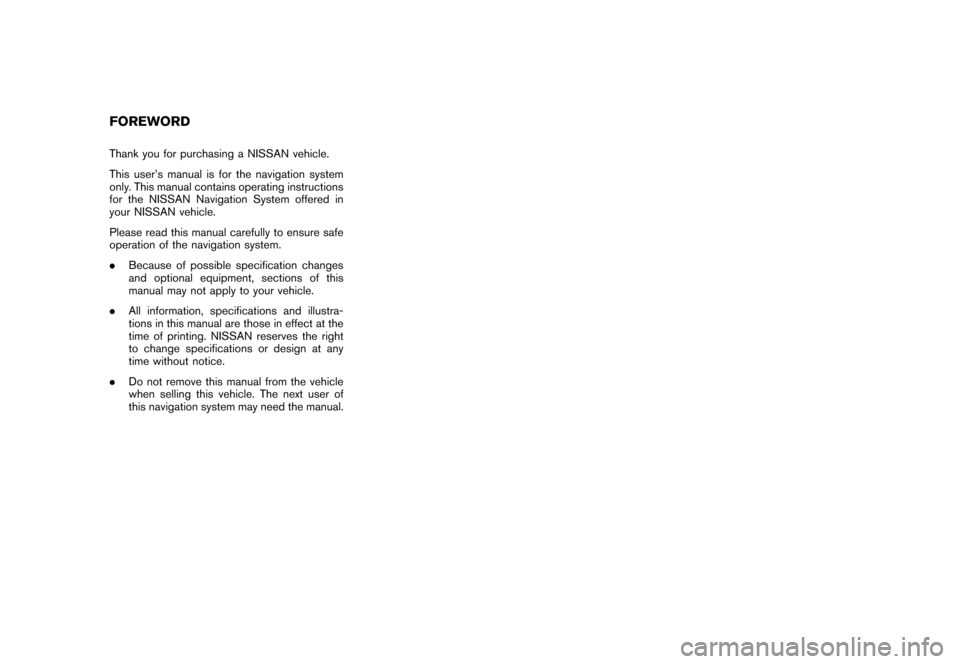
NAV2747
3. Highlight the preferred map view and push . The indicator of the selected
map view illuminates.
4. Push
![NISSAN SENTRA 2006 B15 / 5.G Navigation Manual
NAV2741
3. A confirmation message is displayed. High-light [Yes] and push <ENTER>.
INFO:
If a route is cancelled, [Cancel Route Guidance]
changes to [Resume Route Guidance].
Highlight [Resume Route G](/img/5/699/w960_699-40.png "NISSAN SENTRA 2006 B15 / 5.G Navigation Manual
NAV2741
3. A confirmation message is displayed. High-light [Yes] and push <ENTER>.
INFO:
If a route is cancelled, [Cancel Route Guidance]
changes to [Resume Route Guidance].
Highlight [Resume Route G")