NISSAN TERRANO 2004 Service Repair Manual
TERRANO 2004
NISSAN
NISSAN
https://www.carmanualsonline.info/img/5/57394/w960_57394-0.png
NISSAN TERRANO 2004 Service Repair Manual
Trending: Ic regulator, cruise control, fuel cap release, Door sensor, turn signal relay, oil level, dead battery
Page 1601 of 1833
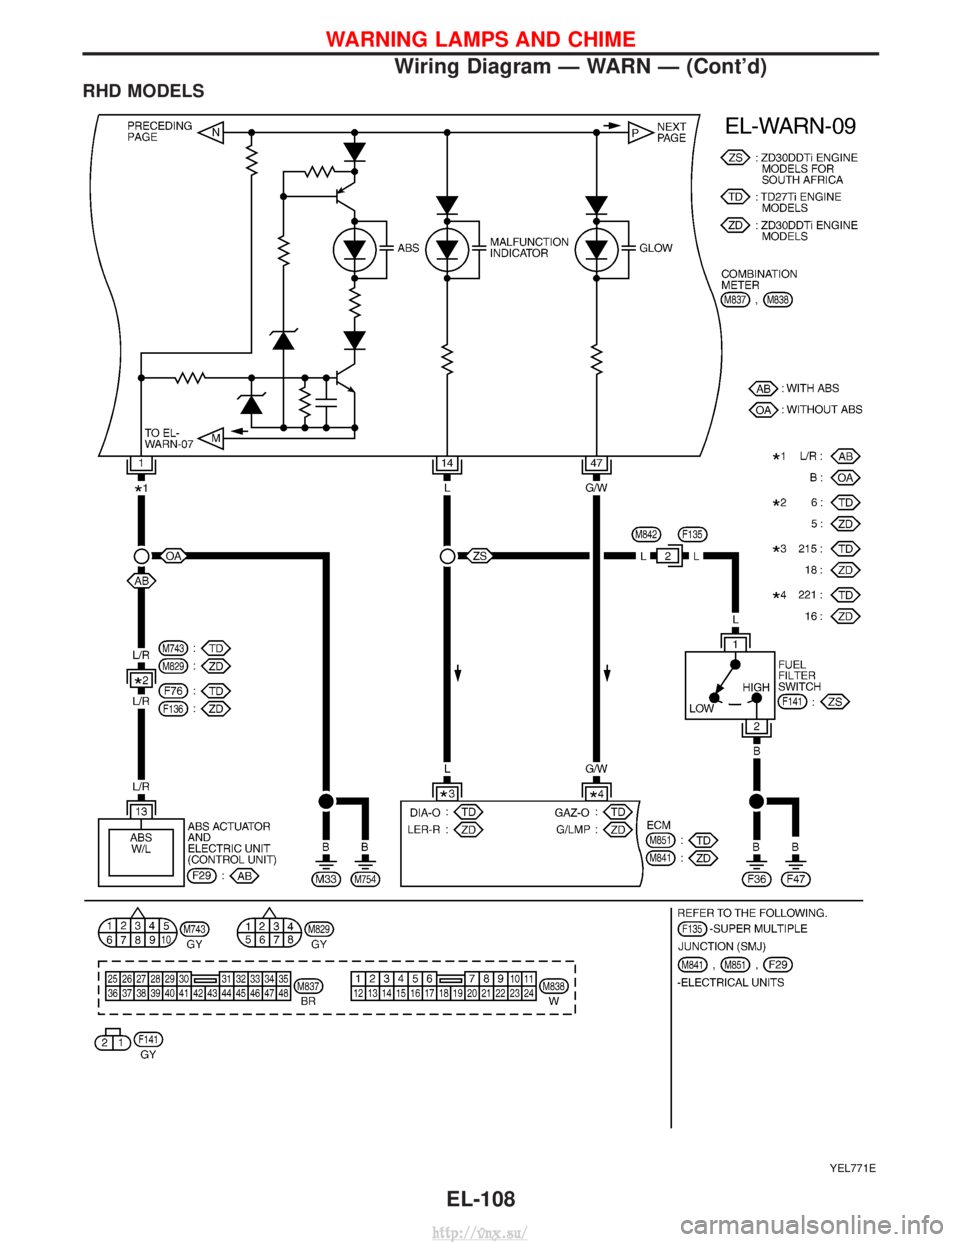
RHD MODELS
YEL771E
WARNING LAMPS AND CHIME
Wiring Diagram Ð WARN Ð (Cont'd)EL-108
http://vnx.su/
Page 1602 of 1833
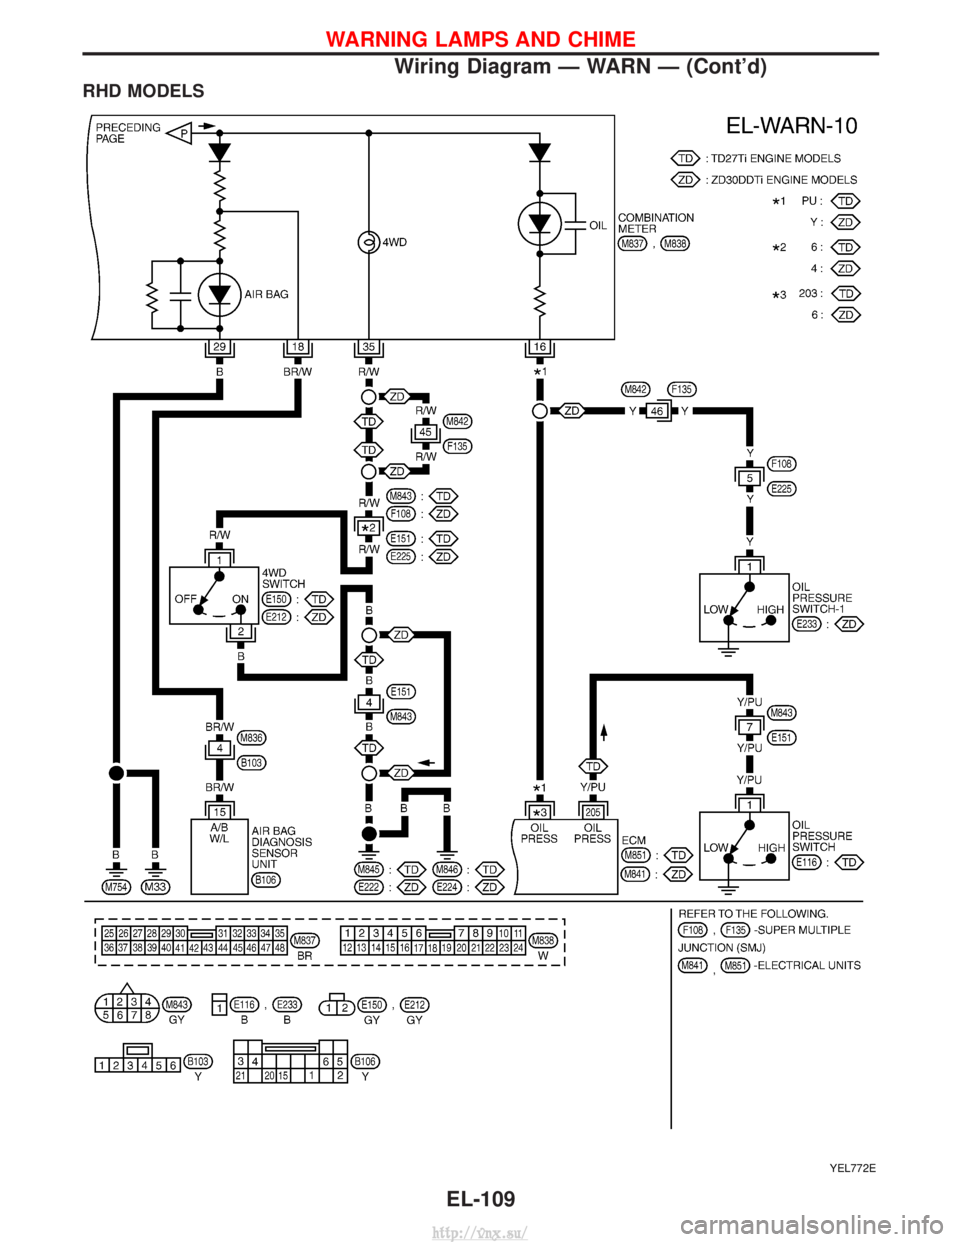
RHD MODELS
YEL772E
WARNING LAMPS AND CHIME
Wiring Diagram Ð WARN Ð (Cont'd)EL-109
http://vnx.su/
Page 1603 of 1833
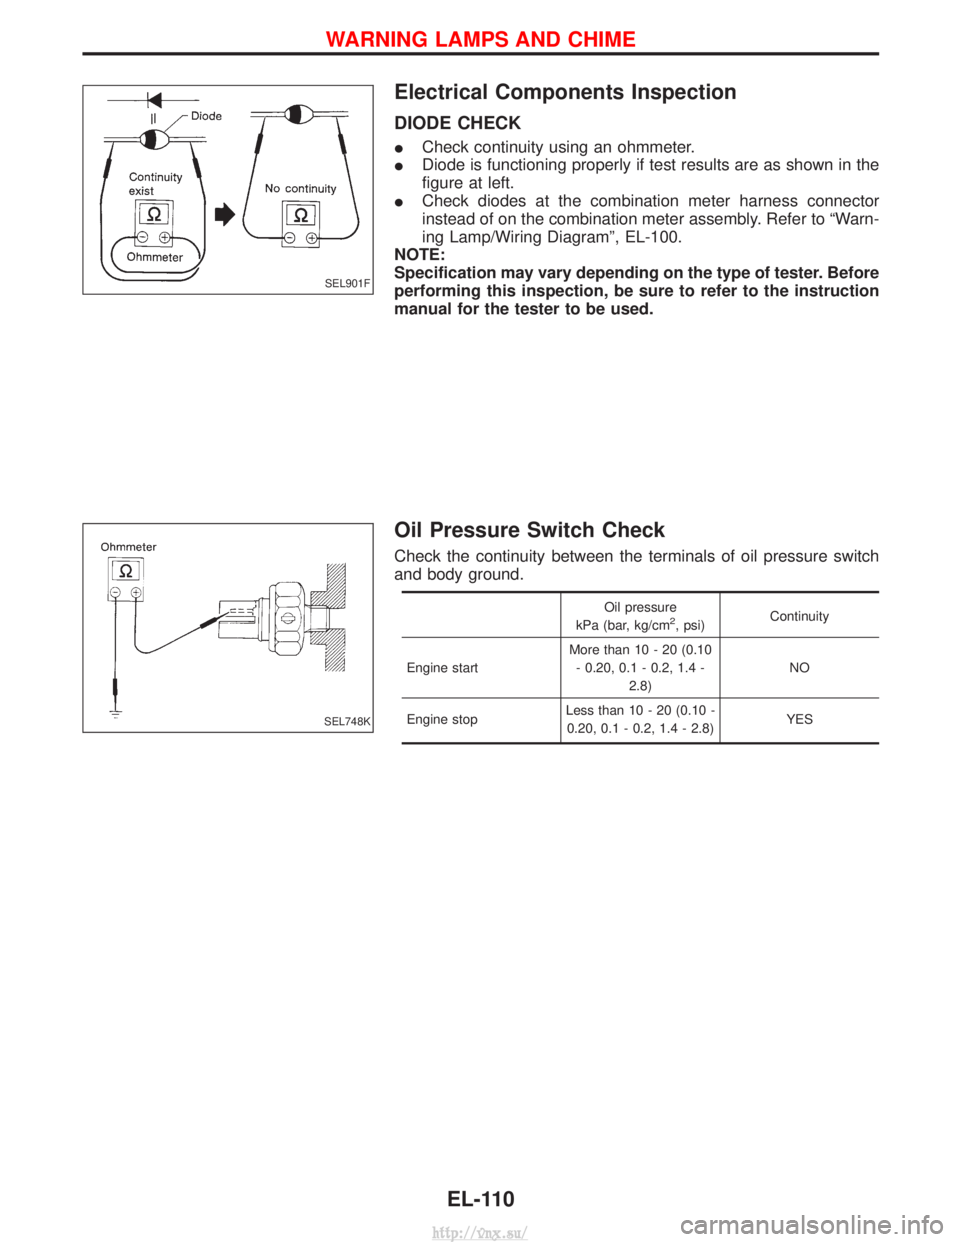
Electrical Components Inspection
DIODE CHECK
ICheck continuity using an ohmmeter.
I Diode is functioning properly if test results are as shown in the
figure at left.
I Check diodes at the combination meter harness connector
instead of on the combination meter assembly. Refer to ªWarn-
ing Lamp/Wiring Diagramº, EL-100.
NOTE:
Specification may vary depending on the type of tester. Before
performing this inspection, be sure to refer to the instruction
manual for the tester to be used.
Oil Pressure Switch Check
Check the continuity between the terminals of oil pressure switch
and body ground.
Oil pressure
kPa (bar, kg/cm2, psi) Continuity
Engine start More than 10 - 20 (0.10
- 0.20, 0.1 - 0.2, 1.4 - 2.8) NO
Engine stop Less than 10 - 20 (0.10 -
0.20, 0.1 - 0.2, 1.4 - 2.8) YES
SEL901F
SEL748K
WARNING LAMPS AND CHIME
EL-110
http://vnx.su/
Page 1604 of 1833
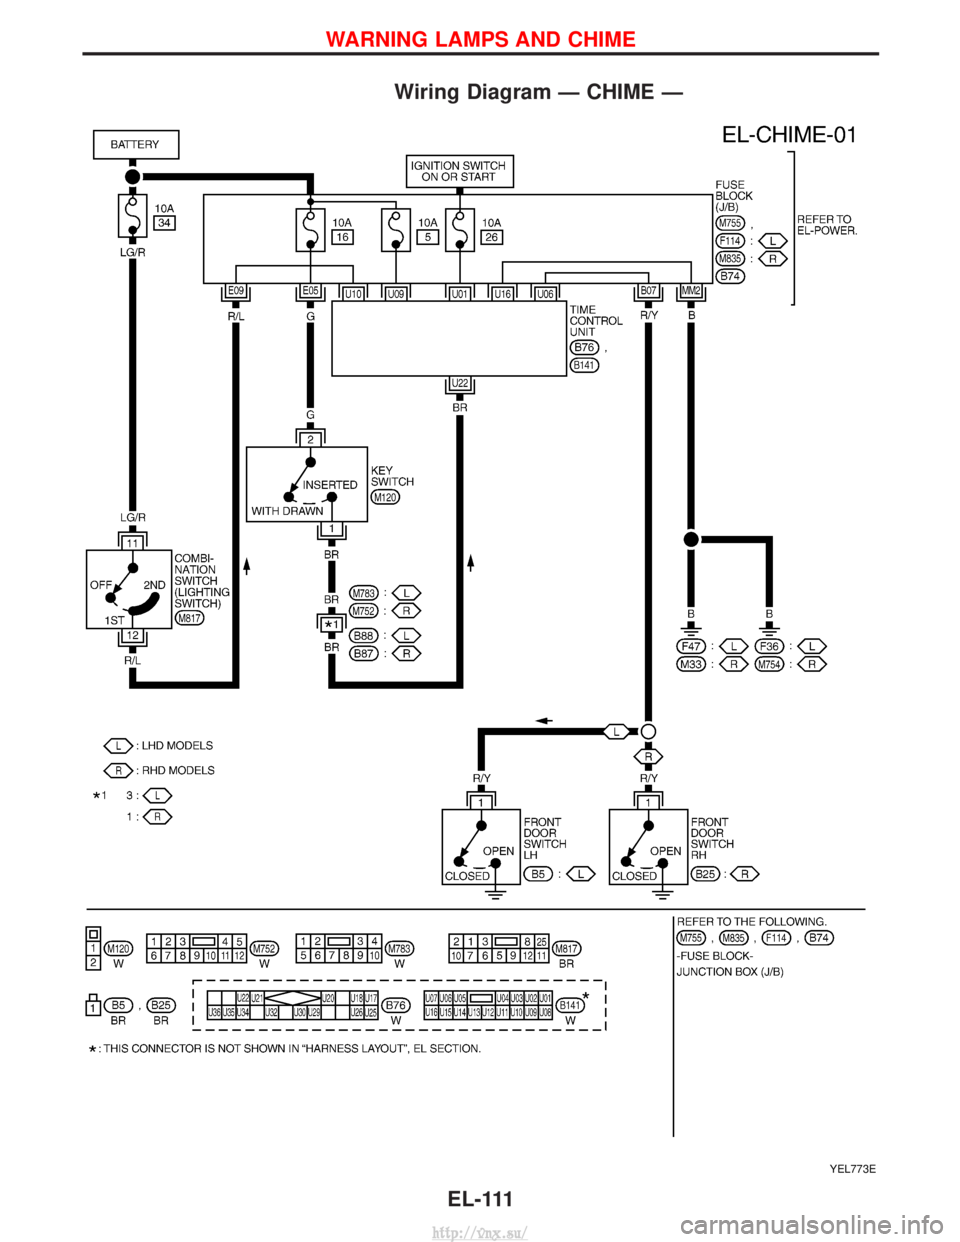
Wiring Diagram Ð CHIME Ð
YEL773E
WARNING LAMPS AND CHIME
EL-111
http://vnx.su/
Page 1605 of 1833
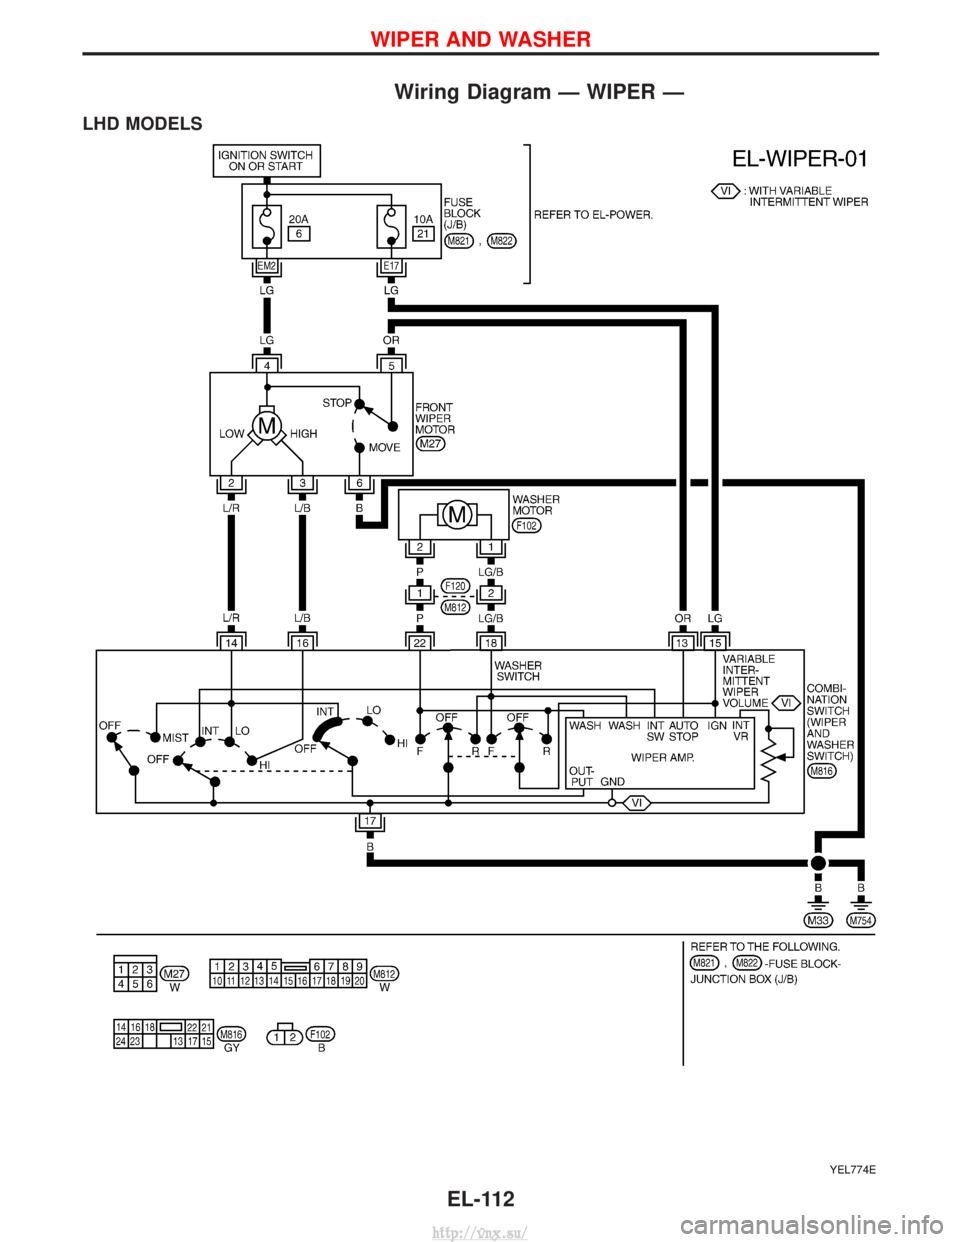
Wiring Diagram Ð WIPER Ð
LHD MODELS
YEL774E
WIPER AND WASHER
EL-112
http://vnx.su/
Page 1606 of 1833
RHD MODELS
YEL111D
WIPER AND WASHER
Wiring Diagram Ð WIPER Ð (Cont'd)EL-113
http://vnx.su/
Page 1607 of 1833
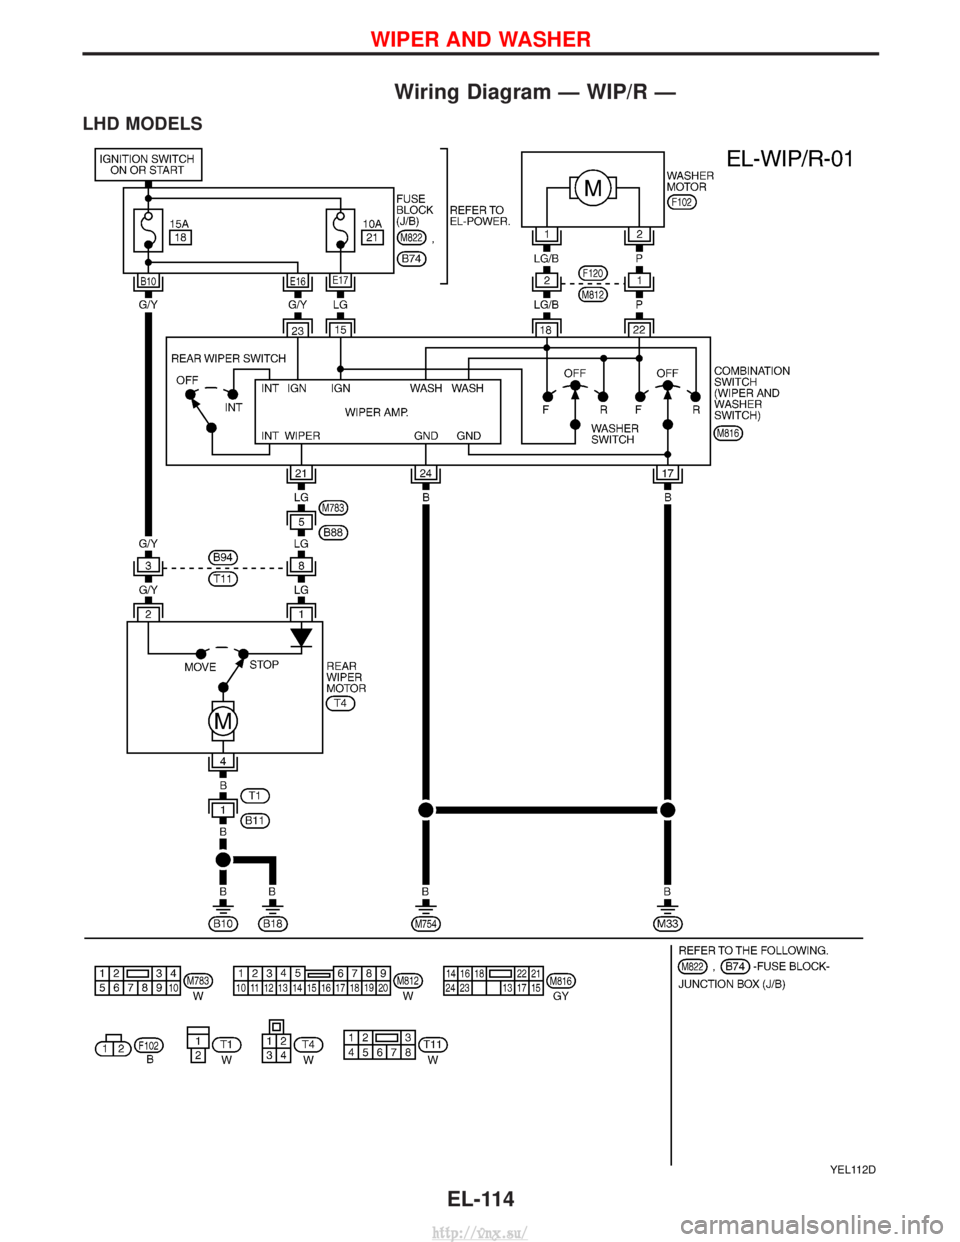
Wiring Diagram Ð WIP/R Ð
LHD MODELS
YEL112D
WIPER AND WASHER
EL-114
http://vnx.su/
Page 1608 of 1833
RHD MODELS
YEL775E
WIPER AND WASHER
Wiring Diagram Ð WIP/R Ð (Cont'd)EL-115
http://vnx.su/
Page 1609 of 1833
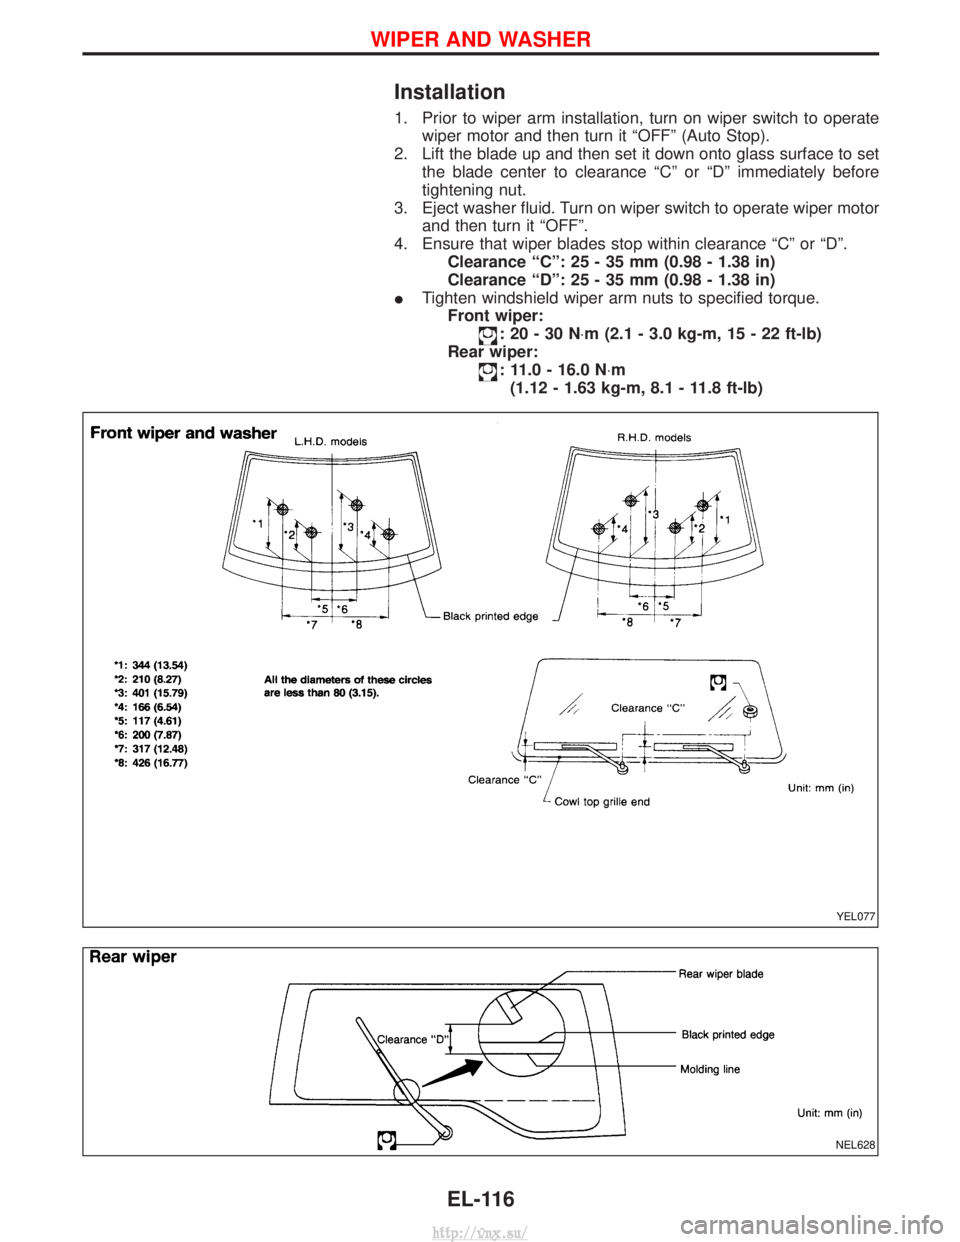
Installation
1. Prior to wiper arm installation, turn on wiper switch to operatewiper motor and then turn it ªOFFº (Auto Stop).
2. Lift the blade up and then set it down onto glass surface to set the blade center to clearance ªCº or ªDº immediately before
tightening nut.
3. Eject washer fluid. Turn on wiper switch to operate wiper motor and then turn it ªOFFº.
4. Ensure that wiper blades stop within clearance ªCº or ªDº. Clearance ªCº: 25 - 35 mm (0.98 - 1.38 in)
Clearance ªDº: 25 - 35 mm (0.98 - 1.38 in)
I Tighten windshield wiper arm nuts to specified torque.
Front wiper:
:20-30N ×m (2.1 - 3.0 kg-m, 15 - 22 ft-lb)
Rear wiper:
: 11.0 - 16.0 N ×m
(1.12 - 1.63 kg-m, 8.1 - 11.8 ft-lb)
YEL077
NEL628
WIPER AND WASHER
EL-116
http://vnx.su/
Page 1610 of 1833
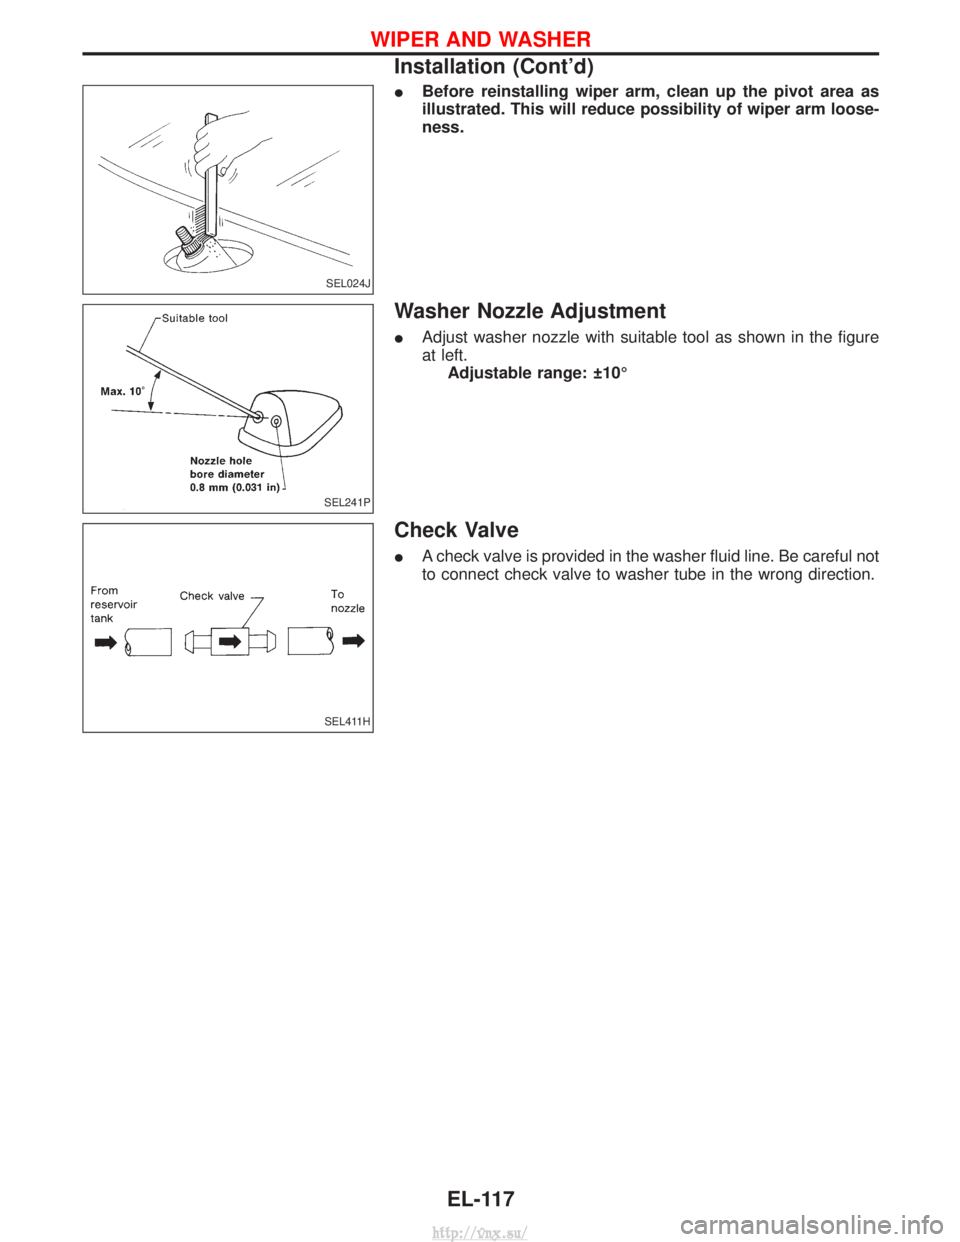
IBefore reinstalling wiper arm, clean up the pivot area as
illustrated. This will reduce possibility of wiper arm loose-
ness.
Washer Nozzle Adjustment
IAdjust washer nozzle with suitable tool as shown in the figure
at left.
Adjustable range: 10É
Check Valve
I A check valve is provided in the washer fluid line. Be careful not
to connect check valve to washer tube in the wrong direction.
SEL024J
SEL241P
SEL411H
WIPER AND WASHER
Installation (Cont'd)
EL-117
http://vnx.su/
Trending: Ambient, glove box, boot, service schedule, keyless, automatic transmission fluid, fuel pump
