Peugeot 206 SW 2003 Owner's Manual
Manufacturer: PEUGEOT, Model Year: 2003, Model line: 206 SW, Model: Peugeot 206 SW 2003Pages: 171, PDF Size: 2.12 MB
Page 111 of 171

26-05-2003
YOUR 206 IN DETAIL101
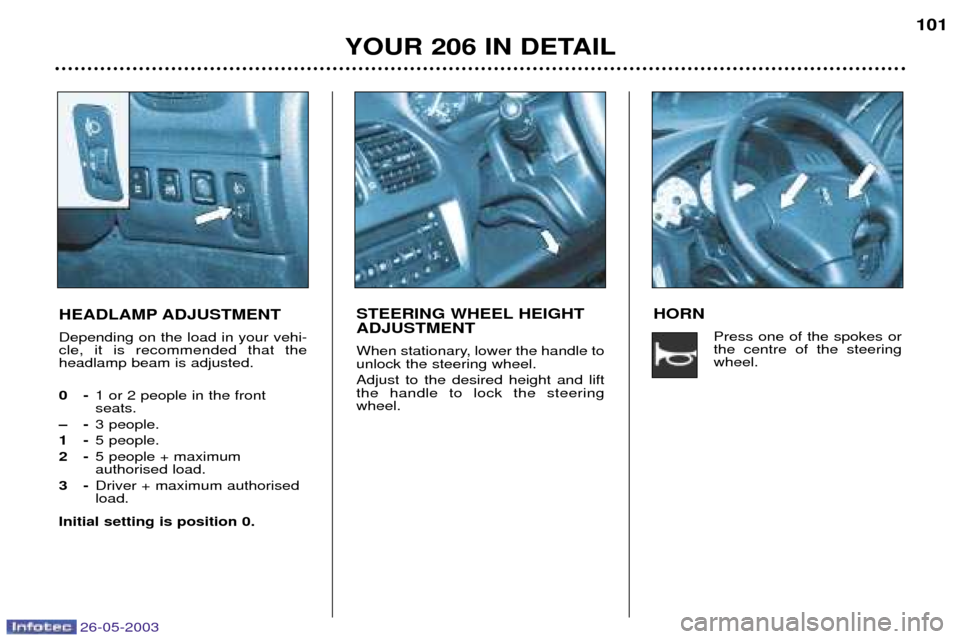
HEADLAMP ADJUSTMENT Depending on the load in your vehi- cle, it is recommended that theheadlamp beam is adjusted. 0- 1 or 2 people in the front seats.
Ð- 3 people.
1- 5 people.
2- 5 people + maximum authorised load.
3- Driver + maximum authorisedload.
Initial setting is position 0.
STEERING WHEEL HEIGHT ADJUSTMENT
When stationary, lower the handle to unlock the steering wheel. Adjust to the desired height and lift the handle to lock the steeringwheel. HORN
Press one of the spokes orthe centre of the steeringwheel.
Page 112 of 171

26-05-2003
YOUR 206 IN DETAIL103
FRONT ASHTRAY
To empty, close the cover. Pull the lug and release the ashtray upwards.
LIGHTER Press and wait a few minutes until it
springs out automatically. It is supplied with power with the ignition key in the accessories posi-tion (1st notch).
GLOVE BOX
To open the glove box, lift the handle. The light comes on when the cover is opened. 1. Handbook pack storage.
2. Can holder.
3. Pen holder.
4. Spectacles storage.
5. Map storage.
6. Coin storage.
Page 113 of 171

26-05-2003
YOUR 206 IN DETAIL
104
Stowing rings Use the stowing rings on the boot floor and on the back of the rear seatto secure your luggage. Luggage retaining net Hooked onto the stowing rings, this enables your luggage to be secured.
BOOT LAYOUT (SALOON)
Retaining strap
A strap secured to the side of the boot enables you to secure variousobjects (cans, first aid kit etc.).
Rear parcel shelf
To remove the shelf:
Ð unhook the two strings 1,
Ð slightly raise the shelf, then remove it.
There are several options for storing the shelf:
Ð either behind the front seats,
Ð or behind the rear seat using theluggage retaining net,
Ð or flat in the boot.
Page 114 of 171

26-05-2003
YOUR 206 IN DETAIL
106
Page 115 of 171

26-05-2003
YOUR 206 IN DETAIL107
BOOT LAYOUT (206 SW)
1. Grab handles and coat hooks
2. Coat hooks There are six hooks to accommodate coats.
3. High load retaining net fastenings The high load retaining net can be installed behind the front seats or behind the rear seat. Open the covers of the corresponding upper fastenings.
Install one end of the metal bar in one of the two fastenings, compress the bar, then install the other end and release.
Secure the two net strap hooks behind the front seats, with the rear seat folded down, or in the stowing rings on the floor.The rings are located directly below the corresponding upper fastenings.Pull the two straps taut.
4. Hooks
There are two side hooks on which to hang light bags.
5. 12 V Socket for accessories This is a 12 volt socket (lighter type) installed on the the rear left trim and supplied from the accessories position(1st notch).
6. Storage nets There are two nets (which cannot be removed) which can contain the luggage retaining net, a first aid kit etc.
7. Retaining straps There are two straps for securing various objects: cans etc.
8. Load space cover Note: release the rear seat back to make installation and removal of the load space cover easier.
To install it: Ð position one end of the roller in one of the two supports, Ð compress the opposite end of the roller and position it,Ð release it to allow it to engage,Ð unroll the cover as far as the boot pillars,Ð insert the cover guides in the rails in the pillars.
To remove it: Ð remove the cover guides from the pillar rails,
Ð return the cover into its roller, compress it and remove it from its support.
9. Stowing rings There are eight stowing rings for securing the luggage retaining net: four on the rear seat back and four on the boot floor(two of which are under the carpet, at the far end of the boot).
Warning triangle The tailgate has a location intended for a warning triangle.
Page 116 of 171

26-05-2003
YOUR 206 IN DETAIL
108
Page 117 of 171

26-05-2003
YOUR 206 IN DETAIL109
BOOT LAYOUT (206 GTi 180*)
1. Puncture repair aerosols insulated storage box.
2. Cover containing the jack and the folding chock.
3. Grab handles with coat hook.
4. Removable rear shelf.
5. Retaining strap for miscellaneous objects: can, first aid kit, etc.
6. Stowing rings. There are six stowing rings onto which the luggage retaining net may be hooked: four on the back of the rear seats and two on the boot rear inner panel (on the right and on the left).
7. Luggage retaining net storage (example of location).
* During the year, according to destination.
Page 118 of 171

YOUR 206 IN DETAIL
110
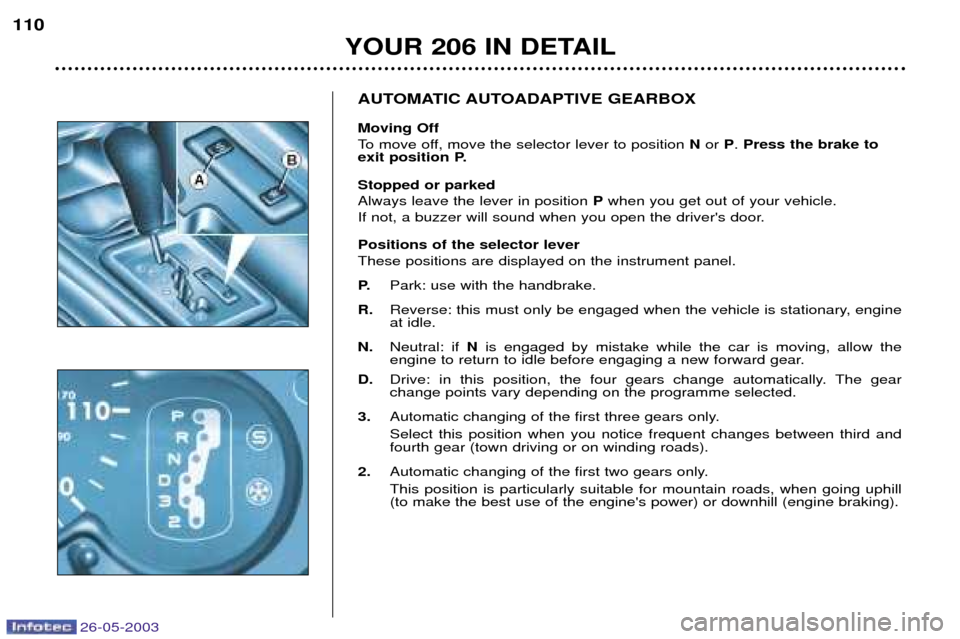
AUTOMATIC AUTOADAPTIVE GEARBOX Moving Off
To move off, move the selector lever to position
Nor P. Press the brake to
exit position P. Stopped or parked Always leave the lever in position Pwhen you get out of your vehicle.
If not, a buzzer will sound when you open the driver's door. Positions of the selector lever These positions are displayed on the instrument panel. P. Park: use with the handbrake.
R. Reverse: this must only be engaged when the vehicle is stationary, engine at idle.
N. Neutral: if Nis engaged by mistake while the car is moving, allow the
engine to return to idle before engaging a new forward gear.
D. Drive: in this position, the four gears change automatically. The gearchange points vary depending on the programme selected.
3. Automatic changing of the first three gears only. Select this position when you notice frequent changes between third and fourth gear (town driving or on winding roads).
2. Automatic changing of the first two gears only. This position is particularly suitable for mountain roads, when going uphill (to make the best use of the engine's power) or downhill (engine braking).
26-05-2003
Page 119 of 171

26-05-2003
YOUR 206 IN DETAIL111
Operating programmes
You have a choice of three operating programmes:
Ð Autoadaptive (normal)
Ð Sport
Ð SnowOne press on button Aor Bwill
select Sport or Snow respectively. The selection is displayed on theinstrument panel. Pressing the but-ton a second time will return to theautoadaptive (normal) programme. Autoadaptive programme (normal)Gear changes are carried out on the basis of various parameters, suchas:
Ð driving style,
Ð road characteristics,
Ð vehicle load.The gearbox selects the most suit- able programme from those in thememory for the current driving con-ditions. Sport programme The Sport programme automatically favours more dynamic driving. Snow Programme In position
D, the Snow programme
provides smooth driving suited to slippery roads in order to improve
traction and stability. Starting is in2nd gear and changing down is at
low engine speeds. Special operating features
Ð During prolonged braking, the gearbox changes down automati-
cally, so as to provide efficientengine braking.
Ð If you take your foot off the accel- erator suddenly (when you aretaken by surprise, for example),the gearbox will not change up, so
as to improve safety.
Ð When the engine is cold, the gear- box automatically selects a spe-cial programme that enables theengine to reach its ideal tempera-ture more quickly in order todecrease pollution.
Kickdown For immediate maximum accelera-
tion without touching the gear lever,press the accelerator pedal down as
far as it will go. The gearbox willchange down automatically or stayin the gear selected, up to maximumengine speed.
Any disruption of the sys- tem is signalled by thesimultaneous flashing ofthe Sport and Snow
lights on the instrument panel. Insuch a case, the gearbox will oper-
ate in downgrade mode. You mayfeel a substantial knock whenreverse is selected from Pto Ror
N to R(without any risk of damage
to the gearbox). Do not exceed 60 mph (100km/h).Contact a PEUGEOT dealer with-
out delay. When the engine is idling with the
car in gear, the car will move evenwithout you accelerating. Do not accelerate while a gear is being selected, when the vehicle is
stationary.
When stationary, have your foot on the brake pedal when selecting a
gear. Do not accelerate in gear with the brakes on. If work needs to be done with the engine running, apply the hand-brake and select position P.
Do not change down to brake onslippery roads. Never select position Nwhen the
vehicle is moving.Never engage Por Runless the
vehicle is stationary.Do not leave children inside the vehicle unsupervised when theengine is running.
Page 120 of 171

YOUR 206 IN DETAIL
112
Normal operation of the ABS may make itself felt by slightvibrations of the brake pedal. In emergency braking, press very firmly without releasingthe pressure.
ANTI-LOCK BRAKING
SYSTEM (ABS) AND THEELECTRONIC BRAKEFORCE DISTRIBUTION(EBFD)
The ABS, in conjunction with the electronic brake force distribution,increases the stability andmanoevrability of your vehicle, par-ticularly on poor or slippery roadsurfaces. Note :when changing wheels (tyres
and rims), make sure that these are approved. The anti-lock braking system comes into operation automatically whenthere is a risk of wheel lock.
When this warning lightcomes on, accompanied bya buzzer and the message"ABS fault" , it indicates
that there is a malfunction of theABS, which can cause a loss of con-trol of the vehicle when braking.
When this warning lightcomes on, connected to the
STOPand ABS warning
lights, accompanied by a
buzzer and the message "Braking
fault" , it indicates that there is a mal-
function of the electronic brake forcedistribution, which can cause a loss
of control of the vehicle when braking.
Stop immediately. In both cases, consult a PEUGEOT
dealer.
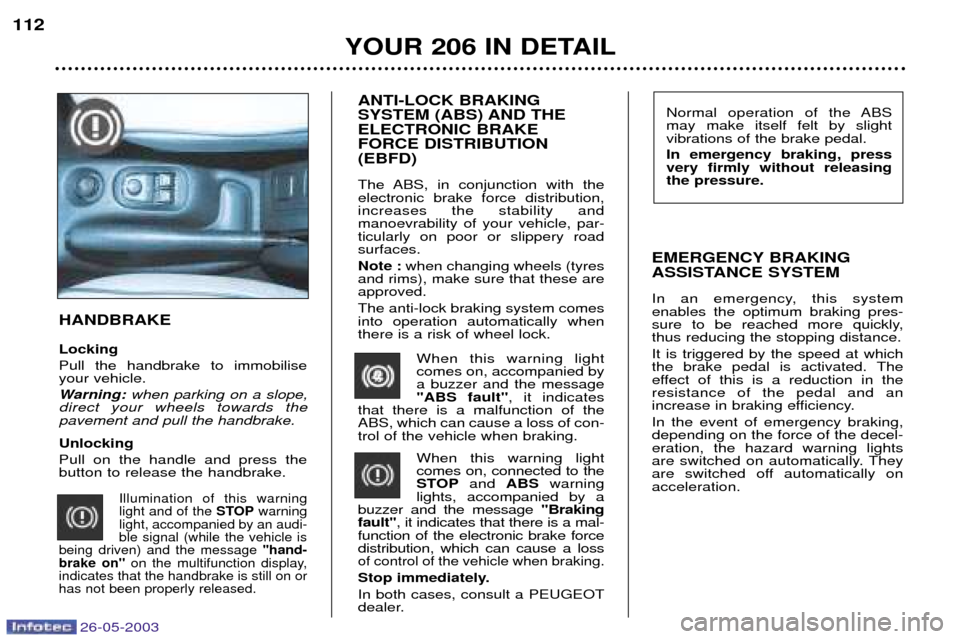
HANDBRAKE Locking Pull the handbrake to immobilise your vehicle.
Warning: when parking on a slope,
direct your wheels towards the pavement and pull the handbrake. Unlocking Pull on the handle and press the button to release the handbrake.
Illumination of this warninglight and of the STOPwarning
light, accompanied by an audi-ble signal (while the vehicle is
being driven) and the message "hand-
brake on" on the multifunction display,
indicates that the handbrake is still on orhas not been properly released.
EMERGENCY BRAKING
ASSISTANCE SYSTEM
In an emergency, this system enables the optimum braking pres-
sure to be reached more quickly,thus reducing the stopping distance. It is triggered by the speed at which
the brake pedal is activated. The
effect of this is a reduction in theresistance of the pedal and an
increase in braking efficiency. In the event of emergency braking, depending on the force of the decel-eration, the hazard warning lights
are switched on automatically. They
are switched off automatically onacceleration.
26-05-2003