Peugeot 208 2015 - RHD (UK, Australia) Workshop Manual
Manufacturer: PEUGEOT, Model Year: 2015, Model line: 208, Model: Peugeot 208 2015Pages: 341, PDF Size: 38.75 MB
Page 51 of 341
49
208_en_Chap03_Indicateurs_ed01-2015
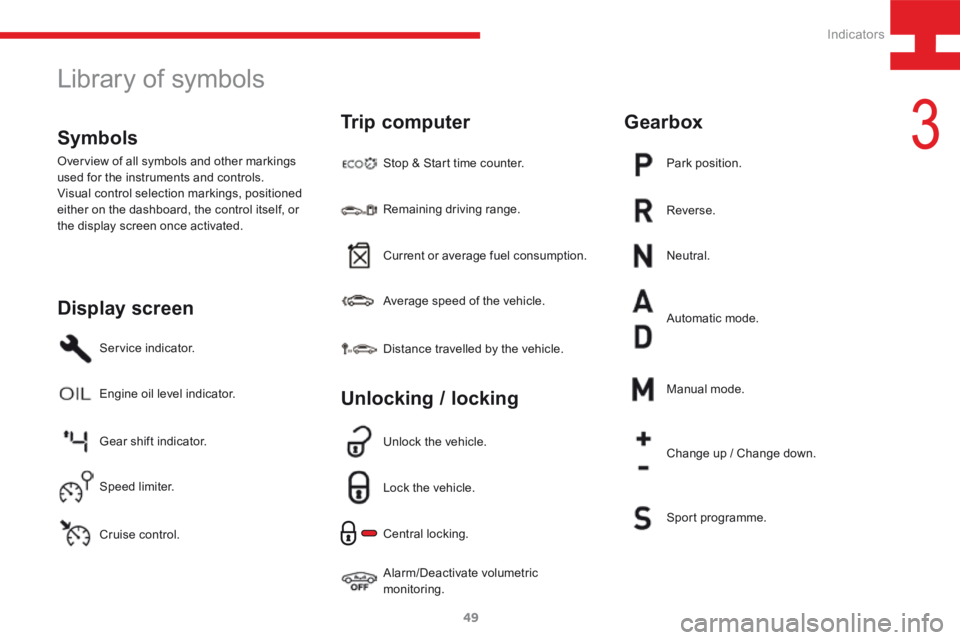
Service indicator.
Gear shift indicator.Stop & Start time counter.
Average speed of the vehicle.
Engine oil level indicator.
Cruise control. Current or average fuel consumption.
Speed limiter. Remaining driving range.
Distance travelled by the vehicle.
Unlock the vehicle.
Neutral.
Automatic mode. Reverse. Park position.
Lock the vehicle.
Alarm/Deactivate volumetric
monitoring. Central locking. Manual mode.
Change up / Change down.
Sport programme.
Display screen
Trip computer
Unlocking / lockingGearbox
Symbols
Overview of all symbols and other markings
used for the instruments and controls.
Visual control selection markings, positioned
either on the dashboard, the control itself, or
the display screen once activated.
Library of symbols
3
Indicators
Page 52 of 341
50
208_en_Chap03_Indicateurs_ed01-2015
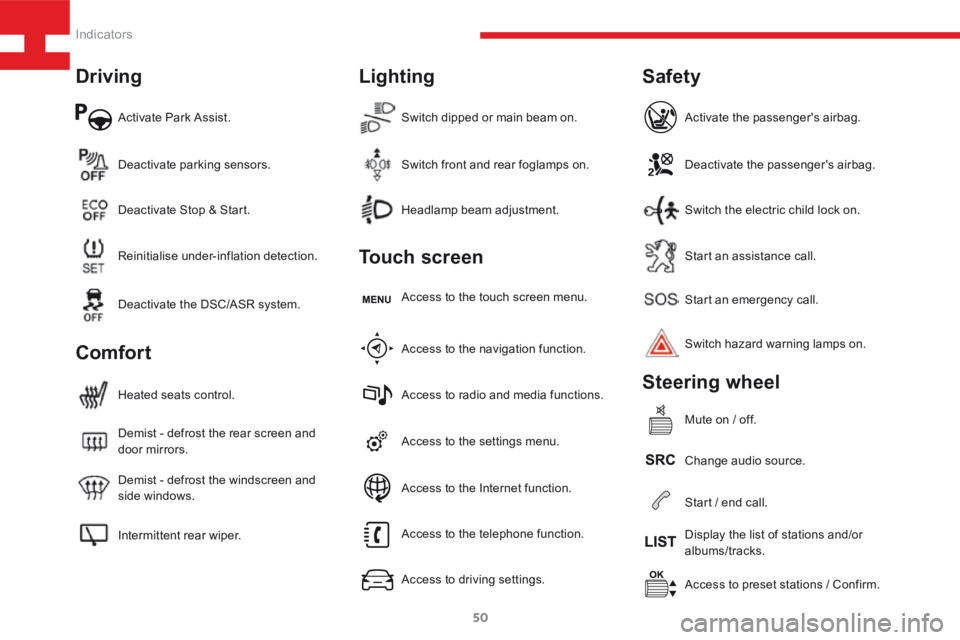
Activate Park Assist.
Intermittent rear wiper. Demist - defrost the windscreen and
side windows. Demist - defrost the rear screen and
door mirrors. Heated seats control.Access to the settings menu.Start an emergency call.
Access to preset stations / Confirm.
Headlamp beam adjustment.
Deactivate parking sensors.
Access to the navigation function. Access to the touch screen menu.Deactivate the passenger's airbag.
Change audio source. Switch hazard warning lamps on. Activate the passenger's airbag.
Mute on / off.
Switch dipped or main beam on.
Reinitialise under-inflation detection. Deactivate Stop & Start.
Access to radio and media functions.Start an assistance call.
Display the list of stations and/or
albums/tracks.
Switch front and rear foglamps on.
Deactivate the DSC/ASR system.
Access to the telephone function.
Access to driving settings.Switch the electric child lock on.
Start / end call.
Access to the Internet function.
Driving
Comfort Lighting
Touch screen
Safety
Steering wheel
Indicators
Page 53 of 341
51
208_en_Chap03_Indicateurs_ed01-2015
Engine coolant
temperature
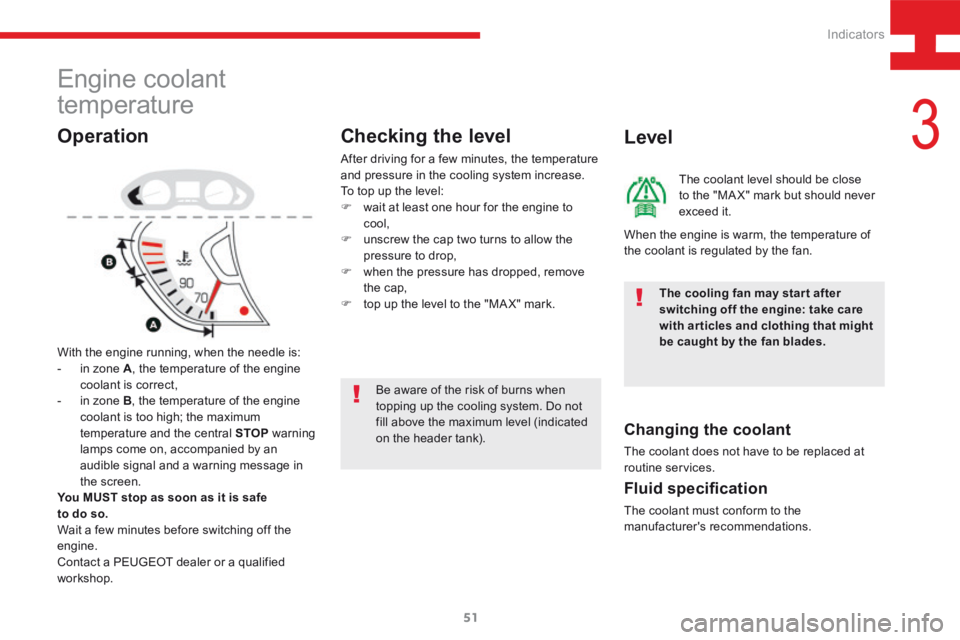
With the engine running, when the needle is:
- in zone A , the temperature of the engine
coolant is correct,
- in zone B , the temperature of the engine
coolant is too high; the maximum
temperature and the central STOP warning
lamps come on, accompanied by an
audible signal and a warning message in
the screen.
You MUST stop as soon as it is safe
to do so.
Wait a few minutes before switching off the
engine.
Contact a PEUGEOT dealer or a qualified
workshop.
Checking the level
After driving for a few minutes, the temperature
and pressure in the cooling system increase.
To top up the level:
F wait at least one hour for the engine to
cool,
F unscrew the cap two turns to allow the
pressure to drop,
F when the pressure has dropped, remove
the cap,
F top up the level to the "MA X" mark.
Be aware of the risk of burns when
topping up the cooling system. Do not
fill above the maximum level (indicated
on the header tank).
Operation Level
The coolant level should be close
to the "MA X" mark but should never
exceed it.
Changing the coolant
The coolant does not have to be replaced at
routine services.
Fluid specification
The coolant must conform to the
manufacturer's recommendations. When the engine is warm, the temperature of
the coolant is regulated by the fan.
The cooling fan may star t after
switching off the engine: take care
with articles and clothing that might
be caught by the fan blades.
3
Indicators
Page 54 of 341
52
208_en_Chap03_Indicateurs_ed01-2015
Instrument panel dimmer
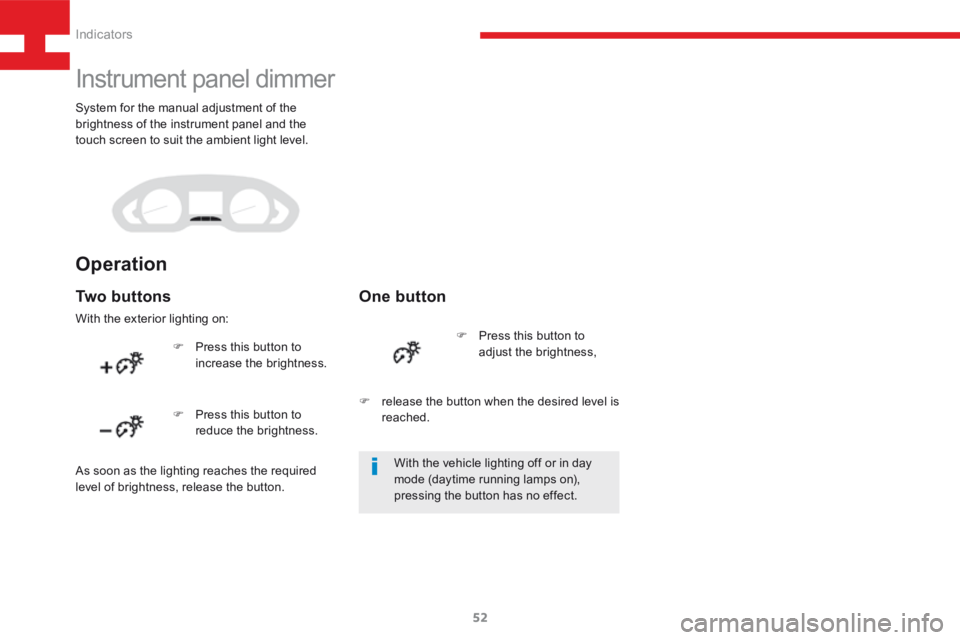
Tw o b u t t o n s
With the exterior lighting on:
One button
F Press this button to
increase the brightness. F
Press this button to
adjust the brightness,
F Press this button to
reduce the brightness. F
release the button when the desired level is
reached.
As soon as the lighting reaches the required
level of brightness, release the button.
Operation
System for the manual adjustment of the
brightness of the instrument panel and the
touch screen to suit the ambient light level.
With the vehicle lighting off or in day
mode (daytime running lamps on),
pressing the button has no effect.
Indicators
Page 55 of 341
53
208_en_Chap03_Indicateurs_ed01-2015
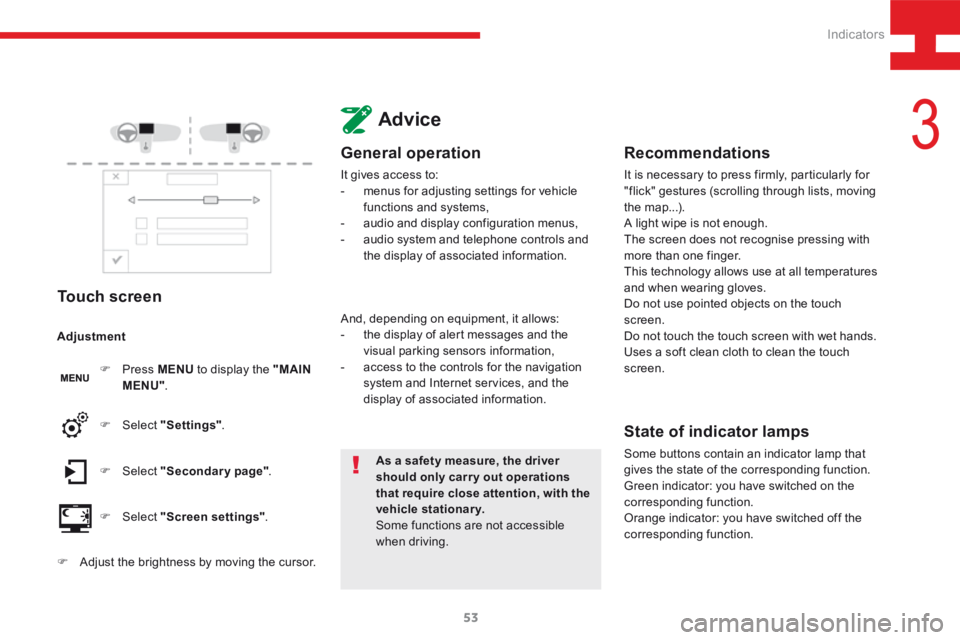
Touch screen
F Press MENU to display the "MAIN
MENU" .
F Select "Secondary page" .
F Select "Screen settings" .
F Select
"Settings" .
Adjustment
F
Adjust the brightness by moving the cursor.
Advice
General operation
It gives access to:
- menus for adjusting settings for vehicle
functions and systems,
- audio and display configuration menus,
- audio system and telephone controls and
the display of associated information.
As a safety measure, the driver
should only carr y out operations
that require close attention, with the
vehicle stationary.
Some functions are not accessible
when driving.
And, depending on equipment, it allows:
-
the display of alert messages and the
visual parking sensors information,
- access to the controls for the navigation
system and Internet services, and the
display of associated information.
Recommendations
It is necessary to press firmly, particularly for
"flick" gestures (scrolling through lists, moving
the map...).
A light wipe is not enough.
The screen does not recognise pressing with
more than one finger.
This technology allows use at all temperatures
and when wearing gloves.
Do not use pointed objects on the touch
screen.
Do not touch the touch screen with wet hands.
Uses a soft clean cloth to clean the touch
screen.
State of indicator lamps
Some buttons contain an indicator lamp that
gives the state of the corresponding function.
Green indicator: you have switched on the
corresponding function.
Orange indicator: you have switched off the
corresponding function.
3
Indicators
Page 56 of 341
54
208_en_Chap03_Indicateurs_ed01-2015
Servicing
Principle
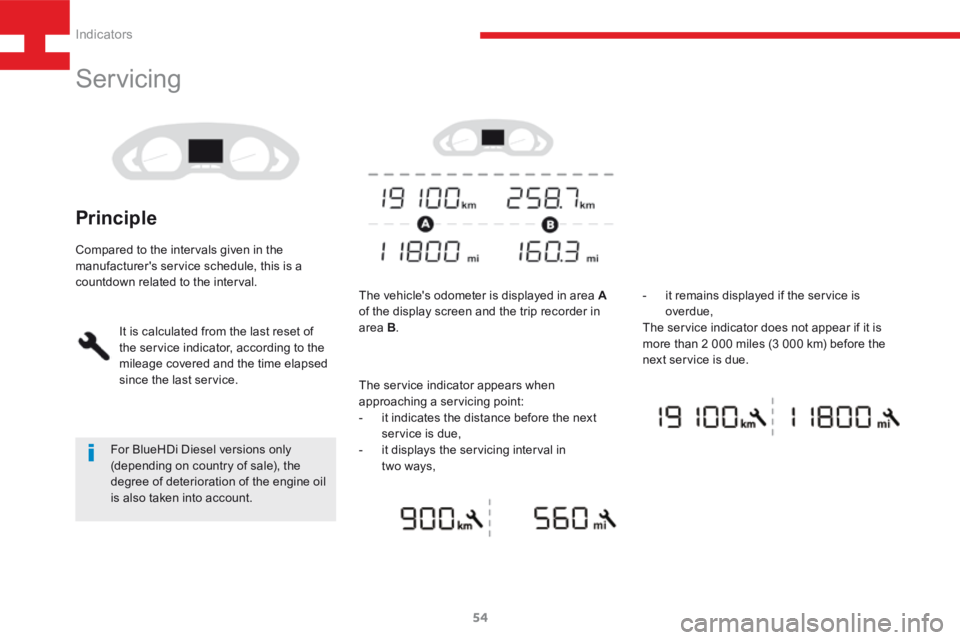
The vehicle's odometer is displayed in area A
of the display screen and the trip recorder in
area B. -
it remains displayed if the service is
overdue,
The service indicator does not appear if it is
more than 2 000 miles (3 000 km) before the
next service is due.
For BlueHDi Diesel versions only
(depending on country of sale), the
degree of deterioration of the engine oil
is also taken into account.
Compared to the intervals given in the
manufacturer's service schedule, this is a
countdown related to the interval.
It is calculated from the last reset of
the service indicator, according to the
mileage covered and the time elapsed
since the last service. The service indicator appears when
approaching a servicing point:
- it indicates the distance before the next
service is due,
- it displays the servicing interval in
two ways,
Indicators
Page 57 of 341
55
208_en_Chap03_Indicateurs_ed01-2015
Servicing reminder
Between 600 miles (1 000 km)
and 1 800 miles (3 000 km) remain
before the next service is due
For 7 seconds after the ignition is switched on,
the spanner symbolising the service operations
comes on. The distance recorder display line
indicates the distance remaining before the
next service is due.
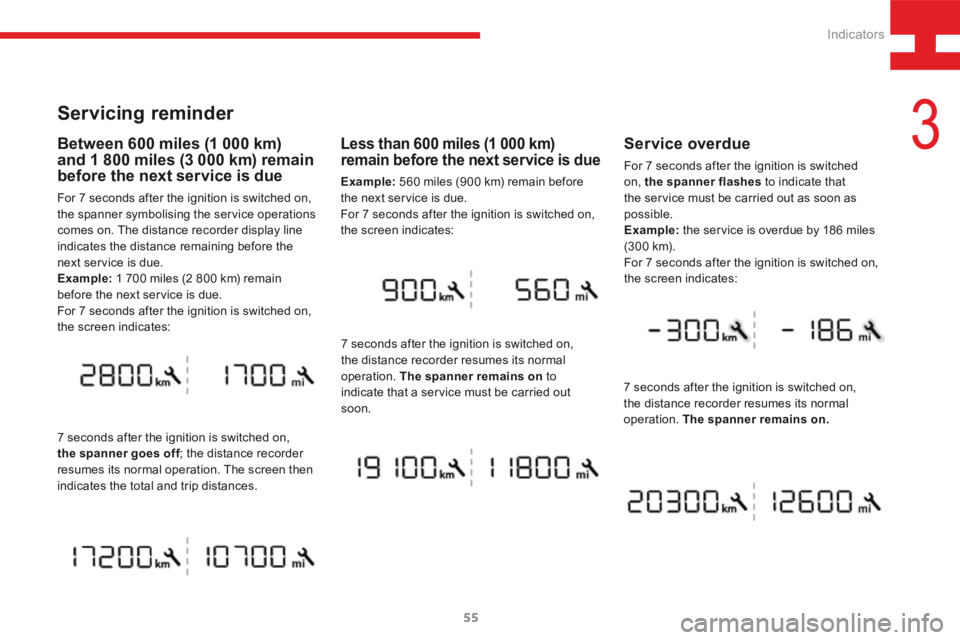
Example: 1 700 miles (2 800 km) remain
before the next service is due.
For 7 seconds after the ignition is switched on,
the screen indicates:
7 seconds after the ignition is switched on,
the spanner goes off ; the distance recorder
resumes its normal operation. The screen then
indicates the total and trip distances.
Less than 600 miles (1 000 km)
remain before the next service is due
Example: 560 miles (900 km) remain before
the next service is due.
For 7 seconds after the ignition is switched on,
the screen indicates:
7 seconds after the ignition is switched on,
the distance recorder resumes its normal
operation. The spanner remains on to
indicate that a service must be carried out
soon.
Service overdue
For 7 seconds after the ignition is switched
on, the spanner flashes to indicate that
the service must be carried out as soon as
possible.
Example: the service is overdue by 186 miles
(3 0 0 k m).
For 7 seconds after the ignition is switched on,
the screen indicates:
7 seconds after the ignition is switched on,
the distance recorder resumes its normal
operation. The spanner remains on .
3
Indicators
Page 58 of 341
56
208_en_Chap03_Indicateurs_ed01-2015
Retrieving the service
information
You can access the service information at any
time.
F Press the trip distance recorder zero reset
button.
The service information is displayed for a
few seconds, then disappears.
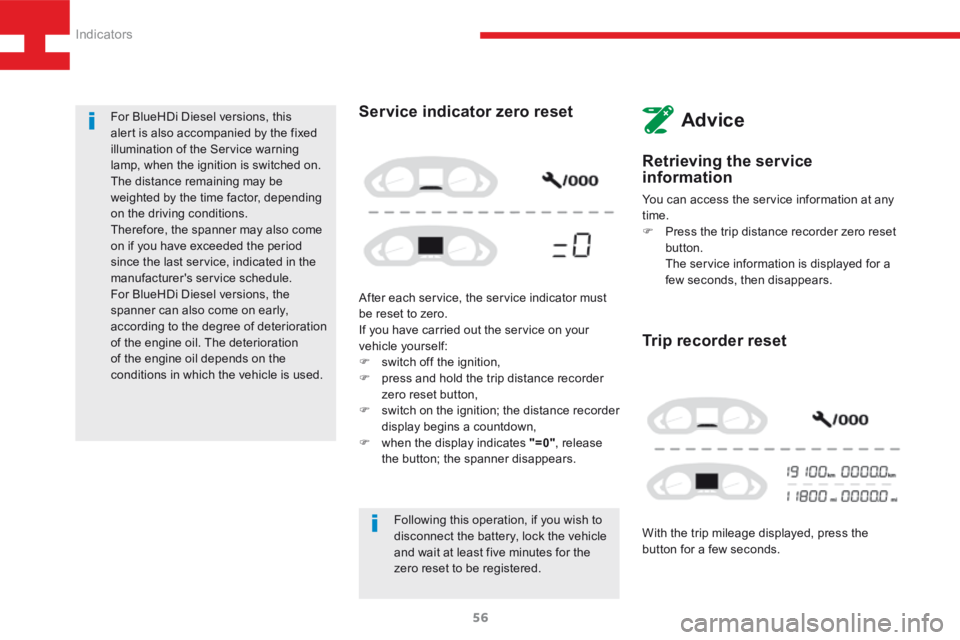
With the trip mileage displayed, press the
button for a few seconds.
Trip recorder reset
Following this operation, if you wish to
disconnect the battery, lock the vehicle
and wait at least five minutes for the
zero reset to be registered.
Service indicator zero reset
After each service, the service indicator must
be reset to zero.
If you have carried out the service on your
vehicle yourself:
F switch off the ignition,
F press and hold the trip distance recorder
zero reset button,
F switch on the ignition; the distance recorder
display begins a countdown,
F when the display indicates "=0" , release
the button; the spanner disappears.
For BlueHDi Diesel versions, this
alert is also accompanied by the fixed
illumination of the Service warning
lamp, when the ignition is switched on.
The distance remaining may be
weighted by the time factor, depending
on the driving conditions.
Therefore, the spanner may also come
on if you have exceeded the period
since the last service, indicated in the
manufacturer's service schedule.
For BlueHDi Diesel versions, the
spanner can also come on early,
according to the degree of deterioration
of the engine oil. The deterioration
of the engine oil depends on the
conditions in which the vehicle is used.
Advice
Indicators
Page 59 of 341
57
208_en_Chap03_Indicateurs_ed01-2015
Oil level
PrincipleAdvice
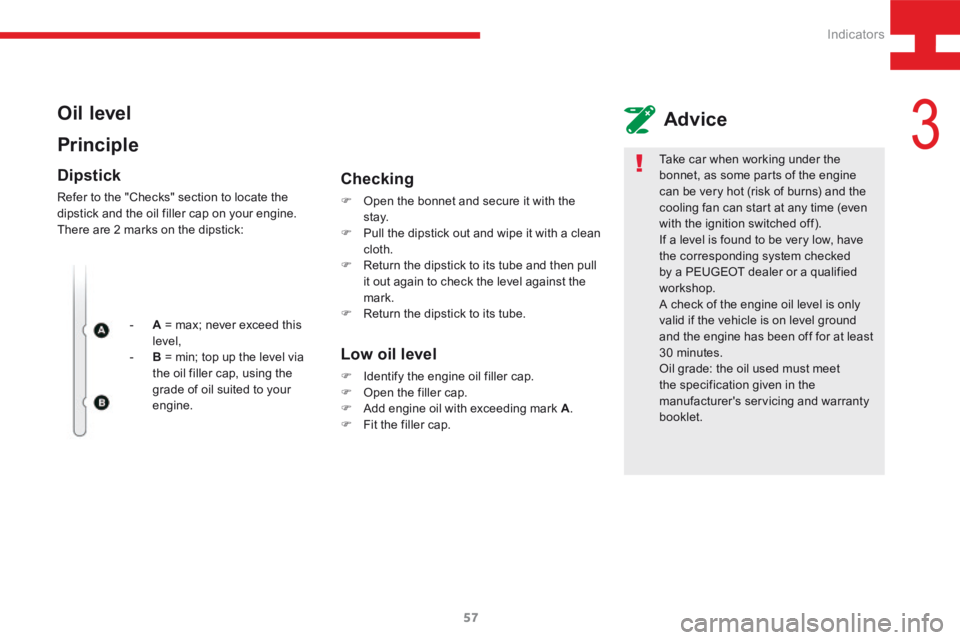
Dipstick
Refer to the "Checks" section to locate the
dipstick and the oil filler cap on your engine.
There are 2 marks on the dipstick:
- A = max; never exceed this
level,
- B = min; top up the level via
the oil filler cap, using the
grade of oil suited to your
engine.
Checking
F Open the bonnet and secure it with the
st ay.
F Pull the dipstick out and wipe it with a clean
cloth.
F Return the dipstick to its tube and then pull
it out again to check the level against the
mark.
F Return the dipstick to its tube.
Low oil level
F Identify the engine oil filler cap.
F Open the filler cap.
F Add engine oil with exceeding mark A .
F Fit the filler cap. Take car when working under the
bonnet, as some parts of the engine
can be very hot (risk of burns) and the
cooling fan can start at any time (even
with the ignition switched off).
If a level is found to be very low, have
the corresponding system checked
by a PEUGEOT dealer or a qualified
workshop.
A check of the engine oil level is only
valid if the vehicle is on level ground
and the engine has been off for at least
30 minutes.
Oil grade: the oil used must meet
the specification given in the
manufacturer's servicing and warranty
booklet.
3
Indicators
Page 60 of 341
58
208_en_Chap03_Indicateurs_ed01-2015
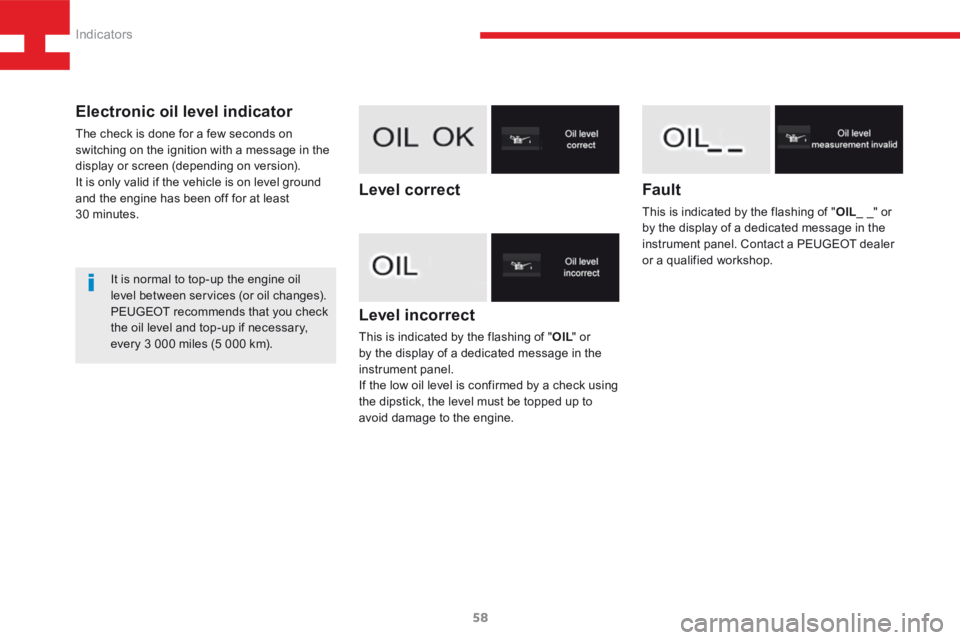
Level incorrect
This is indicated by the flashing of "OIL" or
by the display of a dedicated message in the
instrument panel.
If the low oil level is confirmed by a check using
the dipstick, the level must be topped up to
avoid damage to the engine.
Fault
This is indicated by the flashing of " OIL_ _" or
by the display of a dedicated message in the
instrument panel. Contact a PEUGEOT dealer
or a qualified workshop.
Level correct
It is normal to top-up the engine oil
level between services (or oil changes).
PEUGEOT recommends that you check
the oil level and top-up if necessary,
every 3 000 miles (5 000 km).
Electronic oil level indicator
The check is done for a few seconds on
switching on the ignition with a message in the
display or screen (depending on version).
It is only valid if the vehicle is on level ground
and the engine has been off for at least
30 minutes.
Indicators