Peugeot 306 Break 2002 Manual PDF
Manufacturer: PEUGEOT, Model Year: 2002, Model line: 306 Break, Model: Peugeot 306 Break 2002Pages: 131, PDF Size: 2.25 MB
Page 71 of 131
SPECIAL FEATURES
124
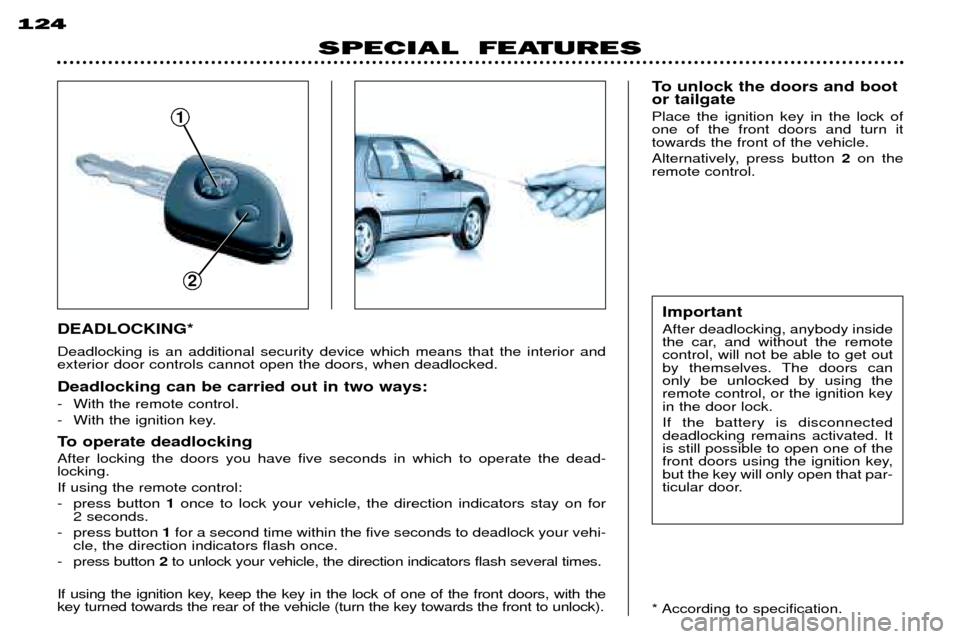
DEADLOCKING* Deadlocking is an additional security device which means that the interior and exterior door controls cannot open the doors, when deadlocked. Deadlocking can be carried out in two ways:
- With the remote control.
- With the ignition key.
To operate deadlocking After locking the doors you have five seconds in which to operate the dead- locking. If using the remote control:
- press button
1once to lock your vehicle, the direction indicators stay on for
2 seconds.
- press button 1for a second time within the five seconds to deadlock your vehi-
cle, the direction indicators flash once.
- press button 2to unlock your vehicle, the direction indicators flash several times.
If using the ignition key, keep the key in the lock of one of the front doors, with the key turned towards the rear of the vehicle (turn the key towards the front to unlock).
To unlock the doors and boot or tailgate Place the ignition key in the lock of one of the front doors and turn ittowards the front of the vehicle.
Alternatively, press button 2on the
remote control.
* According to specification. Important After deadlocking, anybody inside
the car, and without the remotecontrol, will not be able to get out
by themselves. The doors canonly be unlocked by using theremote control, or the ignition keyin the door lock. If the battery is disconnected deadlocking remains activated. Itis still possible to open one of the
front doors using the ignition key,but the key will only open that par-
ticular door.
1
2
Page 72 of 131

SPECIAL FEATURES125
To programme the remote control(s)
To programme the deadlocking remote controls key(s) (on first use):
- the doors must be unlocked.
- use the key with remote control to
turn on the ignition (to position A
ÒaccessoriesÓ).
- immediately press the large button on the key.
- turn off the ignition. To check that programming has been correctly carried out:
- press button
1on the remote con-
trol key (or one of the remote con- trol keys*).
- the doors and boot or tailgate will lock.
- if this is not the case: repeat the programming.Do not operate the dead- locking if there is some-one inside the vehicle. Keep your key reference
number in a safe place. This will enable you to order a new key if the key is lost or stolen. Check that the batteries are in good condition. If the red indicator light comes on this indicates correct operation ofthe transmitter but not that thedoors have been opened orlocked; wait at least one secondbetween each attempt.
* According to specification.
Page 73 of 131

SPECIAL FEATURES
126
ALARM SYSTEM* Setting and disarming the alarm Switching off the siren The alarm completes the security equipment of your vehicle. It com-prises two types of protection: -exterior protection: when this is
set, the alarm sounds if a door,
the bonnet, the boot or the tail- gate are opened.
- interior sensor protection: when
it is set, the alarm sounds if thesensors detect a variation in the
air movement inside the vehicle(breaking of a window) or amovement inside the vehicle.
It is also equipped with an anti-
tamper function. If an attempt is made to neutralise the leads to the siren, the centralcontrol or the battery:
- the alarm is triggered,- the siren sounds, the headlights come on*. To set the alarm (exterior and interior protection) The ignition must be switched off.
You must be outside the vehiclePress the locking button of the remote control key (if your vehiclehas deadlocking, you then need topress this button again). The doors will lock.The direction indicators come on continuously for two seconds. The red lamp on the switch flashes once a second. Five seconds afterwards : the exteri- or protection is set. Fifty seconds afterwards : the interi- or protection is set. Note :
when the alarm is triggered,
the siren sounds for thirty seconds. It then stops, but the alarm remains set.
Warning
If, on setting the alarm, a door, the boot, tailgate or the bonnet are notproperly closed, the siren will be trig-
gered briefly. If the vehicle is proper-ly closed within forty five secondsafter this, the alarm is set, the direc-tion indicators come on continuouslyfor two seconds. In all cases the alarm is set forty five seconds afterwards. To disarm the alarm (exteriorand interior protection) Press the unlocking button on the remote control. The doors unlock.The direction indicators flash for two seconds. The red lamp on the switch goes out.Note :
if the lamp continues to flash
after disarming the alarm, it is
because it has been triggered. Thisflashing will stop on switching on theignition.
* According to specification.
Page 74 of 131
SPECIAL FEATURES127
Emergency cut-off (Failure of the remote control)
Unlock the doors with the key.
Open the door.
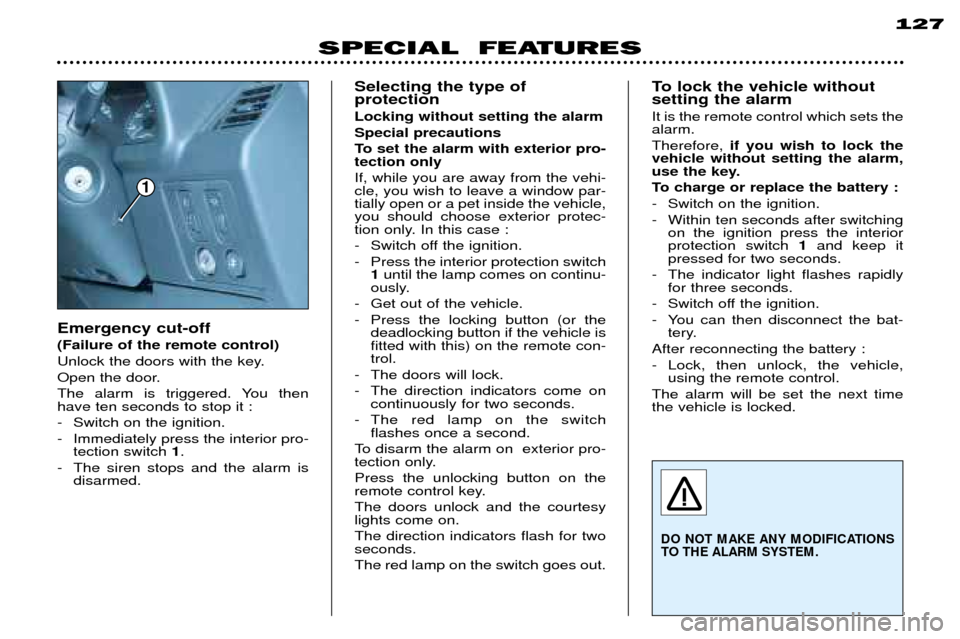
The alarm is triggered. You then have ten seconds to stop it :
- Switch on the ignition.
- Immediately press the interior pro-
tection switch 1.
- The siren stops and the alarm is disarmed. Selecting the type of protection Locking without setting the alarm Special precautions
To set the alarm with exterior pro- tection only If, while you are away from the vehi- cle, you wish to leave a window par-tially open or a pet inside the vehicle,you should choose exterior protec-
tion only. In this case :
- Switch off the ignition.
- Press the interior protection switch
1until the lamp comes on continu-
ously.
- Get out of the vehicle.
- Press the locking button (or the deadlocking button if the vehicle is fitted with this) on the remote con-trol.
- The doors will lock.
- The direction indicators come on continuously for two seconds.
- The red lamp on the switch flashes once a second.
To disarm the alarm on exterior pro-
tection only. Press the unlocking button on the
remote control key. The doors unlock and the courtesy lights come on. The direction indicators flash for two seconds. The red lamp on the switch goes out. To lock the vehicle without setting the alarm It is the remote control which sets the alarm. Therefore,
if you wish to lock the
vehicle without setting the alarm,
use the key.
To charge or replace the battery :
- Switch on the ignition.
- Within ten seconds after switching on the ignition press the interior protection switch 1and keep it
pressed for two seconds.
- The indicator light flashes rapidly for three seconds.
- Switch off the ignition.
- You can then disconnect the bat- tery.
After reconnecting the battery :
- Lock, then unlock, the vehicle, using the remote control.
The alarm will be set the next time the vehicle is locked.
DO NOT M AKE ANY M ODIFICATIONS
TO THE ALARM SYSTEM .
1
Page 75 of 131
79
YOUR 306 IN DETAIL
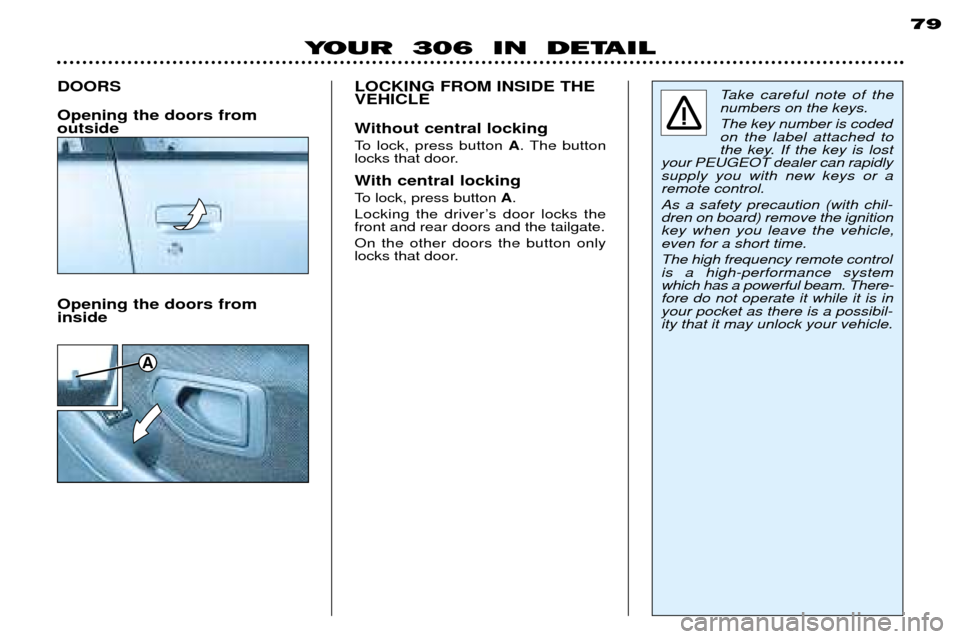
DOORS Opening the doors from outside
Take careful note of the numbers on the keys. The key number is coded on the label attached to
the key. If the key is lost
your PEUGEOT dealer can rapidlysupply you with new keys or aremote control. As a safety precaution (with chil- dren on board) remove the ignitionkey when you leave the vehicle,even for a short time. The high frequency remote control is a high-performance systemwhich has a powerful beam. There-fore do not operate it while it is inyour pocket as there is a possibil-ity that it may unlock your vehicle.
Opening the doors from inside LOCKING FROM INSIDE THEVEHICLE
Without central locking
To lock, press button
A. The button
locks that door.
With central locking
To lock, press button A.
Locking the driverÕs door locks the front and rear doors and the tailgate. On the other doors the button only
locks that door.
A
Page 76 of 131
80
YOUR 306 IN DETAIL
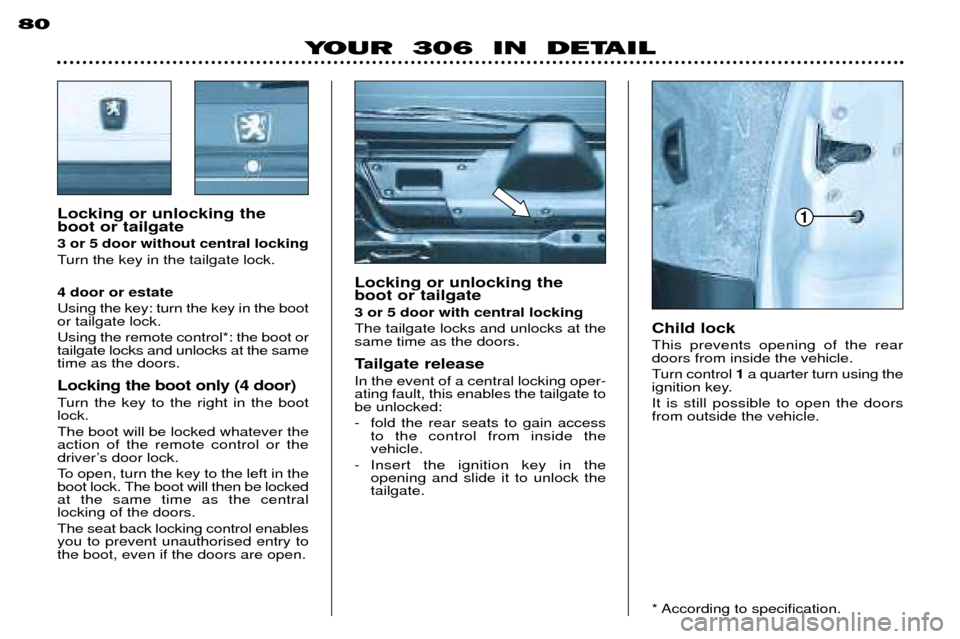
Locking or unlocking the boot or tailgate 3 or 5 door without central locking
Turn the key in the tailgate lock. 4 door or estate Using the key: turn the key in the boot or tailgate lock. Using the remote control*: the boot or tailgate locks and unlocks at the sametime as the doors. Locking the boot only (4 door)
Turn the key to the right in the boot lock. The boot will be locked whatever the action of the remote control or the
driverÕs door lock.
To open, turn the key to the left in the
boot lock. The boot will then be lockedat the same time as the centrallocking of the doors. The seat back locking control enables you to prevent unauthorised entry tothe boot, even if the doors are open. Locking or unlocking theboot or tailgate 3 or 5 door with central locking The tailgate locks and unlocks at the same time as the doors.
Tailgate release In the event of a central locking oper- ating fault, this enables the tailgate tobe unlocked:
- fold the rear seats to gain access
to the control from inside the vehicle.
- Insert the ignition key in the opening and slide it to unlock thetailgate.
Child lock This prevents opening of the rear doors from inside the vehicle.
Turn control 1a quarter turn using the
ignition key. It is still possible to open the doors from outside the vehicle.
* According to specification.
1
Page 77 of 131
YOUR 306 IN DETAIL 81
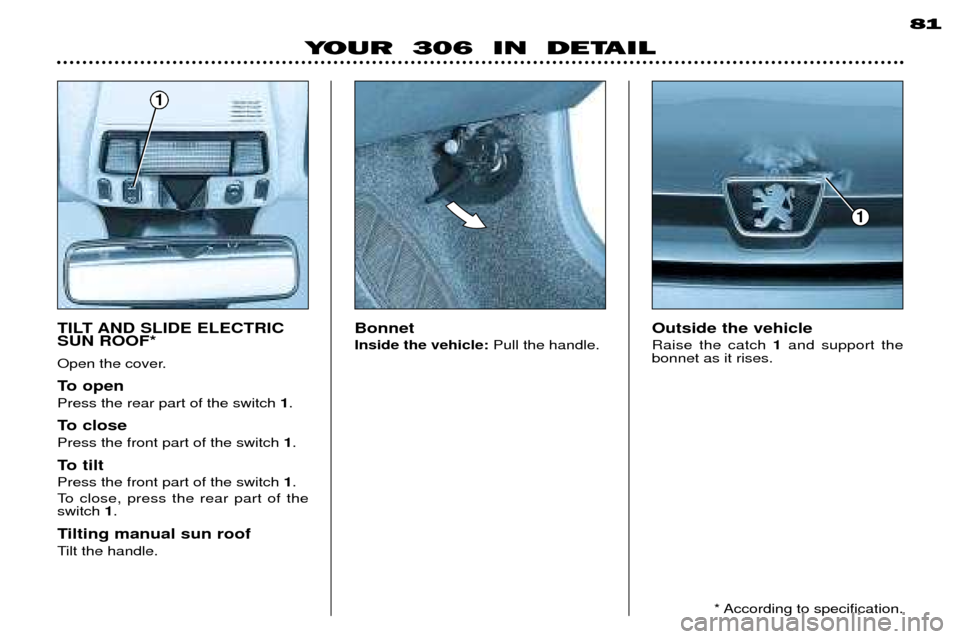
Bonnet Inside the vehicle:
Pull the handle. Outside the vehicleRaise the catch
1and support the
bonnet as it rises.
1
TILT AND SLIDE ELECTRIC SUN ROOF*
Open the cover.
To open Press the rear part of the switch 1.
To closePress the front part of the switch 1.
To tiltPress the front part of the switch 1.
To close, press the rear part of the switch 1.
Tilting manual sun roof
Tilt the handle.
1
* According to specification.
Page 78 of 131
YOUR 306 IN DETAIL
82
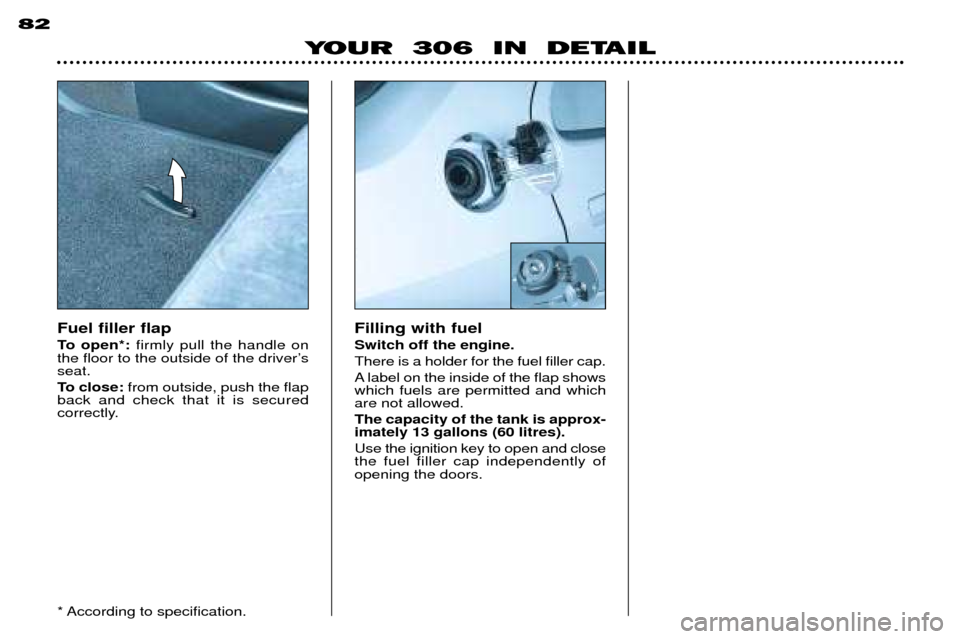
Fuel filler flap
To open*:
firmly pull the handle on
the floor to the outside of the driverÕs seat.
To close: from outside, push the flap
back and check that it is secured
correctly.
* According to specification. Filling with fuel Switch off the engine. There is a holder for the fuel filler cap.
A label on the inside of the flap shows which fuels are permitted and whichare not allowed. The capacity of the tank is approx- imately 13 gallons (60 litres). Use the ignition key to open and close the fuel filler cap independently ofopening the doors.
Page 79 of 131
90
YOUR 306 IN DETAIL
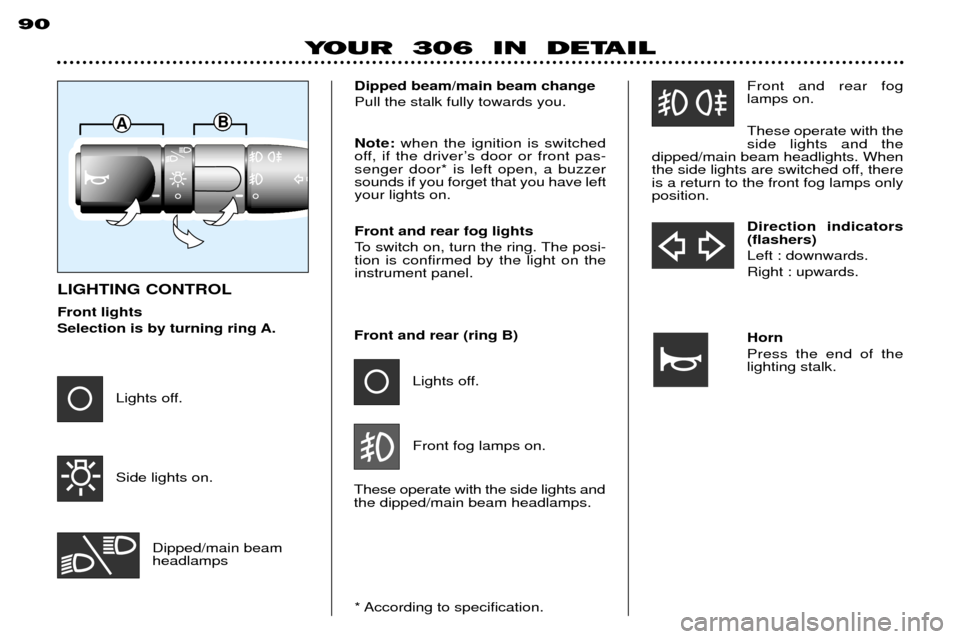
LIGHTING CONTROL Front lights
Selection is by turning ring A.* According to specification.
Lights off. Side lights on.
Dipped/main beam headlamps
Dipped beam/main beam change Pull the stalk fully towards you.
Front and rear (ring B) Lights off.
Front fog lamps on.
These operate with the side lights and the dipped/main beam headlamps. Front and rear foglamps on. These operate with the side lights and the
dipped/main beam headlights. When
the side lights are switched off, thereis a return to the front fog lamps onlyposition.
Direction indicators (flashers) Left : downwards.Right : upwards.
Front and rear fog lights
To switch on, turn the ring. The posi- tion is confirmed by the light on theinstrument panel.
Note:
when the ignition is switched
off, if the driverÕs door or front pas-senger door* is left open, a buzzersounds if you forget that you have leftyour lights on.
Horn Press the end of the lighting stalk.
AB
Page 80 of 131
91
In good weather or in rain, both day and night, if therear fog lamp is lit itcauses glare and is pro-
hibited. Do not forget to switch it off as soon as it is no longer needed. Do not cover the rain detector located on the windscreen behind
the interior mirror. When using an automatic car wash, switch off the ignition orcheck that the wiper control is notin the automatic position. In winter it is advisable to wait for the windscreen to completely clearof ice before operating the auto-matic wipe.
YOUR 306 IN DETAIL
3
2
1
0
4A
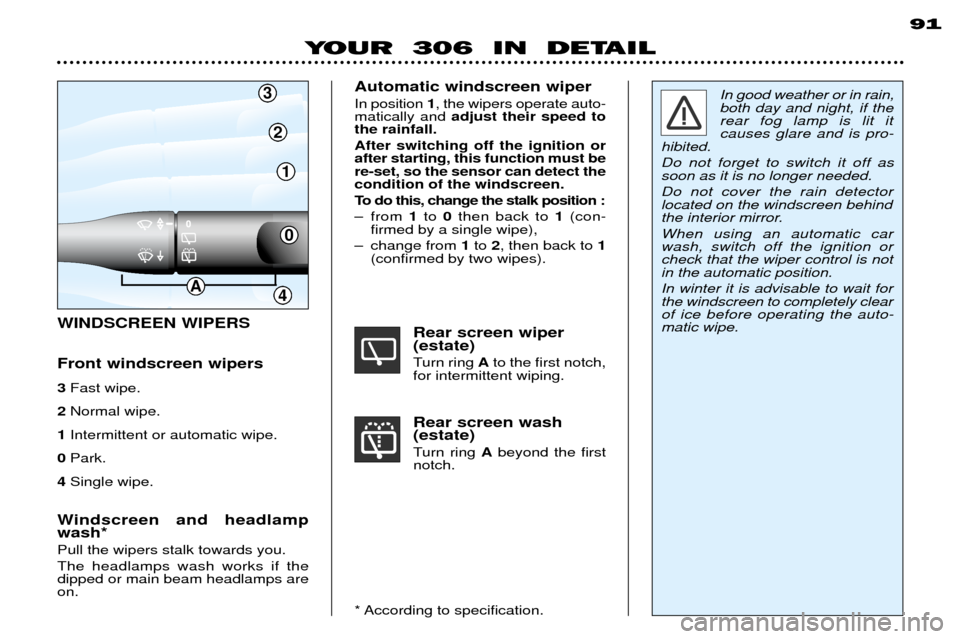
WINDSCREEN WIPERS Front windscreen wipers 3 Fast wipe.
2 Normal wipe.
1 Intermittent or automatic wipe.
0 Park.
4 Single wipe.
Windscreen and headlamp wash* Pull the wipers stalk towards you. The headlamps wash works if the dipped or main beam headlamps areon. Automatic windscreen wiper In position
1, the wipers operate auto-
matically and adjust their speed to
the rainfall. After switching off the ignition or after starting, this function must bere-set, so the sensor can detect thecondition of the windscreen.
To do this, change the stalk position :
Ð from 1to 0then back to 1(con-
firmed by a single wipe),
Ð change from 1to 2, then back to 1
(confirmed by two wipes).
Rear screen wiper (estate)
Turn ring Ato the first notch,
for intermittent wiping. Rear screen wash (estate)
Turn ring Abeyond the first
notch.
* According to specification.