SUBARU LEGACY 1999 Service Repair Manual
Manufacturer: SUBARU, Model Year: 1999, Model line: LEGACY, Model: SUBARU LEGACY 1999Pages: 1456, PDF Size: 59.93 MB
Page 1201 of 1456
D: ASSEMBLY
Assembly is in the reverse order of disassembly
procedures.
CAUTION:
IWhen disassembling generator, replace rear
ball bearing.
G6M0077
IWhen soldering starter coil to diode, do not
touch lead wire with solder for more than 5
seconds.
IBefore installing rear cover, insert pin from
outside of rear cover so that holds brush. After
installing rear cover, remove pin.
B6M0492
IWhen installing rear cover, heat portion (A)
to 50ÉC (122ÉF) with heater drier.
B6M0476B
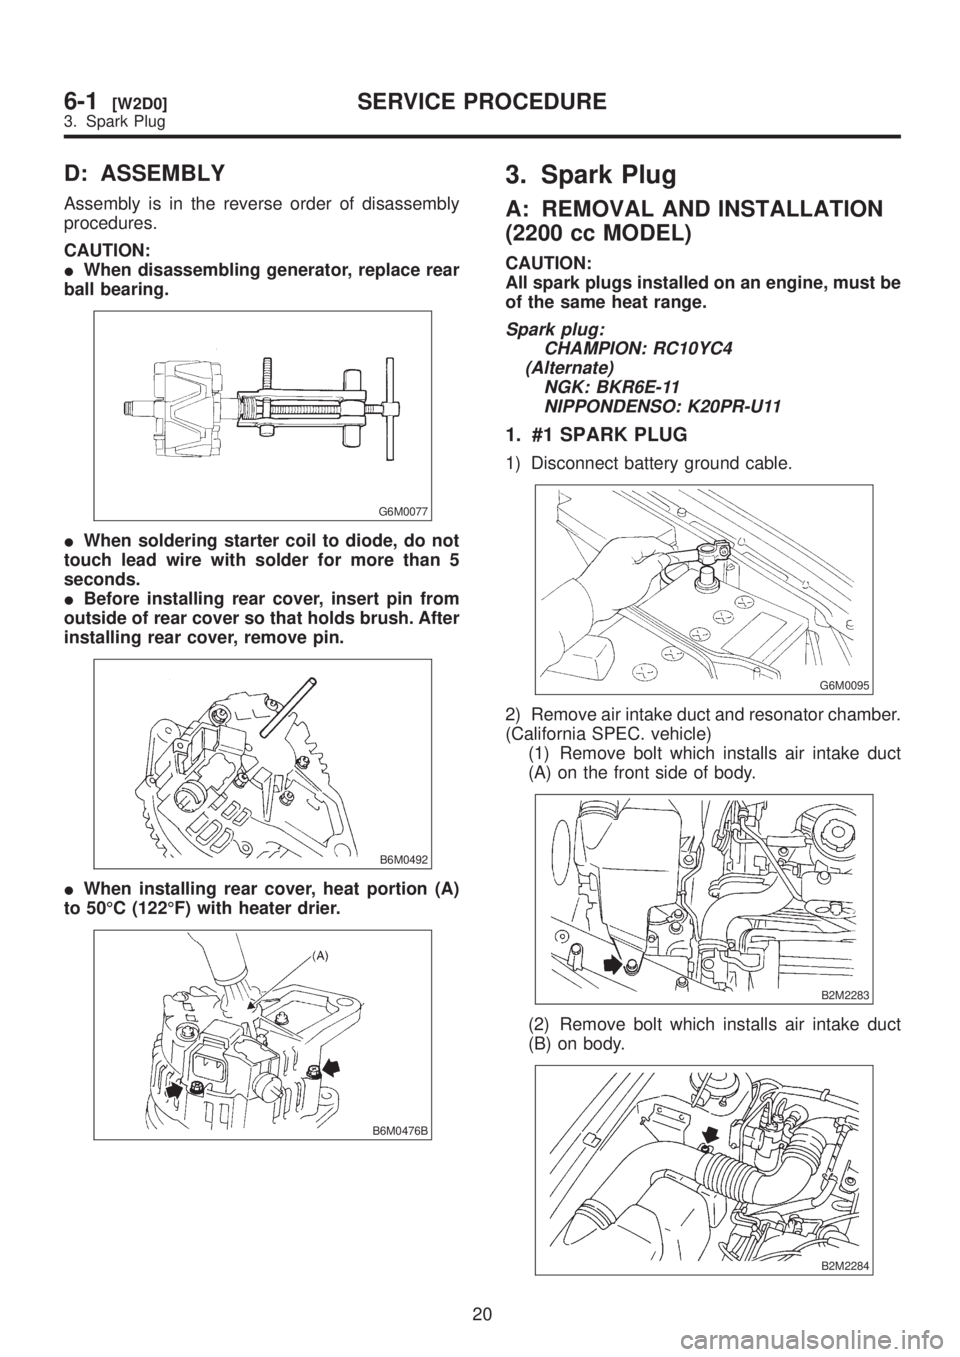
3. Spark Plug
A: REMOVAL AND INSTALLATION
(2200 cc MODEL)
CAUTION:
All spark plugs installed on an engine, must be
of the same heat range.
Spark plug:
CHAMPION: RC10YC4
(Alternate)
NGK: BKR6E-11
NIPPONDENSO: K20PR-U11
1. #1 SPARK PLUG
1) Disconnect battery ground cable.
G6M0095
2) Remove air intake duct and resonator chamber.
(California SPEC. vehicle)
(1) Remove bolt which installs air intake duct
(A) on the front side of body.
B2M2283
(2) Remove bolt which installs air intake duct
(B) on body.
B2M2284
20
6-1[W2D0]SERVICE PROCEDURE
3. Spark Plug
Page 1202 of 1456
D: ASSEMBLY
Assembly is in the reverse order of disassembly
procedures.
CAUTION:
IWhen disassembling generator, replace rear
ball bearing.
G6M0077
IWhen soldering starter coil to diode, do not
touch lead wire with solder for more than 5
seconds.
IBefore installing rear cover, insert pin from
outside of rear cover so that holds brush. After
installing rear cover, remove pin.
B6M0492
IWhen installing rear cover, heat portion (A)
to 50ÉC (122ÉF) with heater drier.
B6M0476B
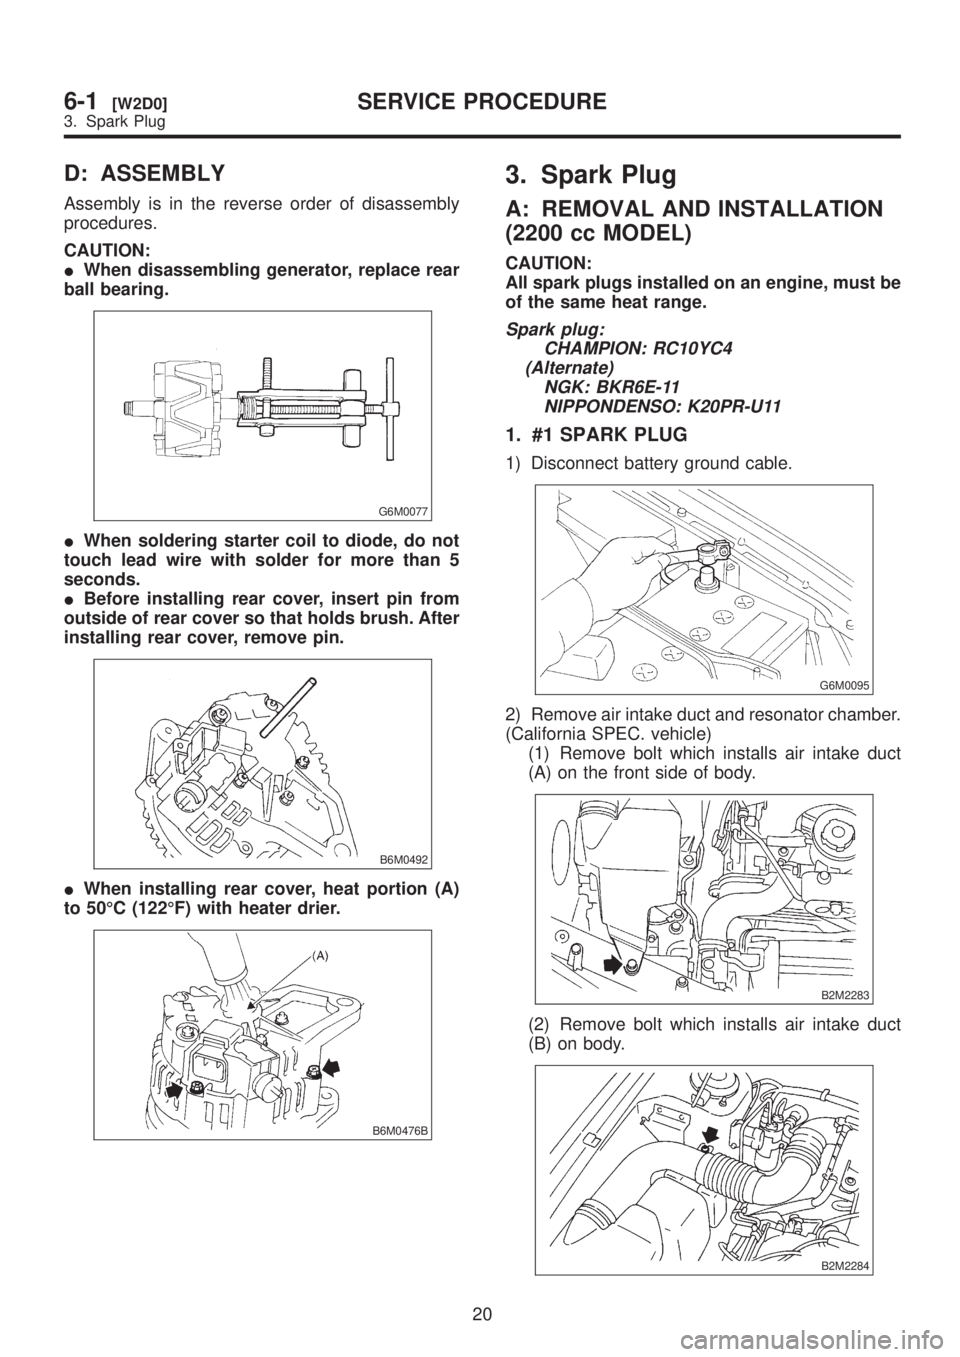
3. Spark Plug
A: REMOVAL AND INSTALLATION
(2200 cc MODEL)
CAUTION:
All spark plugs installed on an engine, must be
of the same heat range.
Spark plug:
CHAMPION: RC10YC4
(Alternate)
NGK: BKR6E-11
NIPPONDENSO: K20PR-U11
1. #1 SPARK PLUG
1) Disconnect battery ground cable.
G6M0095
2) Remove air intake duct and resonator chamber.
(California SPEC. vehicle)
(1) Remove bolt which installs air intake duct
(A) on the front side of body.
B2M2283
(2) Remove bolt which installs air intake duct
(B) on body.
B2M2284
20
6-1[W2D0]SERVICE PROCEDURE
3. Spark Plug
Page 1203 of 1456
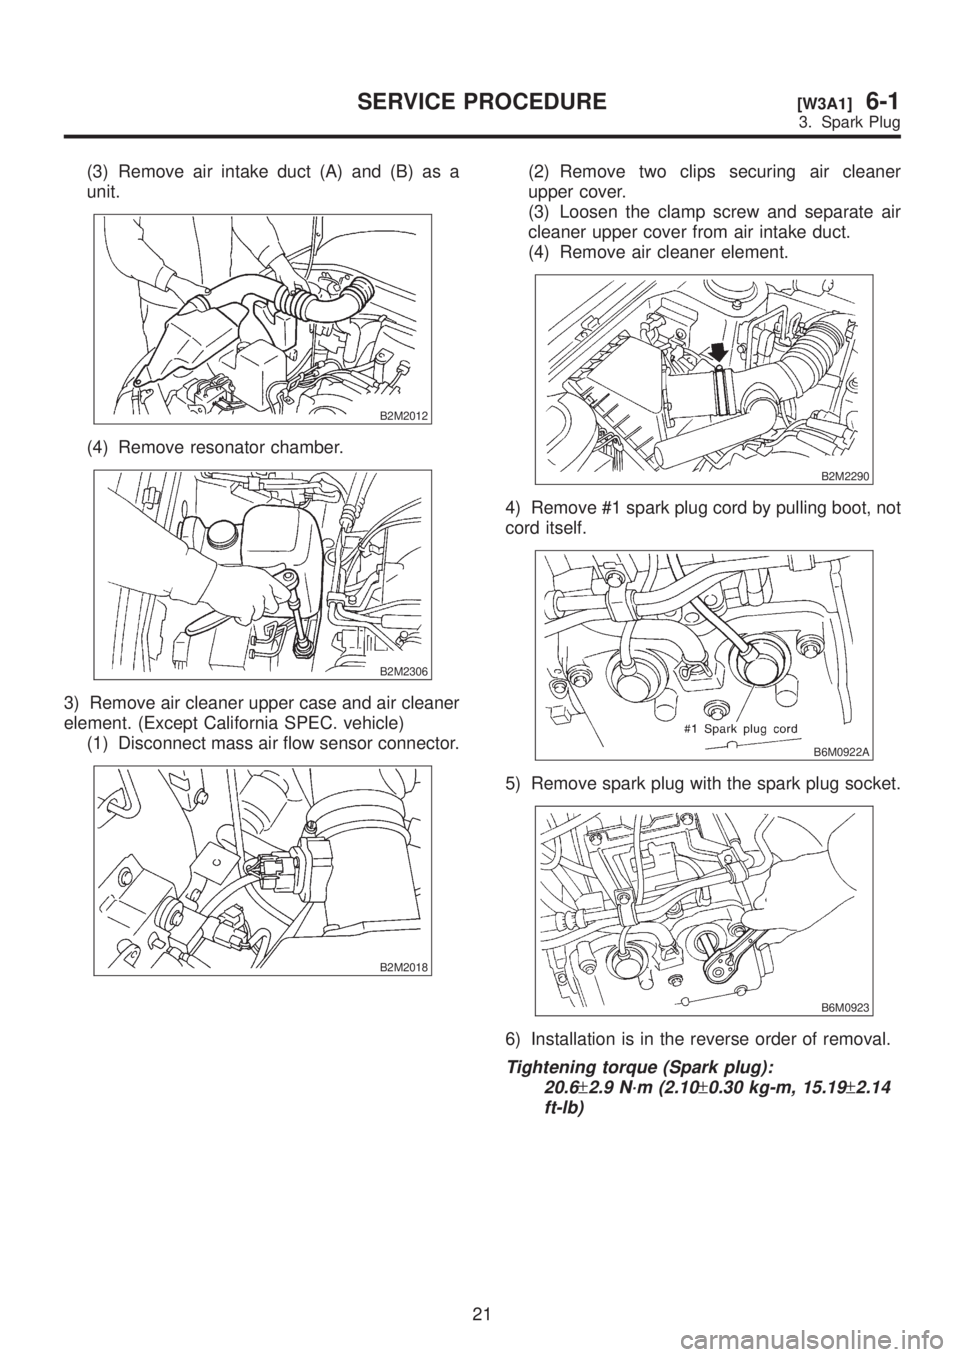
(3) Remove air intake duct (A) and (B) as a
unit.
B2M2012
(4) Remove resonator chamber.
B2M2306
3) Remove air cleaner upper case and air cleaner
element. (Except California SPEC. vehicle)
(1) Disconnect mass air flow sensor connector.
B2M2018
(2) Remove two clips securing air cleaner
upper cover.
(3) Loosen the clamp screw and separate air
cleaner upper cover from air intake duct.
(4) Remove air cleaner element.
B2M2290
4) Remove #1 spark plug cord by pulling boot, not
cord itself.
B6M0922A
5) Remove spark plug with the spark plug socket.
B6M0923
6) Installation is in the reverse order of removal.
Tightening torque (Spark plug):
20.6
±2.9 N´m (2.10±0.30 kg-m, 15.19±2.14
ft-lb)
21
[W3A1]6-1SERVICE PROCEDURE
3. Spark Plug
Page 1204 of 1456
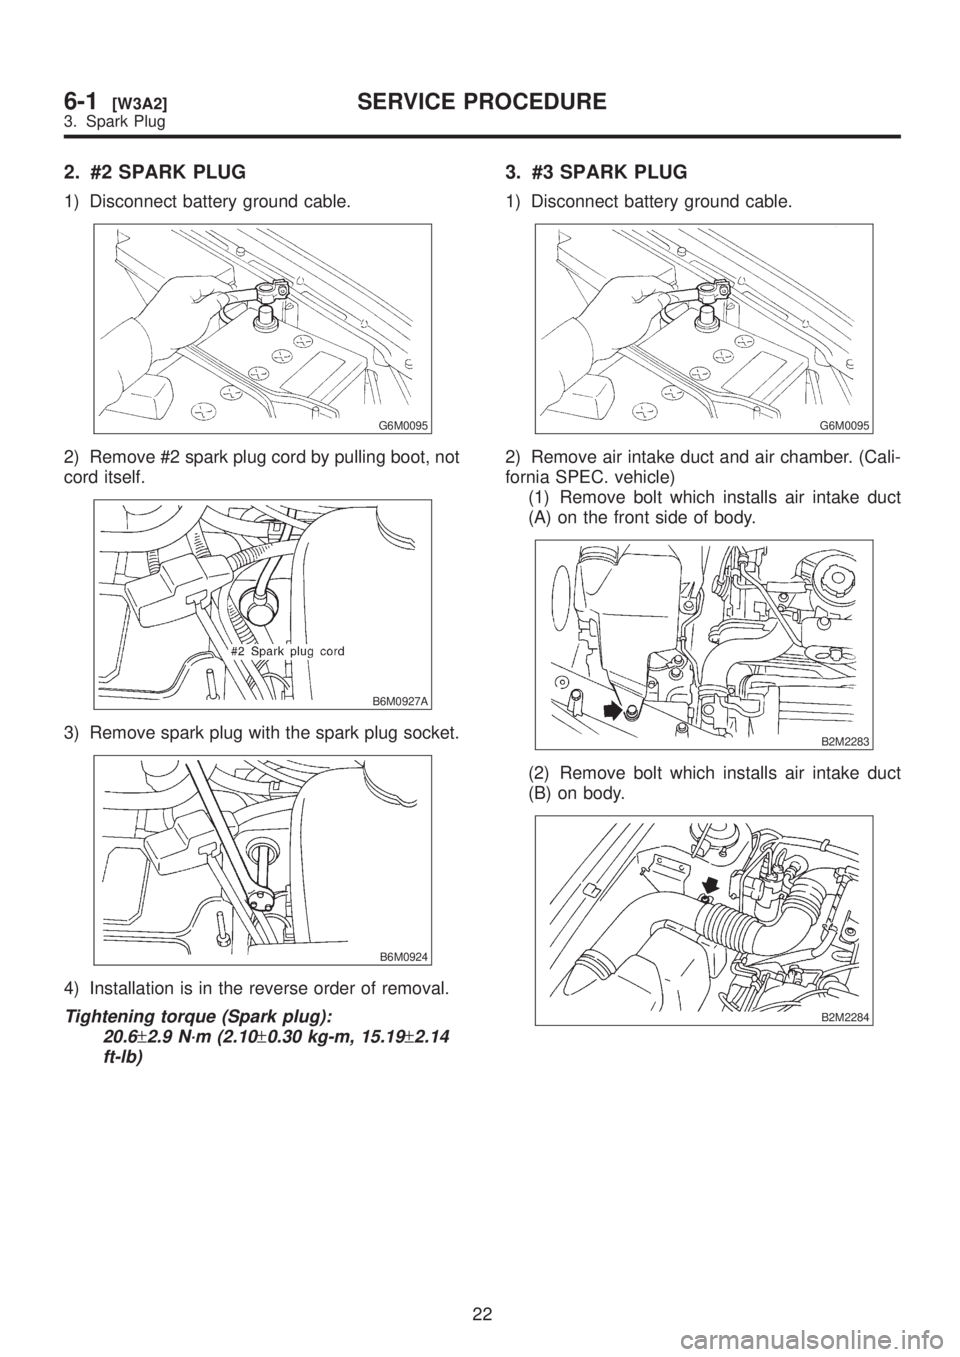
2. #2 SPARK PLUG
1) Disconnect battery ground cable.
G6M0095
2) Remove #2 spark plug cord by pulling boot, not
cord itself.
B6M0927A
3) Remove spark plug with the spark plug socket.
B6M0924
4) Installation is in the reverse order of removal.
Tightening torque (Spark plug):
20.6
±2.9 N´m (2.10±0.30 kg-m, 15.19±2.14
ft-lb)
3. #3 SPARK PLUG
1) Disconnect battery ground cable.
G6M0095
2) Remove air intake duct and air chamber. (Cali-
fornia SPEC. vehicle)
(1) Remove bolt which installs air intake duct
(A) on the front side of body.
B2M2283
(2) Remove bolt which installs air intake duct
(B) on body.
B2M2284
22
6-1[W3A2]SERVICE PROCEDURE
3. Spark Plug
Page 1205 of 1456
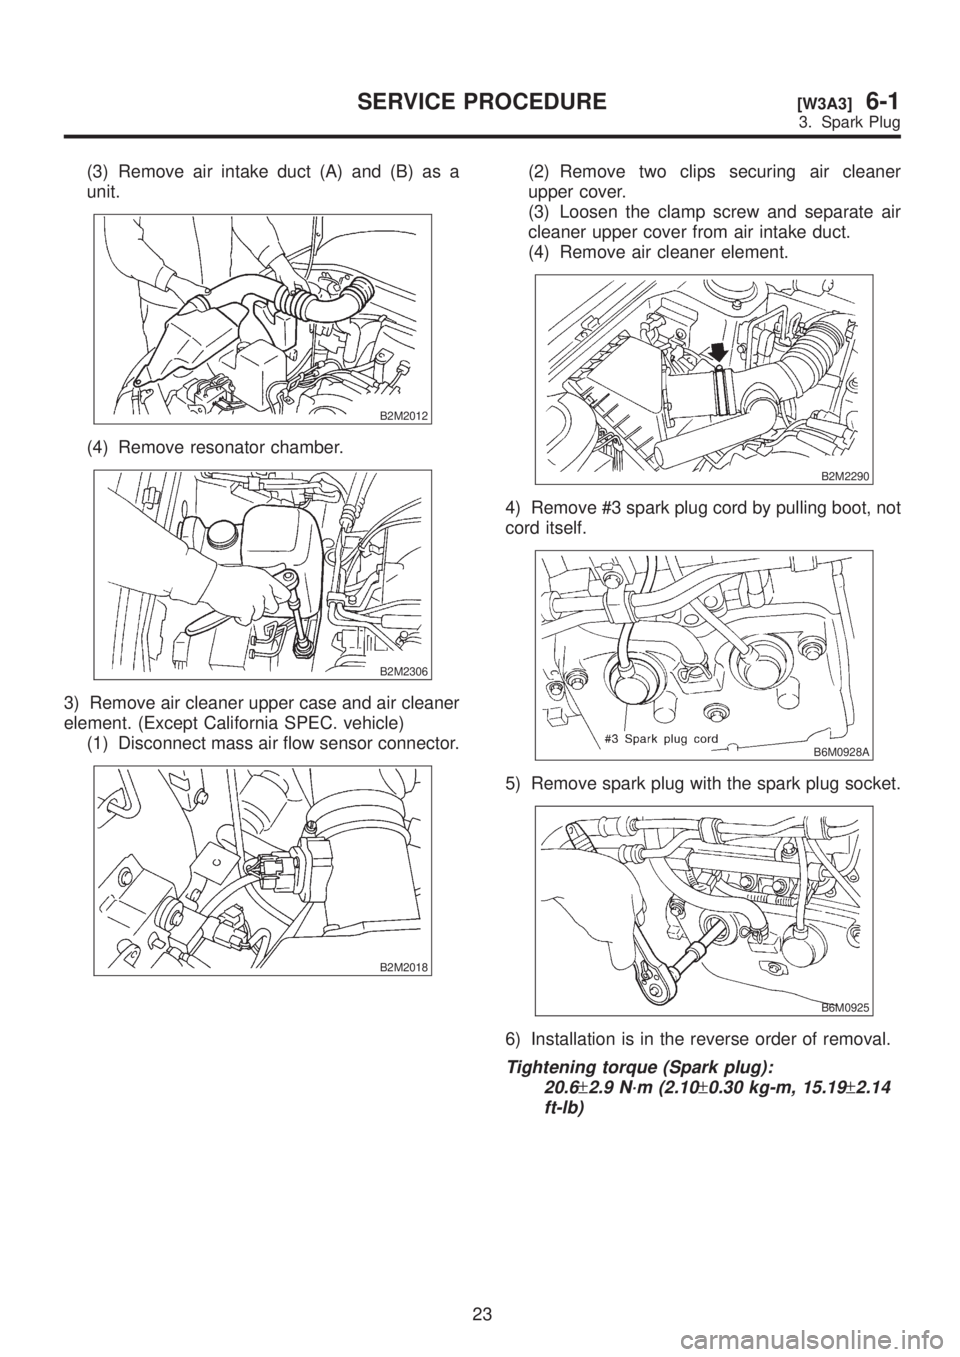
(3) Remove air intake duct (A) and (B) as a
unit.
B2M2012
(4) Remove resonator chamber.
B2M2306
3) Remove air cleaner upper case and air cleaner
element. (Except California SPEC. vehicle)
(1) Disconnect mass air flow sensor connector.
B2M2018
(2) Remove two clips securing air cleaner
upper cover.
(3) Loosen the clamp screw and separate air
cleaner upper cover from air intake duct.
(4) Remove air cleaner element.
B2M2290
4) Remove #3 spark plug cord by pulling boot, not
cord itself.
B6M0928A
5) Remove spark plug with the spark plug socket.
B6M0925
6) Installation is in the reverse order of removal.
Tightening torque (Spark plug):
20.6
±2.9 N´m (2.10±0.30 kg-m, 15.19±2.14
ft-lb)
23
[W3A3]6-1SERVICE PROCEDURE
3. Spark Plug
Page 1206 of 1456
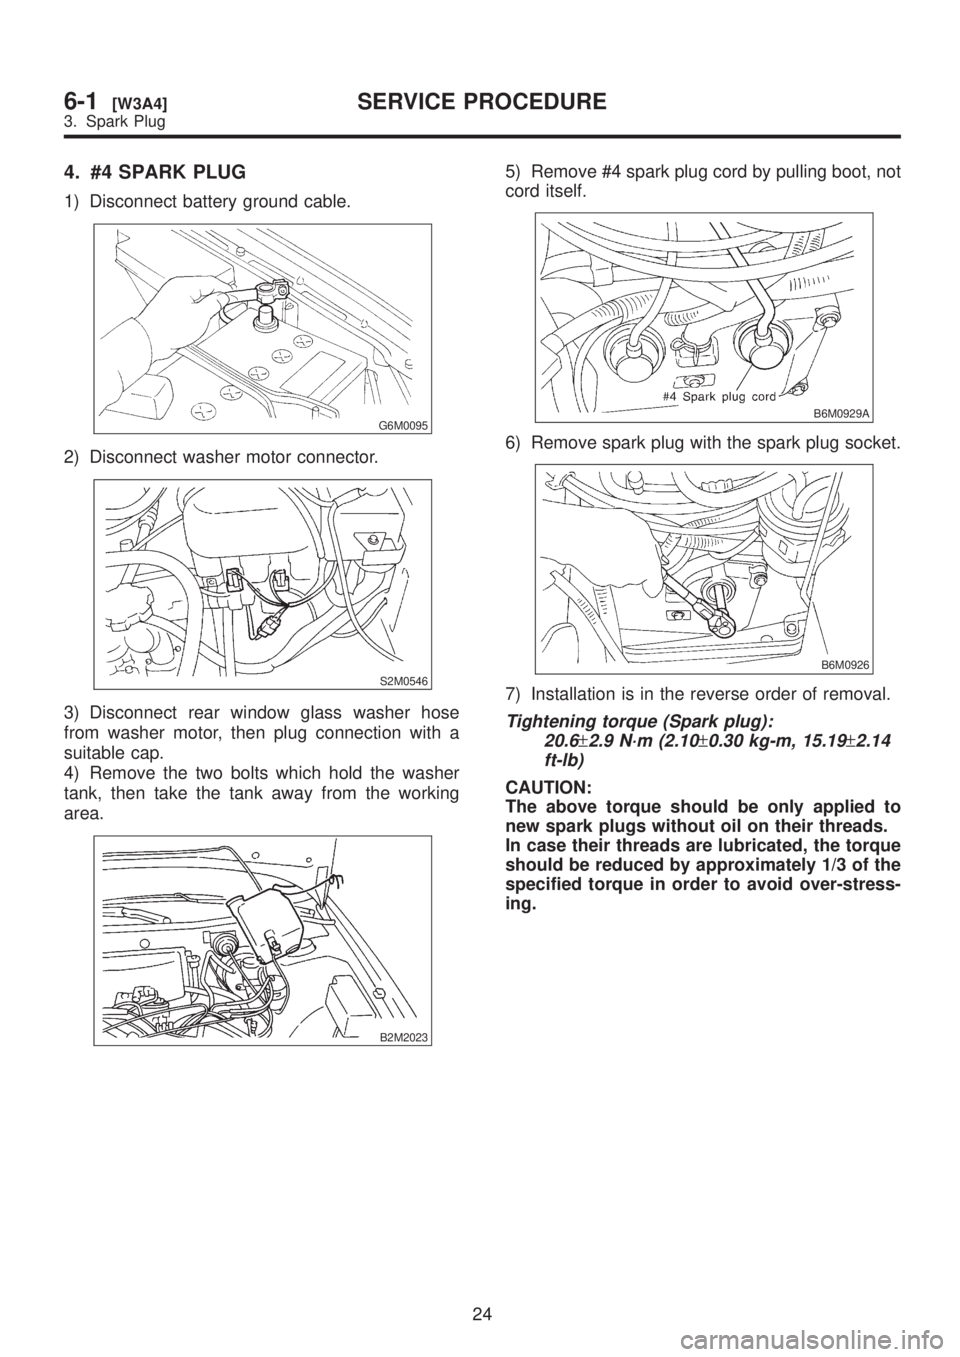
4. #4 SPARK PLUG
1) Disconnect battery ground cable.
G6M0095
2) Disconnect washer motor connector.
S2M0546
3) Disconnect rear window glass washer hose
from washer motor, then plug connection with a
suitable cap.
4) Remove the two bolts which hold the washer
tank, then take the tank away from the working
area.
B2M2023
5) Remove #4 spark plug cord by pulling boot, not
cord itself.
B6M0929A
6) Remove spark plug with the spark plug socket.
B6M0926
7) Installation is in the reverse order of removal.
Tightening torque (Spark plug):
20.6
±2.9 N´m (2.10±0.30 kg-m, 15.19±2.14
ft-lb)
CAUTION:
The above torque should be only applied to
new spark plugs without oil on their threads.
In case their threads are lubricated, the torque
should be reduced by approximately 1/3 of the
specified torque in order to avoid over-stress-
ing.
24
6-1[W3A4]SERVICE PROCEDURE
3. Spark Plug
Page 1207 of 1456
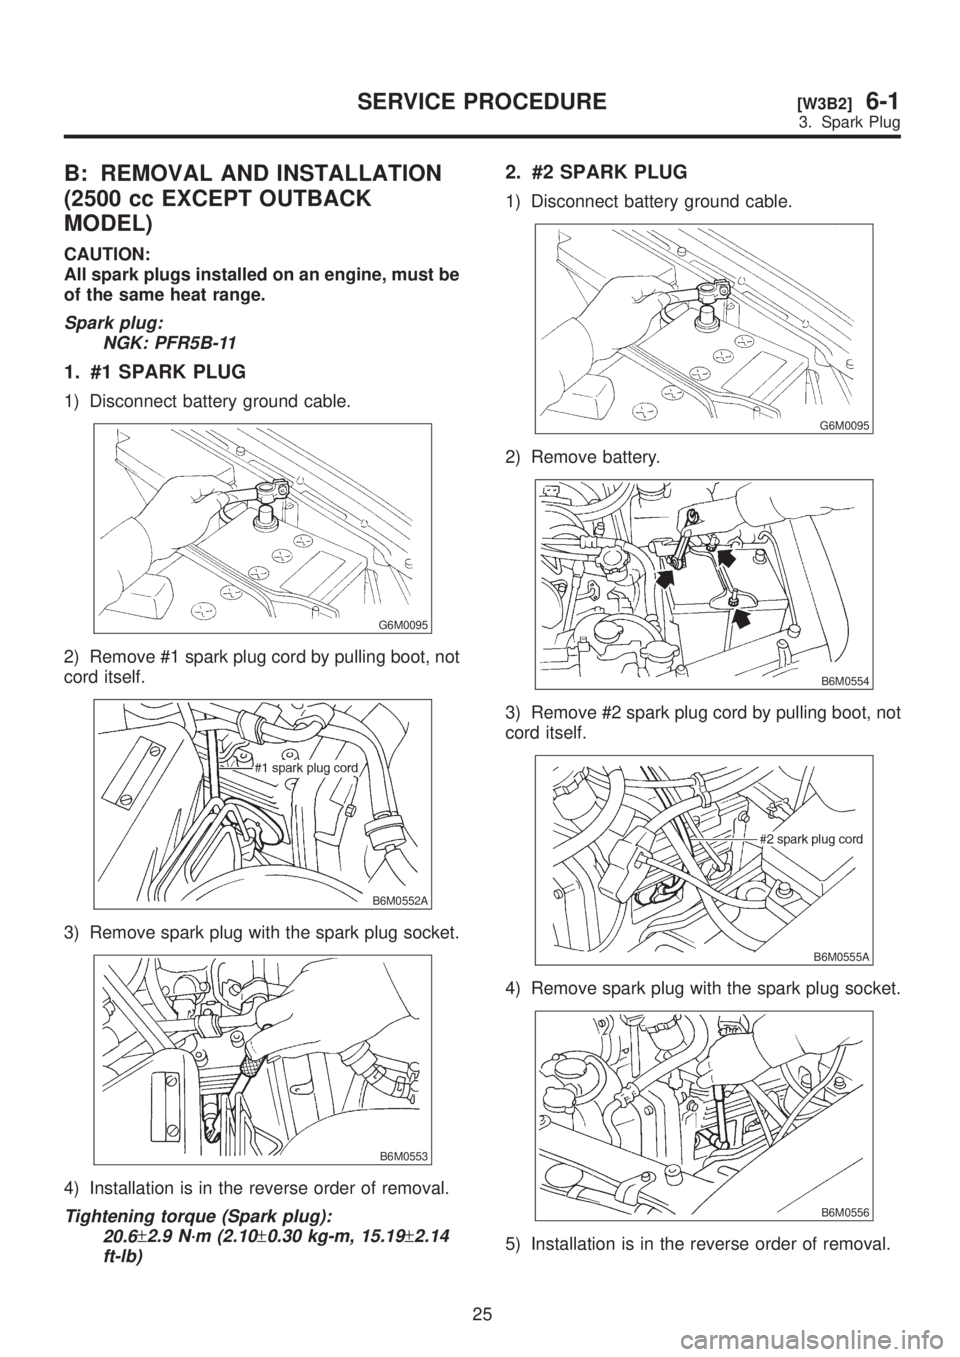
B: REMOVAL AND INSTALLATION
(2500 cc EXCEPT OUTBACK
MODEL)
CAUTION:
All spark plugs installed on an engine, must be
of the same heat range.
Spark plug:
NGK: PFR5B-11
1. #1 SPARK PLUG
1) Disconnect battery ground cable.
G6M0095
2) Remove #1 spark plug cord by pulling boot, not
cord itself.
B6M0552A
3) Remove spark plug with the spark plug socket.
B6M0553
4) Installation is in the reverse order of removal.
Tightening torque (Spark plug):
20.6
±2.9 N´m (2.10±0.30 kg-m, 15.19±2.14
ft-lb)
2. #2 SPARK PLUG
1) Disconnect battery ground cable.
G6M0095
2) Remove battery.
B6M0554
3) Remove #2 spark plug cord by pulling boot, not
cord itself.
B6M0555A
4) Remove spark plug with the spark plug socket.
B6M0556
5) Installation is in the reverse order of removal.
25
[W3B2]6-1SERVICE PROCEDURE
3. Spark Plug
Page 1208 of 1456
Tightening torque (Spark plug):
20.6
±2.9 N´m (2.10±0.30 kg-m, 15.19±2.14
ft-lb)
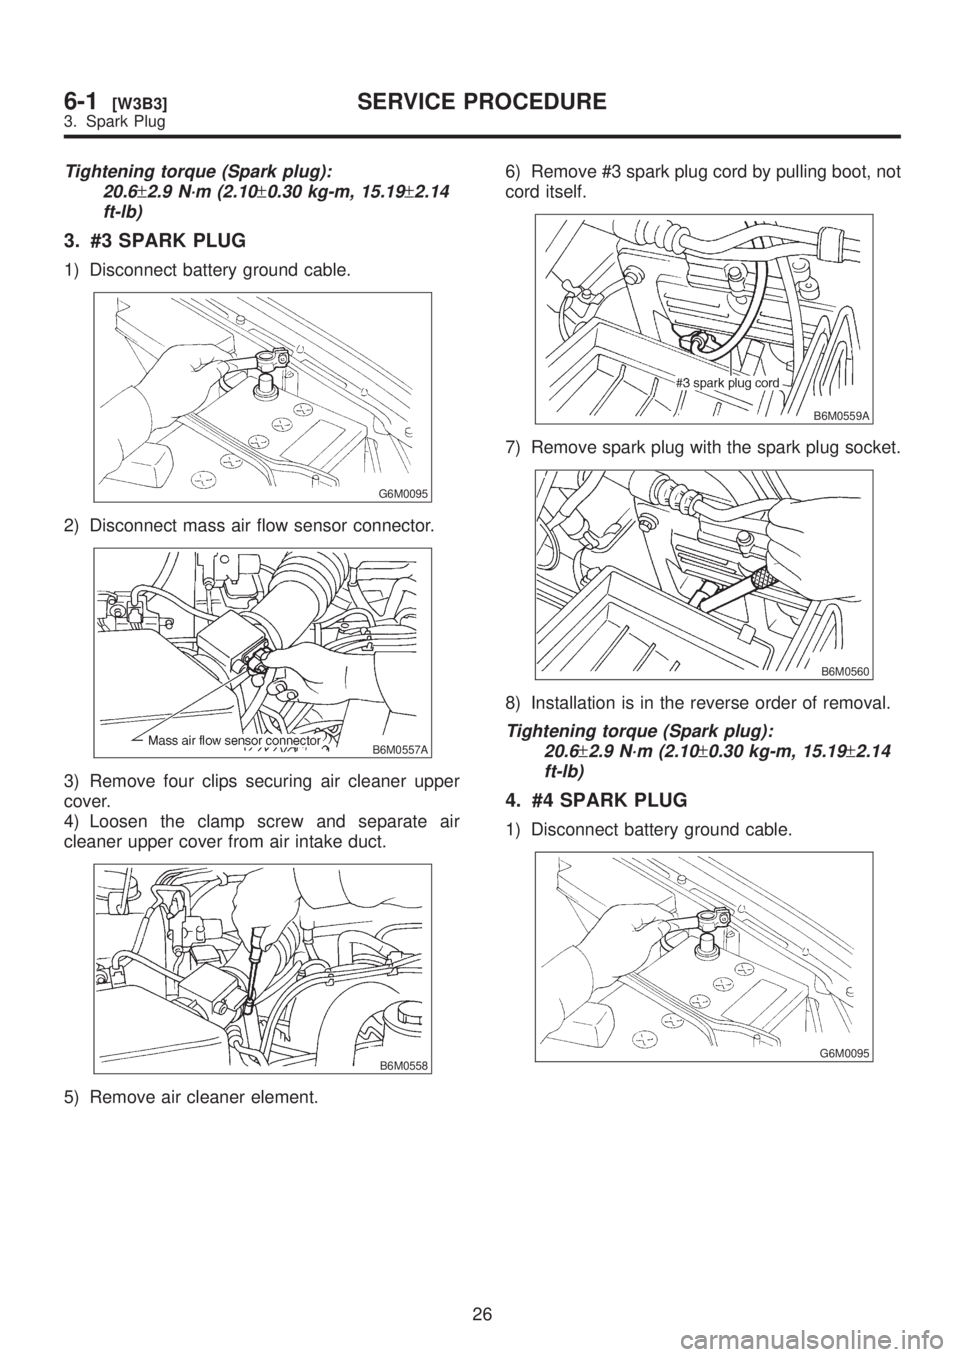
3. #3 SPARK PLUG
1) Disconnect battery ground cable.
G6M0095
2) Disconnect mass air flow sensor connector.
B6M0557A
3) Remove four clips securing air cleaner upper
cover.
4) Loosen the clamp screw and separate air
cleaner upper cover from air intake duct.
B6M0558
5) Remove air cleaner element.6) Remove #3 spark plug cord by pulling boot, not
cord itself.
B6M0559A
7) Remove spark plug with the spark plug socket.
B6M0560
8) Installation is in the reverse order of removal.
Tightening torque (Spark plug):
20.6
±2.9 N´m (2.10±0.30 kg-m, 15.19±2.14
ft-lb)
4. #4 SPARK PLUG
1) Disconnect battery ground cable.
G6M0095
26
6-1[W3B3]SERVICE PROCEDURE
3. Spark Plug
Page 1209 of 1456
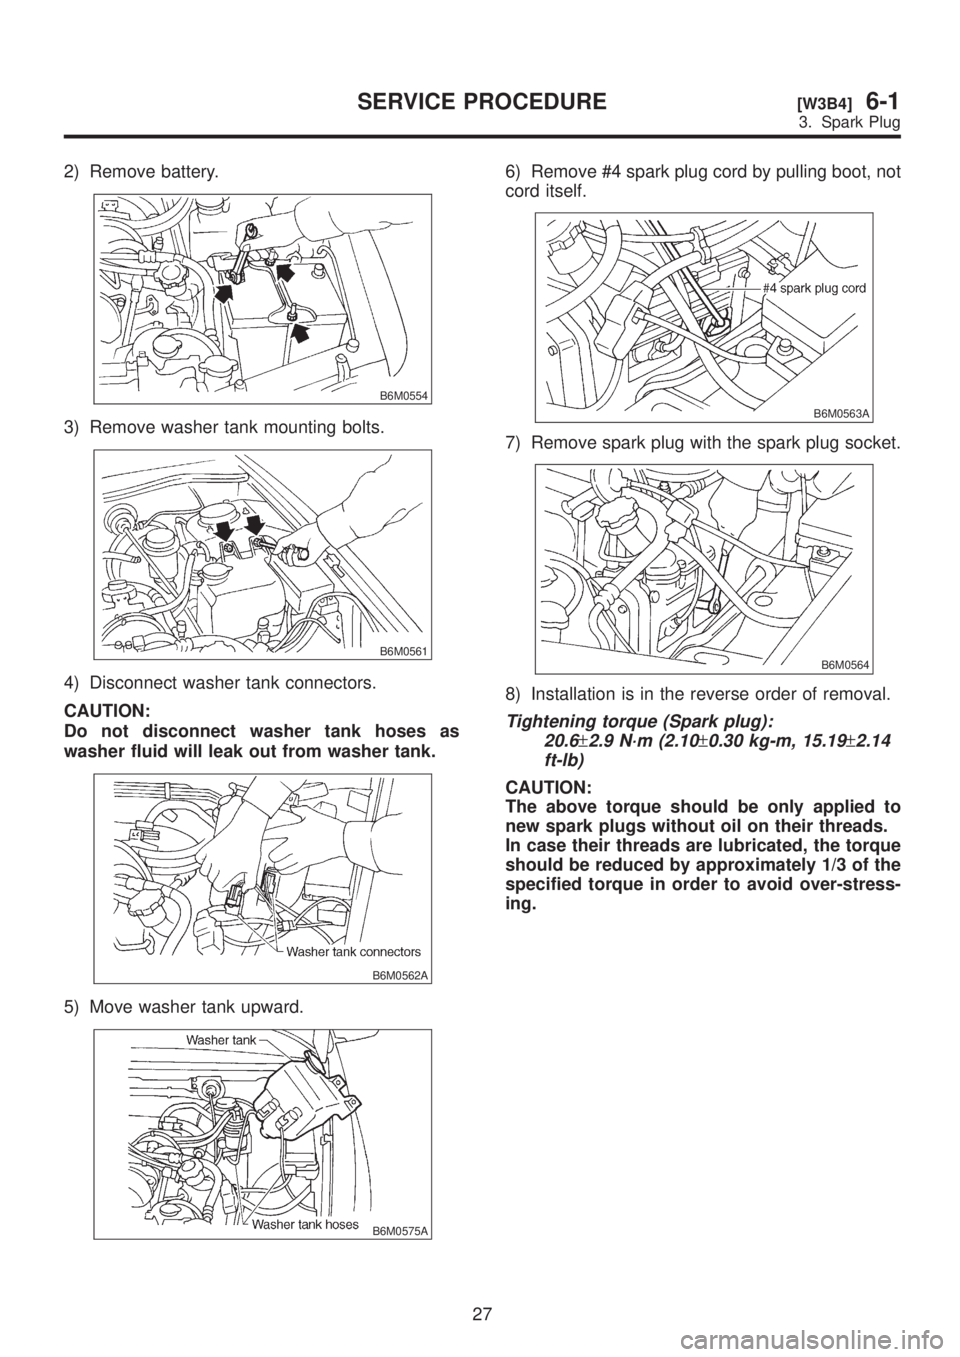
2) Remove battery.
B6M0554
3) Remove washer tank mounting bolts.
B6M0561
4) Disconnect washer tank connectors.
CAUTION:
Do not disconnect washer tank hoses as
washer fluid will leak out from washer tank.
B6M0562A
5) Move washer tank upward.
B6M0575A
6) Remove #4 spark plug cord by pulling boot, not
cord itself.
B6M0563A
7) Remove spark plug with the spark plug socket.
B6M0564
8) Installation is in the reverse order of removal.
Tightening torque (Spark plug):
20.6
±2.9 N´m (2.10±0.30 kg-m, 15.19±2.14
ft-lb)
CAUTION:
The above torque should be only applied to
new spark plugs without oil on their threads.
In case their threads are lubricated, the torque
should be reduced by approximately 1/3 of the
specified torque in order to avoid over-stress-
ing.
27
[W3B4]6-1SERVICE PROCEDURE
3. Spark Plug
Page 1210 of 1456
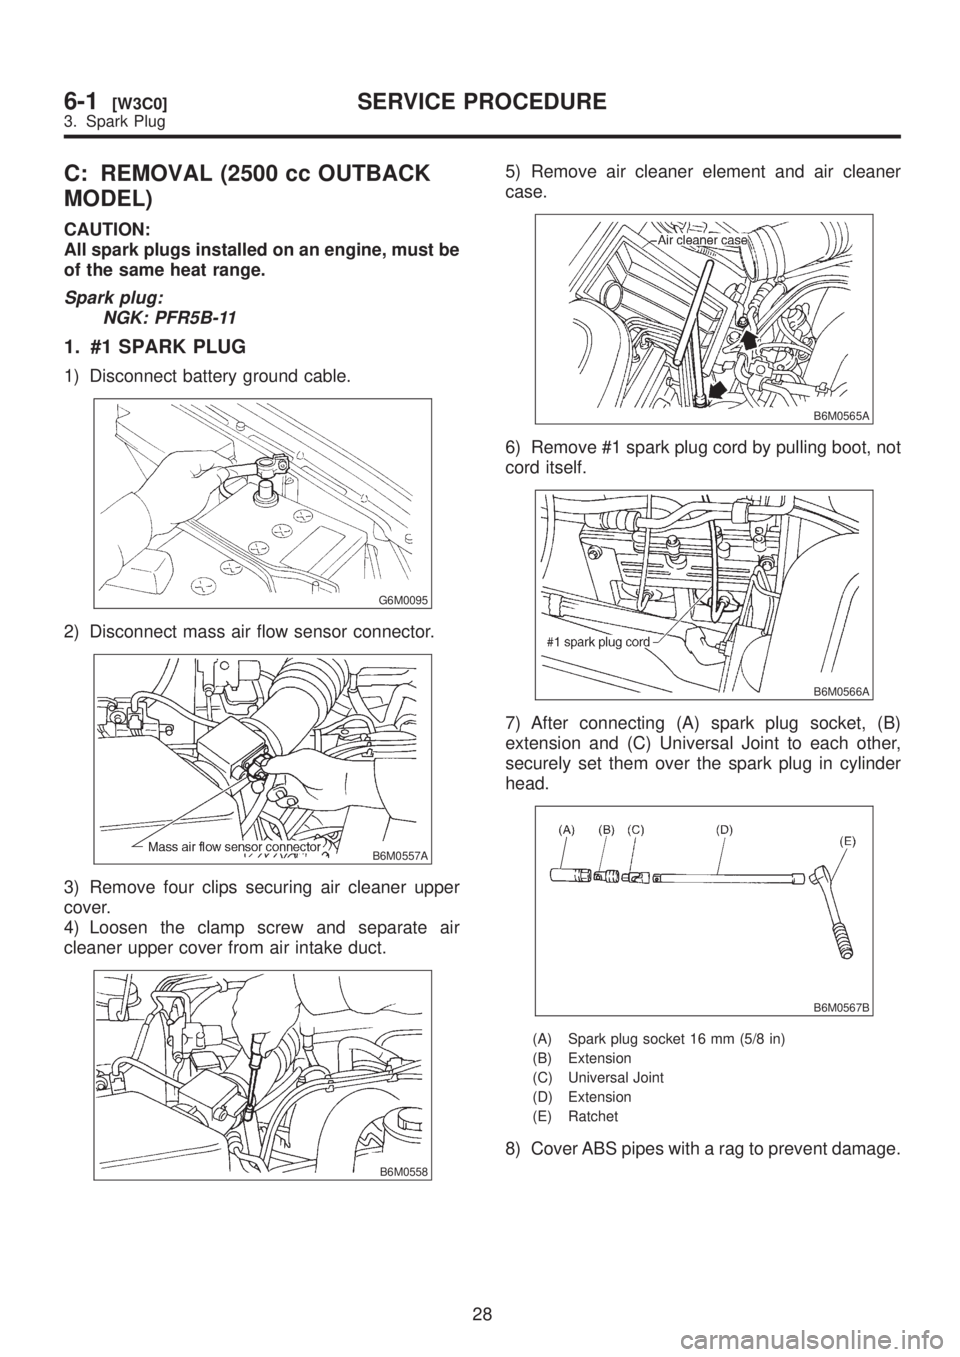
C: REMOVAL (2500 cc OUTBACK
MODEL)
CAUTION:
All spark plugs installed on an engine, must be
of the same heat range.
Spark plug:
NGK: PFR5B-11
1. #1 SPARK PLUG
1) Disconnect battery ground cable.
G6M0095
2) Disconnect mass air flow sensor connector.
B6M0557A
3) Remove four clips securing air cleaner upper
cover.
4) Loosen the clamp screw and separate air
cleaner upper cover from air intake duct.
B6M0558
5) Remove air cleaner element and air cleaner
case.
B6M0565A
6) Remove #1 spark plug cord by pulling boot, not
cord itself.
B6M0566A
7) After connecting (A) spark plug socket, (B)
extension and (C) Universal Joint to each other,
securely set them over the spark plug in cylinder
head.
B6M0567B
(A) Spark plug socket 16 mm (5/8 in)
(B) Extension
(C) Universal Joint
(D) Extension
(E) Ratchet
8) Cover ABS pipes with a rag to prevent damage.
28
6-1[W3C0]SERVICE PROCEDURE
3. Spark Plug