display TOYOTA BZ4X 2022 Owners Manual (in English)
[x] Cancel search | Manufacturer: TOYOTA, Model Year: 2022, Model line: BZ4X, Model: TOYOTA BZ4X 2022Pages: 674, PDF Size: 120.02 MB
Page 453 of 674
451
6
Owners Manual_Europe_M42D76_en
6-4. Using the other interior features
Interior features
WARNING
■Caution regarding interference with electronic devices
People with implantable cardiac pace- makers, cardiac resynchronization therapy-pacemakers or implantable
cardioverters, as well as any other electrical medical device, should con-sult their physician about the usage of
the wireless charger.
■To prevent malfunctions or burns
Observe the following precautions. Failure to do so may result in a equip-ment failure and damage, catch fire,
burns due to overheat or electric shock.
●Do not insert any metallic objects
between the charge area and the portable device while charging
●Do not attach an aluminum sticker or other metallic object to the charge area
●Do not attach an aluminum sticker or other metallic object to the side
of the portable device (or to its case or cover) that touches the charge area
●Do not use the charging tray as a small storage space
●Do not subject to a strong force or impact
●Do not disassemble, modify or remove
●Do not charge devices other than specified portable devices
●Keep away from magnetic items
●Do not charge devices if the charge area is covered in dust
●Do not cover with a cloth or similar material
NOTICE
■Situations in which the function may not operate normally
Devices may not be charged normally in the following situations.
●The portable device is fully charged
●The portable device is being charged with a cable connected
●There is foreign matter between the charge area and portable device
●Charging has caused the portable device to heat up
●The temperature around the charging tray is 35°C (95°F) or
higher, such as in extreme heat
●The portable device is placed with
its charging side facing up
●The portable device is placed in an
area misaligned from the charge area
●The portable device is larger than the charging tray
●A foldable and portable device is placed outside the charge area
●The camera lens protrudes 3 mm. (0.12 in) or more from the surface of the portal device
●The vehicle is in an area where strong electrical waves or noise are
emitted, such as near a television tower, power plant, gasoline station, broadcasting station, large display,
airport, etc.
●Any of the following objects that is
protrudes 3 mm. (0.12 in) or thicker is stuck or installed between the charging side of the portable device
and the charge area.
• Thick cases or covers
Page 459 of 674
457
7
Owners Manual_Europe_M42D76_en
7-1. Maintenance and care
Maintenance and care
on the multi-information display. To
turn off the alarm, lock all the doors.
■Wheels and wheel ornaments
●Remove any dirt immediately by using
a neutral detergent.
●Wash detergent off with water immedi-
ately after use.
●To protect the paint from damage,
make sure to observe the following precautions.• Do not use acidic, alkaline or abrasive
detergent. • Do not use hard brushes.• Do not use detergent on the wheels
when they are hot, such as after driv- ing or parking in hot weather.
■Painted brake calipers (if equipped)
●When using detergent, use neutral detergent. Do not use hard brushes or abrasive cleaners, as they will dam-
age the paint.
●Do not use detergent on the brake cal-
ipers when they are hot.
●Wash detergent off immediately after
use.
■Brake pads and calipers
Rust may form if the vehicle is parked with wet brake pads or disc rotors, caus-
ing them to stick. Before parking the vehicle after it is washed, drive slowly and apply the brakes several times to
dry the parts.
■Bumpers
Do not scrub with abrasive cleaners.
■Plated portions
If dirt cannot be removed, clean the
parts as follows:
●Use a soft cloth dampened with an
approximately 5% solution of neutral detergent and water to clean the dirt off.
●Wipe the surface with a dry, soft cloth to remove any remaining moisture.
●To remove oily deposits, use alcohol wet wipes or a similar product.
WARNING
■When washing the vehicle
Do not apply water to the inside of the
motor compartment. Doing so may cause the electrical components, etc. to catch fire.
■When cleaning the windshield (vehicles with rain-sensing wind-
shield wipers)
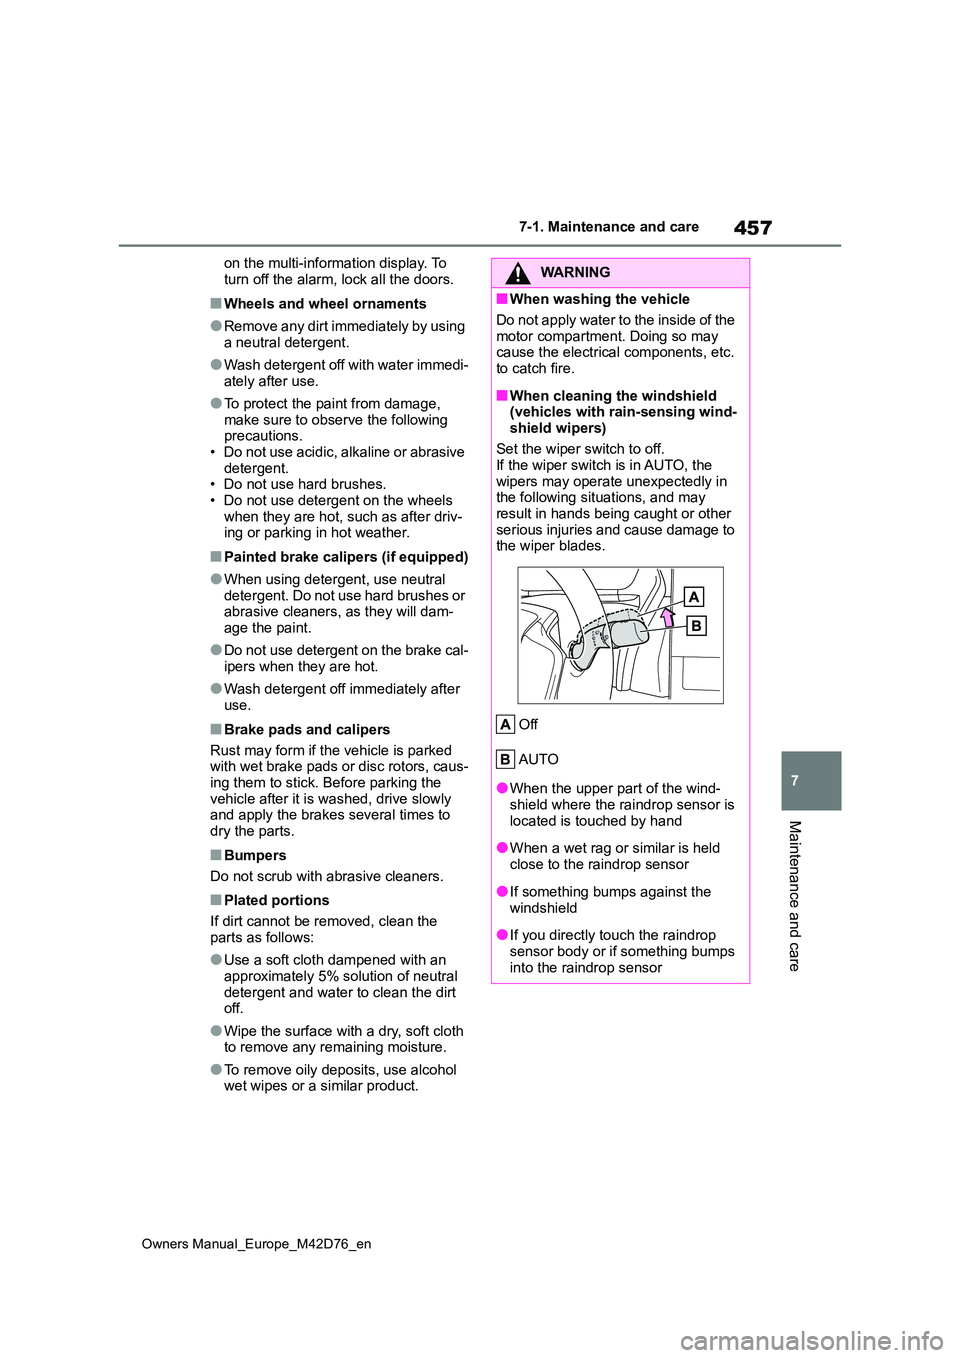
Set the wiper switch to off. If the wiper switch is in AUTO, the
wipers may operate unexpectedly in the following situations, and may result in hands being caught or other
serious injuries and cause damage to the wiper blades.
Off
AUTO
●When the upper part of the wind- shield where the raindrop sensor is
located is touched by hand
●When a wet rag or similar is held
close to the raindrop sensor
●If something bumps against the
windshield
●If you directly touch the raindrop
sensor body or if something bumps into the raindrop sensor
Page 468 of 674
466
Owners Manual_Europe_M42D76_en
7-3. Do-it-yourself maintenance
WARNING
The motor compartment contains many mechanisms and fluids that
may move suddenly, become hot, or become electrically energized. To avoid death or serious injury, observe
the following precautions.
■When working on the motor com-
partment
●Make sure that “POWER ON” on the multi-information display and
the “READY” indicator are both off.
●Keep hands, clothing and tools
away from the moving fan.
●Be careful not to touch the motor,
power control unit, radiator, etc., right after driving as they may be hot. Coolant and other fluids may
also be hot.
●Do not leave anything that may
burn easily, such as paper and rags, in the motor compartment.
●Do not smoke, cause sparks or expose an open flame to the 12-volt battery. 12-volt battery fumes are
flammable.
●Be extremely cautious when work-
ing on the 12-volt battery. It con- tains poisonous and corrosive sulfuric acid.
●Never touch, disassemble, remove or replace the high voltage parts,
cables and their connectors. It can cause severe burns or electric shock that may result in death or
serious injury.
●Take care because brake fluid can
harm your hands or eyes and dam- age painted surfaces. If fluid gets on your hands or in your eyes, flush
the affected area with clean water immediately. If you still experience discomfort, consult a doctor.
■When working near the electric cooling fan or radiator grille
Be sure the power switch is OFF.
With the power switch in ON, the electric cooling fan may automatically start to run if the air conditioning is on
and/or the coolant temperature is high. ( P.471)
■Safety glasses
Wear safety glasses to prevent flying or falling material, fluid spray, etc.,
from getting in your eyes.
NOTICE
■If the fluid level is low or high
It is normal for the brake fluid level to
go down slightly as the brake pads wear or when the fluid level in the accumulator is high.
If the reservoir needs frequent refill- ing, it may indicate a serious problem.
Page 477 of 674
475
7
Owners Manual_Europe_M42D76_en
7-3. Do-it-yourself maintenance
Maintenance and care
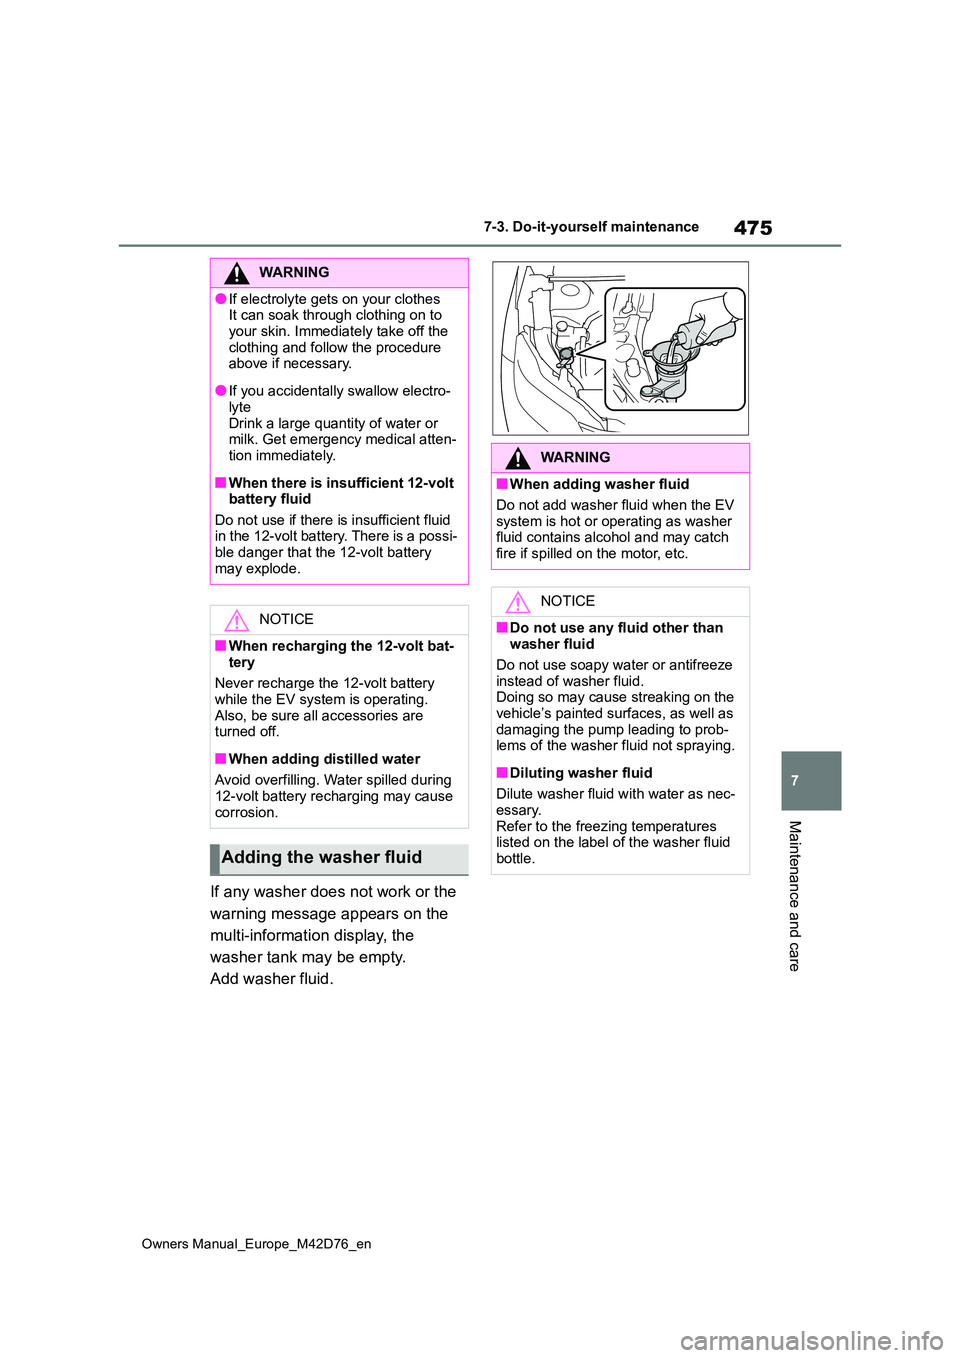
If any washer does not work or the
warning message appears on the
multi-information display, the
washer tank may be empty.
Add washer fluid.
WARNING
●If electrolyte gets on your clothes It can soak through clothing on to
your skin. Immediately take off the clothing and follow the procedure above if necessary.
●If you accidentally swallow electro-lyte
Drink a large quantity of water or milk. Get emergency medical atten-tion immediately.
■When there is insufficient 12-volt battery fluid
Do not use if there is insufficient fluid in the 12-volt battery. There is a possi-ble danger that the 12-volt battery
may explode.
NOTICE
■When recharging the 12-volt bat- tery
Never recharge the 12-volt battery while the EV system is operating.
Also, be sure all accessories are turned off.
■When adding distilled water
Avoid overfilling. Water spilled during 12-volt battery recharging may cause
corrosion.
Adding the washer fluid
WARNING
■When adding washer fluid
Do not add washer fluid when the EV
system is hot or operating as washer fluid contains alcohol and may catch fire if spilled on the motor, etc.
NOTICE
■Do not use any fluid other than washer fluid
Do not use soapy water or antifreeze instead of washer fluid.Doing so may cause streaking on the
vehicle’s painted surfaces, as well as damaging the pump leading to prob-lems of the washer fluid not spraying.
■Diluting washer fluid
Dilute washer fluid with water as nec-
essary. Refer to the freezing temperatures listed on the label of the washer fluid
bottle.
Page 480 of 674
478
Owners Manual_Europe_M42D76_en
7-3. Do-it-yourself maintenance
transmitters to detect low tire infla-
tion pressure before serious prob-
lems arise.
The tire pressure warning system
of this vehicle adopts a 2-type
warning system.
When “Adjust Pressure” is dis-
played (Normal Warning)
A warning with the tire pressure warn-
ing light and warning buzzer when
there is an unknown level of low tire
pressure with the appearance of the tire
due to natural air leakage as well as the
pressure lowering due to changes in
the pressure according to the outside
temperature.
When “Immediately Check tyre
when Safe” is displayed (Emer-
gency Warning)
A warning with the tire pressure warn-
ing light and warning buzzer when
there is a known level of low tire pres-
sure with the appearance of the tire due
to pressure suddenly lowering.
However, the system may not be able
to detect sudden tire ruptures (bursting,
etc.).
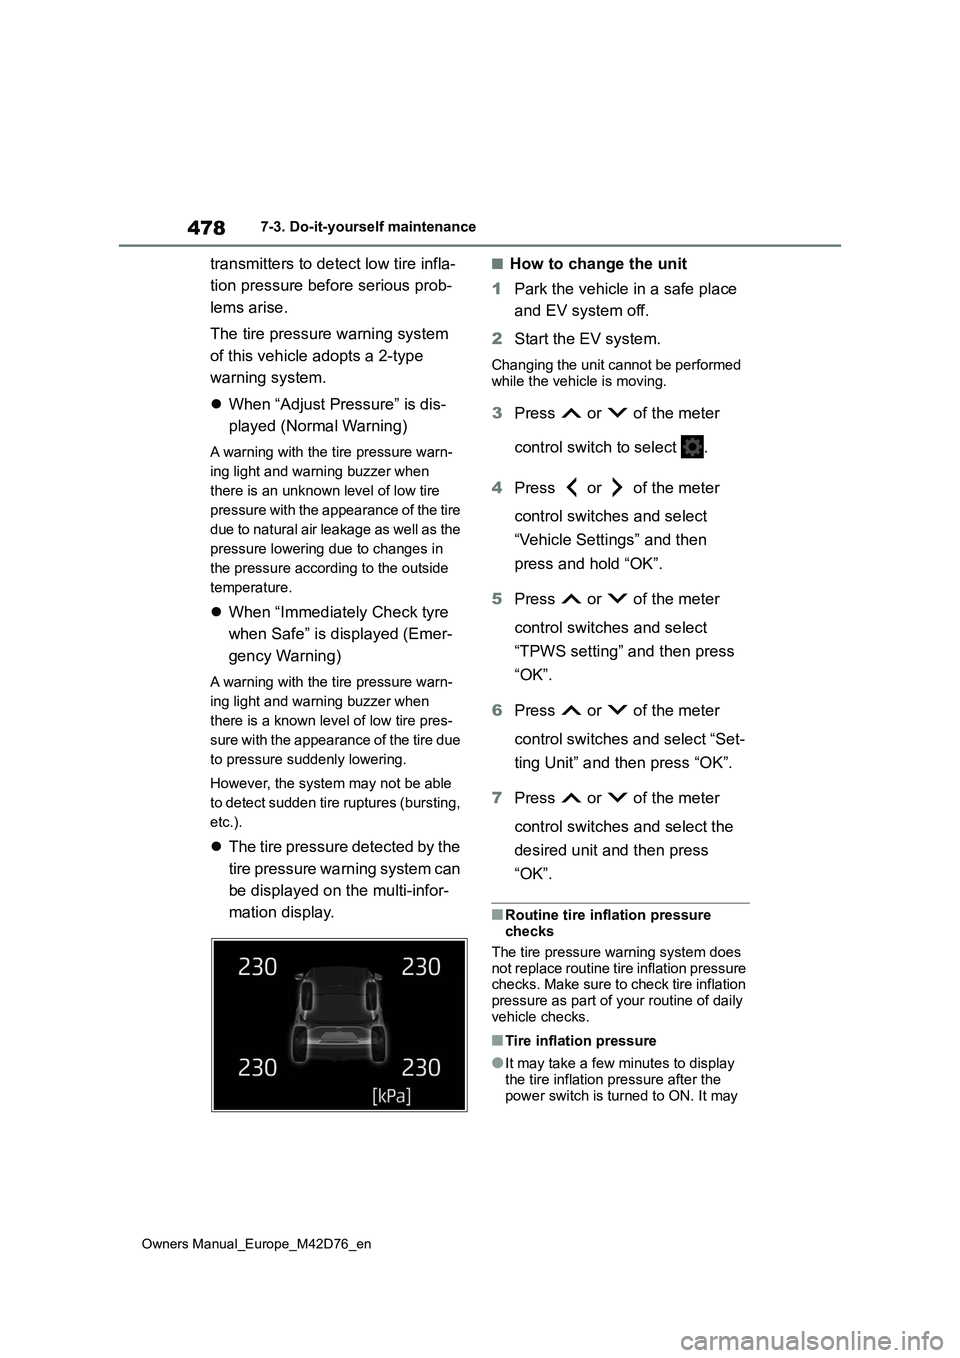
The tire pressure detected by the
tire pressure warning system can
be displayed on the multi-infor-
mation display.
■How to change the unit
1 Park the vehicle in a safe place
and EV system off.
2 Start the EV system.
Changing the unit cannot be performed
while the vehicle is moving.
3 Press or of the meter
control switch to select .
4 Press or of the meter
control switches and select
“Vehicle Settings” and then
press and hold “OK”.
5 Press or of the meter
control switches and select
“TPWS setting” and then press
“OK”.
6 Press or of the meter
control switches and select “Set-
ting Unit” and then press “OK”.
7 Press or of the meter
control switches and select the
desired unit and then press
“OK”.
■Routine tire inflation pressure checks
The tire pressure warning system does
not replace routine tire inflation pressure checks. Make sure to check tire inflation pressure as part of your routine of daily
vehicle checks.
■Tire inflation pressure
●It may take a few minutes to display
the tire inflation pressure after the power switch is turned to ON. It may
Page 481 of 674
479
7
Owners Manual_Europe_M42D76_en
7-3. Do-it-yourself maintenance
Maintenance and care
also take a few minutes to display the
tire inflation pressure after inflation pressure has been adjusted.
●Tire inflation pressure changes with temperature.The displayed values may also be dif-
ferent from the values measured using a tire pressure gauge.
■Situations in which the tire pres-sure warning system may not oper-
ate properly
●In the following cases, the tire pres-
sure warning system may not operate properly.• If non-genuine Toyota wheels are
used. • A tire has been replaced with a tire that is not an OE (Original Equipment)
tire. • A tire has been replaced with a tire that is not of the specified size.
• Tire chains etc. are equipped. • If a window tint that affects the radio wave signals is installed.
• If there is a lot of snow or ice on the vehicle, particularly around the wheels or wheel housings.
• If the tire inflation pressure is extremely higher than the specified level.
• If wheels without tire pressure warning valves and transmitters are used.• If the ID code on the tire pressure
warning valves and transmitters is not registered in the tire pressure warning computer.
●Performance may be affected in the following situations.
• Near a TV tower, electric power plant, gas station, radio station, large dis-play, airport or other facility that gen-
erates strong radio waves or electrical noise• When carrying a portable radio, cellu-
lar phone, cordless phone or other wireless communication device
If tire position information is not correctly
displayed due to the radio wave condi-
tions, the display may be corrected by
driving and changing the radio wave
conditions.
●When the vehicle is parked, the time taken for the warning to start or go off could be extended.
●When tire inflation pressure declines rapidly for example when a tire has
burst, the warning may not function.
When replacing tires or wheels, tire
pressure warning valves and trans-
mitters must also be installed.
When new tire pressure warning valves
and transmitters are installed, new ID
codes must be registered in the tire
pressure warning computer and the tire
pressure warning system must be ini-
tialized. ( P.484)
■When replacing the tires and wheels
If the ID code of the tire pressure warn-
ing valve and transmitter is not regis- tered, the tire pressure warning system will not work properly. After driving for
about 10 minutes, the tire pressure warning light blinks for 1 minute and
stays on to indicate a system malfunc- tion.
Installing tire pressure warn-
ing valves and transmitters
Page 483 of 674
481
7
Owners Manual_Europe_M42D76_en
7-3. Do-it-yourself maintenance
Maintenance and care
7Press or of the meter
control switches and select
“OK”, and then press “OK”.
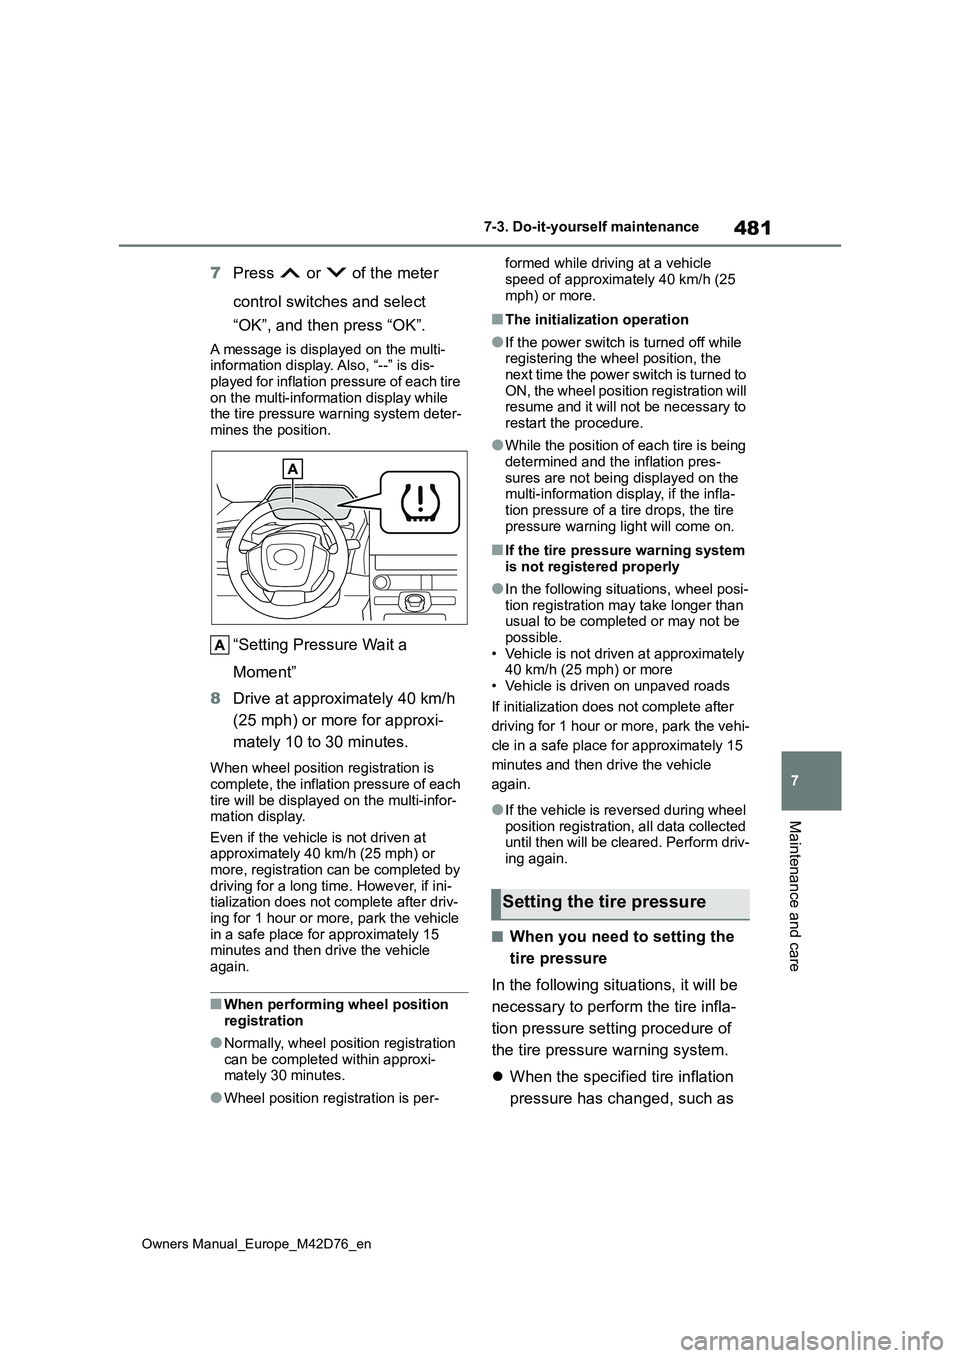
A message is displayed on the multi- information display. Also, “--” is dis-
played for inflation pressure of each tire on the multi-information display while the tire pressure warning system deter-
mines the position.
“Setting Pressure Wait a
Moment”
8 Drive at approximately 40 km/h
(25 mph) or more for approxi-
mately 10 to 30 minutes.
When wheel position registration is
complete, the inflation pressure of each tire will be displayed on the multi-infor-mation display.
Even if the vehicle is not driven at approximately 40 km/h (25 mph) or more, registration can be completed by
driving for a long time. However, if ini- tialization does not complete after driv-ing for 1 hour or more, park the vehicle
in a safe place for approximately 15 minutes and then drive the vehicle again.
■When performing wheel position
registration
●Normally, wheel position registration
can be completed within approxi- mately 30 minutes.
●Wheel position registration is per-
formed while driving at a vehicle
speed of approximately 40 km/h (25 mph) or more.
■The initialization operation
●If the power switch is turned off while registering the wheel position, the next time the power switch is turned to
ON, the wheel position registration will resume and it will not be necessary to restart the procedure.
●While the position of each tire is being determined and the inflation pres-
sures are not being displayed on the multi-information display, if the infla-tion pressure of a tire drops, the tire
pressure warning light will come on.
■If the tire pressure warning system is not registered properly
●In the following situations, wheel posi-tion registration may take longer than usual to be completed or may not be
possible. • Vehicle is not driven at approximately 40 km/h (25 mph) or more
• Vehicle is driven on unpaved roads
If initialization does not complete after
driving for 1 hour or more, park the vehi-
cle in a safe place for approximately 15
minutes and then drive the vehicle
again.
●If the vehicle is reversed during wheel
position registration, all data collected until then will be cleared. Perform driv-ing again.
■When you need to setting the
tire pressure
In the following situations, it will be
necessary to perform the tire infla-
tion pressure setting procedure of
the tire pressure warning system.
When the specified tire inflation
pressure has changed, such as
Setting the tire pressure
Page 484 of 674
482
Owners Manual_Europe_M42D76_en
7-3. Do-it-yourself maintenance
due to carried load, etc.
When the tire inflation pressure
is changed such as when the tire
size is changed.
If the tire inflation pressure has
been adjusted to the specified
level, perform the tire inflation set-
ting procedure by selecting speci-
fied inflation pressure on the multi-
information display.
When the tire inflation pressure is
to be other than specified, such as
when tires other than the specified
size are used, etc., set the tire infla-
tion pressure using the current
pressure. Make sure to adjust the
tire inflation pressure of each tire to
the appropriate level before per-
forming tire pressure setting. The
tire pressure warning system oper-
ates based on this tire inflation
pressure.
■Setting by selecting a speci-
fied tire inflation pressure
1 Start the EV system (P.243)
The tire inflation pressure cannot be set while the vehicle is moving.
2 Press or of the meter
control switches and select .
3 Press or of the meter
control switches and select
“Vehicle Settings”, and then
press and hold the “OK”.
4 Press or of the meter
control switches and select
“TPWS Setting”, and then press
“OK”.
5 Press or of the meter
control switches and select
“Tyre Pressure Setting”, and
then press “OK”.
6 Press or of the meter
control switches and select “Set-
ting by Specified Pressure”, and
then press “OK”.
Select the desired front and rear tire
pressures.
7 Press or of the meter
control switches and select
“OK”, and then press “OK”.
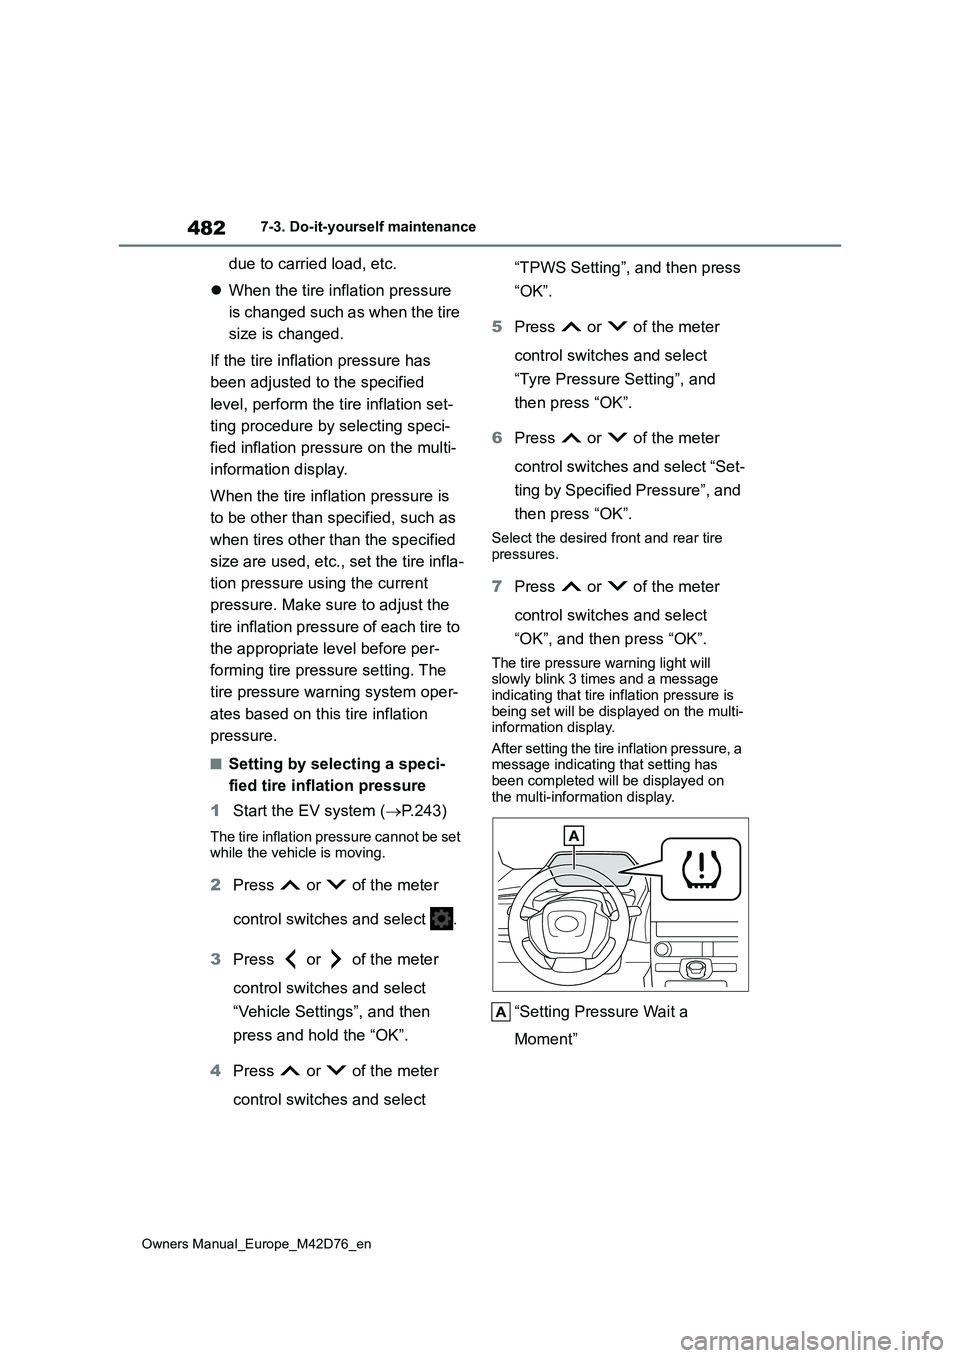
The tire pressure warning light will slowly blink 3 times and a message
indicating that tire inflation pressure is being set will be displayed on the multi-information display.
After setting the tire inflation pressure, a message indicating that setting has been completed will be displayed on
the multi-information display.
“Setting Pressure Wait a
Moment”
Page 485 of 674
483
7
Owners Manual_Europe_M42D76_en
7-3. Do-it-yourself maintenance
Maintenance and care
■Setting using the current tire
inflation pressure
1 Adjust the tire inflation pressure
to the specified cold tire inflation
pressure level.
Make sure to adjust the tire pressure to
the specified cold tire inflation pressure level. The tire pressure warning system will operate based on this pressure
level.
2 Start the EV system (P.243)
The tire inflation pressure cannot be set while the vehicle is moving.
3 Press or of the meter
control switches and select .
4 Press or of the meter
control switches and select
“Vehicle Settings”, and then
press and hold the “OK”.
5 Press or of the meter
control switches and select
“TPWS Setting”, and then press
“OK”.
6 Press or of the meter
control switches and select
“Tyre Pressure Setting”, and
then press “OK”.
7 Press or of the meter
control switches and select “Set-
ting by Current Pressure” and
then press “OK”.
8 Press or of the meter
control switches and select
“OK”, and then press “OK”.
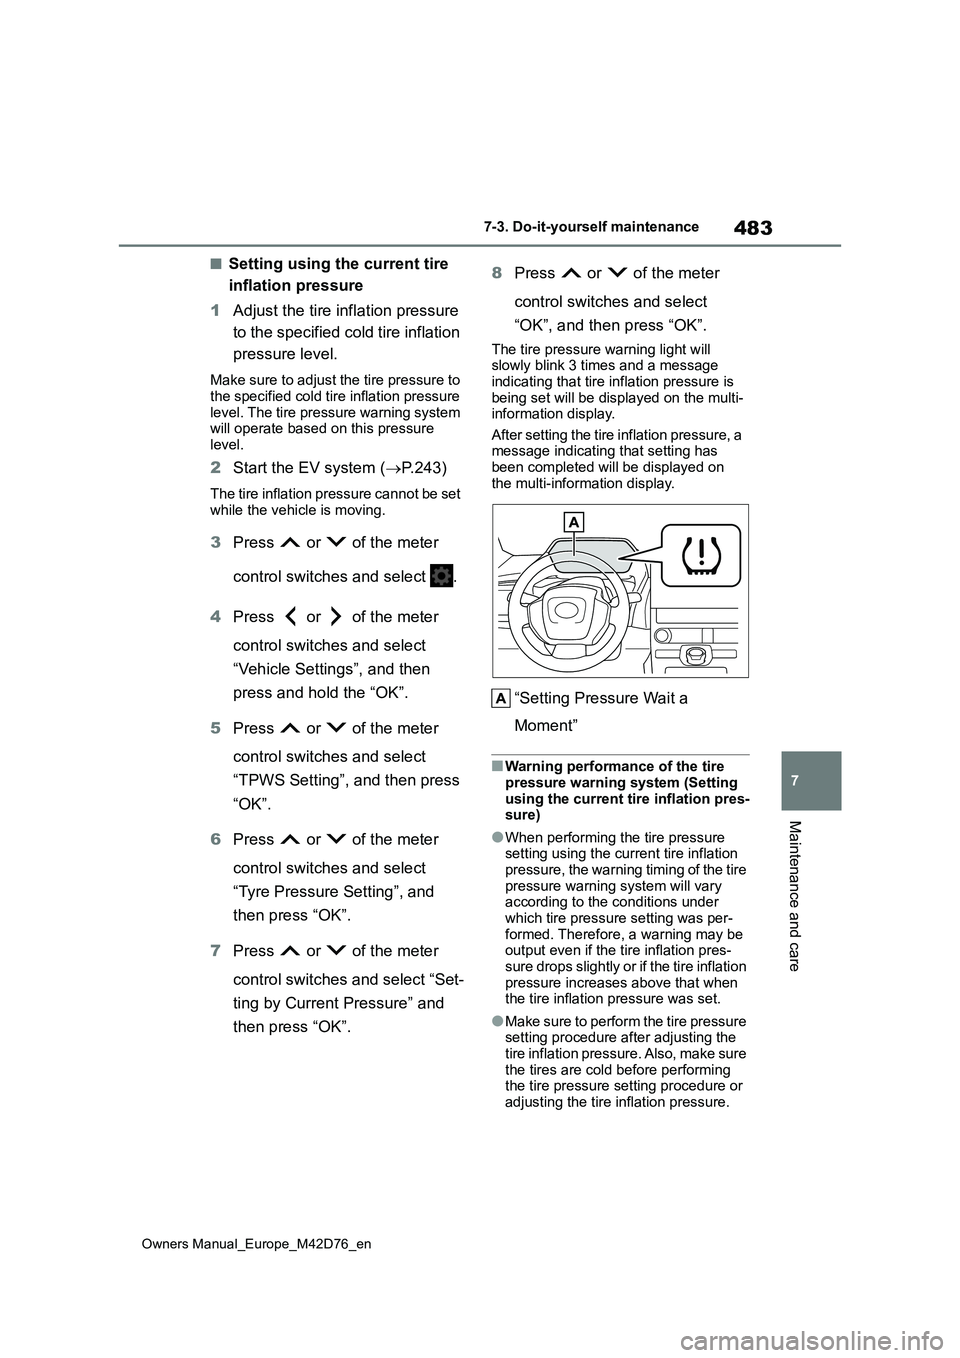
The tire pressure warning light will slowly blink 3 times and a message
indicating that tire inflation pressure is being set will be displayed on the multi-information display.
After setting the tire inflation pressure, a message indicating that setting has been completed will be displayed on
the multi-information display.
“Setting Pressure Wait a
Moment”
■Warning performance of the tire pressure warning system (Setting
using the current tire inflation pres- sure)
●When performing the tire pressure setting using the current tire inflation pressure, the warning timing of the tire
pressure warning system will vary according to the conditions under which tire pressure setting was per-
formed. Therefore, a warning may be output even if the tire inflation pres-
sure drops slightly or if the tire inflation pressure increases above that when the tire inflation pressure was set.
●Make sure to perform the tire pressure setting procedure after adjusting the
tire inflation pressure. Also, make sure the tires are cold before performing the tire pressure setting procedure or
adjusting the tire inflation pressure.
Page 487 of 674
485
7
Owners Manual_Europe_M42D76_en
7-3. Do-it-yourself maintenance
Maintenance and care
7Press or of the meter
control switches and select
“Register New Valve/ID” and
then press “OK”.
8 Check if the desired wheel set
(“Tyre Set 1” or “Tyre Set 2”) is
displayed.
ID codes will be registered to the dis- played wheel set.
To change the wheel set to be regis-
tered, press or of the meter
control switches, and then select the
wheel set you wish to register.
If ID codes have already been regis-
tered for that wheel set, the tire pres- sure warning light will slowly blink 3 times, and a message indicating that
change is occurring will be displayed on the multi-information display.
“Setting Pressure Wait a
Moment”
9 Press or of the meter
control switches and select “OK”
and then press “OK”.
The tire pressure warning light will slowly blink 3 times and a message
indicating that ID code registration is being performed will be displayed on the multi-information display. Wheel set
changing will be canceled and registra- tion will begin.
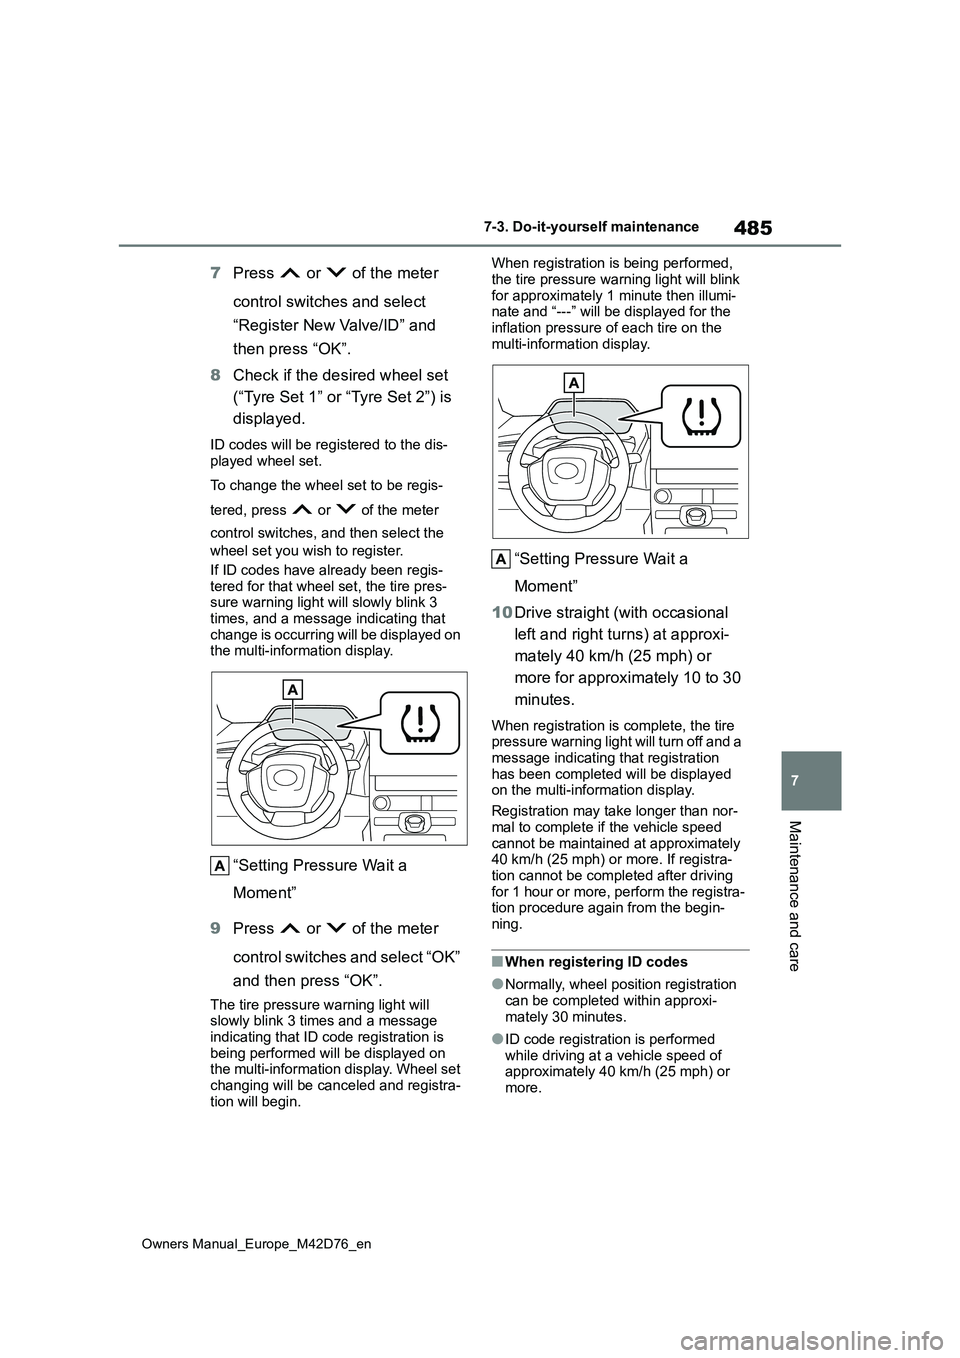
When registration is being performed,
the tire pressure warning light will blink for approximately 1 minute then illumi-nate and “---” will be displayed for the
inflation pressure of each tire on the multi-information display.
“Setting Pressure Wait a
Moment”
10 Drive straight (with occasional
left and right turns) at approxi-
mately 40 km/h (25 mph) or
more for approximately 10 to 30
minutes.
When registration is complete, the tire pressure warning light will turn off and a message indicating that registration
has been completed will be displayed on the multi-information display.
Registration may take longer than nor-
mal to complete if the vehicle speed cannot be maintained at approximately 40 km/h (25 mph) or more. If registra-
tion cannot be completed after driving for 1 hour or more, perform the registra-tion procedure again from the begin-
ning.
■When registering ID codes
●Normally, wheel position registration
can be completed within approxi- mately 30 minutes.
●ID code registration is performed while driving at a vehicle speed of approximately 40 km/h (25 mph) or
more.