TOYOTA CAMRY 2000 Service Repair Manual
CAMRY 2000
TOYOTA
TOYOTA
https://www.carmanualsonline.info/img/14/57447/w960_57447-0.png
TOYOTA CAMRY 2000 Service Repair Manual
Trending: test fuel, ignition coil, gas mileage, codes, Inside door panel, vanity light, steering wheel
Page 661 of 4770
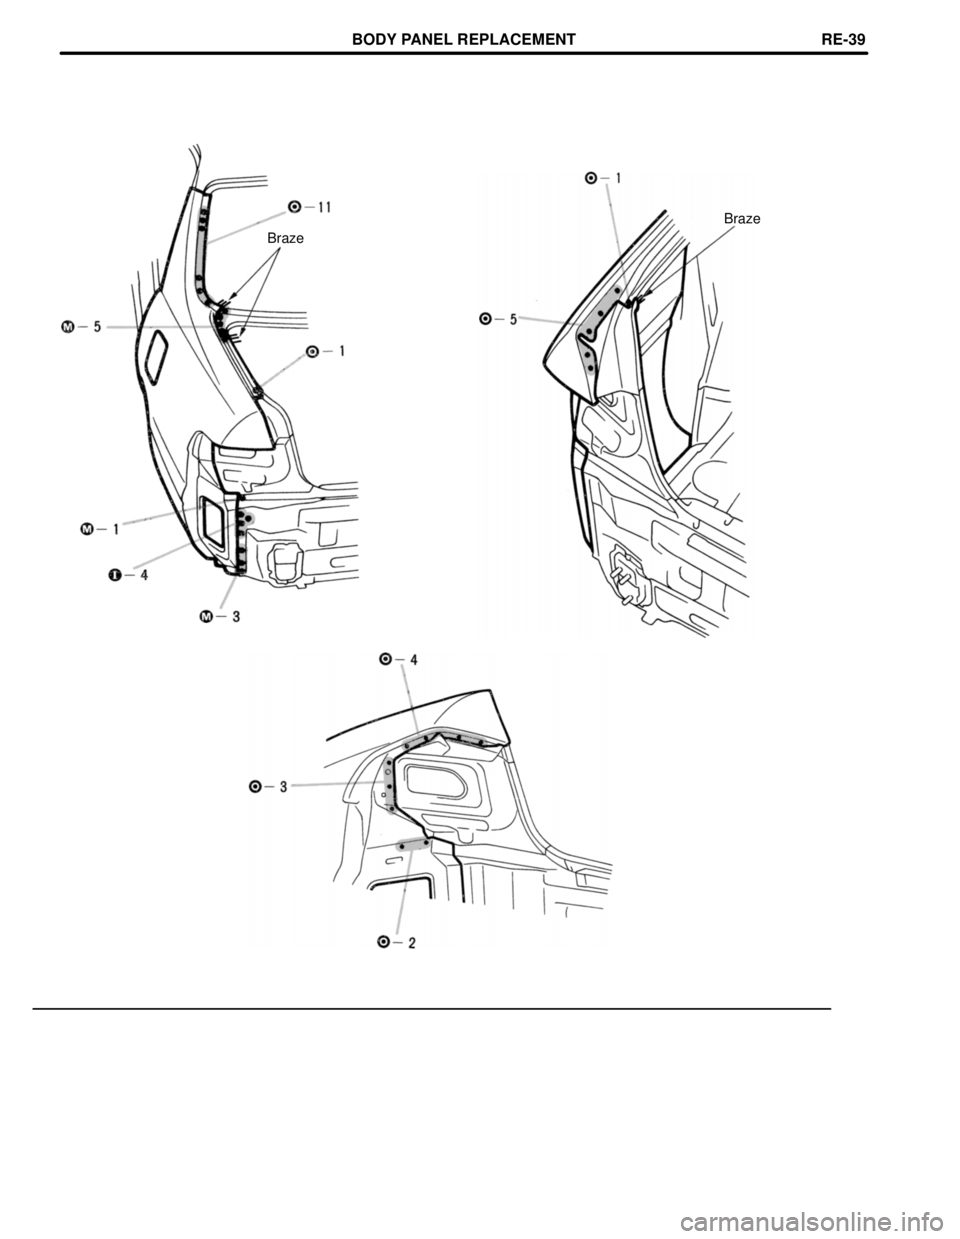
Braze
Braze
BODY PANEL REPLACEMENTRE-39
Page 662 of 4770
mm in.
5 0.20
INSTALLATION
[Foamed Material
Application Areas]
Body Sealer
Butt Weld
about 5 mm
[Foamed Material
Application Areas]
Body Sealer
Braze
2. Temporarily install the new parts and check
the fit of the rear door, luggage compartment
door and rear combination light. 1. Before temporarily installing the new parts,
apply body sealer to the wheel arch.
HINT:
1) Apply body sealer about 5 mm (0.20 in.) from
the flange, avoiding any oozing.
2) Apply sealer evenly, about 3 ± 4 mm (0.12 ±
0.16 in.) in diameter.
3) For other sealing points, refer to section AR.
BODY PANEL REPLACEMENTRE-40
Page 663 of 4770
Fuel Filler Opening Lid
Braze
Waterproof Rivet
Butt Weld
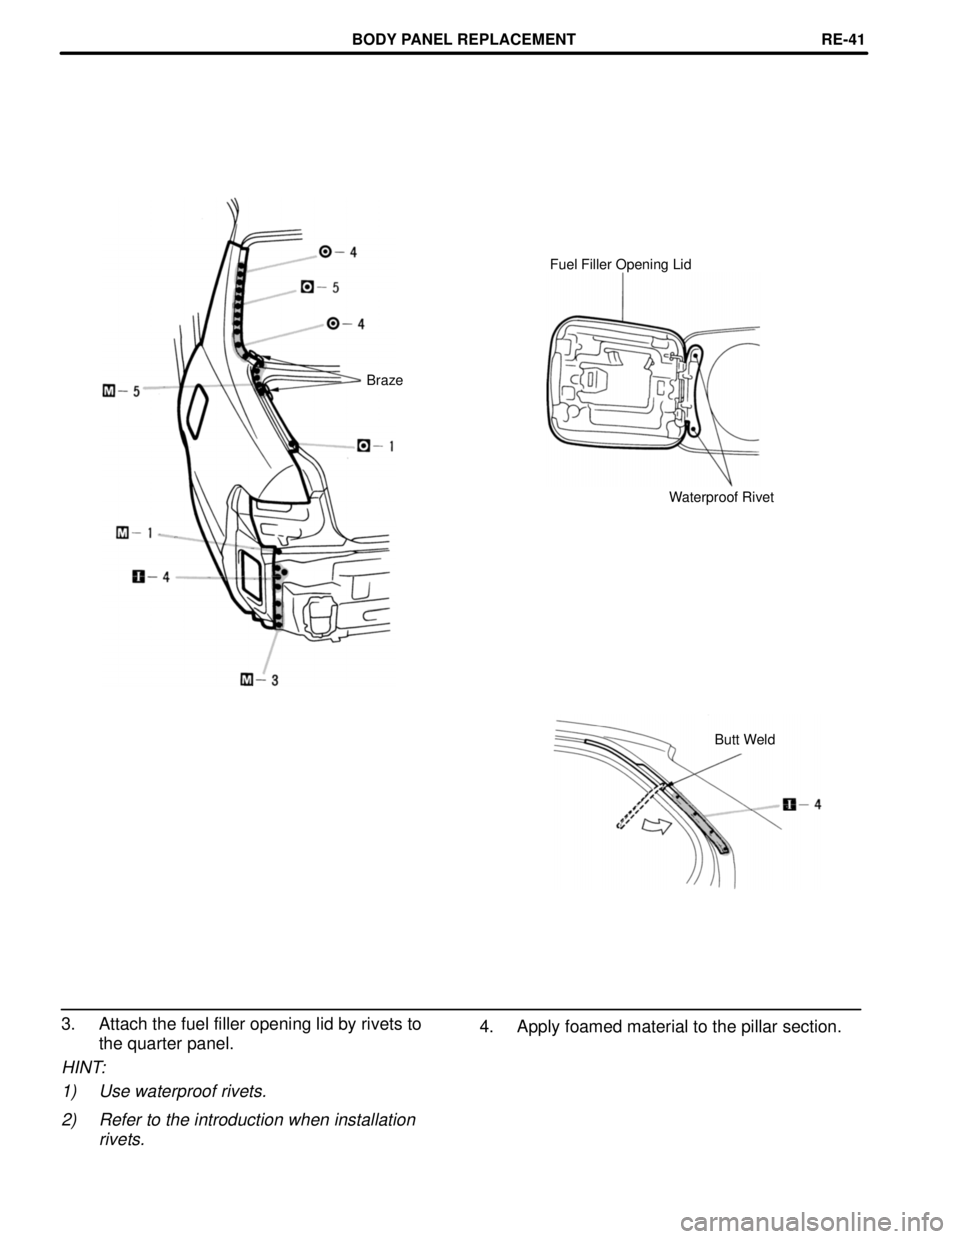
3. Attach the fuel filler opening lid by rivets to
the quarter panel.
HINT:
1) Use waterproof rivets.
2) Refer to the introduction when installation
rivets.
4. Apply foamed material to the pillar section.
BODY PANEL REPLACEMENTRE-41
Page 664 of 4770
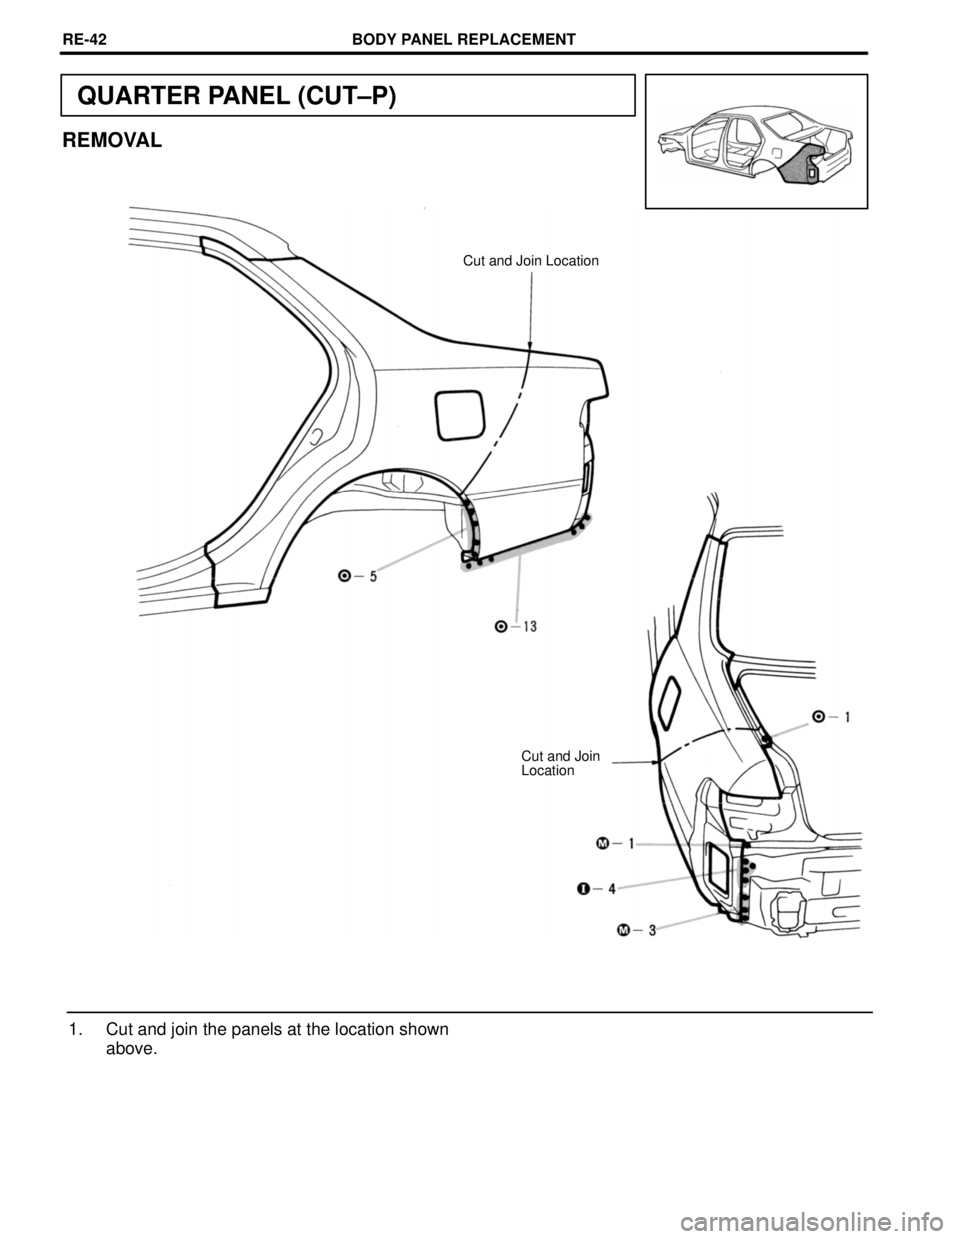
QUARTER PANEL (CUT±P)
REMOVAL
Cut and Join Location
Cut and Join
Location
1. Cut and join the panels at the location shown
above.
BODY PANEL REPLACEMENTRE-42
Page 665 of 4770
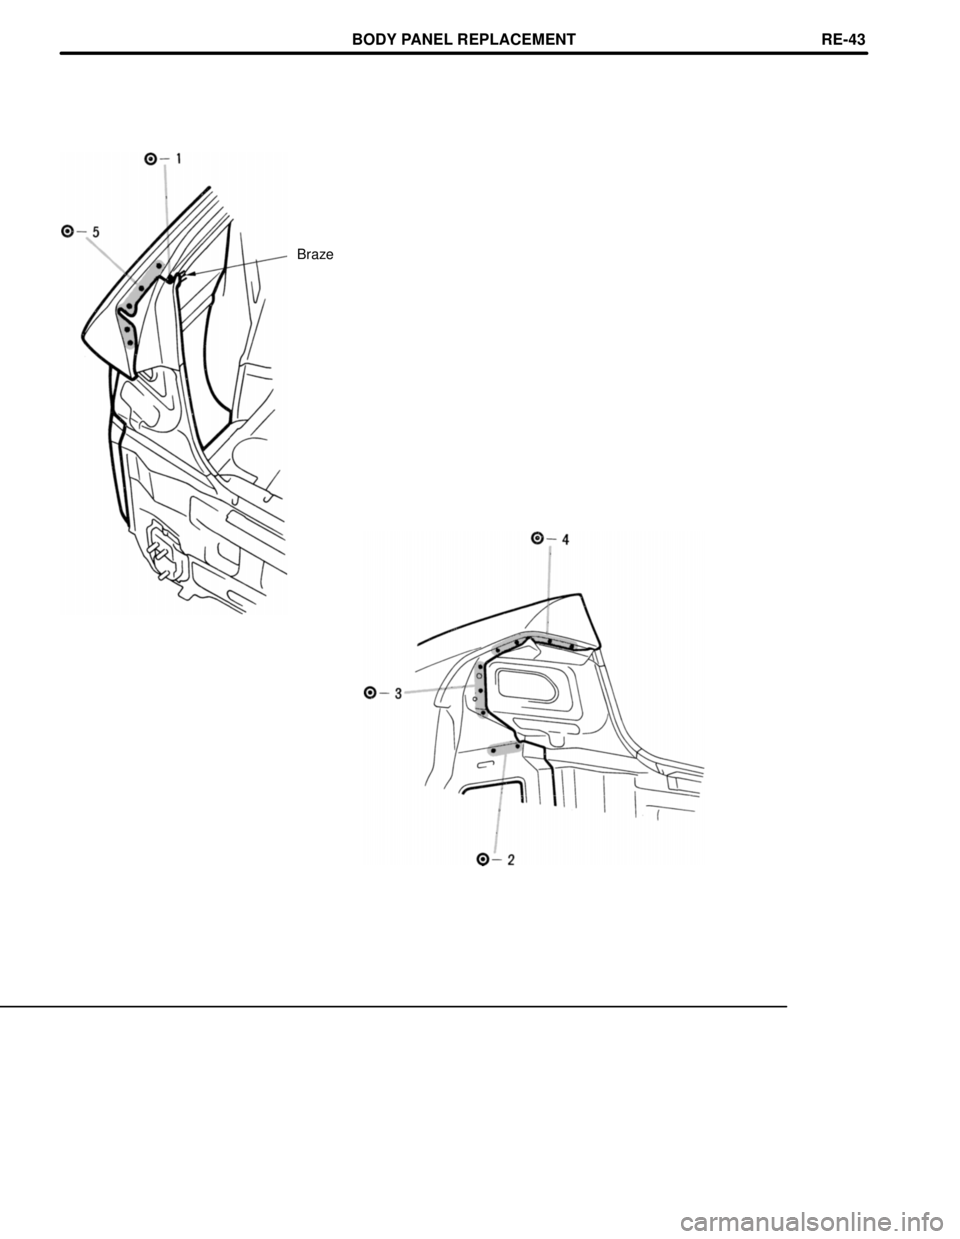
Braze
BODY PANEL REPLACEMENTRE-43
Page 666 of 4770
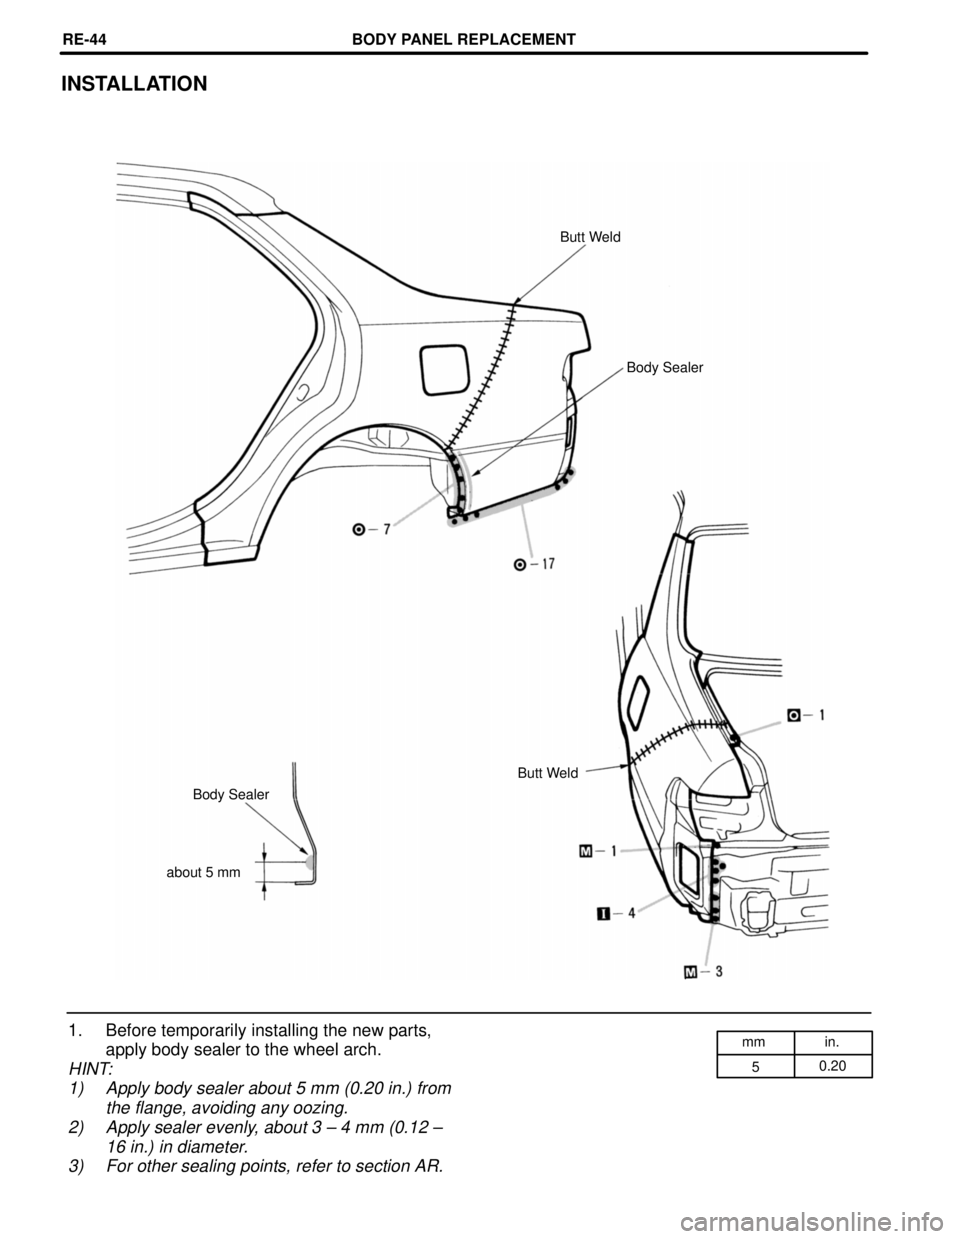
mm in.
50.20
INSTALLATION
Butt Weld
Body Sealer
Butt Weld
Body Sealer
about 5 mm
1. Before temporarily installing the new parts,
apply body sealer to the wheel arch.
HINT:
1) Apply body sealer about 5 mm (0.20 in.) from
the flange, avoiding any oozing.
2) Apply sealer evenly, about 3 ± 4 mm (0.12 ±
16 in.) in diameter.
3) For other sealing points, refer to section AR.
BODY PANEL REPLACEMENTRE-44
Page 667 of 4770
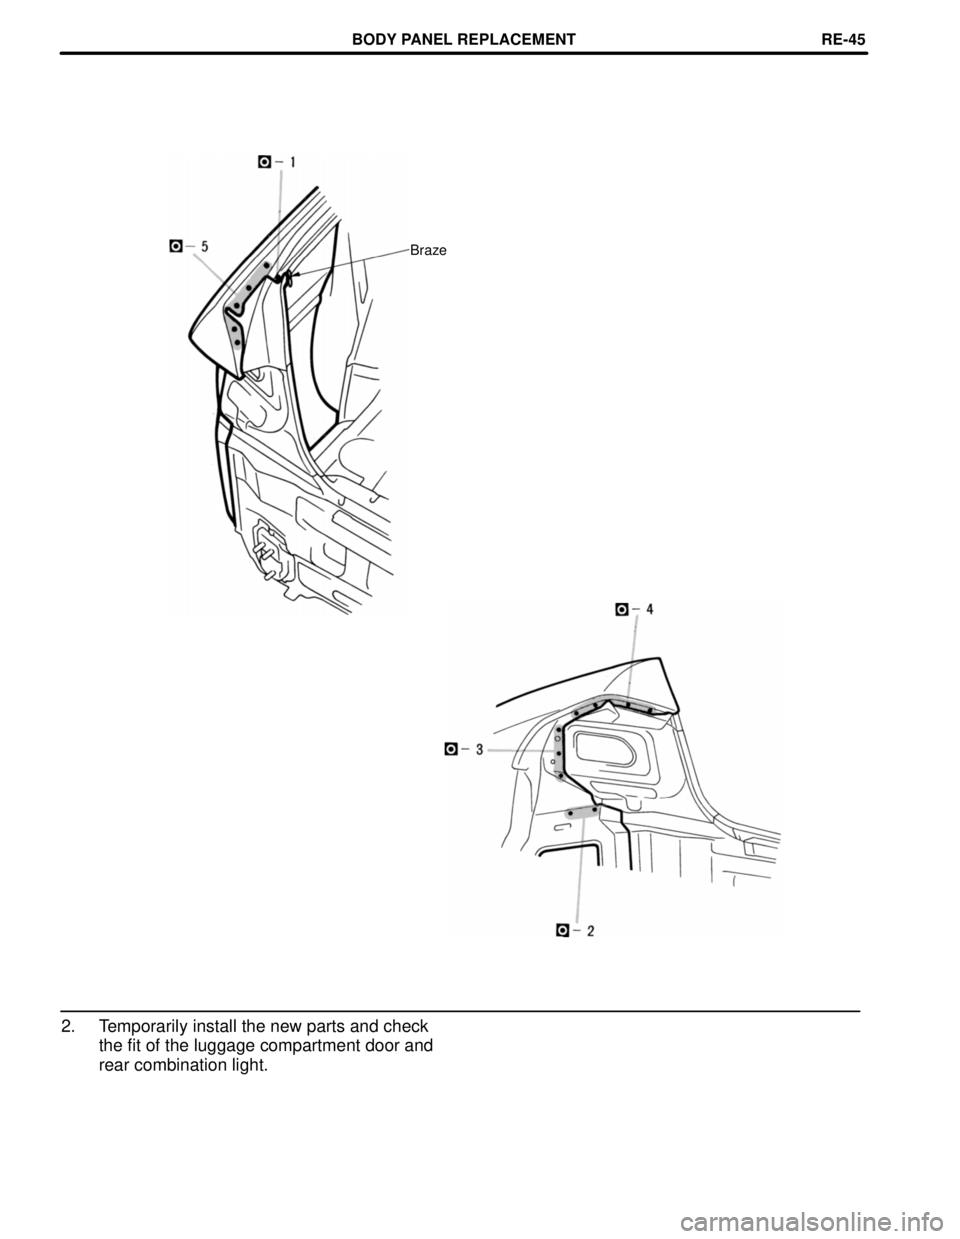
Braze
2. Temporarily install the new parts and check
the fit of the luggage compartment door and
rear combination light.
BODY PANEL REPLACEMENTRE-45
Page 668 of 4770
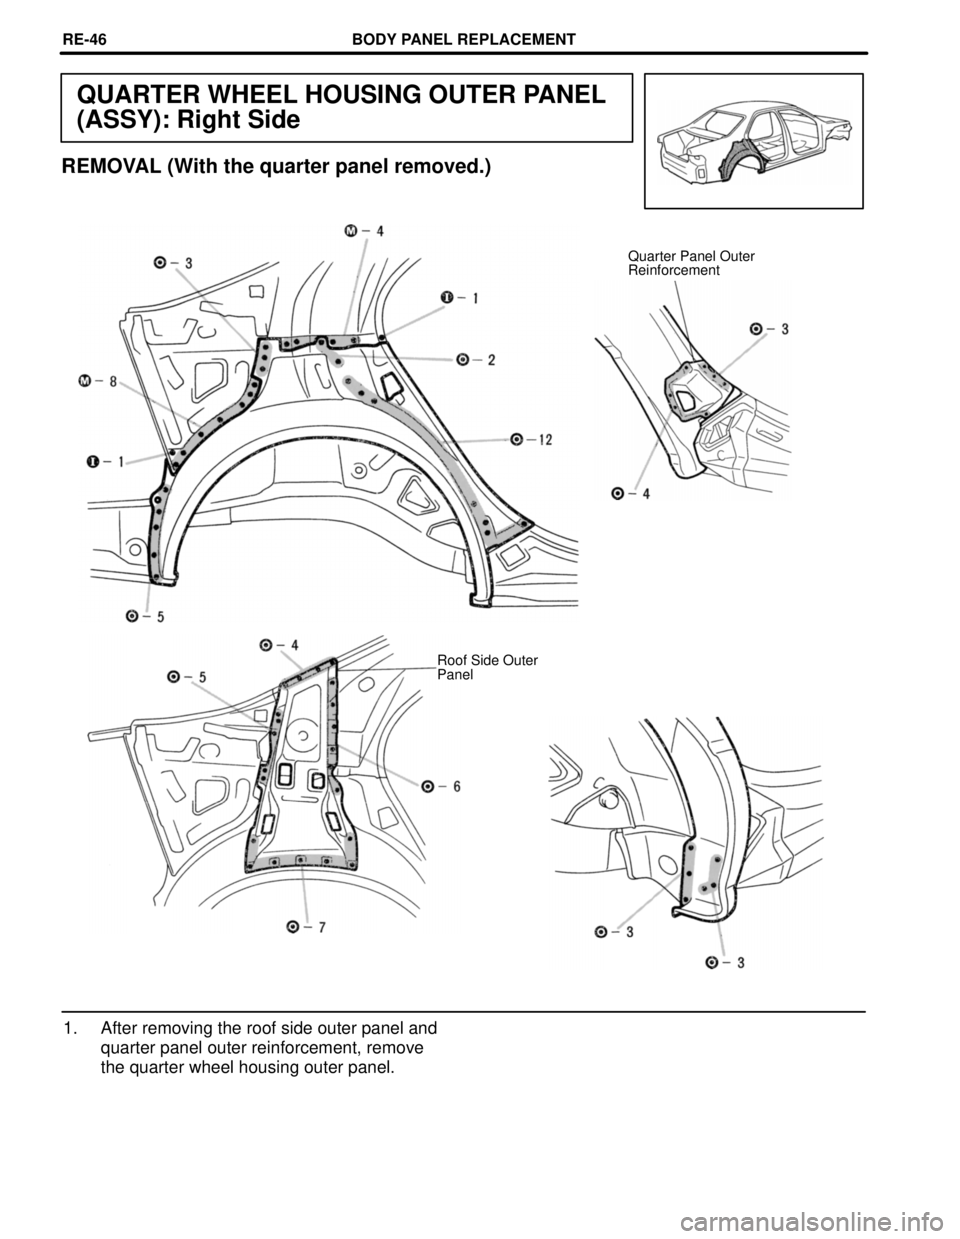
QUARTER WHEEL HOUSING OUTER PANEL
(ASSY): Right Side
REMOVAL (With the quarter panel removed.)
Quarter Panel Outer
Reinforcement
Roof Side Outer
Panel
1. After removing the roof side outer panel and
quarter panel outer reinforcement, remove
the quarter wheel housing outer panel.
BODY PANEL REPLACEMENTRE-46
Page 669 of 4770
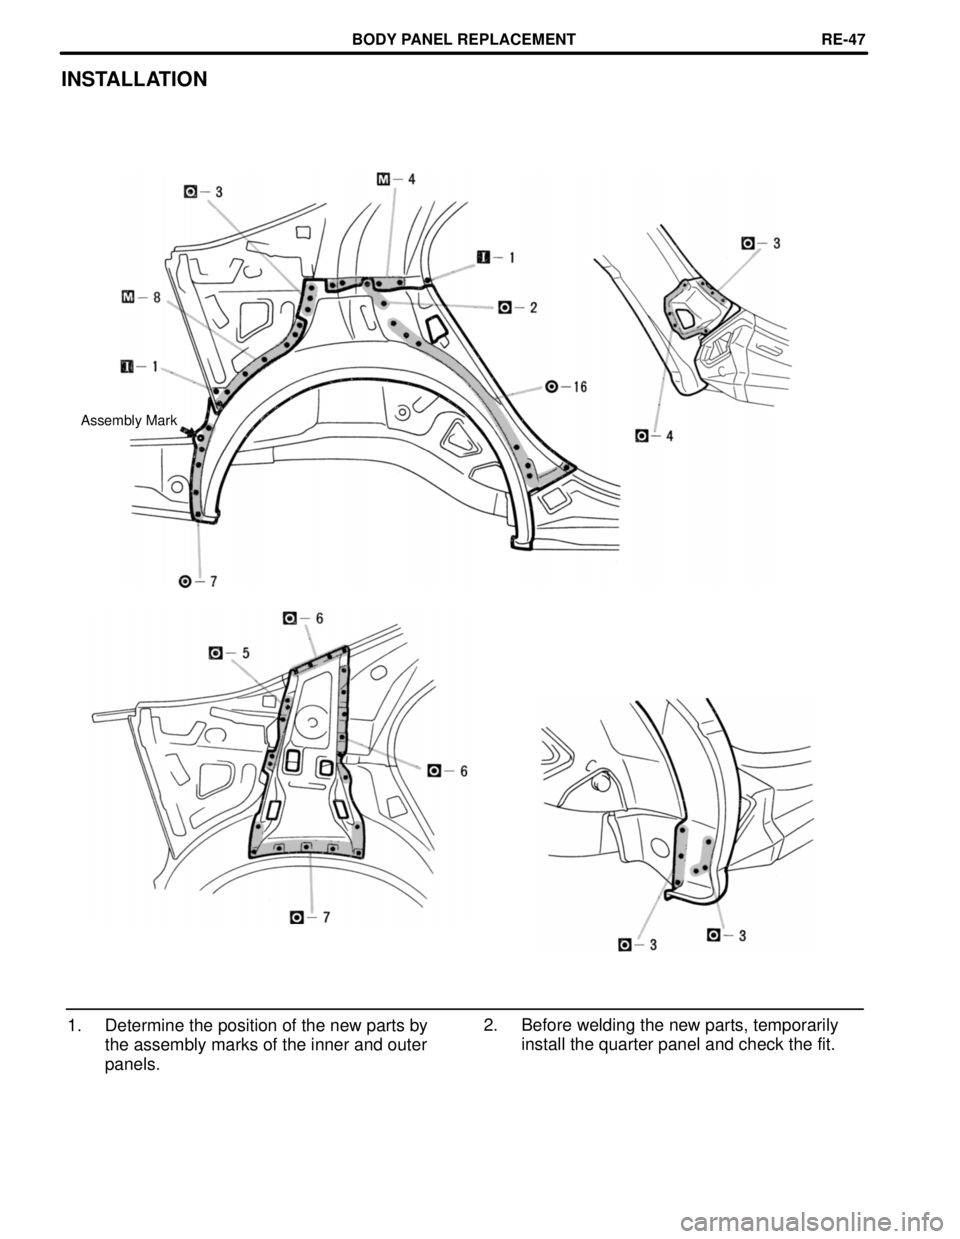
INSTALLATION
Assembly Mark
2. Before welding the new parts, temporarily
install the quarter panel and check the fit. 1. Determine the position of the new parts by
the assembly marks of the inner and outer
panels.
BODY PANEL REPLACEMENTRE-47
Page 670 of 4770
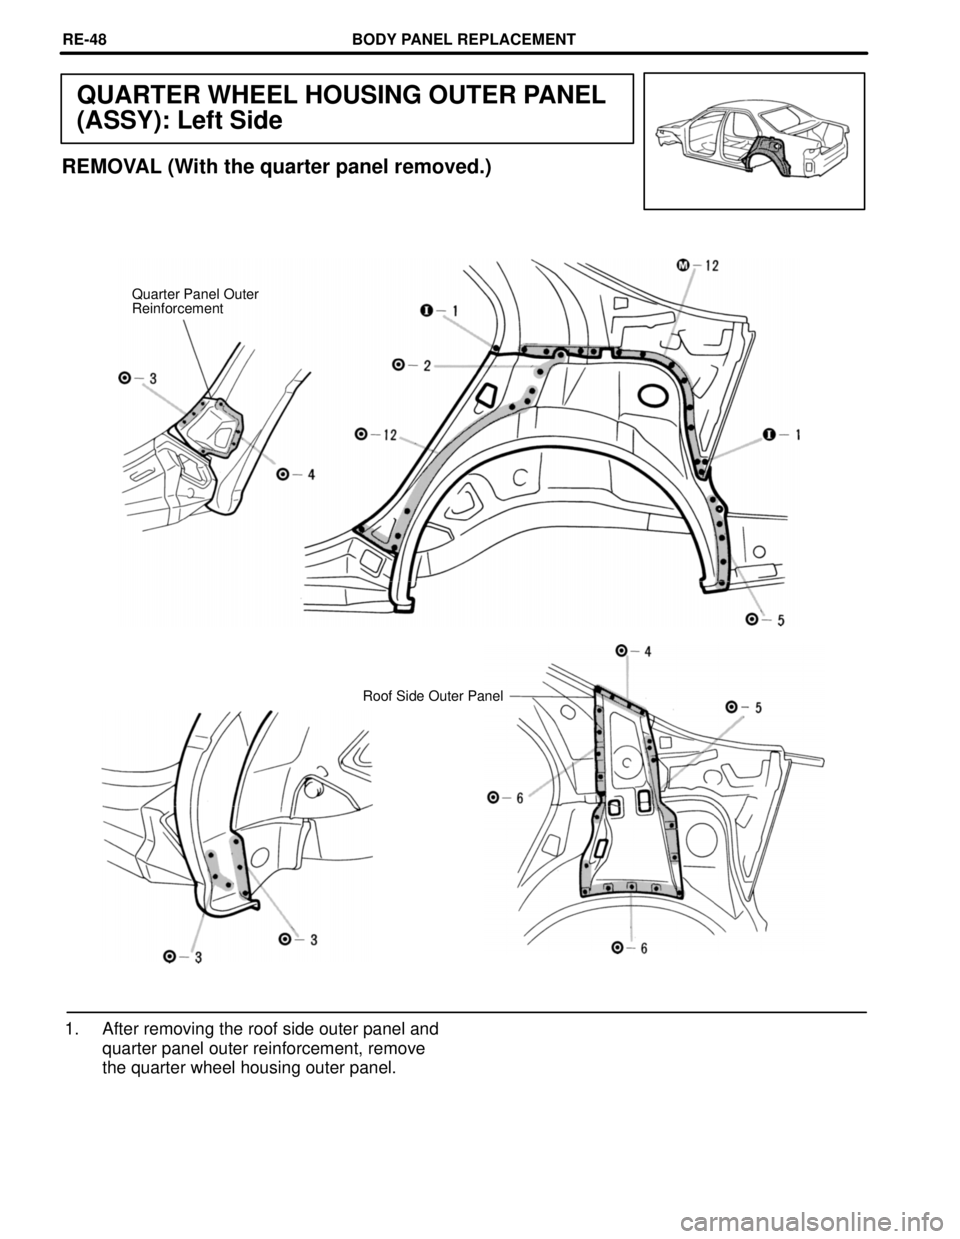
QUARTER WHEEL HOUSING OUTER PANEL
(ASSY): Left Side
REMOVAL (With the quarter panel removed.)
Quarter Panel Outer
Reinforcement
Roof Side Outer Panel
1. After removing the roof side outer panel and
quarter panel outer reinforcement, remove
the quarter wheel housing outer panel.
BODY PANEL REPLACEMENTRE-48
Trending: Motor mounts replacement, roof, coolant capacity, IAC, evap, AUX, open hood
![TOYOTA CAMRY 2000 Service Repair Manual mm in.
5 0.20
INSTALLATION
[Foamed Material
Application Areas]
Body Sealer
Butt Weld
about 5 mm
[Foamed Material
Application Areas]
Body Sealer
Braze
2. Temporarily install the new parts and check
the TOYOTA CAMRY 2000 Service Repair Manual mm in.
5 0.20
INSTALLATION
[Foamed Material
Application Areas]
Body Sealer
Butt Weld
about 5 mm
[Foamed Material
Application Areas]
Body Sealer
Braze
2. Temporarily install the new parts and check
the](/img/14/57447/w960_57447-661.png)
