lock TOYOTA RAV4 PLUG-IN HYBRID 2023 Owners Manual
[x] Cancel search | Manufacturer: TOYOTA, Model Year: 2023, Model line: RAV4 PLUG-IN HYBRID, Model: TOYOTA RAV4 PLUG-IN HYBRID 2023Pages: 718, PDF Size: 167.55 MB
Page 319 of 718
317
5
5-2. Driving procedures
Driving
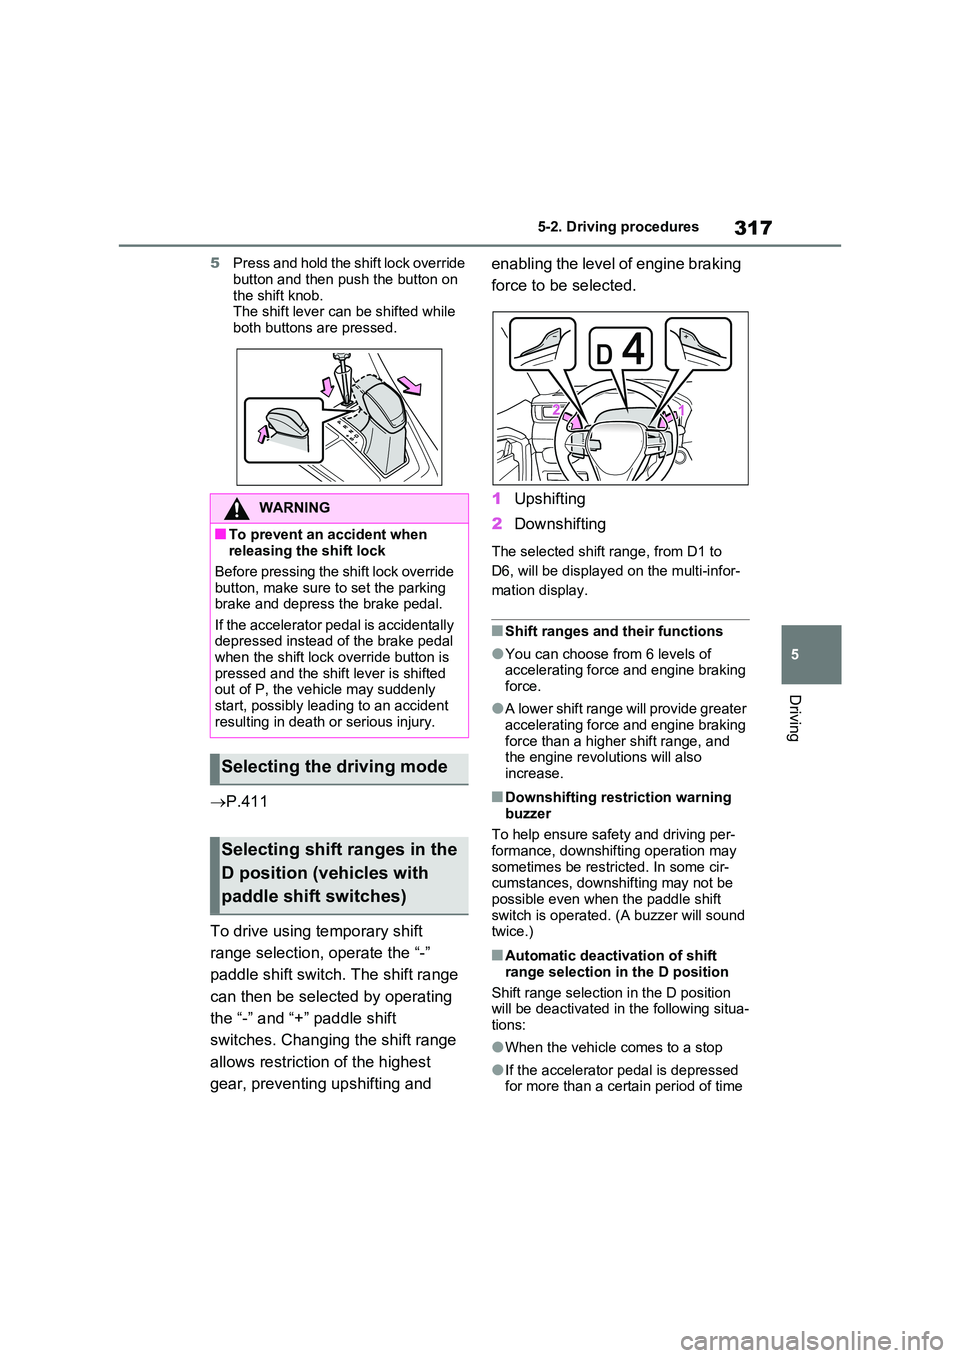
5 Press and hold the shift lock override
button and then push the button on the shift knob.The shift lever can be shifted while
both buttons are pressed.
ï® P.411
To drive using temporary shift
range selection, operate the â-â
paddle shift switch. The shift range
can then be selected by operating
the â-â and â+â paddle shift
switches. Changing the shift range
allows restriction of the highest
gear, preventing upshifting and
enabling the level of engine braking
force to be selected.
1 Upshifting
2 Downshifting
The selected shift range, from D1 to
D6, will be displayed on the multi-infor-
mation display.
â Shift ranges and their functions
âYou can choose from 6 levels of accelerating force and engine braking force.
âA lower shift range will provide greater accelerating force and engine braking
force than a higher shift range, and the engine revolutions will also increase.
â Downshifting restriction warning
buzzer
To help ensure safety and driving per- formance, downshifting operation may
sometimes be restricted. In some cir- cumstances, downshifting may not be possible even when the paddle shift
switch is operated. (A buzzer will sound twice.)
â Automatic deactivation of shift
range selection in the D position
Shift range selection in the D position will be deactivated in the following situa-
tions:
âWhen the vehicle comes to a stop
âIf the accelerator pedal is depressed for more than a certain period of time
WARNING
â To prevent an accident when releasing the shift lock
Before pressing the shift lock override button, make sure to set the parking brake and depress the brake pedal.
If the accelerator pedal is accidentally depressed instead of the brake pedal when the shift lock override button is
pressed and the shift lever is shifted out of P, the vehicle may suddenly start, possibly leading to an accident
resulting in death or serious injury.
Selecting the driving mode
Selecting shift ranges in the
D position (vehicles with
paddle shift switches)
Page 323 of 718
321
5 5-2. Driving procedures
Driving
ï¬When the shift lever is shifted
from P, the parking brake will be
released, and the parking brake
indicator light and the parking
brake switch indicator will turn
off.
ï¬When the shift lever is shifted to
P, the parking brake will be set,
and the parking brake indicator
light and the parking brake
switch indicator will turn on.
Operate the shift lever with the
vehicle stopped and the brake
pedal depressed.
The auto function may not operate
if the shift lever is moved extremely
quickly or the brake pedal is not
firmly depressed.
In this situation, apply the parking
brake manually. (ï®P.320)
ï¬When the hybrid system is off,
the parking brake will be set, and
the parking brake indicator light
and the parking brake switch
indicator turn on.
â Turning the automatic mode
off
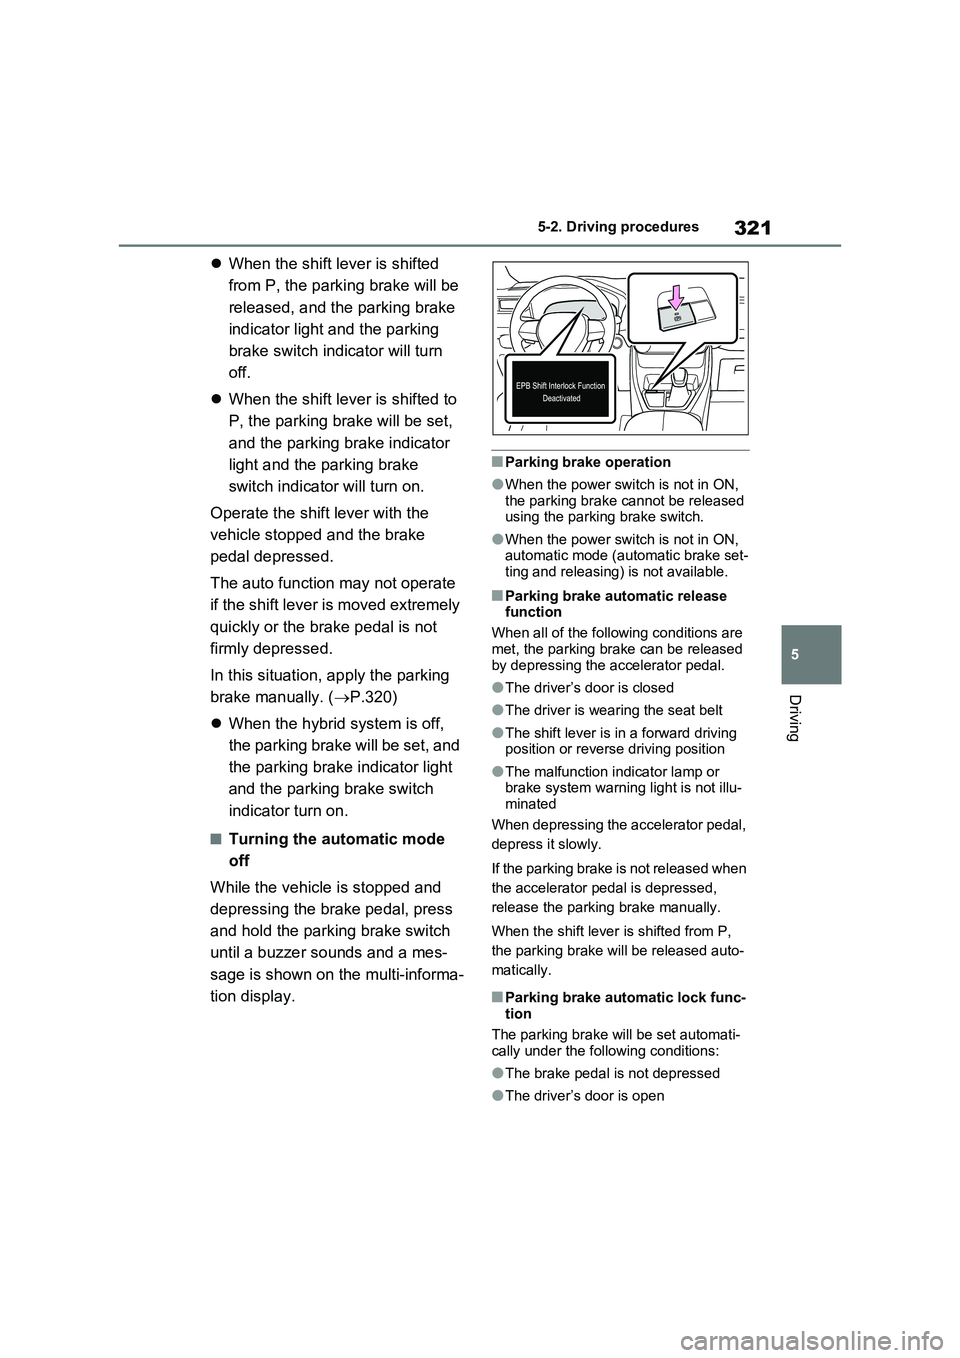
While the vehicle is stopped and
depressing the brake pedal, press
and hold the parking brake switch
until a buzzer sounds and a mes-
sage is shown on the multi-informa-
tion display.
â Parking brake operation
âWhen the power switch is not in ON,
the parking brake cannot be released
using the parking brake switch.
âWhen the power switch is not in ON,
automatic mode (automatic brake set-
ting and releasing) is not available.
â Parking brake automatic release
function
When all of the following conditions are
met, the parking brake can be released
by depressing the accelerator pedal.
âThe driverâs door is closed
âThe driver is wearing the seat belt
âThe shift lever is in a forward driving
position or reverse driving position
âThe malfunction indicator lamp or
brake system warning light is not illu-
minated
When depressing the accelerator pedal,
depress it slowly.
If the parking brake is not released when
the accelerator pedal is depressed,
release the parking brake manually.
When the shift lever is shifted from P,
the parking brake will be released auto-
matically.
â Parking brake automatic lock func-
tion
The parking brake will be set automati-
cally under the following conditions:
âThe brake pedal is not depressed
âThe driverâs door is open
Page 325 of 718
323
5
5-2. Driving procedures
Driving
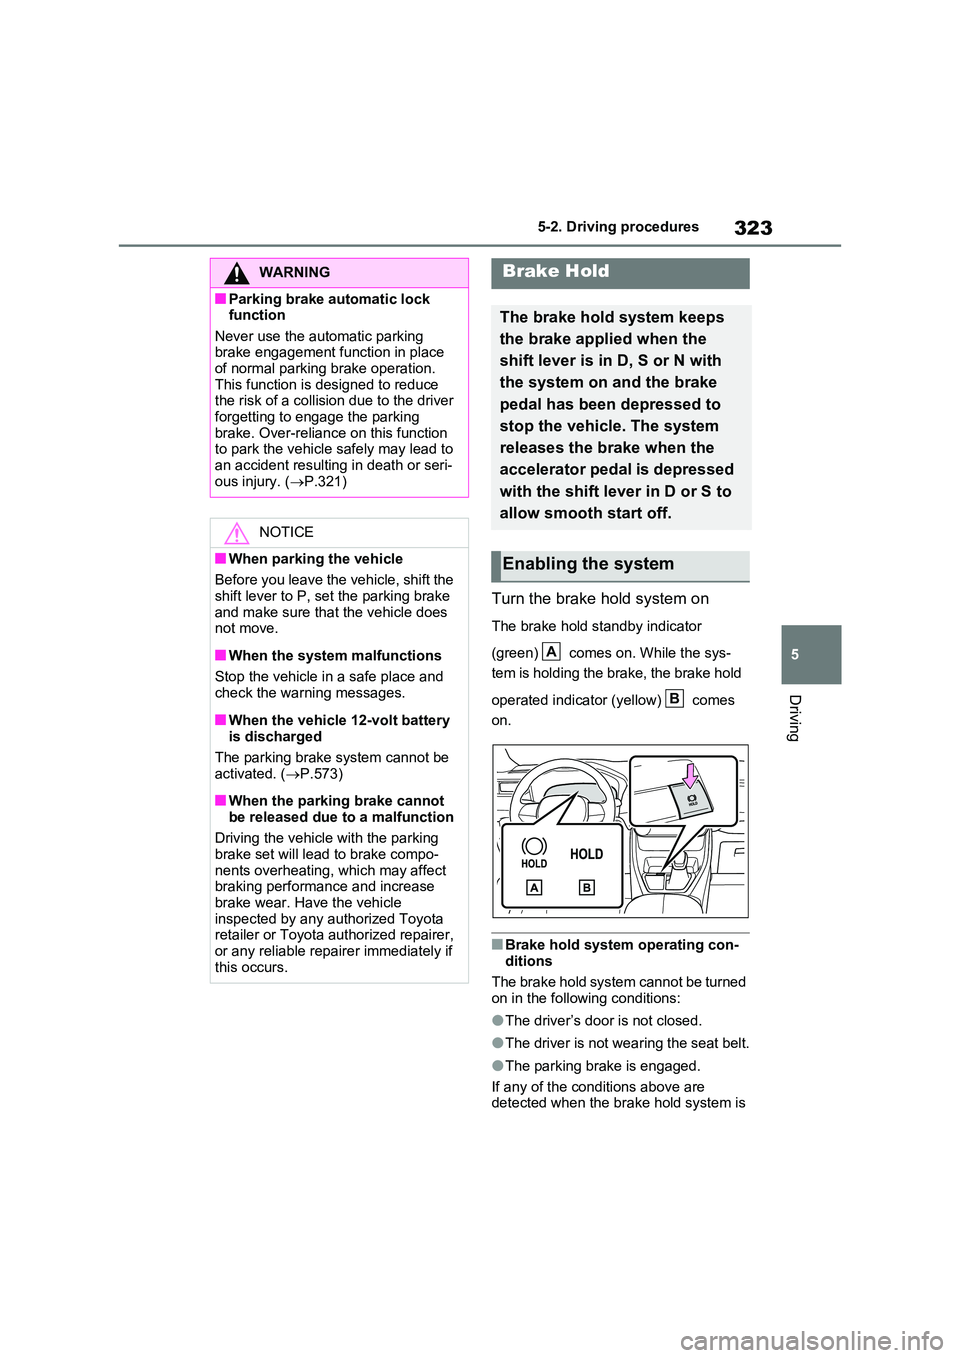
Turn the brake hold system on
The brake hold standby indicator
(green) comes on. While the sys-
tem is holding the brake, the brake hold
operated indicator (yellow) comes
on.
â Brake hold system operating con- ditions
The brake hold system cannot be turned
on in the following conditions:
âThe driverâs door is not closed.
âThe driver is not wearing the seat belt.
âThe parking brake is engaged.
If any of the conditions above are detected when the brake hold system is
WARNING
â Parking brake automatic lock function
Never use the automatic parking brake engagement function in place of normal parking brake operation.
This function is designed to reduce the risk of a collision due to the driver forgetting to engage the parking
brake. Over-reliance on this function to park the vehicle safely may lead to an accident resulting in death or seri-
ous injury. ( ï®P.321)
NOTICE
â When parking the vehicle
Before you leave the vehicle, shift the
shift lever to P, set the parking brake and make sure that the vehicle does not move.
â When the system malfunctions
Stop the vehicle in a safe place and
check the warning messages.
â When the vehicle 12-volt battery is discharged
The parking brake system cannot be
activated. ( ï®P.573)
â When the parking brake cannot
be released due to a malfunction
Driving the vehicle with the parking brake set will lead to brake compo-
nents overheating, which may affect braking performance and increase brake wear. Have the vehicle
inspected by any authorized Toyota retailer or Toyota authorized repairer, or any reliable repairer immediately if
this occurs.
Brake Hold
The brake hold system keeps
the brake applied when the
shift lever is in D, S or N with
the system on and the brake
pedal has been depressed to
stop the vehicle. The system
releases the brake when the
accelerator pedal is depressed
with the shift lever in D or S to
allow smooth start off.
Enabling the system
A
B
Page 328 of 718
3265-3. Operating the lights and wipers
5-3.Operating the lights and wipers
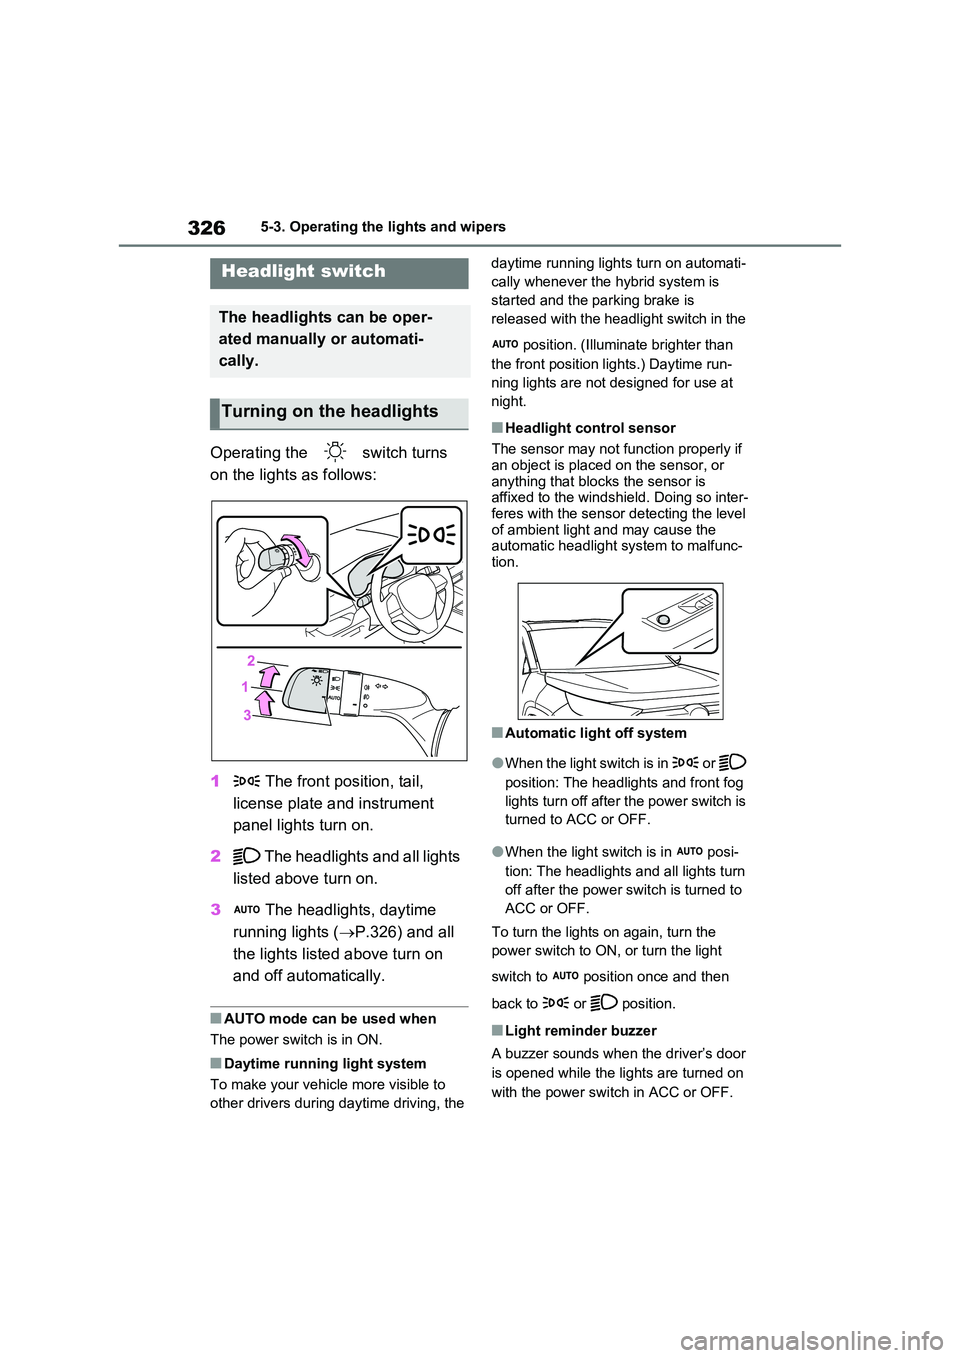
Operating the switch turns
on the lights as follows:
1 The front position, tail,
license plate and instrument
panel lights turn on.
2 The headlights and all lights
listed above turn on.
3 The headlights, daytime
running lights ( ï®P.326) and all
the lights listed above turn on
and off automatically.
â AUTO mode can be used when
The power switch is in ON.
â Daytime running light system
To make your vehicle more visible to
other drivers during daytime driving, the
daytime running lights turn on automati-
cally whenever the hybrid system is
started and the parking brake is
released with the headlight switch in the
position. (Illuminate brighter than
the front position lights.) Daytime run-
ning lights are not designed for use at
night.
â Headlight control sensor
The sensor may not function properly if an object is placed on the sensor, or
anything that blocks the sensor is affixed to the windshield. Doing so inter-feres with the sensor detecting the level
of ambient light and may cause the automatic headlight system to malfunc-tion.
â Automatic light off system
âWhen the light switch is in or
position: The headlights and front fog
lights turn off after the power switch is
turned to ACC or OFF.
âWhen the light switch is in posi-
tion: The headlights and all lights turn
off after the power switch is turned to
ACC or OFF.
To turn the lights on again, turn the
power switch to ON, or turn the light
switch to position once and then
back to or position.
â Light reminder buzzer
A buzzer sounds when the driverâs door
is opened while the lights are turned on
with the power switch in ACC or OFF.
Headlight switch
The headlights can be oper-
ated manually or automati-
cally.
Turning on the headlights
Page 335 of 718
333
5
5-3. Operating the lights and wipers
Driving
â The windshield wipers and washer can be operated when
The power switch is in ON.
â Effects of vehicle speed on wiper operation
With low speed windshield wiper opera-
tion selected, wiper operation will be switched from low speed to intermittent wiper operation when the vehicle is sta-
tionary. (However, when the sensor sen- sitivity is adjusted to the highest level, the mode will not switch.)
â Raindrop sensor
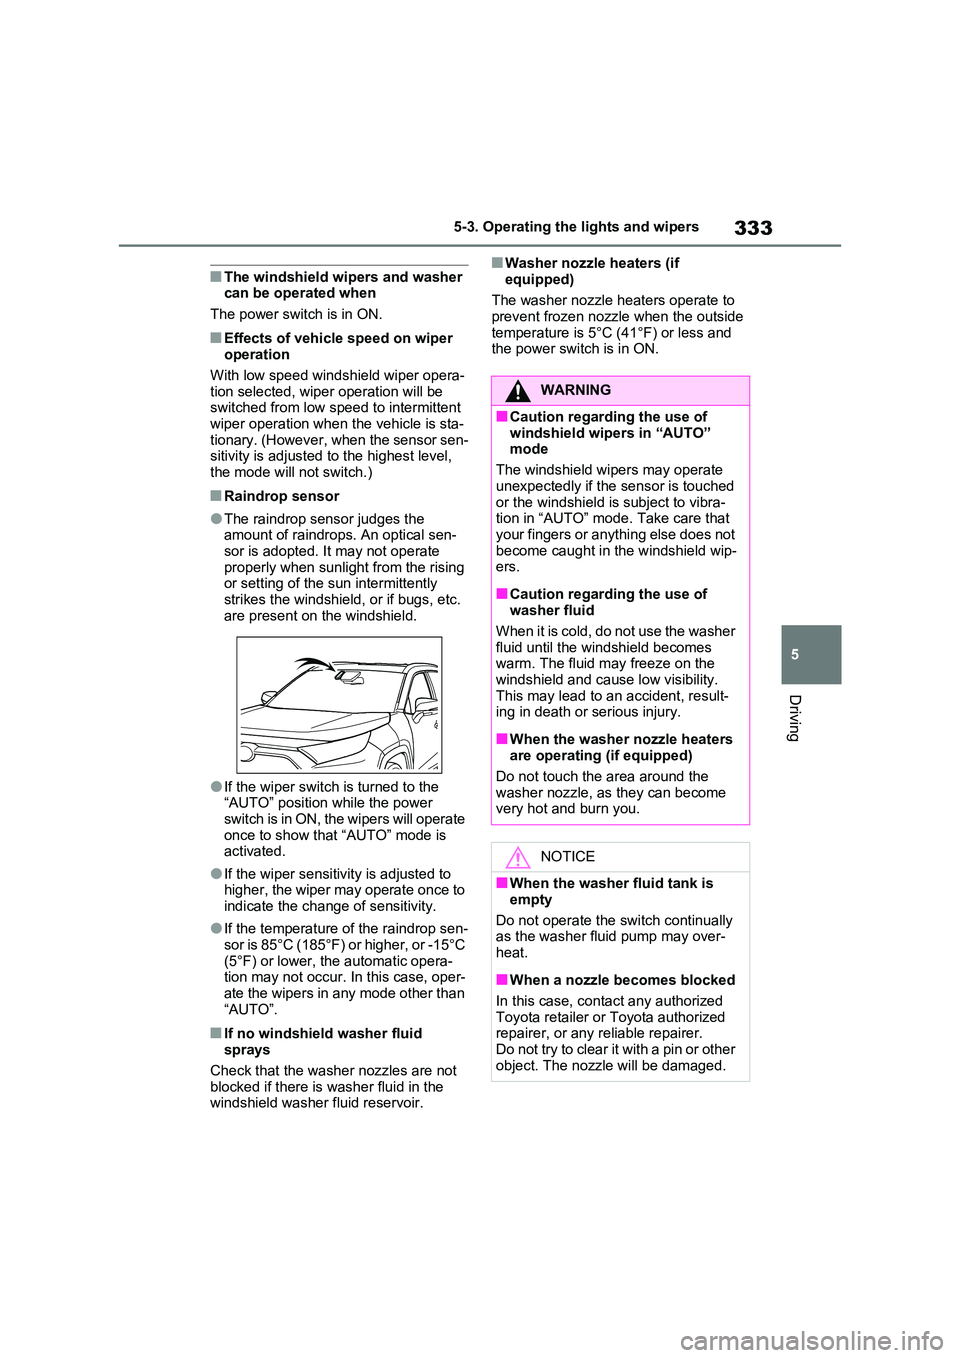
âThe raindrop sensor judges the amount of raindrops. An optical sen-
sor is adopted. It may not operate properly when sunlight from the rising or setting of the sun intermittently
strikes the windshield, or if bugs, etc. are present on the windshield.
âIf the wiper switch is turned to the âAUTOâ position while the power switch is in ON, the wipers will operate
once to show that âAUTOâ mode is activated.
âIf the wiper sensitivity is adjusted to higher, the wiper may operate once to
indicate the change of sensitivity.
âIf the temperature of the raindrop sen-
sor is 85°C (185°F) or higher, or -15°C (5°F) or lower, the automatic opera-tion may not occur. In this case, oper-
ate the wipers in any mode other than âAUTOâ.
â If no windshield washer fluid sprays
Check that the washer nozzles are not blocked if there is washer fluid in the windshield washer fluid reservoir.
â Washer nozzle heaters (if
equipped)
The washer nozzle heaters operate to prevent frozen nozzle when the outside
temperature is 5°C (41°F) or less and the power switch is in ON.
WARNING
â Caution regarding the use of
windshield wipers in âAUTOâ mode
The windshield wipers may operate
unexpectedly if the sensor is touched or the windshield is subject to vibra-tion in âAUTOâ mode. Take care that
your fingers or anything else does not become caught in the windshield wip-ers.
â Caution regarding the use of washer fluid
When it is cold, do not use the washer fluid until the windshield becomes warm. The fluid may freeze on the
windshield and cause low visibility. This may lead to an accident, result-ing in death or serious injury.
â When the washer nozzle heaters are operating (if equipped)
Do not touch the area around the washer nozzle, as they can become very hot and burn you.
NOTICE
â When the washer fluid tank is
empty
Do not operate the switch continually as the washer fluid pump may over-
heat.
â When a nozzle becomes blocked
In this case, contact any authorized Toyota retailer or Toyota authorized repairer, or any reliable repairer.
Do not try to clear it with a pin or other object. The nozzle will be damaged.
Page 337 of 718
335
5
5-3. Operating the lights and wipers
Driving
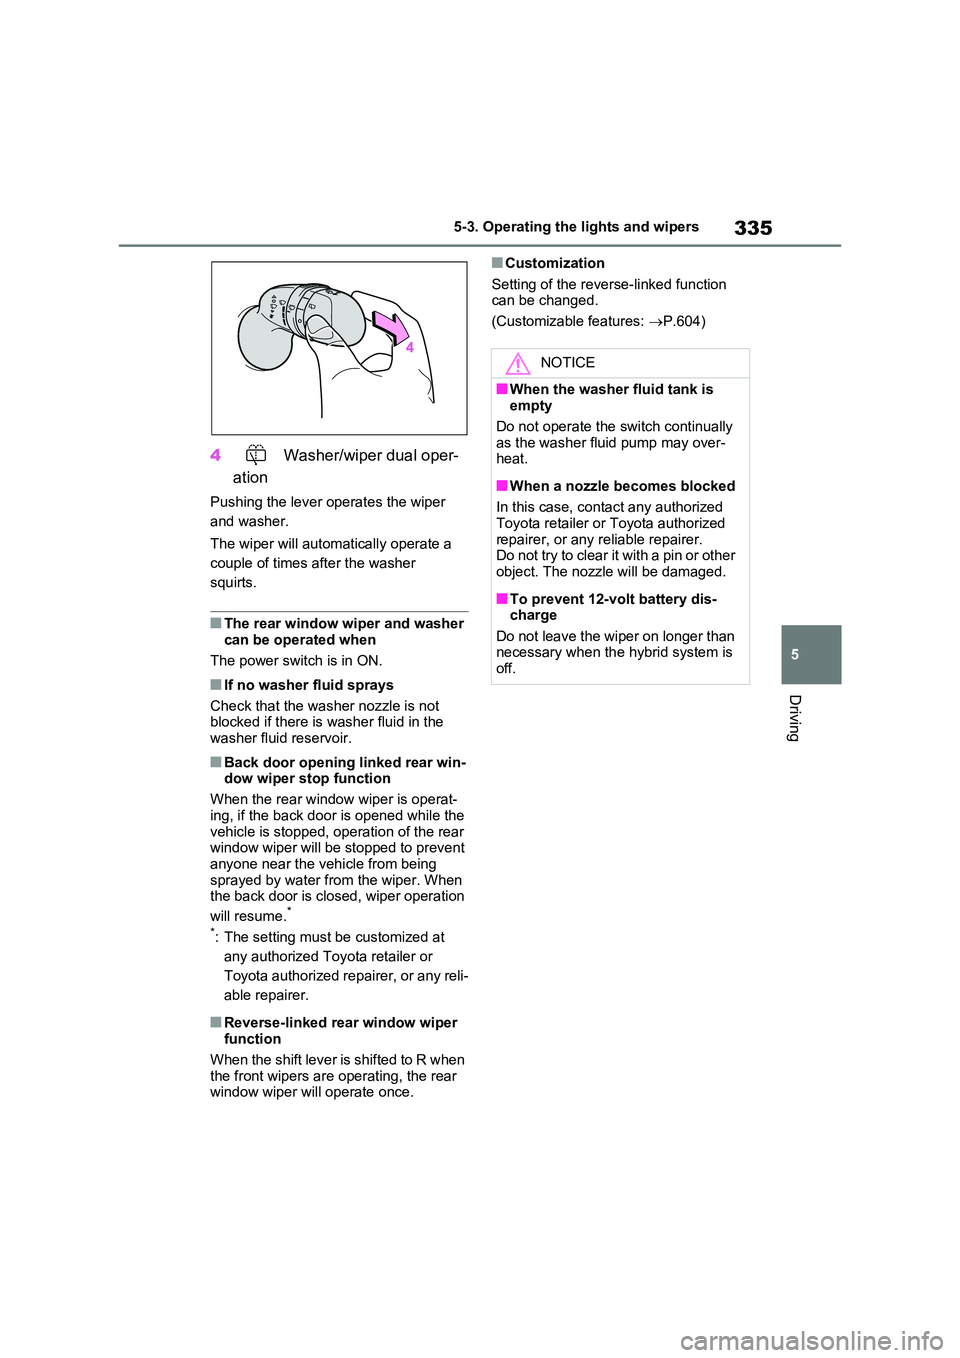
4 Washer/wiper dual oper-
ation
Pushing the lever operates the wiper
and washer.
The wiper will automatically operate a
couple of times after the washer
squirts.
â The rear window wiper and washer can be operated when
The power switch is in ON.
â If no washer fluid sprays
Check that the washer nozzle is not blocked if there is washer fluid in the
washer fluid reservoir.
â Back door opening linked rear win- dow wiper stop function
When the rear window wiper is operat-
ing, if the back door is opened while the vehicle is stopped, operation of the rear window wiper will be stopped to prevent
anyone near the vehicle from being sprayed by water from the wiper. When the back door is closed, wiper operation
will resume.*
*: The setting must be customized at
any authorized Toyota retailer or
Toyota authorized repairer, or any reli-
able repairer.
â Reverse-linked rear window wiper function
When the shift lever is shifted to R when
the front wipers are operating, the rear window wiper will operate once.
â Customization
Setting of the reverse-linked function can be changed.
(Customizable features: ï®P.604)
NOTICE
â When the washer fluid tank is empty
Do not operate the switch continually
as the washer fluid pump may over- heat.
â When a nozzle becomes blocked
In this case, contact any authorized Toyota retailer or Toyota authorized
repairer, or any reliable repairer. Do not try to clear it with a pin or other object. The nozzle will be damaged.
â To prevent 12-volt battery dis-charge
Do not leave the wiper on longer than necessary when the hybrid system is off.
Page 354 of 718
3525-5. Using the driving support systems
⢠If a vehicle ahead is carrying a load
which protrudes past its rear bumper
⢠If a vehicle ahead is irregularly
shaped, such as a tractor or side car
⢠If a vehicle ahead is a child sized bicy-
cle, a bicycle that is carrying a large
load, a bicycle ridden by more than
one person, or a uniquely shaped
bicycle (bicycle with a child seat, tan-
dem bicycle, etc.)
⢠If a pedestrian/or the riding height of a
bicyclist ahead is shorter than approx-
imately 1 m (3.2 ft.) or taller than
approximately 2 m (6.5 ft.)
⢠If a pedestrian/bicyclist is wearing
oversized clothing (a rain coat, long
skirt, etc.), making their silhouette
obscure
⢠If a pedestrian is bending forward or
squatting or bicyclist is bending for-
ward
⢠If a pedestrian/bicyclist is moving fast
⢠If a pedestrian is pushing a stroller,
wheelchair, bicycle or other vehicle
⢠When driving in inclement weather
such as heavy rain, fog, snow or a
sandstorm
⢠When driving through steam or smoke
⢠When the surrounding area is dim,
such as at dawn or dusk, or while at
night or in a tunnel, making a detect-
able object appear to be nearly the
same color as its surroundings
⢠When driving in a place where the sur-
rounding brightness changes sud-
denly, such as at the entrance or exit
of a tunnel
⢠After the hybrid system has started
the vehicle has not been driven for a
certain amount of time
⢠While making a left/right turn and for a
few seconds after making a left/right
turn⢠While driving on a curve and for a few
seconds after driving on a curve
⢠If your vehicle is skidding
⢠If the front of the vehicle is raised or
lowered
⢠If the wheels are misaligned
⢠If a wiper blade is blocking the front
camera
⢠The vehicle is being driven at
extremely high speeds
⢠When driving on a hill
⢠If the radar sensor or front camera is
misaligned
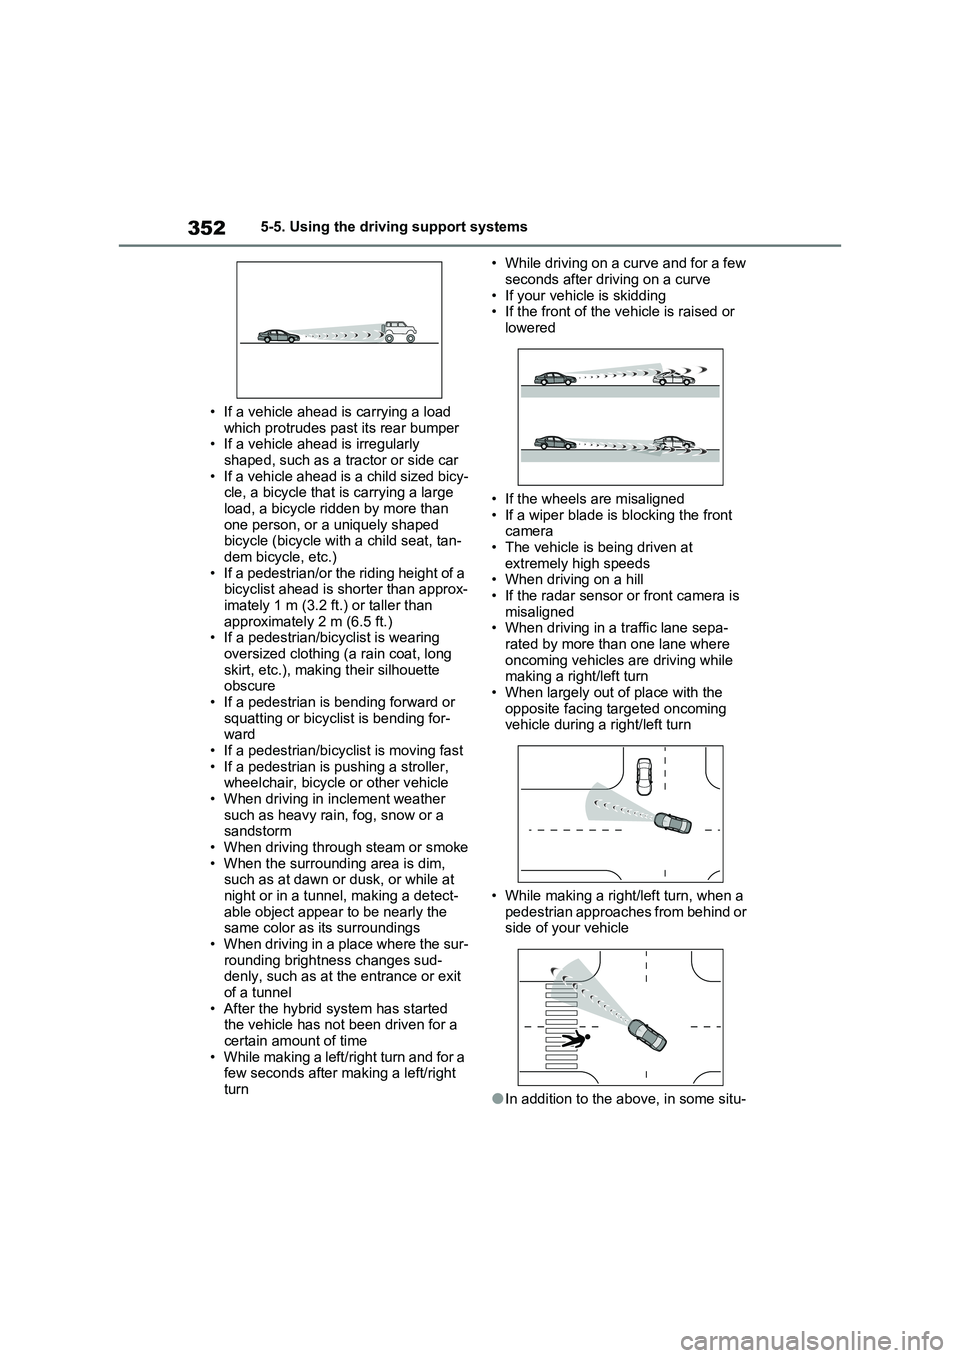
⢠When driving in a traffic lane sepa-
rated by more than one lane where
oncoming vehicles are driving while
making a right/left turn
⢠When largely out of place with the
opposite facing targeted oncoming
vehicle during a right/left turn
⢠While making a right/left turn, when a
pedestrian approaches from behind or
side of your vehicle
âIn addition to the above, in some situ-
Page 417 of 718
415
5
5-5. Using the driving support systems
Driving
â ECB (Electronically Con-
trolled Brake System)
The electronically controlled sys-
tem generates braking force corre-
sponding to the brake operation
â ABS (Anti-lock Brake System)
Helps to prevent wheel lock when
the brakes are applied suddenly, or
if the brakes are applied while driv-
ing on a slippery road surface
â Brake assist
Generates an increased level of
braking force after the brake pedal
is depressed when the system
detects a panic stop situation
â VSC (Vehicle Stability Control)
Helps the driver to control skidding
when swerving suddenly or turning
on slippery road surfaces.
NOTICE
â To prevent the GPF system from not operating properly
âDo not use fuel other than the spec-ified type
âDo not modify the exhaust pipes
Driving assist systems
To keep driving safety and per-
formance, the following sys-
tems operate automatically in
response to various driving sit-
uations. Be aware, however,
that these systems are supple-
mentary and should not be
relied upon too heavily when
operating the vehicle.
Summary of the driving
assist systems
Page 425 of 718
423
5
5-6. Driving tips
Driving
Perform the following according to
the driving conditions:
ï¬ Do not try to forcibly open a win-
dow or move a wiper that is fro-
zen. Pour warm water over the
frozen area to melt the ice. Wipe
away the water immediately to
prevent it from freezing.
ï¬ To ensure proper operation of
the climate control system fan,
remove any snow that has accu-
mulated on the air inlet vents in
front of the windshield.
ï¬ Check for and remove any
excess ice or snow that may
have accumulated on the exte-
rior lights, outside rear view mir-
rors, windows, vehicleâs roof,
chassis, around the tires or on
the brakes.
ï¬ Remove any snow or mud from
the bottom of your shoes before
getting in the vehicle.
Accelerate the vehicle slowly, keep
a safe distance between you and
the vehicle ahead, and drive at a
reduced speed suitable to road
conditions.
ï¬ Turn automatic mode of the
parking brake off. Otherwise, the
parking brake may freeze and
not be able to be released auto-
matically.
Also, avoid using the following as the
parking brake may operate automati-
cally, even if automatic mode is off.
⢠Brake hold system
ï¬ Park the vehicle and shift the
shift lever to P without setting the
parking brake. The parking brake
may freeze up, preventing it from
being released. If the vehicle is
parked without setting the park-
ing brake, make sure to block the
wheels. Failure to do so may be
dangerous because it may cause
the vehicle to move unexpect-
edly, possibly leading to an acci-
dent.
ï¬ When the parking brake is in
automatic mode, release the
parking brake after shifting the
shift lever to P. ( ï®P.321)
ï¬ If the vehicle is parked without
setting the parking brake, con-
firm that the shift lever cannot be
moved out of P.
ï¬ If the vehicle is left parked with
the brakes damp in cold tem-
peratures, there is a possibility of
the brakes freezing.
Before driving the vehicle
When driving the vehicle
When parking the vehicle
WARNING
â When parking the vehicle
When parking the vehicle without
applying the parking brake, make sure to chock the wheels. If you do not chock the wheels, the vehicle may
move unexpectedly, possibly result- ing in an accident.
Page 433 of 718
431
6
6-1. Using the air conditioning system and defogger
Interior features
â Adjusting the temperature set-
ting
Turn driverâs side temperature con-
trol dial clockwise to increases the
temperature and turn the dial coun-
terclockwise to decreases the tem-
perature.
The air conditioning system switches
between individual and simultaneous
modes each time the âDUALâ switch is
pressed.
Simultaneous mode (the indicator on
the âDUALâ switch is off):
The driverâs side temperature control
dial can be used to adjust the tempera-
ture for the driverâs and passengerâs
side. At this time, operate the passen-
gerâs side temperature control dial to
enter individual mode.
Individual mode (the indicator on the
âDUALâ switch is on):
The temperature for the driverâs and
passengerâs side can be adjusted sepa-
rately.
â Setting the fan speed
Press the fan speed increase
switch to increase the fan speed
and the fan speed decrease switch
to decrease the fan speed.
Pressing the âOFFâ switch to turns off
the fan.
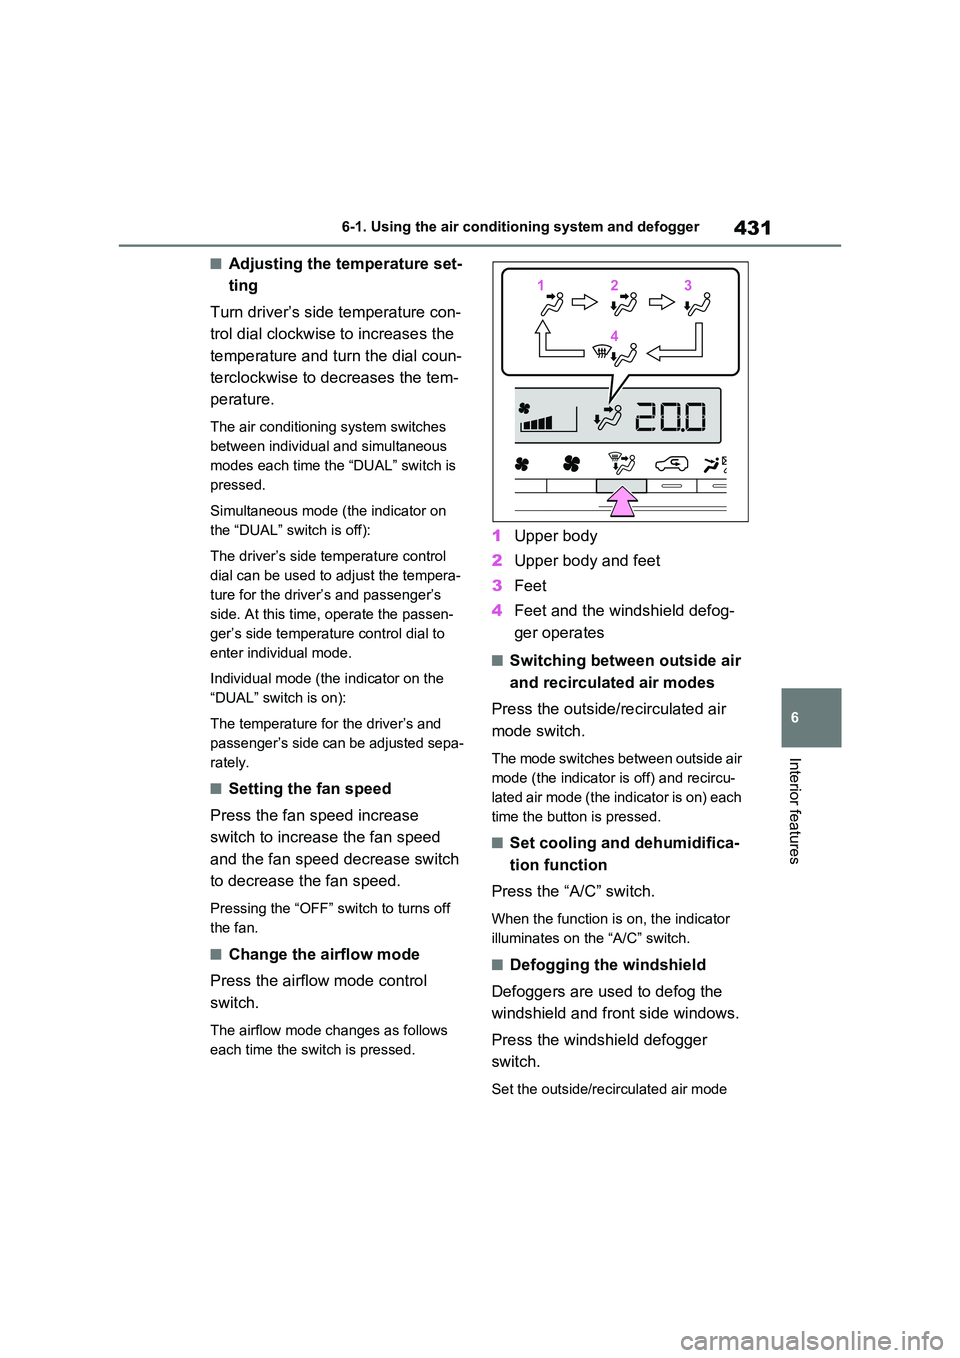
â Change the airflow mode
Press the airflow mode control
switch.
The airflow mode changes as follows
each time the switch is pressed.
1 Upper body
2 Upper body and feet
3 Feet
4 Feet and the windshield defog-
ger operates
â Switching between outside air
and recirculated air modes
Press the outside/recirculated air
mode switch.
The mode switches between outside air
mode (the indicator is off) and recircu-
lated air mode (the indicator is on) each
time the button is pressed.
â Set cooling and dehumidifica-
tion function
Press the âA/Câ switch.
When the function is on, the indicator
illuminates on the âA/Câ switch.
â Defogging the windshield
Defoggers are used to defog the
windshield and front side windows.
Press the windshield defogger
switch.
Set the outside/recirculated air mode
112233
44