sensor TOYOTA RAV4 PLUG-IN HYBRID 2023 Owner's Manual
[x] Cancel search | Manufacturer: TOYOTA, Model Year: 2023, Model line: RAV4 PLUG-IN HYBRID, Model: TOYOTA RAV4 PLUG-IN HYBRID 2023Pages: 718, PDF Size: 167.55 MB
Page 237 of 718

235
4
4-2. Opening, closing and locking the doors
Before driving
4-2.Opening, closing and lo cking th e d oors
■Using the entry function
Carry the electronic key to enable
this function.
1 Grip the front door handle to
unlock the doors.
Make sure to touch the sensor on the
back of the handle.
The doors cannot be unlocked for 3
seconds after the doors are locked.
2 Touch the lock sensor (the
indentation on the upper part of
the door handle) to lock the
doors.
Check that the door is securely locked.
■Using the wireless remote
control
1 Locks all the doors
Check that the door is securely locked.
Press and hold to close the side win-
dows and panoramic moon roof (if
equipped).*
2 Unlocks all the doors
Press and hold to open the side win-
dows and panoramic moon roof (if
equipped).*
*: These settings must be customized
at any authorized Toyota retailer or
Toyota authorized repairer, or any
reliable repairer.
■Switching the door unlock function
It is possible to set which doors the entry function unlocks using the wireless
remote control. Operate the switching operation in the vehicle or within approx-imately 1 m (3.2 ft.) of the vehicle.
1 Turn the power switch to OFF.
2 Cancel the intrusion sensor and tilt
sensor of the alarm system to pre- vent unintended triggering of the
alarm while changing the settings. (if equipped) ( P.80)
3 When the indicator light on the key
surface is not on, press and hold
or for approximately
5 seconds while pressing and hold-
ing .
Side doors
The vehicle can be locked and
unlocked using the entry func-
tion, wireless remote control,
door lock switches or inside
lock buttons.
Charging port lid and charging
connector will also be locked and
unlocked. ( P.121)
Unlocking and locking the
doors from the outside
Page 238 of 718
2364-2. Opening, closing and locking the doors
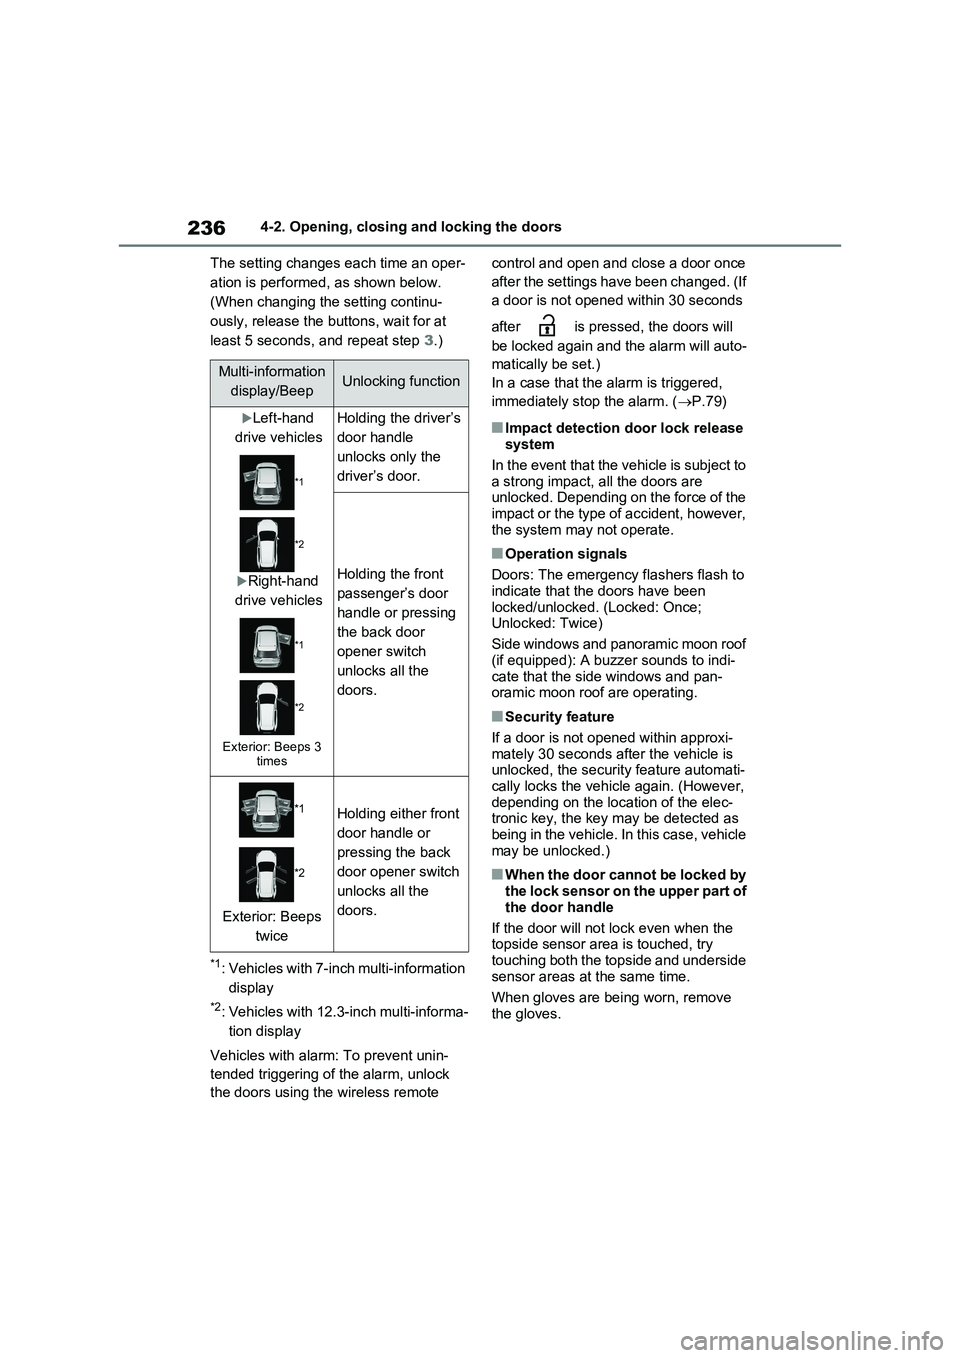
The setting changes each time an oper-
ation is performed, as shown below.
(When changing the setting continu-
ously, release the buttons, wait for at
least 5 seconds, and repeat step 3.)
*1: Vehicles with 7-inch multi-information
display
*2: Vehicles with 12.3-inch multi-informa-
tion display
Vehicles with alarm: To prevent unin-
tended triggering of the alarm, unlock
the doors using the wireless remote control and open and close a door once
after the settings have been changed. (If
a door is not opened within 30 seconds
after is pressed, the doors will
be locked again and the alarm will auto-
matically be set.)
In a case that the alarm is triggered,
immediately stop the alarm. (P.79)
■Impact detection door lock release
system
In the event that the vehicle is subject to
a strong impact, all the doors are
unlocked. Depending on the force of the
impact or the type of accident, however,
the system may not operate.
■Operation signals
Doors: The emergency flashers flash to
indicate that the doors have been
locked/unlocked. (Locked: Once;
Unlocked: Twice)
Side windows and panoramic moon roof
(if equipped): A buzzer sounds to indi-
cate that the side windows and pan-
oramic moon roof are operating.
■Security feature
If a door is not opened within approxi-
mately 30 seconds after the vehicle is
unlocked, the security feature automati-
cally locks the vehicle again. (However,
depending on the location of the elec-
tronic key, the key may be detected as
being in the vehicle. In this case, vehicle
may be unlocked.)
■When the door cannot be locked by
the lock sensor on the upper part of
the door handle
If the door will not lock even when the
topside sensor area is touched, try
touching both the topside and underside
sensor areas at the same time.
When gloves are being worn, remove
the gloves.
Multi-information
display/BeepUnlocking function
Left-hand
drive vehicles
*1
*2
Right-hand
drive vehicles
*1
*2
Exterior: Beeps 3
times
Holding the driver’s
door handle
unlocks only the
driver’s door.
Holding the front
passenger’s door
handle or pressing
the back door
opener switch
unlocks all the
doors.
*1
*2
Exterior: Beeps
twice
Holding either front
door handle or
pressing the back
door opener switch
unlocks all the
doors.
Page 246 of 718
2444-2. Opening, closing and locking the doors
opens/closes.
Unlock the back door before operating.
Pressing the switch while the power
back door is opening/closing stops the
operation. When the switch is pressed
and held again during the halted opera-
tion, the back door will perform the
reverse operation.
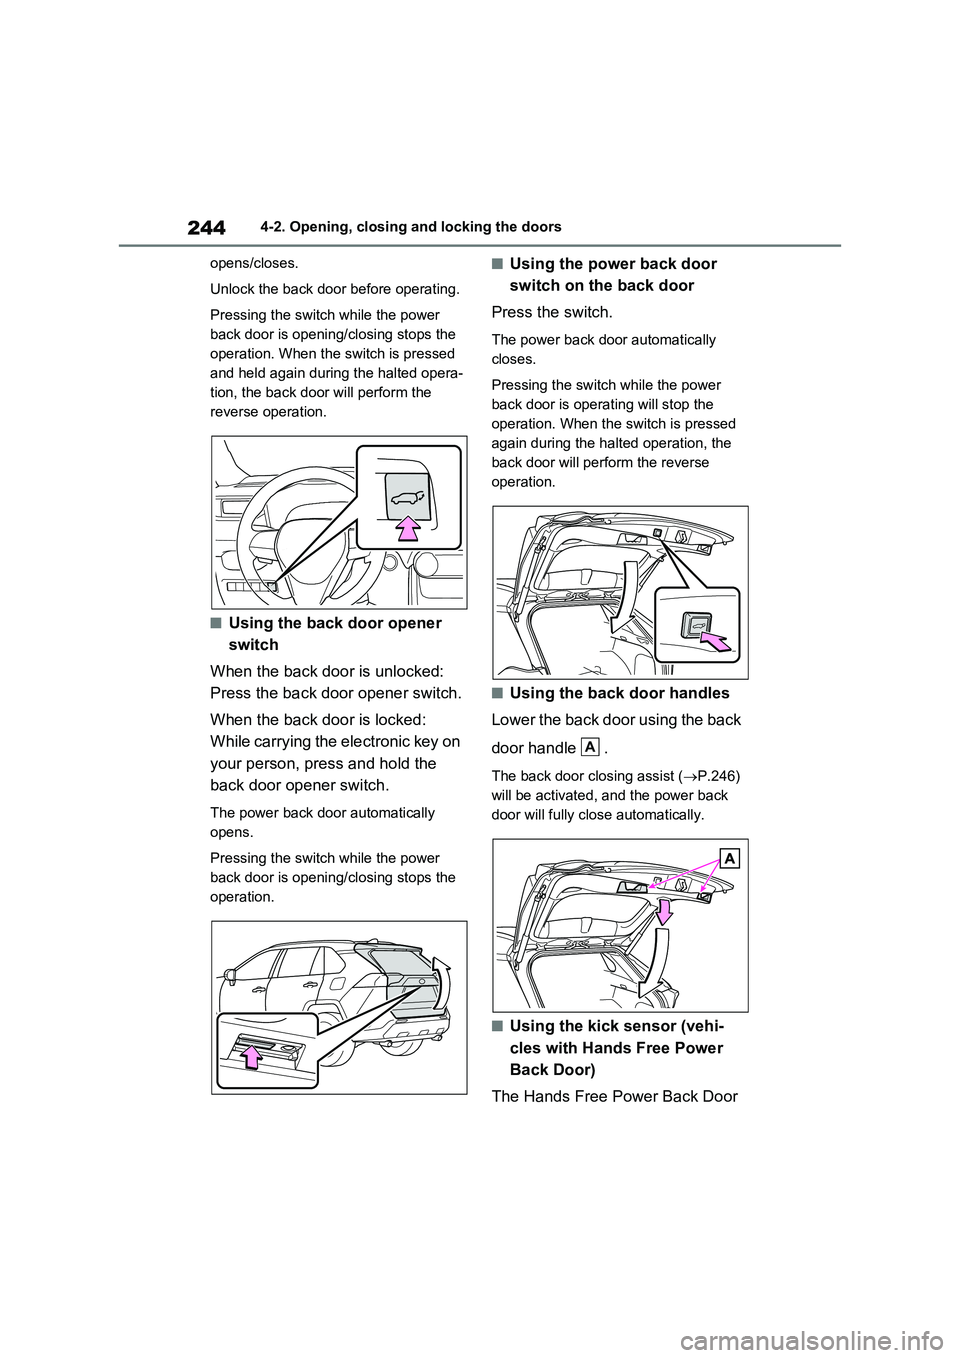
■Using the back door opener
switch
When the back door is unlocked:
Press the back door opener switch.
When the back door is locked:
While carrying the electronic key on
your person, press and hold the
back door opener switch.
The power back door automatically
opens.
Pressing the switch while the power
back door is opening/closing stops the
operation.
■Using the power back door
switch on the back door
Press the switch.
The power back door automatically
closes.
Pressing the switch while the power
back door is operating will stop the
operation. When the switch is pressed
again during the halted operation, the
back door will perform the reverse
operation.
■Using the back door handles
Lower the back door using the back
door handle .
The back door closing assist (P.246)
will be activated, and the power back
door will fully close automatically.
■Using the kick sensor (vehi-
cles with Hands Free Power
Back Door)
The Hands Free Power Back Door
A
Page 247 of 718
245
4 4-2. Opening, closing and locking the doors
Before driving
enables automatic opening and
closing of the power back door by
putting your foot near the lower
center part of the rear bumper and
moving it away from the rear
bumper. When operating the Hands
Free Power Back Door, make sure
that the power switch is in OFF, the
Hands Free Power Back Door
operation is enabled (P.206) and
you are carrying an electronic key.
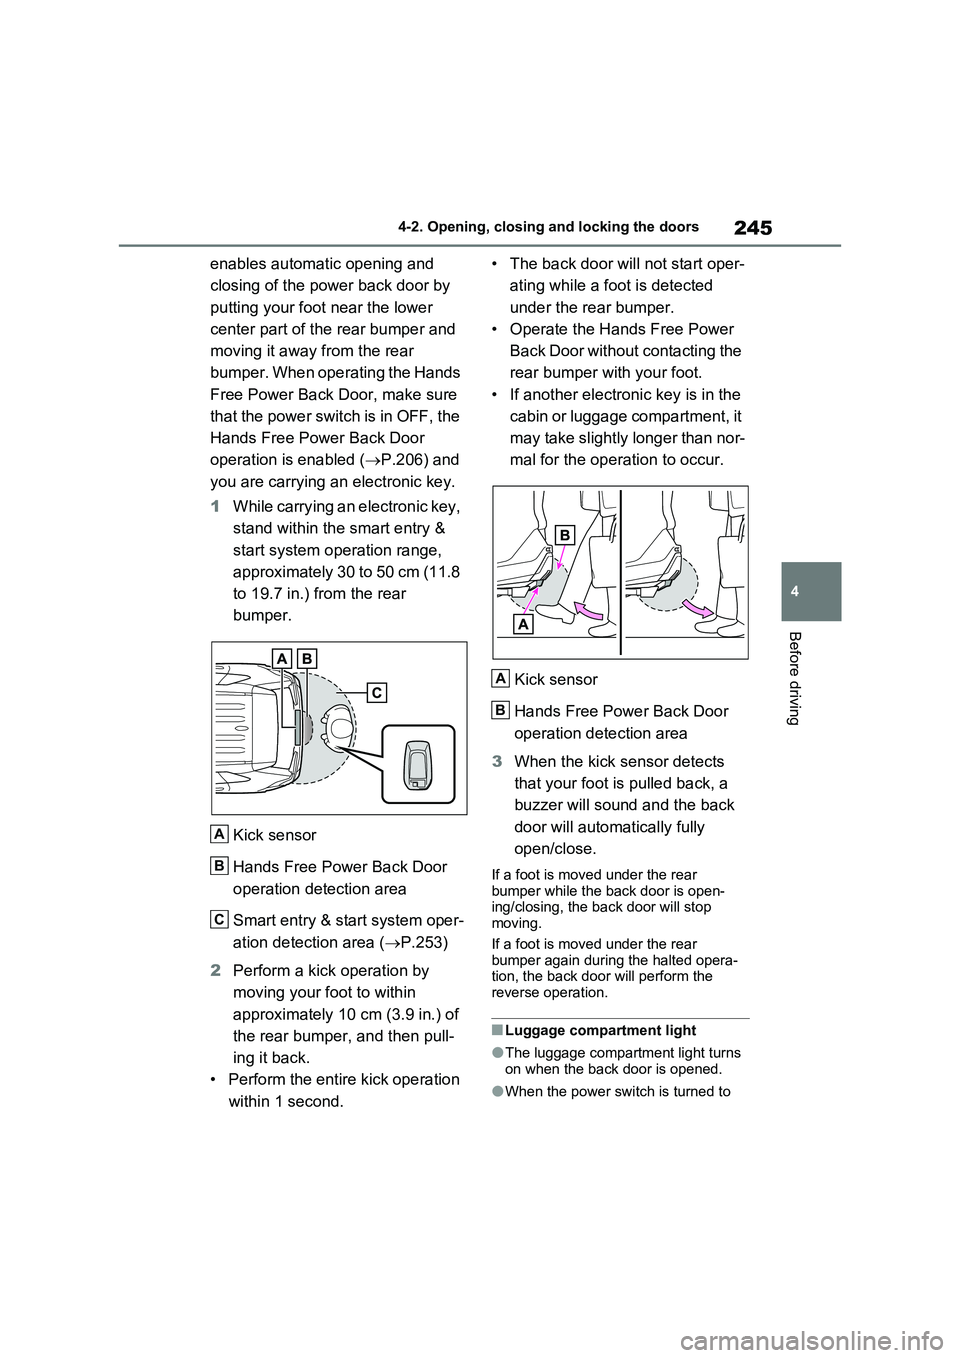
1While carrying an electronic key,
stand within the smart entry &
start system operation range,
approximately 30 to 50 cm (11.8
to 19.7 in.) from the rear
bumper.
Kick sensor
Hands Free Power Back Door
operation detection area
Smart entry & start system oper-
ation detection area (P.253)
2Perform a kick operation by
moving your foot to within
approximately 10 cm (3.9 in.) of
the rear bumper, and then pull-
ing it back.
• Perform the entire kick operation
within 1 second.• The back door will not start oper-
ating while a foot is detected
under the rear bumper.
• Operate the Hands Free Power
Back Door without contacting the
rear bumper with your foot.
• If another electronic key is in the
cabin or luggage compartment, it
may take slightly longer than nor-
mal for the operation to occur.
Kick sensor
Hands Free Power Back Door
operation detection area
3When the kick sensor detects
that your foot is pulled back, a
buzzer will sound and the back
door will automatically fully
open/close.
If a foot is moved under the rear
bumper while the back door is open-
ing/closing, the back door will stop
moving.
If a foot is moved under the rear
bumper again during the halted opera-
tion, the back door will perform the
reverse operation.
■Luggage compartment light
●The luggage compartment light turns
on when the back door is opened.
●When the power switch is turned to
A
B
C
A
B
Page 248 of 718
2464-2. Opening, closing and locking the doors
OFF, the light will go off automatically
after 20 minutes.
■Back door closer
In the event that the back door is left
slightly open, the back door closer will
automatically close it to the fully closed
position.
Whatever the state of the power switch,
the back door closer operates.
■Power back door operating condi-
tions
The power back door can automatically
open and close under the following con-
ditions:
●When the power back door system is
enabled. (P.206)
●When the back door is unlocked.
However, if the back door opener switch
is pressed and held while carrying the
electronic key on your person, the
power back door will be operated even if
the back door is locked. (P.244)
●When the power switch is in ON, in
addition to the above for the opening
operations, the back door operates for
any of the following conditions:
• Parking brake is engaged
• The brake pedal is depressed
• The shift lever is in P.
■Operation of the power back door
●A buzzer sounds to indicate that the
back door is opening/closing.
●When the power back door system is
disabled, the power back door does
not operate but it can be opened and
closed by hand.
●When the power back door automati-
cally opens, if an abnormality due to
people or objects is detected, opera-
tion will stop.
■Jam protection function
Sensors are equipped on both sides of
the power back door. If anything
obstructs the power back door while it is
closing, the back door will automatically
operate in the opposite direction or stop.
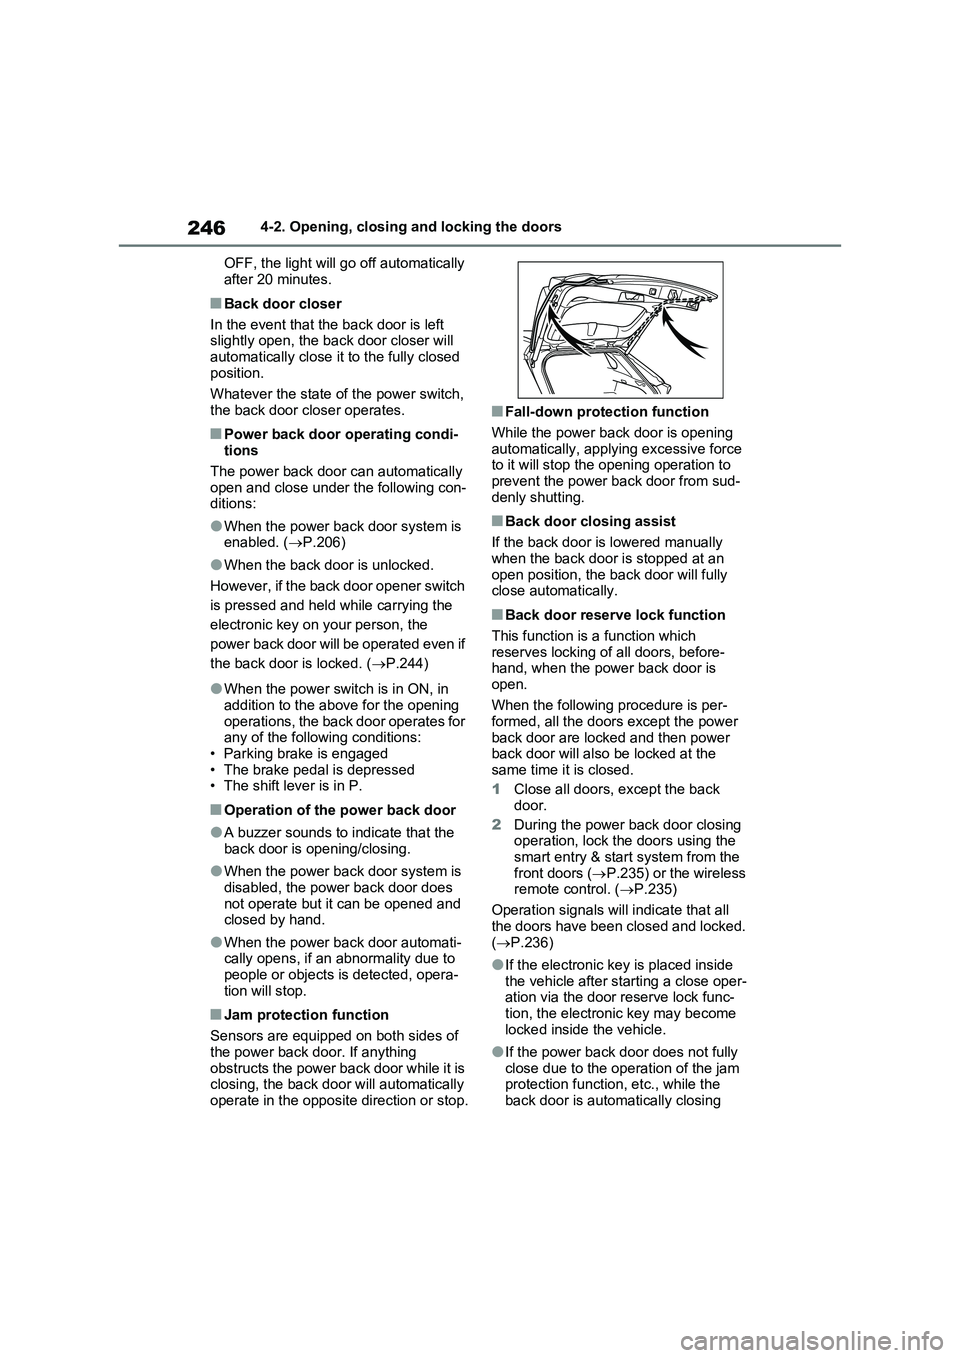
■Fall-down protection function
While the power back door is opening
automatically, applying excessive force
to it will stop the opening operation to
prevent the power back door from sud-
denly shutting.
■Back door closing assist
If the back door is lowered manually
when the back door is stopped at an
open position, the back door will fully
close automatically.
■Back door reserve lock function
This function is a function which
reserves locking of all doors, before-
hand, when the power back door is
open.
When the following procedure is per-
formed, all the doors except the power
back door are locked and then power
back door will also be locked at the
same time it is closed.
1Close all doors, except the back
door.
2During the power back door closing
operation, lock the doors using the
smart entry & start system from the
front doors (P.235) or the wireless
remote control. (P.235)
Operation signals will indicate that all
the doors have been closed and locked.
(P.236)
●If the electronic key is placed inside
the vehicle after starting a close oper-
ation via the door reserve lock func-
tion, the electronic key may become
locked inside the vehicle.
●If the power back door does not fully
close due to the operation of the jam
protection function, etc., while the
back door is automatically closing
Page 253 of 718
251
4
4-2. Opening, closing and locking the doors
Before driving
The settings of the power back door
system can be changed by select-
ing the “Vehicle Settings” from the
screen of the multi-information
display and displaying the “PBD”
screen. ( P.206)
The changed power back door settings
are not reset by turning the power
switch to OFF. In order to restore the
original settings, they need to be
NOTICE
●Take care not to damage the sen- sors (installed on the right and left
edges of the power back door) with a knife or other sharp object. If the sensor is disconnected, the power
back door will not close automati- cally.
■Hands Free Power Back Door precautions (if equipped)
The kick sensor is located behind
lower center part of the rear bumper. Observe the following to ensure that the Hands Free Power Back Door
function operates properly:
●Keep the lower center part of the rear bumper clean at all times.
If the lower center part of the rear bumper is dirty or covered with snow, the kick sensor may not
operate. In this situation, clean off the dirt or snow, move the vehicle from the current position and then
check if the kick sensor operates. If it does not operate, have the vehi-cle inspected by any authorized
Toyota retailer or Toyota authorized repairer, or any reliable repairer.
●Do not apply coatings that have a rain clearing (hydrophilic) effect, or other coatings, to the lower center
part of the rear bumper.
●Do not park the vehicle near objects
that may move and contact the lower center part of the rear bumper, such as grass or trees.
If the vehicle has been parked for a while near objects that may move and contact the lower center part of
the rear bumper, such as grass or trees, the kick sensor may not oper-ate. In this situation, move the vehi-
cle from the current position and then check if the kick sensor oper-ates. If it does not operate, have the
vehicle inspected by any authorized Toyota retailer or Toyota authorized repairer, or any reliable repairer.
●Do not subject the kick sensor or its surrounding area to a strong impact.
If the kick sensor or its surrounding area has been subjected to a strong impact, the kick sensor may not
operate properly. If the kick sensor does not operate in the following situations, have the vehicle
inspected by any authorized Toyota retailer or Toyota authorized repairer, or any reliable repairer.
• The kick sensor or its surrounding area has been subjected to a strong impact.
• The lower center part of the rear bumper is scratched or damaged.
●Do not disassemble the rear bumper.
●Do not attach stickers to the rear bumper.
●Do not paint the rear bumper.
●If a bicycle carrier or similar heavy
object is attached to the power back door, disable the Hands Free Power Back Door. ( P.206)
Changing settings of the
power back door system
(vehicles with power back
door)
Page 258 of 718
2564-2. Opening, closing and locking the doors
key is near the vehicle, there is a pos-
sibility that the door may not be
unlocked by the entry function. (Use
the wireless remote control to unlock
the doors.)
●Touching the door lock sensor while
wearing gloves may delay or prevent
lock operation. Remove the gloves
and touch the lock sensor again.
●When the lock operation is performed
using the lock sensor, recognition sig-
nals will be shown up to two consecu-
tive times. After this, no recognition
signals will be given.
●If the door handle becomes wet while
the electronic key is within the effec-
tive range, the door may lock and
unlock repeatedly. In that case, follow
the following correction procedures to
wash the vehicle:
• Place the electronic key in a location 2
m (6 ft.) or more away from the vehi-
cle. (Take care to ensure that the key
is not stolen.)
• Set the electronic key to battery-sav-
ing mode to disable the smart entry &
start system. (P.254)
●If the electronic key is inside the vehi-
cle and a door handle becomes wet
during a car wash, a message may be
shown on the multi-information dis-
play and a buzzer will sound outside
the vehicle. To turn off the alarm, lock
all the doors.
●The lock sensor may not work prop-
erly if it comes into contact with ice,
snow, mud, etc. Clean the lock sensor
and attempt to operate it again, or use
the lock sensor on the lower part of
the door handle.
●A sudden approach to the effective
range or door handle may prevent the
doors from being unlocked. In this
case, return the door handle to the
original position and check that the
doors unlock before pulling the door
handle again.
●If there is another electronic key in the
detection area, it may take slightly lon-
ger to unlock the doors after the door handle is gripped.
■When the vehicle is not driven for
extended periods
●To prevent theft of the vehicle, do not
leave the electronic key within 2 m (6
ft.) of the vehicle.
●The smart entry & start system can be
deactivated in advance. (P.601)
●Battery-saving mode can reduce the
power consumption of electronic keys.
(P.254)
■To operate the system properly
Make sure to carry the electronic key
when operating the system. For vehicles
with entry function, do not get the elec-
tronic key too close to the vehicle when
operating the system from the outside of
the vehicle.
Depending on the position and holding
condition of the electronic key, the key
may not be detected correctly and the
system may not operate properly. (The
alarm may go off accidentally, or the
door lock prevention may not operate.)
■If the smart entry & start system
does not operate properly
●Locking and unlocking the doors: Use
the mechanical key. (P.572)
●Starting the hybrid system: P.310
■Customization
Settings (e.g. smart entry & start sys-
tem) can be changed.
(Customizable features: P.600)
If the smart entry & start system has
been deactivated in a customized set-
ting, refer to the explanations for the fol-
lowing operations.
●Locking and unlocking the doors:
Use the wireless remote control or
mechanical key. (P.235, 572)
●Starting the hybrid system and chang-
ing power switch modes: P.572
●Stopping the hybrid system: P.312
Page 269 of 718
267
4
4-4. Adjusting the steering wheel and mirrors
Before driving
*: If equipped
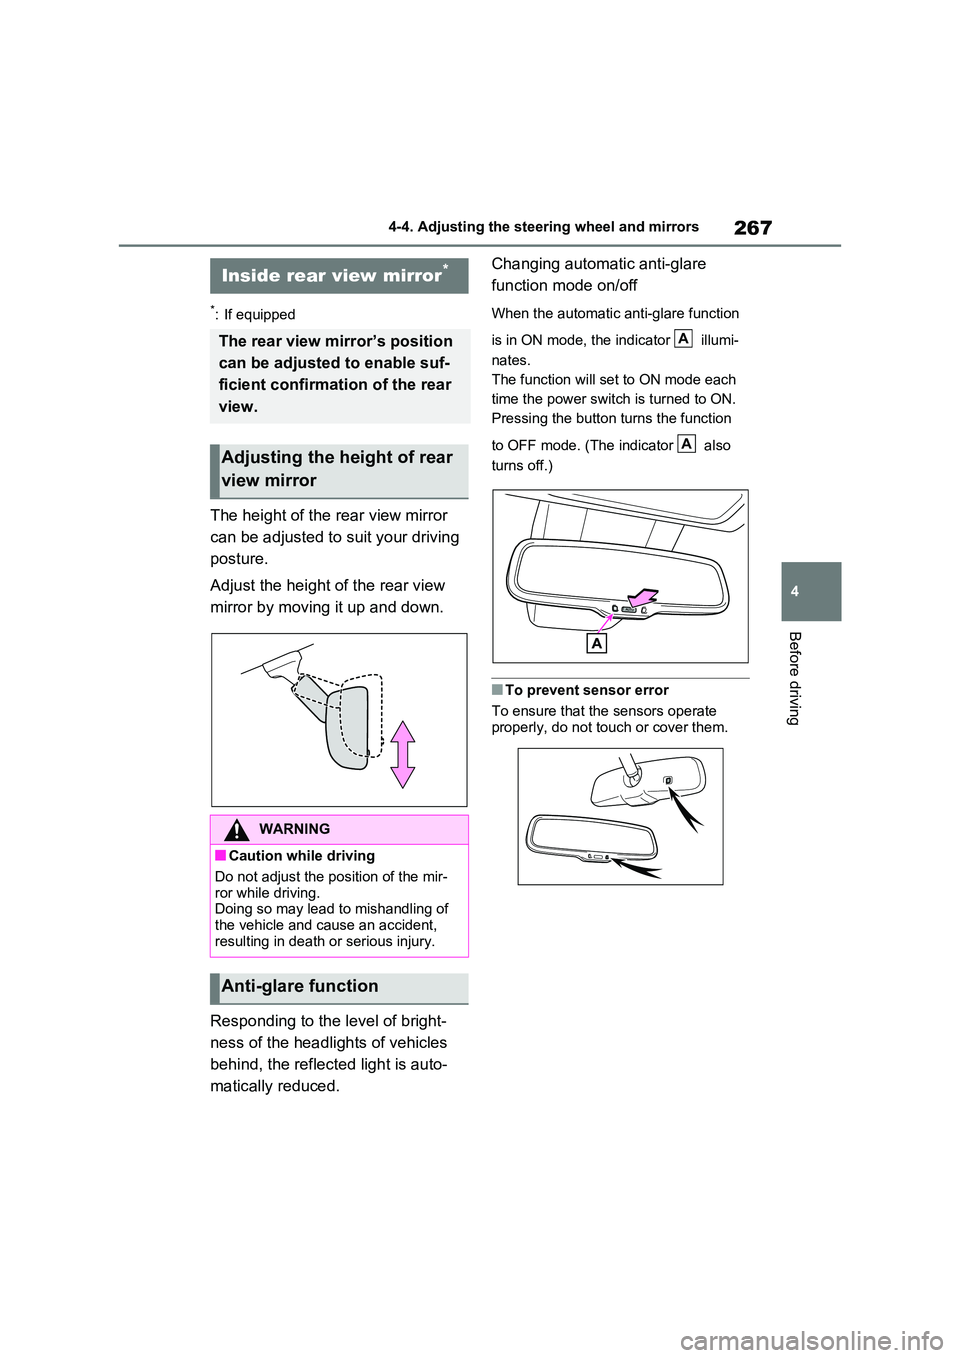
The height of the rear view mirror
can be adjusted to suit your driving
posture.
Adjust the height of the rear view
mirror by moving it up and down.
Responding to the level of bright-
ness of the headlights of vehicles
behind, the reflected light is auto-
matically reduced.
Changing automatic anti-glare
function mode on/off
When the automatic anti-glare function
is in ON mode, the indicator illumi-
nates.
The function will set to ON mode each
time the power switch is turned to ON.
Pressing the button turns the function
to OFF mode. (The indicator also
turns off.)
■To prevent sensor error
To ensure that the sensors operate
properly, do not touch or cover them.
Inside rear view mirror*
The rear view mirror’s position
can be adjusted to enable suf-
ficient confirmation of the rear
view.
Adjusting the height of rear
view mirror
WARNING
■Caution while driving
Do not adjust the position of the mir- ror while driving.Doing so may lead to mishandling of
the vehicle and cause an accident, resulting in death or serious injury.
Anti-glare function
A
A
Page 273 of 718
271
4
4-4. Adjusting the steering wheel and mirrors
Before driving
ror mode and the optical mirror
mode.
When using the digital mirror
mode
P.270
When using the optical mirror
mode
1 Press the menu button.
The icons will be displayed.
2Press or to
enable (ON)/disable (OFF) the
automatic anti-glare function.
The icons will disappear if a button is not operated for approximately 5 sec-onds or more.
■Adjusting the display (digital mirror mode)
●If the displayed image is adjusted, it may appear distorted. This is not a
malfunction.
●If the brightness of the Digital Rear-
view Mirror is set too high, it may cause eye strain. Adjust the Digital Rear-view Mirror to an appropriate
brightness. If your eyes become tired, change to optical mirror mode.
●The brightness of the Digital Rear-view Mirror will change automatically according to the brightness of the
area in front of your vehicle.
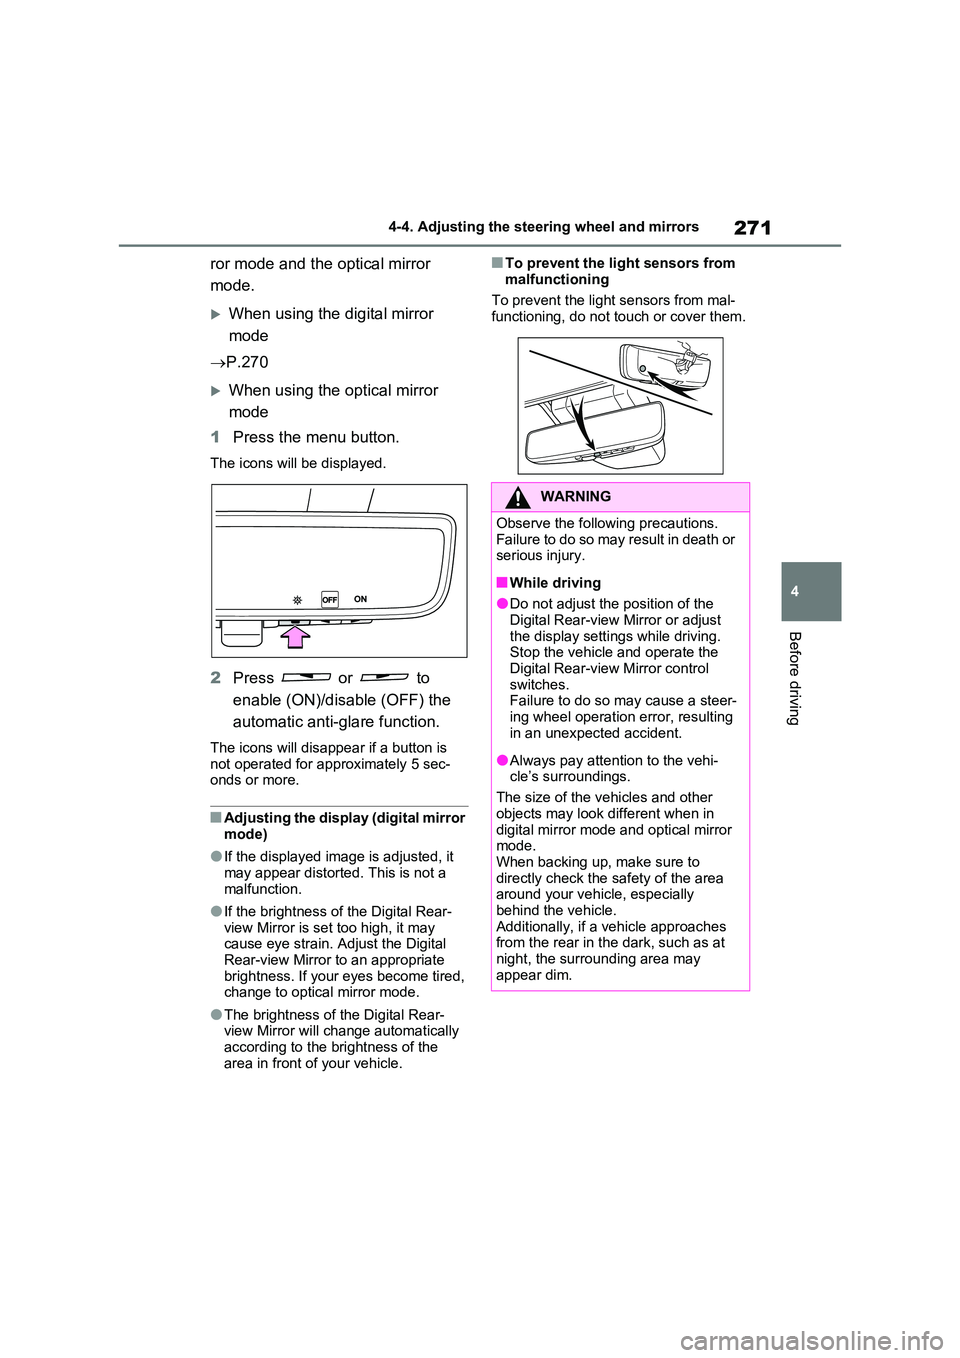
■To prevent the light sensors from
malfunctioning
To prevent the light sensors from mal- functioning, do not touch or cover them.
WARNING
Observe the following precautions.Failure to do so may result in death or serious injury.
■While driving
●Do not adjust the position of the
Digital Rear-view Mirror or adjust the display settings while driving.Stop the vehicle and operate the
Digital Rear-view Mirror control switches. Failure to do so may cause a steer-
ing wheel operation error, resulting in an unexpected accident.
●Always pay attention to the vehi-cle’s surroundings.
The size of the vehicles and other
objects may look different when in digital mirror mode and optical mirror mode.
When backing up, make sure to directly check the safety of the area around your vehicle, especially
behind the vehicle. Additionally, if a vehicle approaches from the rear in the dark, such as at
night, the surrounding area may appear dim.
Page 289 of 718
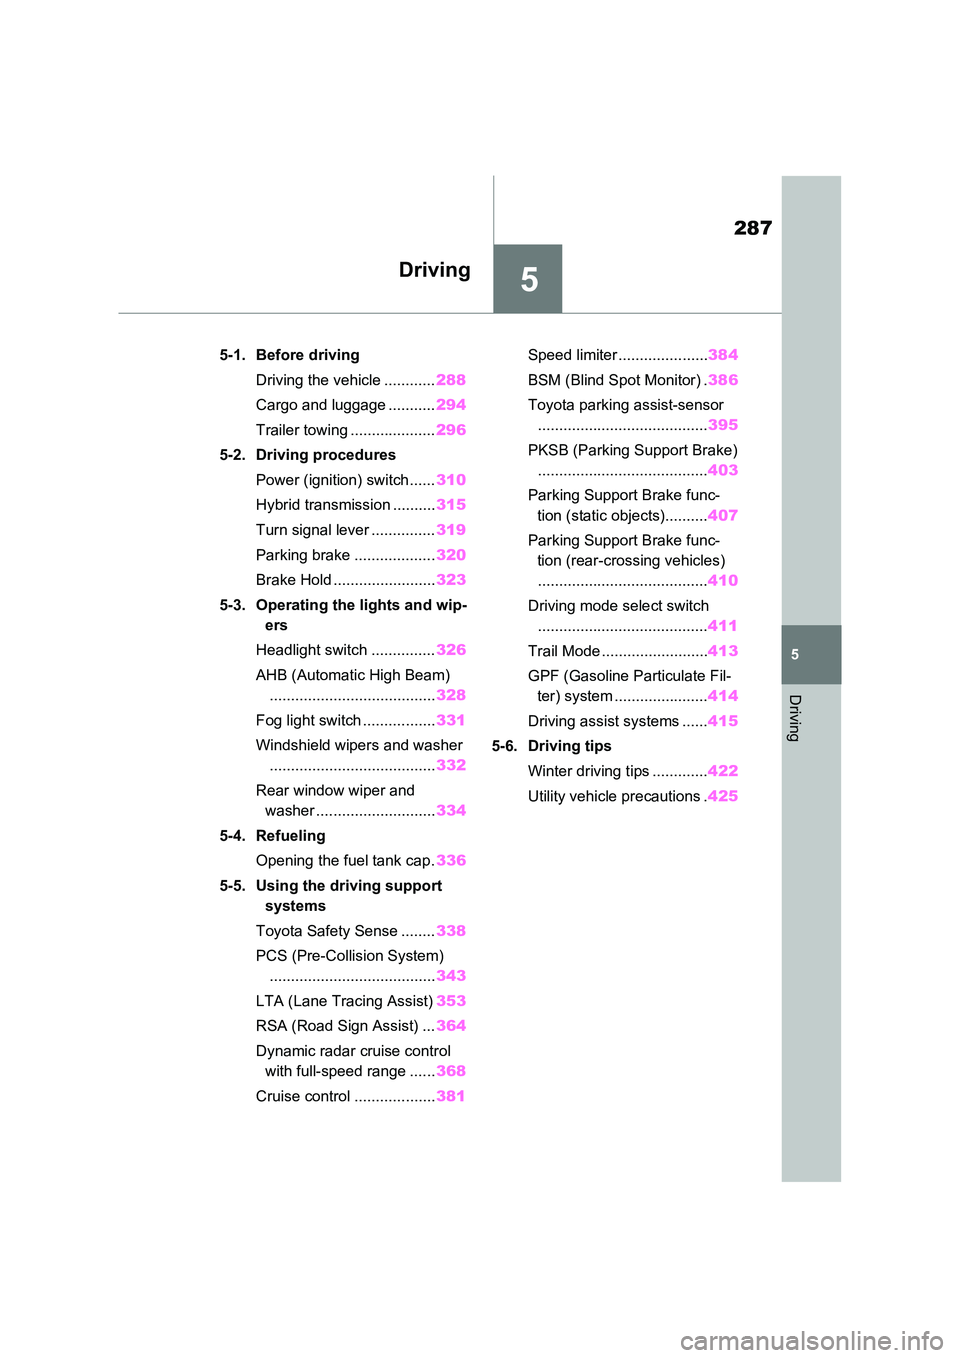
5
287
5
Driving
Driving
5-1. Before driving
Driving the vehicle ............ 288
Cargo and luggage ........... 294
Trailer towing .................... 296
5-2. Driving procedures
Power (ignition) switch ...... 310
Hybrid transmission .......... 315
Turn signal lever ............... 319
Parking brake ................... 320
Brake Hold ........................ 323
5-3. Operating the lights and wip-
ers
Headlight switch ............... 326
AHB (Automatic High Beam)
....................................... 328
Fog light switch ................. 331
Windshield wipers and washer
....................................... 332
Rear window wiper and
washer ............................ 334
5-4. Refueling
Opening the fuel tank cap. 336
5-5. Using the driving support
systems
Toyota Safety Sense ........ 338
PCS (Pre-Collision System)
....................................... 343
LTA (Lane Tracing Assist) 353
RSA (Road Sign Assist) ... 364
Dynamic radar cruise control
with full-speed range ...... 368
Cruise control ................... 381
Speed limiter ..................... 384
BSM (Blind Spot Monitor) . 386
Toyota parking assist-sensor
........................................ 395
PKSB (Parking Support Brake)
........................................ 403
Parking Support Brake func-
tion (static objects).......... 407
Parking Support Brake func-
tion (rear-crossing vehicles)
........................................ 410
Driving mode select switch
........................................ 411
Trail Mode ......................... 413
GPF (Gasoline Particulate Fil-
ter) system ...................... 414
Driving assist systems ...... 415
5-6. Driving tips
Winter driving tips ............. 422
Utility vehicle precautions . 425