ECO mode AUDI S6 2009 User Guide
[x] Cancel search | Manufacturer: AUDI, Model Year: 2009, Model line: S6, Model: AUDI S6 2009Pages: 398, PDF Size: 43 MB
Page 38 of 398
Driver inf ormati on displ ay
Ap plies to vehicles : wit h en gine sp eed limitat ion
Engine speed limitation ,-;,,
l.r1 Engine speed maximum XXXX RPM
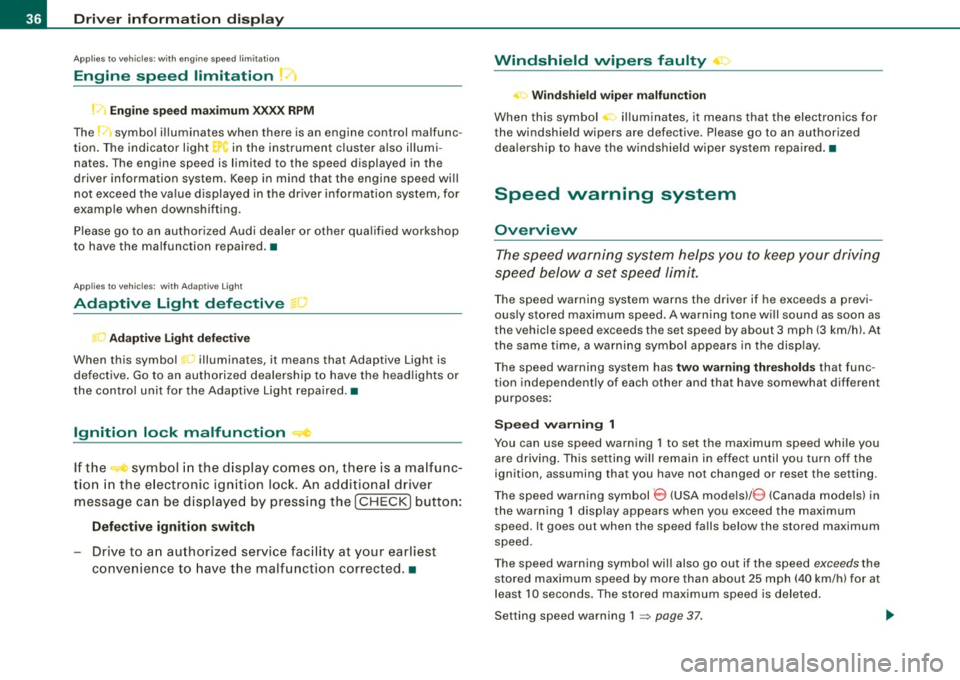
The )t symbo l illuminates when there is an engine control malfunc
tion. The indicator light
C in the instrument cluster also illumi
nates . The engine speed is limited to the speed displayed in the
driver information system. Keep in mind that the engine speed will
not exceed the va lue displayed in the driver information system, for
example when downshifting.
P lease go to an authorized Audi dealer or other qua lified workshop
to have the ma lfunction repaired .•
Ap plies to vehicles: wit h A dapt ive Li ght
Adaptive Light defective t;: :
Adapti ve Li ght defect ive
When this symbol '" illuminates, it means that Adaptive Light is
defective. Go to an authorized dealership to have the head lights or
the control unit for the Adaptive Light repaired. •
Ignition lock malfunction ..,e
If the symbol in the d isplay c omes on, there is a malfunc -
tion in the e lectronic ignition lock. An additional driver
message can be displayed by press ing the [ CHECK ] button:
D efe ctiv e ignition swi tch
- Drive to an authorized service facility at your earliest
convenie nce to have the malfunction corrected .•
Windshield wipers faulty ->
. W in ds hield wi per m alfun ction
When this symbol il luminates, i t means tha t the electronics for
the windshield wipers are defective . Please go to an authorized
dea lership to have the windshield wiper system repaired .•
Speed warning system
Overview
The speed warning system helps you to keep your driving
speed below a set speed limit.
The speed warning system warns the driver if he exceeds a previ
ous ly stored maximum speed. A warning tone will sound as soon as
the vehicle speed exceeds th e set speed by about 3 mph (3 km/h). At
the same t ime, a warning symbol appears in the display .
The speed warning system has
t w o wa rnin g thr eshol ds that func
tion independent ly of each other and that have somewhat different
purposes:
S peed warnin g 1
You can use speed warning 1 to set the maximum speed while you
are driving. This setting will remain in effect until you turn off the
ignition , assuming that you have not changed or reset the se tting .
The speed warning symbol
0 (USA models) /0 (Canada models) in
the warning 1 display appears when you exceed the maximum speed . It goes out when the speed falls below the stored maximum
speed .
The speed warning symbol wi ll also go out if the speed
e xce eds the
stored maximum speed by more than about 25 mph
(40 km/h) for at
leas t 1 O seconds. The stored maximum speed is deleted .
Setting speed warning 1 :::::,
page 37.
Page 39 of 398
Speed warning 2
Storing warning 2 is recommended if you always want to be
reminded of a certain speed, for example when you are traveling in
a country that has a general maximum speed limit, or if you do not
want to exceed a specified speed for winter tires.
Th e speed warning 2 symbol,
8, (USA models)/ 8, (Canada models)
appears in the display when you exceed the stored speed limit.
Unlike warning 1, it will not go out until the vehicle speed drops
below the stored speed limit.
Setting speed warning 2
~ page 37.
[ i J Tips
Even though your vehicle is equipped with a speed warning system,
you should still watch the speedometer to make sure you are not
driving faster than the speed limit. •
Speed warning 1: setting a speed limit
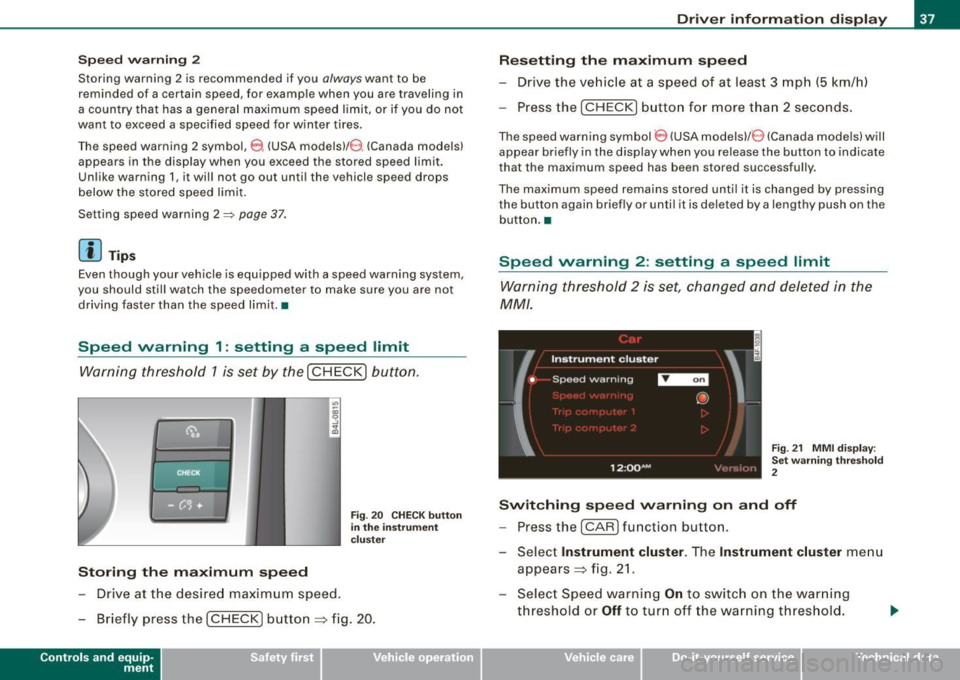
Warning threshold 1 is set by the (
CHECK) button.
Storing the maximum speed
-Drive at the desired maximum speed.
Fig. 20 CHECK button
in the instrument
cluster
- Briefly press the ( CHECK) button => fig. 20.
Contro ls and eq uip
ment
Driver information display
Resetting the maximum speed
- Drive the vehicle at a speed of at least 3 mph (5 km/h)
- Press the (
CHECK) button for more than 2 seconds.
The speed warning symbol 8 (USA models)/ e) (Canada models) will
appear briefly in the display when you release the button to indicate
that the maximum speed has been stored successfully.
The maximum speed remains stored until it is changed by pressing
the button again briefly or until it is deleted by a lengthy push on the
button. •
Speed warning 2: setting a speed limit
Warning threshold 2 is set, changed and deleted in the
MM/.
Fig. 21 MMI display :
Set warning threshold
2
Switching speed warning on and off
- Press the ( CARI function button.
- Select
Instrument cluster. The Instrument cluster menu
appears=> fig. 21.
- Select Speed warning
On to switch on the warning
threshold or
Off to turn off the warning threshold.
Vehicle care I I Technical data
Page 40 of 398
Driver inf ormati on displ ay
S ettin g and a djustin g th e w arnin g thr eshold
- Press the
I CAR I function button .
- Select
In strum ent cluster . The Instrum ent clust er menu
appears.
Select the second item in the
Sp eed wa rning menu. The
submenu
Sp eed th resh old appears ~ page 37, fig. 21.
- Set t he warning threshold you want.
Warning thresho ld 2 can be adjusted within a speed range of 30 to
200 km/h . Settings can be adjusted in intervals of 10 km/h each. •
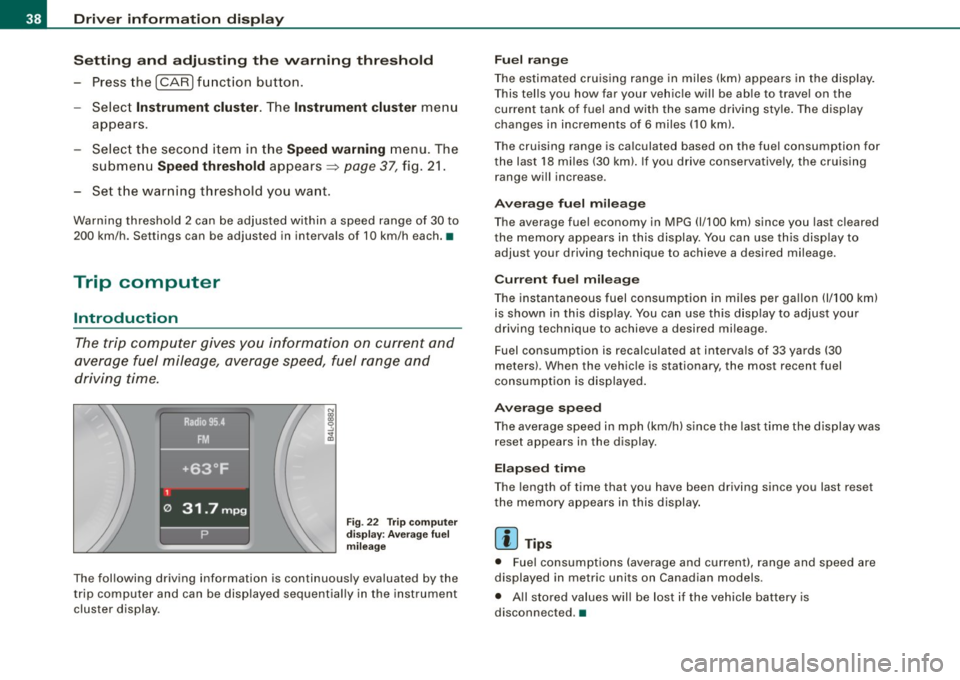
Trip computer
Introduction
The trip computer gives you informati on on current and
average fuel mileage, average speed, fuel range and
driving time .
Fig. 22 T rip comput er
d isp lay: Ave rage fuel
mil eage
The following driving information is continuously evaluated by the
t rip computer and can be disp layed sequential ly in the instrument
cluster display.
Fu el ra ng e
The estimated cruising range in miles (km) appears in the disp lay.
This tel ls you how far your vehic le will be ab le to travel on the
current tank of fuel and with the same driving style . The display
changes in increments of 6 miles
(10 km).
The cruising range is calculated based on the fuel consumption for
the last 18 miles (30 km). If you drive conservative ly, the cruising
range will increase.
Ave rage fuel m ileag e
The average fuel economy in MPG (1/100 km) since you last cleared
the memory appears in this display. You can use th is disp lay to
adjust your driving technique to achieve a desired mileage.
C urr ent fu el mi leage
The instantaneous fuel consumption in m iles per gallon 0/100 km)
is shown in this display. You can use th is d isp lay to adjus t your
driving technique to achieve a desired mileage.
Fuel consumption is recalculated at intervals of 33 yards (30
meters) . When the vehicle is stationary, the most recent fuel
consumption is displayed .
Ave ra ge spee d
The average speed in mph (km/h) since the last time the display was
reset appears in the display.
E la p sed time
The length of time that you have been driving since you last reset
the memory appears in this display .
[ i ] Tips
• Fuel consumptions (average and current), range and speed are
displayed in metric units on Canadian models .
• All sto red values will be lost if the vehic le battery is
disconnected .•
Page 67 of 398
Le avi ng hom e
The Leaving home functio ns ensures that when unlocking the
vehicle periphery is i lluminated in the dark . In addition, the fron t fog
lights, the tai l lights and the license plate light are turned on. Th is
function can be turned on and off .
Daytime running light s
USA models : On vehicles with xenon lights the daytime running
lights can be turned on or off using this function . On vehicles with
halogen lights there is no dayt ime running lights function.
Canada models ; The function cannot be turned off. It is activated
automatically each ti me the ignition is t urned on. This menu item is
shown "greyed out" .•
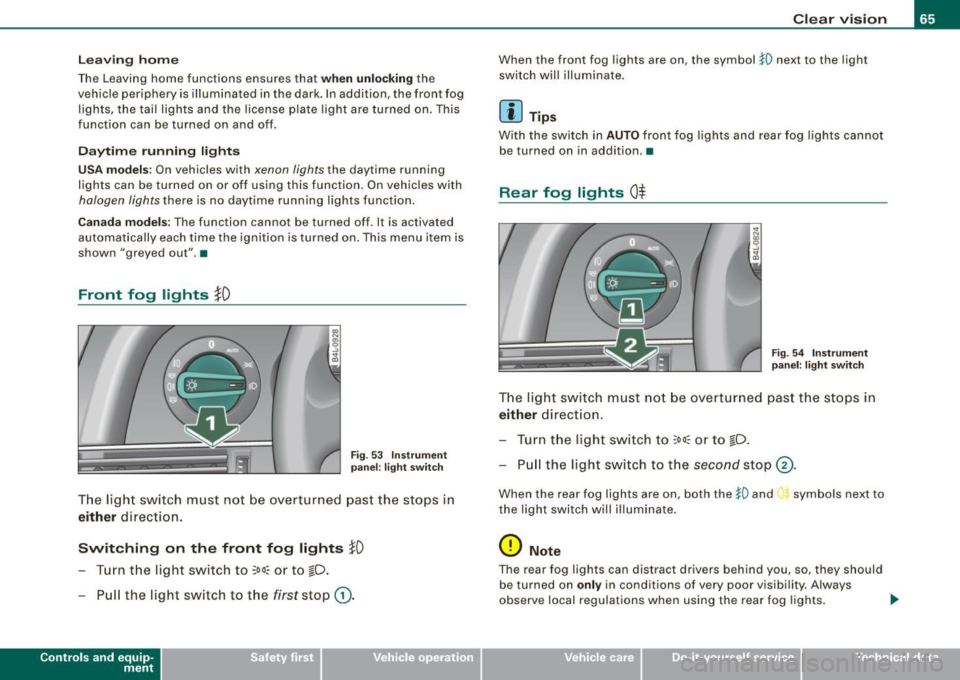
Front fog lights }D
Fig . 53 Ins tru men t
pa nel: lig ht swit ch
The light switch must not be overt urned pas t the stops in
either d ire ction .
Switching on the front fog lights !D
- Turn the light switch to ;oo: or to io.
- Pull the light sw itch to t he first stop G) .
Con tro ls and eq uip
ment
Clear vision
When the front fog lights are on, the symbo l }0 next to the light
switch will illuminate .
[ i ] Tips
With the switch in AUTO front fog lights and rear fog lights cannot
be turned on in addition .•
Rear fog lights 0$
F ig . 54 In stru ment
p ane l: lig ht sw itch
T h e light switch must not be overt urned pas t th e stops in
either direct ion.
Tu rn t he ligh t sw itch to
;oo~ or to io .
Pull the light switch to t he second sto p (v.
When the rear fog lights are on, both the }O and symbols next to
the light switch will i lluminate .
0 Note
The rear fog lights can distract dr ive rs beh ind you, so, they should
be turned on
only in cond itions of very poor visibility. Always
observe local regulations when using the rea r fog lights . ...
Vehicle care I I irechnical data
Page 74 of 398
Clear vision
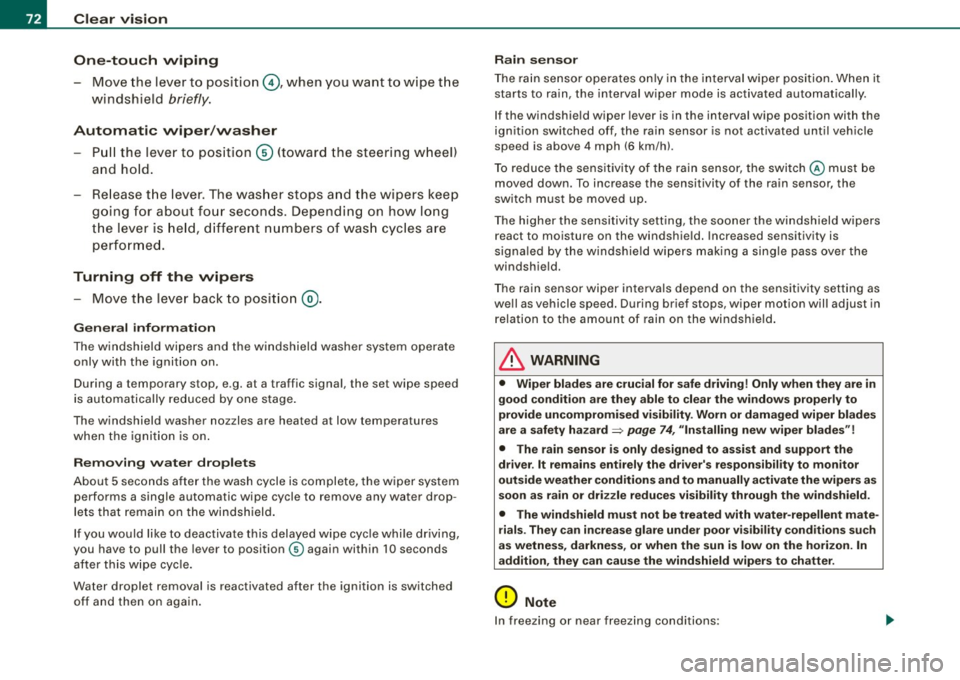
One-touch wiping
- Move the lever to position@, when you want to wipe the
windsh ield
briefly.
Automatic wiper /washer
- Pull the lever to pos ition © (toward the steering wheel)
and ho ld.
- Re lease t he lever. T he wash er stops a nd the wipers keep
g o ing for about fo ur secon ds. Dep ending on h ow long
t h e lever is held, d ifferent numbers of was h cyc les are
performed.
Turning off the wipers
- Move the lever back to position @ .
Gen era l inform ati on
The windshield wipers and the windshield washer system operate
only with the ignition on.
During a temporary stop, e.g. at a traffic signa l, the set wipe speed
is aut omatically reduced by one stage .
The windshield washer nozzles are heated at low temperatures
when the ignition is on .
Removing vv ater drop let s
About 5 seconds after the wash cycle is complete, the wiper system
performs a single automatic wipe cycle to remove any water drop
lets that remain on the windshield .
If you would like to deactivate this delayed wipe cyc le whi le dr iving,
you have to pull the lever to position © again within 10 seconds
af ter this w ipe cyc le .
Water droplet removal is reactivated after the ignition is switched off and then on again .
Rain se nsor
The ra in sensor operates on ly in the interval wiper position . When it
starts to rain, the interval wiper mode is activated automatically .
I f the windshie ld wiper lever is in the interval wipe position with the
ign ition sw itched off, the rain sensor is not activated unt il veh ic le
speed is above 4 mph (6 km/h) .
T o reduce the sens itivi ty of the rain sensor, the swi tch
© must be
moved down. To increase the sensitivity of the rain sensor, the
sw itc h must be moved up .
T he higher the sensitivity sett ing, the sooner the windshield wipers
react to moisture on the windshie ld. Increased sensitivity is
signa led by the windshie ld w ipers making a si ng le pass over the
windshield.
T he rain sensor wiper interva ls depend on the sens itivity setting as
we ll as vehicle speed. During brief stops, wiper motion will adjust in
r elation to the amount of rain on the windshield .
& WARNING
• Wiper blades are crucial for safe driving! Only when they are in
good cond ition are they able to clear the windo ws properly to
provide uncompromised visibility . Worn or d am aged wiper blades
are a safet y hazard ::::> page
74 , "I nst alli ng new wiper blades "!
• The rain sensor is only designed to a ssist and support the
dri ver . It remai ns entirel y the dr iver's respon sibil ity to monitor
out side weather conditions and to manually activate the wiper s as
so on a s rain or dri zzle reduce s vis ibility through the wind sh ield.
• The wind shield must not be treated with water -repellent mate
rials . The y can incre as e g la re under poor visibility condition s su ch
as wetness , darkne ss, or when th e sun is low on t he horizon. In
addition , they can cause the wind shield wiper s to ch att er.
0 Note
In freezing or near freezing conditions :
Page 81 of 398
Applies to vehi cles: wit h dig it al compass
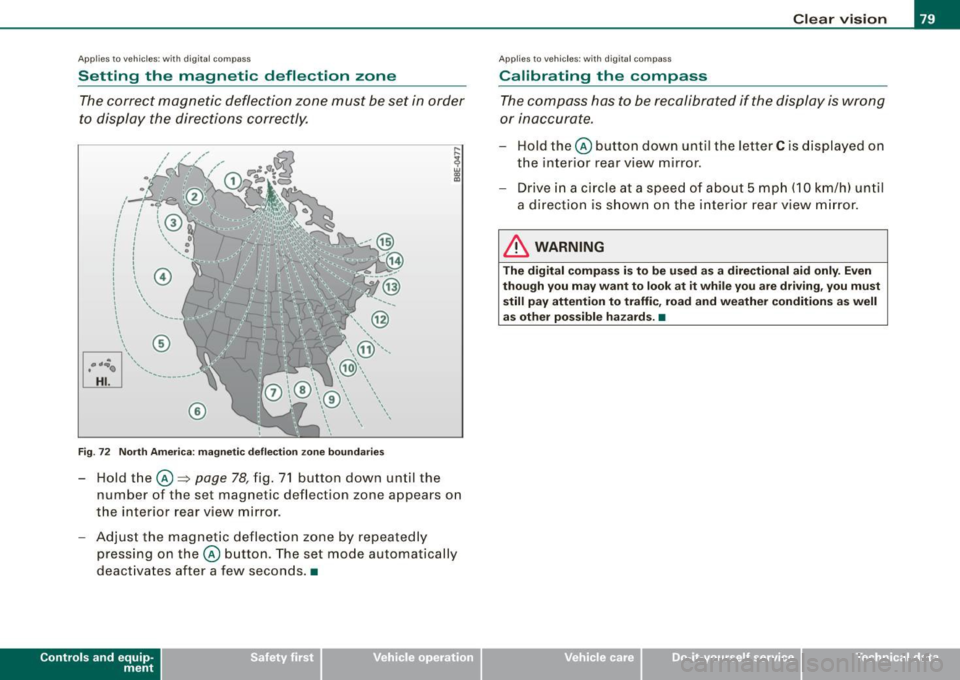
Setting the magnetic deflection zone
The correct magnetic deflection zone must be set in order
to display the directions correctly .
/
@
®
Fig. 72 North America: magnetic deflection zone boundaries
-Hold the@=> page 78, fig. 71 button down until the
number of the set magnetic deflection zone appears on
the interior rear v iew mirror .
- Adjust the magnetic deflection zone by repeatedly
pressing on the @ button. The set mode automatically
deactivates after a few seconds. •
Contro ls and eq uip
ment
Ap plies to vehi cles: with digital compass
Calibrating the compass Clear vision
The
compass has to be recalibrated if the display is wrong
or inaccurate.
Hold the@ button down until the letter C is displayed on
the interior rear view mirror.
Drive in a circle at a speed of about 5 mph (10 km/h) until
a direction is shown on the interior rear view mirror.
& WARNING
The digital compass is to be used as a directional aid only. Even
though you may want to look at it while you are driving, you must
still pay attention to traffic, road and weather conditions as well
as other possible hazards. •
Vehicle care
I I irechnical data
Page 95 of 398
& WARNING
• The ski sack is intended only for the transportation of skis and
other light objects. To reduce the risk of serious personal injury
never transport heavy or pointed objects in the ski sack.
• When braking rapidly or during an accident the load could be
displaced and cause injury to occupants.
• Sharp edges on the load must be covered for protection.
Always fasten the belt tightly around the sack and its contents
=> page 92, fig. 90.
[ i J Tips
Never stow the ski sack away if it's wet or damp (for example, snow
melting from skis) . Let it dry completely before you stow it away .•
Roof rack
First things first
A roof rack can be fitted to carry additional luggage on
the roof.
-Always read and follow the instructions provided by the
roof rack manufacturer when the roof rack system must
be installed.
If you are transporting luggage or other objects on the roof, please
note the following:
• Your vehicle has specially designed aerodynamic roof rails . Only
install a roof rack specifically designed for your model. Contact the
nearest Audi dealer for information on approved modular roof racks
for your vehicle.
• These approved roof racks are the basis for a complete roof rack
system. Additional attachments for the basic roof rack are neces-
Controls and equip
ment
Seats and storage
sary to safely transport luggage, bicycles, surf boards, skis or small
boats. All necessary hardware for these systems is available at your
authorized Audi dealer.
• We recommend that you keep the installation instructions for
your roof rack system together with your Owner's literature in the
vehicle.
When should the roof rack be removed?
• Before going through an automatic car wash (it is best to ask the
car wash operator for advice).
• When not in use , to reduce fuel consumption, wind noise and to
guard against theft.
& WARNING
• Use of an unapproved roof rack or incorrect mounting of an
approved roof rack can cause the roof rack or the items attached
to it to fall off the roof onto the road.
• Objects falling from the roof of a vehicle can cause a crash and
personal injury.
• Only mount the system between the markings shown in
=> page 94, fig. 91.
• The roof rack system must be installed exactly according to the
instructions provided.
0 Note
• Your vehicle warranty does not cover any damages to the vehicle
caused by using roof racks or mounting structures not approved by
Audi for your vehicle. The same applies to damage resulting from incorrect roof rack installation .
• Always check the roof rack mountings and hardware before each
trip and during a trip to make sure everything is securely tightened.
If necessary, retighten the mountings and check the entire system
from time to time . .,,
I • •
Page 104 of 398
• .___w_ a_ rm __ a_ n_ d_ c_o _l_d ________________________________________________ _
Warm and cold
Climate control
Description
The air conditioner is fully automatic and is designed to
maintain a comfortable and uniform climate inside the
vehicle.
We recommend the follow ing settings:
- Set the temperature to 75 °F (+23 °C).
- Press the !AUTO
I button.
With this setting, you attain maximum comfort in the least amount
of time. Change this setting, as desired, to meet your personal needs.
The climate controls are a combination of heating, ventilation and cooling systems, which automatically reduce humidity and cool the
air inside your vehicle.
The air temperature, air flow and air distribution are automatically
regulated to achieve and maintain the desired passenger compart
ment temperature as quickly as possible.
The system automatically compensates for changes in outside
temperature and for the intensity of the sunlight entering the
vehicle. We recommend you use the
Automatic mode=> page 105
for year-round comfort.
Please note the following:
Turn on the air conditioner to reduce humidity in the vehicle. This also prevents the windows from fogging up.
When the outside temperature is high and the air is very humid,
condensation from the evaporator may drip under the vehicle. This
is normal and does not indicate a leak. If the outside temperature is low,
the fan normally only switches to
a higher speed once the engine coolant has warmed up sufficiently.
The air conditioner temporarily switches off when you drive off from
a standstill using full throttle to save engine power.
The compressor also switches off if the coolant temperature is too
high, so that the engine can be adequately cooled under extreme
loads.
Air pollutants filter
The air pollutants filter (a combined particle filter and activated
charcoal filter) reduces or prevents outside air pollution (dust, or
pollen) from entering the vehicle.
The air pollutants filter must be changed at the intervals specified
in your Warranty
& Maintenance booklet, so that the air conditioner
can properly work.
If you drive your vehicle in an area with high air pollution, the filter
may need to be changed more frequently than specified in your
Audi Warranty
& Maintenance booklet. If in doubt, ask your autho
rized Audi Service Advisor for advice.
Key coded settings
The air conditioner settings selected are automatically stored and
assigned to the key being used. When the vehicle is started, the air
conditioner automatically selects the settings assigned to that key.
This way every driver will maintain his/her own personal settings
and does not have to reset them manually.
If a different driver uses your key and changes the air conditioner
settings, the latest adjustments will erase and replace the settings
you have stored.
Energy management
To prevent the battery from being discharged and to restore the
balance of energy, components which require large amounts of
Page 106 of 398
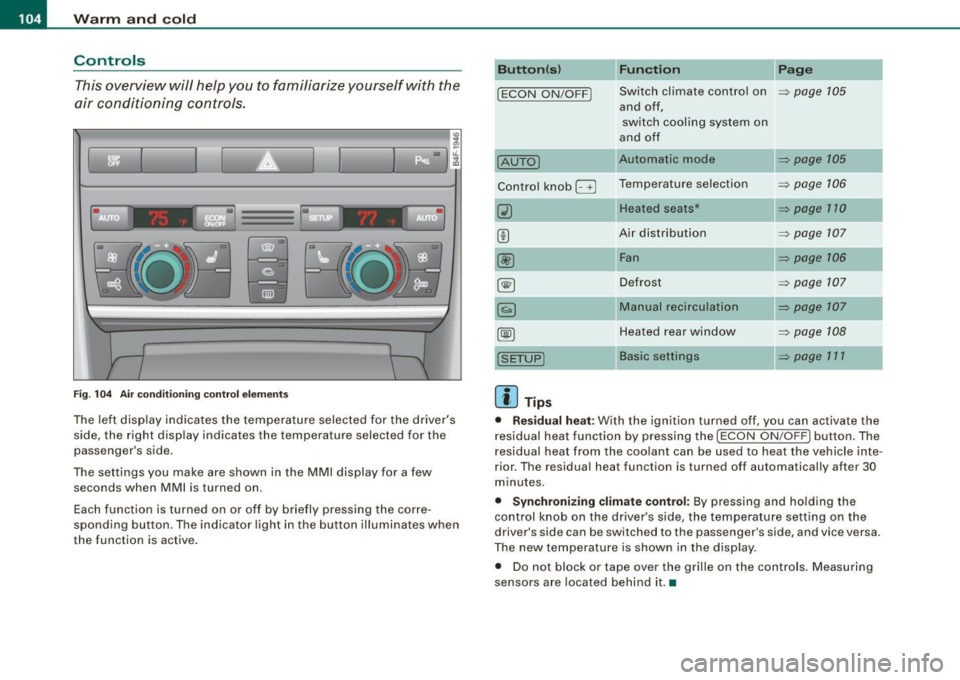
_L--_W:....:....: a=- r:..: m..:..:....: a.:.;n..:. d=- c.::..:: o..:.ld =-------------------------------------------------
Controls
This overview will help y ou to familiarize yourself with the
air conditioning controls.
I I
Fig. 104 Air condit ionin g c ontrol el em ent s
The left dis play indicates the temperature selected for the d river's
side , the right display indicates the temperature selected for the
passenger 's side.
The settings you make are shown in the MMI disp lay for a few
seconds when MMI is turned on.
Each function is turned on or off by briefly pressing the corre
spond ing button . The indicator l ight in the button illumina tes when
the function is active .
Button(s ) Function Page
!ECON ON/OFF J Switch climate contro l on ~ page 105
and off,
switch coo ling system on
a nd off
IAUTOJ Automatic mode ~ page 105
Contro l kn ob G Temperatu re selec tion ~ page 106
Heated seats* ~ page 170
Air distribut ion ~ page 107
@ Fan ~ page 706
~ Defrost ~ page 107
Manual recirculation ~ page 107
Heated rear wi ndow ~ p age 108
Basic settings ~ page 171
[ i ] Tips
• Residual heat: With the ignition turned off, you can activate the
r esidual heat function by p ressing the
!ECON ON/O FFJ button. The
residual heat from the coo lant can be used to heat the vehicle inte
r ior. The residua l heat function is turned off automa tically after 30
minutes.
• Synchronizing climate control: By pressing and ho lding the
control knob on the driver's side, the temperature setting on the
driver's side can be switched to the passenger's side, and vice versa.
The new temperature is shown in the display .
• Do not block or tape over the grille on the contro ls . M easuring
se nsors a re located behind it. •
Page 107 of 398
![AUDI S6 2009 User Guide _________________________________________________ w_ a_ r_ m __ a_n_ d_ c_ o_ld __ llll
Turning on and off [ECON ON/OFF]
Turning th e air conditioning on
- Press [ECON ON /OF F], or
- Pre AUDI S6 2009 User Guide _________________________________________________ w_ a_ r_ m __ a_n_ d_ c_ o_ld __ llll
Turning on and off [ECON ON/OFF]
Turning th e air conditioning on
- Press [ECON ON /OF F], or
- Pre](/img/6/57595/w960_57595-106.png)
_________________________________________________ w_ a_ r_ m __ a_n_ d_ c_ o_ld __ llll
Turning on and off [ECON ON/OFF]
Turning th e air conditioning on
- Press [ECON ON /OF F], or
- Press
[AUTO].
Turning the air conditioning off
-Press the [ECON ON /OFF] button to switc h the air condi
tion ing off and to block the air supply from the
outside. "OF F" appea rs in the display.
Sw itching air c onditionin g on /off
- Switching the air conditioning system on/off is done with
climate contro l switched on.
- Press the
[ECON ON /OFF] button just briefly.
The air conditioner turns back on if you press one of the control
buttons or the contro l knob .
ECON operation is indicated by the glowing LED on the right next to
the word ECON.
The air conditioning (compressor) is turned off in ECON mode .
"ECON" means "Economy" . You save fuel by switching off the air
conditioning=>
page 109 .
Please note that vehicle interior temperature cannot be lower than
the outside temperature in the ECON mode . The air is no t coo led or
dehumid ified. This can cause the windows to fog up.
[ i ) Tip s
Residu al he at: With the ignition turned off, you can activate the
residual heat function by pressing the !ECON ON /OFF] button . The
residual heat from the coo lant can be used to heat the vehic le inte-
Controls and equip
ment
rior . The residual heat function is turned off automatical ly after 30
minutes .•
Automatic mode [AUTO]
The automatic mode is the standard setting for all
seasons .
- Select temperature between 60 °F ( +16 °C) and 84 °F
(+28 °C).
- Press
[AUTO ].
Automatic operation ensures constant tempera tures in the interior
and dehumidifies the air inside the vehicle. Air temperature , volume
and d is tribution are controlled automatically to reach or maintain
the desired interior temperature as quickly as possible . F luctua tions
in exterior temperature and the effects of temperature from the
position of the sun are compensated for automatically .
This operating mode works only in the adjustable temperature
range, from 60 °F (+ 16 °C) to 84 °F ( +28 °C). If a temperature below
60 ° F
(+ 16 °C) is selected, LO appears in the display . At temperatures
above 84 °F (+28 °C),
HI is displayed . At both ex treme settings,
climate control runs continuous ly at maximum cooling or heating
power . There is no temperatu re regulation. •
I • •