CHEVROLET AVEO 2002 Service Repair Manual
AVEO 2002
CHEVROLET
CHEVROLET
https://www.carmanualsonline.info/img/24/56853/w960_56853-0.png
CHEVROLET AVEO 2002 Service Repair Manual
Trending: drain bolt, reset, radio, fuse, recommended oil, ABS, warning light
Page 2701 of 5127
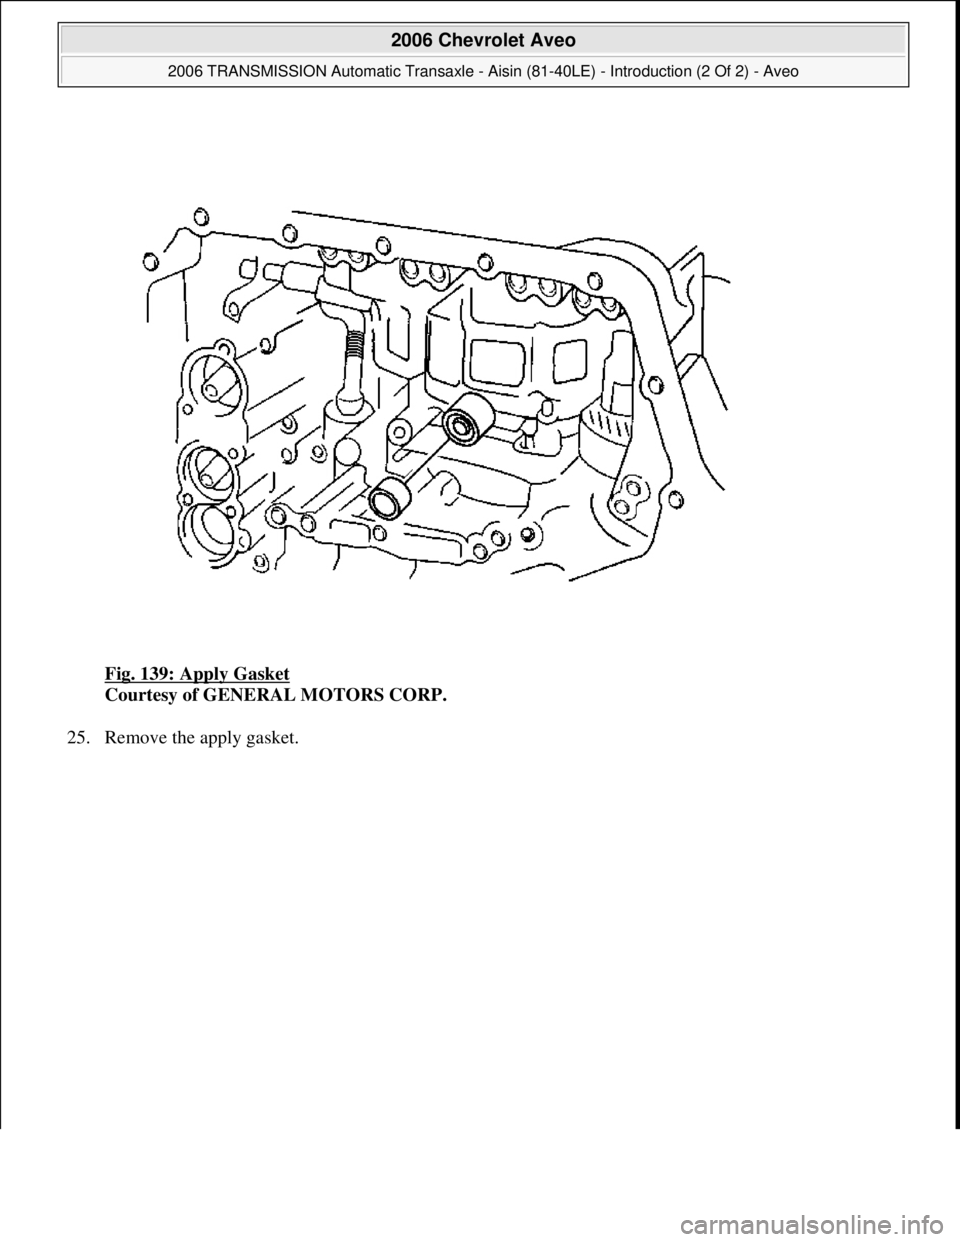
Fig. 139: Apply Gasket
Courtesy of GENERAL MOTORS CORP.
25. Remove the apply gasket.
2006 Chevrolet Aveo
2006 TRANSMISSION Automatic Transaxle - Aisin (81-40LE) - Introduction (2 Of 2) - Aveo
Microsoft
Thursday, July 16, 2009 1:17:21 PMPage 152 © 2005 Mitchell Repair Information Company, LLC.
Page 2702 of 5127
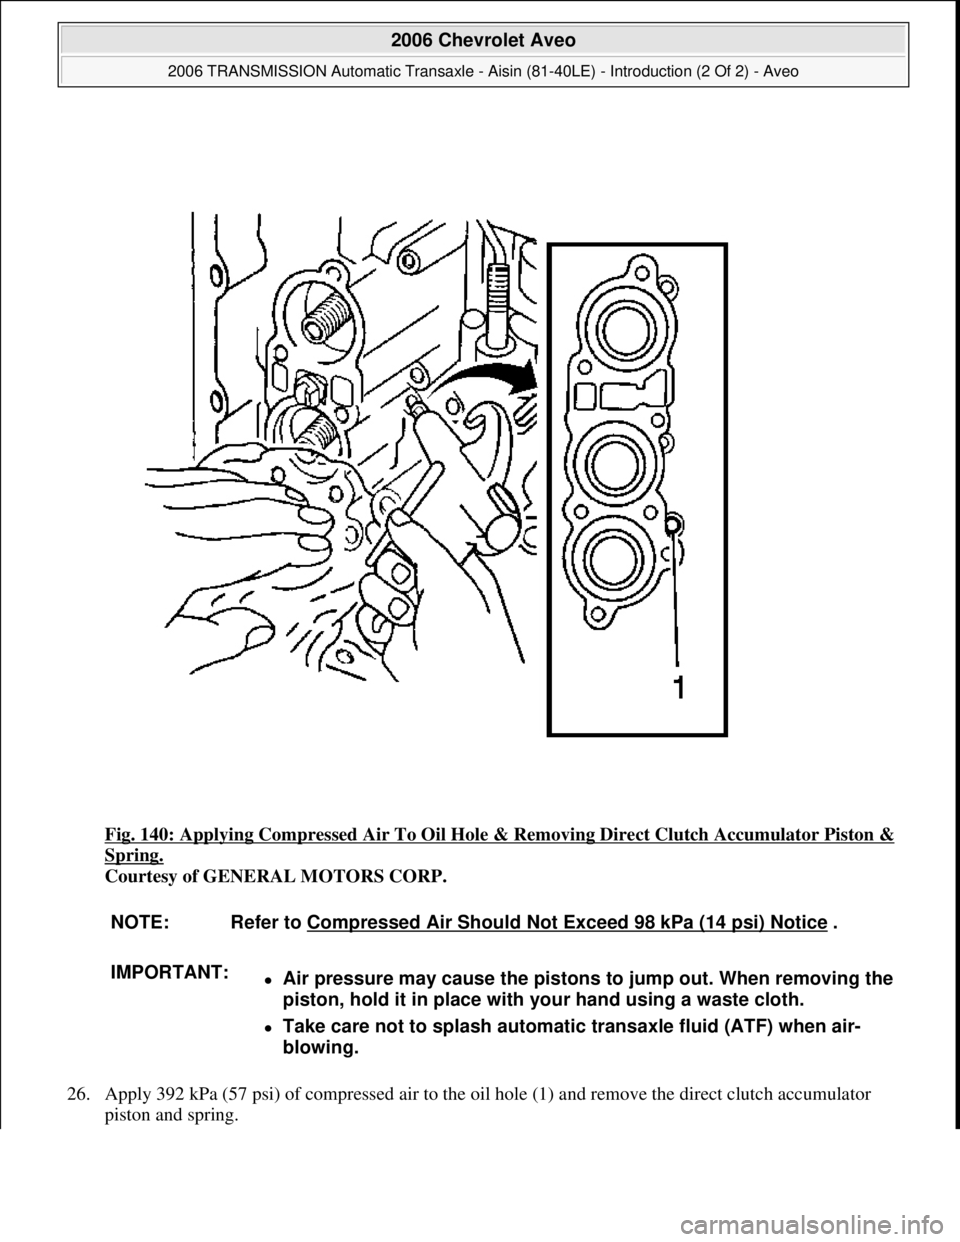
Fig. 140: Applying Compressed Air To Oil Hole & Removing Direct Clutch Accumulator Piston &
Spring.
Courtesy of GENERAL MOTORS CORP.
26. Apply 392 kPa (57 psi) of compressed air to the oil hole (1) and remove the direct clutch accumulator
piston and spring.
NOTE: Refer to Compressed Air Should Not Exceed 98 kPa (14 psi) Notice .
IMPORTANT:
Air pressure may cause the pistons to jump out. When removing the
piston, hold it in place with your hand using a waste cloth.
Take care not to splash automatic transaxle fluid (ATF) when air-
blowing.
2006 Chevrolet Aveo
2006 TRANSMISSION Automatic Transaxle - Aisin (81-40LE) - Introduction (2 Of 2) - Aveo
Microsoft
Thursday, July 16, 2009 1:17:21 PMPage 153 © 2005 Mitchell Repair Information Company, LLC.
Page 2703 of 5127
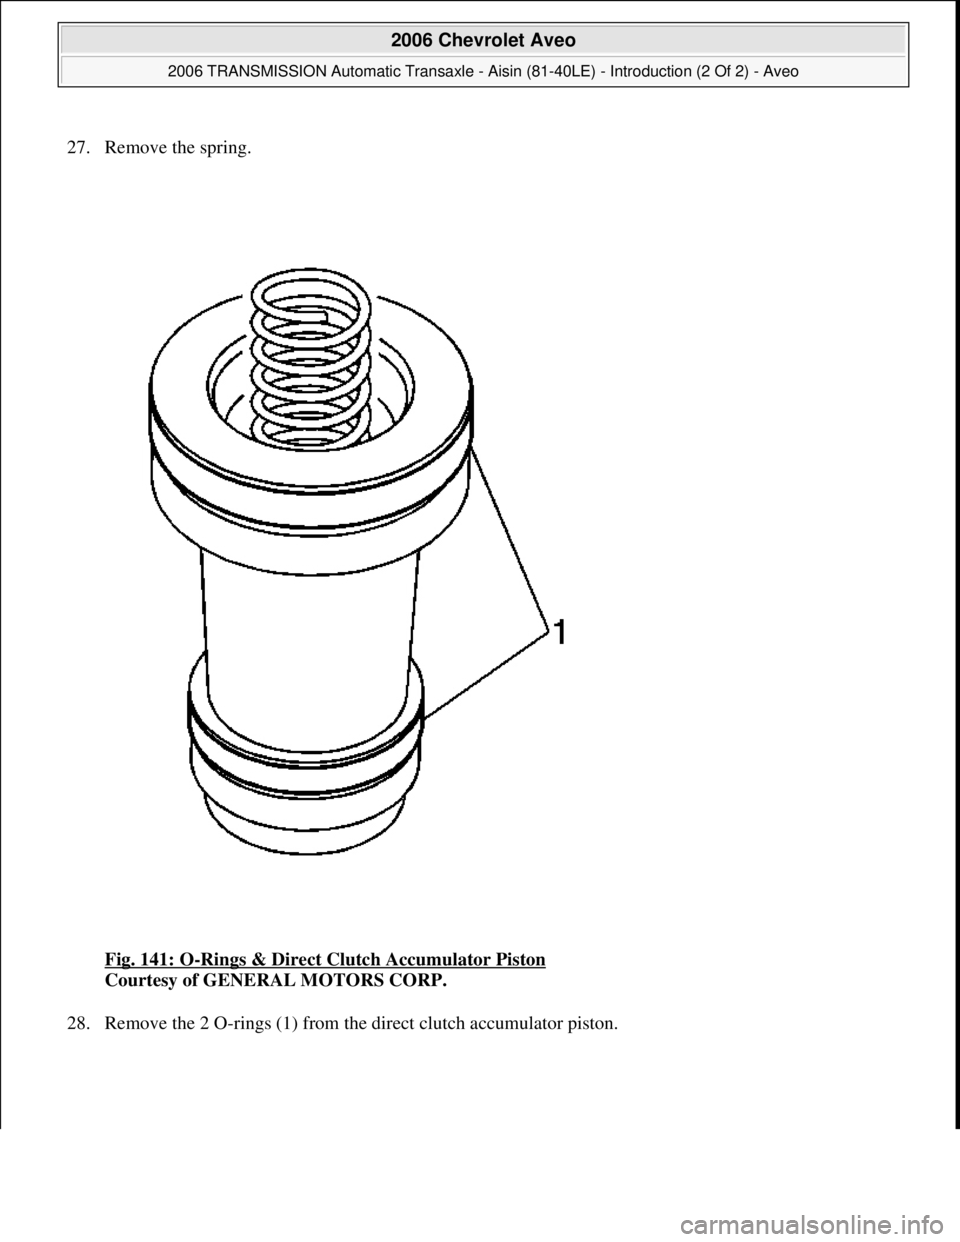
27. Remove the spring.
Fig. 141: O
-Rings & Direct Clutch Accumulator Piston
Courtesy of GENERAL MOTORS CORP.
28. Remove the 2 O-rin
gs (1) from the direct clutch accumulator piston.
2006 Chevrolet Aveo
2006 TRANSMISSION Automatic Transaxle - Aisin (81-40LE) - Introduction (2 Of 2) - Aveo
Microsoft
Thursday, July 16, 2009 1:17:21 PMPage 154 © 2005 Mitchell Repair Information Company, LLC.
Page 2704 of 5127
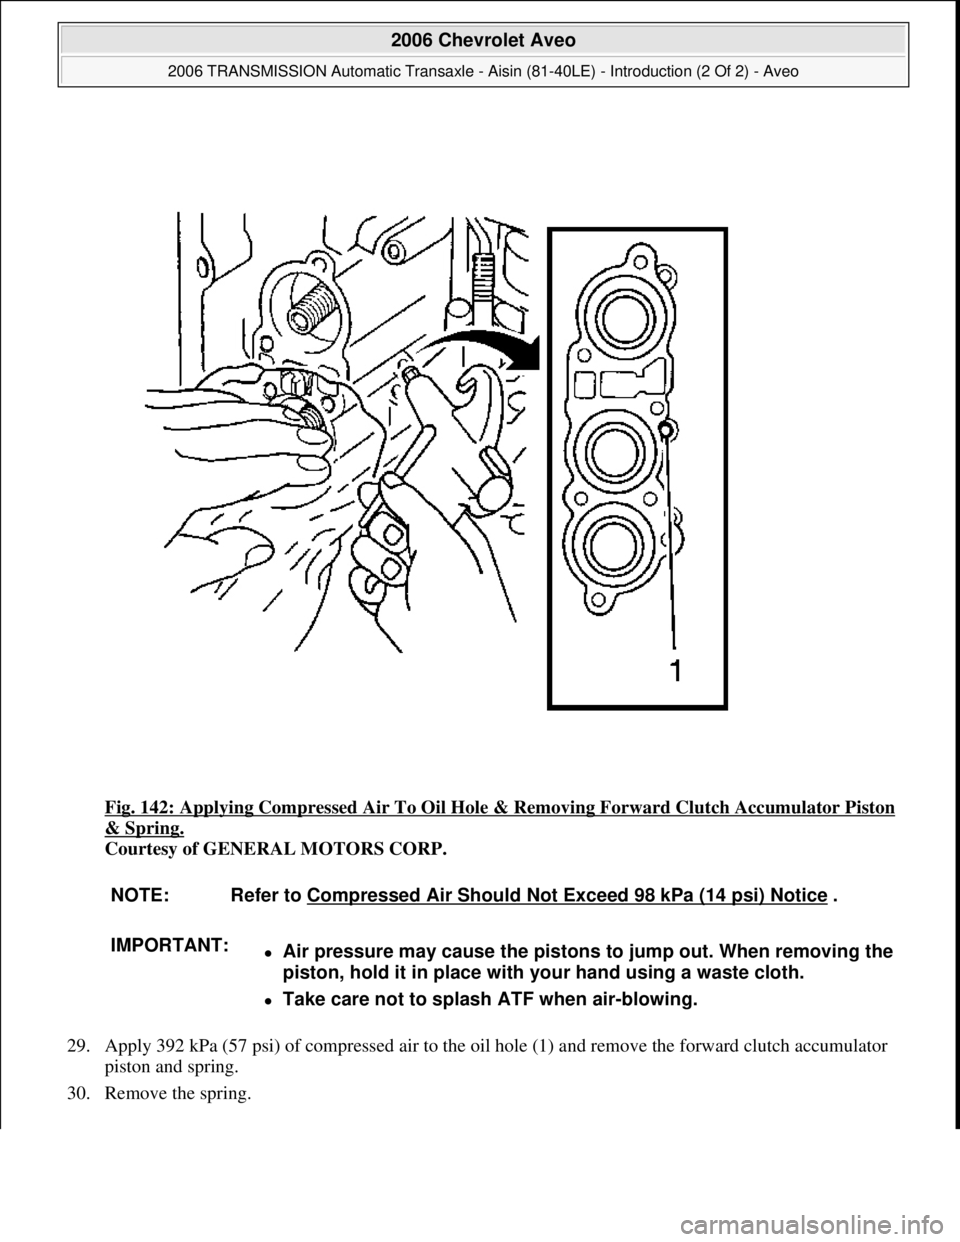
Fig. 142: Applying Compressed Air To Oil Hole & Removing Forward Clutch Accumulator Piston
& Spring.
Courtesy of GENERAL MOTORS CORP.
29. Apply 392 kPa (57 psi) of compressed air to the oil hole (1) and remove the forward clutch accumulator
piston and spring.
30. Remove the spring.
NOTE: Refer to Compressed Air Should Not Exceed 98 kPa (14 psi) Notice .
IMPORTANT:
Air pressure may cause the pistons to jump out. When removing the
piston, hold it in place with your hand using a waste cloth.
Take care not to splash ATF when air-blowing.
2006 Chevrolet Aveo
2006 TRANSMISSION Automatic Transaxle - Aisin (81-40LE) - Introduction (2 Of 2) - Aveo
Microsoft
Thursday, July 16, 2009 1:17:22 PMPage 155 © 2005 Mitchell Repair Information Company, LLC.
Page 2705 of 5127
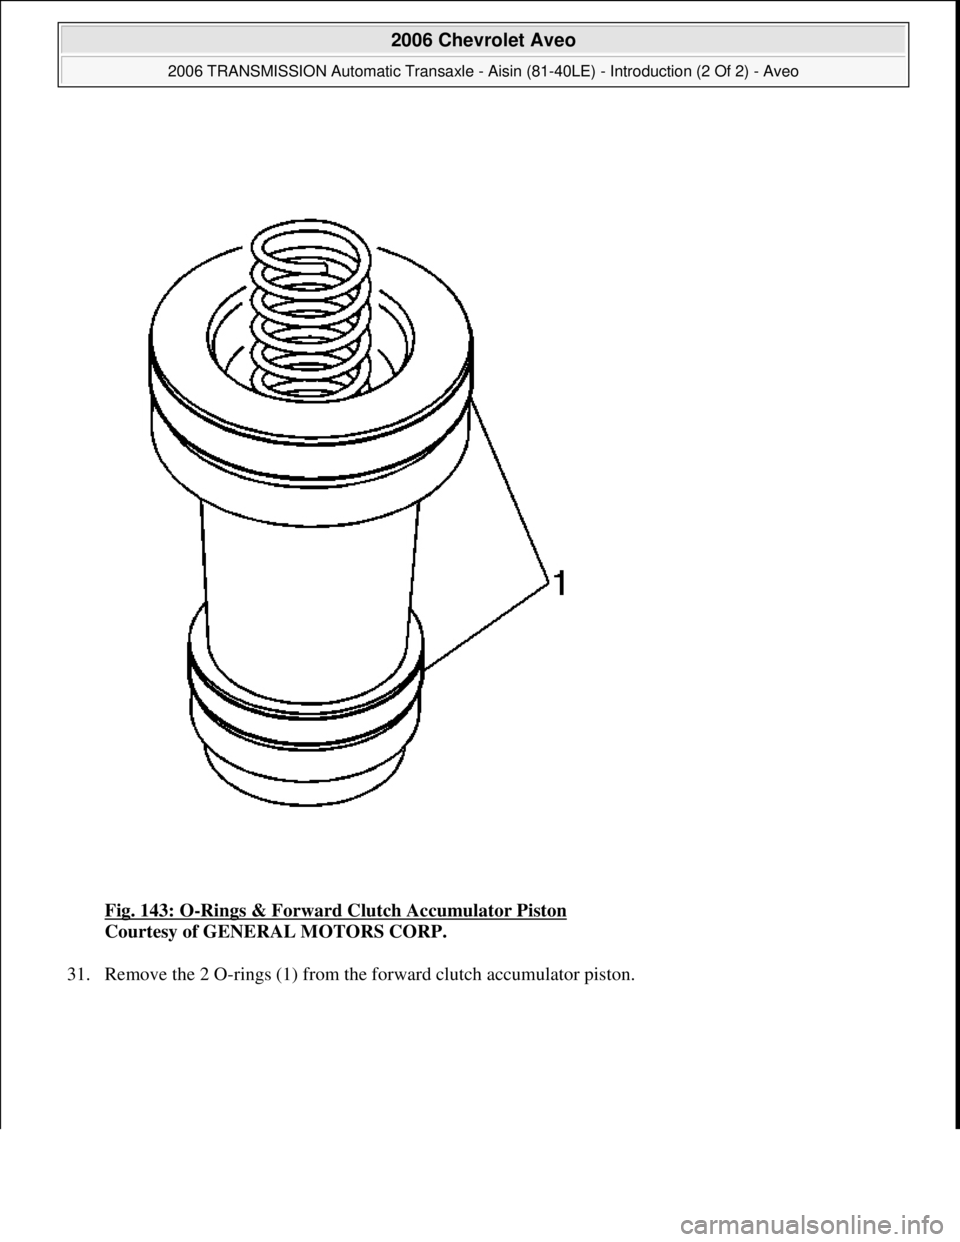
Fig. 143: O-Rings & Forward Clutch Accumulator Piston
Courtesy of GENERAL MOTORS CORP.
31. Remove the 2 O-rin
gs (1) from the forward clutch accumulator piston.
2006 Chevrolet Aveo
2006 TRANSMISSION Automatic Transaxle - Aisin (81-40LE) - Introduction (2 Of 2) - Aveo
Microsoft
Thursday, July 16, 2009 1:17:22 PMPage 156 © 2005 Mitchell Repair Information Company, LLC.
Page 2706 of 5127
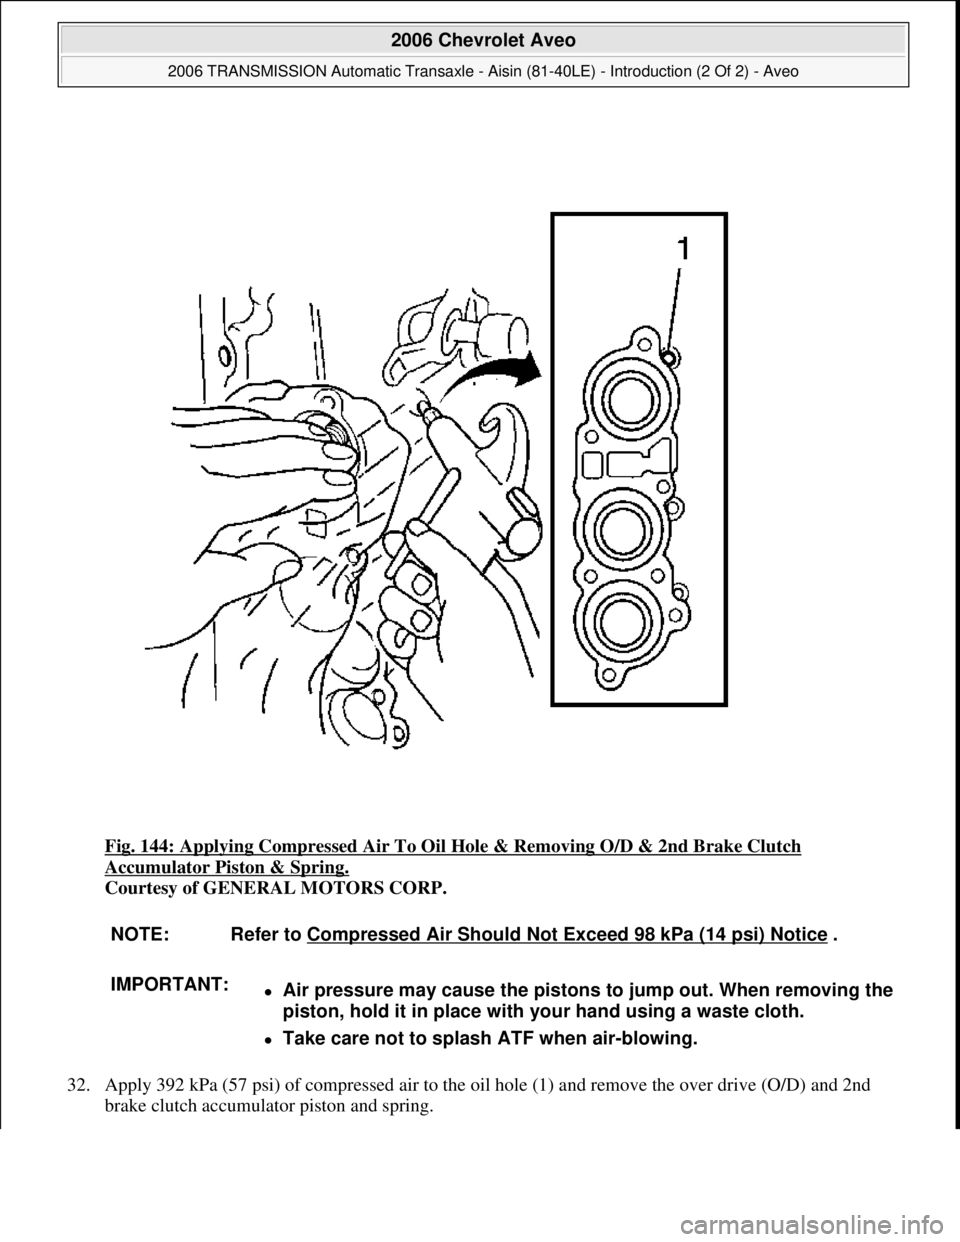
Fig. 144: Applying Compressed Air To Oil Hole & Removing O/D & 2nd Brake Clutch
Accumulator Piston & Spring.
Courtesy of GENERAL MOTORS CORP.
32. Apply 392 kPa (57 psi) of compressed air to the oil hole (1) and remove the over drive (O/D) and 2nd
brake clutch accumulator piston and spring.
NOTE: Refer to Compressed Air Should Not Exceed 98 kPa (14 psi) Notice .
IMPORTANT:
Air pressure may cause the pistons to jump out. When removing the
piston, hold it in place with your hand using a waste cloth.
Take care not to splash ATF when air-blowing.
2006 Chevrolet Aveo
2006 TRANSMISSION Automatic Transaxle - Aisin (81-40LE) - Introduction (2 Of 2) - Aveo
Microsoft
Thursday, July 16, 2009 1:17:22 PMPage 157 © 2005 Mitchell Repair Information Company, LLC.
Page 2707 of 5127
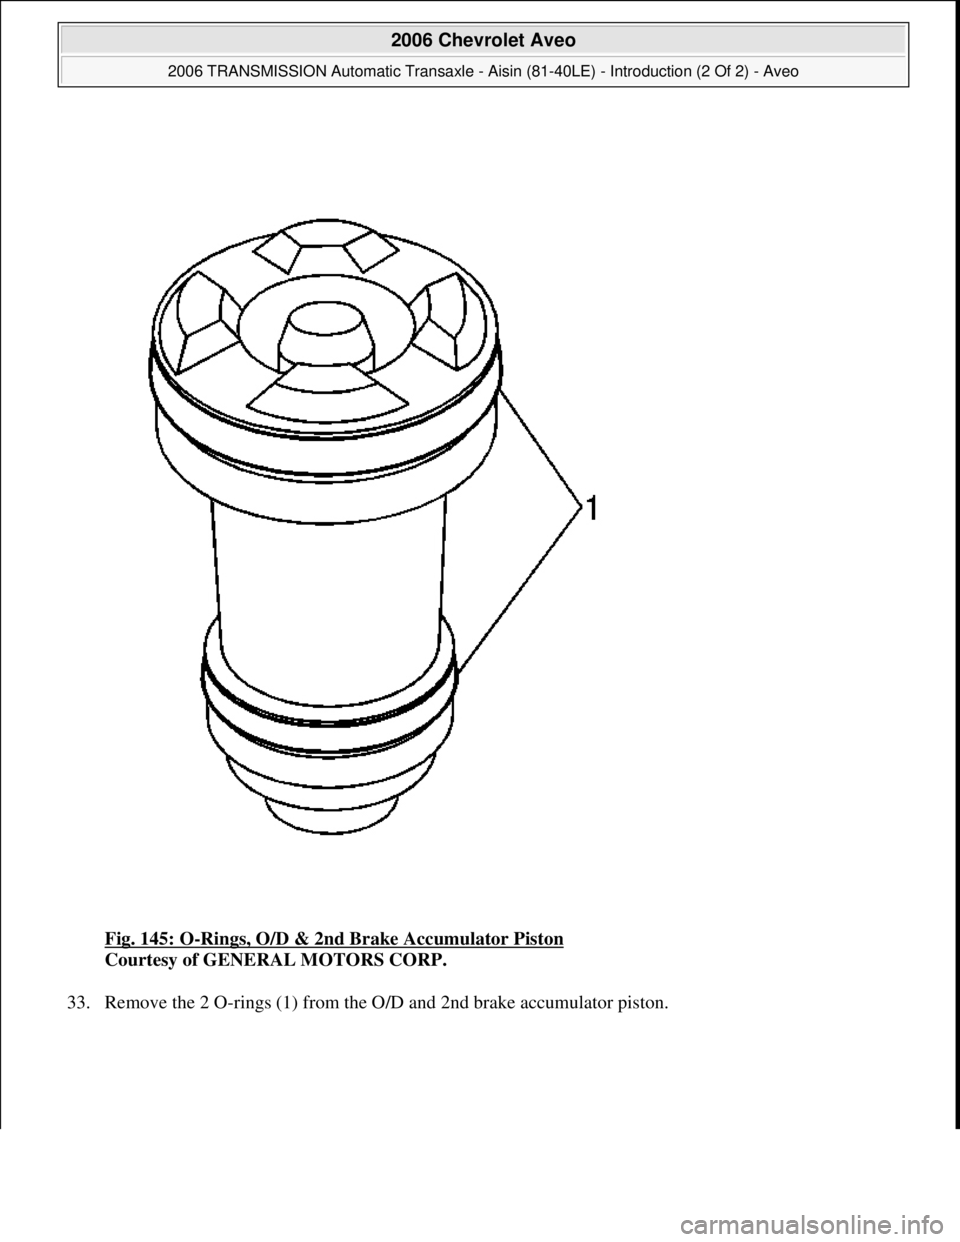
Fig. 145: O-Rings, O/D & 2nd Brake Accumulator Piston
Courtesy of GENERAL MOTORS CORP.
33. Remove the 2 O-rin
gs (1) from the O/D and 2nd brake accumulator piston.
2006 Chevrolet Aveo
2006 TRANSMISSION Automatic Transaxle - Aisin (81-40LE) - Introduction (2 Of 2) - Aveo
Microsoft
Thursday, July 16, 2009 1:17:22 PMPage 158 © 2005 Mitchell Repair Information Company, LLC.
Page 2708 of 5127
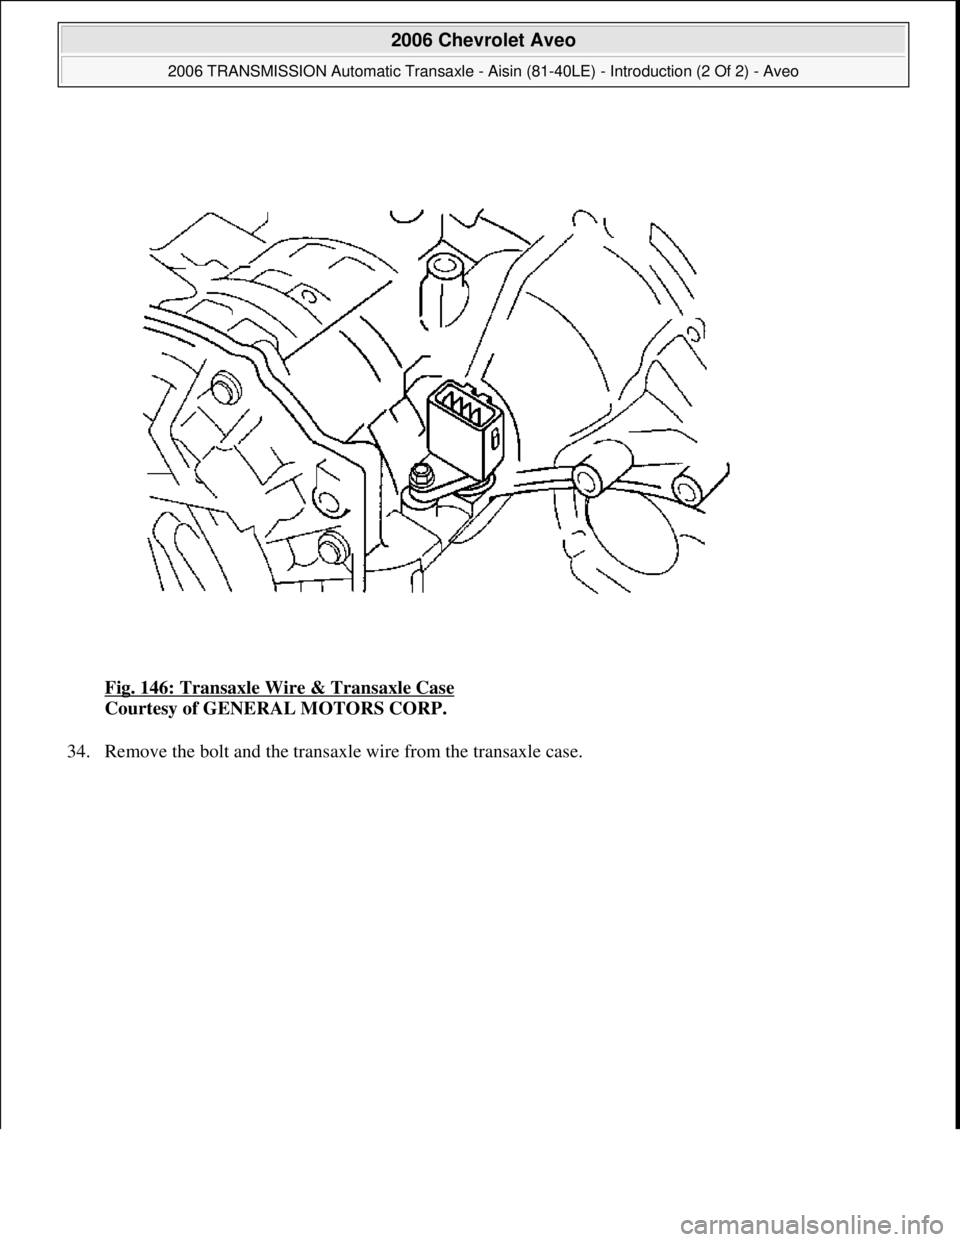
Fig. 146: Transaxle Wire & Transaxle Case
Courtesy of GENERAL MOTORS CORP.
34. Remove the bolt and the transaxle wire from the transaxle case.
2006 Chevrolet Aveo
2006 TRANSMISSION Automatic Transaxle - Aisin (81-40LE) - Introduction (2 Of 2) - Aveo
Microsoft
Thursday, July 16, 2009 1:17:22 PMPage 159 © 2005 Mitchell Repair Information Company, LLC.
Page 2709 of 5127
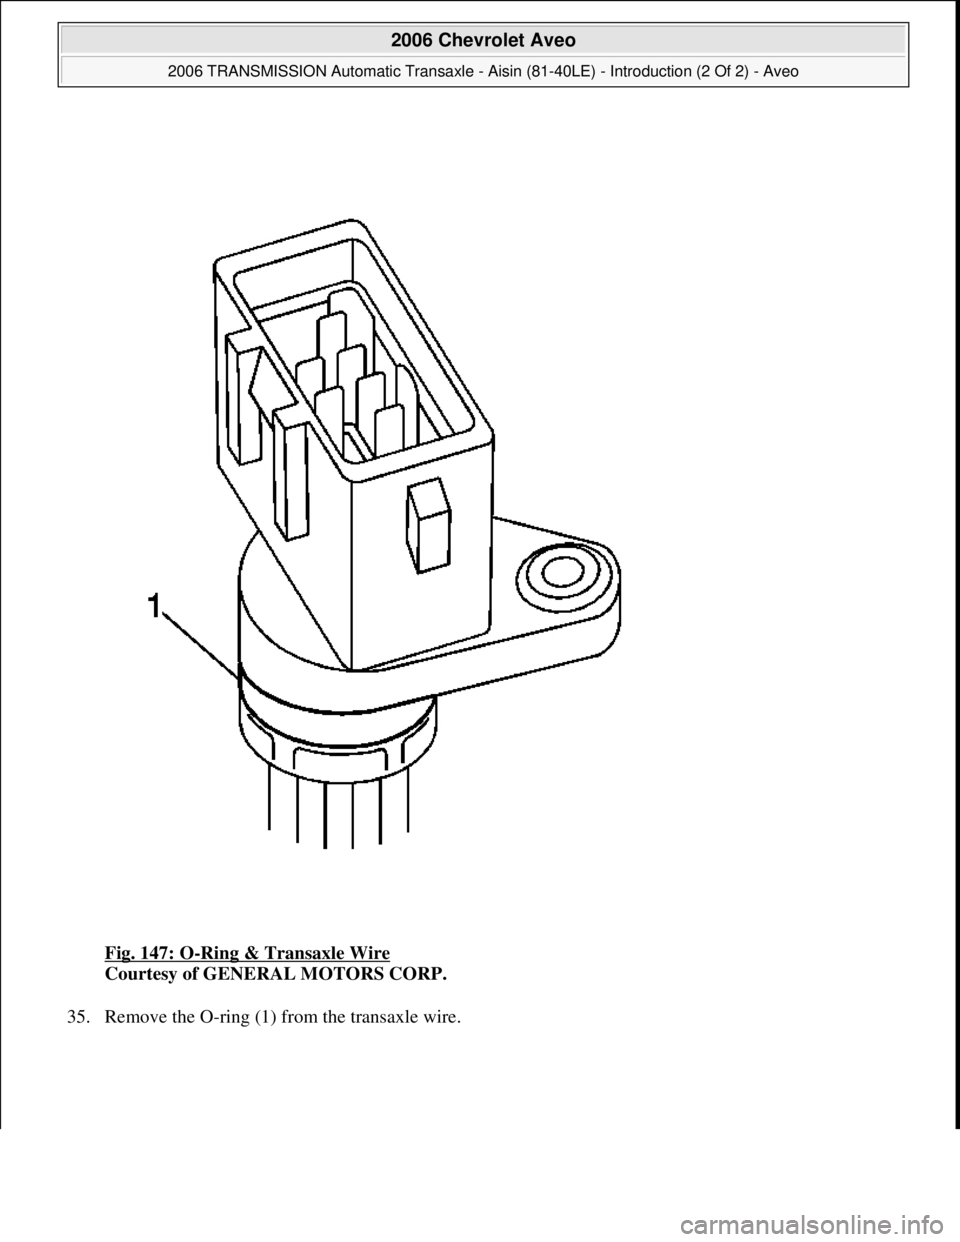
Fig. 147: O-Ring & Transaxle Wire
Courtesy of GENERAL MOTORS CORP.
35. Remove the O-rin
g (1) from the transaxle wire.
2006 Chevrolet Aveo
2006 TRANSMISSION Automatic Transaxle - Aisin (81-40LE) - Introduction (2 Of 2) - Aveo
Microsoft
Thursday, July 16, 2009 1:17:22 PMPage 160 © 2005 Mitchell Repair Information Company, LLC.
Page 2710 of 5127
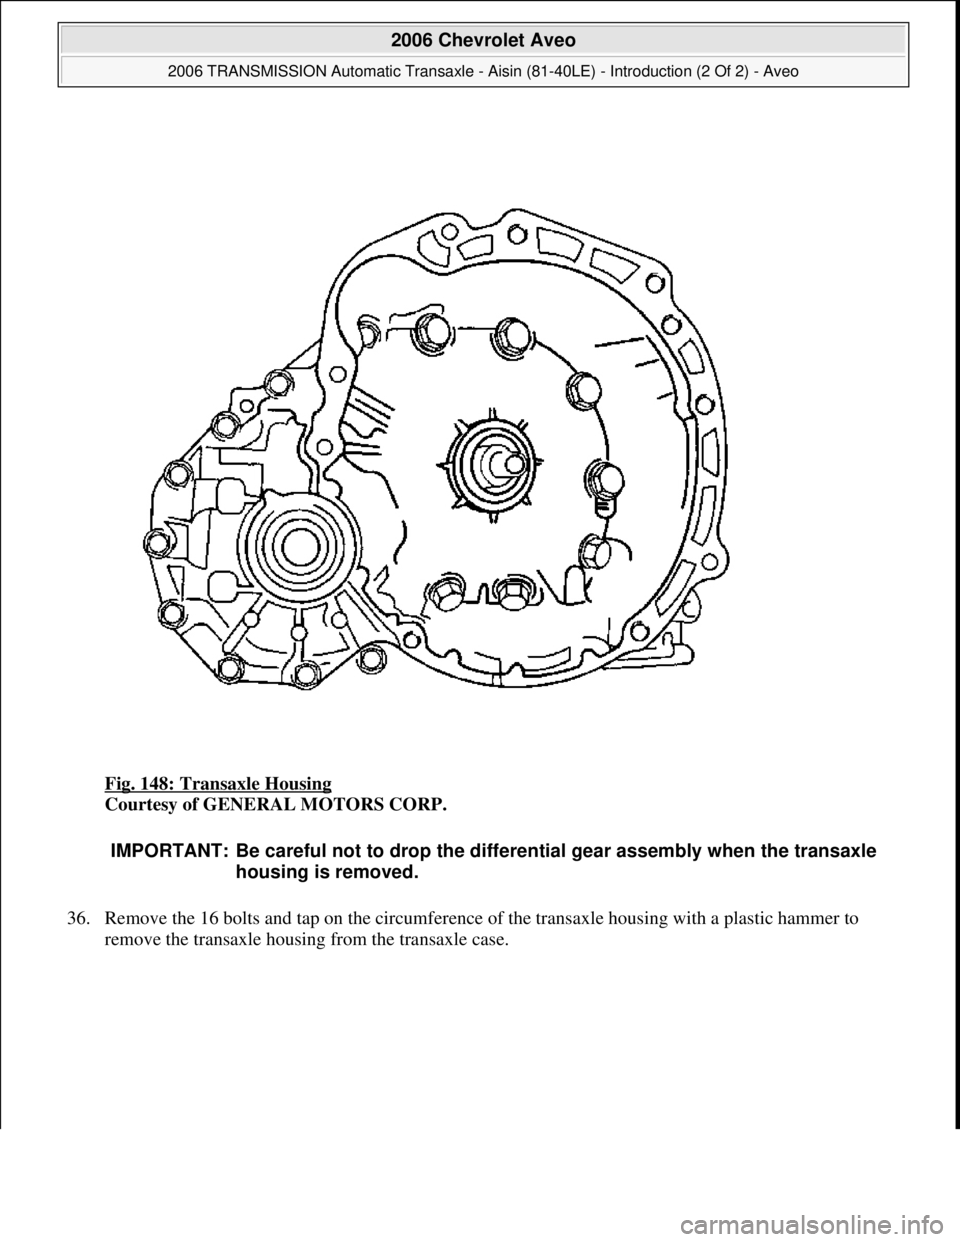
Fig. 148: Transaxle Housing
Courtesy of GENERAL MOTORS CORP.
36. Remove the 16 bolts and tap on the circumference of the transaxle housing with a plastic hammer to
remove the transaxle housing from the transaxle case.
IMPORTANT: Be careful not to drop the differential gear assembly when the transaxle
housing is removed.
2006 Chevrolet Aveo
2006 TRANSMISSION Automatic Transaxle - Aisin (81-40LE) - Introduction (2 Of 2) - Aveo
Microsoft
Thursday, July 16, 2009 1:17:22 PMPage 161 © 2005 Mitchell Repair Information Company, LLC.
Trending: immobilizer, heating, spark plugs replace, engine coolant, brake, wheel size, brake rotor
