warning ISUZU TROOPER 1995 Workshop Manual
[x] Cancel search | Manufacturer: ISUZU, Model Year: 1995, Model line: TROOPER, Model: ISUZU TROOPER 1995Pages: 1928
Page 1632 of 1928
9J-8 Supplemental Restraint System
DEFINITIONS
AIR BAG -An inflatable cloth cushion designed to
deploy in certain frontal crashes. It supplements the
protection offered by the seat belts by distributing the
impact load more evenly over the vehicle occupant's
head and torso.
ASYNCHRONOUS -Performed in a non-periodic
fashion,i.e.no defined time or interval.
B+-Battery voltage, the voltage available at the battery
at the time of the indicated measurement. With the key
"ON" and the engine not running, the system voltage will
likely be between 12 and 12.5 volts. At idle the voltage
may be 14 to 16 volts. The voltage could be as low as 1
0
volts during engine cranking.
BULB
CHECK-The DERM will cause the "AIR BAG"
warning lamp to flash seven times and then go "OFF"
whenever the ignition switch transitions to the RUN
position from any other ignition switch position and no
malfunctions are detected.
"CONTINUOUS MONITORING"-Tests performed by
the DERM on the
SRS every 1 00 milliseconds while
"Ignition
1" voltage is in the normal operating voltage
range at the DERM.
DATA LINK CONNECTOR(DLC)-Formerly "ALDL'', a
connector which allows communication with an
off-board computer, such as a scan
tool.
DATUM LINE-A base line parallel to the plane of the
underbody or frame from which all vertical
measurements originate.
DEPLOY-To inflate the air bag.
DEPLOYMENT
LOOPS - The circuits which supply
current to the inflator modules to deploy the air bag.
DERM -Diagnostic
energy reserve module which
provides reserve energy to the deployment loops and
performs diagnostic monitoring of
all SRS components.
DIAGNOSTIC TROUBLE CODE(DTC) -Formerly
"Code,"a numerical designator used by the DERM to
indicate specific
SRS malfunctions.
DRIVER CURRENT SOURCE-An output of the DERM
which injects current into the driver inflator module circuit
during the "Initiator Assembly Resistance
Test."
DRIVER INFLATOR
MODULE-An assembly located in
the steering wheel hub consisting of an inflatable air bag,
an inflator and an initiator.
DUAL
POLE ARMING SENSOR-A sensor on the high
side(power side) of the deployment loops that is
calibrated to supply voltage to the inflator modules when
the vehicle velocity changes are severe enough to
warrant arming of the air bags in preparation for
deployment.
EEPROM -Electrically Erasable Programmable Read ~
Only Memory. Memory which retains its contents when
power
is removed from the DERM.
FORWARD LH DISCRIMINATING SENSOR-A sensor
on the low side(ground side) of the deployment loops
which is calibrated to ground the inflator modules when
the vehicle velocity changes are severe enough to
warrant deployment of the air bags.
FORWARD RH DISCRIMINATING SENSOR-A sensor
on the low side(ground side) of the deployment loops
which
is calibrated to ground the inflator modules when
the vehicle velocity changes are severe enough
to
warrant deployment of the air bag.
FORWARD LH SENSOR Eng-Room HARNESS-An
assembly of two correct carrying wires which connects
the Forward
LH discriminating sensor to SRS harness.
FORWARD RH SENSOR Eng-Room HARNESS
JUMPER-An assembly of two current carrying wires
which connects the Forward
RH discriminating sensor to
the
SRS harness.
HIGHER PRIORITY FAULT-Each diagnostic trouble
code
is assigned a priority based on the detectability with
other DTCs present. The priority corresponds to the
detectability of the malfunction ONLY, and does NOT
relate to the criticality of the malfunction with respect to ~
deployment or non-deployment under any given
condition.
IGNITION CYCLE -The voltage at the PERM "Ignition
1"
inputs, with ignition switch "ON," is within the normal
operating voltage range for at least ten seconds before
turning ignition switch
"OFF."
IGNITION1
-A battery voltage(B+)circuit which is only
powered with the ignition switch in the RUN,BULB
TEST,or START positions.
INITIATOR-The electrical component inside the inflator
module which, when sufficient current flows, sets off the
chemical reaction that inflates the air bag.
"INITIATOR ASSEMBLY RESISTANCE TEST"-Tests
performed once each ignition cycle when no
malfunctions are detected during "Turn-ON" or
"Continuous Monitoring." This test checks for the correct
DERM configuration for the vehicle, shorts to
"Ignition 1"
in the deployment loops, high resistance or opens in the
"Driver
Side High," "Driver Side Low," "Passenger Side
High"
and "Passenger Side Low" circuits and measures
the resistance of the inflator assembly consisting of: 1)
Initiators, 2) SRS coil assembly(driver side only), 3)
Connectors and associated wiring.
NORMAL OPERATING VOLTAGE RANGE-The ~
voltage measured between the DERM "Ignition 1" ·
terminals and "Ground" terminals is between 7.25 and 16
volts.
•
Page 1634 of 1928
9J-10 Supplemental Restraint System
DIAGNOSIS
WARNING: TO AVOID DEPLOYMENT WHEN
TROUBLESHOOTING THE SRS, DO NOT USE
ELECTRICAL TEST EQUIPMENT SUCH AS A
BATTERY-POWERED OR AC-POWERED
VOLTMETER,OHMMETER,ETC., OR ANY TYPE OF
ELECTRICAL EQUIPMENT OTHER THAN THAT
SPECIFIED IN THIS MANUAL. DO NOT USE A
NON-POWERED PROBE TYPE TESTER.
INSTRUCTIONS IN THIS MANUAL MUST BE
FOLLOWED CAREFULLY, OTHERWISE PERSONAL
INJURY
MAY RESULT.
DIAGNOSTIC TROUBLE CODES
The "SRS Diagnostic System Check" must always be the
starting point of any SRS diagnosis. The "SRS
Diagnostic System Check" checks for proper" AIR BAG"
warning lamp operation and checks for
SRS diagnostic
trouble codes using the scan
tool.
1. Current diagnostic trouble codes-Malfunctions that
are presently being detected. Current diagnostic
trouble codes are stored
in RAM(Random Access
Memory).
2. History diagnostic trouble codes -All malfunctions
detected since the last time the history memory was
cleared. History diagnostic trouble codes are stored
in EEPROM.
SCAN TOOL DIAGNOSTICS
A scan tool is used to read current and history diagnostic
trouble codes and to clear all diagnostic trouble codes
after a repair is completed. The scan tool must be
updated to communicate with the SRS through a
replaceable cartridge before it can be used for
SRS
diagnostics. To use the scan tool, connect it to the data
link connector and turn the ignition switch
"ON." The scan
tool reads serial data from the DERM
"Serial Data" line
terminal
"A11" to the data link connector terminal "2".
USE OF SPECIAL TOOLS ~
WARNING: TO AVOID DEPLOYMENT WHEN
TROUBLESHOOTING THE SRS, DO NOT USE
ELECTRICAL TEST EQUIPMENT SUCH AS A
BATTERY POWERED
OR AC POWERED
VOLTMETER, OHMMETER, ETC., OR ANY TYPE OF
ELECTRICAL EQUIPMENT OTHER THAN THAT
SPECIFIED IN THIS MANUAL. DO NOT USE A
NON-POWERED PROBE TYPE TESTER.
INSTRUCTIONS IN THIS MANUAL MUST BE
FOLLOWED CAREFULLY, OTHERWISE PERSONAL
INJURY
MAY RESULT. YOU SHOULD BE FAMILIAR
WITH
THE TOOLS LISTED IN THIS SECTION UNDER
THE HEADING SRS SPECIAL TOOLS."
You should be able to measure voltage and resistance.
You should be familiar with proper use of a scan tool such
as the Tech 1 Diagnostic Computer TK-O, SRS
Driver/Passenger Load Tool J-41433, Connector Test
Adapter Kit J-35616-A, and the DVM(Digital
Multimeter)J-39200.
•
Page 1637 of 1928
Supplemental Restraint System 9J-13
ON-VEHICLE SERVICE
SERVICE PRECAUTIONS
WARNING: WHEN PERFORMING SERVICE ON OR
AROUND SRS COMPONENTS OR SRS WIRING,
FOLLOW
THE PROCEDURES LISTED BELOW TO
TEMPORARILY DISABLE THE SRS. FAILURE TO
FOLLOW PROCEDURES COULD RESULT IN
POSSIBLE AIR
BAG DEPLOYMENT, PERSONAL
INJURY OR OTHERWISE
UNNEEDED SRS
REPAIRS.
The DERM in Driver-Passenger SRS can maintain
sufficient voltage to cause a deployment for up to 2
minutes after the ignition switch is turned
"OFF," the
battery is disconnected, or the fuse powering the DERM
is removed.
Many of the service procedures require removal of the
"AIR BAG" fuse, and disconnection of the inflator
modules from the deployment loop to avoid an accidental
deployment.
If the inflator module is disconnected from
the deployment loop as noted in the "Disabling the
SRS"
procedure that follows, service can begin immediately
without waiting for the 2-minute time period to expire.
DISABLING THE SRS
REMOVAL
Turn the ignition switch to "OFF"
1. Remove SRS fuse C-21, C-22, C-23 and C-24 from
left dash side lower fuse block.
2. Disconnect yellow 3-way connector at the base of
steering column.
3. Remove 1/P compartment door assembly, Refer to
"Passenger inflator module replacement" in section
9J-132.
4. Disconnect yellow 4-way connector behind the 1/P
compartment door assembly.
IMPORTANT
• With the "AIR BAG" fuse removed and ignition switch
"ON," if Fuse 21 left. the "AIR BAG" warning lamp will
be "ON." This is normal operation and does not
indicate an
SRS malfunction.
ENABLING THE SRS
INSTALLATION
Turn ignition switch to "LOCK" and remove key.
1. Connect yellow 4-way connector for passenger
inflator module.
2. 1/P compartment door assembly, Refer to
"Passenger inflator module replacemenf' in section
9J-3.
3. Connect yellow 2-way connector at the base of the
steering column.
4. Install "AIR BAG" fuse C-21, C-22, C-23 and C-24 to
left dash side lower fuse block.
Turn ignition switch to
"RUN" and verify that the "AIR
BAG"
warning lamp flashes seven times and then turns
"OFP' If it does not operate as described, perform the
"SRS Diagnostic System Check" in section 9J-2.
HANDLING/INSTALLATION/DIAGNOSIS
1. Inflator modules should not be subjected to
temperatures above
65°C{150°F).
2. Discriminating sensors, inflator modules, arming
sensors, or DERMs should not be used if they have
been dropped from a height
of 91.4 centimeters
{3feet).
3. When a discriminating sensor or arming sensor is
replaced, it must be oriented with the arrow on the
sensor pointing toward the front of the vehicle.
It is
very important for the discriminating sensors and
arming sensor to be located flat on the mounting
surface, parallel to the vehicle datum line.
It is
important that the sensor mounting surface is free of
any dirt or other foreign material.
4. Do not apply power to the SRS unless all
components are connected or a diagnostic chart
requests it, as this
will set a diagnostic trouble code.
5. The "SRS Diagnostic System Check" must be the
starting point of any
SRS diagnostics. The "SRS
Diagnostic System Check" will verify proper "AIR
BAG"
warning lamp operation and will lead you to the
correct chart to diagnose any
SRS malfunctions.
Bypassing these procedures may result
in extended
diagnostic time, incorrect diagnosis, and incorrect
parts replacements.
Page 1638 of 1928
--
9J-14 Supplemental Restraint System
INFLATOR MODULE HANDLING/SHIPPING/SCRAPPI G
LIVE (UNDEPLOYED) INFLATOR MODULE ~
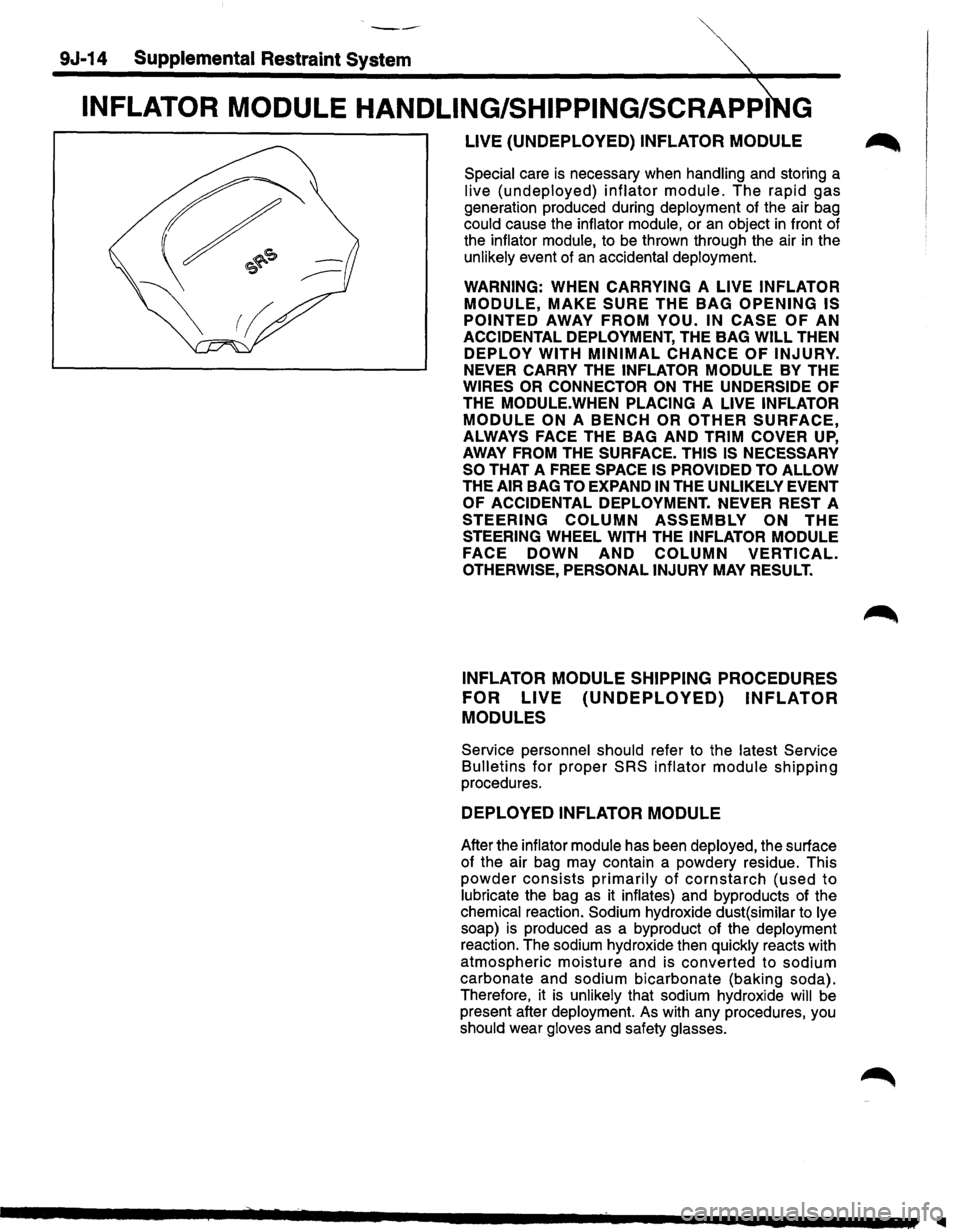
Special care is necessary when handling and storing a
live (undeployed) inflator module. The rapid gas
generation produced during deployment of the air bag
could cause the inflator module, or an object in front of
the inflator module,
to be thrown through the air in the
unlikely event of an accidental deployment.
WARNING: WHEN CARRYING A LIVE INFLATOR
MODULE, MAKE SURE THE BAG OPENING IS
POINTED
AWAY FROM YOU. IN CASE OF AN
ACCIDENTAL DEPLOYMENT, THE BAG WILL THEN
DEPLOY WITH MINIMAL CHANCE OF INJURY.
NEVER CARRY THE INFLATOR MODULE BY THE
WIRES OR CONNECTOR ON THE UNDERSIDE OF
THE MODULE.WHEN PLACING A LIVE INFLATOR
MODULE ON A BENCH OR OTHER SURFACE,
ALWAYS FACE THE BAG AND TRIM COVER UP,
AWAY FROM THE SURFACE. THIS IS NECESSARY
SO
THAT A FREE SPACE IS PROVIDED TO ALLOW
THE AIR BAG TO EXPAND IN THE UNLIKELY EVENT
OF ACCIDENTAL DEPLOYMENT. NEVER REST A
STEERING COLUMN ASSEMBLY ON THE
STEERING WHEEL WITH THE INFLATOR MODULE
FACE
DOWN AND COLUMN VERTICAL.
OTHERWISE, PERSONAL INJURY MAY RESULT.
INFLATOR MODULE SHIPPING PROCEDURES
FOR
LIVE (UNDEPLOYED) INFLATOR
MODULES
Service personnel should refer to the latest Service
Bulletins for proper SRS inflator module shipping
procedures.
DEPLOYED INFLATOR MODULE
After the inflator module has been deployed, the surface
of the air bag may contain a powdery residue. This
powder consists primarily of cornstarch (used to
lubricate the bag as it inflates) and byproducts of the
chemical reaction. Sodium hydroxide dust( similar
to lye
soap)
is produced as a byproduct of the deployment
reaction. The sodium hydroxide then quickly reacts with
atmospheric moisture and is converted to sodium
carbonate and sodium bicarbonate (baking soda).
Therefore, it
is unlikely that sodium hydroxide will be
present after deployment. As with any procedures, you
should wear gloves and safety glasses.
Page 1639 of 1928
INFLATOR
PROCEDURE
MODULE
SCRAPPING
'-""' During the course of a vehicle's useful life, certain
situations may arise which
will necessitate the disposal
of a live (undeployed) inflator module. This information
covers proper procedures for disposing of a
live inflator
module.
Before a live inflator module can be disposed of, it must
be
deployed. Live inflator modules must not be disposed
of through
normal refuse channels.
WARNING: FAILURE TO FOLLOW PROPER
SUPPLEMENTAL RESTRAINT SYSTEM (SRS)
INFLATOR MODULE DISPOSAL PROCEDURES
CAN RESULT IN AIR BAG DEPLOYMENT WHICH
MAY CAUSE PERSONAL INJURY. UNDEPLOYED
INFLATOR MODULES MUST NOT
BE DISPOSED OF
THROUGH
NORMAL REFUSE CHANNELS. THE
UNDEPLOYED INFLATOR MODULE CONTAINS
SUBSTANCES
THAT CAN CAUSE SEVERE ILLNESS
OR
PERSONAL INJURY IF THE SEALED
CONTAINER IS DAMAGED DURING DISPOSAL.
DISPOSAL IN
ANY MANNER INCONSISTENT WITH
PROPER PROCEDURES MAY BE A VIOLATION OF
FEDERAL, STATE, AND/OR LOCAL LAW.
In situations which require deployment of a live inflator
module, deployment
may be accomplished inside or
outside the
vehicle. The method employed depends
upon the
final disposition of the particular vehicle, as
noted in
"Deployment Outside Vehicle" and "Deployment
Inside Vehicle"
in this section.
Supplemental Restraint System 9J-15
Page 1640 of 1928
9J-16 Supplemental Restraint ~
DEPLOYMENT OUTSIDE VEHICLE (DRIVER
INFLATOR
MODULE)
Deployment outside the vehicle is proper when the
vehicle is to be returned to service. This includes, for
example, situations in which the vehicle will be returned
to
useful service after a functionally or cosmetically
deficient
inflator module is replaced. Deployment and
disposal of a malfunctioning inflator module is, of course,
subject to any required retention period.
For deployment of a
live (undeployed) inflator module
outside the vehicle, the deployment procedure must be
followed exactly. Always wear safety glasses during this
deployment procedure
until a deployed inflator module is
scrapped
or until an undeployed inflator module is
shipped. Before performing the procedures, you
should
be familiar with servicing the SRS and with proper
handling of the inflator module. Procedures should be
read fully before they are performed.
The following procedure requires use of J-41434
SRS
deployment harness with appropriate pigtail adapter. Do
not attempt procedure without J-41434 adapter.
WARNING: FAILURE TO FOLLOW PROCEDURES
IN
THE ORDER LISTED MAY RESULT IN PERSONAL
INJURY.
NEVER CONNECT DEPLOYMENT
HARNESS TO ANY POWER SOURCE BEFORE
CONNECTING DEPLOYMENT HARNESS TO THE
DRIVER INFLATOR MODULE. DEPLOYMENT
HARNESS SHALL REMAIN SHORTED AND NOT BE ~
CONNECTED TO A POWER SOURCE UNTIL THE
AIR BAG IS TO BE DEPLOYED. THE INFLATOR
MODULE WILL IMMEDIATELY DEPLOY THE AIR
BAG WHEN A POWER SOURCE IS CONNECTED TO
IT. WEAR SAFETY GLASSES THROUGHOUT THIS
ENTIRE DEPLOYMENT AND DISPOSAL
PROCEDURE.
NOTE
• This information applies only to driver inflator
modules. Refer to "Deployment Outside
Vehicle(Passenger Inflator Module)" in this section
for information on passenger inflator module
scrapping.
1. Turn ignition switch to "LOCK," remove key and put
on safety glasses.
2. Inspect J-41434 SRS Deployment Harness and
appropriate
pigtail adapter for damage. If harness or
pigtail adapter is damaged, discard and obtain a
replacement.
•
Page 1641 of 1928
'"""' Supplemental Restraint System 9J-17
3. Short the two SRS deployment harness leads
together by fully seating one banana plug into the
other. SRS deployment harness shall remain
shorted and not be connected to a power source until
the air bag is to
be deployed.
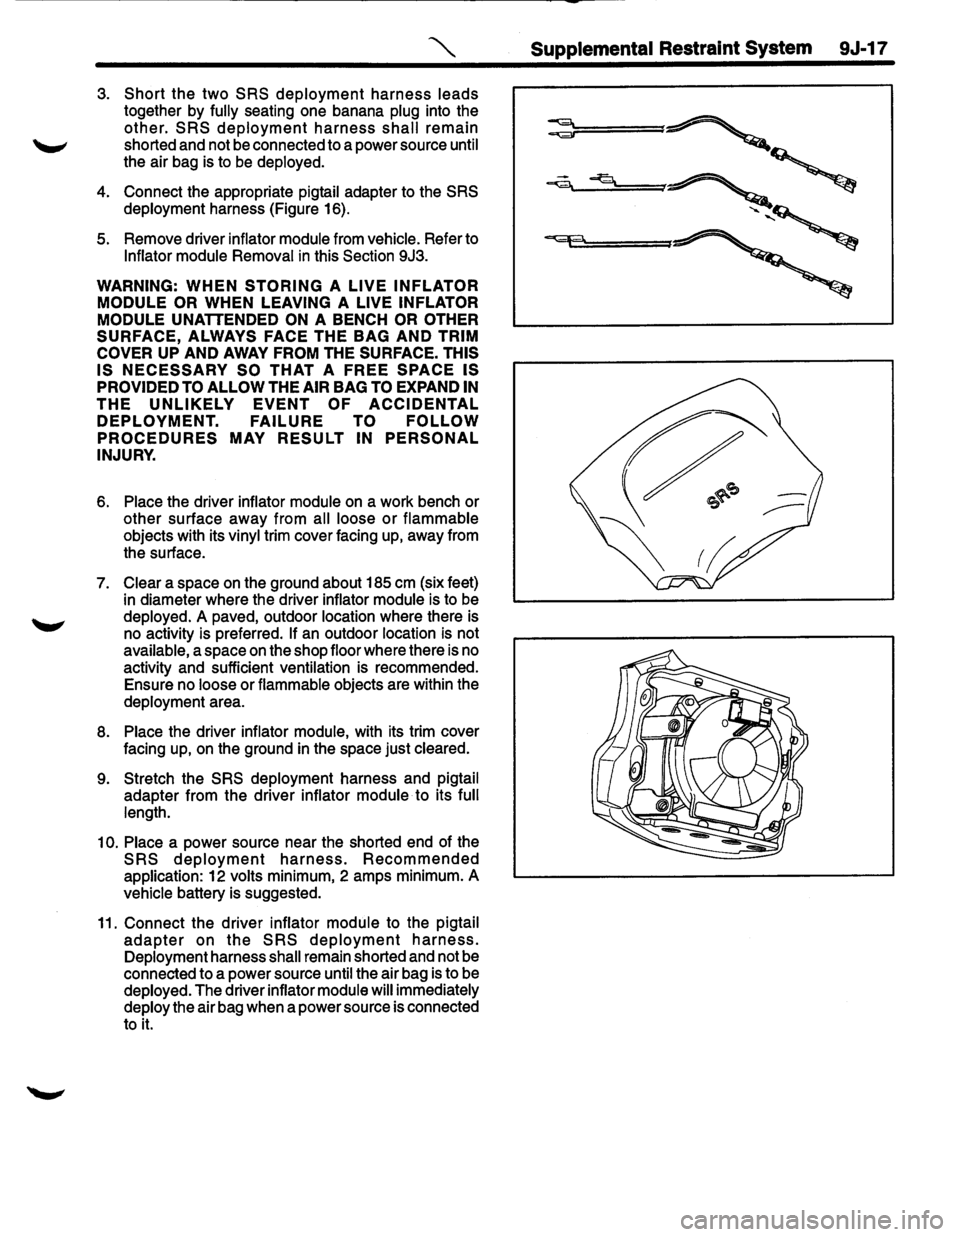
4. Connect the appropriate pigtail adapter to the SRS
deployment harness (Figure 16).
5. Remove driver inflator module from vehicle. Refer to
Inflator module Removal in this Section 9J3.
WARNING: WHEN STORING A LIVE INFLATOR
MODULE OR
WHEN LEAVING A LIVE INFLATOR
MODULE
UNATTENDED ON A BENCH OR OTHER
SURFACE, ALWAYS FACE THE BAG AND TRIM
COVER
UP AND AWAY FROM THE SURFACE. THIS
IS NECESSARY SO THAT A FREE SPACE IS
PROVIDED TO ALLOW THE AIR BAG TO EXPAND IN
THE UNLIKELY EVENT OF ACCIDENTAL
DEPLOYMENT. FAILURE TO FOLLOW
PROCEDURES MAY RESULT IN PERSONAL
INJURY.
6. Place the driver inflator module on a work bench or
other surface away from all loose
or flammable
objects with its vinyl trim cover facing up, away from
the surface.
7. Clear a space on the ground about 185 em (six feet)
in diameter where the driver inflator module is to be
deployed.
A paved, outdoor location where there is
no activity is preferred.
If an outdoor location is not
available, a space
on the shop floor where there is no
activity and sufficient ventilation is recommended.
Ensure no loose or flammable objects are within the
deployment area.
8. Place the driver inflator module, with its trim cover
facing up,
on the ground in the space just cleared.
9. Stretch the SRS deployment harness and pigtail
adapter from the driver inflator module to its full
length.
10. Place a power source near the shorted end of the
SRS deployment harness. Recommended
application: 12 volts minimum, 2 amps minimum. A
vehicle battery is suggested.
11. Connect the driver inflator module to the pigtail
adapter on the SRS deployment harness.
Deployment harness shall remain shorted and not be
connected to a power source until the air bag is to be
deployed. The driver inflator module will immediately
deploy the air bag when a power source is connected
to
it.
Page 1642 of 1928
9J-18 Supplemental Restraint System
NOTE: Ensure that the pigtail adapter is firmly seated
into the driver inflator module connector. Failure to fully
seat the connectors may leave the shorting bar located
in the
driver inflator module connector functioning
(shorted) and may result
in non-deployment of the driver
inflator module.
12. Verify that the area around the driver inflator module
is clear of all people and loose or flammable objects.
13. Verify that the driver inflator module is resting with its
trim cover facing up.
14. Notify all people
in the immediate area that you
intend to deploy the driver inflator module. The
deployment will be accompanied by a loud noise
which may startle the uninformed.
15.
Separate the two banana plugs on the SRS
deployment harness.
NOTE: When the air bag deploys, the driver inflator
module may jump about
30 em (one foot) vertically. This
is a normal reaction of the driver inflator module to the
force of the rapid gas expansion inside the air bag.
NOTE: When the air bag deploys, the rapid gas
expansion will create a loud noise. Notify all people
in the
immediate area that you intend to deploy the driver
inflator module.
16. Connect the
SRS deployment harness wires to the
power source to immediately deploy the driver
inflator module. Recommended application: 12 volts
minimum, 2 amps minimum. A vehicle battery is
suggested.
17. Disconnect the
SRS deployment harness from the
power source.
18.
Short the two SRS deployment harness leads
together by fully seating one banana plug into the
other.
19.
In the unlikely event that the driver inflator module did
not deploy after following these procedures, proceed
immediately with
Steps 24 through 27. If the driver
inflator module did deploy, proceed with
Steps 20
through 23.
20. Put on a pair of shop gloves to protect your hands
from possible irritation and heat when handling the
deployed driver inflator module.After the driver
inflator module has been deployed, the surface of the
air bag may contain a powdery residue. This power
consists primarily of cornstarch(used to lubricate the
bag as it inflates) and byproducts of the chemical
reaction.
Sodium hydroxide dust( similar to lye soap)
is produced as a byproduct
of the deployment
reaction.The sodium hydroxide then quickly reacts
with the atmospheric moisture and is converted to
sodium carbonate and sodium bicarbonate(baking
soda). Therefore, it is unlikely that sodium hydroxide
will be present after deployment. As a precaution,
however, gloves and safely glasses are
recommended to prevent any possible irritation of
the skin or eyes.
WARNING: SAFETY PRECAUTIONS MUST BE
OBSERVED WHEN
HANDING A DEPLOYED
INFLATOR MODULE. AFTER DEPLOYMENT, THE ~
METAL SURFACES OF THE INFLATOR MODULE
WILL BE VERY HOT. ALLOW THE INFLATOR
MODULE TO COOL BEFORE HANDLING ANY
METAL PORTION OF IT. DO NOT PLACE THE
DEPLOYED
INFLATOR MODULE NEAR ANY
FLAMMABLE OBJECTS.
FAILURE TO FOLLOW
PROCEDURES MAY RESULT
IN FIRE OR
PERSONAL INJURY.
After a driver inflator module has been deployed, the
metal canister and surrounding areas
of the driver
inflator module will
be very hot. Do not touch the metal
areas of the driver inflator module for about twenty
minutes after deployment.
If the deployed driver inflator
module must
be moved before it is cool, wear gloves and
handle by the air bag or trim cover.
21. Disconnect the pigtail adapter from the driver inflator
module as soon after deployment as possible. This
will prevent damage to the pigtail adapter or
SRS
deployment harness due to possible contact with the
hot driver inflator module canister. The pigtail can be
reused. They should, however, be inspected for
damage after each deployment and replaced if
necessary.
22. Dispose of the deployed driver inflator module
through normal refuse channels after it has cooled
for at least
20 minutes. ~
23. Wash your hands with mild soap and water
afterward.
NOTE: The remaining steps are to be followed in the
unlikely event that the driver inflator module did not
deploy after following these procedures.
24. Ensure that the
SRS deployment harness has been
disconnected from the power source and that its two
banana plugs have been shorted together by fully
seating one banana plug into the other.
25. Disconnect the pigtail
adapter from the driver inflator
module.
WARNING: WHEN STORING A LIVE INFLATOR
MODULE OR WHEN LEAVING A LIVE INFLATOR
MODULE UNATTENDED ON A BENCH OR OTHER
SURFACE, ALWAYS FACE THE BAG AND
TRIM
COVER
UP AND AWAY FROM THE SURFACE. THIS
IS
NECESSARY SO THAT A FREE SPACE
ISRPROVIDED TO ALLOW THE AIR BAG TO
EXPAND IN THE UNLIKELY EVENT OF ACCIDENTAL
DEPLOYMENT. FAILURE TO FOLLOW
PROCEDURES MAY RESULT IN PERSONAL
INJURY.
•
Page 1643 of 1928
~ Supplemental Restraint System 9J-19
26. Temporarily store the driver inflator module with its inflator module can be found in the applicable service
vinyl trim cover facing
up, away from the surface manual or in a service bulletin.
upon which is rests.
27.
Call the Technical Assistance group for further
assistance.
DEPLOYMENT OUTSIDE VEHICLE
(PASSENGER INFLATOR MODULE)
WARNING: FAILURE TO FOLLOW PROPER SRS
INFLATOR MODULE DISPOSAL PROCEDURES
CAN RESULT IN AIR BAG DEPLOYMENT WHICH
MAY CAUSE PERSONAL INJURY. UNDEPLOYED
INFLATOR MODULES MUST NOT BE DISPOSED OF
THROUGH NORMAL REFUSE CHANNELS. THE
UNDEPLOYED INFLATOR MODULE CONTAINS
SUBSTANCES
THAT CAN CAUSE SEVERE ILLNESS
OR
PERSONAL INJURY IF THE SEALED
CONTAINER IS DAMAGED DURING DISPOSAL.
DISPOSAL
IN ANY MANNER INCONSISTENT WITH
PROPER PROCEDURES MAY BE A VIOLATION OF
FEDERAL, STATE AND/OR LOCALLAWS.
Deployment out of the vehicle is proper when the vehicle
is to be returned to service. This includes, for example,
situations
in which a functionally or cosmetically deficient
inflator module
is replaced. Deployment and disposal of
an inflator module is, of course, subject to any required
reterntion period.
For deployment
of a live inflator module out of the
·'-" vehicle, the deployment procedure must be followed
exactly.
ALWAYS wear safety glasses during this
deployment procedure until the deployed inflator module
is scrapped. Before performing the procedures you
should
be familiar with servicing the SRS system and
with proper handling of the inflator module. Procedures
should be read fully before they are performed.
The following procedure requires use of J-41434
SIR
Deployment Harness with the appropriate pigtail
adapter. The procedure also requires the use of J-41497
Passenger
Side SRS Module Deployment Fixture. Do
not attempt this procedure without J-41434 and adapter,
and J-41497.
WARNING: FAILURE TO FOLLOW PROCEDURES
IN THE ORDER LISTED MAY RESULT IN PERSONAL
INJURY.
NEVER CONNECT DEPLOYMENT
HARNESS TO ANY POWER SOURCE BEFORE
CONNECTING DEPLOYMENT HARNESS TO THE
INFLATOR MODULE. DEPLOYMENT HARNESS
SHALL REMAIN SHORTED AND NOT BE
CONNECTED TO A POWER SOURCE UNTIL THE
AIRBAG IS TO BE DEPLOYED. THE INFLATOR
MODULE WILL IMMEDIATELY DEPLOY THE
AIRBAG WHEN A POWER SOURCE IS CONNECTED
TO IT. WEAR SAFETY GLASSES THROUGHOUT
THIS ENTIRE DEPLOYMENT AND DISPOSAL
~ PROCEDURE.
NOTE: This information applies only to passenger
inflator modules. Information for disposing of a live driver
1. Turn ignition switch to "LOCK", remove key, and put
on safety glasses.
2. Inspect J-41434 SRS Deployment Harness and
appropriate pigtail adapter for damage.
If harness or
pigtail is damaged, discard and obtain a
replacement.
Page 1645 of 1928
WARNING: ENSURE THAT THE PIGTAIL ADAPTOR
IS FIRMLY SEATED INTO THE INFLATOR MODULE
CONNECTOR. FAILURE TO FULLY SEAT THE
CONNECTORS MAY LEAVE THE SHORTING BAR
LOCATED IN THE INFLATOR MODULE
CONNECTOR FUNCTIONING (SHORTING THE
DEPLOYMENT CIRCUIT) AND MAY RESULT IN
NONDEPLOYMENT OF THE INFLATOR MODULE.
12.
Verify that the area around the inflator module is clear
of all people and loose or flammable objects.
13.
Verify that the inflator module is firmly and properly
in J-41497.
14. Notify
all people in the immediate area of your
intention to deploy the inflator module. The
deployment will be accompanied by a substantial
noise which may startle the uninformed.
15.
Separate the two banana plugs on the SRS
Deployment Harness that were shorted together in
Step 3.
NOTE: When air bag depolys, the rapid gas
expansion will create a substantial noise. Notify all
people in the immediate area that you intend to deploy
the inflator module.
WARNING: DEPLOYMENT HARNESS SHELL
REMAIN SHORTED AND NOT BE CONNECTED TO A
POWER SOURCE UNTIL THE AIR BAG IN TO BE
DEPLOYED. THE INFLATOR MODULE WILL
IMMEDIATELY DEPLOY THE AIR BAG WHEN A
POWER SOURCE IS CONNECTED TO IT.
CONNECTING
THE DEPLOYMENT HARNESS TO
THE POWER SOURCE SHOULD ALWAYS BE THE
LAST STEP IN THE INFLATOR MODULE
DEPLOYMENT PROCEDURE. FAILURE TO
FOLLOW PROCEDURES IN THE ORDER LISTED
MAY RESULT IN PERSONAL INJURY.
16. Connect the SRS Deployment Harness wires to the
power source to immediately deploy the inflator
module.
17. Disconnect the
SRS Deployment Harness from the
power source.
18.
Short the two SRS Deployment Harness leads
together by fully seating one banana plug into the
other.
19.
In the unlikely event that the inflator module did not
deploy after following these procedures, proceed
immediately with
Steps 24 through 27. If the inflator
module deployed
as intended, proceed with Steps 20
through 23.
20. Put on a pair of shop gloves to protect your hands
from possible irritation and heat when handling the
deployed inflator module. After the inflator module
has been deployed, the surface of the air bag may
contain a powdery residue. This powder consists
primarily of cornstarch (used to lubricate the bag as
it inflates) and byproducts of the chemical reaction.
Supplemental Restraint System 9J-21
Sodium hydroxide dust (similar to lye soap) is
produced as a byproduct of the deployment reaction.
The sodium hydroxide quickly reacts with the
atmospheric moisture and is convertered to sodium
carbonate and sodium bicarbonate (baking soda).
Therefore, it is unlikely that sodium hydroxide will
be
present for very long after deplyment. As a
precaution, however, gloves and safety glasses are
recommended to prevent any possible irritation of
the skin or eyes.
WARNING: SAFETY PRECAUTIONS MUST BE
OBSERVED WHEN HANDLING A DEPLOYED
INFLATOR MODULE. AFTER DEPLOYMENT, THE
METAL
SURFACES OF THE INFLATOR MODULE
WILL BE HOT. ALLOW THE INFLATOR MODULE TO
COOL
BEFORE HANDLING ANY METAL PORTION
OF
IT. DO NOT PLACE THE DEPLOYED INFLATOR
MODULE NEAR ANY FLAMMABLE OBJECTS.
FAILURE TO FOLLOW PROCEDURES MAY RESULT
IN FIRE OR PERSONAL INJURY.
AFTER AN INFLATOR MODULE HAS BEEN
DEPLOYED, THE METAL CANISTER AND
SURROUDING AREAS OF THE INFLATOR MODULE
WILL BE HOT. DO NOT TOUCH THE METAL AREAS
OF
THE INFLATOR MODULE FOR ABORT TWENTY
MINUTES AFTER DEPLOYMENT. IF THE DEPLOYED
INFLATOR MODULE MUST BE MOVED BEFORE IT
IS COOL,
WEAR GLOVES AND HANDLE BY THE AIR
BAG ITSELF.
21. Disconnect the pigtail adapter from the inflator
module as soon after deployment as possible to
avoid damage to the pigtail adaptor or SRS
Deployment Harness from contacting the hot inflator
module canister. The pigtail adapter and SIR
Deployment Harness are designed to be reused.
They should, however, be inspected for damage
after each deployment and replaced if necessary.
22. Dispose
of the deployed inflator module trough
normal refuse channels afterit has cooled for at least
20 minutes.
23. Wash
your hands with mild soap and water
afterward.
NOTE: The remaining steps are to be followed in the
unlikely event that the inflator module did not deploy after
following the above procedures.
24. Ensure that the
SRS Deplyment Harness has been
disconnected from the the power source and that its
two banana plugs have been shorted together by
fully seating one banana plug into the other.
25. Disconnect the pigtail adapter from the inflator
module.
WARNING: WHEN STORING A LIVE INFLATOR
MODULE OR WHEN LEAVING A LIVE INFLATOR
MODULE UNATTENDED ON A BENCH OR OTHER
SURFACE, ALWAYS
FACE THE BAG UP AND AWAY
FROM THE SURFACE. THIS IS NECESSARY SO
THAT A FREE SPACE IS PROVIDED TO ALLOW THE