body JAGUAR X308 1998 2.G Workshop Manual
[x] Cancel search | Manufacturer: JAGUAR, Model Year: 1998, Model line: X308, Model: JAGUAR X308 1998 2.GPages: 2490, PDF Size: 69.81 MB
Page 2040 of 2490
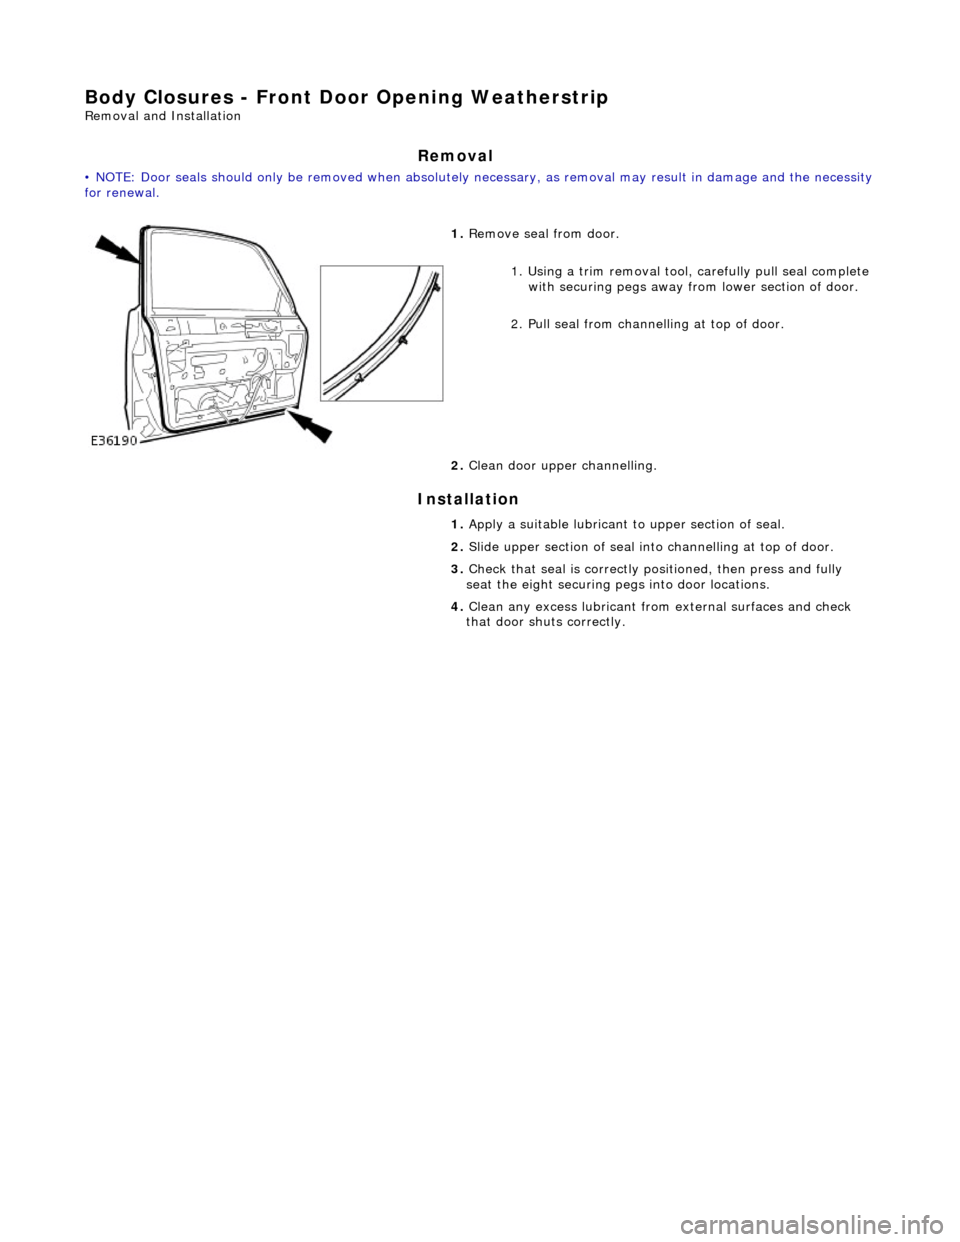
Body Closures - Front Door Opening Weatherstrip
Removal and Installation
Removal
• NOTE: Door seals should only be remove d when absolutely necessary, as removal may result in damage and the necessity for renewal.
Installation
1. Remove seal from door.
1. Using a trim removal tool, carefully pull seal complete
with securing pegs away from lower section of door.
2. Pull seal from chan nelling at top of door.
2. Clean door uppe r channelling.
1. Apply a suitable lubricant to upper section of seal.
2. Slide upper section of seal into channelling at top of door.
3. Check that seal is correctly positioned, then press and fully
seat the eight securing pegs into door locations.
4. Clean any excess lubricant from external surfaces and check
that door shuts correctly.
Page 2041 of 2490
Body Closures - Fuel Filler Door Removal and Installation
Removal
Installation
1.
Remove battery cover and disconnect ground cable from battery
terminal. Refer to Section 86.15.19.
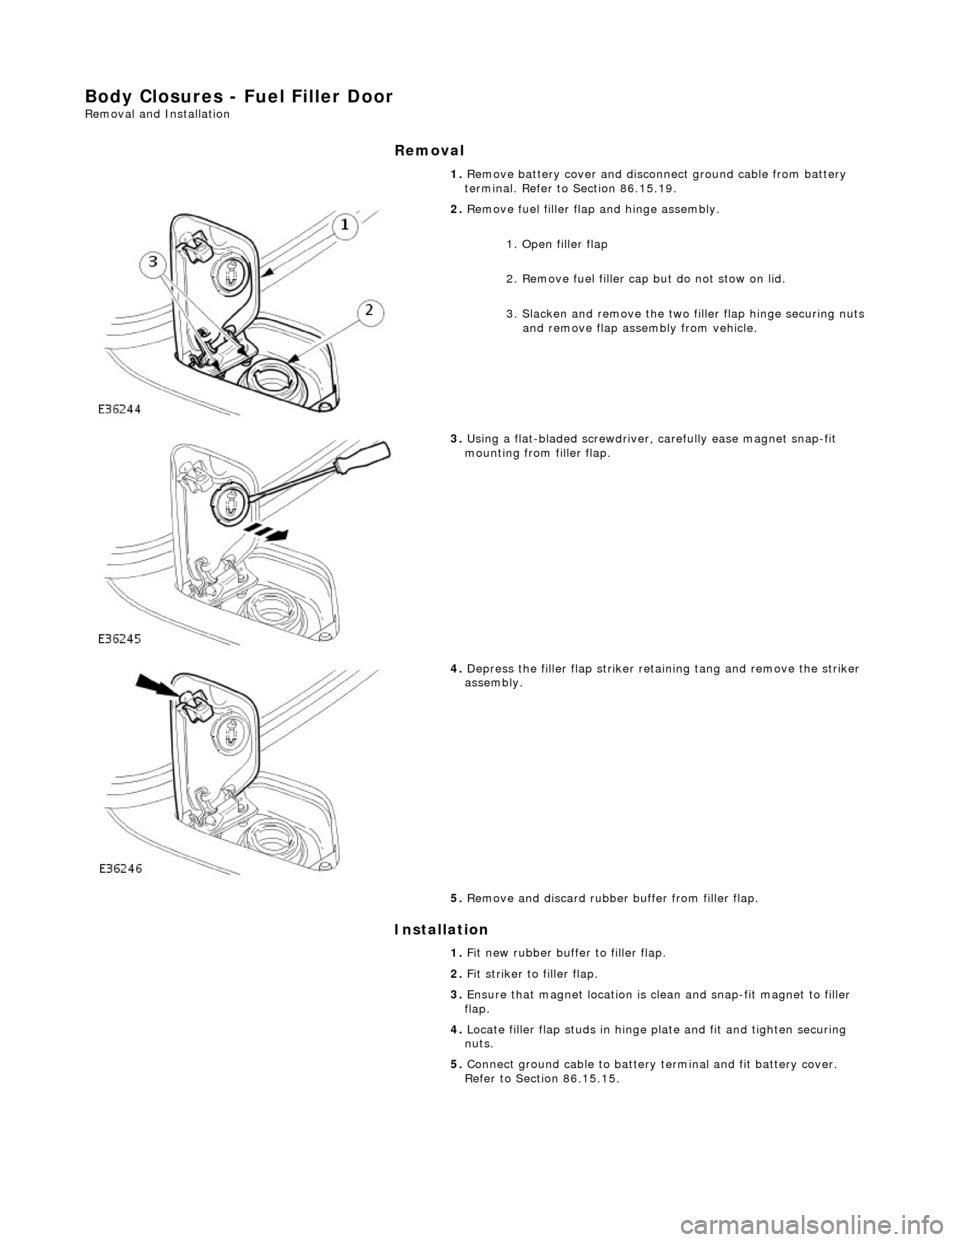
2. Remove fuel filler flap and hinge assembly.
1. Open filler flap
2. Remove fuel filler cap but do not stow on lid.
3. Slacken and remove the two filler flap hinge securing nuts and remove flap assembly from vehicle.
3. Using a flat-bladed screwdriver, carefully ease magnet snap-fit
mounting from filler flap.
4. Depress the filler flap striker retaining tang and remove the striker
assembly.
5. Remove and discard rubber buffer from filler flap.
1. Fit new rubber buffer to filler flap.
2. Fit striker to filler flap.
3. Ensure that magnet location is clean and snap-fit magnet to filler
flap.
4. Locate filler flap studs in hinge plate and fit and tighten securing
nuts.
5. Connect ground cable to battery terminal and fit battery cover.
Refer to Section 86.15.15.
Page 2042 of 2490
Body Closures - Hood
Removal and Installation
Removal
1. CAUTION: The hood assembly must be fully supported
throughout the following procedure.
Fit fender covers.
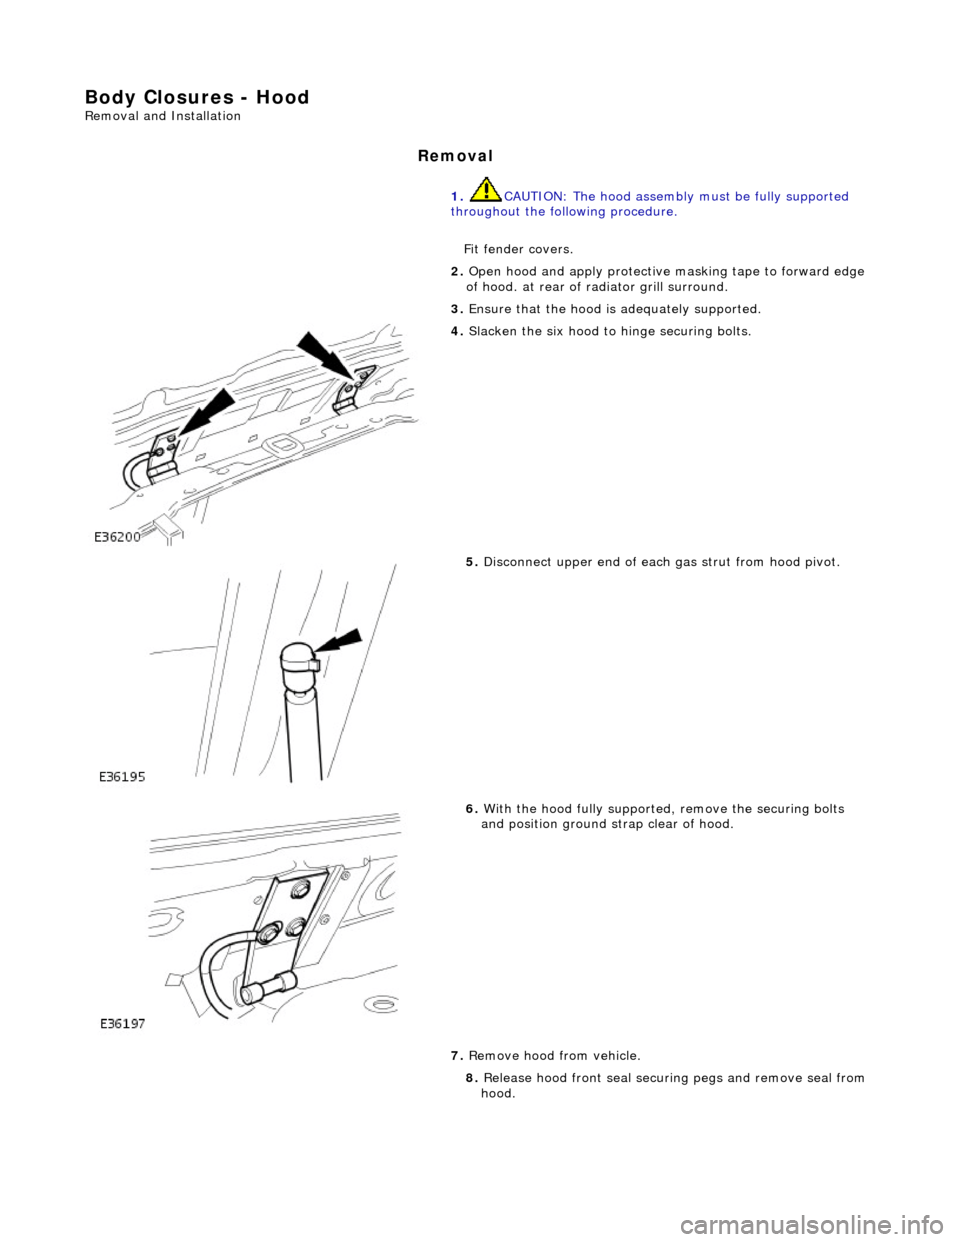
2. Open hood and apply protective masking tape to forward edge
of hood. at rear of ra diator grill surround.
3. Ensure that the hood is adequately supported.
4. Slacken the six hood to hinge securing bolts.
5. Disconnect upper end of each gas strut from hood pivot.
6. With the hood fully supported , remove the securing bolts
and position ground strap clear of hood.
7. Remove hood from vehicle.
8. Release hood front seal securi ng pegs and remove seal from
hood.
Page 2045 of 2490
Body Closures - Hood Hinge
Removal and Installation
Removal
Installation
1.
CAUTION: Before slackening hi nge bolts, ensure that the
hood is sufficiently supported to prevent damage to paintwork
and gas support struts.
Remove cover from battery and disconnect ground cable from
battery terminal. Refer to 86.15.19.
2. Open hood and fit fender covers.
3. Remove radiator grille. Refer to 76.55.03.
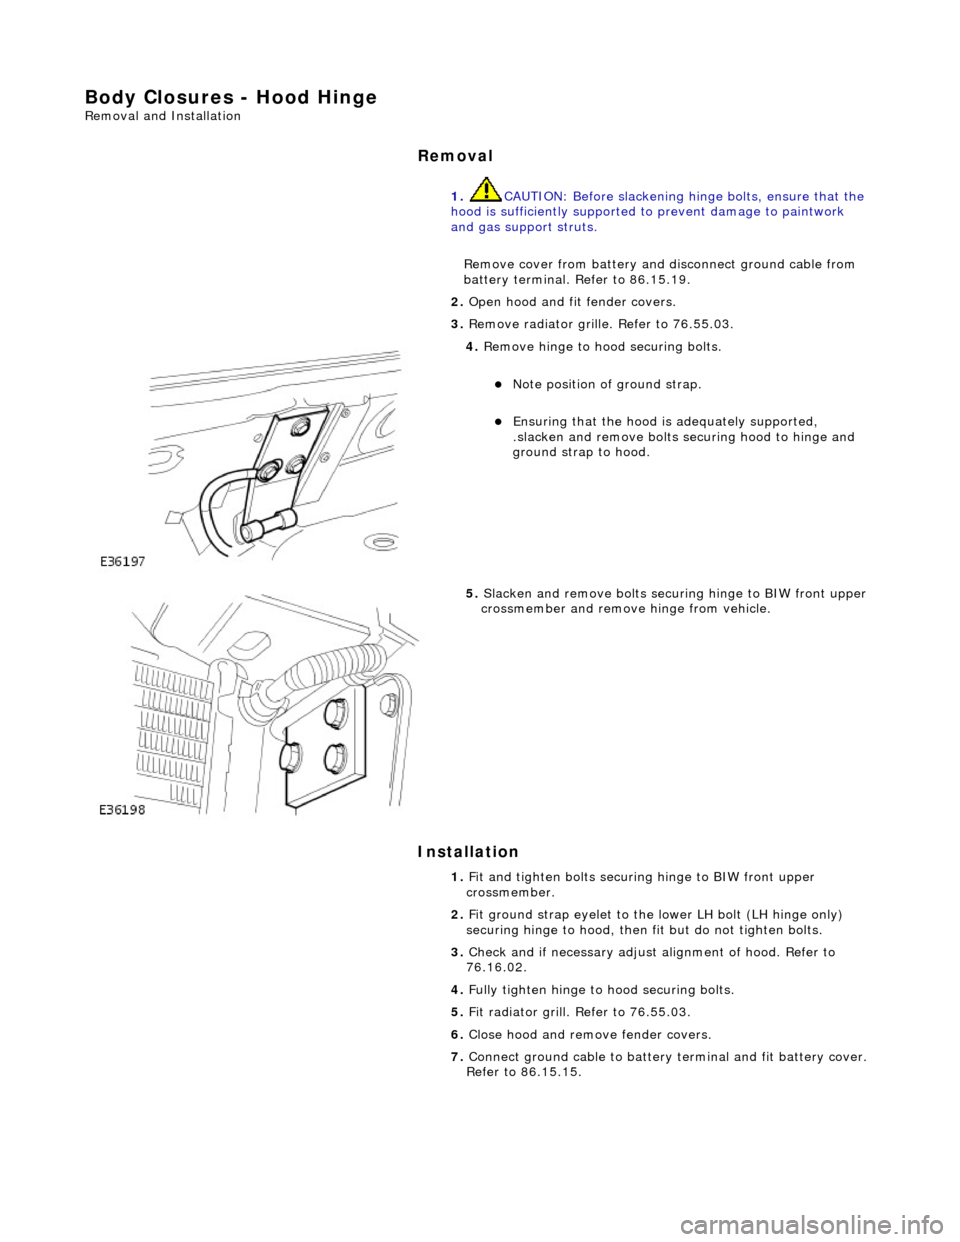
4. Remove hinge to hood securing bolts.
Note position of ground strap.
Ensuring that the hood is adequately supported,
.slacken and remove bolts se curing hood to hinge and
ground strap to hood.
5. Slacken and remove bolts securi ng hinge to BIW front upper
crossmember and remove hinge from vehicle.
1. Fit and tighten bolts securing hinge to BIW front upper
crossmember.
2. Fit ground strap eyelet to the lower LH bolt (LH hinge only)
securing hinge to hood, then fit but do not tighten bolts.
3. Check and if necessary adjust alignment of hood. Refer to
76.16.02.
4. Fully tighten hinge to hood securing bolts.
5. Fit radiator grill. Refer to 76.55.03.
6. Close hood and remove fender covers.
7. Connect ground cable to battery terminal and fit battery cover.
Refer to 86.15.15.
Page 2046 of 2490
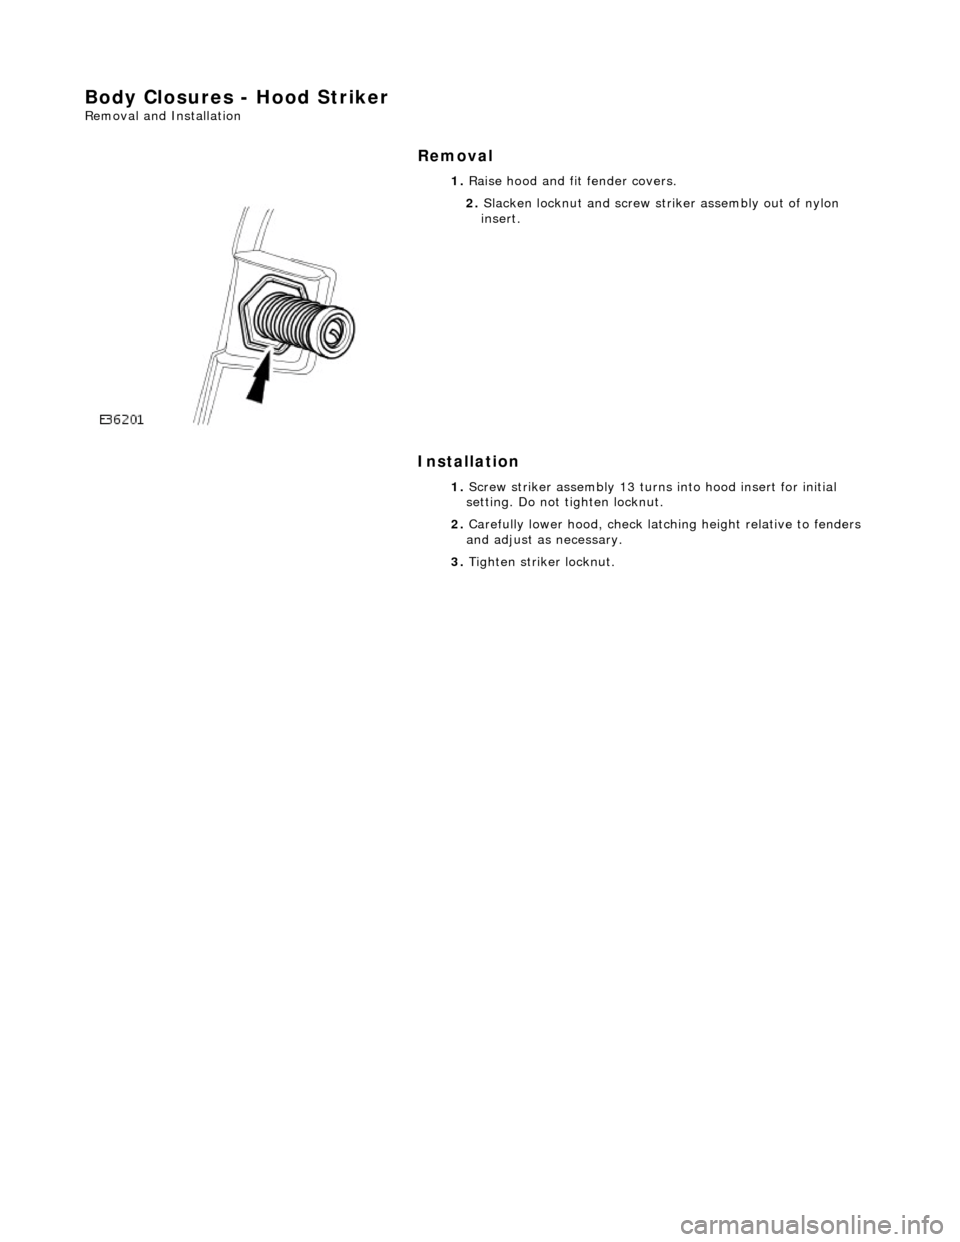
Body Closures - Hood Striker
Removal and Installation
Removal
Installation
1.
Raise hood and fit fender covers.
2. Slacken locknut and screw stri ker assembly out of nylon
insert.
1. Screw striker assembly 13 turns into hood insert for initial
setting. Do not tighten locknut.
2. Carefully lower hood, ch eck latching height relative to fenders
and adjust as necessary.
3. Tighten strike r locknut.
Page 2047 of 2490
Body Closures - Hood Strut
Removal and Installation
Removal
Installation
1.
Open hood and fit fender covers.
2. Install suitable supports for hood.
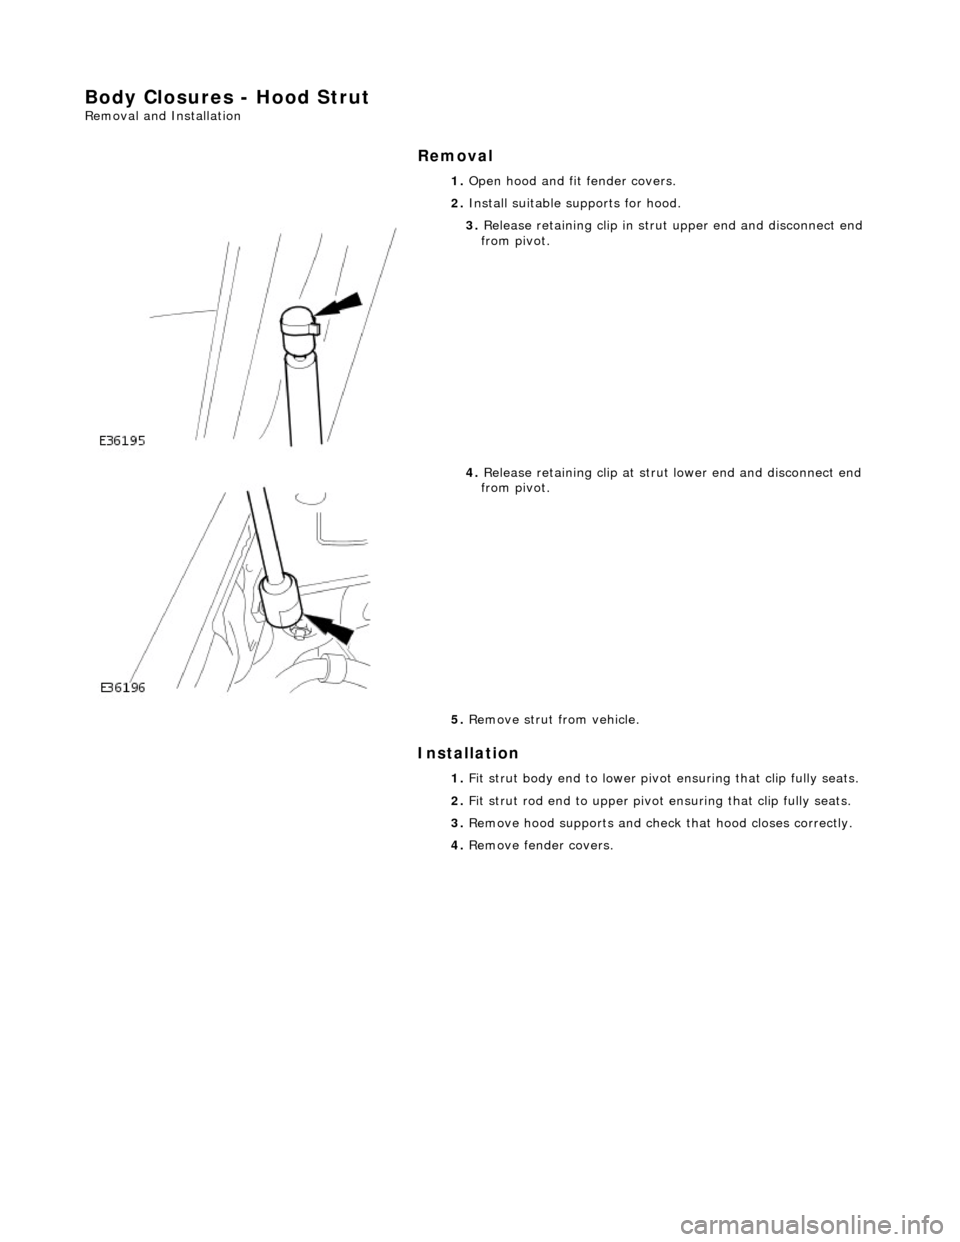
3. Release retaining clip in stru t upper end and disconnect end
from pivot.
4. Release retaining clip at stru t lower end and disconnect end
from pivot.
5. Remove strut from vehicle.
1. Fit strut body end to lower pivot ensuring that clip fully seats.
2. Fit strut rod end to upper pivot en suring that clip fully seats.
3. Remove hood supports and check that hood closes correctly.
4. Remove fender covers.
Page 2048 of 2490

Body Closures - Luggage Compartment Lid Hinge
Removal and Installation
Removal
Installation
1. CAUTION: Before slackening hi nge securing bolts, ensure
that trunk lid is sufficiently supported to prevent paintwork
damage .
Remove hinge cover.
2. Sever and discard tie straps se curing harness to hinge (RH
hinge only) and position harness clear of hinge.
3. Disconnect gas strut rod end from from hinge pivot. Refer to
76.19.27.
4. Slacken and remove bolts securing hinge to trunk lid.
5. Slacken and remove bolts securing hinge to underside of
BIW saddle panel.
6. Remove hinge from vehicle.
1. Fit and tighten bolts securing hinge to BIW saddle panel.
2. Fit but do not tighten bolts se curing hing to trunk lid.
Page 2050 of 2490

Body Closures - Luggage Compartment Lid Opening Weatherstrip
Removal and Installation
Removal
Installation
1.
Remove trunk rear finisher. Refer to 76.19.44.
2. Commencing at front of trunk aperture, withdraw seal from
flange, exercising care on re aching bonded joint at latch
striker.
3. Clean trunk flange.
1. Commencing with bonded joint at latch striker, press seal onto
trunk flange.
2. Applying light tension, progress around trunk aperture firmly
seating seal onto flange.
3. Check that seal is free from kinks and trunk lid closes correctly.
4. Fit trunk rear finish er. Refer to 76.19.44.
Page 2051 of 2490

Body Closures - Luggage Compartment Lid Striker
Removal and Installation
Removal
Installation
1.
Remove rear finisher. Refer to 76.19.44.
2. Lightly mark position of stri ker top edge on rear panel.
3. Slacken and remove the two bolts and spring washers securing
striker to trunk rear panel.
4. Remove striker fro m rear panel.
1. Position striker on rear panel, aligning top edge with mark.
2. Fit and lightly tighten securing bolts with spring washers.
3. Shut trunk lid and check alignment with rear fenders.
4. If necessary, slacken securing bolts and adjust striker position
as required.
5. Fit trunk rear finish er. Refer to 76.19.44.
Page 2052 of 2490

Body Closures - Luggage Compartment Lid Strut
Removal and Installation
Removal
Installation
1.
Remove trunk front liner. Refer to 76.19.31.
2. Place a suitable support under trunk lid.
3. Release strut from pivots.
1. Using a screwdriver, rele ase clip at rear end of
strut, withdraw end from trunk lid pivot and lower
strut for access.
2. Using a long screwdriver, release clip at front end of strut, withdraw end fro m pivot and remove strut
from vehicle.
1. Extend strut and fit front end onto pivot ensuring that retaining
clip fully seats.
2. Fit rear end of strut onto lid pi vot ensuring that retaining clip
fully seats.
3. Remove lid support and check that lid closes correctly.
4. Fit trunk front liner. Refer to 76.19.31.