body JAGUAR X308 1998 2.G Workshop Manual
[x] Cancel search | Manufacturer: JAGUAR, Model Year: 1998, Model line: X308, Model: JAGUAR X308 1998 2.GPages: 2490, PDF Size: 69.81 MB
Page 2246 of 2490
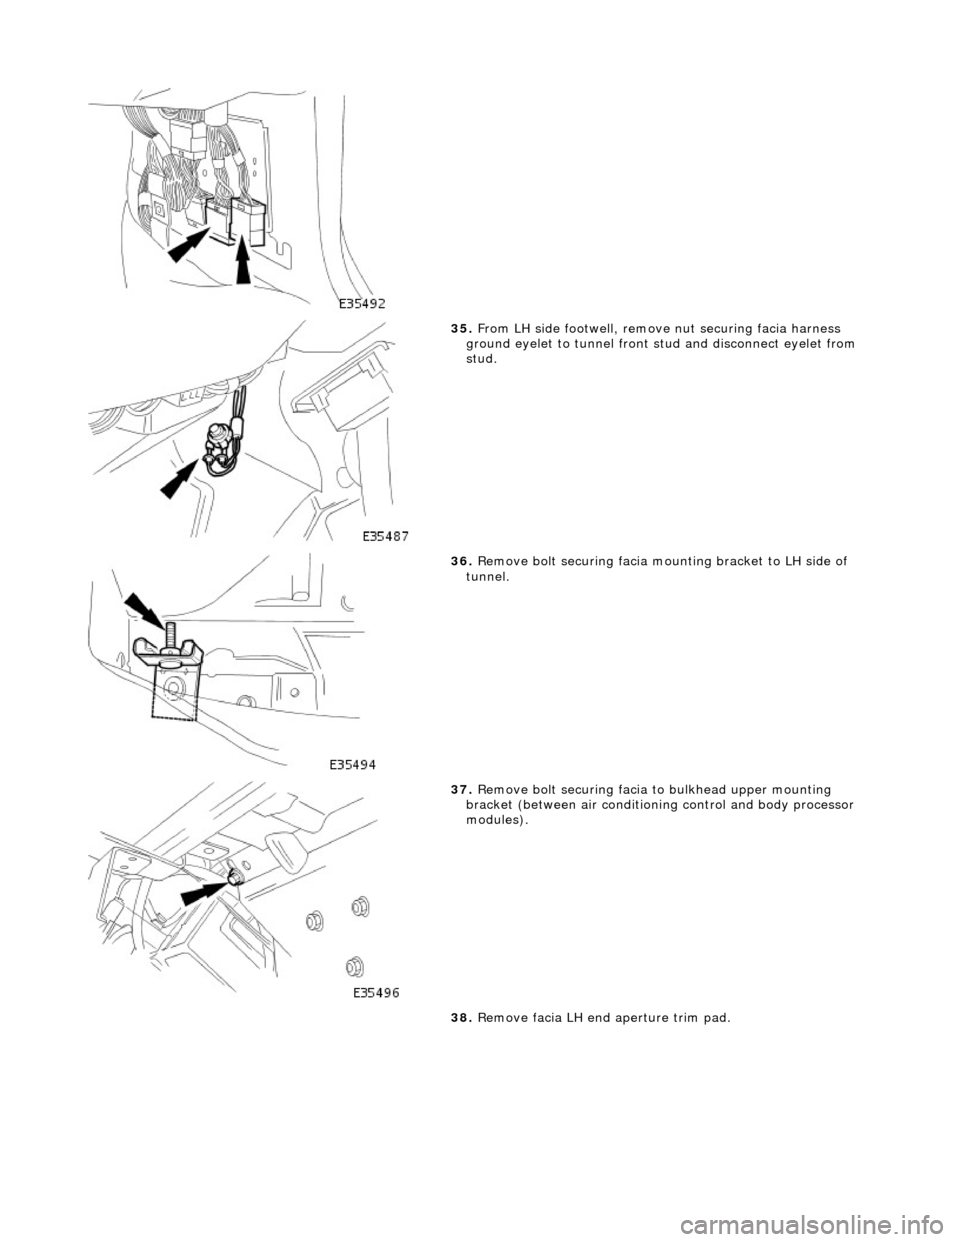
35. From LH side footwell, remove nut securing facia harness
ground eyelet to tunnel front stud and disconnect eyelet from
stud.
36. Remove bolt securing facia moun ting bracket to LH side of
tunnel.
37. Remove bolt securing facia to bulkhead upper mounting
bracket (between air conditioni ng control and body processor
modules).
38. Remove facia LH end aperture trim pad.
Page 2247 of 2490
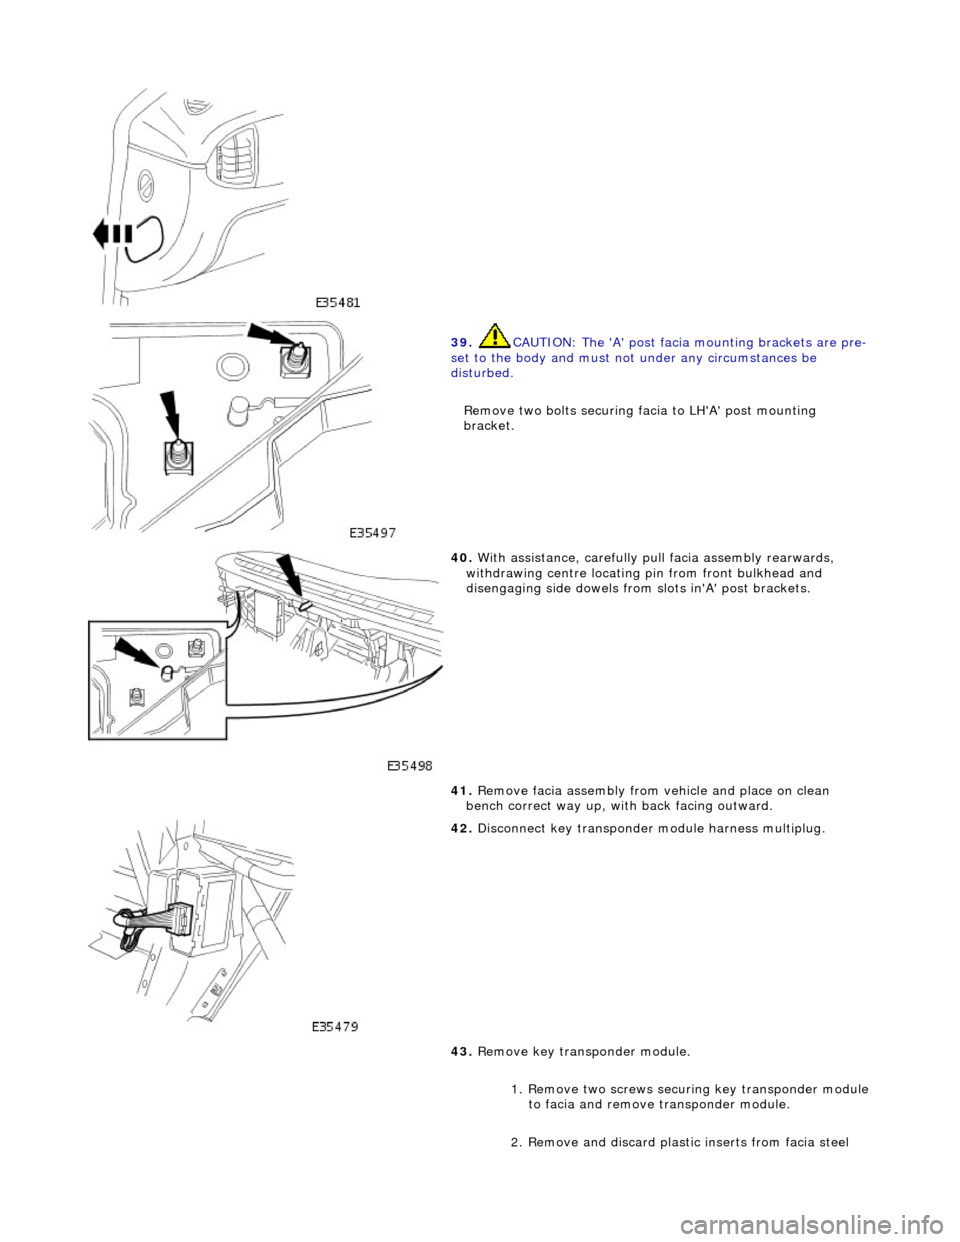
39. CAUTION: The 'A' post facia mounting brackets are pre-
set to the body and must no t under any circumstances be
disturbed.
Remove two bolts securing facia to LH'A' post mounting
bracket.
40. With assistance, carefully pull facia assembly rearwards,
withdrawing centre locating pin from front bulkhead and
disengaging side dowels from slots in'A' post brackets.
41. Remove facia assembly from vehicle and place on clean
bench correct way up, with back facing outward.
42. Disconnect key transponder module harness multiplug.
43. Remove key transponder module.
1. Remove two screws securi ng key transponder module
to facia and remove transponder module.
2. Remove and discard plastic inserts from facia steel
Page 2248 of 2490

reinforcement.
44. Remove illumination control module.
1. Disconnect illumination control module harness
multiplug.
2. Slide module upwards to release it from facia.
45. Remove captive bolt retaining body processor module harness multiplug and disconnect multiplug.
46. Remove three nuts securing body processor module to facia
and remove module.
47. Turn facia around to fa ce outwards on bench.
48. Remove instrument panel veneer. Refer to 76.47.24.
49. Remove major gauge module. Refer to 88.20.24.
50. Remove and discard instrument panel veneer retaining plastic
inserts from facia.
51. Release in-car sensor/trunk release switch assembly from
facia for access and disconnect trunk release switch harness
Page 2257 of 2490

23. WARNING: ENSURE THAT THE AIR BAG AND
RETAINING CLIPS ARE FULLY SEATED.
Install deployment door.
Install and fully seat deployment door retaining clips in
facia.
Install and fully seat deployment door in clips.
24. Position trunk release switch/housing at facia and connect in-
car sensor to housing.
25. Connect trunk release switch multiplug to facia harness and
install in-car sensor/trunk release switch assembly to facia.
26. Install new major gauge module retaining screw inserts to
facia.
27. Install major gauge module in facia. Refer to 88.20.24.
28. Install instrument panel veneer panel. Refer to 76.47.24.
29. Reposition facia on bench wi th back facing outwards.
30. Position body processor module in facia and install securing
nuts.
Page 2258 of 2490

31. Connect body processor module harness multiplug to facia
harness and tighten captive securing bolt.
32. Install illumination control module on facia. mounting.
1. Connect module to facia harness multiplug.
2. Slide module downward to secure on mounting bracket.
33. Install new key transponder module securing screw plastic
inserts to facia. Position key transponder module in facia and
install securing screws.
34. Connect key transponder module harness multiplug to facia
harness.
Page 2259 of 2490
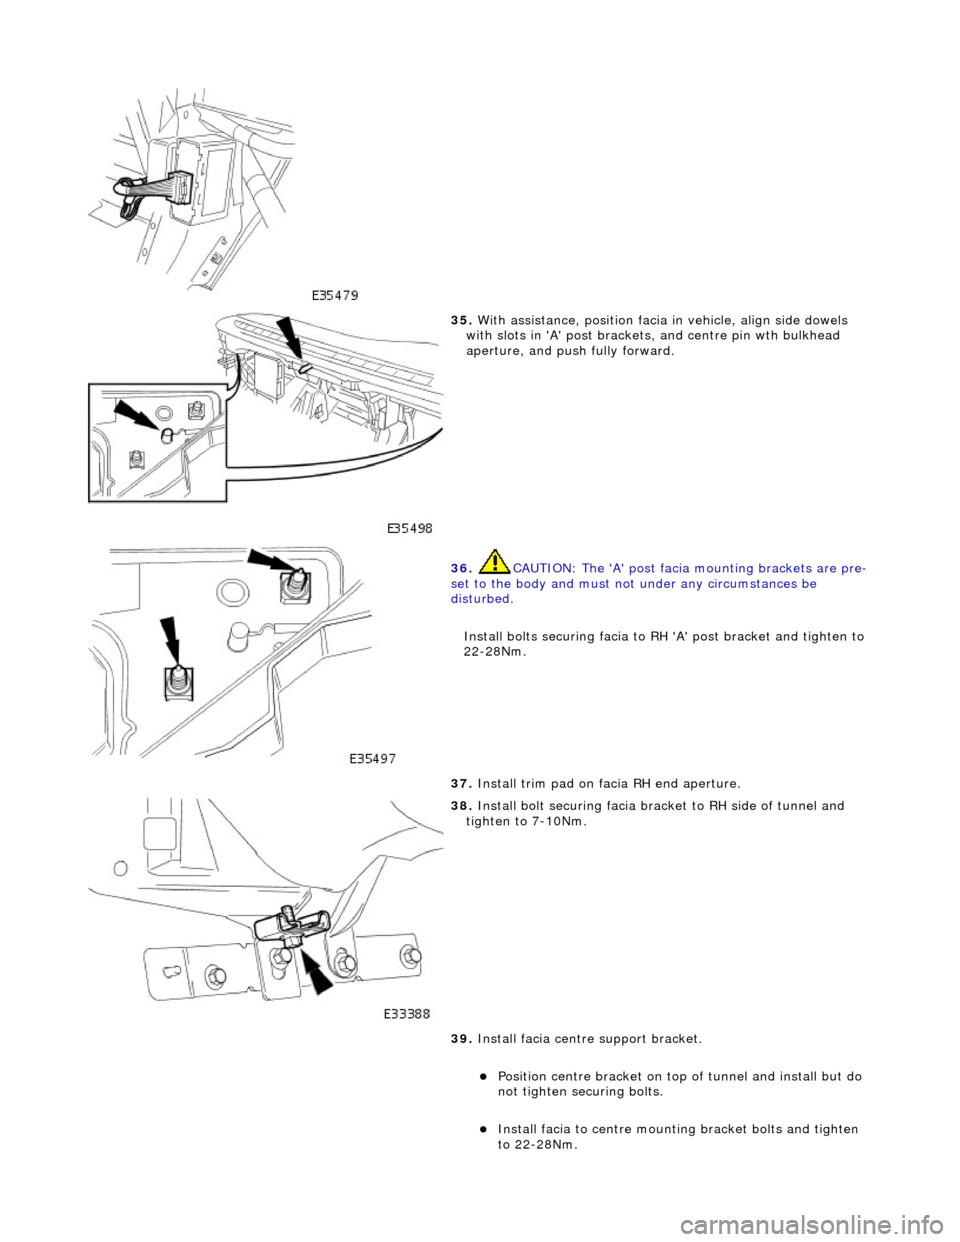
35. With assistance, position facia in vehicle, align side dowels
with slots in 'A' post brackets , and centre pin wth bulkhead
aperture, and push fully forward.
36. CAUTION: The 'A' post facia mounting brackets are pre-
set to the body and must no t under any circumstances be
disturbed.
Install bolts securing facia to RH 'A' post bracket and tighten to
22-28Nm.
37. Install trim pad on facia RH end aperture.
38. Install bolt securing facia brac ket to RH side of tunnel and
tighten to 7-10Nm.
39. Install facia centre support bracket.
Position centre bracket on top of tunnel and install but do
not tighten securing bolts.
Install facia to centre mounting bracket bolts and tighten
to 22-28Nm.
Page 2260 of 2490
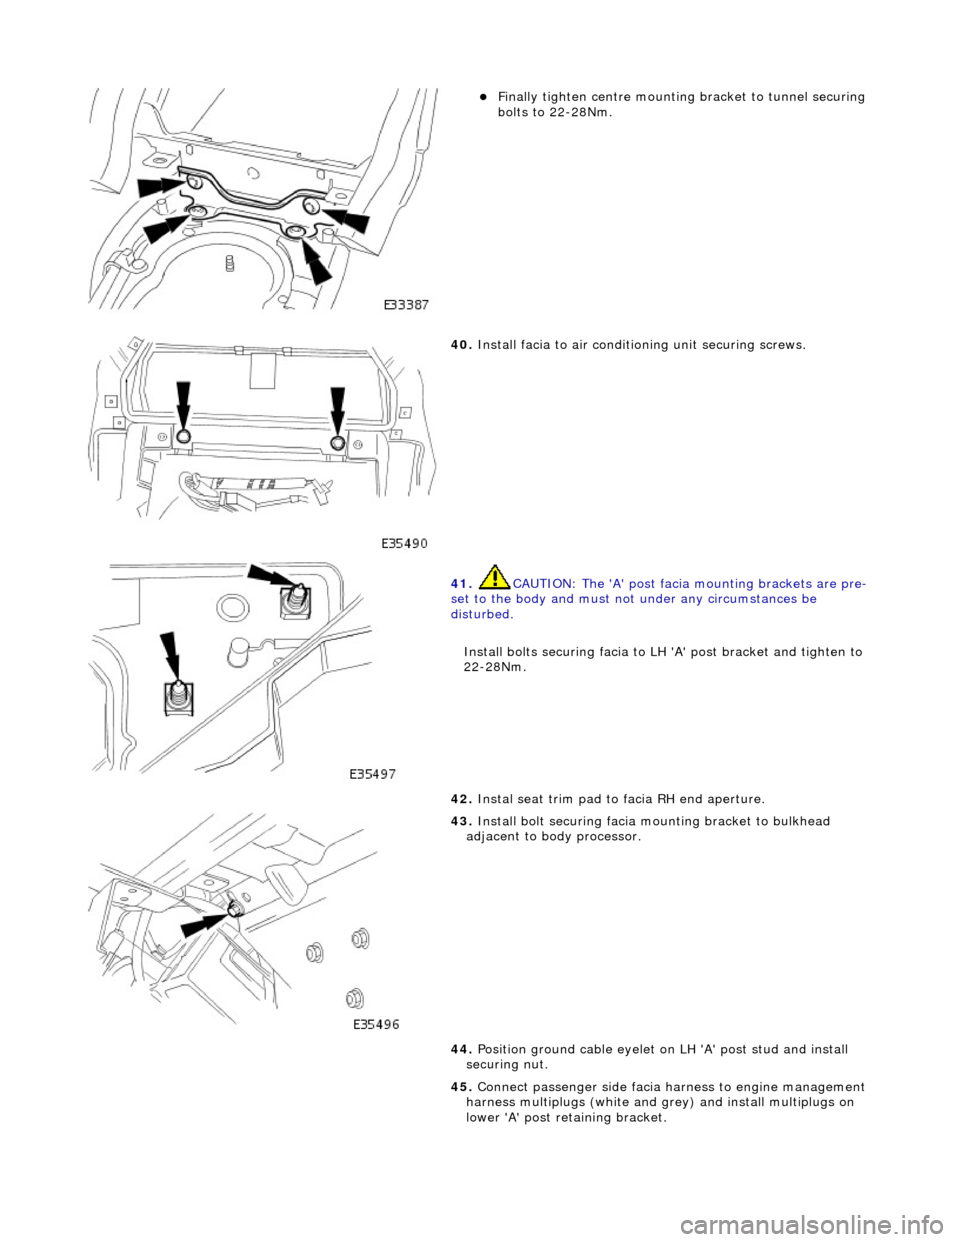
Finally tighten centre mounting bracket to tunnel securing
bolts to 22-28Nm.
40. Install facia to air conditioning unit securing screws.
41. CAUTION: The 'A' post facia mounting brackets are pre-
set to the body and must no t under any circumstances be
disturbed.
Install bolts securing facia to LH 'A' post bracket and tighten to
22-28Nm.
42. Instal seat trim pad to facia RH end aperture.
43. Install bolt securing facia mounting bracket to bulkhead
adjacent to body processor.
44. Position ground cable eyelet on LH 'A' post stud and install
securing nut.
45. Connect passenger side facia harness to engine management
harness multiplugs (white and gr ey) and install multiplugs on
lower 'A' post retaining bracket.
Page 2307 of 2490
cooling duct.
The windshield washer is operated by pressing the button at the end of the wiper control stalk switch. Pressing and
releasing the button operates the washer for 1 to 1.4 seconds and the wiper completes three sweeps. An optional drip wipe
function adds a further sweep of the wiper after a 4 second delay, to clear residual fluid from the windshield. If the button is
held depressed, the washer and wiper will operate continuous ly for up to 20 seconds. When the button is released, the
wiper will again complete three further sweeps.
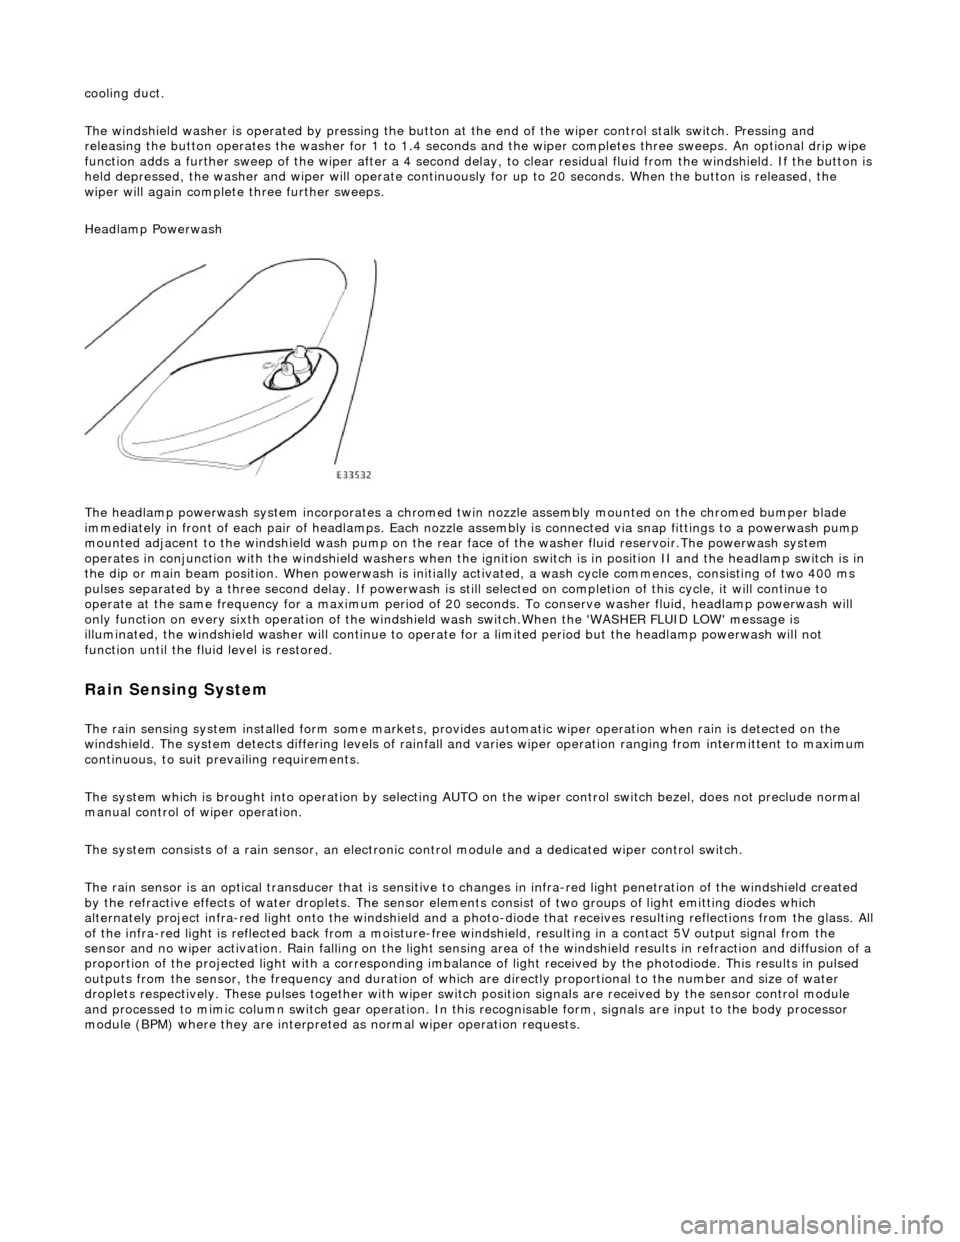
Headlamp Powerwash
The headlamp powerwash system incorporates a chromed twin nozzle assembly mounted on the chromed bumper blade
immediately in front of each pair of he adlamps. Each nozzle assembly is connected via snap fittings to a powerwash pump
mounted adjacent to the windshield wash pump on the rear face of the washer fluid reservoir.The powerwash system
operates in conjunction with the windshield washers when the ignition switch is in position II and the headlamp switch is in
the dip or main beam position. When powerwash is initially activated, a wash cycle commences, consisting of two 400 ms
pulses separated by a three second delay. If powerwash is still selected on completion of this cycle, it will continue to
operate at the same frequency for a maximum period of 20 se conds. To conserve washer fluid, headlamp powerwash will
only function on every sixth operation of the windshie ld wash switch.When the 'WASHER FLUID LOW' message is
illuminated, the windshield washer will continue to operat e for a limited period but the headlamp powerwash will not
function until the fluid level is restored.
Rain Sensing System
The rain sensing system installed form so me markets, provides automatic wiper operation when rain is detected on the
windshield. The system detects differing le vels of rainfall and varies wiper operation ranging from intermittent to maximum
continuous, to suit prevailing requirements.
The system which is brought into operation by selecting AUTO on the wiper control switch bezel, does not preclude normal
manual control of wiper operation.
The system consists of a rain sensor, an electronic control module and a dedicated wiper control switch.
The rain sensor is an optical transducer that is sensitive to changes in infra-red light penetration of the windshield created
by the refractive effects of water drople ts. The sensor elements consist of two groups of light emitting diodes which
alternately project infra-red light onto th e windshield and a photo-diode that receiv es resulting reflections from the glass. A ll
of the infra-red light is reflected back from a moisture-free windshield, resulting in a contact 5V output signal from the
sensor and no wiper activation. Rain falling on the light sensing area of the wi ndshield results in refraction and diffusion of a
proportion of the projected light with a corresponding imbalance of light received by the photodiode. This results in pulsed
outputs from the sensor, the frequency and duration of which are directly proportional to the number and size of water
droplets respectively. These pulses together with wiper switch position signals are received by the sensor control module
and processed to mimic column switch gear operation. In this recognisable form, signals are input to the body processor
module (BPM) where they are interprete d as normal wiper operation requests.
Page 2308 of 2490

The rain sensor unit is installed on the inside of the windshield within the rear view mirror stem cover. The unit is secured t o
the glass by a special adhesive th at facilitates service removal. When installing a rain sensor unit, it must be positioned in
the clear circle within the obscuration band.
The rain sensor control module is a non- serviceable unit installed in the engine bay cool box and connected to the rain
sensor unit and the body processor module.
Page 2317 of 2490
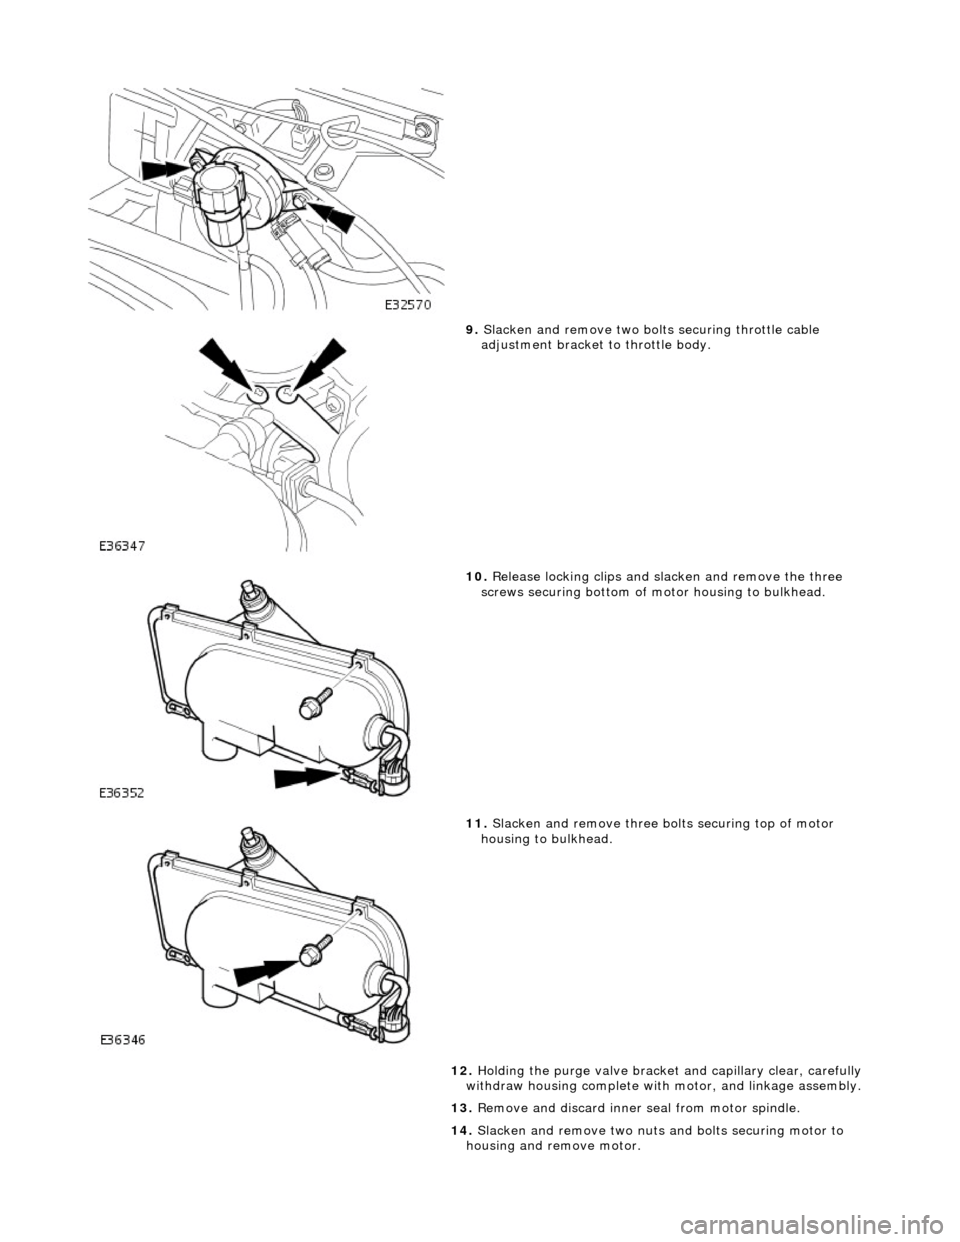
9. Slacken and remove two bolts securing throttle cable
adjustment bracket to throttle body.
10. Release locking clips and sl acken and remove the three
screws securing bottom of motor housing to bulkhead.
11. Slacken and remove three bo lts securing top of motor
housing to bulkhead.
12. Holding the purge valve bracket and capillary clear, carefully
withdraw housing complete with motor, and linkage assembly.
13. Remove and discard inner seal from motor spindle.
14. Slacken and remove two nuts and bolts securing motor to
housing and remove motor.