JAGUAR XFR 2010 1.G Workshop Manual
XFR 2010 1.G
JAGUAR
JAGUAR
https://www.carmanualsonline.info/img/21/7642/w960_7642-0.png
JAGUAR XFR 2010 1.G Workshop Manual
Page 985 of 3039
Engine - V8 S/C 5.0L Petrol - Flexplate
Removal and Installation
Removal
NOTE: Removal steps in this procedure may contain installation details. Published: 11-May-2011
1. Refer to: Battery Disconnect and Connect (414-01 Battery, Mounting and Cables, General Procedures).
2. CAUTION: Make sure to support the vehicle with axle stands.
Raise and support the vehicle.
3. Refer to: Transmission - V8 5.0L Petrol/V8 S/C 5.0L Petrol (307-01B Automatic Transmission/Transaxle - TDV6 3.0L Diesel /V8 5.0L Petrol/V8
S/C 5.0L Petrol, Removal).
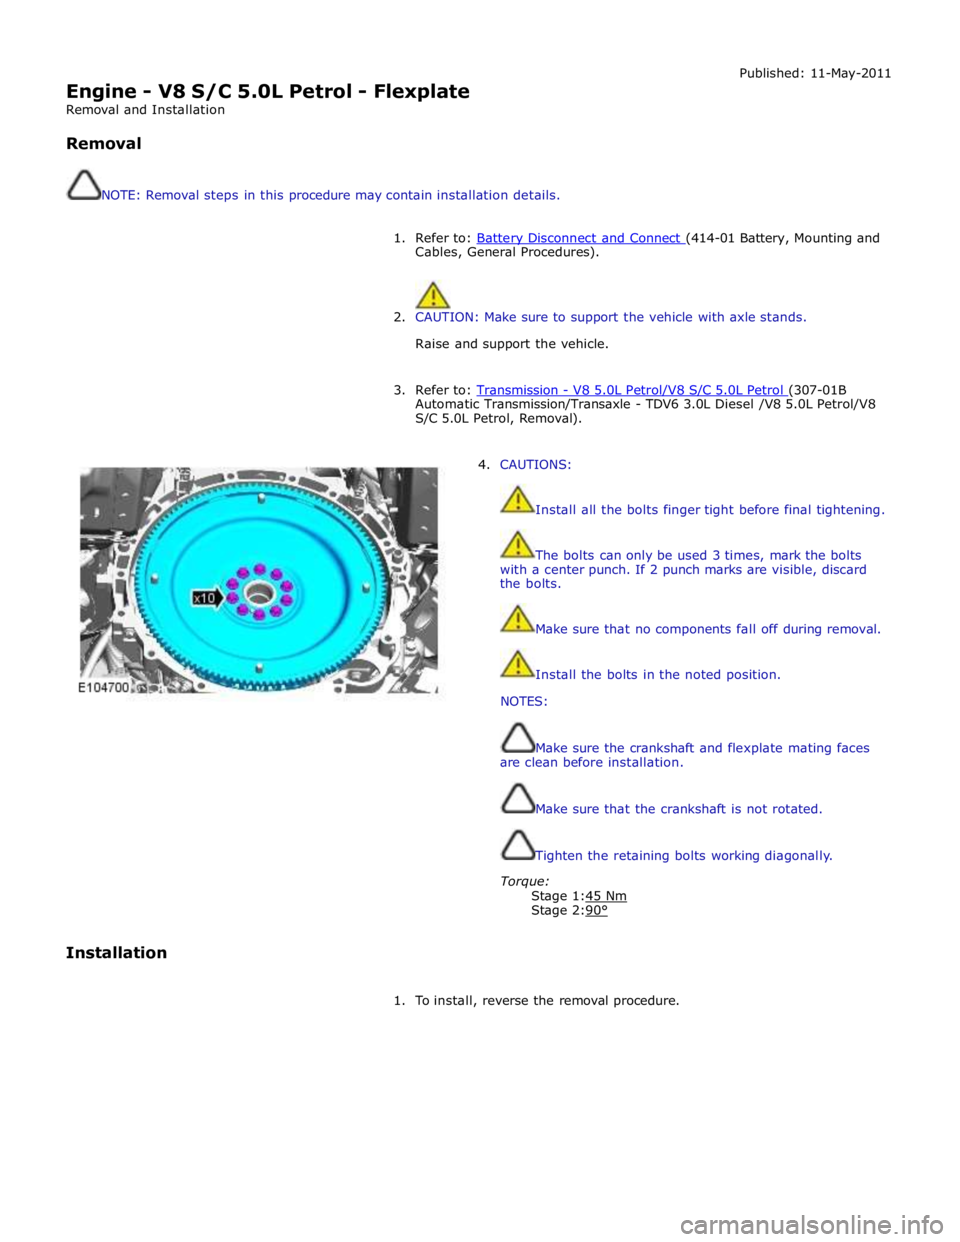
4. CAUTIONS:
Install all the bolts finger tight before final tightening.
The bolts can only be used 3 times, mark the bolts
with a center punch. If 2 punch marks are visible, discard
the bolts.
Make sure that no components fall off during removal.
Install the bolts in the noted position.
NOTES:
Make sure the crankshaft and flexplate mating faces
are clean before installation.
Make sure that the crankshaft is not rotated.
Tighten the retaining bolts working diagonally.
Torque:
Stage 1:45 Nm Stage 2:90°
Installation
1. To install, reverse the removal procedure.
Page 987 of 3039
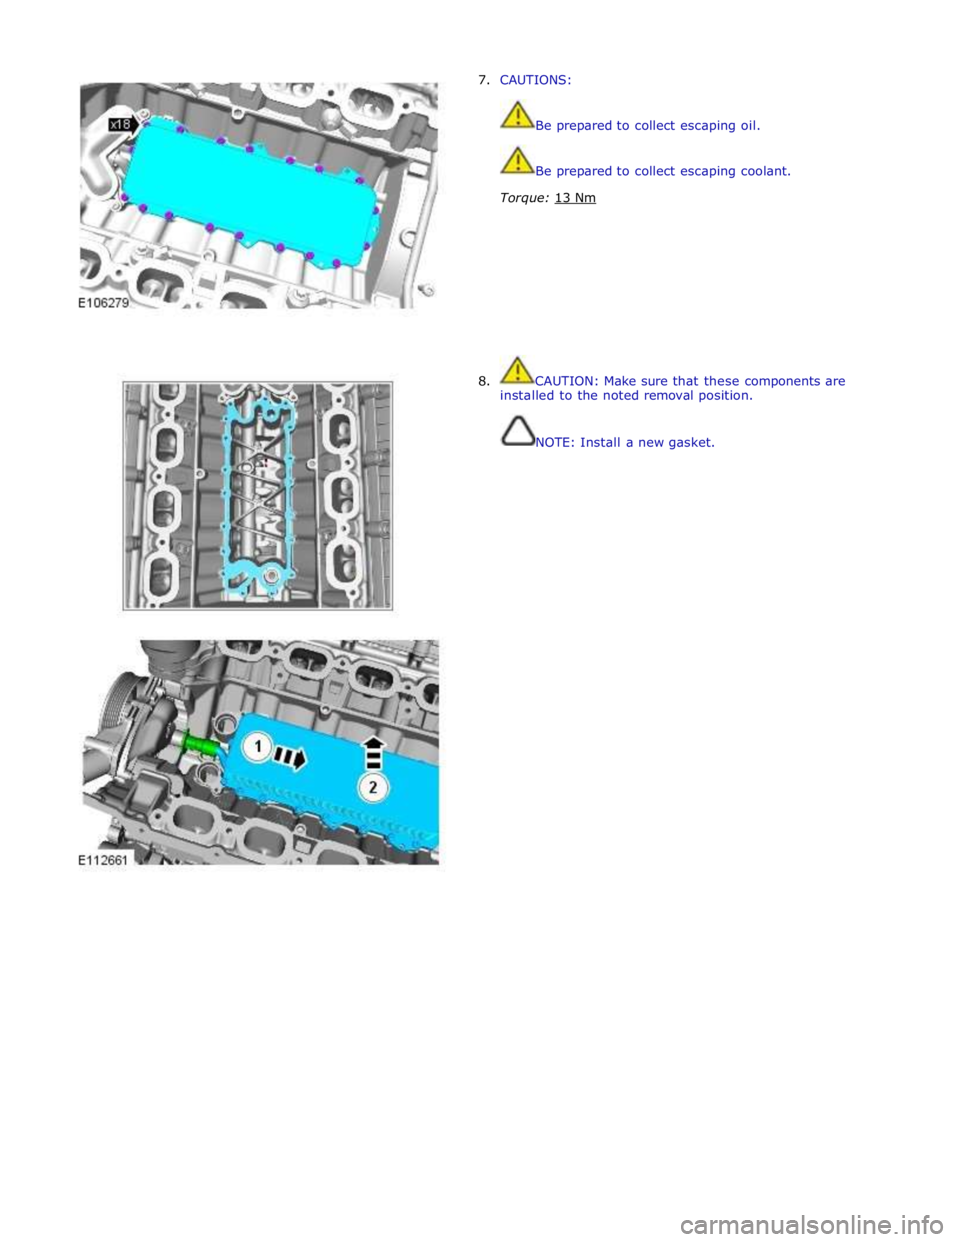
7. CAUTIONS:
Be prepared to collect escaping oil.
Be prepared to collect escaping coolant.
Torque: 13 Nm
8. CAUTION: Make sure that these components are
installed to the noted removal position.
NOTE: Install a new gasket.
Page 992 of 3039
Installation
1. CAUTIONS:
Use only a plastic scraper when removing the sealing
material.
Use lint free cloth.
Make sure that the mating faces are clean and free of
corrosion and foreign material.
Apply RTV sealant WSE-M4G323-A6 (Loctite 5901G)
to the areas shown, and tighten the bolts within 7
minutes.
Apply a bead of sealant, 2.5 mm diameter, to the
area indicated.
2. NOTE: Tighten the bolts in the sequence shown.
Torque: 12 Nm
3. Refer to: Engine Oil Level Sensor (303-14D Electronic Engine Controls - V8 S/C 5.0L Petrol, Removal and Installation).
Page 1003 of 3039
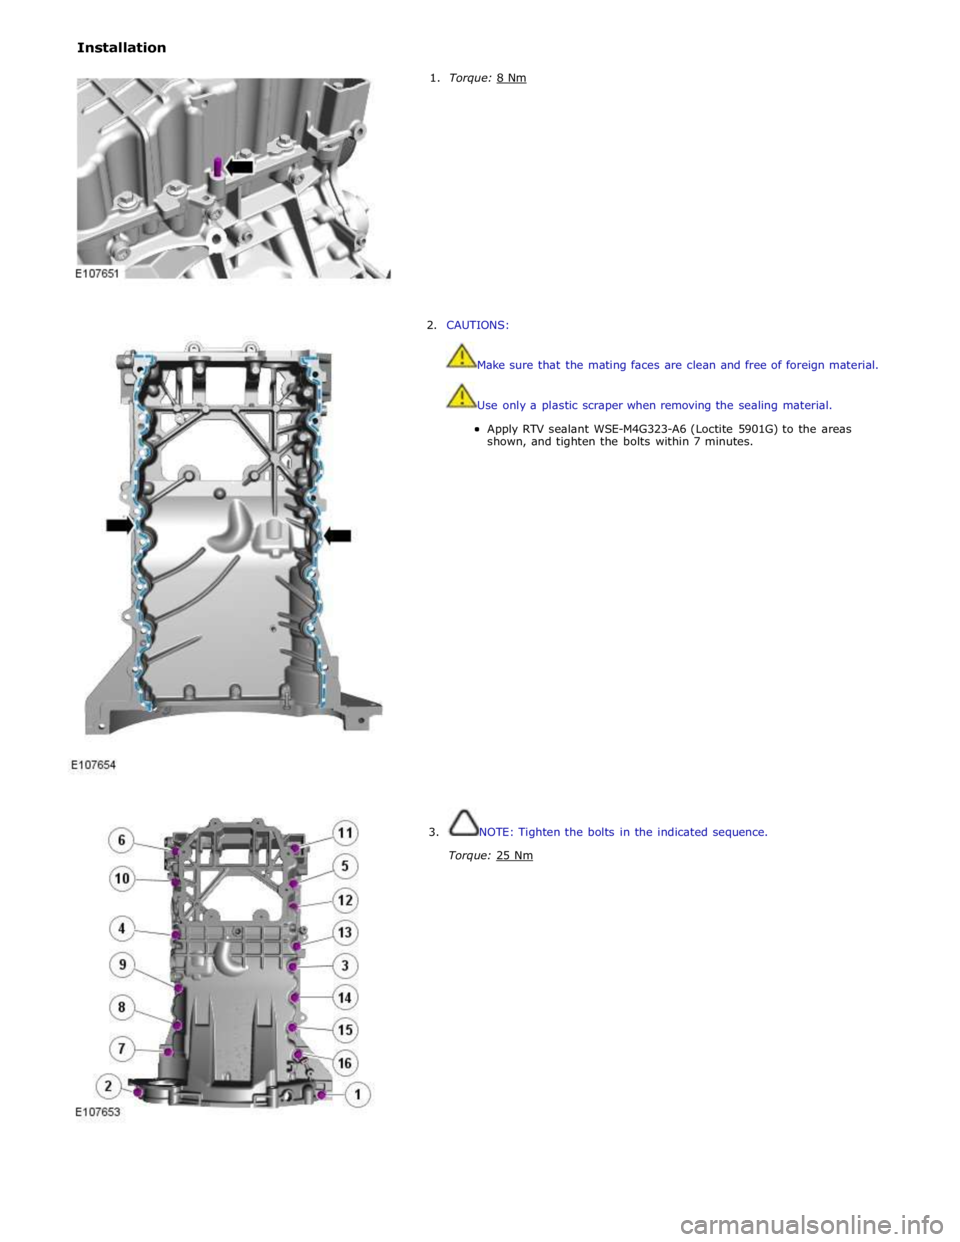
Installation
1. Torque: 8 Nm 2. CAUTIONS:
Make sure that the mating faces are clean and free of foreign material.
Use only a plastic scraper when removing the sealing material.
Apply RTV sealant WSE-M4G323-A6 (Loctite 5901G) to the areas
shown, and tighten the bolts within 7 minutes.
3. NOTE: Tighten the bolts in the indicated sequence.
Torque: 25 Nm
Page 1004 of 3039
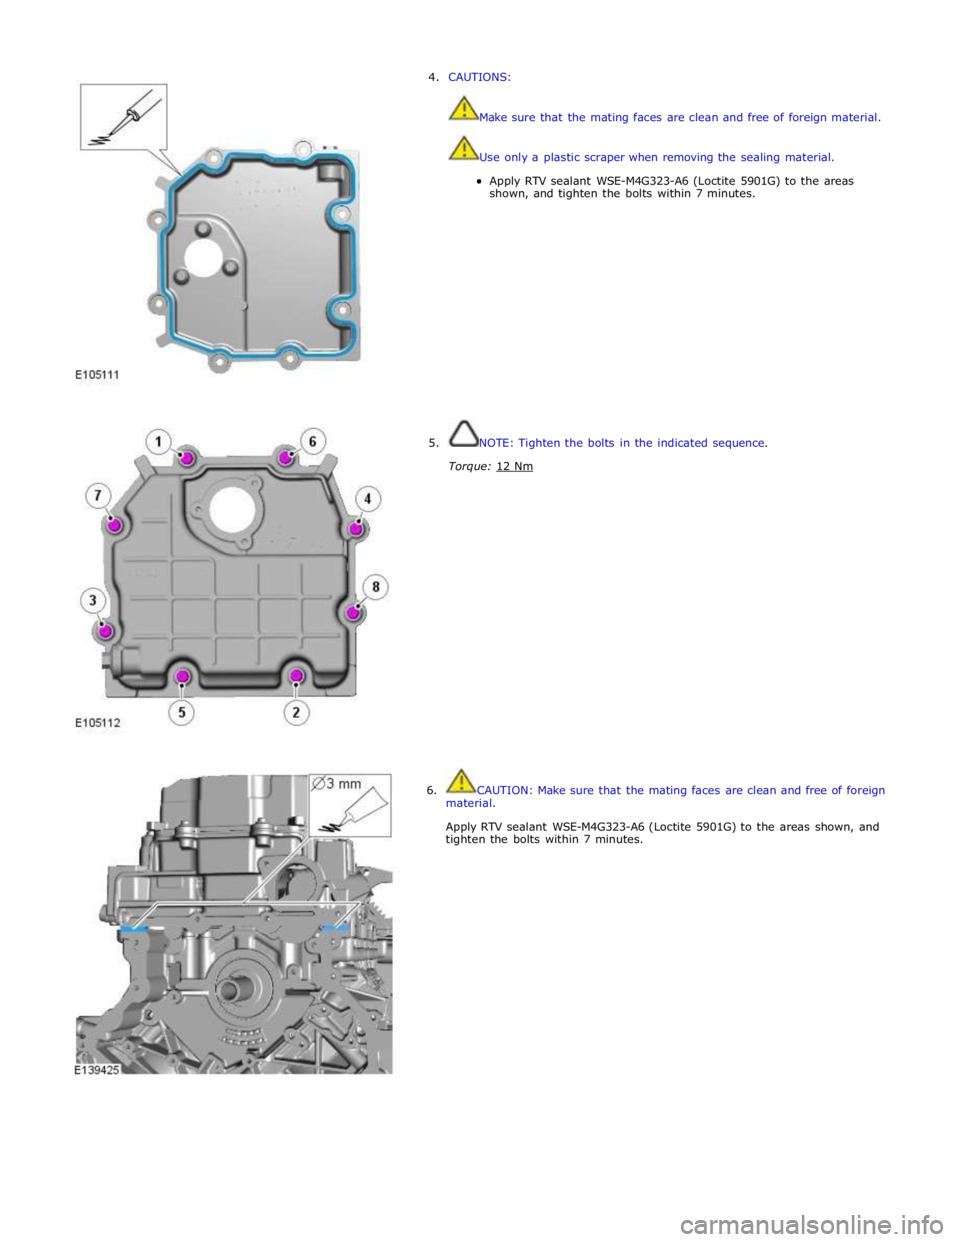
4. CAUTIONS:
Make sure that the mating faces are clean and free of foreign material.
Use only a plastic scraper when removing the sealing material.
Apply RTV sealant WSE-M4G323-A6 (Loctite 5901G) to the areas
shown, and tighten the bolts within 7 minutes.
5. NOTE: Tighten the bolts in the indicated sequence.
Torque: 12 Nm
6. CAUTION: Make sure that the mating faces are clean and free of foreign
material.
Apply RTV sealant WSE-M4G323-A6 (Loctite 5901G) to the areas shown, and
tighten the bolts within 7 minutes.
Page 1005 of 3039
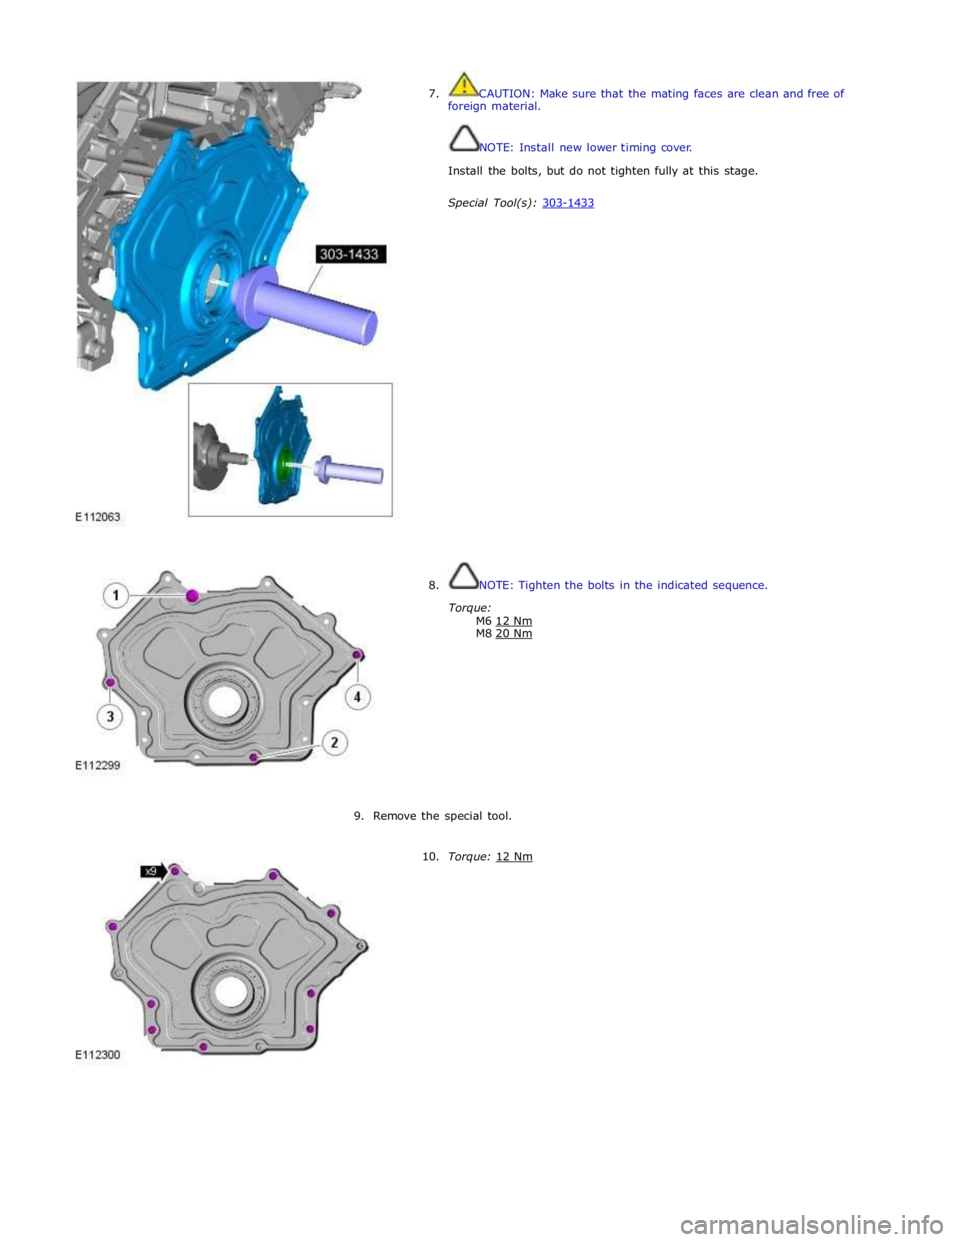
7. CAUTION: Make sure that the mating faces are clean and free of
foreign material.
NOTE: Install new lower timing cover.
Install the bolts, but do not tighten fully at this stage.
Special Tool(s): 303-1433
8. NOTE: Tighten the bolts in the indicated sequence.
Torque:
M6 12 Nm M8 20 Nm
9. Remove the special tool.
10. Torque: 12 Nm
Page 1006 of 3039
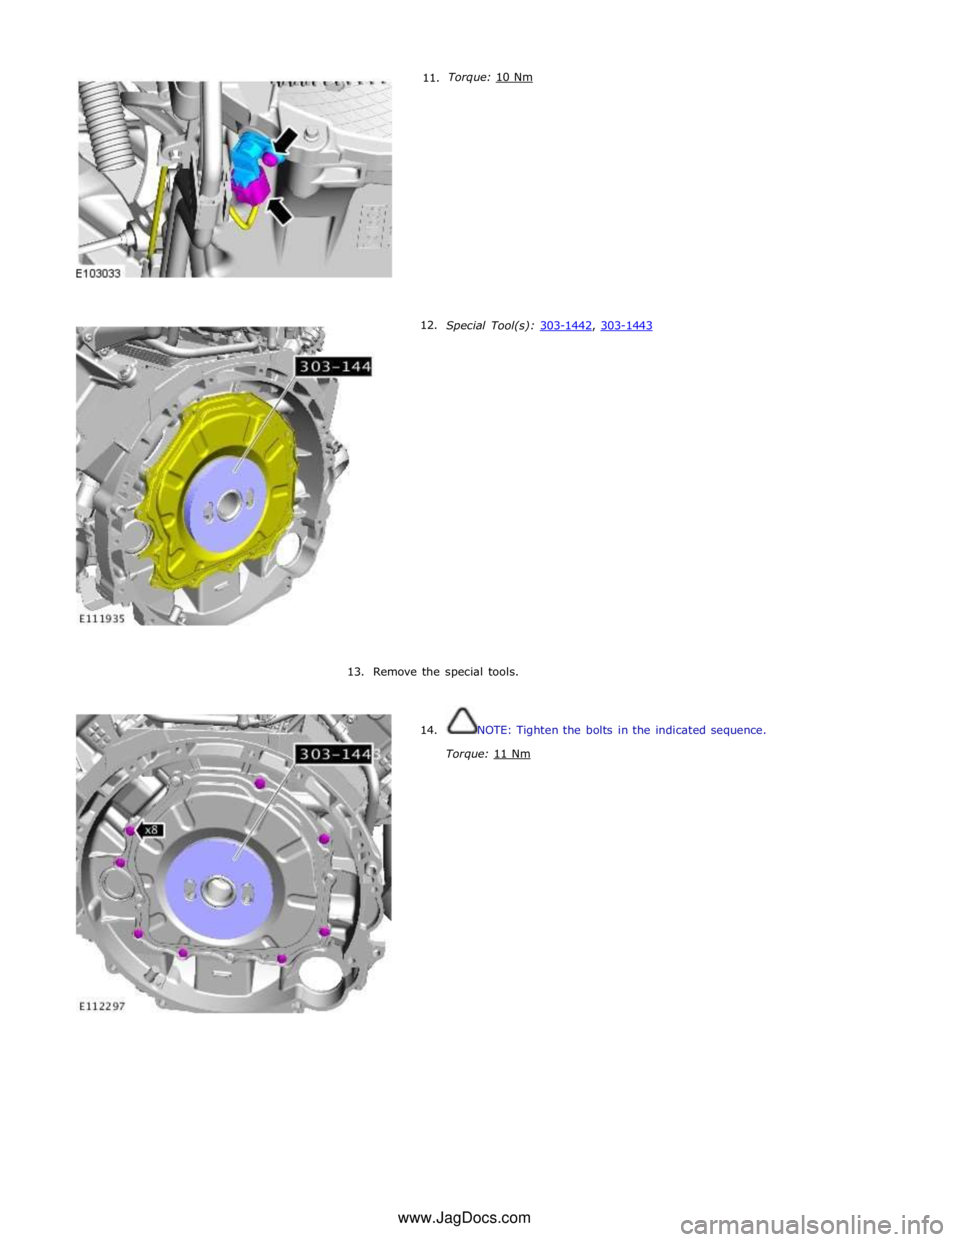
11.
12. Torque: 10 Nm
Special Tool(s): 303-1442, 303-1443
13. Remove the special tools.
14. NOTE: Tighten the bolts in the indicated sequence.
Torque: 11 Nm www.JagDocs.com
Page 1007 of 3039
15.
16.
17.
18. Torque: 11 Nm
Torque: 11 Nm
NOTE: Lubricate the fuel rail high-pressure fuel pump bucket with clean
engine oil.
CAUTION: Tighten the Torx screws a turn at a time until the correct
torque is achieved.
NOTE: Lubricate the fuel rail high-pressure fuel pump O-ring seal with
clean engine oil.
Torque: 11 Nm
Page 1008 of 3039
19.
20.
21.
22. Loosen the Torx screws half a turn each.
NOTE: Lubricate the fuel rail high-pressure fuel pump bucket with clean
engine oil.
CAUTION: Tighten the Torx screws a turn at a time until the correct
torque is achieved.
NOTE: Lubricate the fuel rail high-pressure fuel pump O-ring seal with
clean engine oil.
Torque: 11 Nm
Page 1010 of 3039
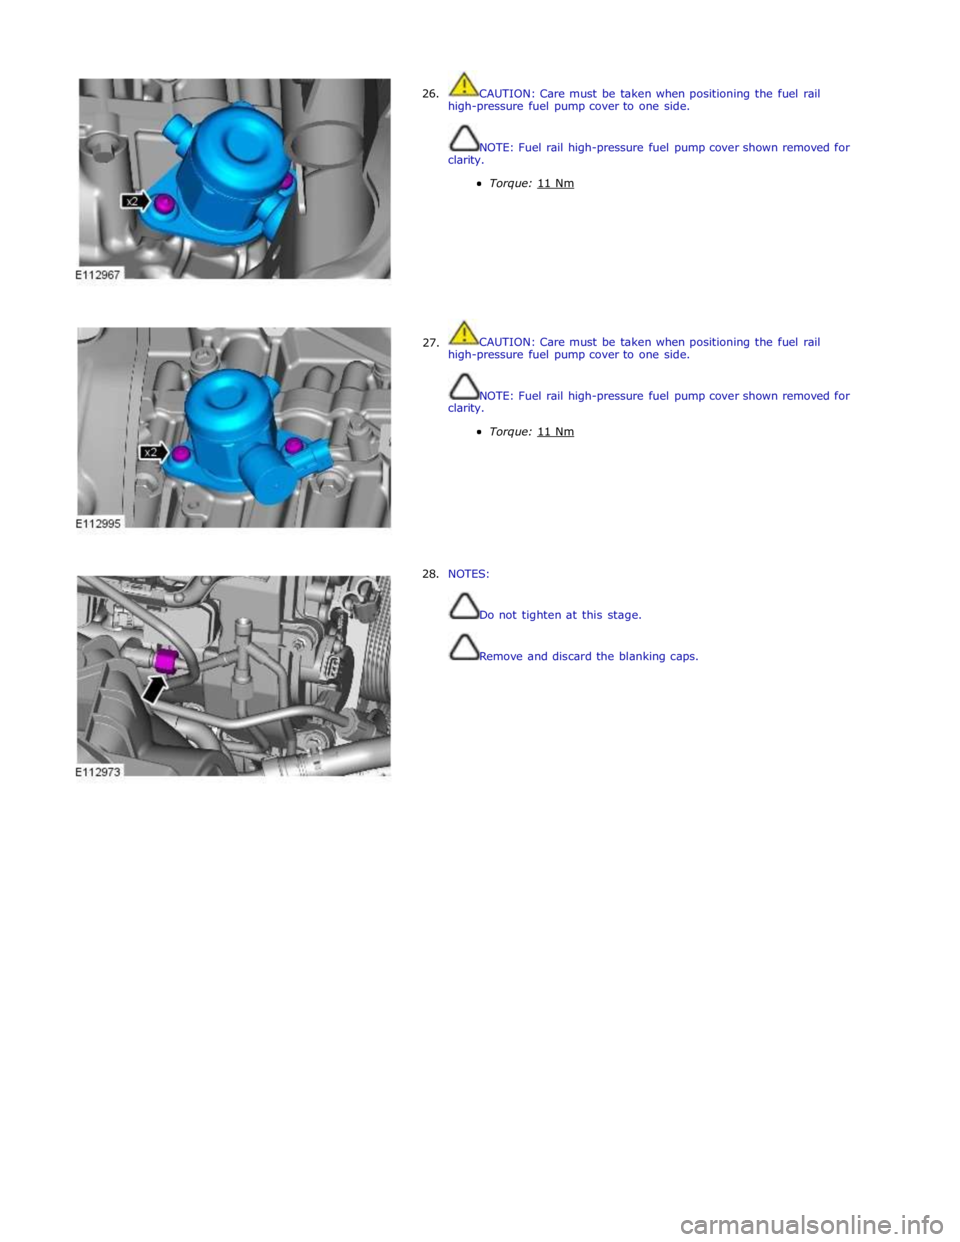
26.
27.
28. CAUTION: Care must be taken when positioning the fuel rail
high-pressure fuel pump cover to one side.
NOTE: Fuel rail high-pressure fuel pump cover shown removed for
clarity.
Torque: 11 Nm
CAUTION: Care must be taken when positioning the fuel rail
high-pressure fuel pump cover to one side.
NOTE: Fuel rail high-pressure fuel pump cover shown removed for
clarity.
Torque: 11 Nm
NOTES:
Do not tighten at this stage.
Remove and discard the blanking caps.

