JAGUAR XFR 2010 1.G Workshop Manual
XFR 2010 1.G
JAGUAR
JAGUAR
https://www.carmanualsonline.info/img/21/7642/w960_7642-0.png
JAGUAR XFR 2010 1.G Workshop Manual
Page 1057 of 3039
42.
43.
Remove the special tool.
Special Tool(s): 303-1447
Torque: 10 Nm
44.
Refer to: Timing Cover (303-01C Engine - V8 5.0L Petrol, Removal and Installation).
45. Connect the battery ground cable.
Refer to: Battery Disconnect and Connect (414-01 Battery, Mounting and Cables, General Procedures).
Page 1058 of 3039
Engine - V8 S/C 5.0L Petrol - Valve Cover LH
Removal and Installation Published: 11-May-2011
Removal
NOTE: Removal steps in this procedure may contain installation details.
1. Refer to: Battery Disconnect and Connect (414-01 Battery, Mounting and Cables, General Procedures).
2. Refer to: Supercharger (303-12D Intake Air Distribution and Filtering - V8 S/C 5.0L Petrol, Removal and Installation).
3. Refer to: Secondary Bulkhead Panel LH - TDV6 3.0L Diesel /V8 5.0L Petrol/V8 S/C 5.0L Petrol (501-02 Front End Body Panels, Removal and Installation).
4. Refer to: Air Cleaner Outlet Pipe LH (303-12D Intake Air Distribution and Filtering - V8 S/C 5.0L Petrol, Removal and Installation).
5. Refer to: Fuel Rail LH (303-04E Fuel Charging and Controls - V8 S/C 5.0L Petrol, Removal and Installation).
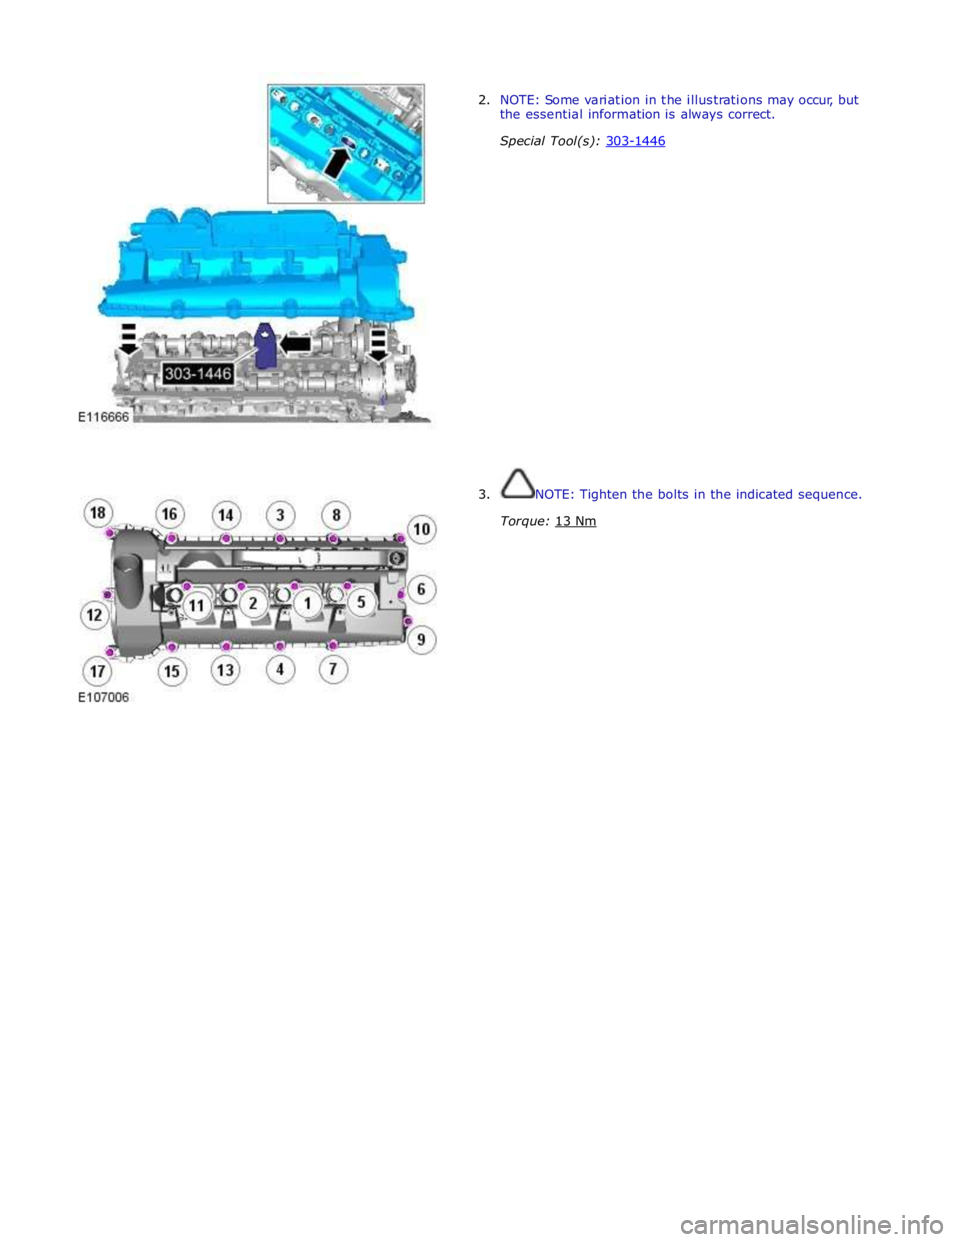
6. Torque: 10 Nm 303-1446
Valve Cover Alignment Tool Special Tool(s)
Page 1060 of 3039
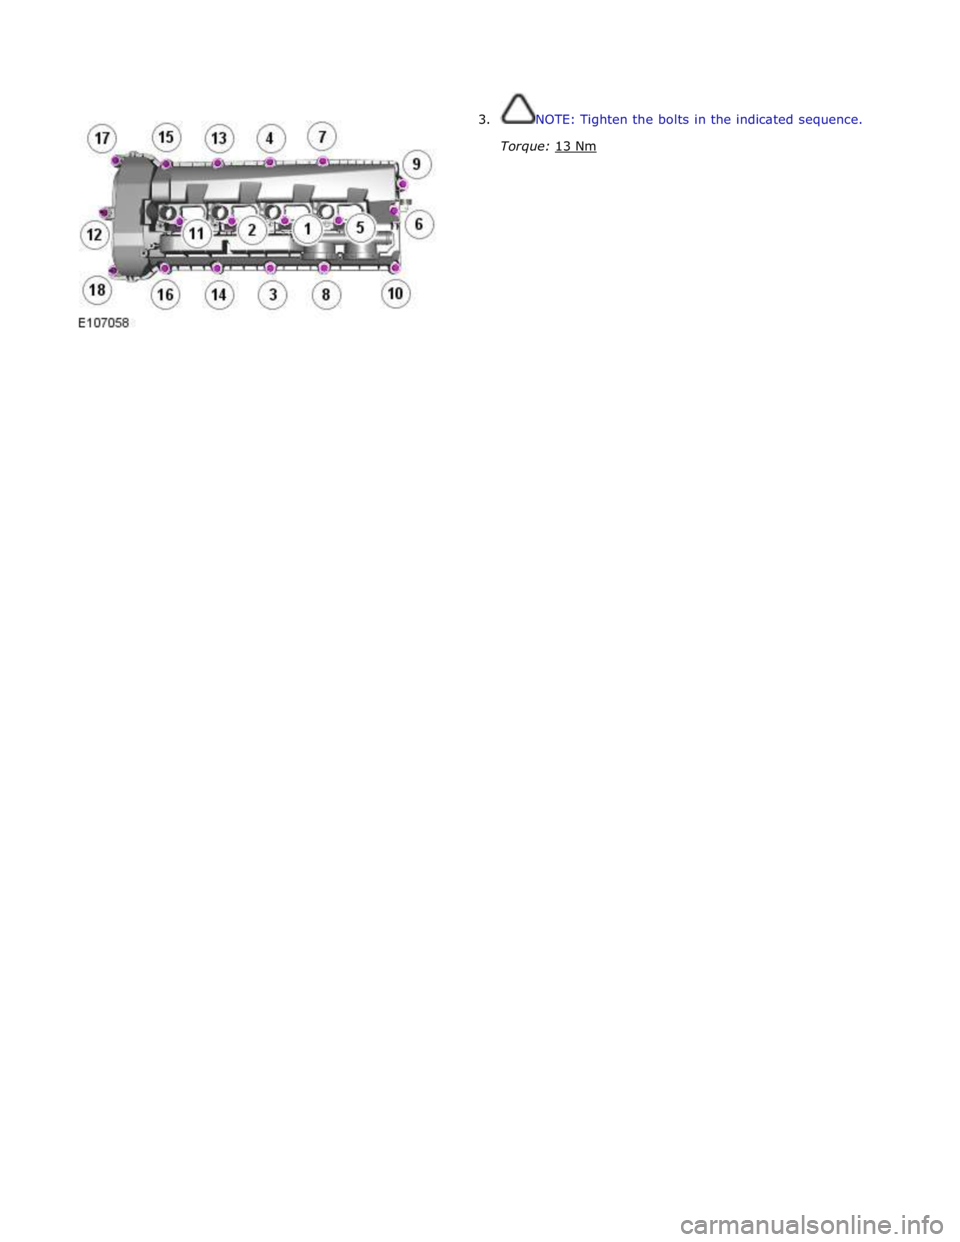
3. NOTE: Tighten the bolts in the indicated sequence.
Torque: 13 Nm
Page 1063 of 3039
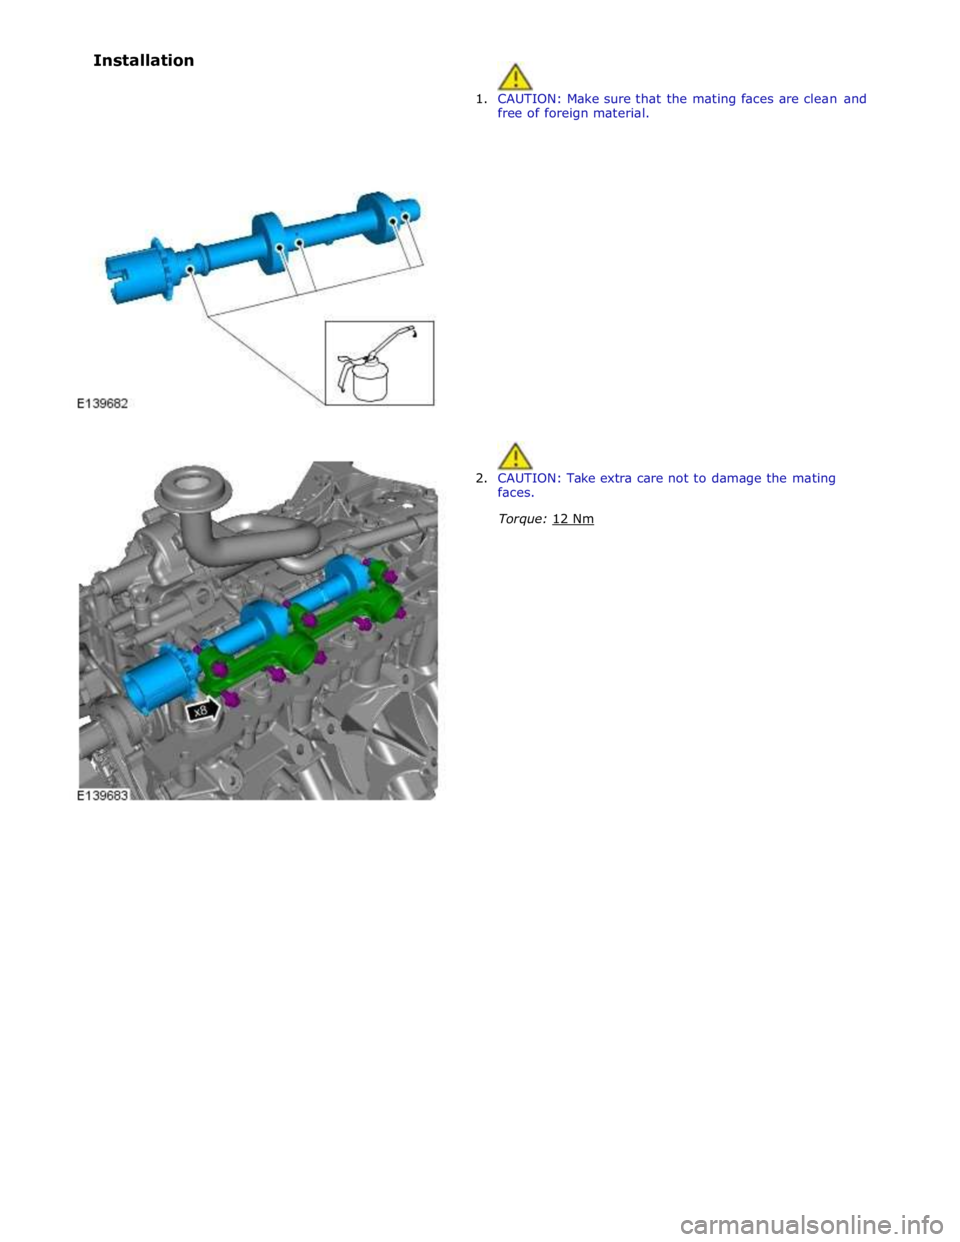
3. NOTE: Tighten the bolts in the indicated sequence.
Torque: 13 Nm
Page 1069 of 3039
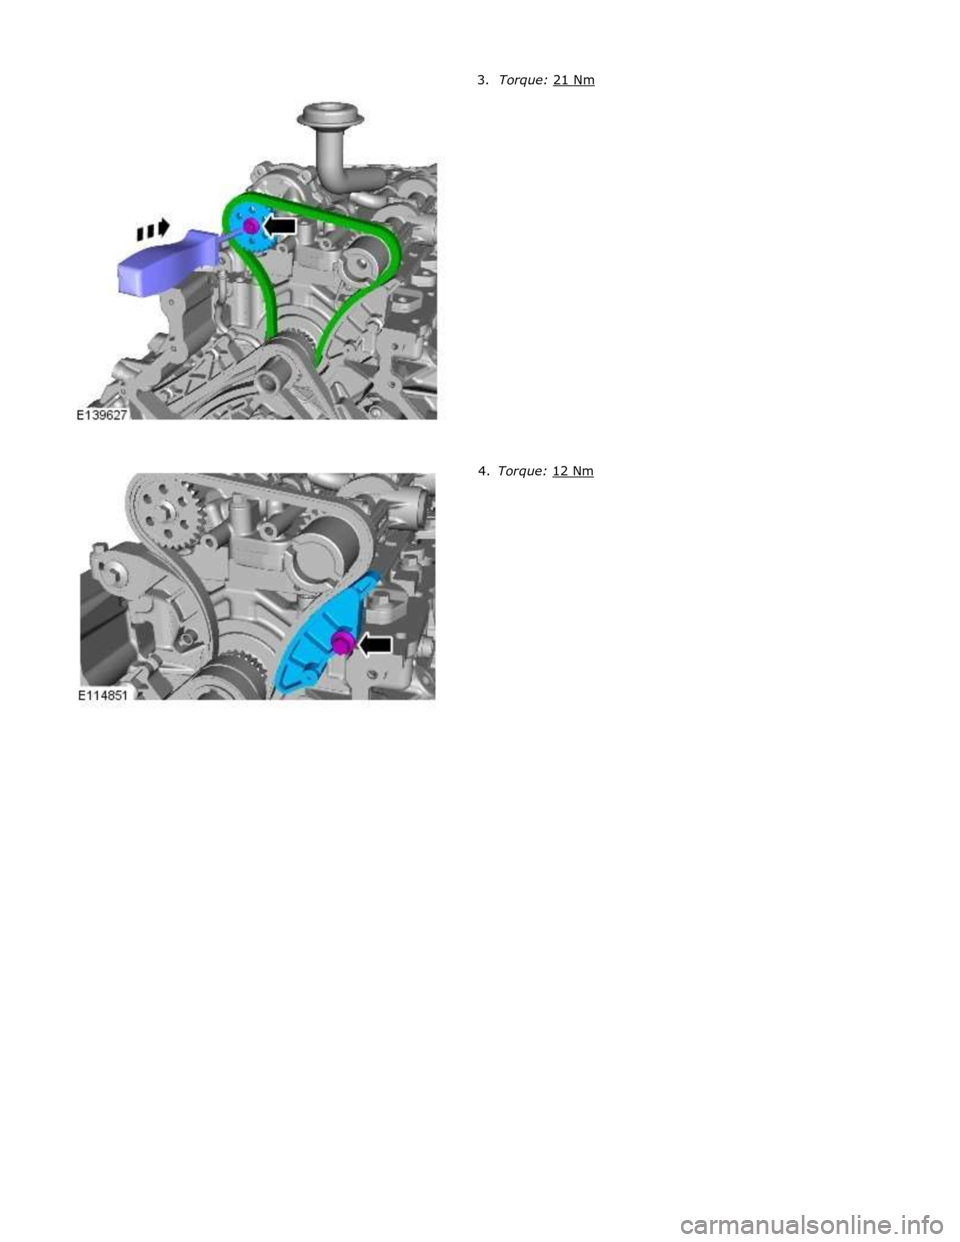
1. CAUTION: Make sure that the mating faces are clean and
free of foreign material.
2. CAUTION: Take extra care not to damage the mating
faces.
Torque: 12 Nm Installation
Page 1070 of 3039
Page 1074 of 3039
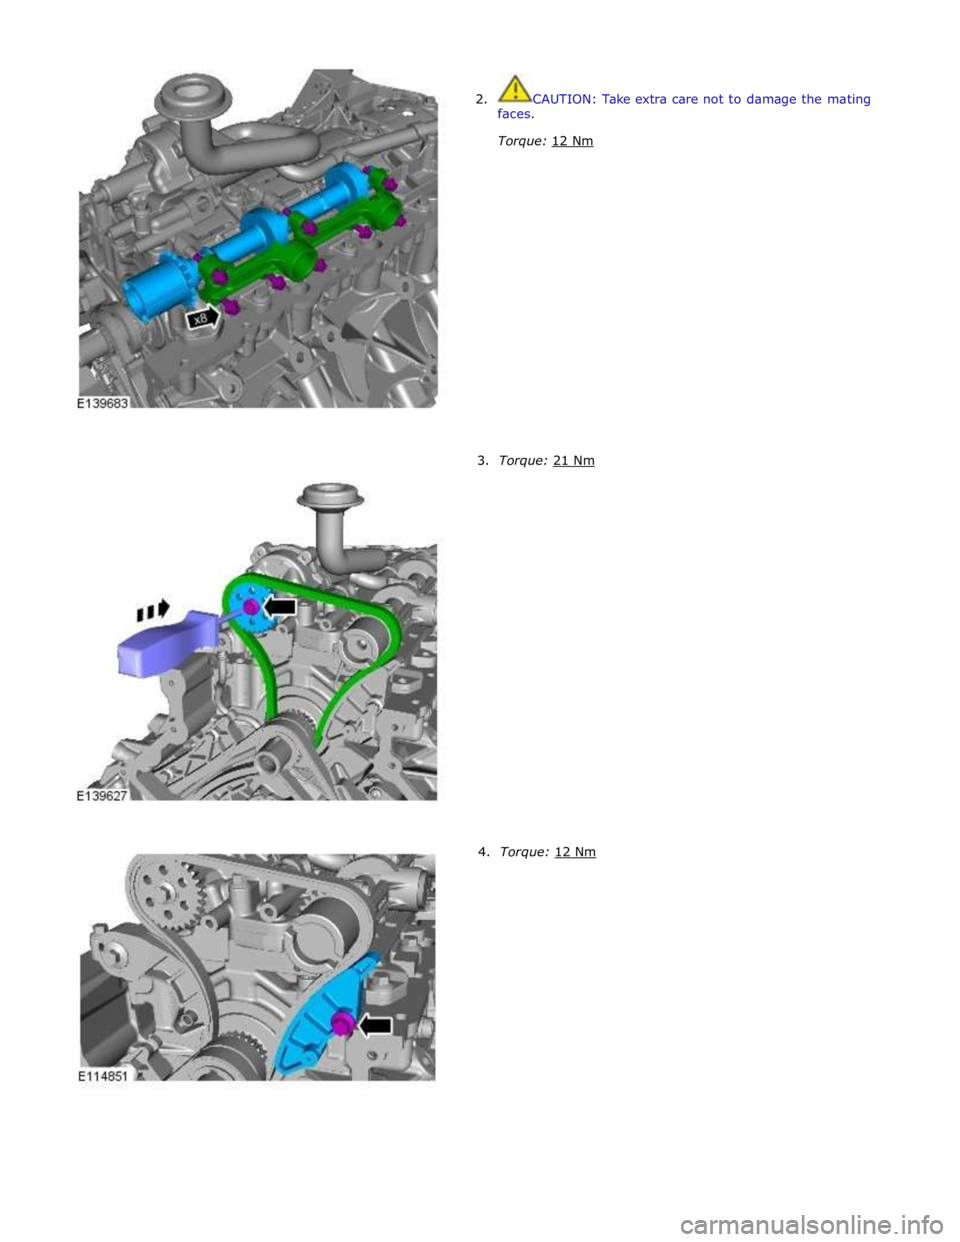
2. CAUTION: Take extra care not to damage the mating
faces.
Torque: 12 Nm
3. Torque: 21 Nm 4. Torque: 12 Nm
Page 1079 of 3039
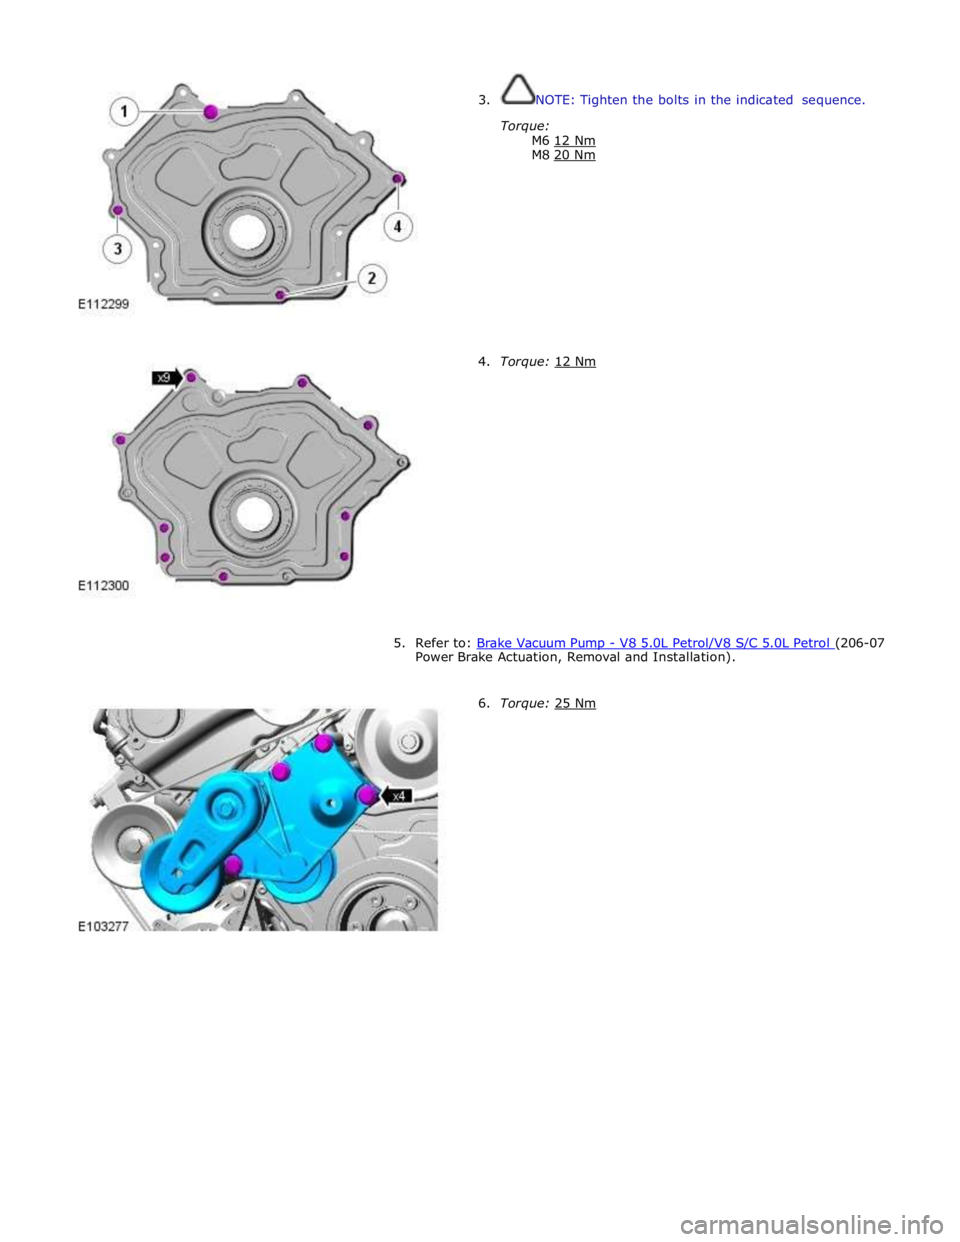
3. NOTE: Tighten the bolts in the indicated sequence.
Torque:
M6 12 Nm M8 20 Nm
4. Torque: 12 Nm
5. Refer to: Brake Vacuum Pump - V8 5.0L Petrol/V8 S/C 5.0L Petrol (206-07 Power Brake Actuation, Removal and Installation).
6. Torque: 25 Nm
Page 1080 of 3039

7. NOTE: Install the bolt finger tight before final
tightening.
Torque: 40 Nm
8. Torque: 40 Nm
9. Refer to: Crankshaft Pulley (303-01D Engine - V8 S/C 5.0L Petrol, Removal and Installation).
10. Refer to: Battery Disconnect and Connect (414-01 Battery, Mounting and Cables, General Procedures).
11. CAUTION: Make sure that the vehicle is left for 5 minutes from
filling with oil and that the engine oil level is reading at least minimum
(by following Steps 14-18), before starting the engine.
Fill the engine with oil - for filling values on vehicles without
supercharger:
Refer to: Specifications (303-01C Engine - V8 5.0L Petrol, Specifications).
Fill the engine with oil - for filling values on vehicles with
supercharger:
Refer to: Specifications (303-01D Engine - V8 S/C 5.0L Petrol, Specifications).
Clean any residual engine oil from the oil filler cap area.
12. CAUTION: Make sure that the vehicle has been left for 5 minutes
from filling with oil.
Follow the Steps 14-18 before starting the engine.
13.
Start the engine and allow to run for 10 minutes, stop the
engine.
Page 1097 of 3039
Engine - V8 S/C 5.0L Petrol - Engine
Installation
NOTES:
Some variation in the illustrations may occur, but the essential information is always correct. Published: 19-Nov-2013
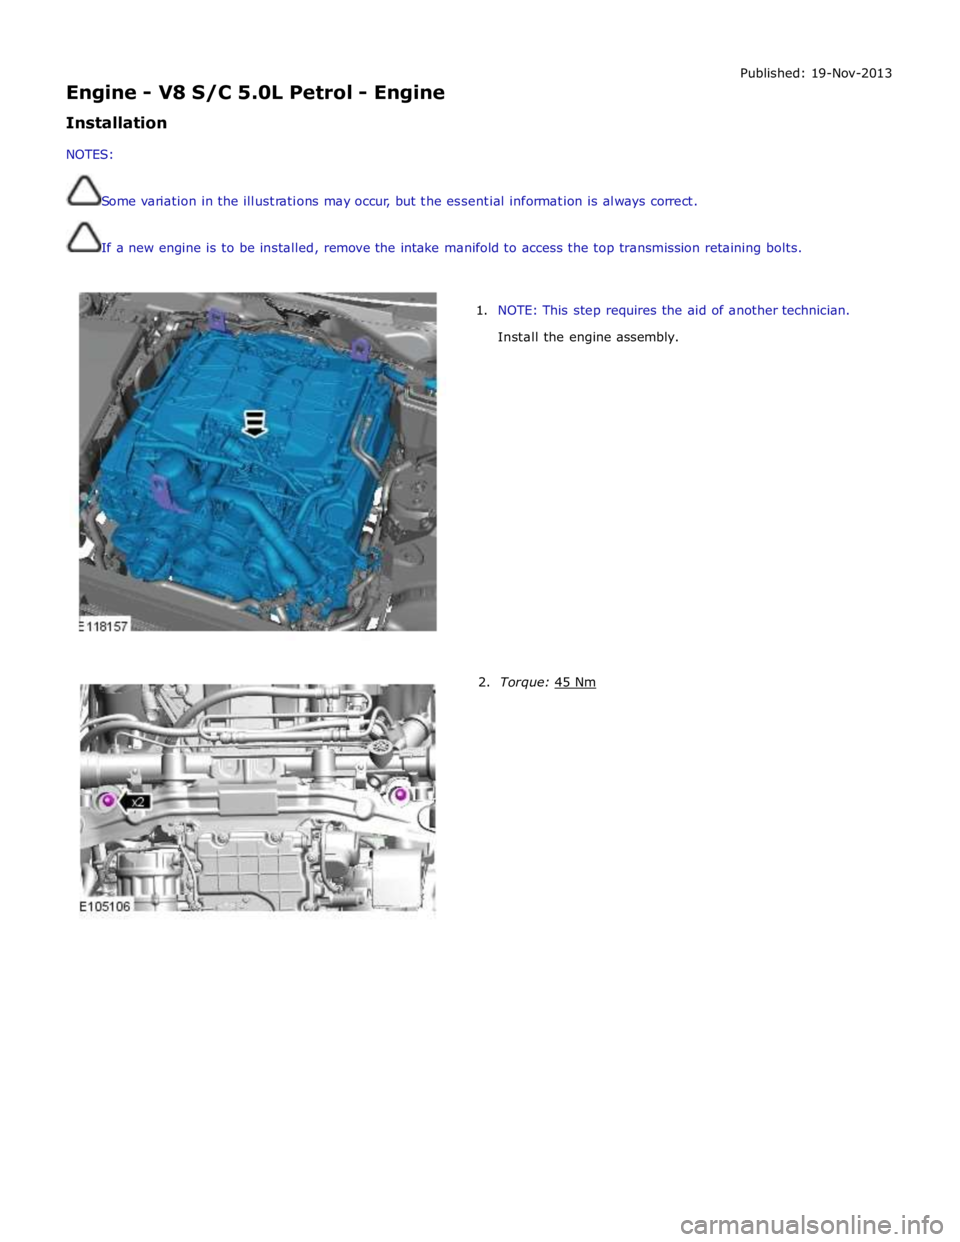
If a new engine is to be installed, remove the intake manifold to access the top transmission retaining bolts.
1. NOTE: This step requires the aid of another technician.
Install the engine assembly.
2. Torque: 45 Nm


