LAND ROVER FRELANDER 2 2006 Repair Manual
FRELANDER 2 2006
LAND ROVER
LAND ROVER
https://www.carmanualsonline.info/img/64/57251/w960_57251-0.png
LAND ROVER FRELANDER 2 2006 Repair Manual
Trending: ECU, coolant capacity, navigation update, spare tire, maintenance schedule, lights, manual transmission
Page 2291 of 3229
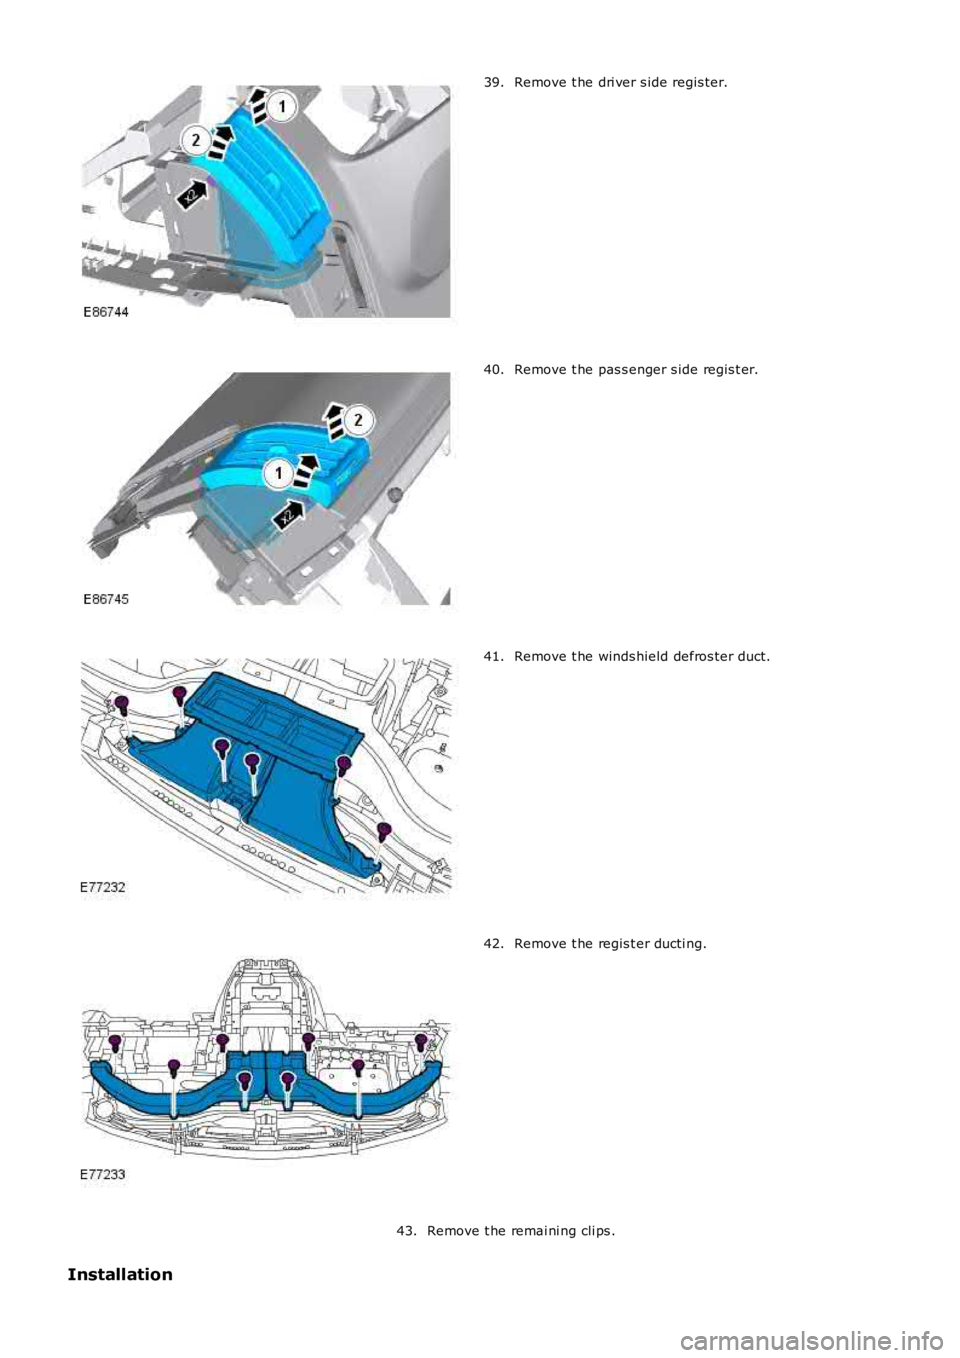
Remove t he dri ver s ide regis ter.39.
Remove t he pas s enger s ide regis t er.40.
Remove t he winds hield defros ter duct.41.
Remove t he regis t er ducti ng.42.
Remove t he remai ni ng cli ps .43.
Installation
Page 2292 of 3229
Inst all t he cl ips .
1.
Inst all t he regis t er ducti ng.
2.
Inst all t he winds hield defros ter duct.
3.
Inst all t he pas s enger s ide regis t er.
4.
Inst all t he dri ver s ide regis ter.
5.
Inst all t he dri ver s ide i nst rument panel end trim panel .
6.
Inst all t he keyl es s s t art cont rol module.
7.
Inst all t he keyl es s s t art cont rol module trim cover.
8.
Inst all t he in-vehicl e temperature s ens or.
9.
Inst all t he winds hield defros ter t ri m panel.
10.
Inst all t he glove compartment s upport panel s .
11.
Inst all t he glove compartment l id hi nges .
12.
Inst all t he glove compartment l amp.
13.
Inst all t he pas s enger ai r bag modul e.
T orque: 10 Nm 14.
Inst all t he glove compartment s t ri ker reinforcement panel.
15.
W it h ass i st ance, i ns t all the ins trument panel upper s ect ion.
16.
Secure t he wiring harnes s cli p t o t he pas s enger s ide of t he
i ns t rument panel upper secti on.
17.
Secure t he 2 wi ri ng harness cl ips t o t he winds hield defros ter duct
and connect the sunload s ens or.
18.
W it h ass i st ance, s ecure t he ins trument panel upper s ecti on.
19.
Inst all t he winds hield defros ter outer finis hers .
20.
Connect t he pass enger ai r bag modul e electrical connect ors .
21.
Connect t he glove compart ment lamp el ect ri cal connector.
22.
Secure t he pass enger ai r bag modul e and glove compart ment lamp
wi ri ng harness .
23.
Inst all t he glove compartment .
24.
Page 2293 of 3229
Refer t o: Glove Compart ment (501-12 Ins trument Panel andConsol e, Removal and Ins t al lat ion).
Inst all t he pas s enger s ide ins trument panel end trim panel .25.
Secure t he wiring harnes s s upport bracket .26.
Secure t he wiring harnes s t o t he cent er of the i nst rument panelupper s ecti on.27.
Inst all t he cl imat e control as s embly.28.
Inst all t he audi o unit .29.
Inst all t he cent er speaker.30.
Inst all t he video dis play.
Refer t o: Video Dis play (415-01 Informati on and Entert ainmentSyst em, Removal and Ins tall ati on).
31.
Inst all t he fl oor consol e.
Refer t o: Fl oor Cons ole (501-12 Inst rument Panel and Cons ole,Removal and Ins tall ati on).
32.
Inst all t he fl oor consol e extens ions.33.
Inst all both ins trument panel s peakers .34.
Inst all both upper t rim panels .35.
Connect t he in-vehi cl e t emperature s ens or electrical connect or.36.
Connect t he keyl es s s t art module elect rical connect or.37.
Secure t he ins trument cl ust er wiring harnes s cli p.38.
Inst all t he ins trument cl ust er.
Refer t o: Ins trument Clus ter (413-01 Ins t rument Clus t er, Removaland Inst all at ion).
39.
Inst all t he cl ocks pri ng.
Refer t o: Clocks pri ng (501-20B Supplement al Res t raint Sys tem,Removal and Ins tall ati on).
40.
Inst all both cowl s ide t rim panels .
Refer t o: Cowl Si de Tri m Panel (501-05 Interior Tri m andOrnament ati on, Removal and Ins tal lat ion).
41.
Secure both scuff pl ate t rim panels .42.
Inst all t he A-pi llar center t rim panels .43.
Page 2294 of 3229
Inst all both A-pil lar upper t ri m panels .
Refer t o: A-Pil lar Tri m Panel (501-05 Int erior Trim andOrnament ati on, Removal and Ins tal lat ion).
44.
Connect t he batt ery ground cable.
Refer t o: Specificati ons (414-00 Bat tery and Charging Sys tem -General Informat ion, Specificati ons).
45.
Return t he s teeri ng col umn t o i ts original posi ti on.46.
Page 2295 of 3229
Publi s hed: 11-May-2011
Instrument Panel and Console - Instrument Panel Console
Removal and Inst all ati on
Removal
• NOTE: Removal s t eps in t his procedure may cont ain i nst all ati on det ail s.
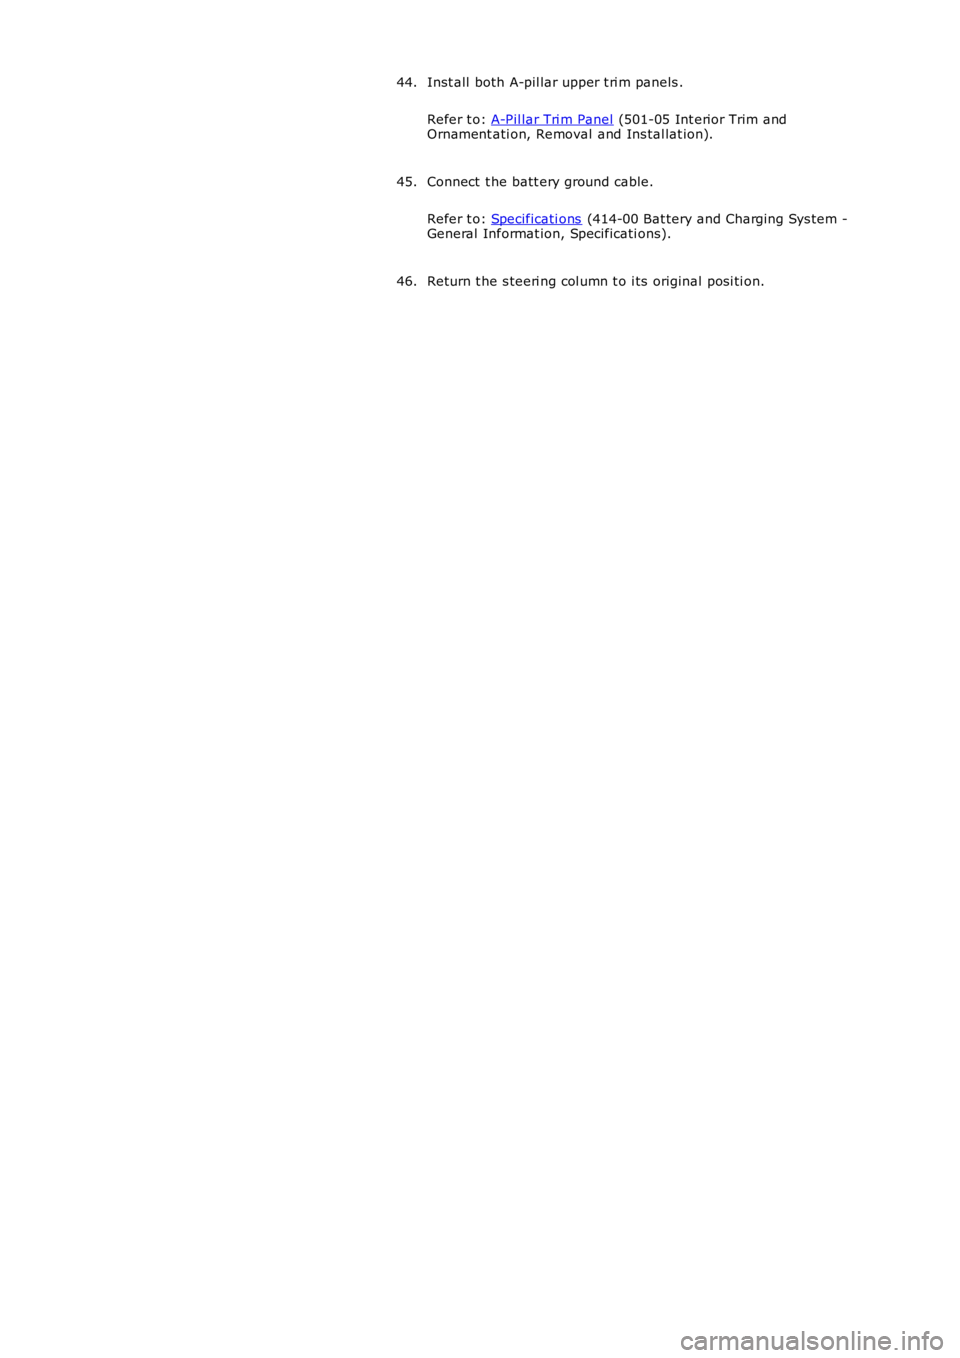
If equi pped.1.
2.
Page 2296 of 3229
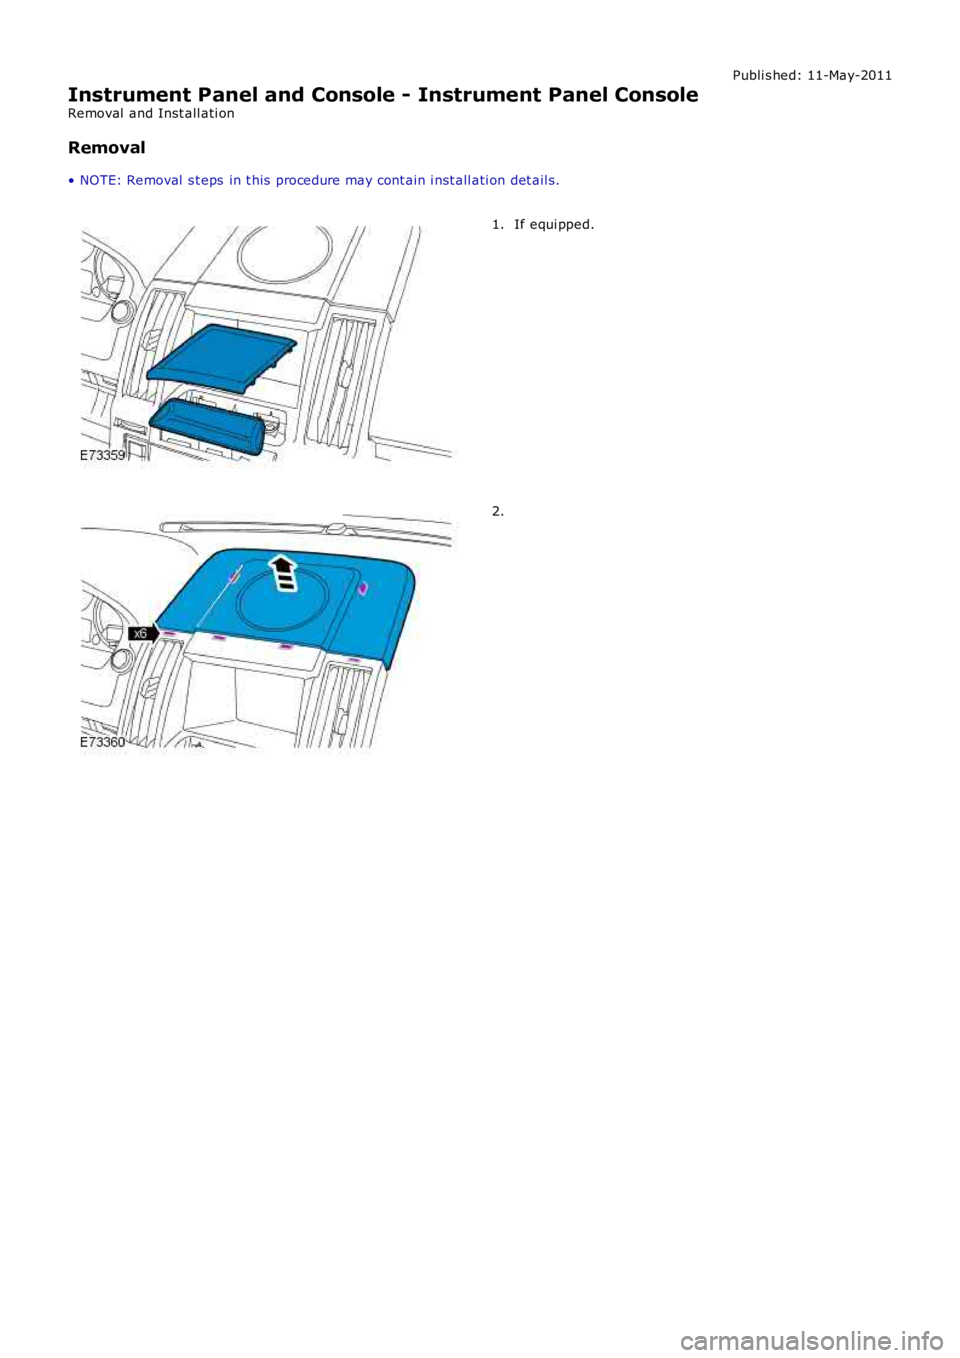
3. CAUTION: Prot ect t he s urroundi ng trim from
damage when changi ng the component .
T orque: 3 Nm 3.
4.
Page 2297 of 3229
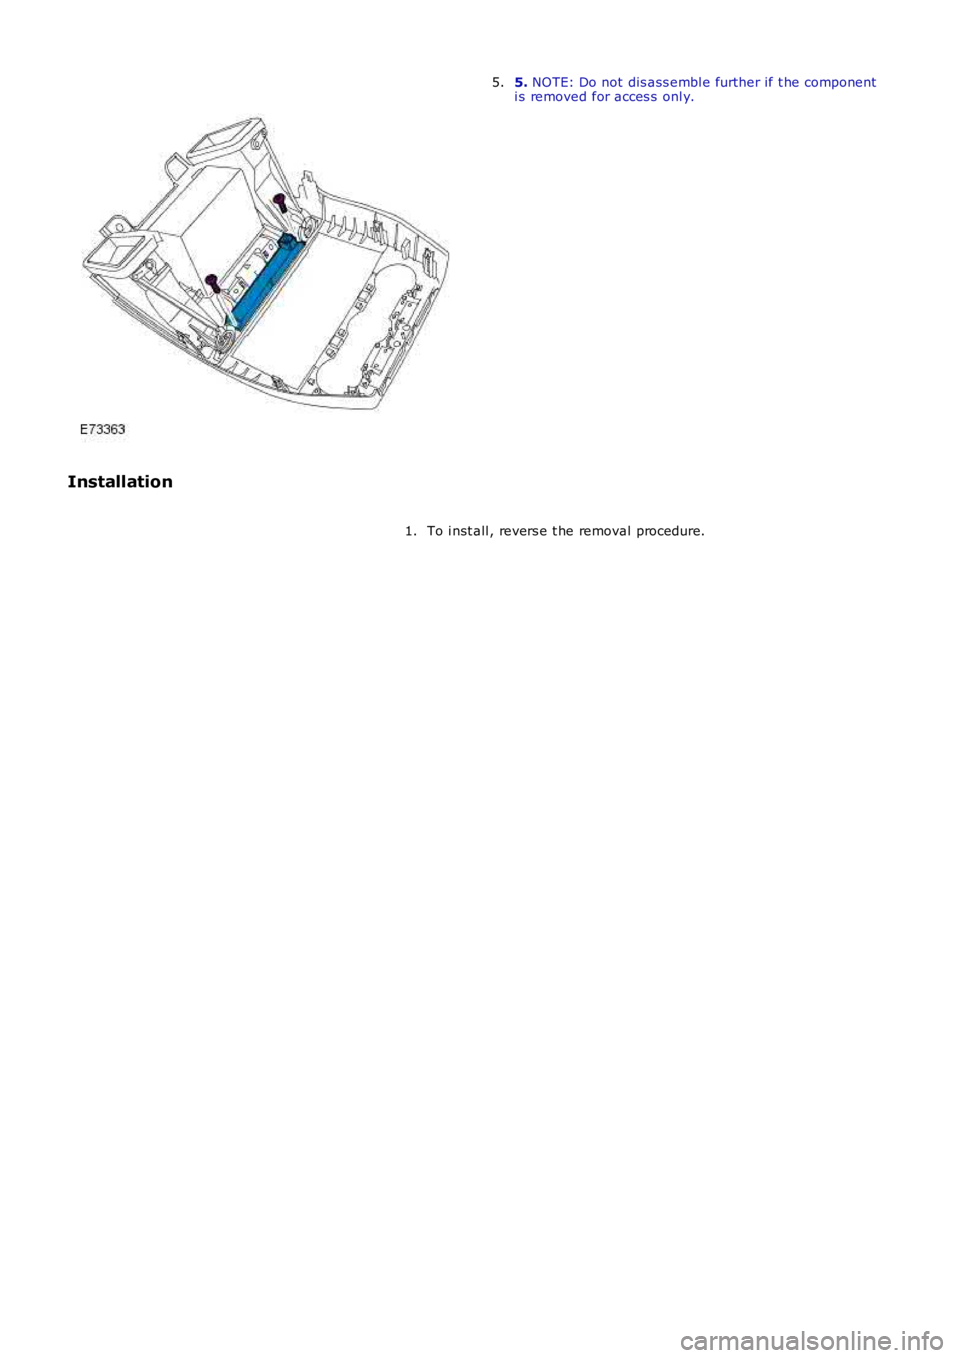
5. NOTE: Do not dis ass embl e further if t he componenti s removed for acces s onl y.5.
Installation
To i nst all , revers e t he removal procedure.1.
Page 2298 of 3229
Publi s hed: 11-May-2011
Instrument Panel and Console - Floor Console
Removal and Inst all ati on
Removal
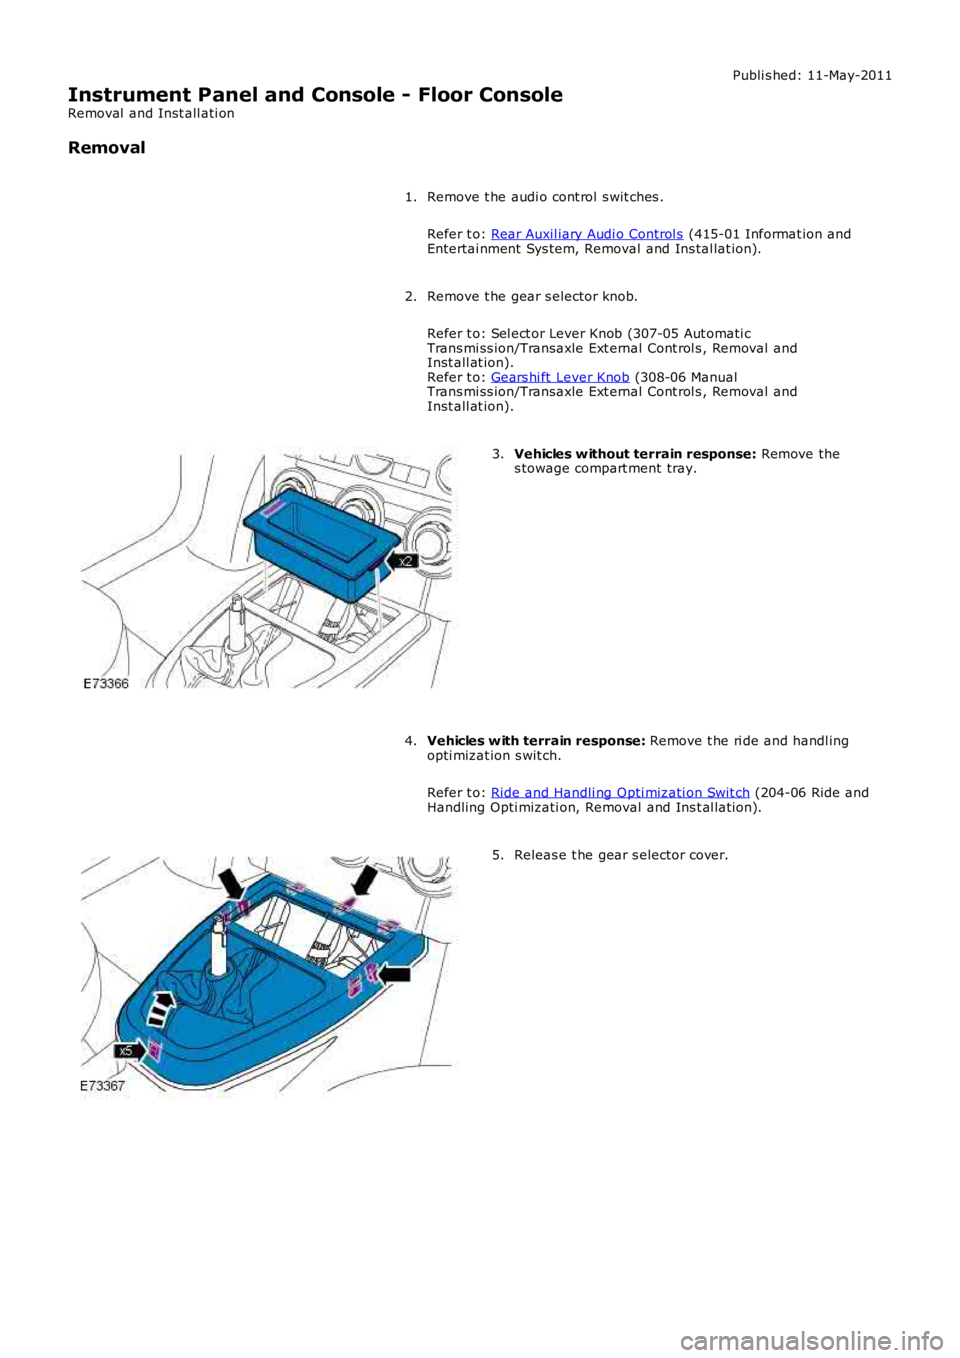
Remove t he audi o cont rol s wit ches .
Refer t o: Rear Auxil iary Audi o Control s (415-01 Informat ion andEntertai nment Sys tem, Removal and Ins tal lat ion).
1.
Remove t he gear s elector knob.
Refer t o: Sel ect or Lever Knob (307-05 Aut omati cTrans mi ss ion/Transaxle Ext ernal Cont rol s , Removal andInst all at ion).Refer t o: Gears hi ft Lever Knob (308-06 ManualTrans mi ss ion/Transaxle Ext ernal Cont rol s , Removal andInst all at ion).
2.
Vehicles w ithout terrain response: Remove thes towage compart ment tray.3.
Vehicles w ith terrain response: Remove t he ri de and handl ingopti mizat ion s wit ch.
Refer t o: Ride and Handli ng Opti mizati on Swit ch (204-06 Ride andHandling Opti mizati on, Removal and Ins t al lat ion).
4.
Releas e t he gear s elector cover.5.
Page 2299 of 3229
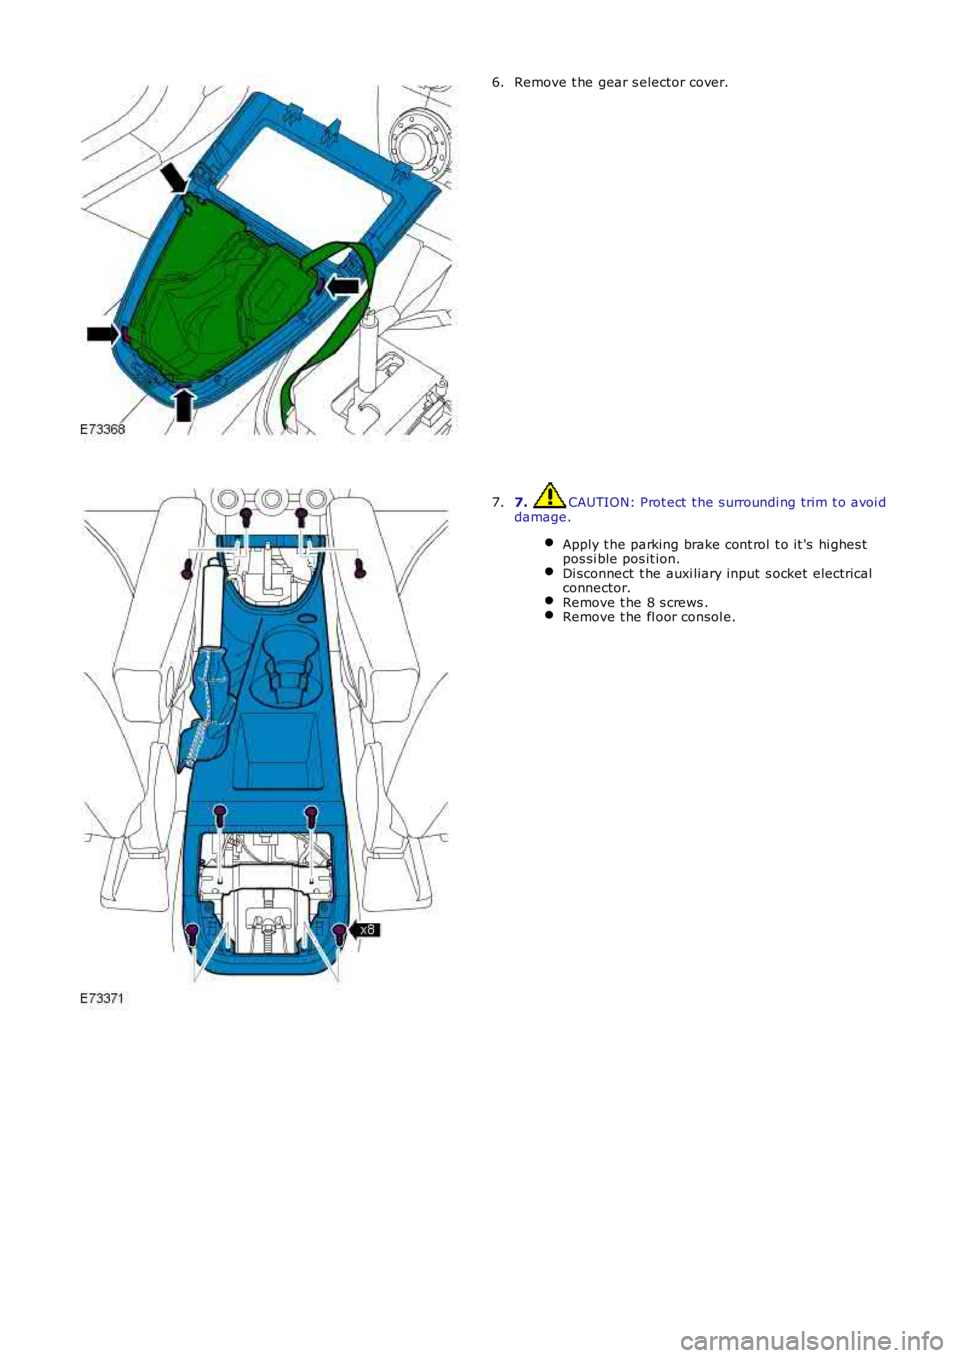
Remove t he gear s elector cover.6.
7. CAUTION: Prot ect t he s urroundi ng trim t o avoi ddamage.
Apply t he parking brake cont rol t o it 's hi ghes tpos si ble pos it ion.Di sconnect t he auxi liary input s ocket electricalconnector.Remove t he 8 s crews .Remove t he fl oor consol e.
7.
Page 2300 of 3229
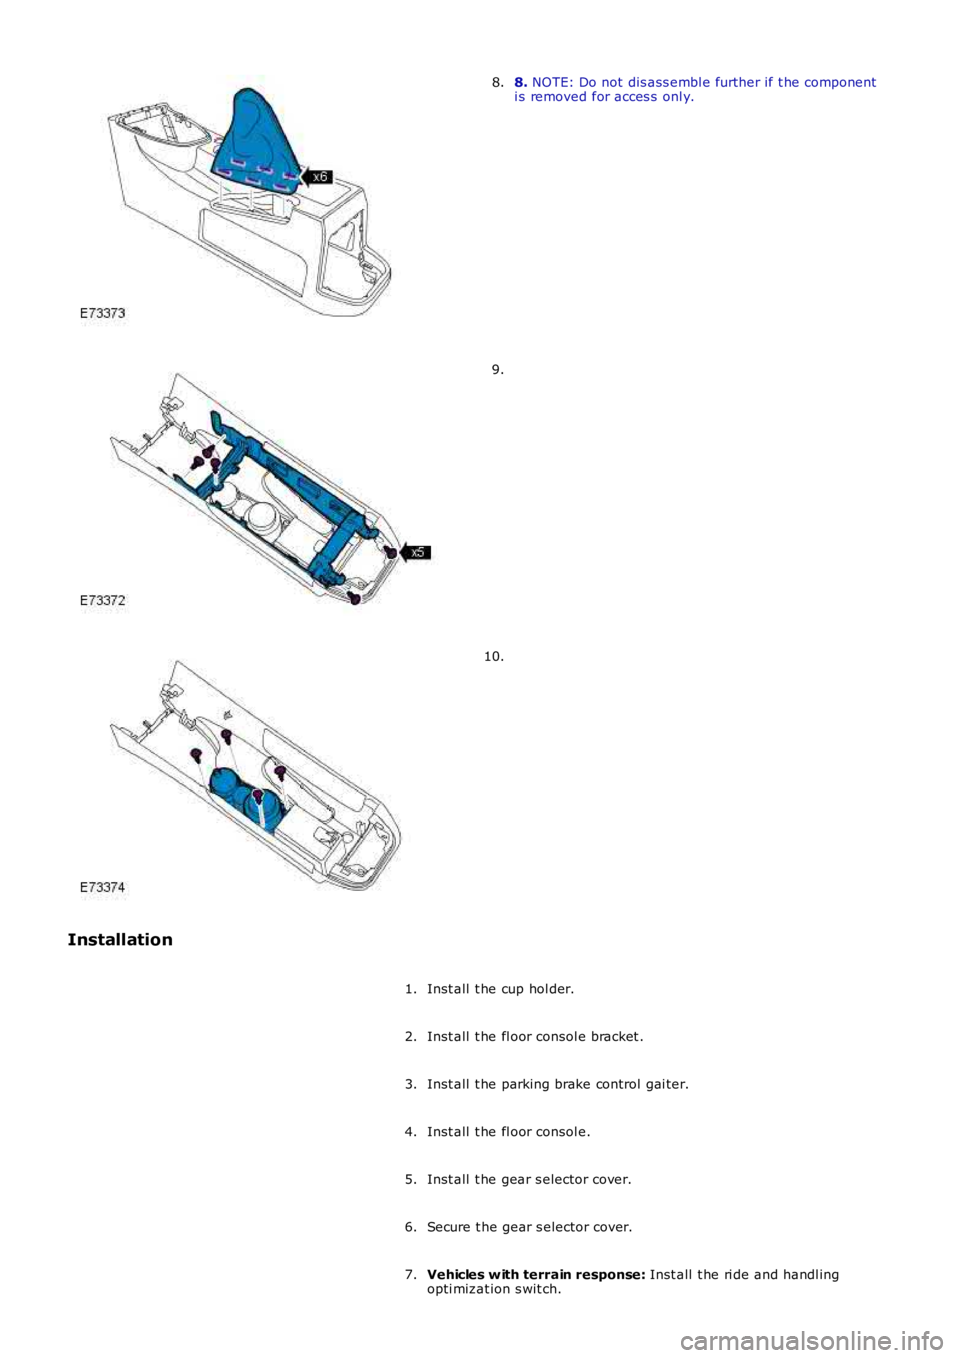
8. NOTE: Do not dis ass embl e further if t he componenti s removed for acces s onl y.8.
9.
10.
Installation
Inst all t he cup hol der.1.
Inst all t he fl oor consol e bracket .2.
Inst all t he parking brake control gai ter.3.
Inst all t he fl oor consol e.4.
Inst all t he gear s elector cover.5.
Secure t he gear s elector cover.6.
Vehicles w ith terrain response: Inst all t he ri de and handl ingopti mizat ion s wit ch.7.
Trending: check transmission fluid, deactivate airbag, air suspension, washer fluid, cabin filter, light, fuel tank capacity
