navigation Lexus CT200h 2014 Navigation manual (in English)
[x] Cancel search | Manufacturer: LEXUS, Model Year: 2014, Model line: CT200h, Model: Lexus CT200h 2014Pages: 410, PDF Size: 42.88 MB
Page 147 of 410
147
3. ROUTE GUIDANCE
CT200h_Navi_OM76113E_(EE)
13.12.06 15:16
3
NAVIGATION SYSTEM
1Display the “Route” screen.
(P.144)
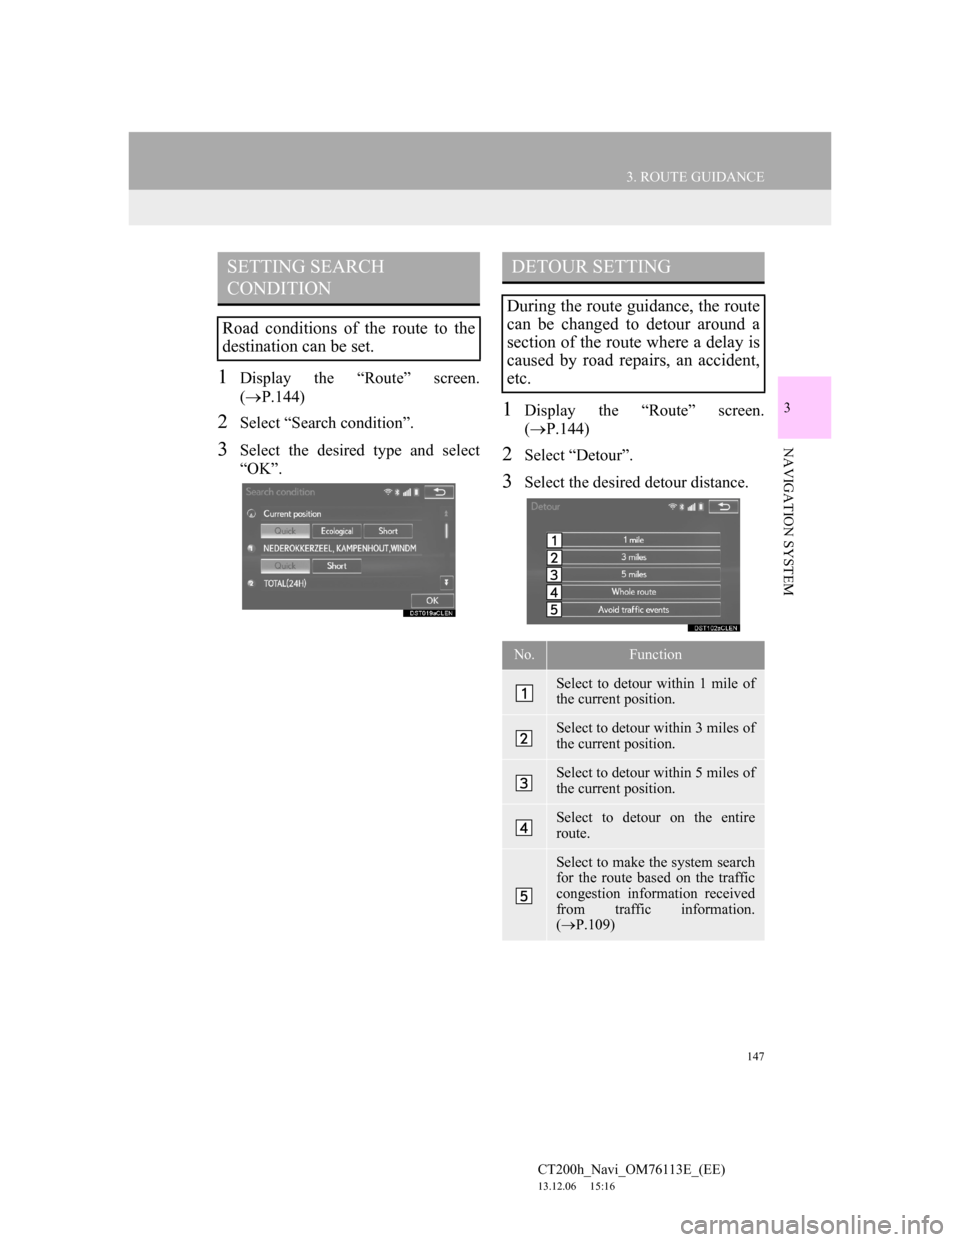
2Select “Search condition”.
3Select the desired type and select
“OK”.
1Display the “Route” screen.
(P.144)
2Select “Detour”.
3Select the desired detour distance.
SETTING SEARCH
CONDITION
Road conditions of the route to the
destination can be set.
DETOUR SETTING
During the route guidance, the route
can be changed to detour around a
section of the route where a delay is
caused by road repairs, an accident,
etc.
No.Function
Select to detour within 1 mile of
the current position.
Select to detour within 3 miles of
the current position.
Select to detour within 5 miles of
the current position.
Select to detour on the entire
route.
Select to make the system search
for the route based on the traffic
congestion information received
from traffic information.
(P.109)
Page 149 of 410
149
3. ROUTE GUIDANCE
CT200h_Navi_OM76113E_(EE)
13.12.06 15:16
3
NAVIGATION SYSTEM
1Display the “Route” screen.
(P.144)
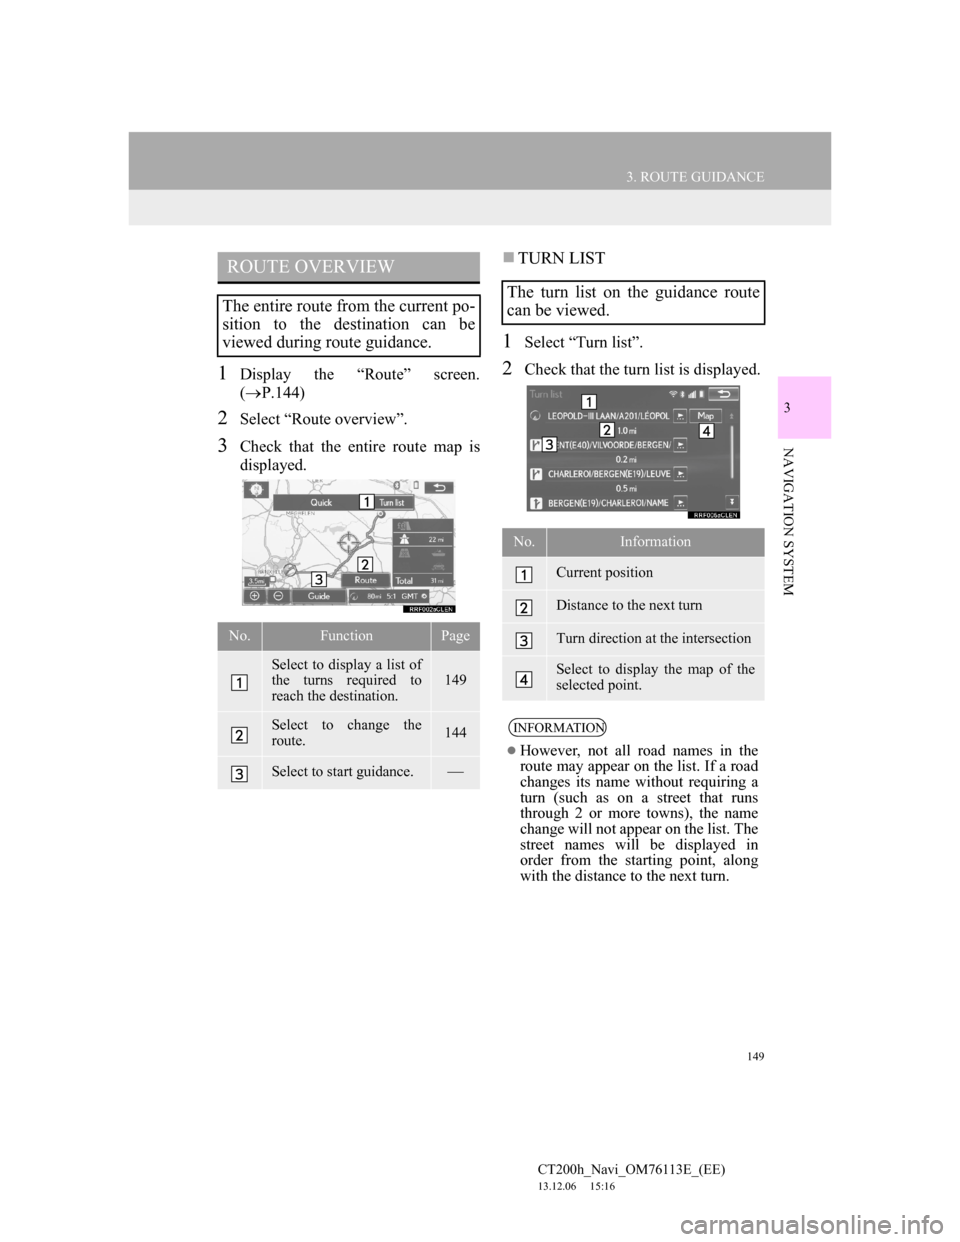
2Select “Route overview”.
3Check that the entire route map is
displayed.
TURN LIST
1Select “Turn list”.
2Check that the turn list is displayed.
ROUTE OVERVIEW
The entire route from the current po-
sition to the destination can be
viewed during route guidance.
No.FunctionPage
Select to display a list of
the turns required to
reach the destination.
149
Select to change the
route.144
Select to start guidance.
The turn list on the guidance route
can be viewed.
No.Information
Current position
Distance to the next turn
Turn direction at the intersection
Select to display the map of the
selected point.
INFORMATION
However, not all road names in the
route may appear on the list. If a road
changes its name without requiring a
turn (such as on a street that runs
through 2 or more towns), the name
change will not appear on the list. The
street names will be displayed in
order from the starting point, along
with the distance to the next turn.
Page 151 of 410
151
4. MY MEMORY
CT200h_Navi_OM76113E_(EE)
13.12.06 15:16
3
NAVIGATION SYSTEM
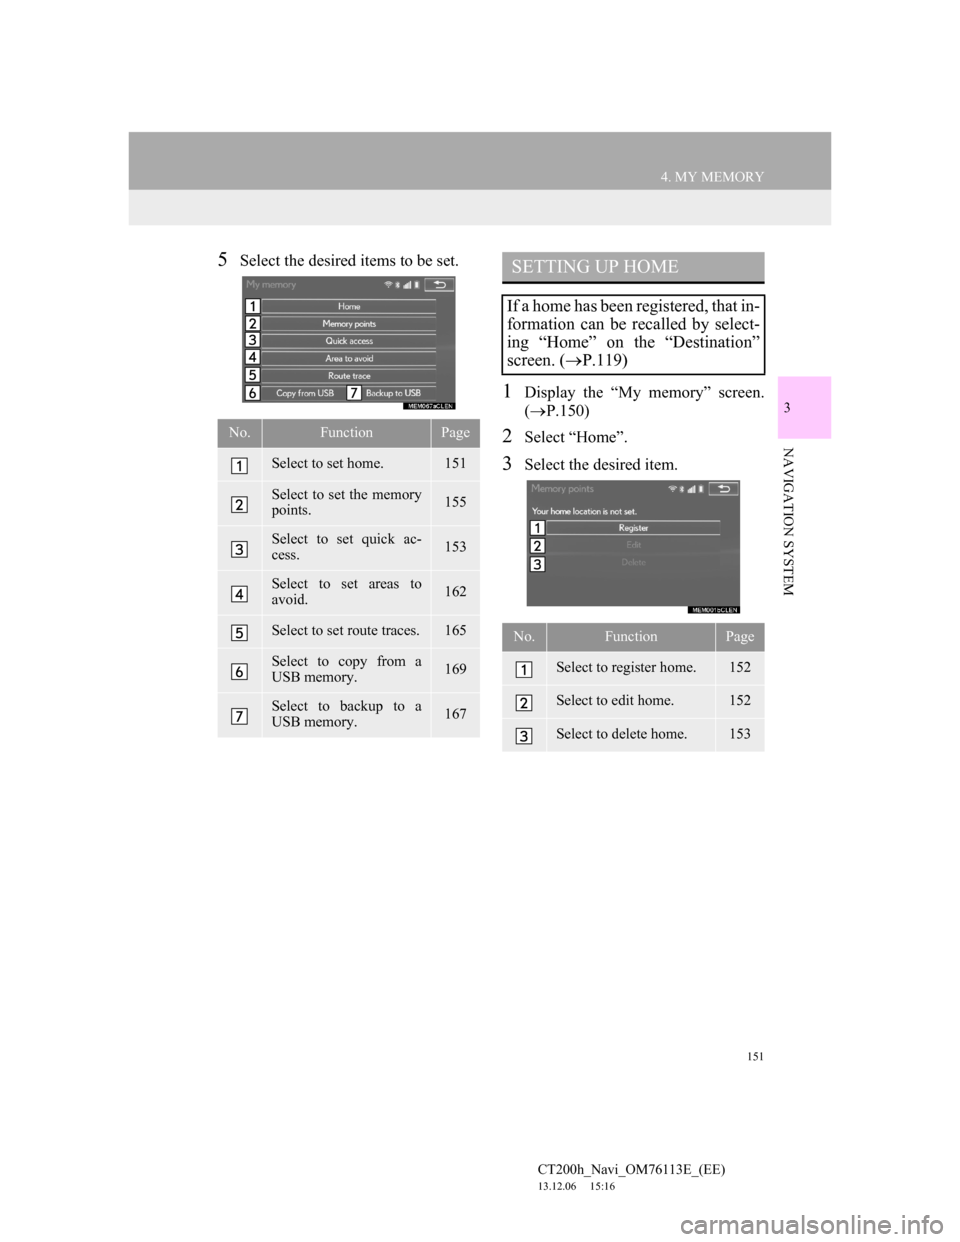
5Select the desired items to be set.
1Display the “My memory” screen.
(P.150)
2Select “Home”.
3Select the desired item.
No.FunctionPage
Select to set home.151
Select to set the memory
points.155
Select to set quick ac-
cess.153
Select to set areas to
avoid.162
Select to set route traces.165
Select to copy from a
USB memory.169
Select to backup to a
USB memory.167
SETTING UP HOME
If a home has been registered, that in-
formation can be recalled by select-
ing “Home” on the “Destination”
screen. (P.119)
No.FunctionPage
Select to register home.152
Select to edit home.152
Select to delete home.153
Page 153 of 410
153
4. MY MEMORY
CT200h_Navi_OM76113E_(EE)
13.12.06 15:16
3
NAVIGATION SYSTEM
1Select “Delete”.
2Select “Yes” when the confirmation
screen appears.
1Display the “My memory” screen.
(P.150)
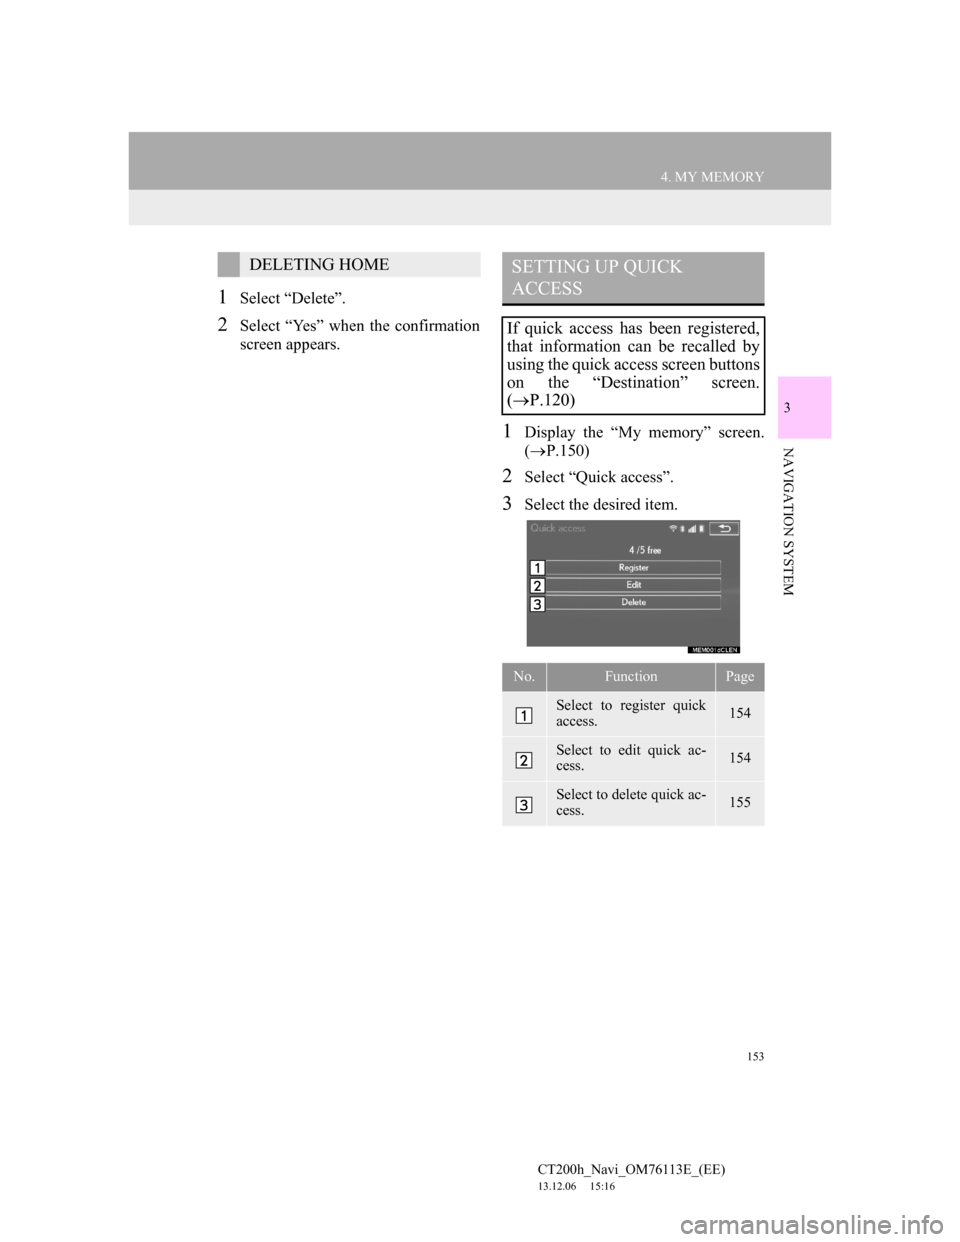
2Select “Quick access”.
3Select the desired item.
DELETING HOMESETTING UP QUICK
ACCESS
If quick access has been registered,
that information can be recalled by
using the quick access screen buttons
on the “Destination” screen.
(P.120)
No.FunctionPage
Select to register quick
access.154
Select to edit quick ac-
cess.154
Select to delete quick ac-
cess.155
Page 155 of 410
155
4. MY MEMORY
CT200h_Navi_OM76113E_(EE)
13.12.06 15:16
3
NAVIGATION SYSTEM
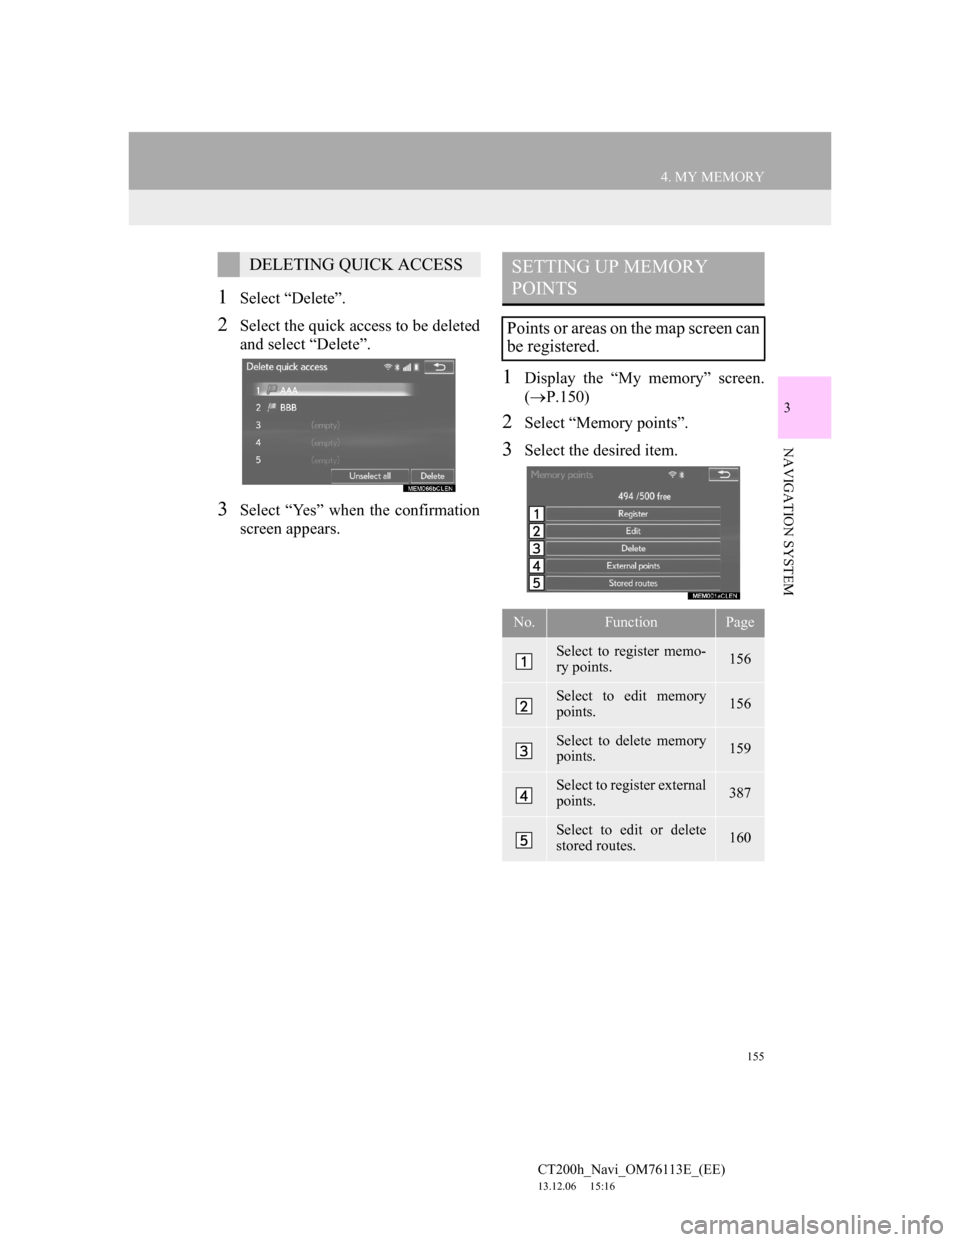
1Select “Delete”.
2Select the quick access to be deleted
and select “Delete”.
3Select “Yes” when the confirmation
screen appears.
1Display the “My memory” screen.
(P.150)
2Select “Memory points”.
3Select the desired item.
DELETING QUICK ACCESSSETTING UP MEMORY
POINTS
Points or areas on the map screen can
be registered.
No.FunctionPage
Select to register memo-
ry points.156
Select to edit memory
points.156
Select to delete memory
points.159
Select to register external
points.387
Select to edit or delete
stored routes.160
Page 157 of 410
157
4. MY MEMORY
CT200h_Navi_OM76113E_(EE)
13.12.06 15:16
3
NAVIGATION SYSTEM
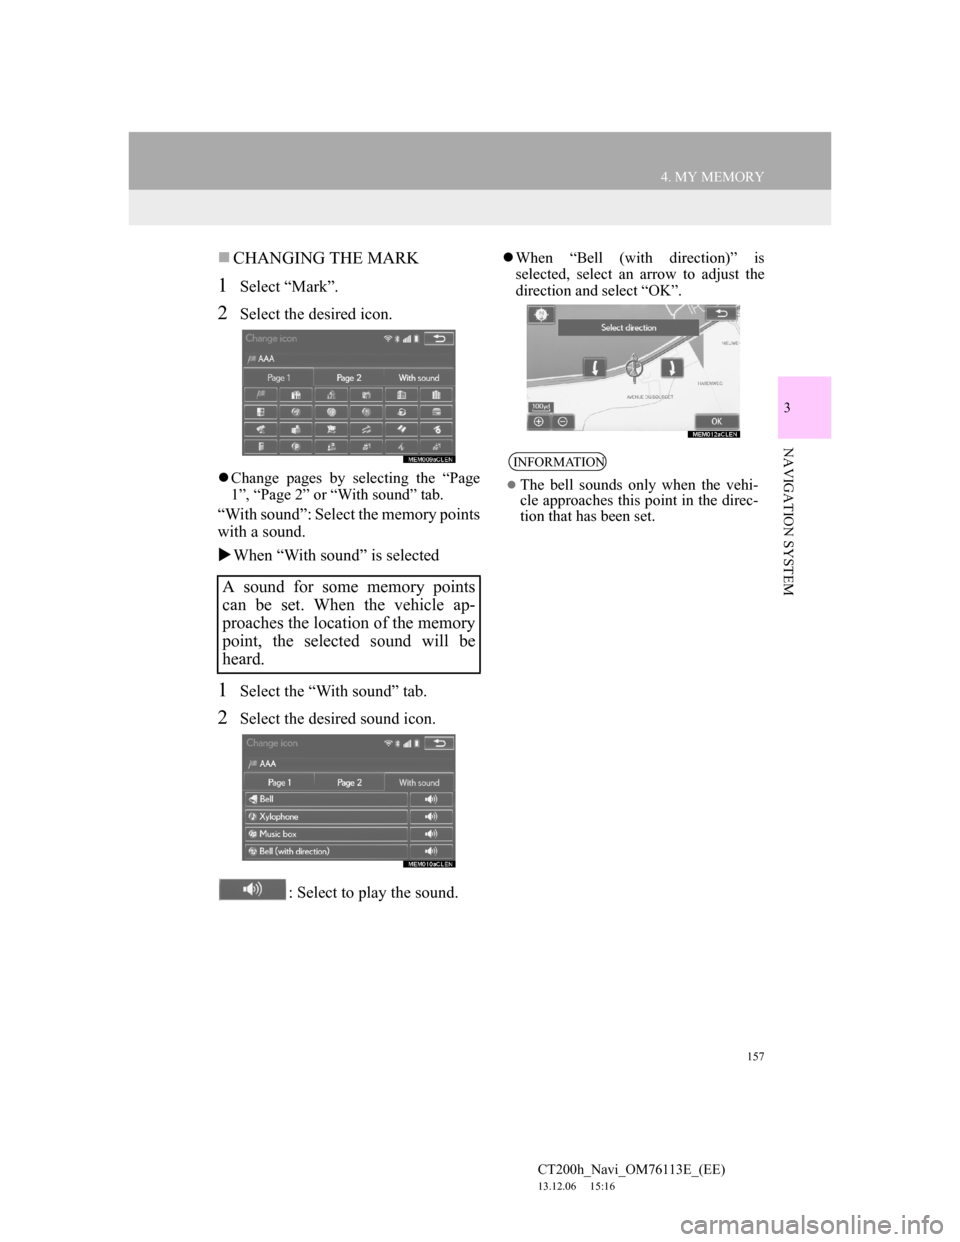
CHANGING THE MARK
1Select “Mark”.
2Select the desired icon.
Change pages by selecting the “Page
1”, “Page 2” or “With sound” tab.
“With sound”: Select the memory points
with a sound.
When “With sound” is selected
1Select the “With sound” tab.
2Select the desired sound icon.
: Select to play the sound.
When “Bell (with direction)” is
selected, select an arrow to adjust the
direction and select “OK”.
A sound for some memory points
can be set. When the vehicle ap-
proaches the location of the memory
point, the selected sound will be
heard.
INFORMATION
The bell sounds only when the vehi-
cle approaches this point in the direc-
tion that has been set.
Page 159 of 410
159
4. MY MEMORY
CT200h_Navi_OM76113E_(EE)
13.12.06 15:16
3
NAVIGATION SYSTEM
To register a new group
1Select “New group”.
2Enter the group name and select
“OK”.
To edit group name
1Select the group to be edited.
2Select “Edit name”.
3Enter the group name and select
“OK”.
To delete group
1Select “Delete group”.
2Select the group to be deleted and se-
lect “delete”.
3Select “Yes” when the confirmation
screen appears.
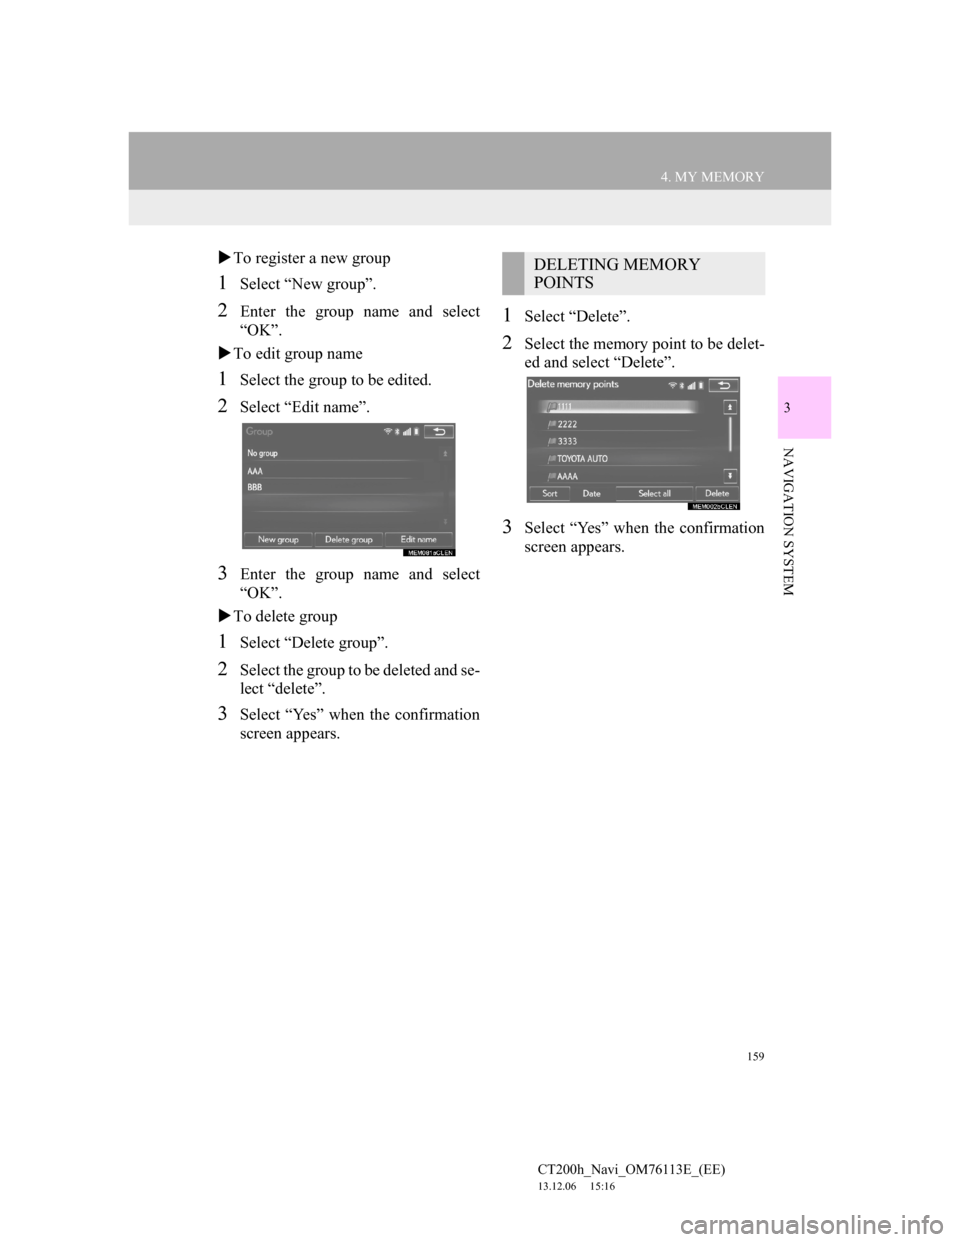
1Select “Delete”.
2Select the memory point to be delet-
ed and select “Delete”.
3Select “Yes” when the confirmation
screen appears.
DELETING MEMORY
POINTS
Page 161 of 410
161
4. MY MEMORY
CT200h_Navi_OM76113E_(EE)
13.12.06 15:16
3
NAVIGATION SYSTEM
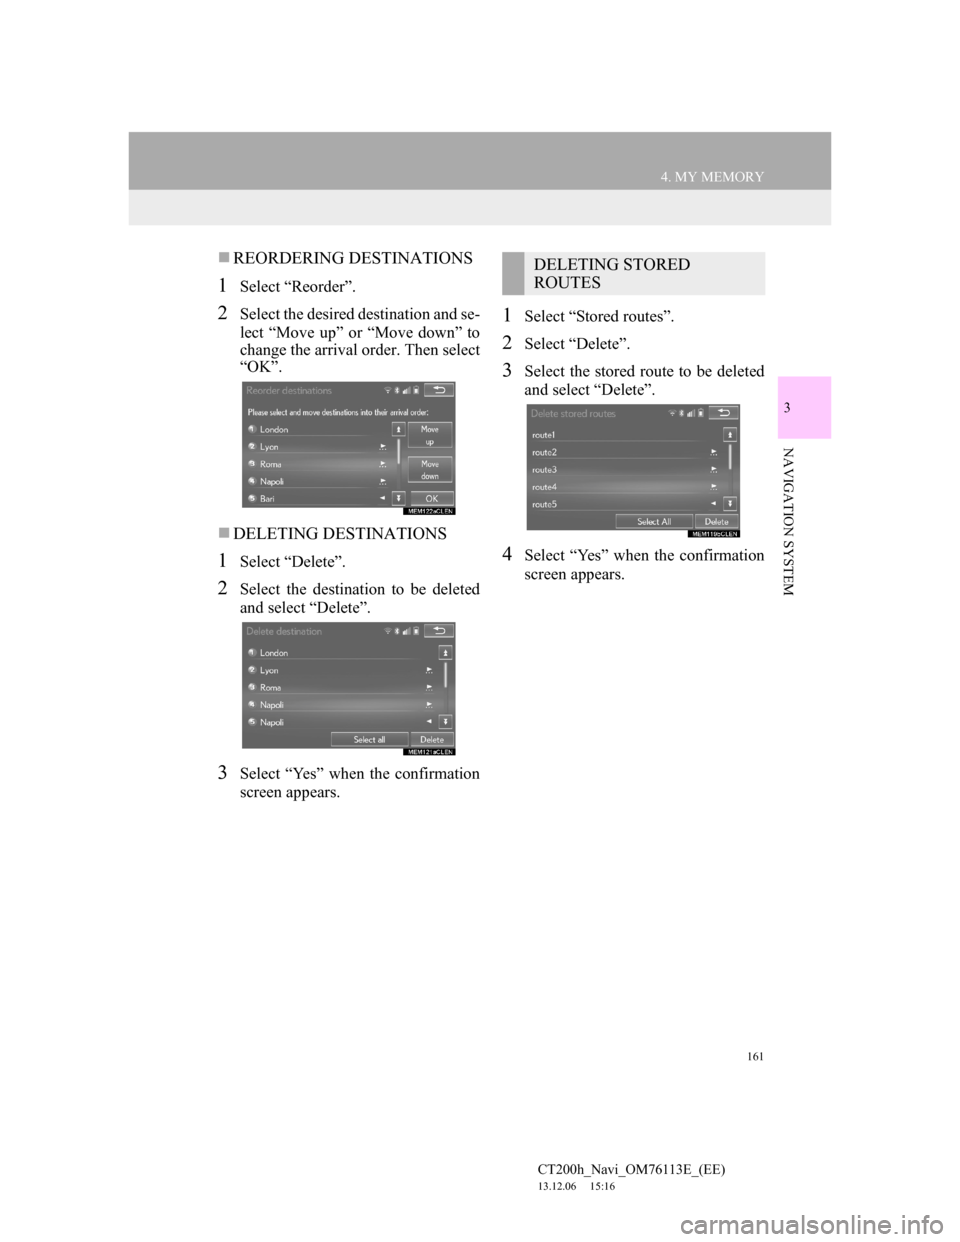
REORDERING DESTINATIONS
1Select “Reorder”.
2Select the desired destination and se-
lect “Move up” or “Move down” to
change the arrival order. Then select
“OK”.
DELETING DESTINATIONS
1Select “Delete”.
2Select the destination to be deleted
and select “Delete”.
3Select “Yes” when the confirmation
screen appears.
1Select “Stored routes”.
2Select “Delete”.
3Select the stored route to be deleted
and select “Delete”.
4Select “Yes” when the confirmation
screen appears.
DELETING STORED
ROUTES
Page 163 of 410
163
4. MY MEMORY
CT200h_Navi_OM76113E_(EE)
13.12.06 15:16
3
NAVIGATION SYSTEM
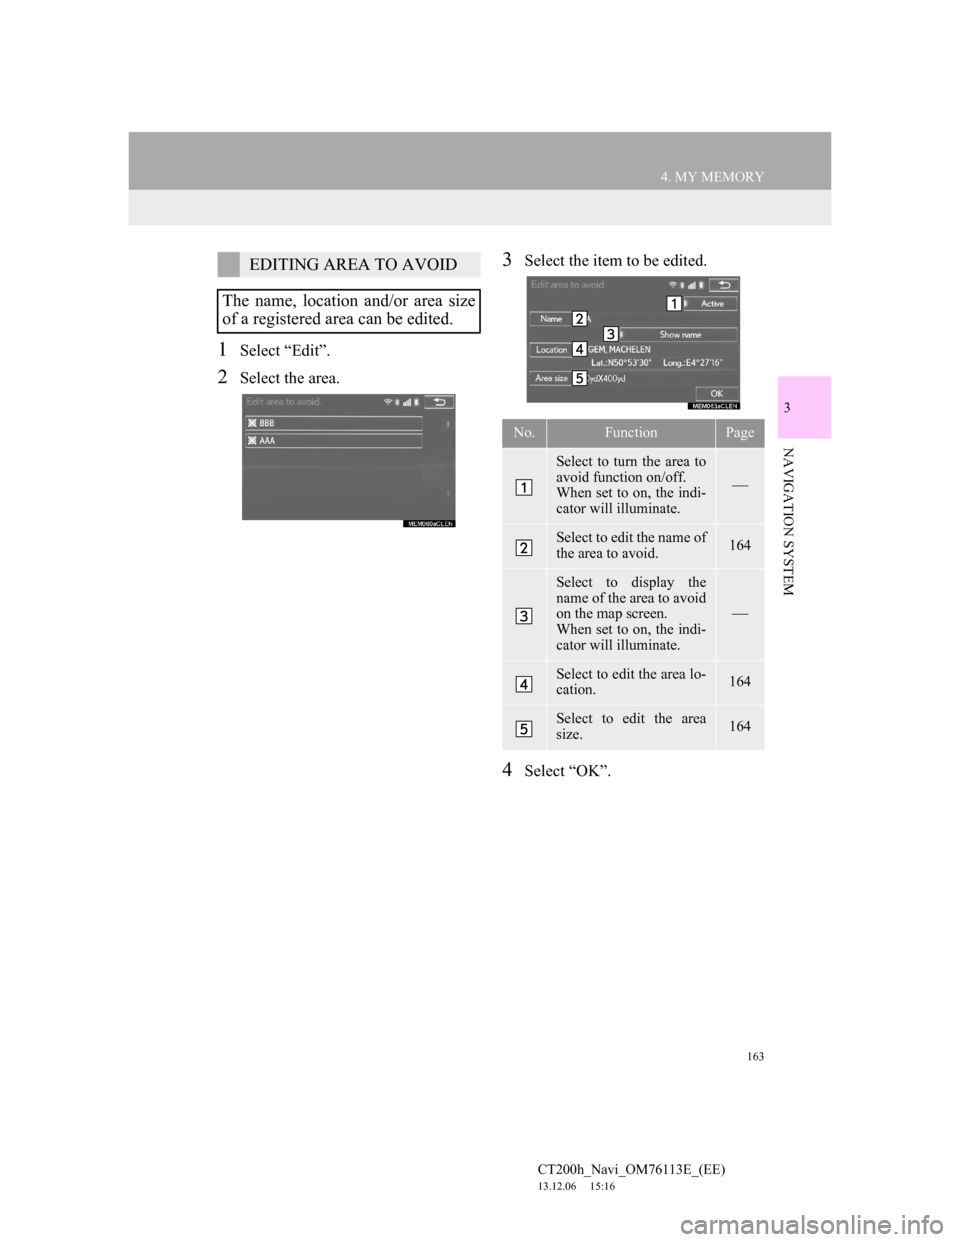
1Select “Edit”.
2Select the area.
3Select the item to be edited.
4Select “OK”.
EDITING AREA TO AVOID
The name, location and/or area size
of a registered area can be edited.
No.FunctionPage
Select to turn the area to
avoid function on/off.
When set to on, the indi-
cator will illuminate.
Select to edit the name of
the area to avoid.164
Select to display the
name of the area to avoid
on the map screen.
When set to on, the indi-
cator will illuminate.
Select to edit the area lo-
cation.164
Select to edit the area
size.164
Page 165 of 410
165
4. MY MEMORY
CT200h_Navi_OM76113E_(EE)
13.12.06 15:16
3
NAVIGATION SYSTEM
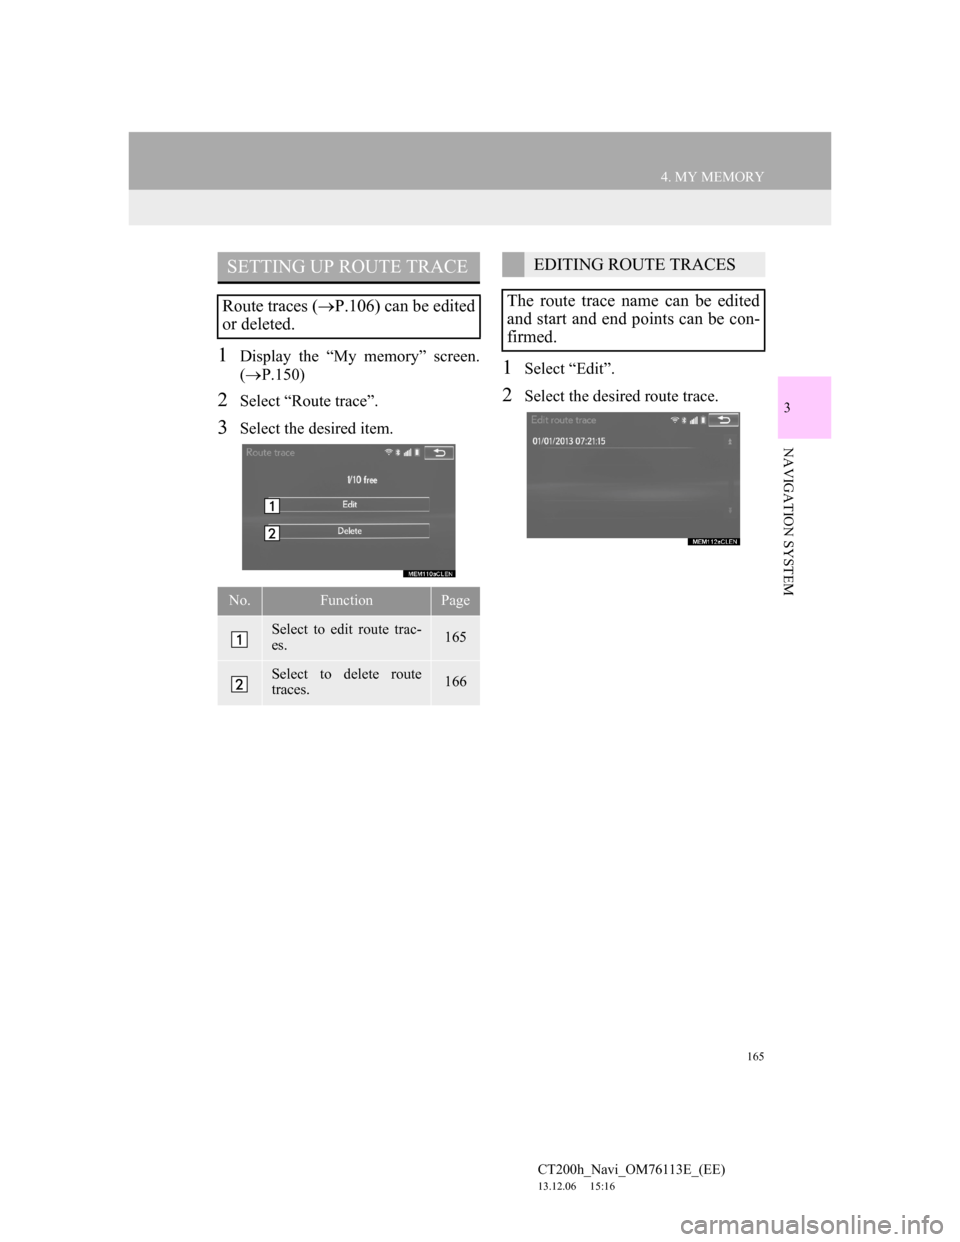
1Display the “My memory” screen.
(P.150)
2Select “Route trace”.
3Select the desired item.
1Select “Edit”.
2Select the desired route trace.
SETTING UP ROUTE TRACE
Route traces (P.106) can be edited
or deleted.
No.FunctionPage
Select to edit route trac-
es. 165
Select to delete route
traces.166
EDITING ROUTE TRACES
The route trace name can be edited
and start and end points can be con-
firmed.