LEXUS LS430 2003 Factory Repair Manual
Manufacturer: LEXUS, Model Year: 2003,
Model line: LS430,
Model: LEXUS LS430 2003
Pages: 4500, PDF Size: 87.45 MB
LEXUS LS430 2003 Factory Repair Manual
LS430 2003
LEXUS
LEXUS
https://www.carmanualsonline.info/img/36/57050/w960_57050-0.png
LEXUS LS430 2003 Factory Repair Manual
Trending: fuel pressure, manual transmission, shock absorber, tow, spare tire, battery replacement, coolant capacity
Page 2121 of 4500
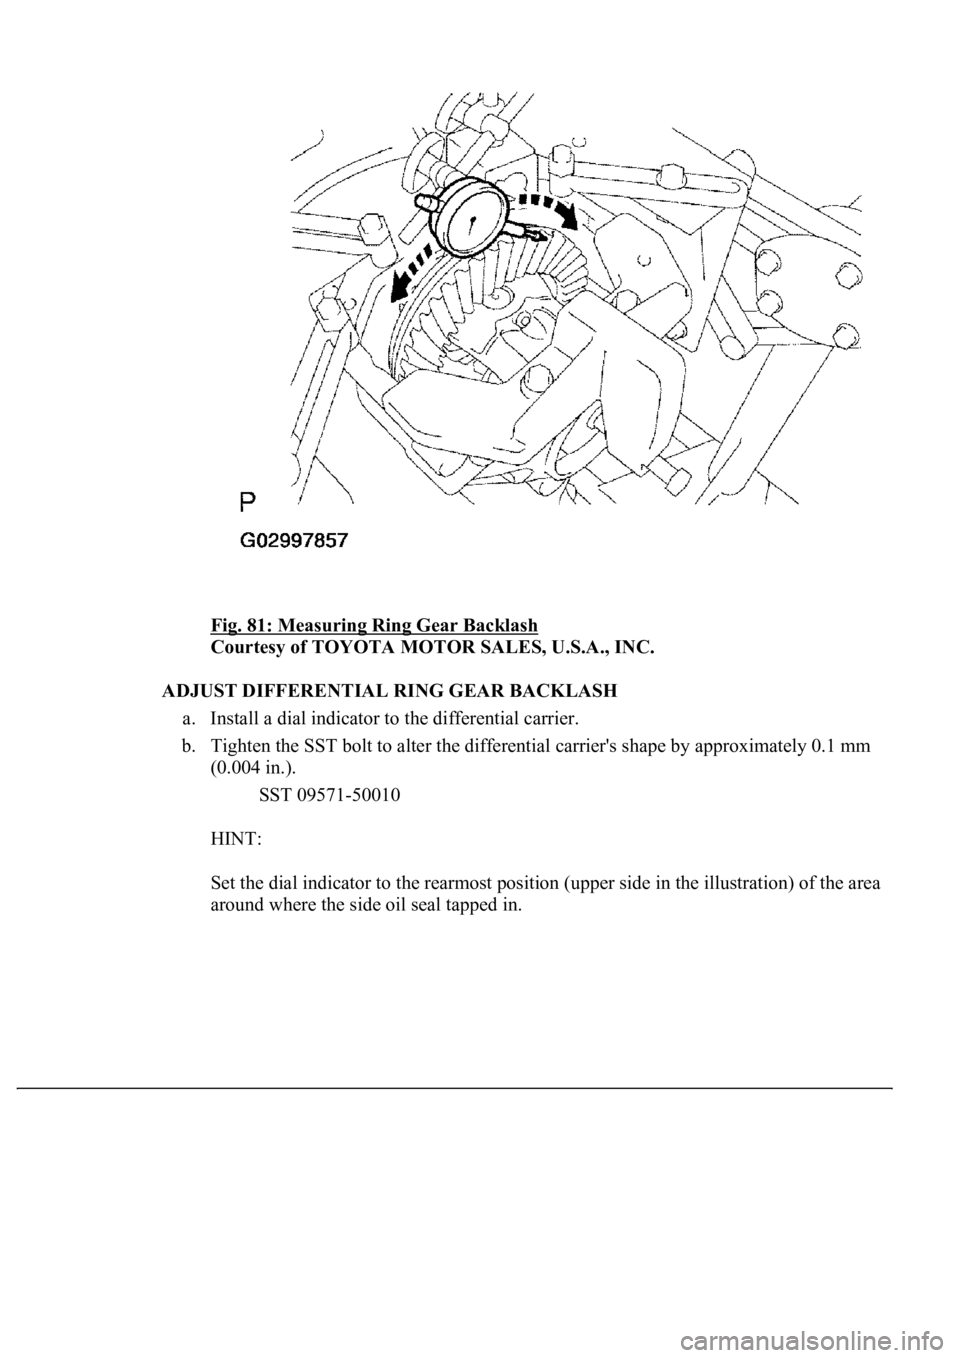
Fig. 81: Measuring Ring Gear Backlash
Courtesy of TOYOTA MOTOR SALES, U.S.A., INC.
ADJUST DIFFERENTIAL RING GEAR BACKLASH
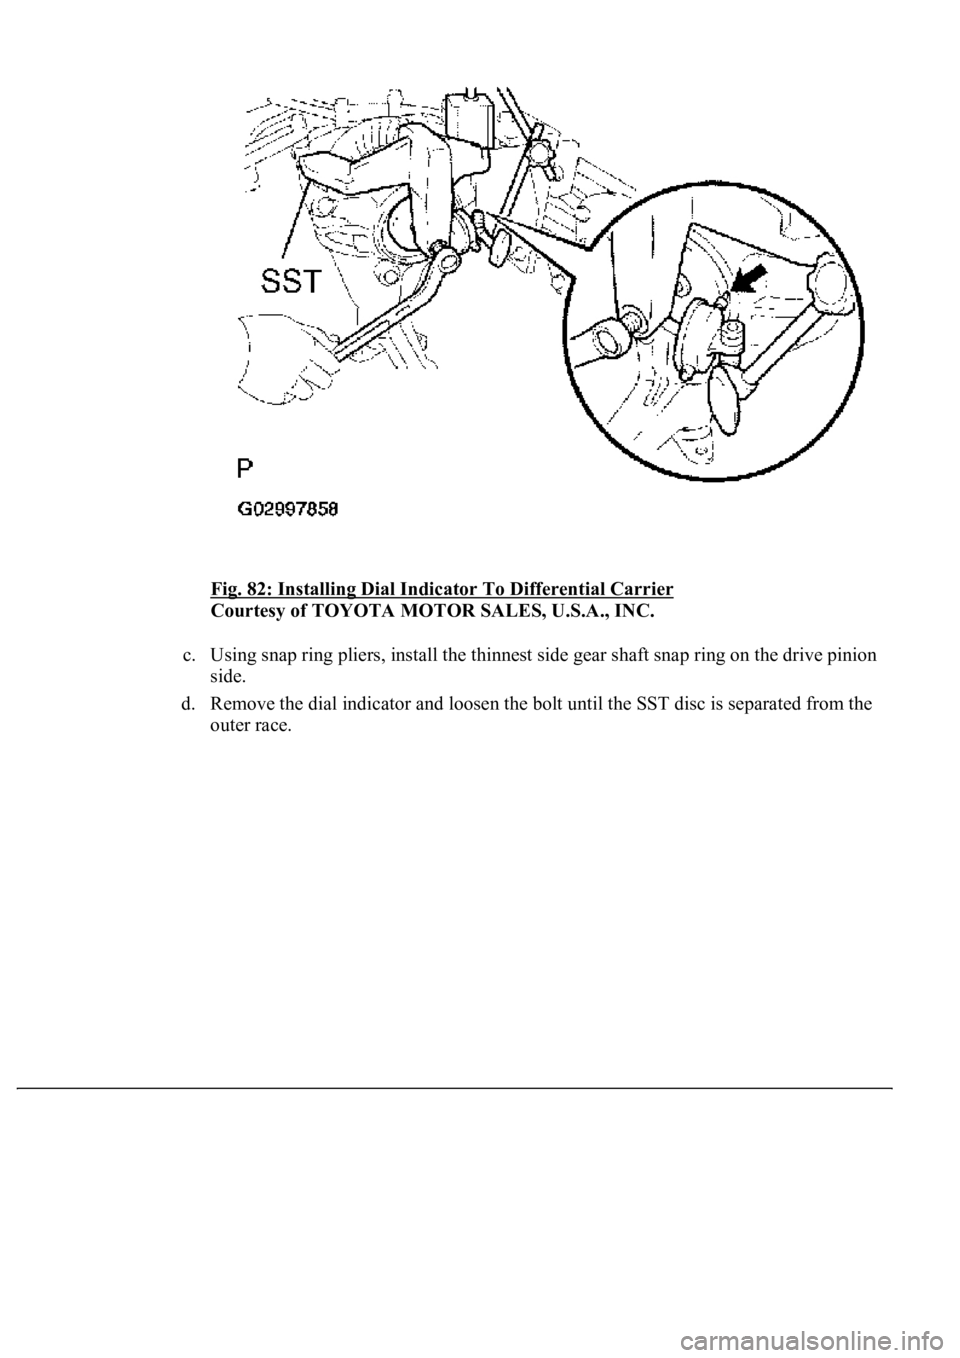
a. Install a dial indicator to the differential carrier.
b. Tighten the SST bolt to alter the differential carrier's shape by approximately 0.1 mm
(0.004 in.).
SST 09571-50010
HINT:
Set the dial indicator to the rearmost position (upper side in the illustration) of the area
around where the side oil seal tapped in.
Page 2122 of 4500
Fig. 82: Installing Dial Indicator To Differential Carrier
Courtesy of TOYOTA MOTOR SALES, U.S.A., INC.
c. Using snap ring pliers, install the thinnest side gear shaft snap ring on the drive pinion
side.
d. Remove the dial indicator and loosen the bolt until the SST disc is separated from the
outer race.
Page 2123 of 4500
Fig. 83: Installing Thinnest Side Gear Shaft Snap Ring On Drive Pinion Side
Courtesy of TOYOTA MOTOR SALES, U.S.A., INC.
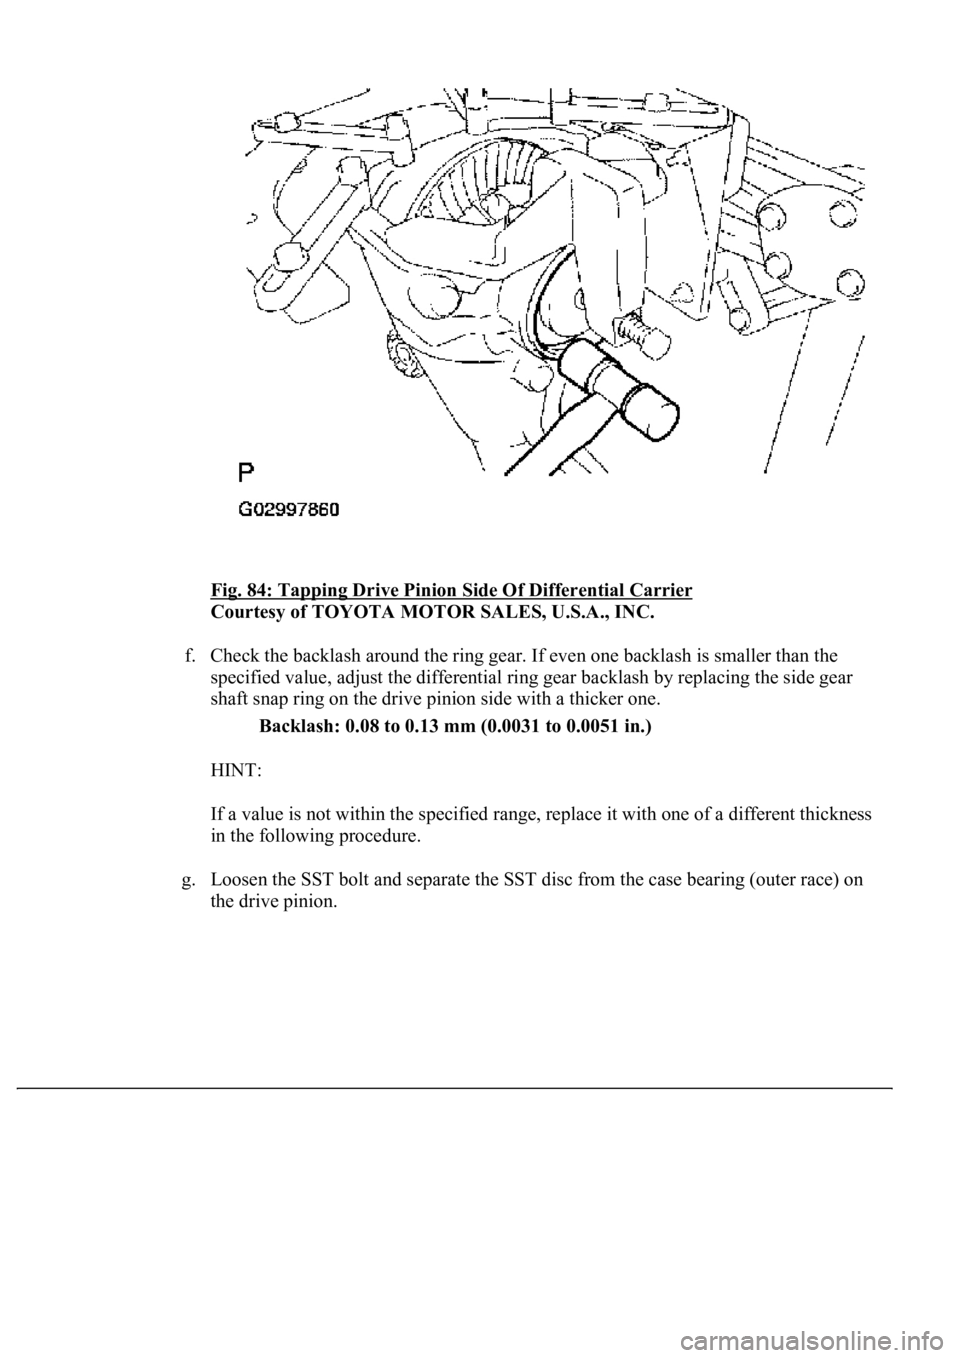
e. Using a plastic hammer, lightly tap the drive pinion side of the differential carrier.
Page 2124 of 4500
Fig. 84: Tapping Drive Pinion Side Of Differential Carrier
Courtesy of TOYOTA MOTOR SALES, U.S.A., INC.
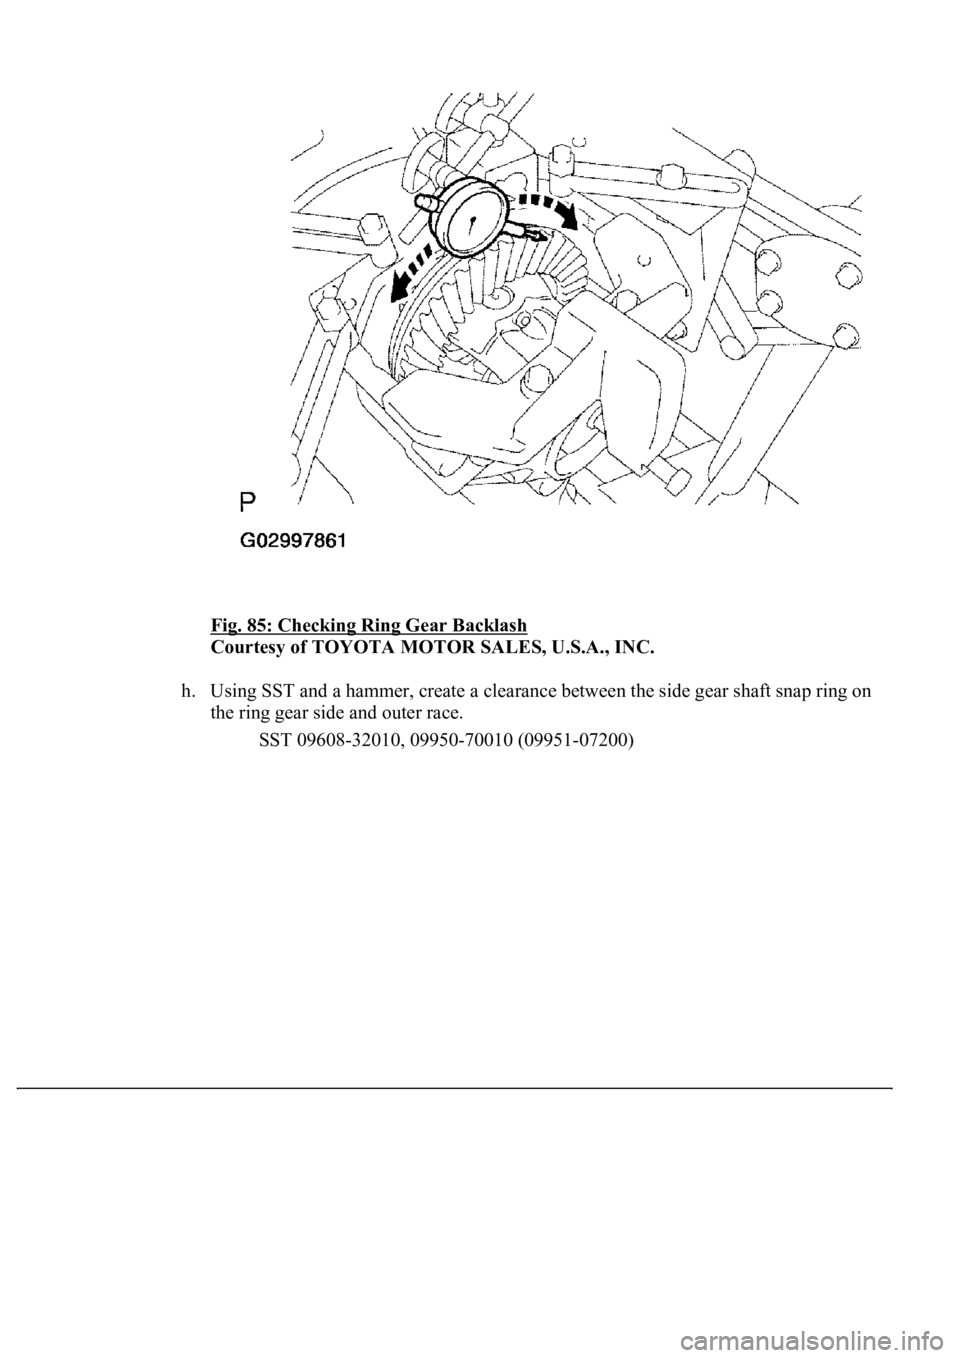
f. Check the backlash around the ring gear. If even one backlash is smaller than the
specified value, adjust the differential ring gear backlash by replacing the side gear
shaft snap ring on the drive pinion side with a thicker one.
Backlash: 0.08 to 0.13 mm (0.0031 to 0.0051 in.)
HINT:
If a value is not within the specified range, replace it with one of a different thickness
in the following procedure.
g. Loosen the SST bolt and separate the SST disc from the case bearing (outer race) on
the drive pinion.
Page 2125 of 4500
Fig. 85: Checking Ring Gear Backlash
Courtesy of TOYOTA MOTOR SALES, U.S.A., INC.
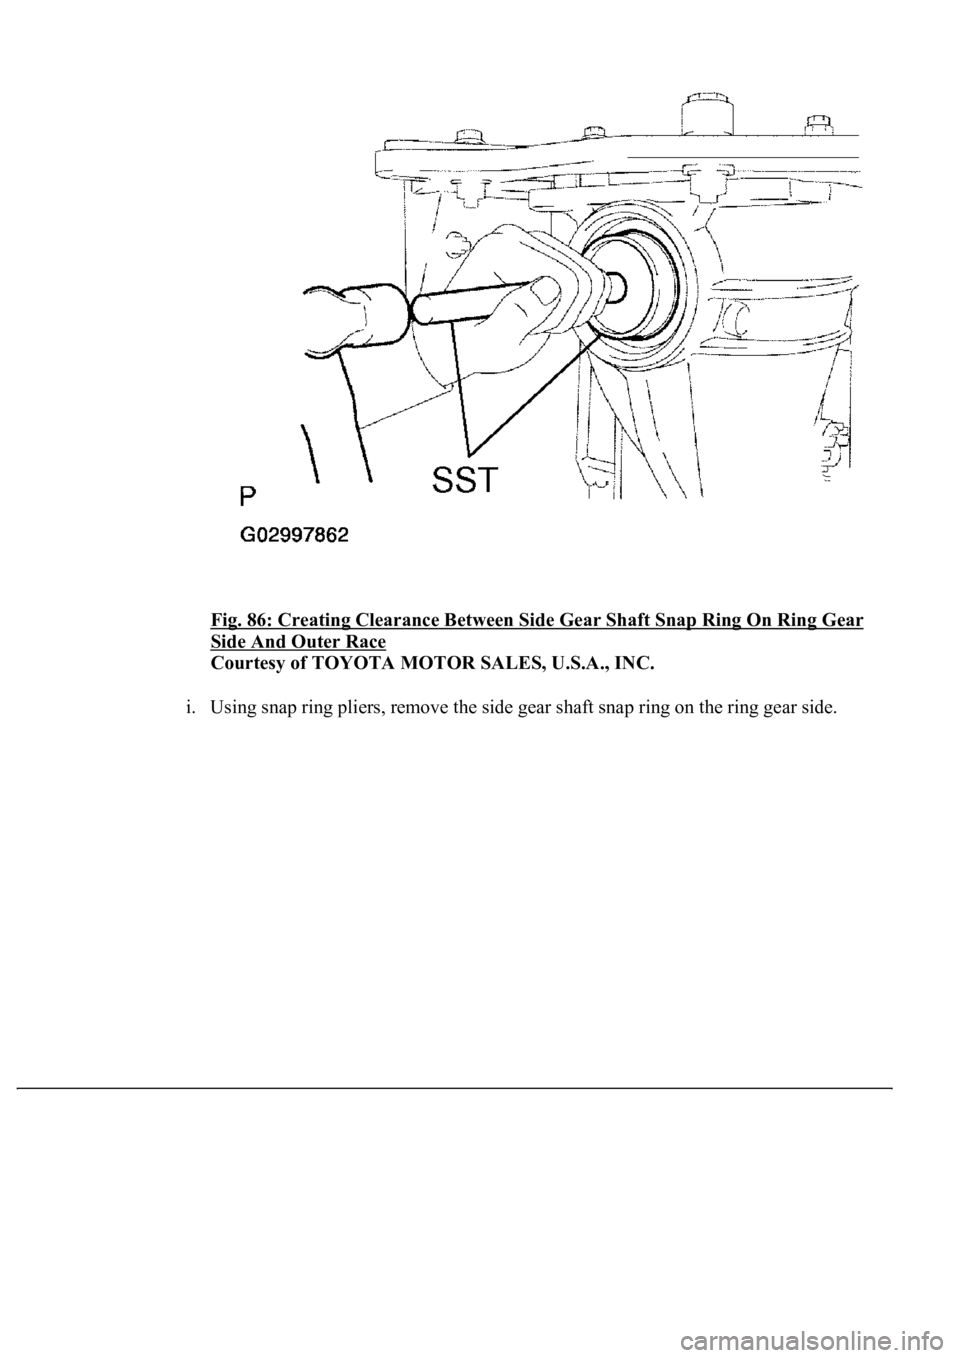
h. Using SST and a hammer, create a clearance between the side gear shaft snap ring on
the ring gear side and outer race.
SST 09608-32010, 09950-70010 (09951-07200)
Page 2126 of 4500
Fig. 86: Creating Clearance Between Side Gear Shaft Snap Ring On Ring Gear
Side And Outer Race
Courtesy of TOYOTA MOTOR SALES, U.S.A., INC.
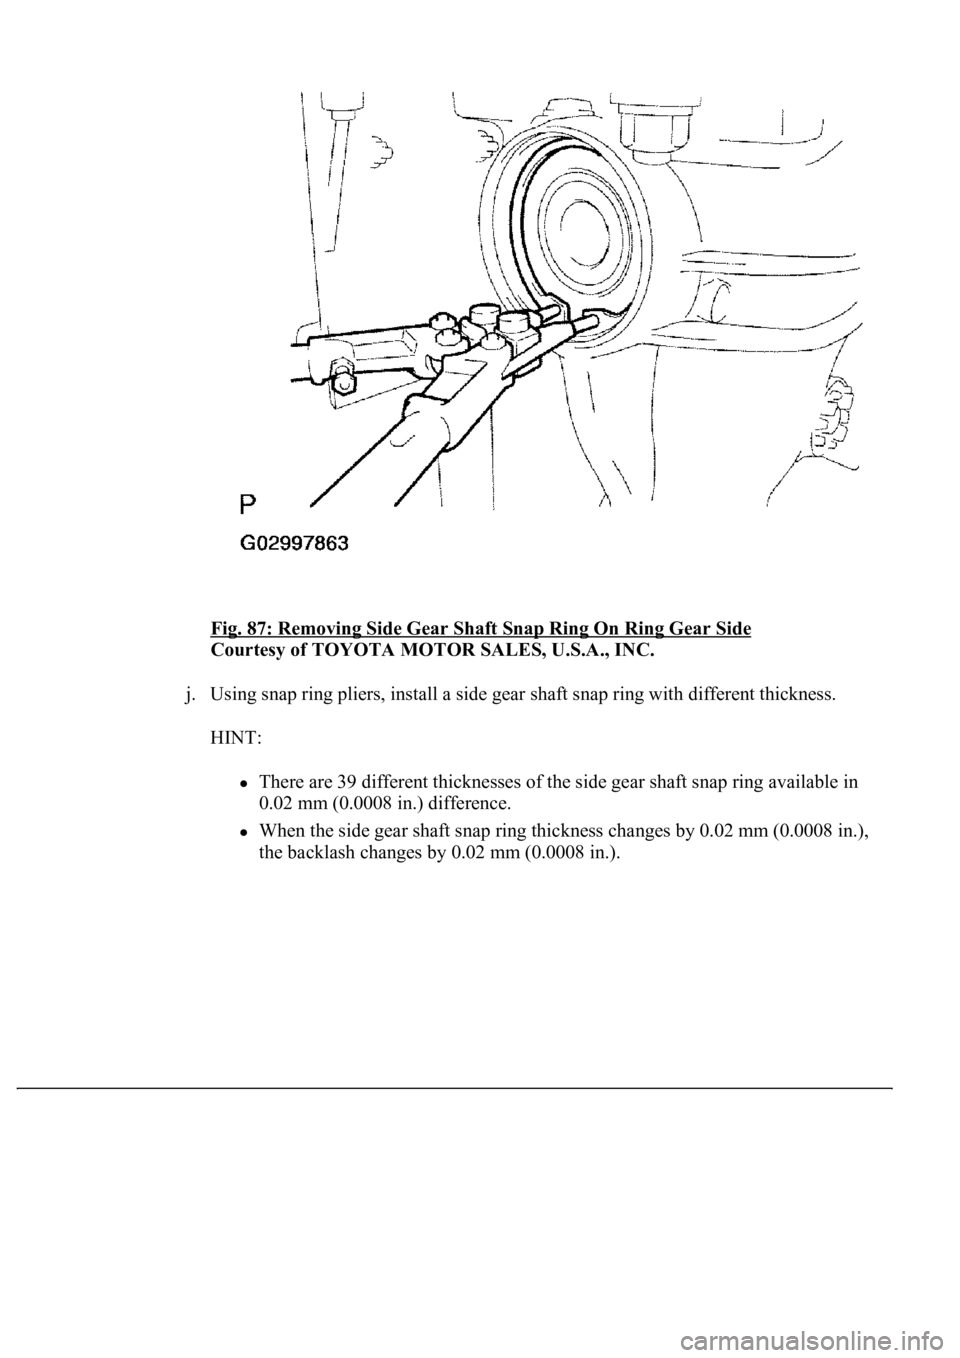
i. Using snap ring pliers, remove the side gear shaft snap ring on the ring gear side.
Page 2127 of 4500
Fig. 87: Removing Side Gear Shaft Snap Ring On Ring Gear Side
Courtesy of TOYOTA MOTOR SALES, U.S.A., INC.
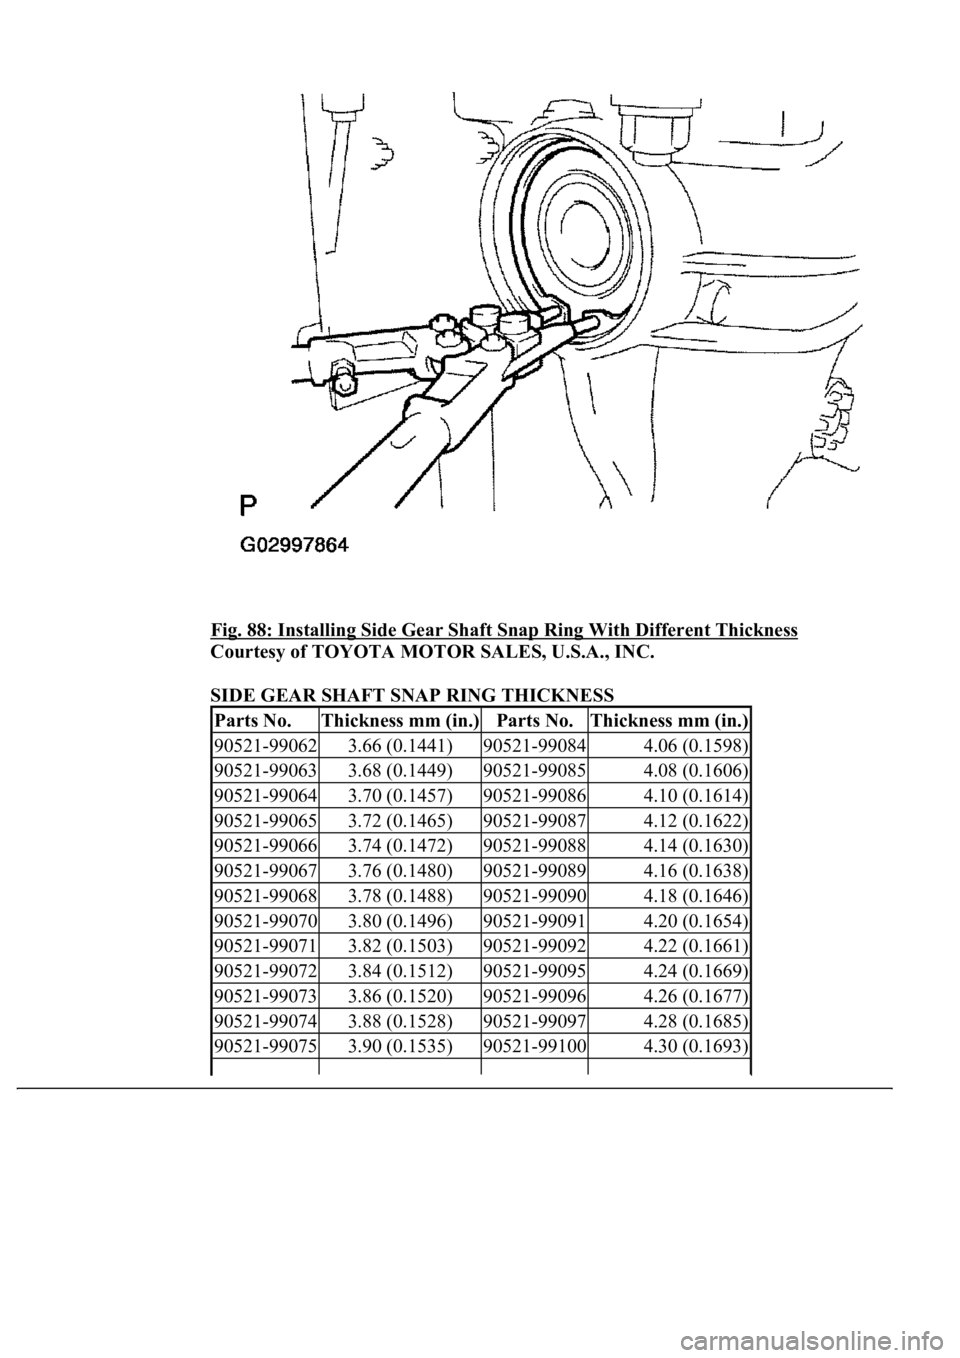
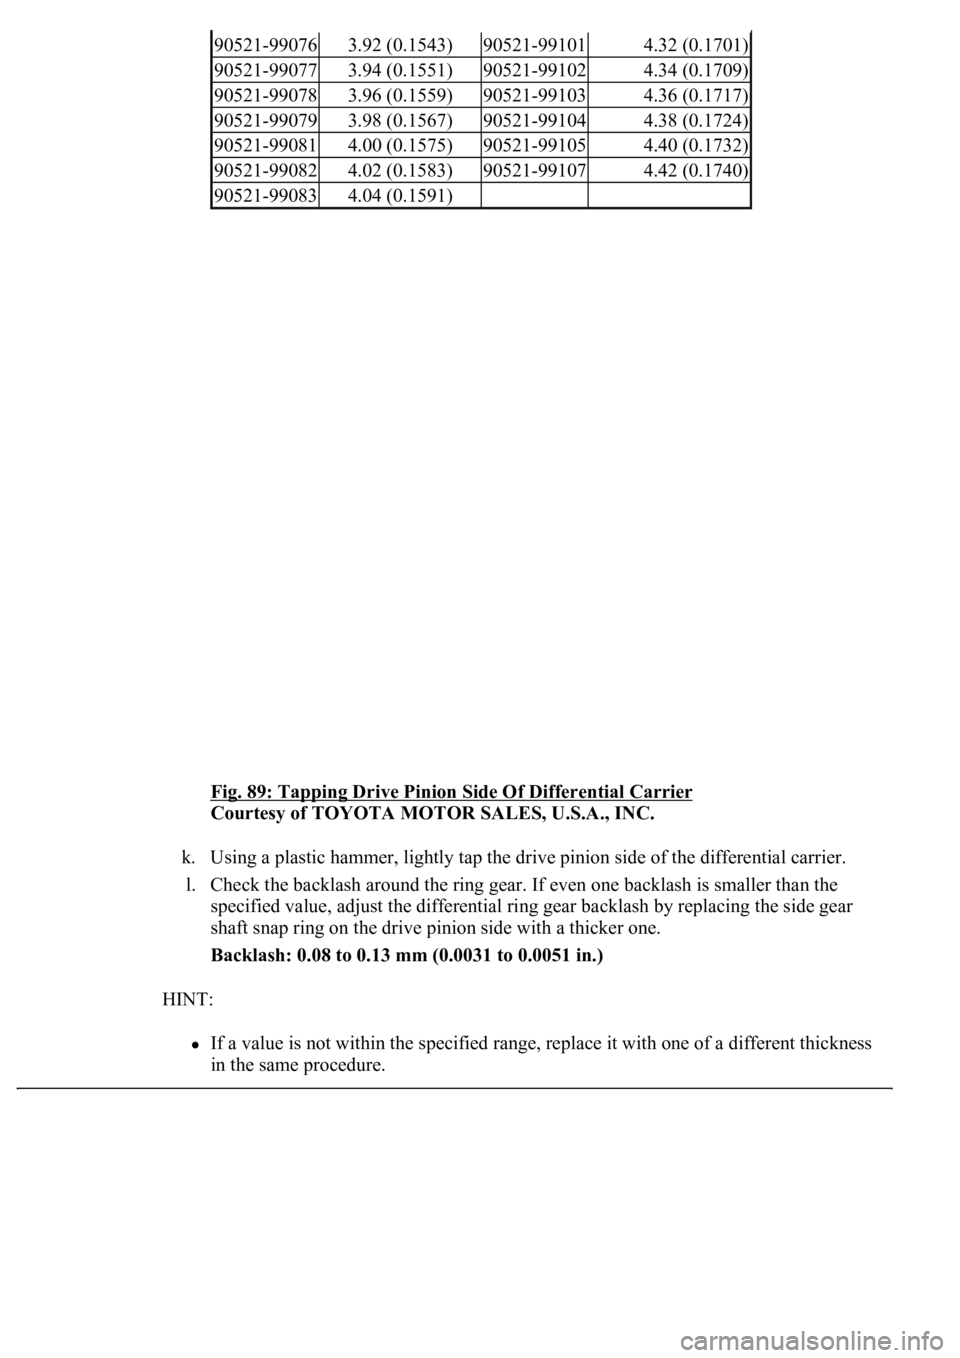
j. Using snap ring pliers, install a side gear shaft snap ring with different thickness.
HINT:
There are 39 different thicknesses of the side gear shaft snap ring available in
0.02 mm (0.0008 in.) difference.
<003a004b0048005100030057004b004800030056004c004700480003004a00480044005500030056004b0044004900570003005600510044005300030055004c0051004a00030057004b004c0046004e005100480056005600030046004b00440051004a00
48005600030045005c00030013001100130015000300500050[ (0.0008 in.),
the backlash changes by 0.02 mm (0.0008 in.).
Page 2128 of 4500
Fig. 88: Installing Side Gear Shaft Snap Ring With Different Thickness
Courtesy of TOYOTA MOTOR SALES, U.S.A., INC.
SIDE GEAR SHAFT SNAP RING THICKNESS
Parts No.Thickness mm (in.)Parts No.Thickness mm (in.)
90521-990623.66 (0.1441)90521-990844.06 (0.1598)
90521-990633.68 (0.1449)90521-990854.08 (0.1606)
90521-990643.70 (0.1457)90521-990864.10 (0.1614)
90521-990653.72 (0.1465)90521-990874.12 (0.1622)
90521-990663.74 (0.1472)90521-990884.14 (0.1630)
90521-990673.76 (0.1480)90521-990894.16 (0.1638)
90521-990683.78 (0.1488)90521-990904.18 (0.1646)
90521-990703.80 (0.1496)90521-990914.20 (0.1654)
90521-990713.82 (0.1503)90521-990924.22 (0.1661)
90521-990723.84 (0.1512)90521-990954.24 (0.1669)
90521-990733.86 (0.1520)90521-990964.26 (0.1677)
90521-990743.88 (0.1528)90521-990974.28 (0.1685)
90521-990753.90 (0.1535)90521-991004.30 (0.1693)
Page 2129 of 4500
Fig. 89: Tapping Drive Pinion Side Of Differential Carrier
Courtesy of TOYOTA MOTOR SALES, U.S.A., INC.
k. Using a plastic hammer, lightly tap the drive pinion side of the differential carrier.
l. Check the backlash around the ring gear. If even one backlash is smaller than the
specified value, adjust the differential ring gear backlash by replacing the side gear
shaft snap ring on the drive pinion side with a thicker one.
Backlash: 0.08 to 0.13 mm (0.0031 to 0.0051 in.)
HINT:
If a value is not within the specified range, replace it with one of a different thickness
in the same procedure.
90521-990763.92 (0.1543)90521-991014.32 (0.1701)
90521-990773.94 (0.1551)90521-991024.34 (0.1709)
90521-990783.96 (0.1559)90521-991034.36 (0.1717)
90521-990793.98 (0.1567)90521-991044.38 (0.1724)
90521-990814.00 (0.1575)90521-991054.40 (0.1732)
90521-990824.02 (0.1583)90521-991074.42 (0.1740)
90521-990834.04 (0.1591)
Page 2130 of 4500
Fig. 90: Checking Ring Gear Backlash
Courtesy of TOYOTA MOTOR SALES, U.S.A., INC.
ADJUST TOTAL PRELOAD
a. Using SST and a torque wrench, measure the preload with the teeth of the drive pinion
and ring gear in contact.
b. SST 09229-55010
Total preload (at starting):
Drive pinion preload plus 0.46 to 1.37 N.m
(4.69 to 13.97 kgf.cm, 4.07 to 12.13 in..lbf)
If the preload is greater than the specification, replace the rear differential side
gear shaft snap ring of the ring gear's tooth surface side with a thinner one.
Trending: actuator damper, shock absorber, engine oil, Rear control Arm, warning, maintenance reset, fuel system
