sensor LEXUS LS430 2003 Factory Repair Manual
[x] Cancel search | Manufacturer: LEXUS, Model Year: 2003, Model line: LS430, Model: LEXUS LS430 2003Pages: 4500, PDF Size: 87.45 MB
Page 593 of 4500
c. Check the operating sound of the exhaust solenoid valve.
OK:
It should make an operating sound (click).
HINT:
When a malfunction is found in the exhaust solenoid valve, replace the height control compressor assy.
NG: REPLACE HEIGHT CONTROL COMPRESSOR ASSY (SEE REPLACEMENT
)
OK:Go to next step
6.INSPECT HEIGHT CONTROL SENSOR LINK SUB-ASSY
a. Inspect and adjust the height control sensor link sub-assy (see ON
-VEHICLE INSPECTION ).
NG: REPLACE HEIGHT CONTROL SENSOR LINK SUB-ASSY
OK: CHECK AND REPAIR OR REPLACE PARTS
Air tube is clogged (see ON-VEHICLE INSPECTION ).
Compressor is faulty (see REPLACEMENT ).
Height control sensor sub-assy is faulty (see REPLACEMENT - HEIGHT CONTROL
SENSOR SUB-ASSY FRONT , REPLACEMENT - HEIGHT CONTROL SENSOR SUB-
ASSY REAR LH ).
Foreign material in the height control solenoid valve and/or exhaust solenoid valve (see
REPLACEMENT
- HEIGHT CONTROL COMPRESSOR ASSY , REPLACEMENT -
HEIGHT CONTROL VALVE SUB
-ASSY NO.1 , REPLACEMENT - HEIGHT CONTROL
VALVE SUB-ASSY NO.2 ).
Suspension control ECU malfunction (see REPLACEMENT ).
CIRCUIT DESCRIPTION
Page 595 of 4500
POWER SOURCE CIRCUIT ).
NG: REPAIR CIRCUIT INDICATED BY OUTPUT CODE
OK:Go to next step
2.CHECK HARNESS AND CONNECTOR (HEIGHT CONTROL SENSOR SUB-ASSY POWER
SOURCE) (SEE ELECTRONIC CIRCUIT INSPECTION PROCEDURE
)
a. Disconnect the height control sensor sub-assy connector.
b. Turn the ignition switch to the ON position.
c. Measure the voltage according to the value (s) in the table below.
TESTER CONNECTION STANDARD SPECIFIED CONDITION STANDARD (FRONT
RH)
TESTER CONNECTION STANDARD SPECIFIED CONDITION STANDARD (FRONT
LH):
TESTER CONNECTION STANDARD SPECIFIED CONDITION STANDARD (REAR RH)
TESTER CONNECTION STANDARD SPECIFIED CONDITION STANDARD (REAR LH)
NG: CHECK HEIGHT CONTROL SENSOR SUB-ASSY CIRCUIT (SEE DTC C1711 RIGHT
FRONT HEIGHT CONTROL SENSOR CIRCUIT, DTC C1712 LEFT FRONT HEIGHT
CONTROL SENSOR CIRCUIT,DTC C1713 RIGHT REAR HEIGHT CONTROL SENSOR
CIRCUIT, DTC C1714 LEFT REAR HEIGHT CONTROL SENSOR CIRCUIT )
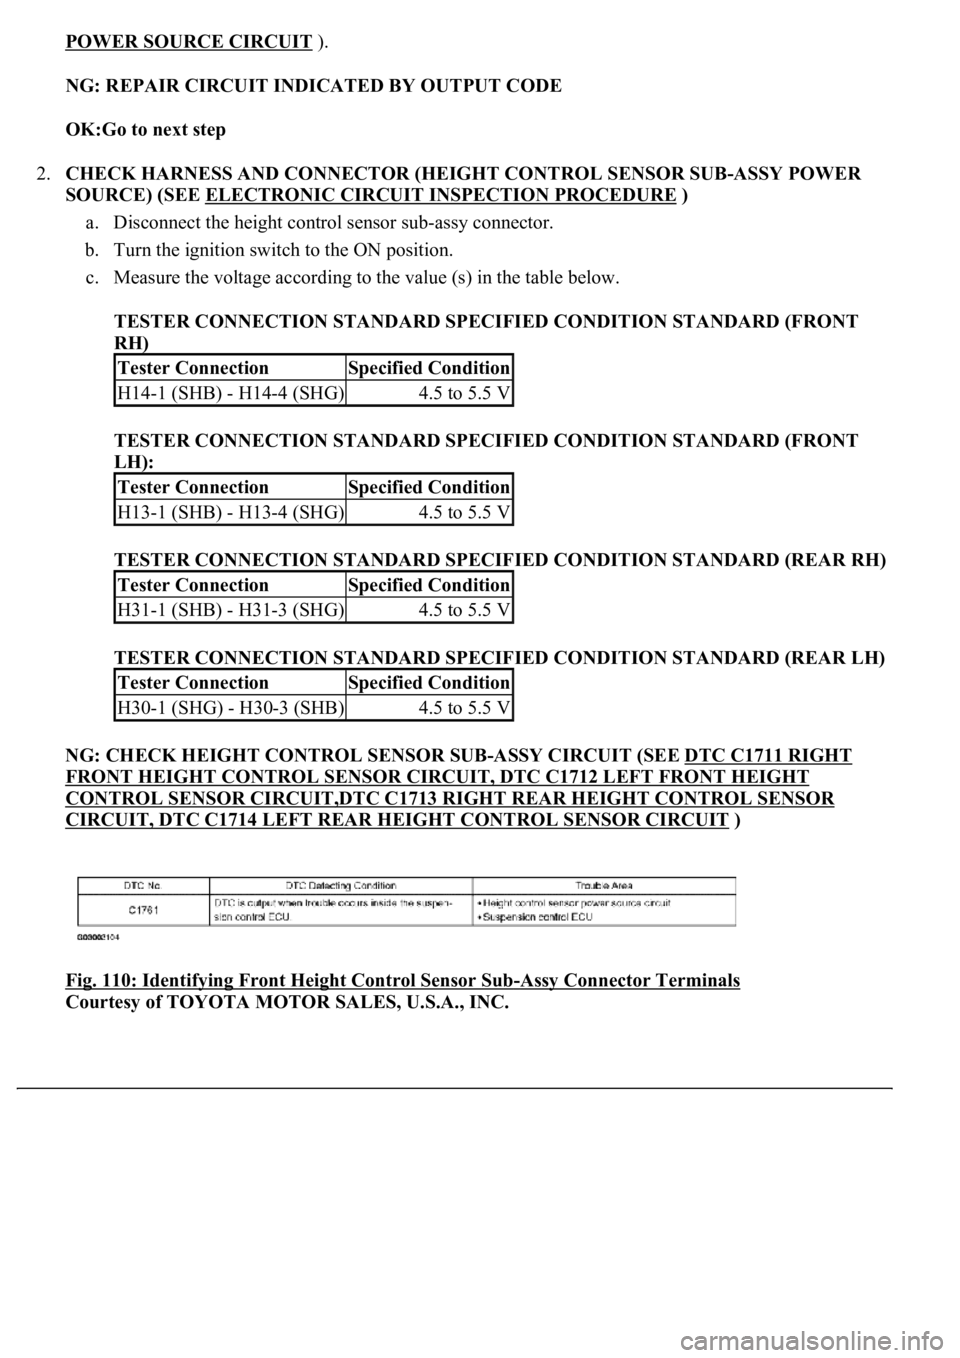
Fig. 110: Identifying Front Height Control Sensor Sub
-Assy Connector Terminals
Courtesy of TOYOTA MOTOR SALES, U.S.A., INC.
Tester ConnectionSpecified Condition
H14-1 (SHB) - H14-4 (SHG)4.5 to 5.5 V
Tester ConnectionSpecified Condition
H13-1 (SHB) - H13-4 (SHG)4.5 to 5.5 V
Tester ConnectionSpecified Condition
H31-1 (SHB) - H31-3 (SHG)4.5 to 5.5 V
Tester ConnectionSpecified Condition
H30-1 (SHG) - H30-3 (SHB)4.5 to 5.5 V
Page 596 of 4500
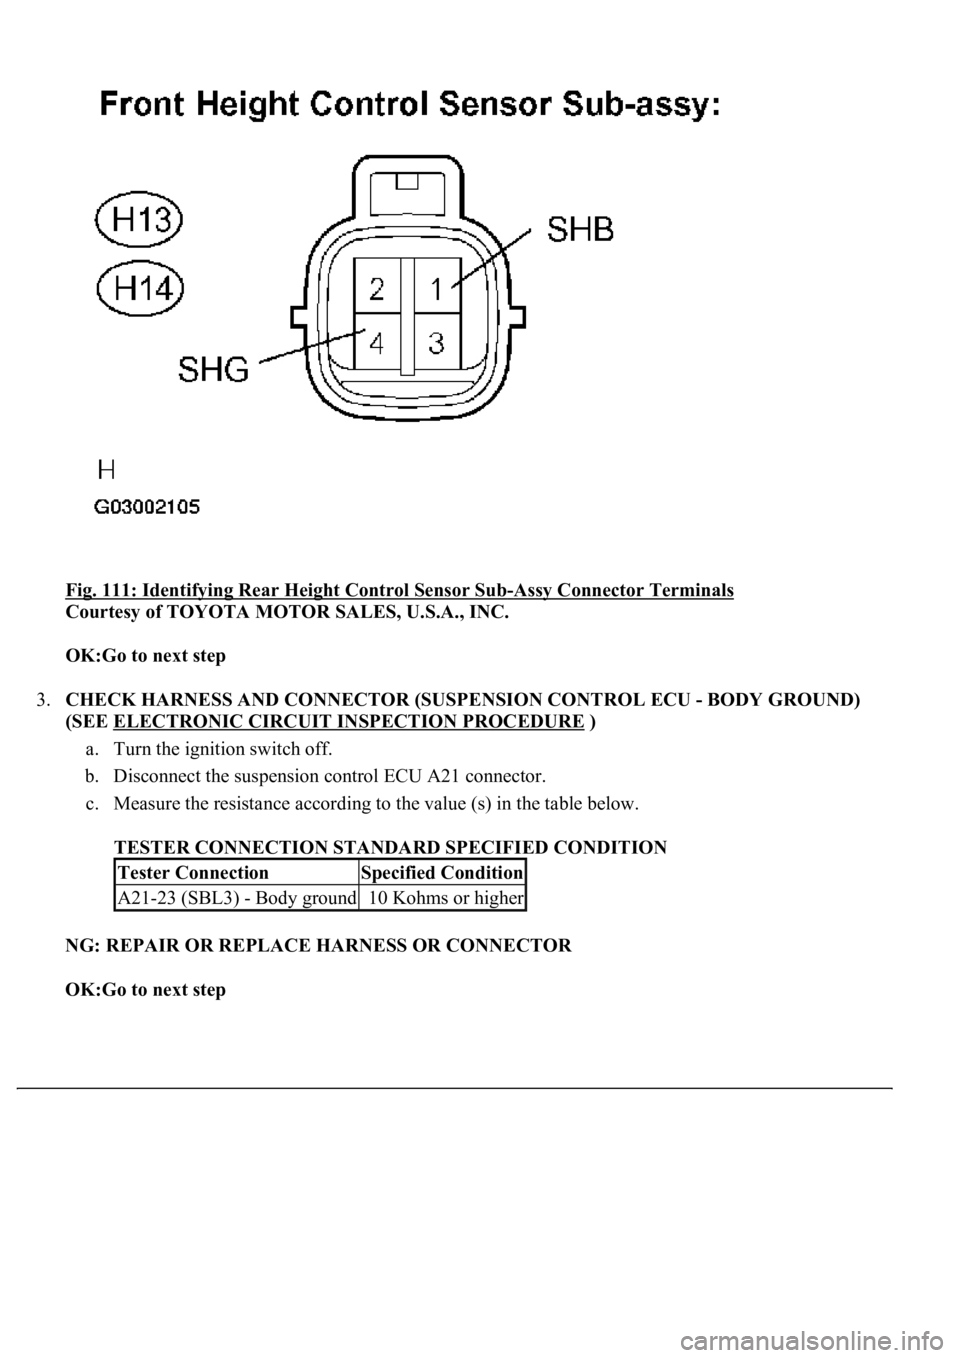
Fig. 111: Identifying Rear Height Control Sensor Sub-Assy Connector Terminals
Courtesy of TOYOTA MOTOR SALES, U.S.A., INC.
OK:Go to next step
3.CHECK HARNESS AND CONNECTOR (SUSPENSION CONTROL ECU - BODY GROUND)
(SEE ELECTRONIC CIRCUIT INSPECTION PROCEDURE
)
a. Turn the ignition switch off.
b. Disconnect the suspension control ECU A21 connector.
c. Measure the resistance according to the value (s) in the table below.
TESTER CONNECTION STANDARD SPECIFIED CONDITION
NG: REPAIR OR REPLACE HARNESS OR CONNECTOR
OK:Go to next step
Tester ConnectionSpecified Condition
A21-23 (SBL3) - Body ground10 Kohms or higher
Page 598 of 4500

Fig. 113: Identifying Suspension Control ECU Connector Terminals
Courtesy of TOYOTA MOTOR SALES, U.S.A., INC.
NG: CHECK POWER SOURCE CIRCUIT (SEE DTC C1774 POWER SOURCE CIRCUIT
)
OK: REPLACE SUSPENSION CONTROL ECU (SEE REPLACEMENT
)
CIRCUIT DESCRIPTION
When the ignition switch is turned to the ON position, the D-IG1 relay is activated and battery voltage is
applied to terminal B of the suspension control ECU. When the ignition switch is turned off, the D-IG1 relay is
de-energized and the power source is cut off.
This power source energizes the suspension control actuator, height control solenoid valve, D-IG1 relay, each
IC and sensor.
Page 605 of 4500

Fig. 120: Identifying Suspension Control ECU Connector Terminals
Courtesy of TOYOTA MOTOR SALES, U.S.A., INC.
NG: REPAIR OR REPLACE HARNESS OR CONNECTOR
OK: REPLACE SUSPENSION CONTROL ECU (SEE REPLACEMENT
)
CIRCUIT DESCRIPTION
The speed sensors monitors the speed of the wheels, and sends an appropriate speed signals to the suspension
control ECU through the brake actuator assy (skid control ECU).
If trouble occurs in either the right rear speed sensor or left rear speed sensor, DTC (C1776) is output.
Page 606 of 4500
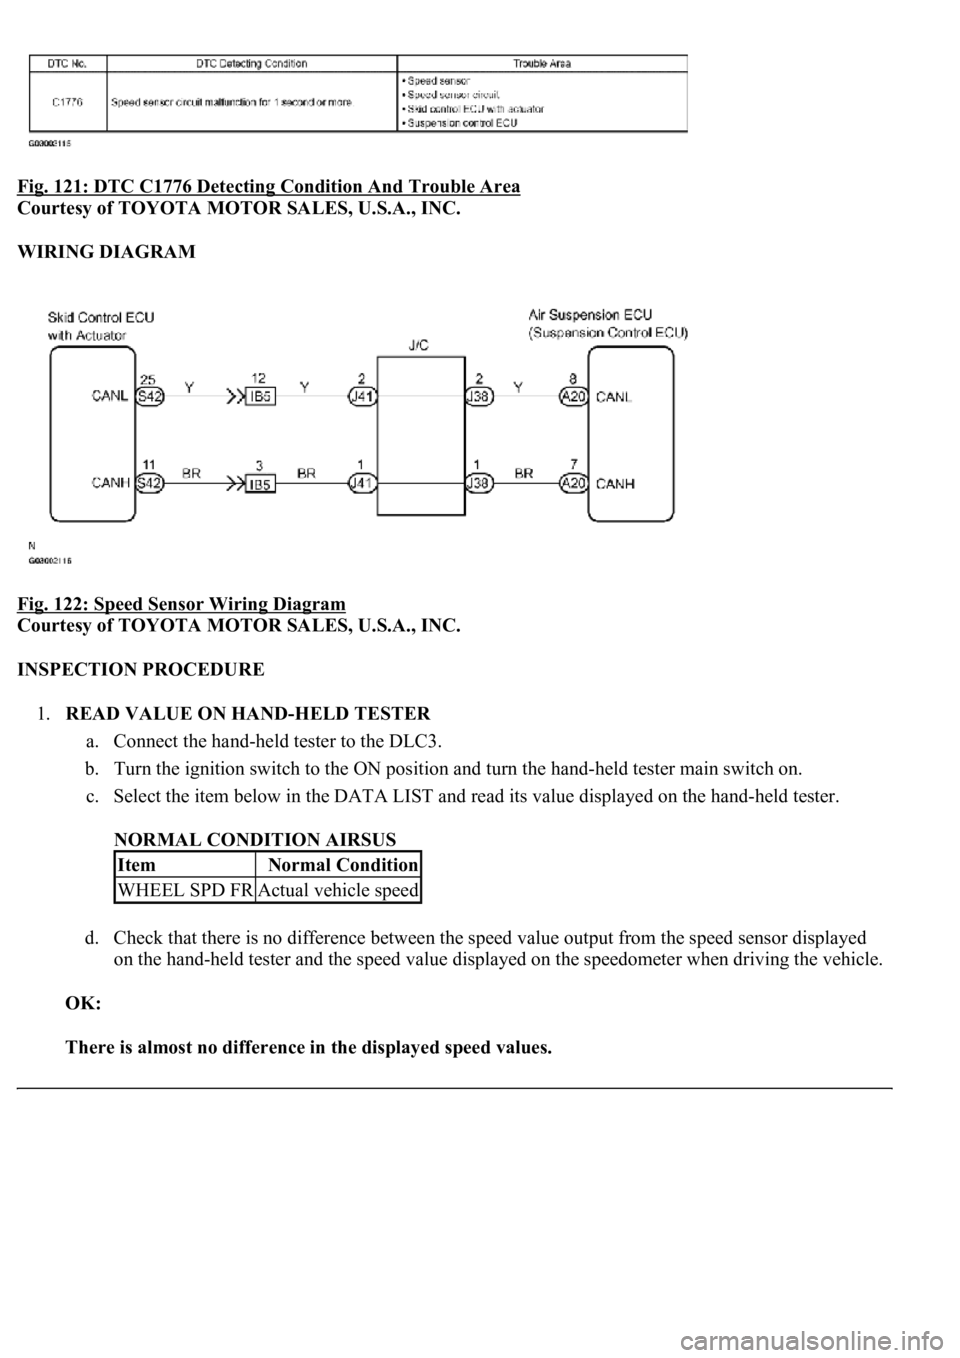
Fig. 121: DTC C1776 Detecting Condition And Trouble Area
Courtesy of TOYOTA MOTOR SALES, U.S.A., INC.
WIRING DIAGRAM
Fig. 122: Speed Sensor Wiring Diagram
Courtesy of TOYOTA MOTOR SALES, U.S.A., INC.
INSPECTION PROCEDURE
1.READ VALUE ON HAND-HELD TESTER
a. Connect the hand-held tester to the DLC3.
b. Turn the ignition switch to the ON position and turn the hand-held tester main switch on.
c. Select the item below in the DATA LIST and read its value displayed on the hand-held tester.
NORMAL CONDITION AIRSUS
d. Check that there is no difference between the speed value output from the speed sensor displayed
on the hand-held tester and the speed value displayed on the speedometer when driving the vehicle.
OK:
There is almost no difference in the displayed speed values.
ItemNormal Condition
WHEEL SPD FRActual vehicle speed
Page 607 of 4500
HINT:
There is tolerance of +/- 10 % in the speedometer indication.
NG: Go to step 2
OK: REPLACE SUSPENSION CONTROL ECU (SEE REPLACEMENT
)
2.CHECK DIAGNOSTIC CODE OUTPUT
a. Check if the normal system code is output in the VSC system (SEE DTC CHECK/CLEAR
).
OK:
No DTC is output in the VSC system.
NG: REPAIR CIRCUIT INDICATED BY OUTPUT CODE
OK:Go to next step
3.CHECK DIAGNOSTIC CODE OUTPUT
a. Check if the normal system code is output in the CAN communication system (SEE HOW TO
PROCEED WITH TROUBLESHOOTING ).
OK:
No DTC is output in the CAN communication system.
NG: REPAIR CIRCUIT INDICATED BY OUTPUT CODE
OK: REPLACE SUSPENSION CONTROL ECU (SEE REPLACEMENT
)
CIRCUIT DESCRIPTION
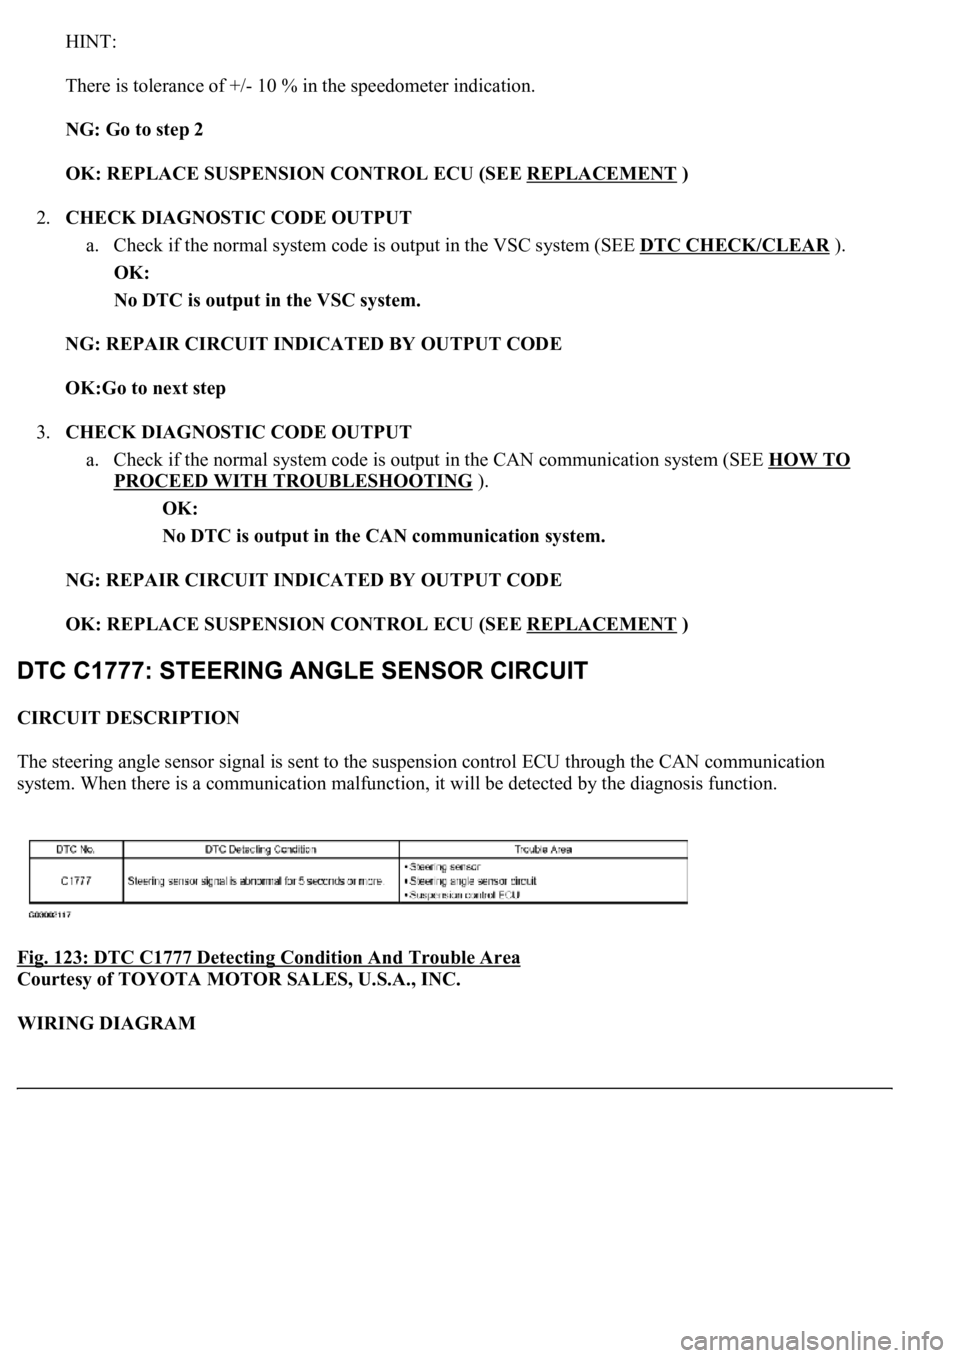
The steering angle sensor signal is sent to the suspension control ECU through the CAN communication
system. When there is a communication malfunction, it will be detected by the diagnosis function.
Fig. 123: DTC C1777 Detecting Condition And Trouble Area
Courtesy of TOYOTA MOTOR SALES, U.S.A., INC.
WIRING DIAGRAM
Page 608 of 4500
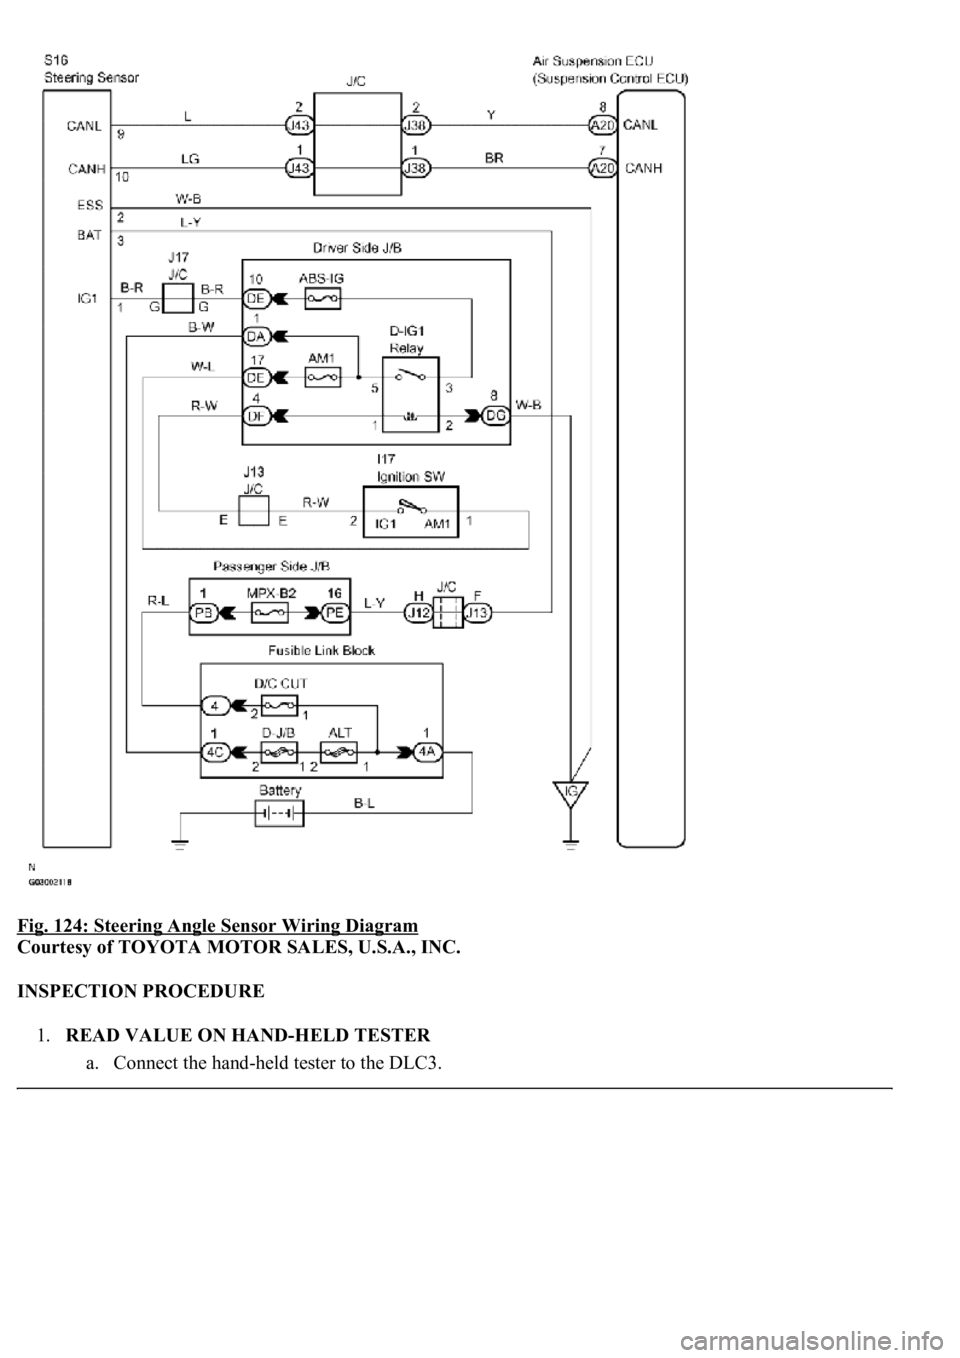
Fig. 124: Steering Angle Sensor Wiring Diagram
Courtesy of TOYOTA MOTOR SALES, U.S.A., INC.
INSPECTION PROCEDURE
1.READ VALUE ON HAND-HELD TESTER
a. Connect the han
d-held tester to the DLC3.
Page 609 of 4500
b. Turn the ignition switch to the ON position and turn the hand-held tester main switch on.
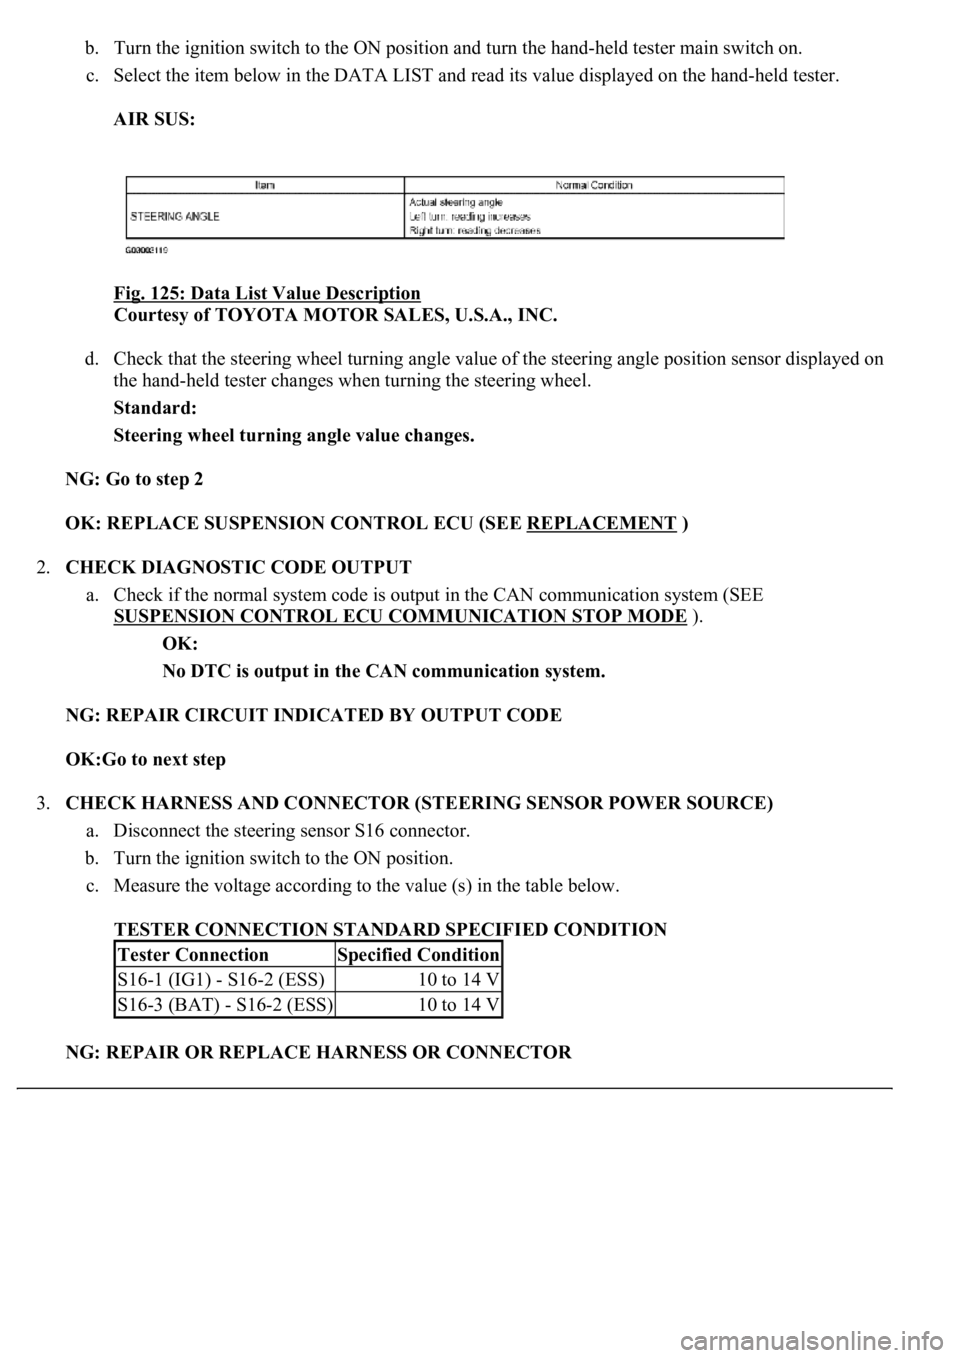
c. Select the item below in the DATA LIST and read its value displayed on the hand-held tester.
AIR SUS:
Fig. 125: Data List Value Description
Courtesy of TOYOTA MOTOR SALES, U.S.A., INC.
d. Check that the steering wheel turning angle value of the steering angle position sensor displayed on
the hand-held tester changes when turning the steering wheel.
Standard:
Steering wheel turning angle value changes.
NG: Go to step 2
OK: REPLACE SUSPENSION CONTROL ECU (SEE REPLACEMENT
)
2.CHECK DIAGNOSTIC CODE OUTPUT
a. Check if the normal system code is output in the CAN communication system (SEE
SUSPENSION CONTROL ECU COMMUNICATION STOP MODE
).
OK:
No DTC is output in the CAN communication system.
NG: REPAIR CIRCUIT INDICATED BY OUTPUT CODE
OK:Go to next step
3.CHECK HARNESS AND CONNECTOR (STEERING SENSOR POWER SOURCE)
a. Disconnect the steering sensor S16 connector.
b. Turn the ignition switch to the ON position.
c. Measure the voltage according to the value (s) in the table below.
TESTER CONNECTION STANDARD SPECIFIED CONDITION
NG: REPAIR OR REPLACE HARNESS OR CONNECTOR
Tester ConnectionSpecified Condition
S16-1 (IG1) - S16-2 (ESS)10 to 14 V
S16-3 (BAT) - S16-2 (ESS)10 to 14 V
Page 610 of 4500
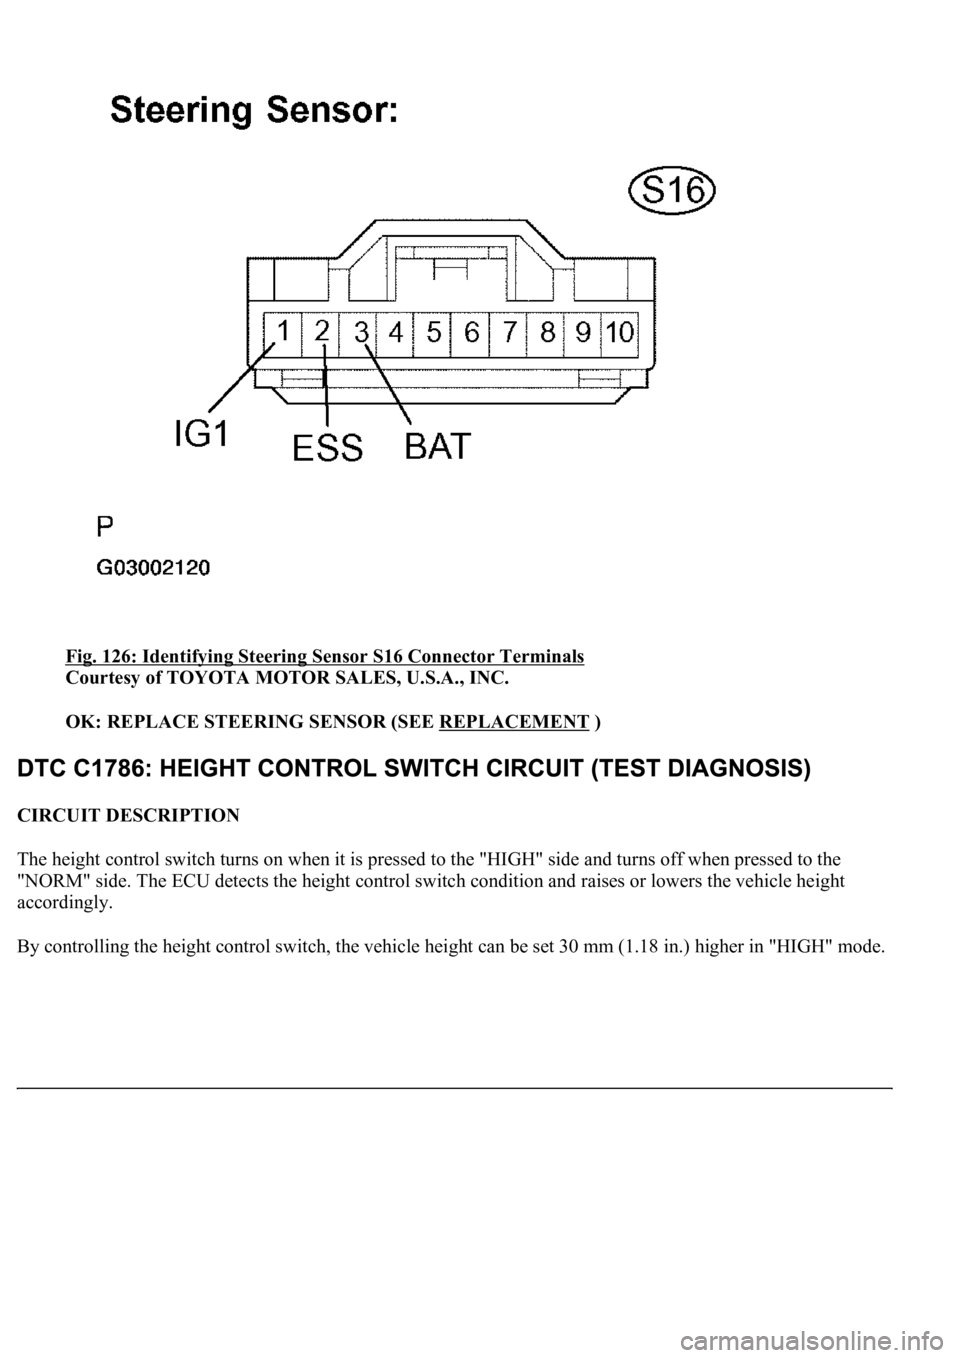
Fig. 126: Identifying Steering Sensor S16 Connector Terminals
Courtesy of TOYOTA MOTOR SALES, U.S.A., INC.
OK: REPLACE STEERING SENSOR (SEE REPLACEMENT
)
CIRCUIT DESCRIPTION
The height control switch turns on when it is pressed to the "HIGH" side and turns off when pressed to the
"NORM" side. The ECU detects the height control switch condition and raises or lowers the vehicle height
accordingly.
B
y controlling the height control switch, the vehicle height can be set 30 mm (1.18 in.) higher in "HIGH" mode.