LEXUS LS430 2003 Factory Repair Manual
Manufacturer: LEXUS, Model Year: 2003,
Model line: LS430,
Model: LEXUS LS430 2003
Pages: 4500, PDF Size: 87.45 MB
LEXUS LS430 2003 Factory Repair Manual
LS430 2003
LEXUS
LEXUS
https://www.carmanualsonline.info/img/36/57050/w960_57050-0.png
LEXUS LS430 2003 Factory Repair Manual
Trending: oil dipstick, v belt tensioner pulley, recommended oil, seat memory, oil temperature, shock absorber, rear seat back
Page 4031 of 4500
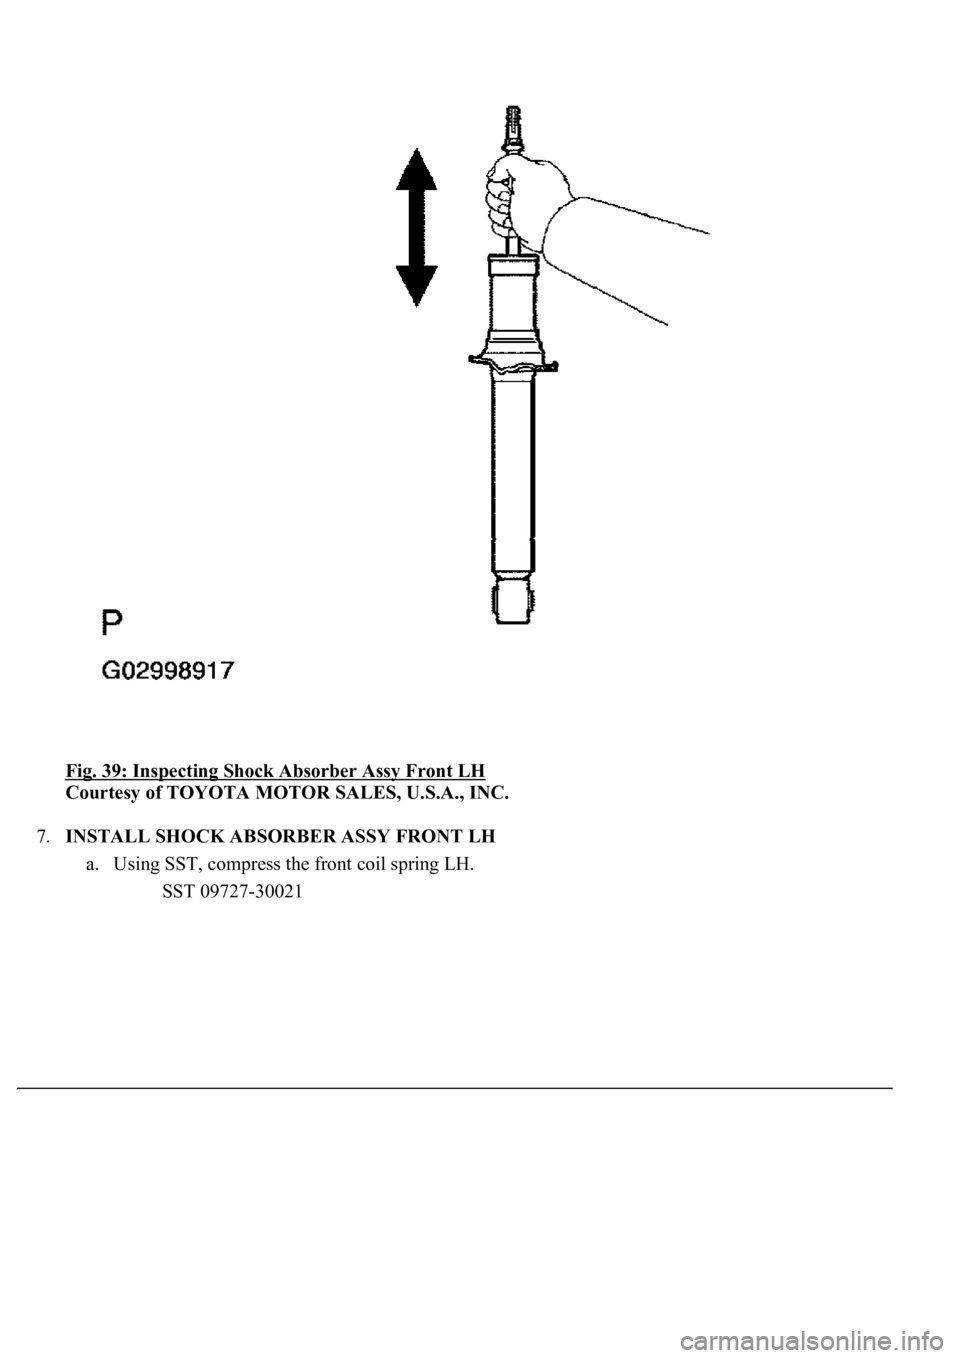
Fig. 39: Inspecting Shock Absorber Assy Front LH
Courtesy of TOYOTA MOTOR SALES, U.S.A., INC.
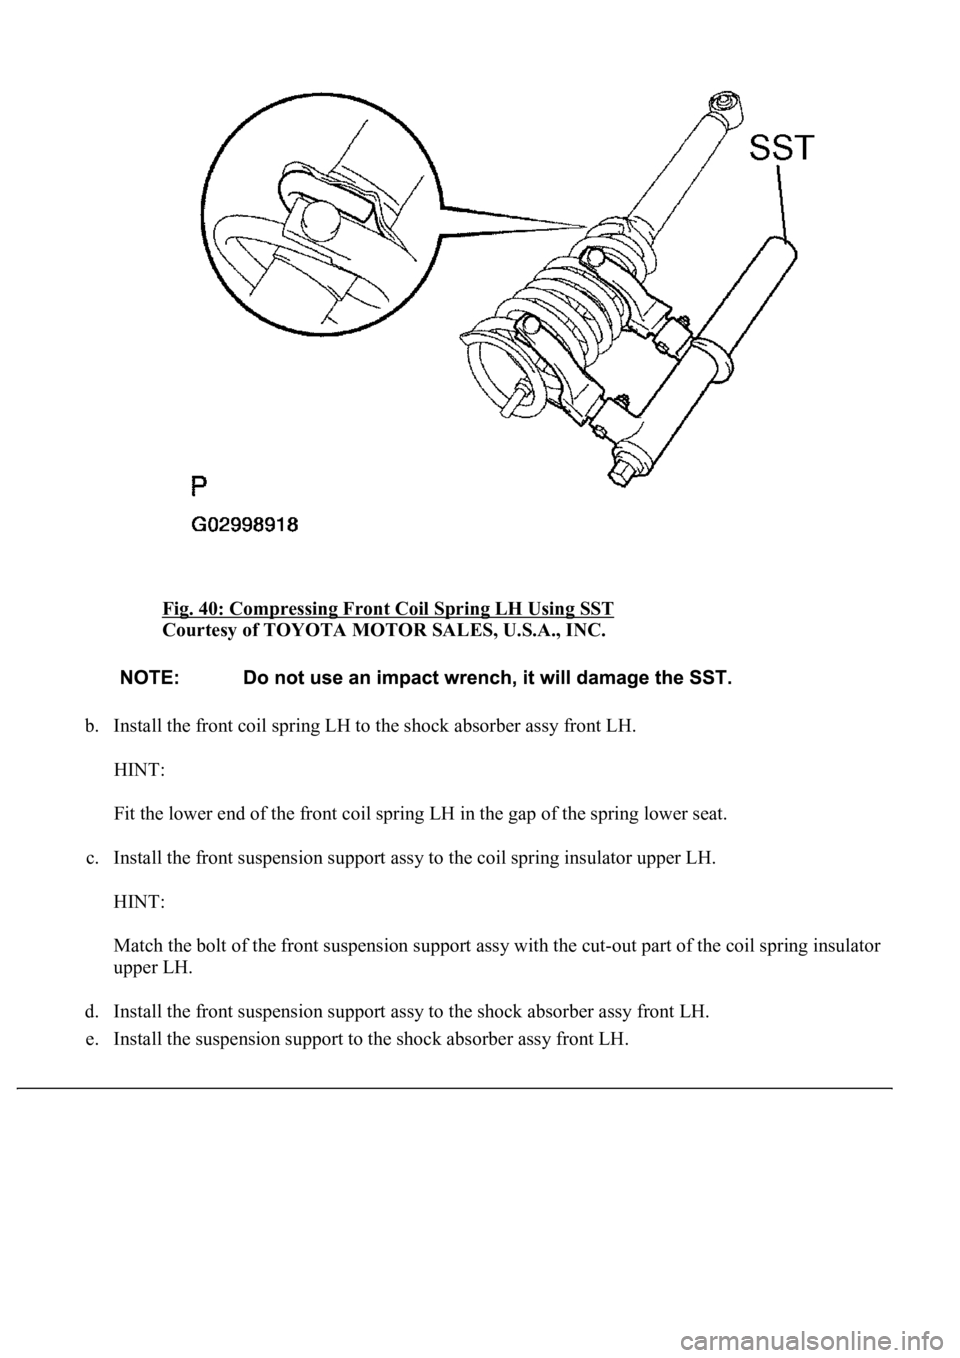
7.INSTALL SHOCK ABSORBER ASSY FRONT LH
a. Using SST, compress the front coil spring LH.
SST 09727-30021
Page 4032 of 4500
Fig. 40: Compressing Front Coil Spring LH Using SST
Courtesy of TOYOTA MOTOR SALES, U.S.A., INC.
b. Install the front coil spring LH to the shock absorber assy front LH.
HINT:
Fit the lower end of the front coil spring LH in the gap of the spring lower seat.
c. Install the front suspension support assy to the coil spring insulator upper LH.
HINT:
Match the bolt of the front suspension support assy with the cut-out part of the coil spring insulator
upper LH.
d. Install the front suspension support assy to the shock absorber assy front LH.
e. Install the suspension support to the shock absorber ass
y front LH.
Page 4033 of 4500
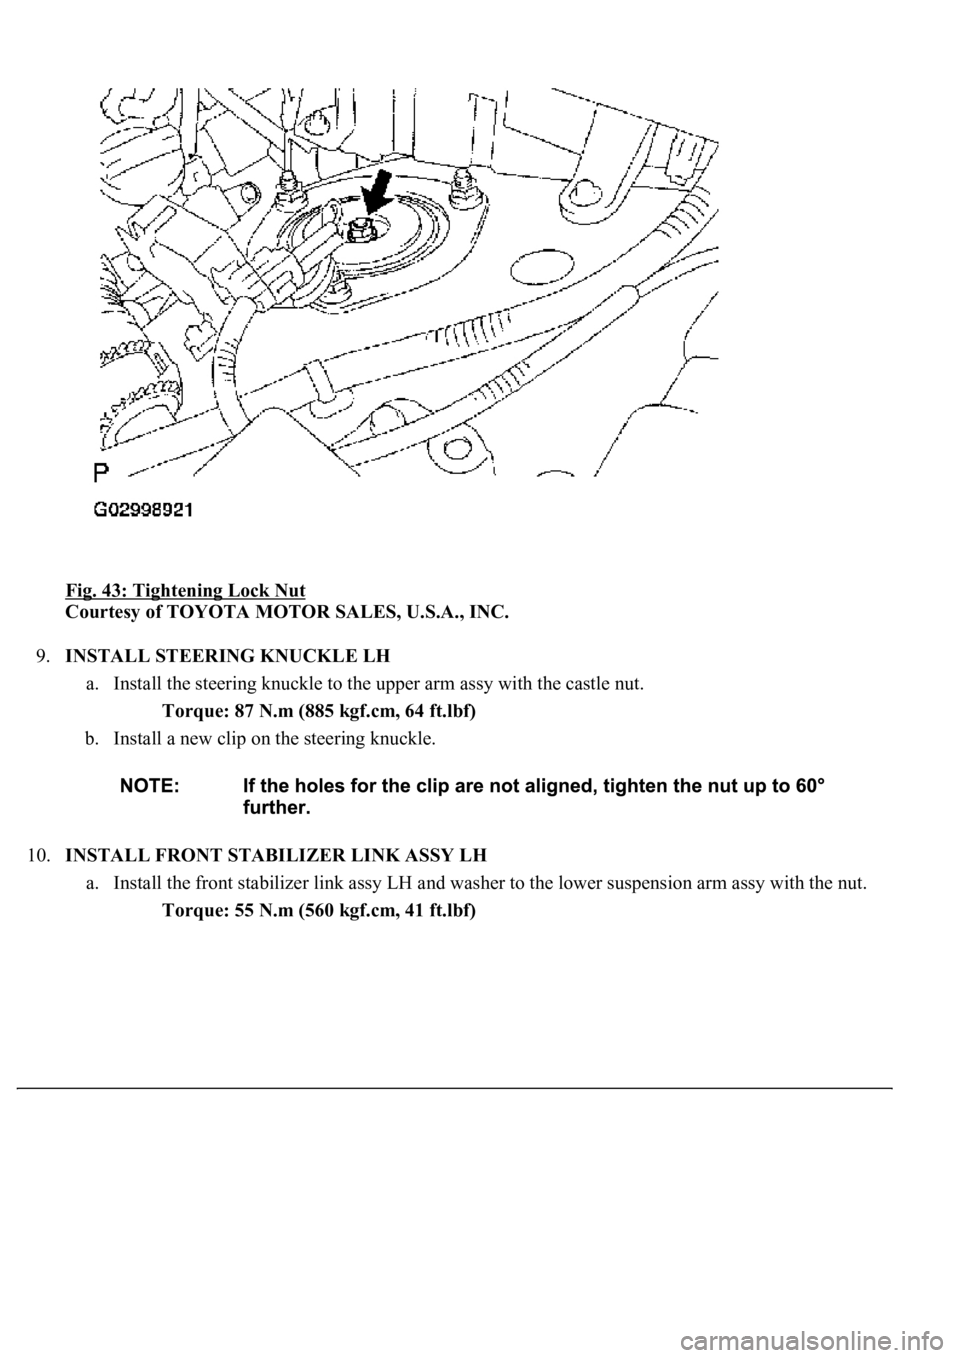
f. Temporarily tighten a new lock nut.
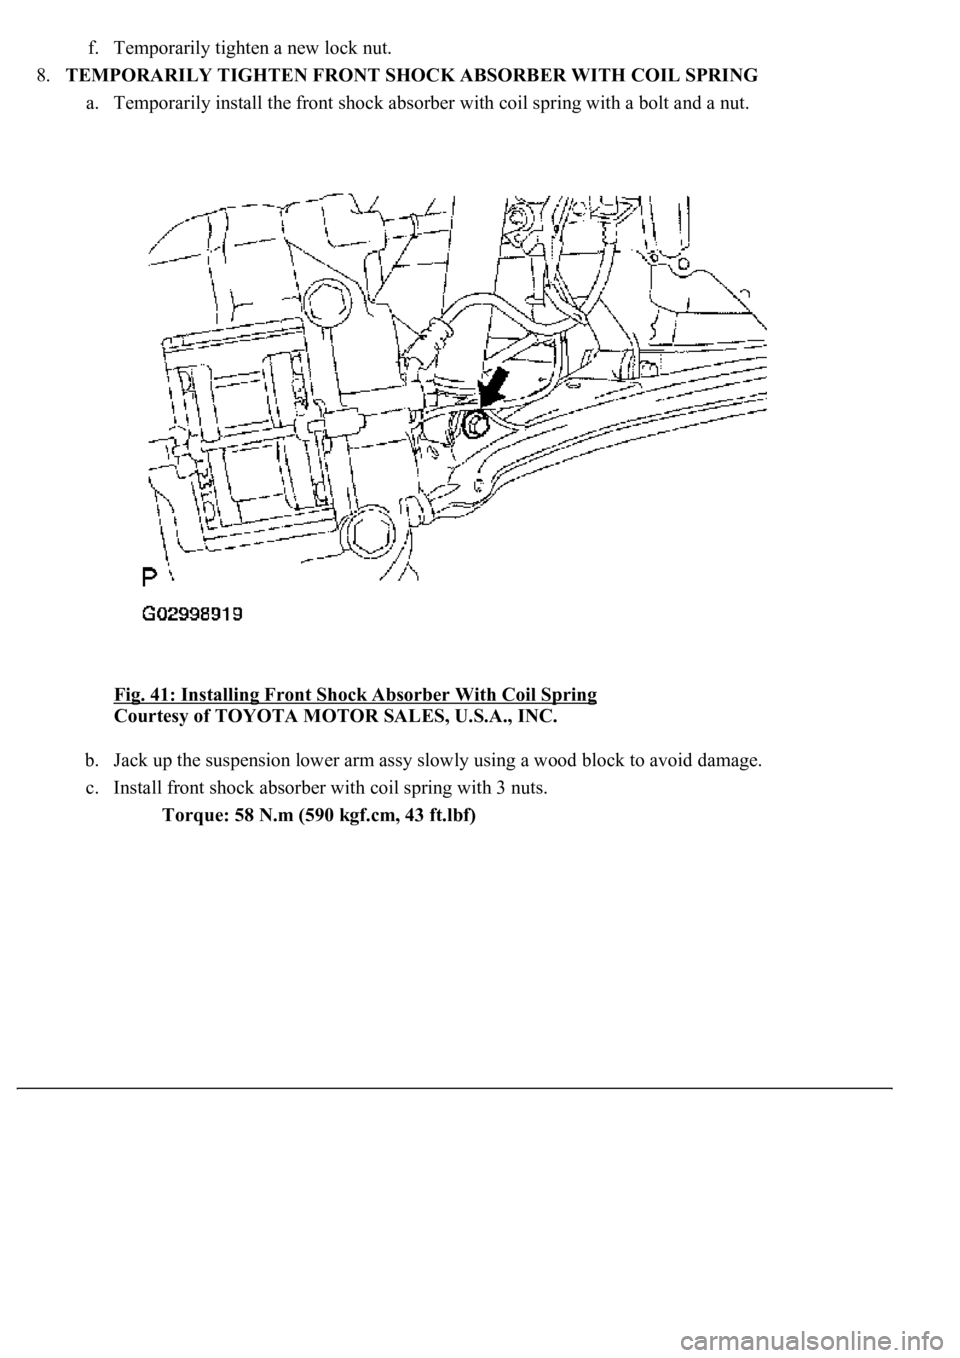
8.TEMPORARILY TIGHTEN FRONT SHOCK ABSORBER WITH COIL SPRING
a. Temporarily install the front shock absorber with coil spring with a bolt and a nut.
Fig. 41: Installing Front Shock Absorber With Coil Spring
Courtesy of TOYOTA MOTOR SALES, U.S.A., INC.
b. Jack up the suspension lower arm assy slowly using a wood block to avoid damage.
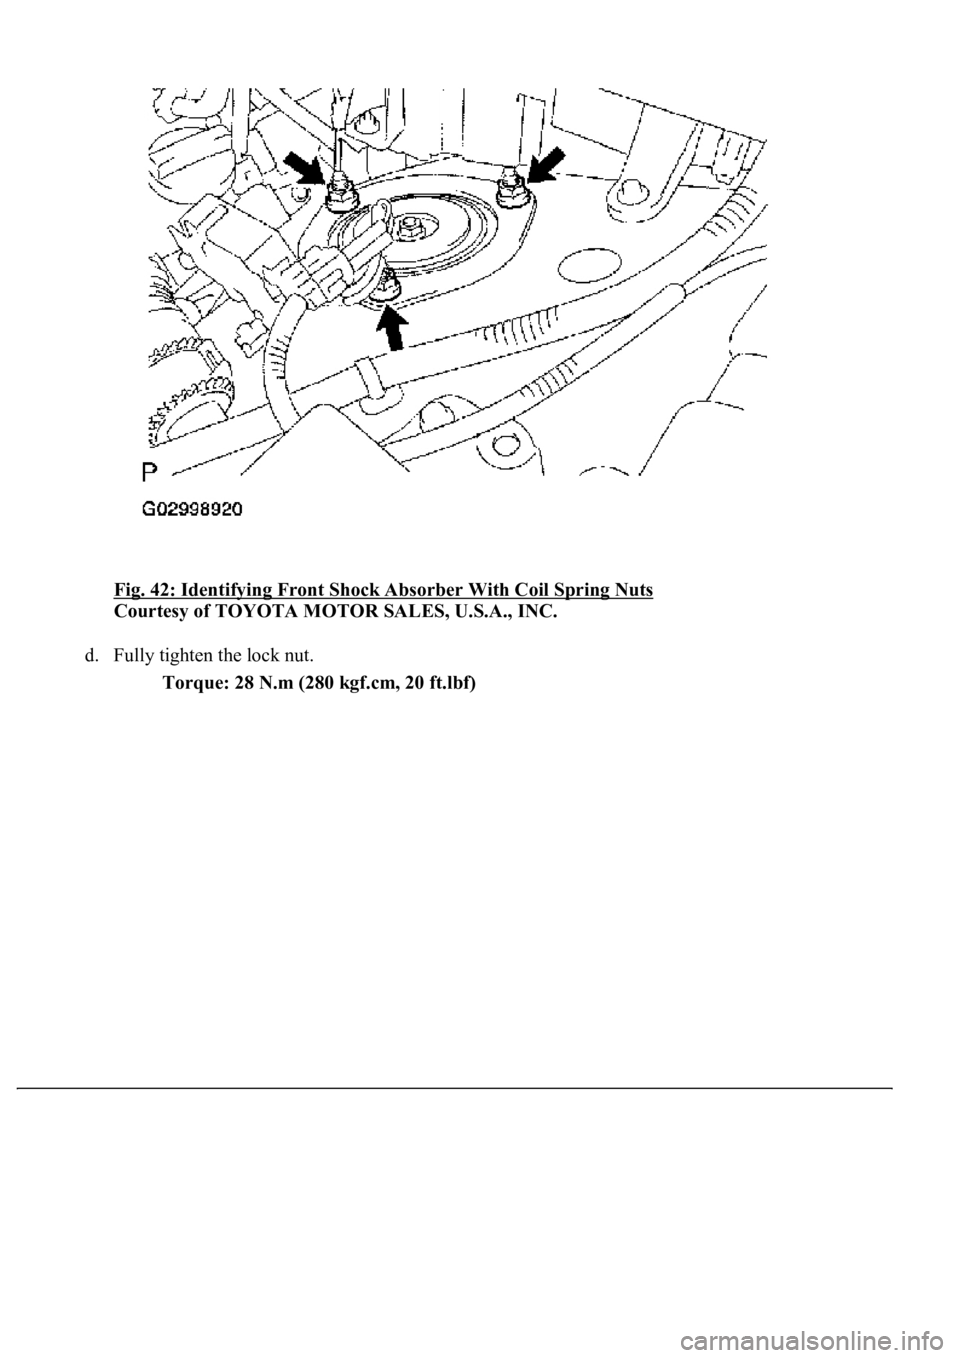
c. Install front shock absorber with coil spring with 3 nuts.
Torque: 58 N.m (590 kgf.cm, 43 ft.lbf)
Page 4034 of 4500
Fig. 42: Identifying Front Shock Absorber With Coil Spring Nuts
Courtesy of TOYOTA MOTOR SALES, U.S.A., INC.
d. Fully tighten the lock nut.
Torque: 28 N.m (280 kgf.cm, 20 ft.lbf)
Page 4035 of 4500
Fig. 43: Tightening Lock Nut
Courtesy of TOYOTA MOTOR SALES, U.S.A., INC.
9.INSTALL STEERING KNUCKLE LH
a. Install the steering knuckle to the upper arm assy with the castle nut.
Torque: 87 N.m (885 kgf.cm, 64 ft.lbf)
b. Install a new clip on the steering knuckle.
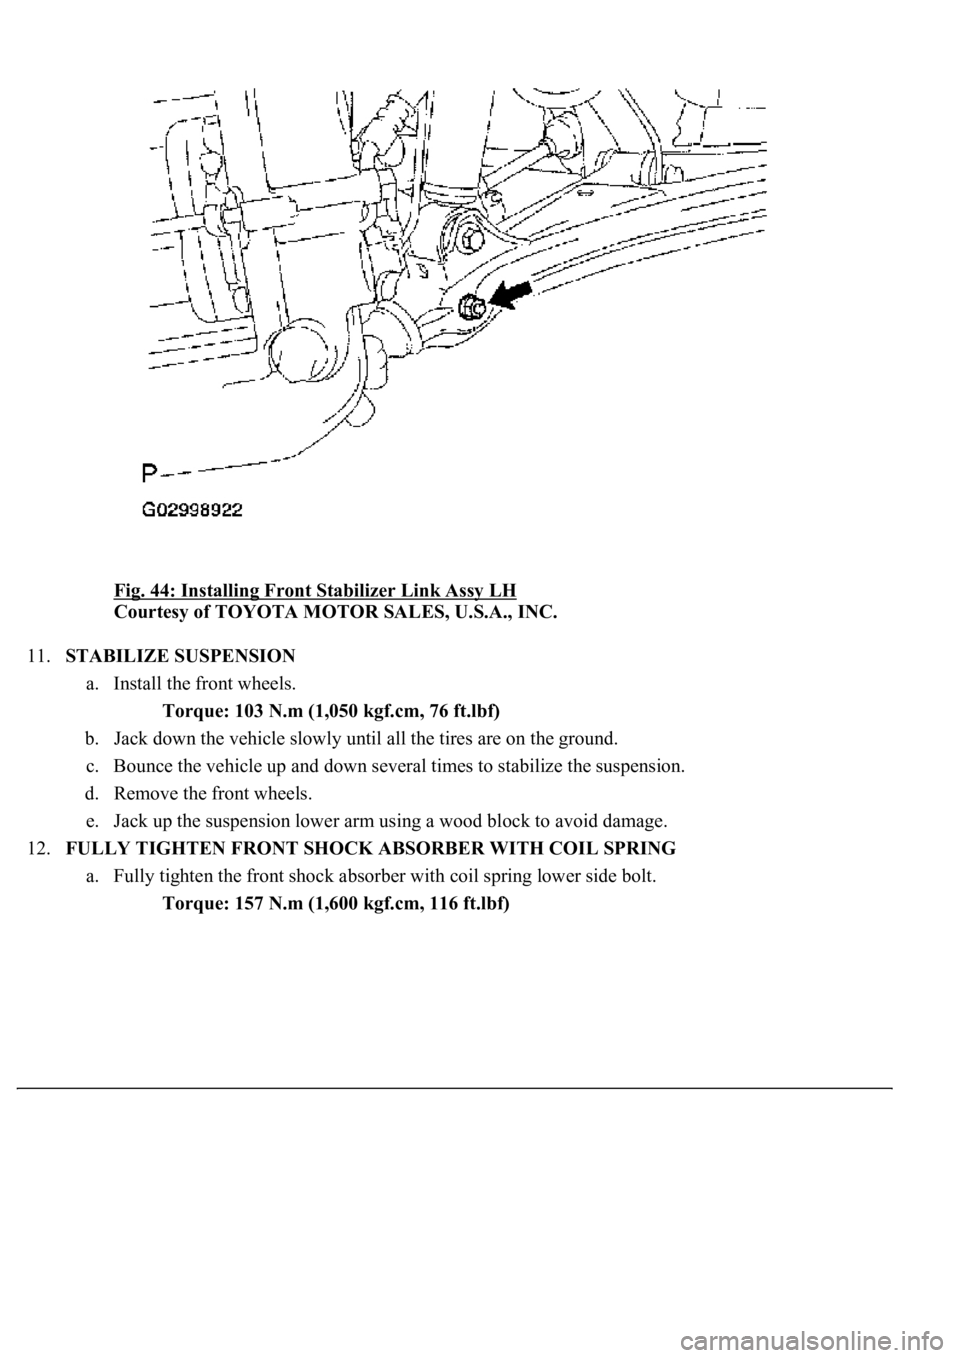
10.INSTALL FRONT STABILIZER LINK ASSY LH
a. Install the front stabilizer link assy LH and washer to the lower suspension arm assy with the nut.
Torque: 55 N.m (560 kgf.cm, 41 ft.lbf)
Page 4036 of 4500
Fig. 44: Installing Front Stabilizer Link Assy LH
Courtesy of TOYOTA MOTOR SALES, U.S.A., INC.
11.STABILIZE SUSPENSION
a. Install the front wheels.
Torque: 103 N.m (1,050 kgf.cm, 76 ft.lbf)
b. Jack down the vehicle slowly until all the tires are on the ground.
c. Bounce the vehicle up and down several times to stabilize the suspension.
d. Remove the front wheels.
e. Jack up the suspension lower arm using a wood block to avoid damage.
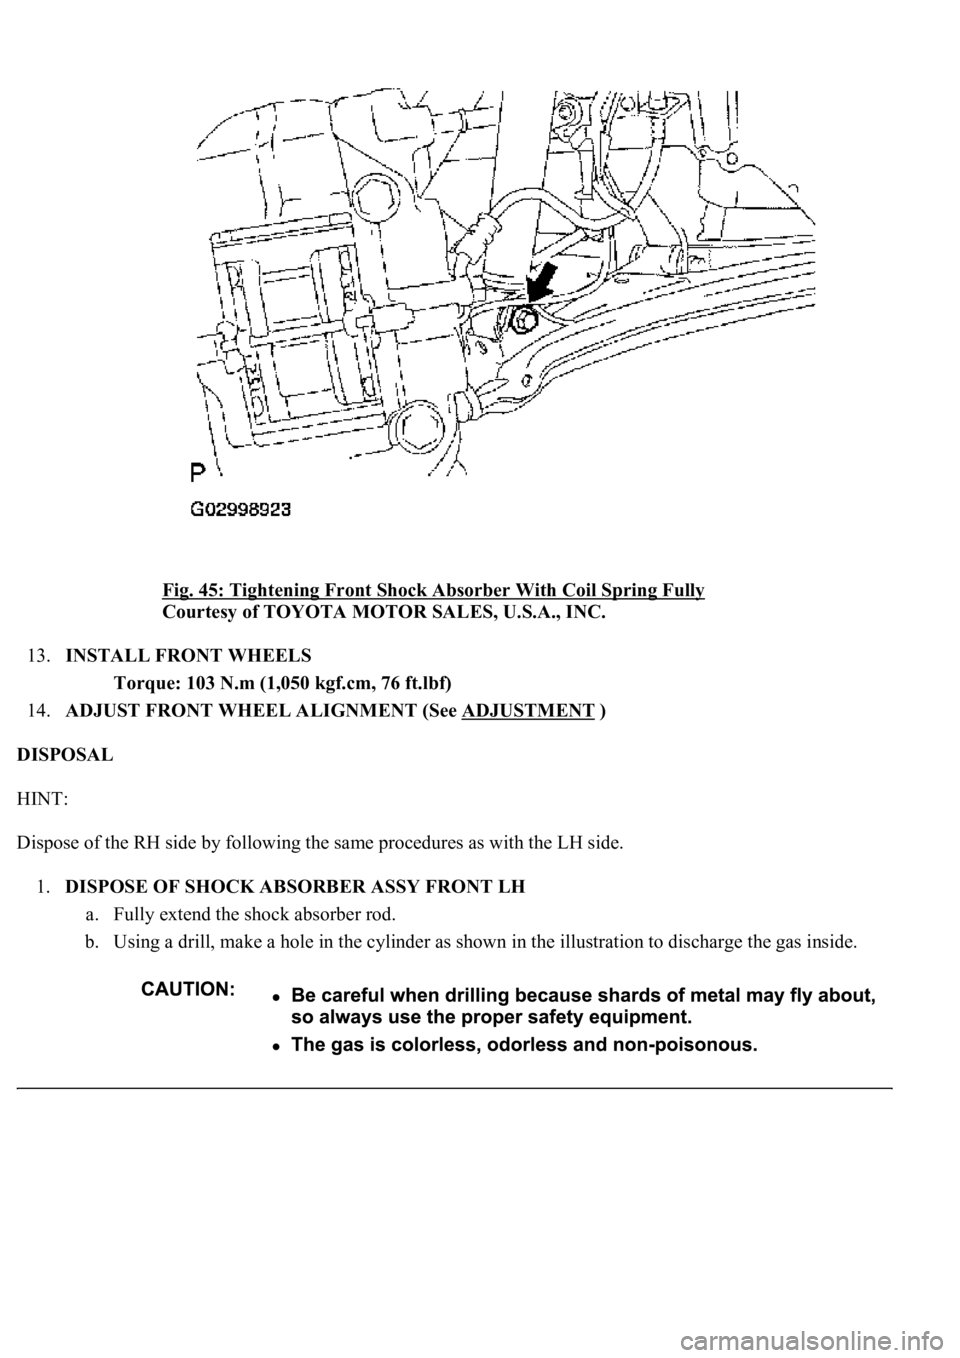
12.FULLY TIGHTEN FRONT SHOCK ABSORBER WITH COIL SPRING
a. Fully tighten the front shock absorber with coil spring lower side bolt.
Torque: 157 N.m (1,600 kgf.cm, 116 ft.lbf)
Page 4037 of 4500
Fig. 45: Tightening Front Shock Absorber With Coil Spring Fully
Courtesy of TOYOTA MOTOR SALES, U.S.A., INC.
13.INSTALL FRONT WHEELS
Torque: 103 N.m (1,050 kgf.cm, 76 ft.lbf)
14.ADJUST FRONT WHEEL ALIGNMENT (See ADJUSTMENT
)
DISPOSAL
HINT:
Dispose of the RH side by following the same procedures as with the LH side.
1.DISPOSE OF SHOCK ABSORBER ASSY FRONT LH
a. Fully extend the shock absorber rod.
b. Using a drill, make a hole in the cylinder as shown in the illustration to discharge the gas inside.
Page 4038 of 4500
Fig. 46: Disposing Shock Absorber Assy Front LH
Courtesy of TOYOTA MOTOR SALES, U.S.A., INC.
REPLACEMENT
HINT:
Use the same procedures for the RH side and LH side.
The procedures listed below are for the LH side.
1.REMOVE FRONT WHEELS
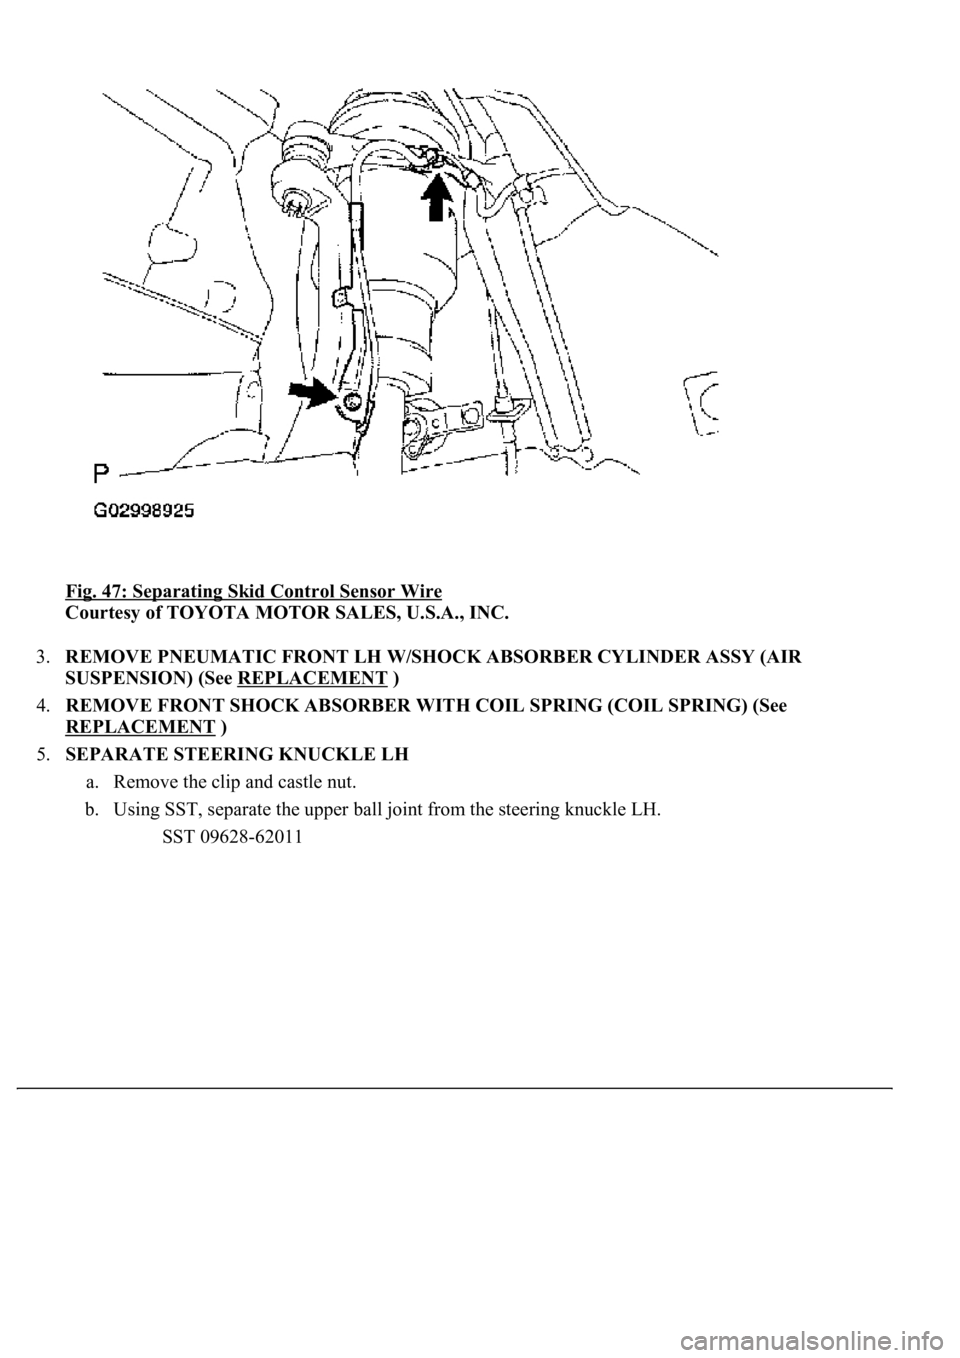
2.SEPARATE SKID CONTROL SENSOR WIRE
a. Remove the 2 bolts and separate the skid control sensor wire.
Page 4039 of 4500
Fig. 47: Separating Skid Control Sensor Wire
Courtesy of TOYOTA MOTOR SALES, U.S.A., INC.
3.REMOVE PNEUMATIC FRONT LH W/SHOCK ABSORBER CYLINDER ASSY (AIR
SUSPENSION) (See REPLACEMENT
)
4.REMOVE FRONT SHOCK ABSORBER WITH COIL SPRING (COIL SPRING) (See
REPLACEMENT
)
5.SEPARATE STEERING KNUCKLE LH
a. Remove the clip and castle nut.
b. Using SST, separate the upper ball joint from the steering knuckle LH.
SST 09628-62011
Page 4040 of 4500
Fig. 48: Separating Steering Knuckle LH
Courtesy of TOYOTA MOTOR SALES, U.S.A., INC.
6.REMOVE FRONT SUSPENSION UPPER ARM ASSY LH
a. Remove the 2 bolts and front suspension upper arm ass
y LH.
Trending: rear view mirror, alternator, TPMS, clock, tires, B2620, lane assist
