MITSUBISHI ENDEAVOR 2004 Service Repair Manual
ENDEAVOR 2004
MITSUBISHI
MITSUBISHI
https://www.carmanualsonline.info/img/19/57105/w960_57105-0.png
MITSUBISHI ENDEAVOR 2004 Service Repair Manual
Trending: immobilizer location, valve cover, oil, wiring, Rear differential gear oil plug, intro, radio
Page 1421 of 3870
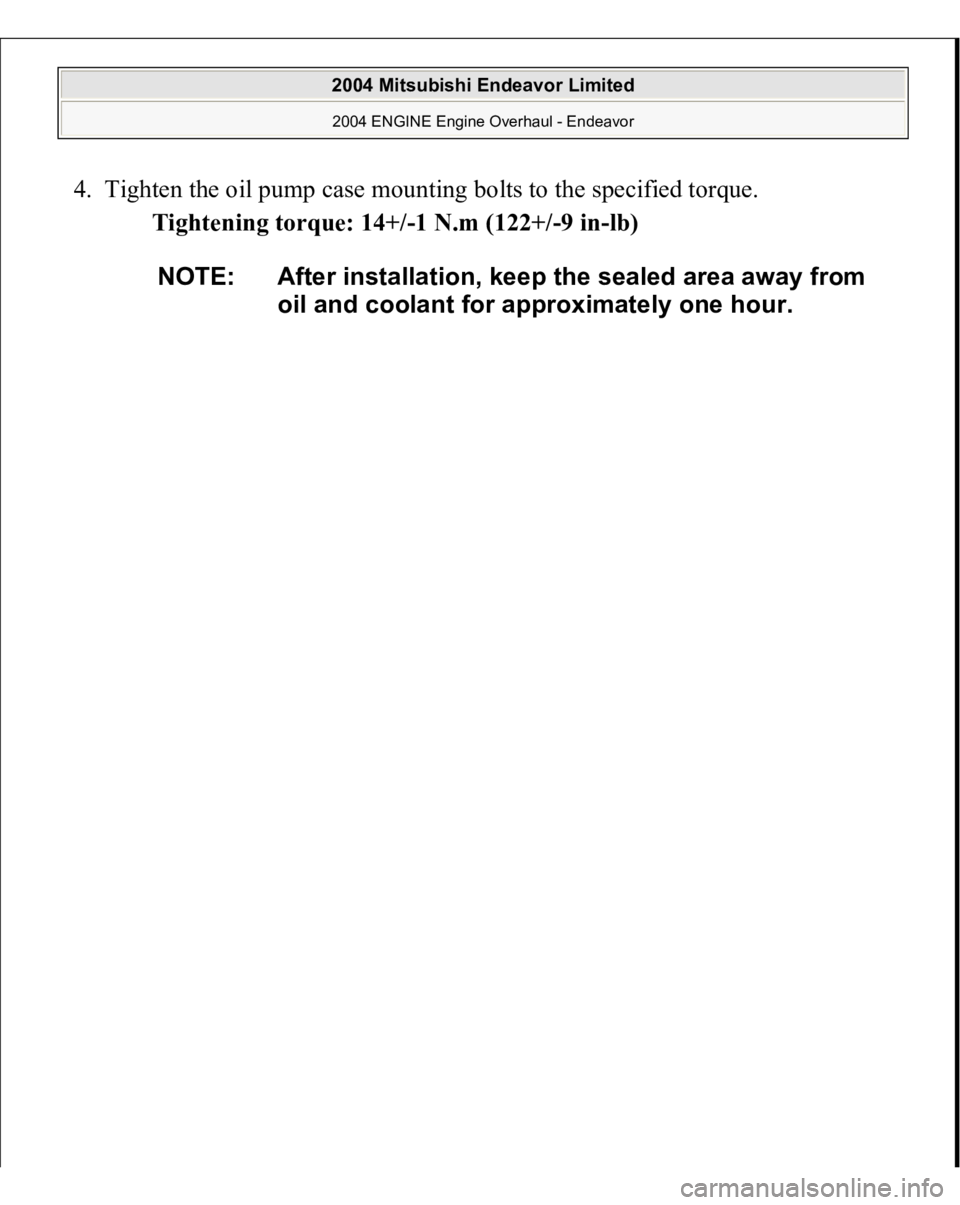
4. Tighten the oil pump case mounting bolts to the specified torque.
Tightening torque: 14+/-1 N.m (122+/-9 in-lb)
NOTE: After installation, keep the sealed area away from
oil and coolant for approximately one hour.
2004 Mitsubishi Endeavor Limited 2004 ENGINE Engine Overhaul - Endeavor
Page 1422 of 3870
2004 Mitsubishi Endeavor Limited 2004 ENGINE Engine Overhaul - Endeavor
Page 1423 of 3870
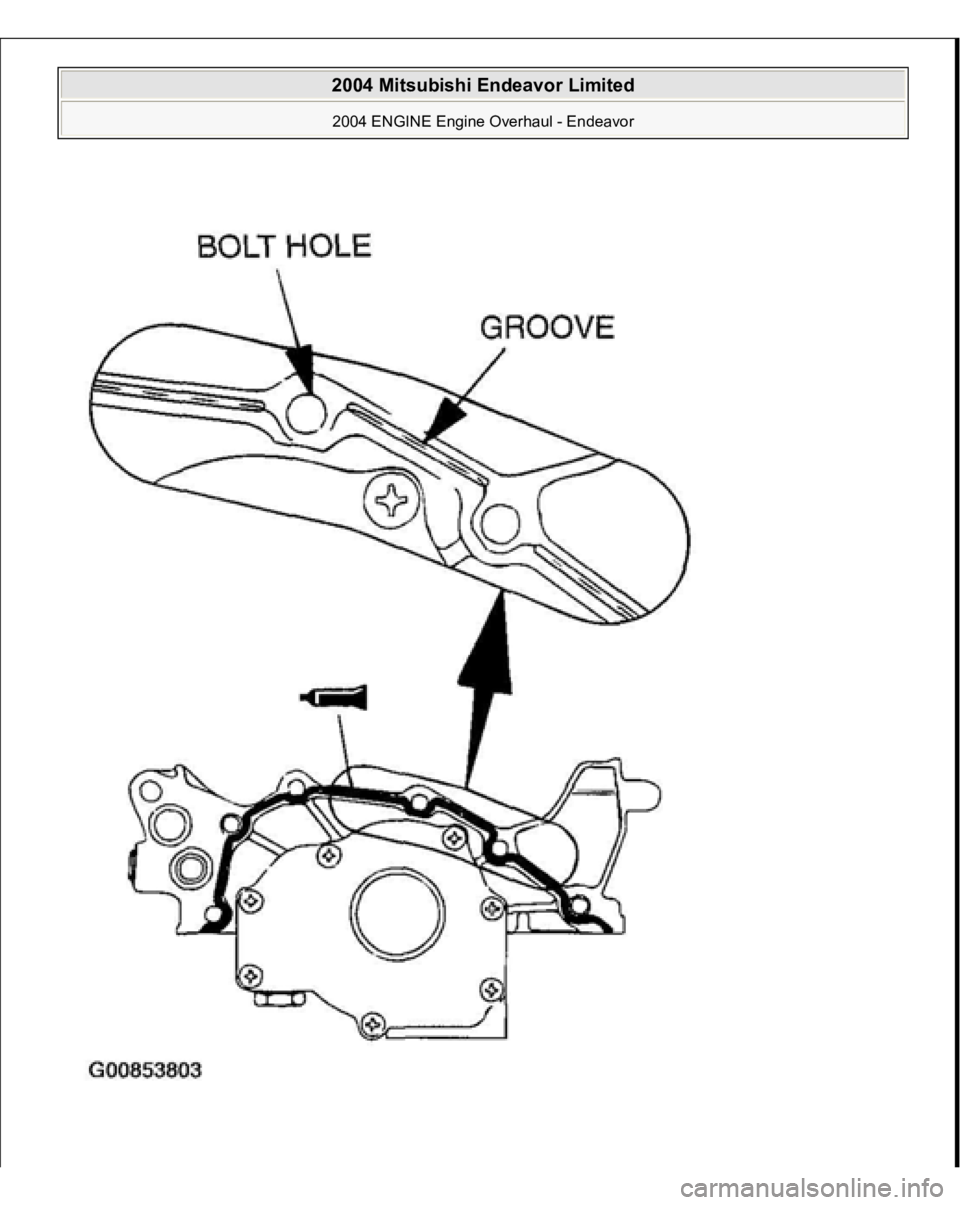
Fig. 98: Installing Oil Pump Case
Courtesy of MITSUBISHI MOTOR SALES OF AMERICA.
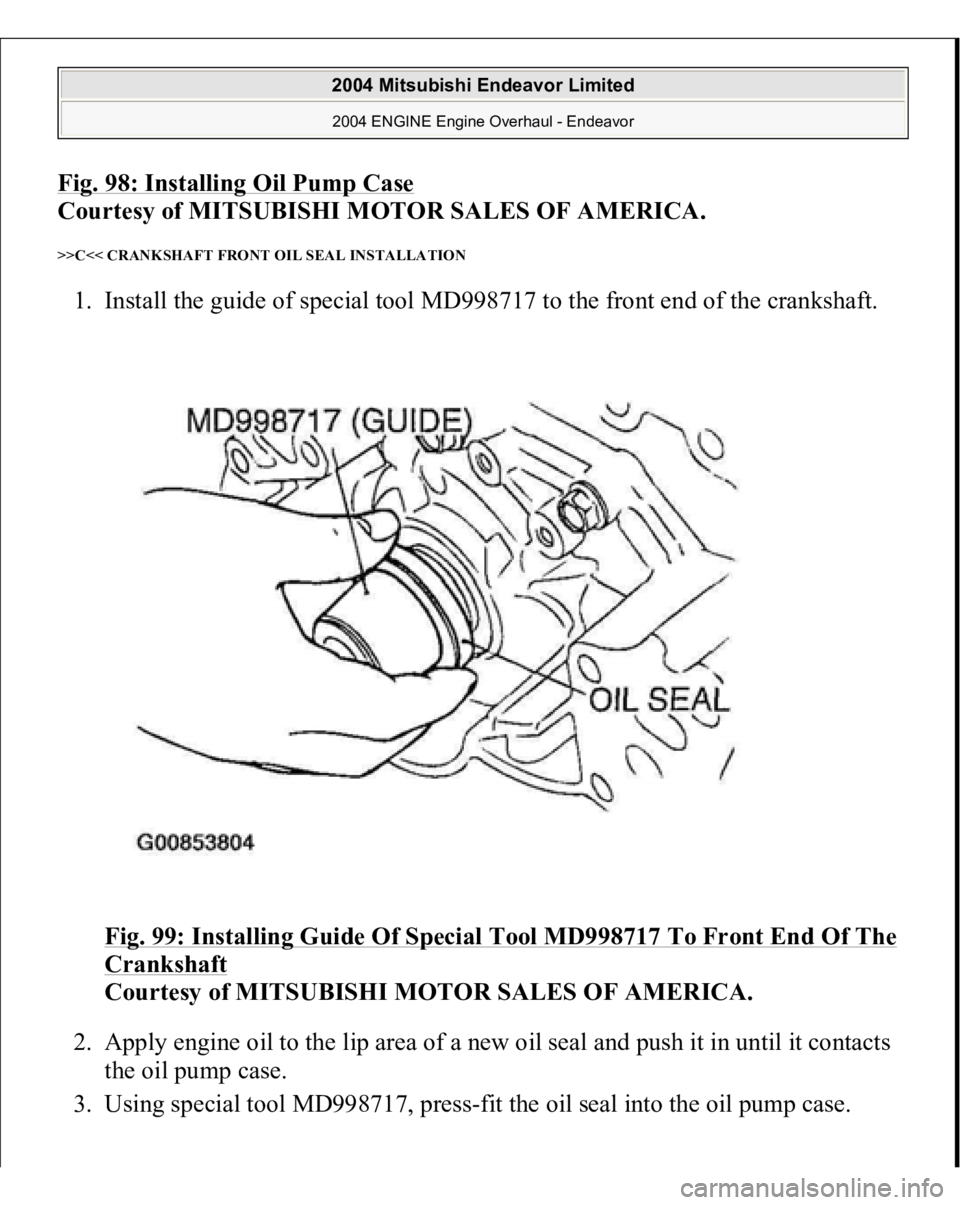
>>C<< CRANKSHAFT FRONT OIL SEAL INSTALLATION 1. Install the guide of special tool MD998717 to the front end of the crankshaft.
Fig. 99: Installing Guide Of Special Tool MD998717 To Front End Of The
Crankshaft
Courtesy of MITSUBISHI MOTOR SALES OF AMERICA.
2. Apply engine oil to the lip area of a new oil seal and push it in until it contacts
the oil pump case.
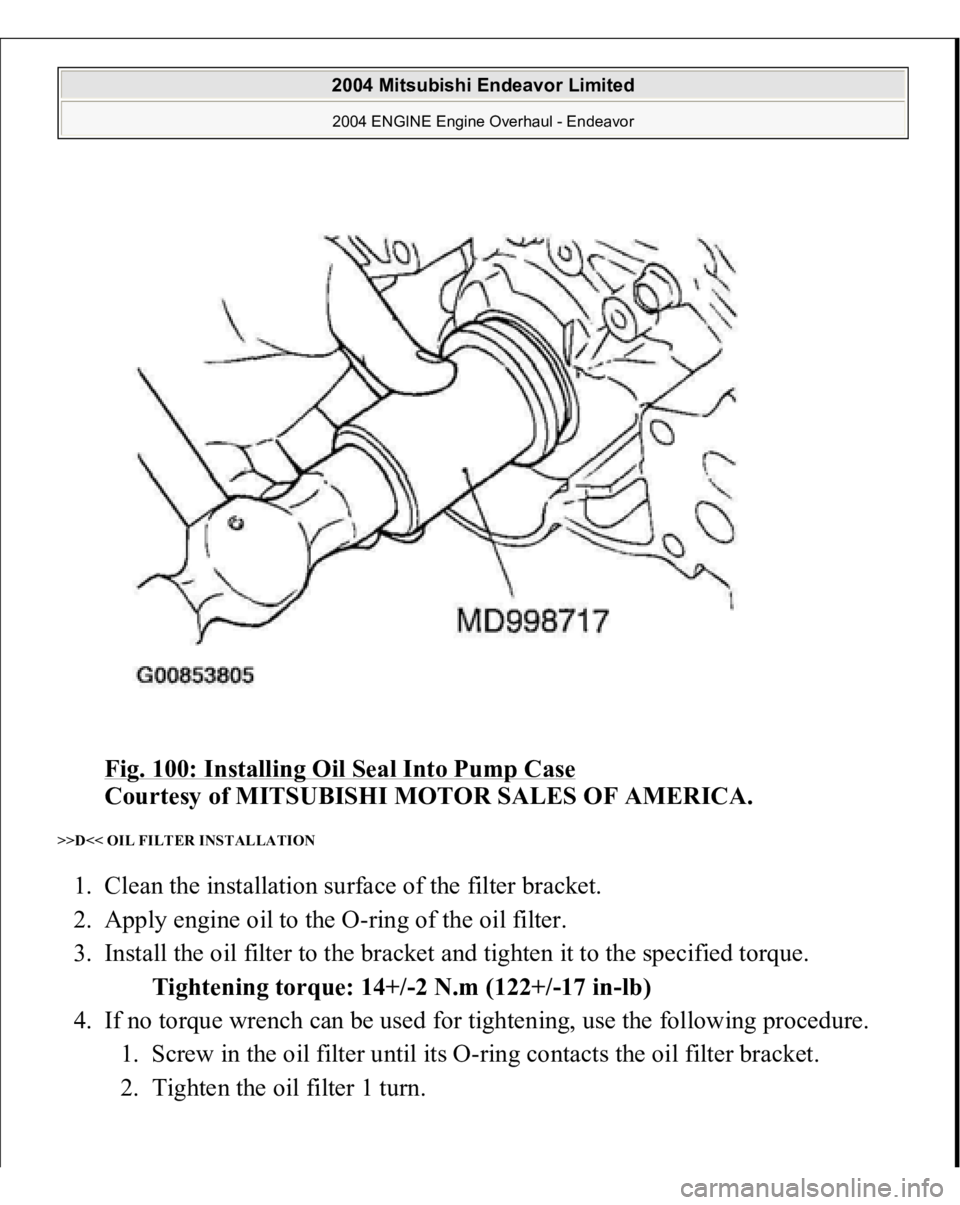
3. Usin
g special tool MD998717,
pres
s-fit the oil seal into the oil
pum
p case.
2004 Mitsubishi Endeavor Limited 2004 ENGINE Engine Overhaul - Endeavor
Page 1424 of 3870
Fig. 100: Installing Oil Seal Into Pump Case
Courtesy of MITSUBISHI MOTOR SALES OF AMERICA.
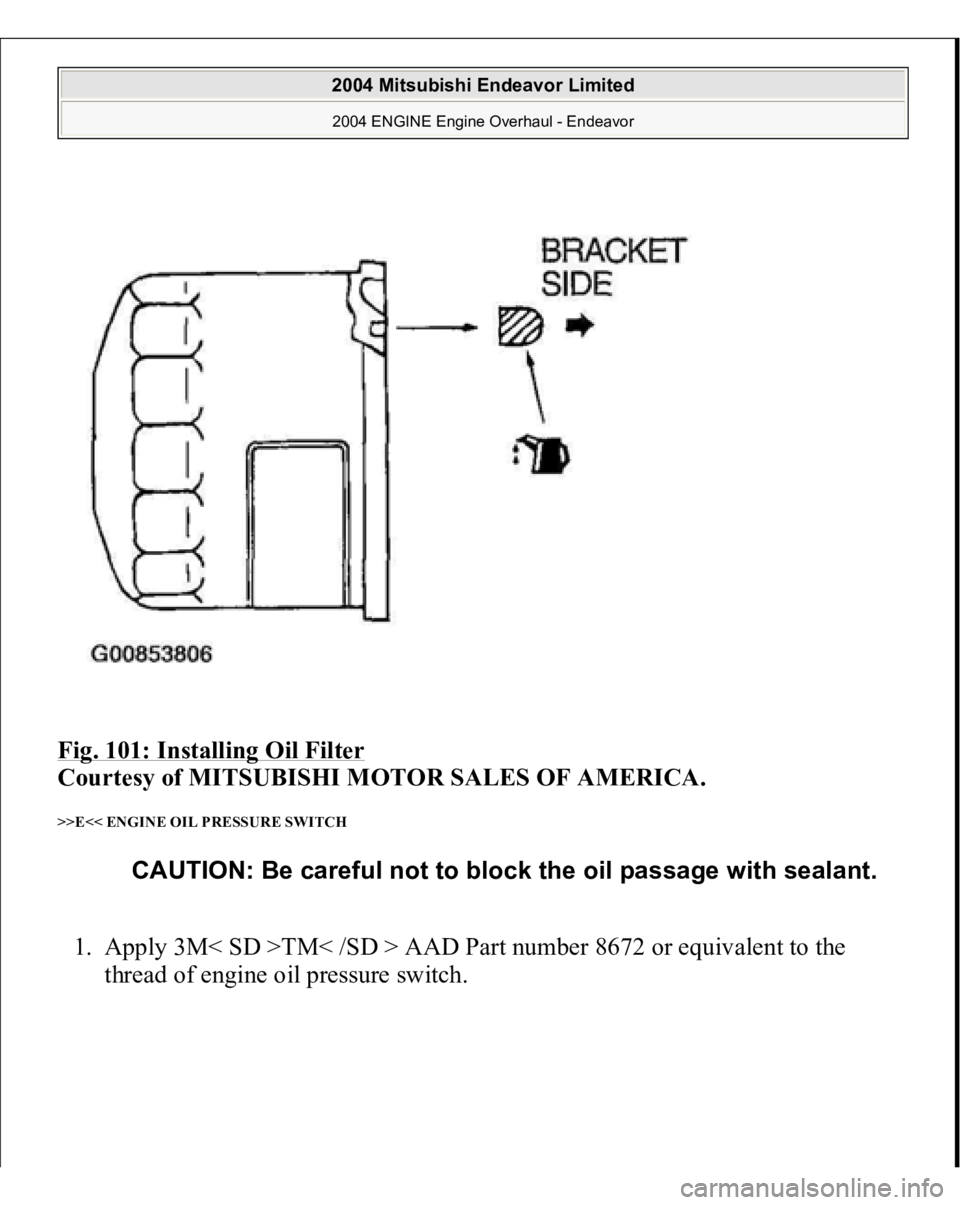
>>D<< OIL FILTER INSTALLATION 1. Clean the installation surface of the filter bracket.
2. Apply engine oil to the O-ring of the oil filter.
3. Install the oil filter to the bracket and tighten it to the specified torque.
Tightening torque: 14+/-2 N.m (122+/-17 in-lb)
4. If no torque wrench can be used for tightening, use the following procedure.
1. Screw in the oil filter until its O-ring contacts the oil filter bracket.
2. Ti
ghten the oil filter 1 turn.
2004 Mitsubishi Endeavor Limited 2004 ENGINE Engine Overhaul - Endeavor
Page 1425 of 3870
Fig. 101: Installing Oil Filter
Courtesy of MITSUBISHI MOTOR SALES OF AMERICA.
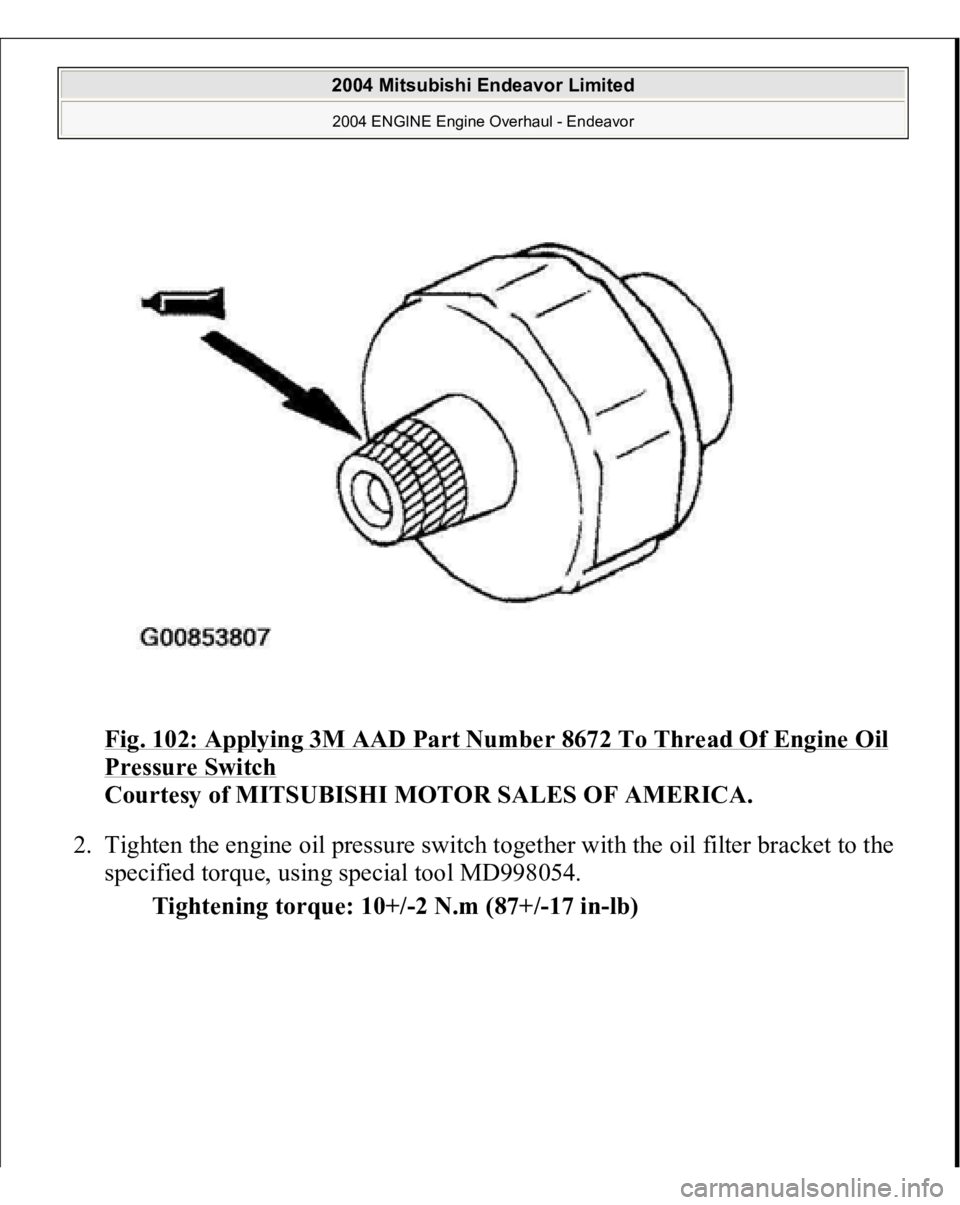
>>E<< ENGINE OIL PRESSURE SWITCH 1. Apply 3M< SD >TM< /SD > AAD Part number 8672 or equivalent to the
thread of engine oil pressure switch.
CAUTION: Be careful not to block the oil passage with sealant.
2004 Mitsubishi Endeavor Limited 2004 ENGINE Engine Overhaul - Endeavor
Page 1426 of 3870
Fig. 102: Applying 3M AAD Part Number 8672 To Thread Of Engine Oil Pressure Switch
Courtesy of MITSUBISHI MOTOR SALES OF AMERICA.
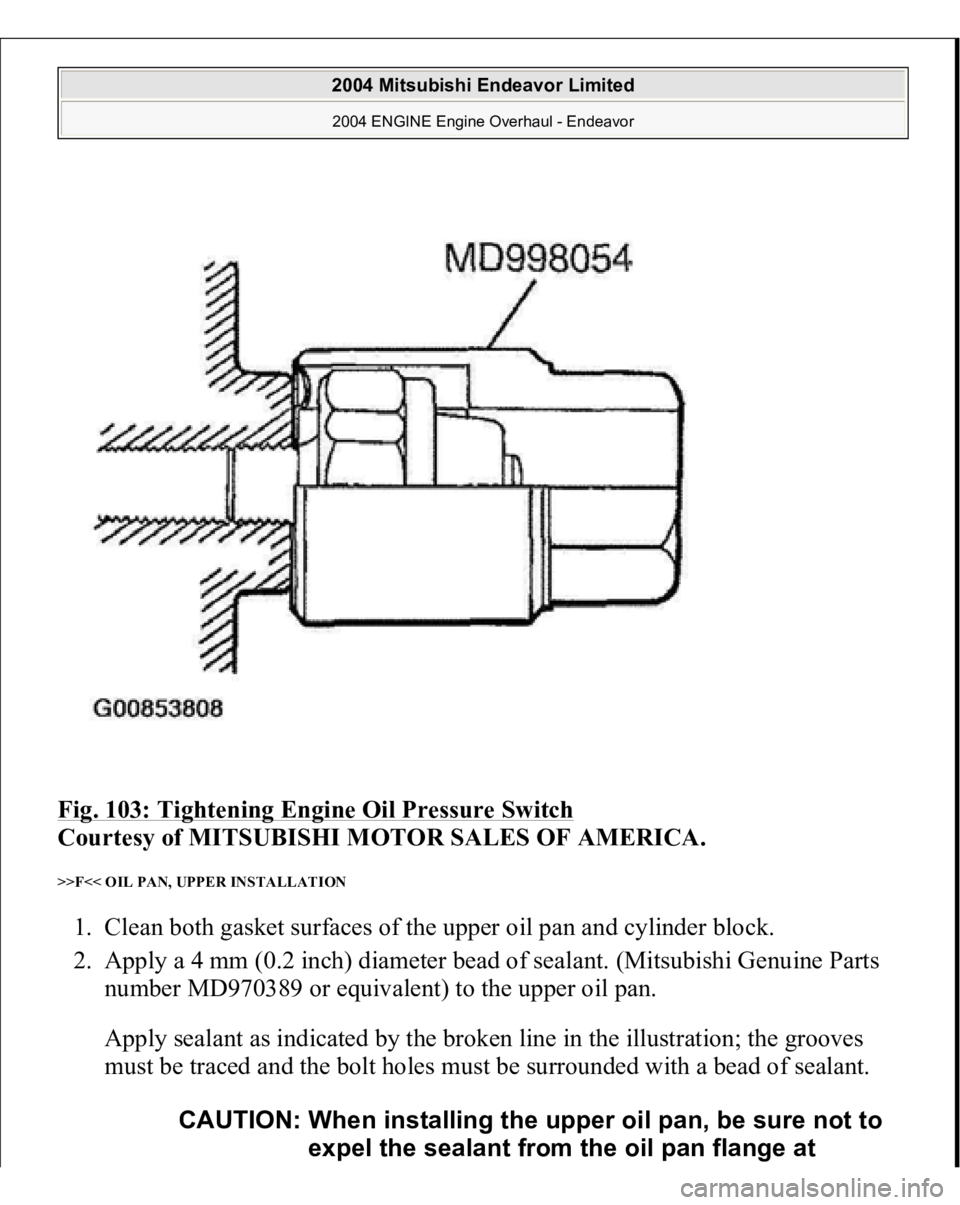
2. Tighten the engine oil pressure switch together with the oil filter bracket to the
specified torque, using special tool MD998054.
Tightening torque: 10+/-2 N.m (87+/-17 in-lb)
2004 Mitsubishi Endeavor Limited 2004 ENGINE Engine Overhaul - Endeavor
Page 1427 of 3870
Fig. 103: Tightening Engine Oil Pressure Switch
Courtesy of MITSUBISHI MOTOR SALES OF AMERICA.
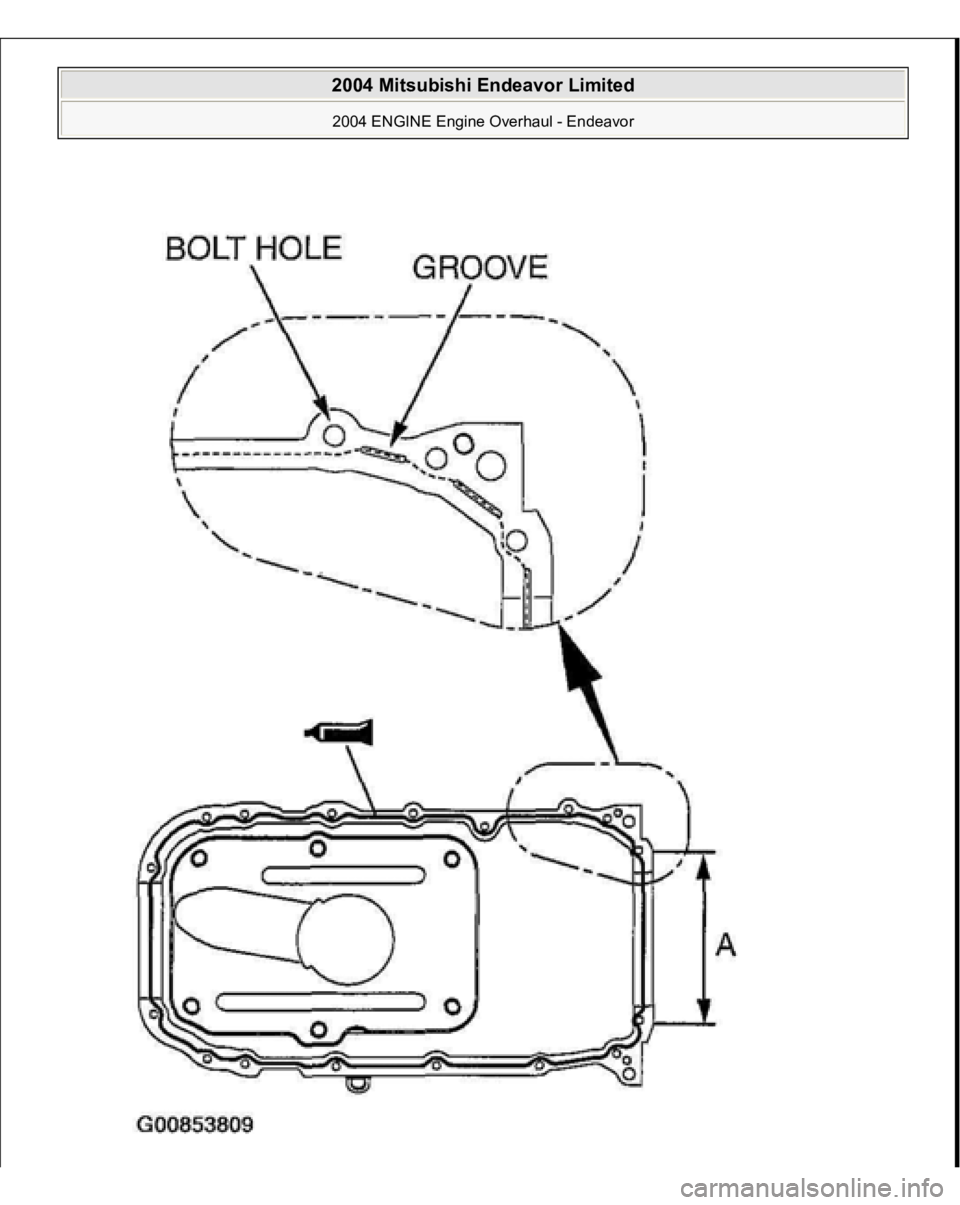
>>F<< OIL PAN, UPPER INSTALLATION 1. Clean both gasket surfaces of the upper oil pan and cylinder block.
2. Apply a 4 mm (0.2 inch) diameter bead of sealant. (Mitsubishi Genuine Parts
number MD970389 or equivalent) to the upper oil pan.
Apply sealant as indicated by the broken line in the illustration; the grooves
must be traced and the bolt holes must be surrounded with a bead of sealant.
CAUTION: When installing the upper oil pan, be sure not to
expel the sealant from the oil pan flange at
2004 Mitsubishi Endeavor Limited 2004 ENGINE Engine Overhaul - Endeavor
Page 1428 of 3870
3. Install the oil pan to the bottom of the cylinder block.
portion A in the illustration.
NOTE: Be sure to install the oil pan quickly while the sealant is
wet (within 15 minutes).
2004 Mitsubishi Endeavor Limited 2004 ENGINE Engine Overhaul - Endeavor
Page 1429 of 3870
2004 Mitsubishi Endeavor Limited 2004 ENGINE Engine Overhaul - Endeavor
Page 1430 of 3870
Fig. 104: Installing Oil Pan To Bottom Of Cylinder
Courtesy of MITSUBISHI MOTOR SALES OF AMERICA.
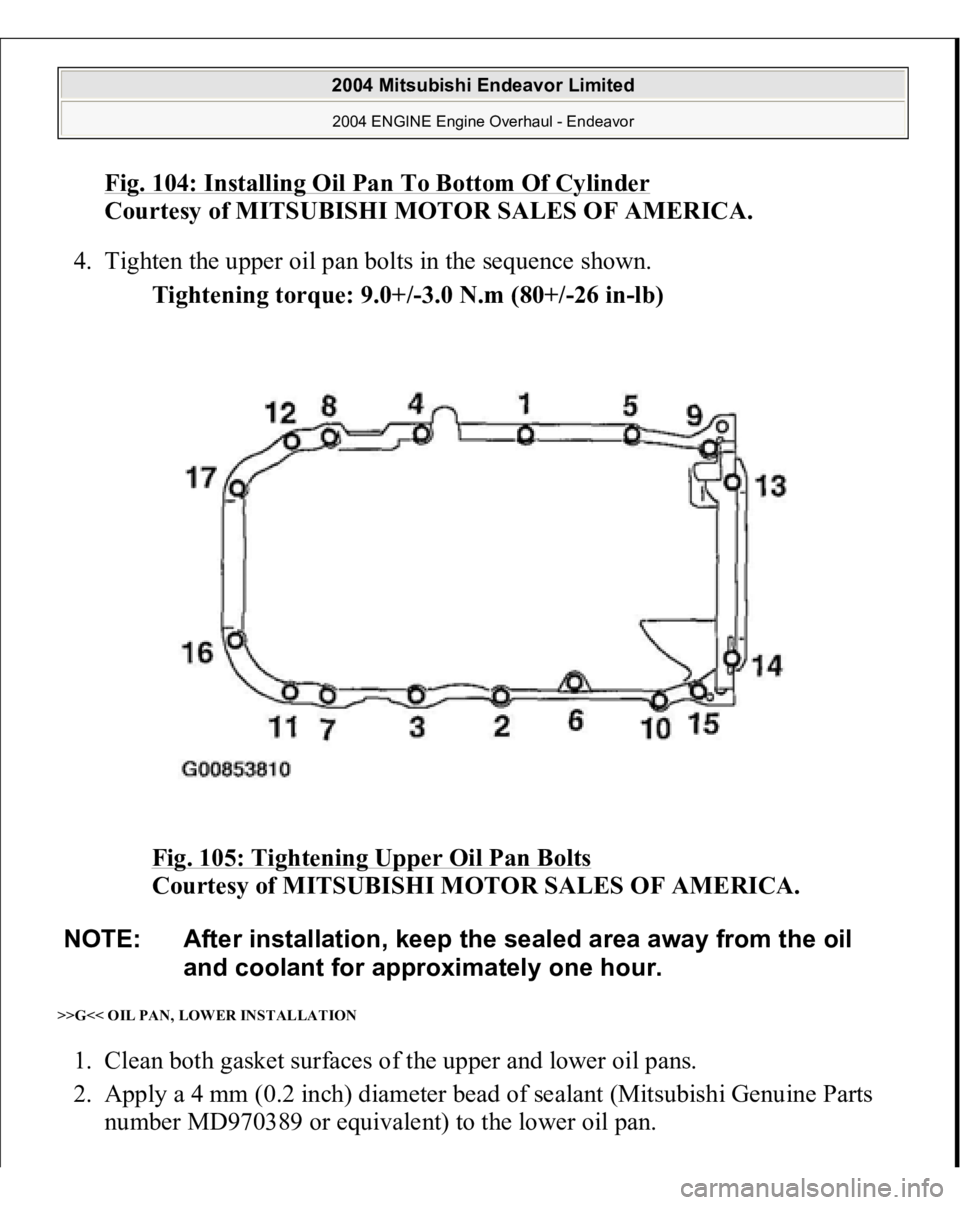
4. Tighten the upper oil pan bolts in the sequence shown.
Tightening torque: 9.0+/-3.0 N.m (80+/-26 in-lb)
Fig. 105: Tightening Upper Oil Pan Bolts
Courtesy of MITSUBISHI MOTOR SALES OF AMERICA.
>>G<< OIL PAN, LOWER INSTALLATION 1. Clean both gasket surfaces of the upper and lower oil pans.
2. Apply a 4 mm (0.2 inch) diameter bead of sealant (Mitsubishi Genuine Parts
number MD970389 or e
quivalent
) to the lower oil
pan.
NOTE: After installation, keep the sealed area away from the oil
and coolant for approximately one hour.
2004 Mitsubishi Endeavor Limited 2004 ENGINE Engine Overhaul - Endeavor
Trending: bolt tightening order, steering wheel adjustment, width, towing capacity, intro, Lift, ESP
