MITSUBISHI OUTLANDER SPORT 2014 3.G Owners Manual
Manufacturer: MITSUBISHI, Model Year: 2014, Model line: OUTLANDER SPORT, Model: MITSUBISHI OUTLANDER SPORT 2014 3.GPages: 388, PDF Size: 20.04 MB
Page 91 of 388
Seat belts5-12 Seat and seat belts
5
E00405000420
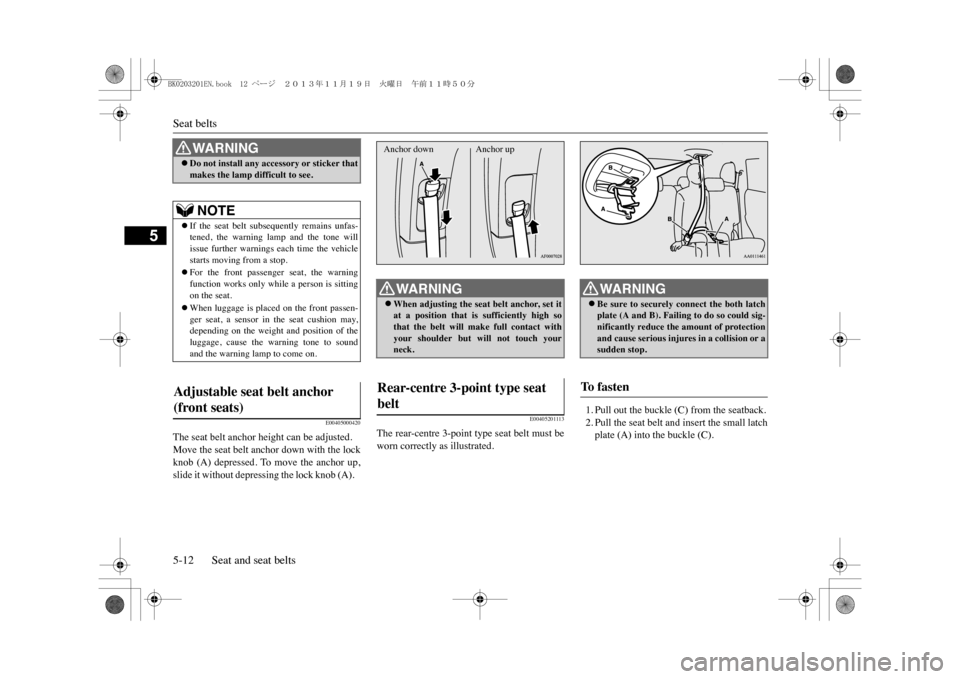
The seat belt anchor height can be adjusted.Move the seat belt anchor down with the lockknob (A) depressed. To move the anchor up,slide it without depressing the lock knob (A).
E00405201113
The rear-centre 3-point type seat belt must beworn correctly as illustrated.
1. Pull out the buckle (C) from the seatback.2. Pull the seat belt and insert the small latchplate (A) into the buckle (C).
WA R N I N G�zDo not install any accessory or sticker thatmakes the lamp difficult to see.NOTE
�zIf the seat belt subse
quently remains unfas-
tened, the warning lamp and the tone willissue further warnings each time the vehiclestarts moving from a stop.�zFor the front passenge
r seat, the warning
function works only while a person is sittingon the seat.�zWhen luggage is placed on the front passen-ger seat, a sensor in the seat cushion may,depending on the weight
and position of the
luggage, cause the warning tone to soundand the warning lamp to come on.
Adjustable seat belt anchor (front seats)
WA R N I N G�zWhen adjusting
the seat belt anchor, set it
at a position that is
sufficiently high so
that the belt will make full contact withyour shoulder but will not touch yourneck.
Rear-centre 3-point type seat belt Anchor down
Anchor up
WA R N I N G�zBe sure to securely connect the both latchplate (A and B). Failing to do so could sig-nificantly reduce the amount of protectionand cause serious injures in a collision or asudden stop.
To f a s t e n
BK0203201EN.book 12 ページ 2013年11月19日 火曜日 午前11時50分
Page 92 of 388
Seat belts
Seat and seat belts 5-13
5
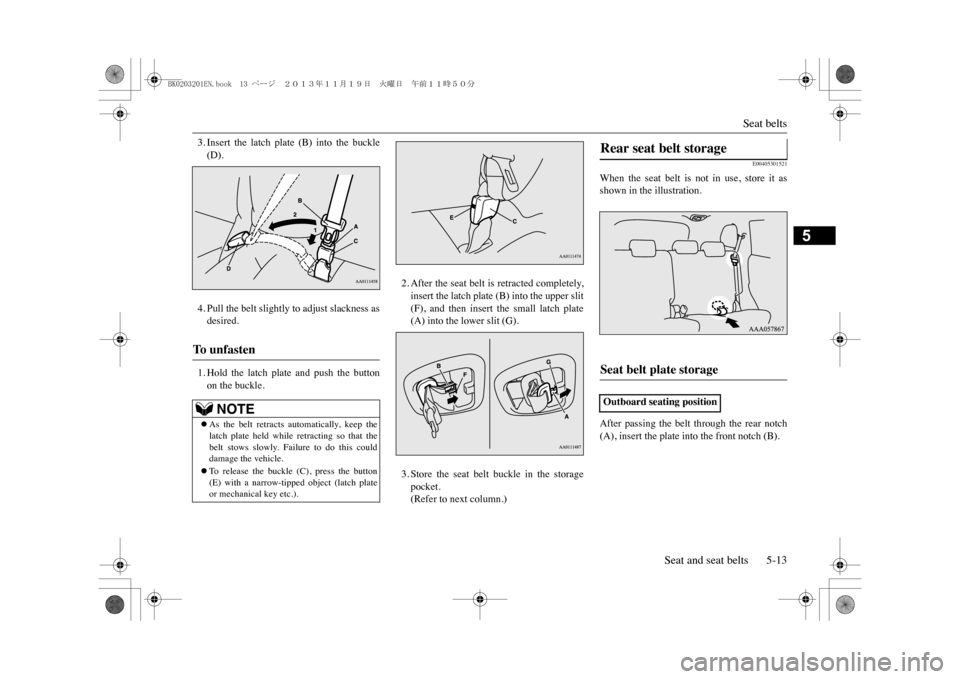
3. Insert the latch plate (B) into the buckle(D).4. Pull the belt slightly to adjust slackness asdesired.1. Hold the latch plate and push the buttonon the buckle.
2. After the seat belt is retracted completely,insert the latch plate (B) into the upper slit(F), and then insert the small latch plate(A) into the lower slit (G).3. Store the seat belt buckle in the storagepocket.(Refer to next column.)
E00405301521
When the seat belt is not in use, store it asshown in the illustration.After passing the belt through the rear notch(A), insert the plate into the front notch (B).
To u n f a s t e n
NOTE
�zAs the belt retracts au
tomatically, keep the
latch plate held while retracting so that thebelt stows slowly. Failure to do this coulddamage the vehicle.�zTo r e l e a s e t h e b u c k l e ( C ) , p r e s s t h e b u t t o n(E) with a narrow-tipped object (latch plateor mechanical key etc.).
Rear seat belt storage Seat belt plate storage Outboard seating position
BK0203201EN.book 13 ページ 2013年11月19日 火曜日 午前11時50分
Page 93 of 388
Pregnant women restraint5-14 Seat and seat belts
5
E00405600077
E00405701323
The driver’s seat and front passenger’s seateach have a seat belt equipped with a pre-ten-sioner system and
force limiter system.
E00405802259
When the operation mode of the powerswitch is in ON, if there is a frontal impact ora side impact severe enough to injure theand/or front passenger, the pre-tensioner sys-tem will retract their respective seat beltsinstantaneously, thus maximizing the seatbelt’s effectiveness.
E00405900360
The same warning lamp/display is shared bythe SRS airbags and the pre-tensioner seatbelts.Refer to “SRS warning lamp/display” onpage 5-30 .
Pregnant women restraint
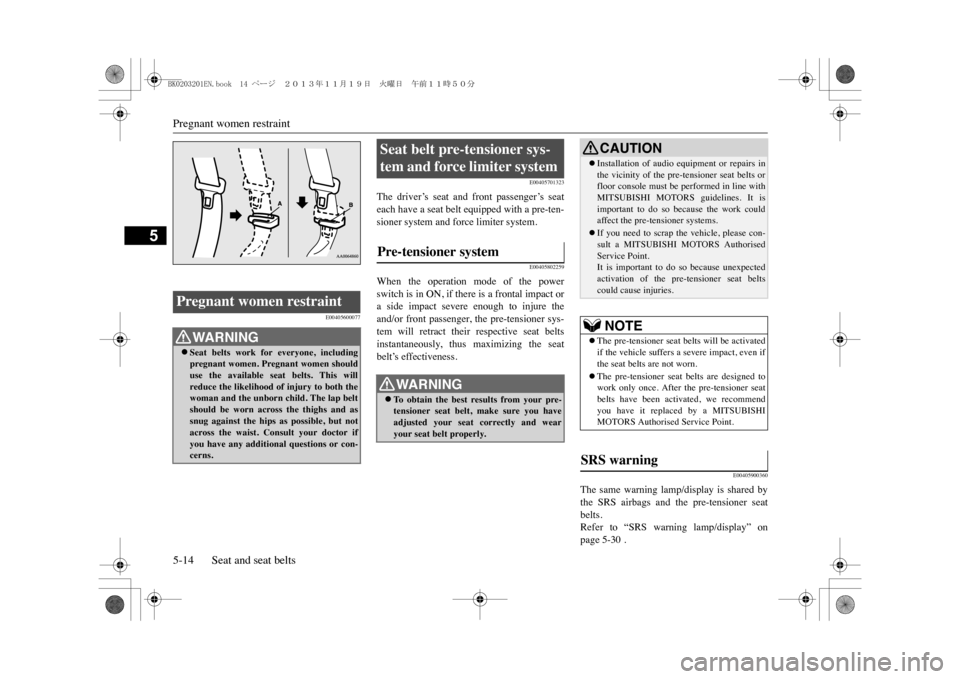
WA R N I N G�zSeat belts work for everyone, includingpregnant women. Pregnant women shoulduse the available seat belts. This willreduce the likelihood of injury to both thewoman and the unborn child. The lap beltshould be worn across the thighs and assnug against the hips as possible, but notacross the waist. Consult your doctor ifyou have any addition
al questions or con-
cerns.
Seat belt pre-tensioner sys-tem and force limiter system Pre-tensioner system
WA R N I N G�zTo o b t a i n t h e b e s t r e s u l t s f r o m y o u r p r e -tensioner seat belt, make sure you haveadjusted your seat correctly and wearyour seat belt properly.
CAUTION�zInstallation of audio e
quipment or repairs in
the vicinity of the pre-tensioner seat belts orfloor console must be
performed in line with
MITSUBISHI MOTORS
guidelines. It is
important to do so because the work couldaffect the pre-tensioner systems.�zIf you need to scrap the vehicle, please con-sult a MITSUBISHI MOTORS AuthorisedService Point.It is important to do so because unexpectedactivation of the pre-tensioner seat beltscould cause injuries.NOTE
�zThe pre-tensioner seat belts will be activatedif the vehicle suffers a severe impact, even ifthe seat belts are not worn.�zThe pre-tensioner seat belts are designed towork only once. After the pre-tensioner seatbelts have been activated, we recommendyou have it replaced by a MITSUBISHIMOTORS Authorised Service Point.
SRS warning
BK0203201EN.book 14 ページ 2013年11月19日 火曜日 午前11時50分
Page 94 of 388
Child restraint
Seat and seat belts 5-15
5
E00406000209
In the event of a collision, each force limitersystem will effectively absorb the loadapplied to the seat belt to minimize theimpact to the passenger.
E00406403145
When transporting children in your vehicle,an approved child restraint system should beused for each child (it is recommended).
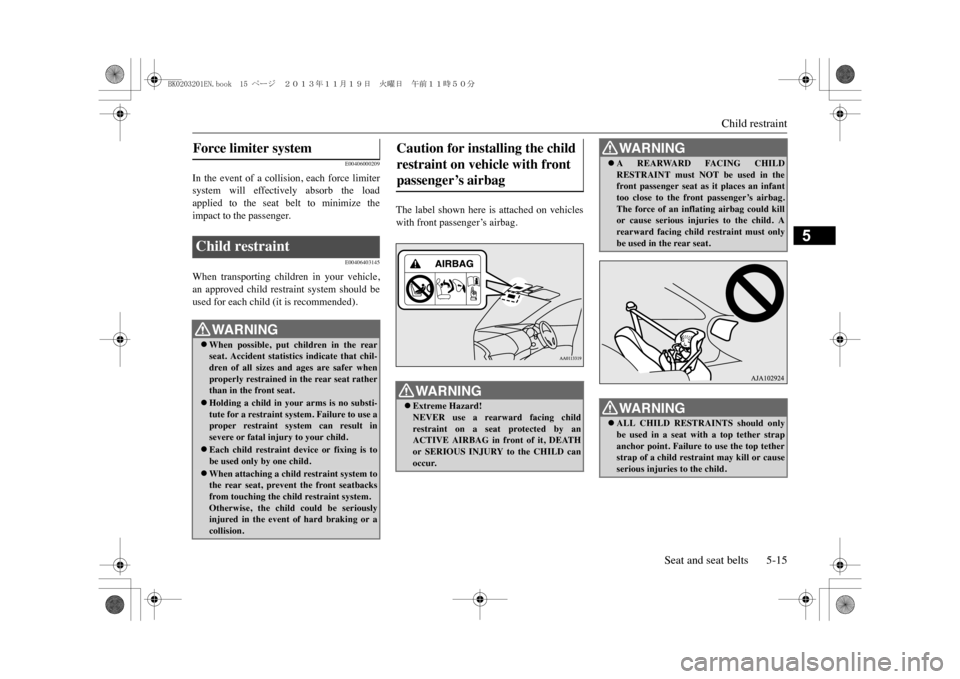
The label shown here is attached on vehicleswith front passenger’s airbag.
Force limiter system Child restraint
WA R N I N G�zWhen possible, put children in the rearseat. Accident statistics indicate that chil-dren of all sizes and ages are safer whenproperly restrained in the rear seat ratherthan in the front seat.�zHolding a child in your arms is no substi-tute for a restraint system. Failure to use aproper restraint system can result insevere or fatal injury to your child.�zEach child restraint device or fixing is tobe used only by one child.�zWhen attaching a child restraint system tothe rear seat, prevent the front seatbacksfrom touching the child restraint system.Otherwise, the child could be seriouslyinjured in the event of
hard braking or a
collision.
Caution for installing the child restraint on vehicle with front passenger’s airbag
WA R N I N G�zExtreme Hazard!NEVER use a rearward facing childrestraint on a seat protected by anACTIVE AIRBAG in front of it, DEATHor SERIOUS INJURY to the CHILD canoccur.
�zA REARWARD FACING CHILDRESTRAINT must NOT be used in thefront passenger seat as it places an infanttoo close to the front passenger’s airbag.The force of an infl
ating airbag could kill
or cause serious injuries to the child. Arearward facing child restraint must onlybe used in the rear seat.WA R N I N G�zALL CHILD RESTRAINTS should onlybe used in a seat wi
th a top tether strap
anchor point. Failure to use the top tetherstrap of a child restraint may kill or causeserious injuries to the child.WA R N I N G
BK0203201EN.book 15 ページ 2013年11月19日 火曜日 午前11時50分
Page 95 of 388
Child restraint5-16 Seat and seat belts
5
E00406600465
For infants small enough for infants seats, usea Standards Association of Australiaapproved baby restraint. For small childrenwhose height when seated allows the shoul-der belt to lie in contact with the face or thethroat, a child seat should be used.
E00406700307
Children who have outgrown the childrestraint system should be seated in the rearseat and wear combination lap shoulder belt.The lap portion of the belt should be snug andpositioned low on the abdomen so that it isbelow the top of the hip-bone. Otherwise, thebelt could intrude into the child’s abdomenduring an accident and cause injury.
E00406901931
When fitting a child restraint, always followthe manufacturer’s instructions using theapproved anchorage points shown.
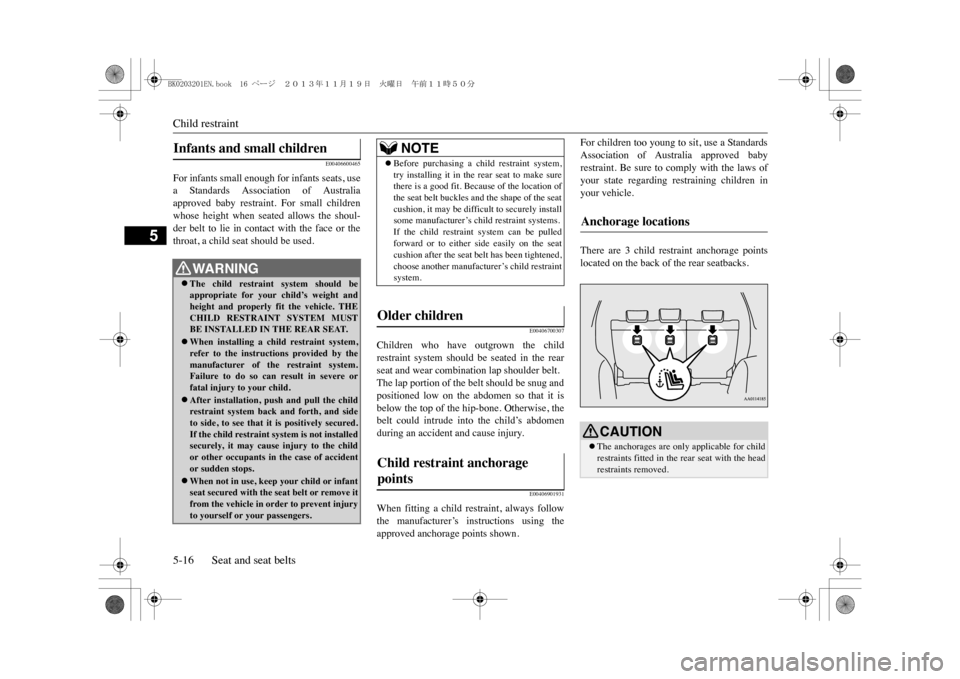
For children too young to sit, use a StandardsAssociation of Australia approved babyrestraint. Be sure to comply with the laws ofyour state regarding restraining children inyour vehicle.There are 3 child restraint anchorage pointslocated on the back of the rear seatbacks.
Infants and small children
WA R N I N G�zThe child restraint system should beappropriate for your
child’s weight and
height and properly fit the vehicle. THECHILD RESTRAINT SYSTEM MUSTBE INSTALLED IN THE REAR SEAT.�zWhen installing a child restraint system,refer to the instructions provided by themanufacturer of the restraint system.Failure to do so can result in severe orfatal injury to your child.�zAfter installation, push and pull the childrestraint system back and forth, and sideto side, to see that it is positively secured.If the child restraint system is not installedsecurely, it may cause injury to the childor other occupants in the case of accidentor sudden stops.�zWhen not in use, keep your child or infantseat secured with the seat belt or remove itfrom the vehicle in order to prevent injuryto yourself or
your passengers.
NOTE
�zBefore purchasing a child restraint system,try installing it in the rear seat to make surethere is a good fit. Because of the location ofthe seat belt buckles and the shape of the seatcushion, it may be difficult to securely installsome manufacturer’s child restraint systems.If the child restraint system can be pulledforward or to either side easily on the seatcushion after the seat belt has been tightened,choose another manufacturer’s child restraintsystem.
Older children Child restraint anchorage points
Anchorage locations
CAUTION�zThe anchorages are only applicable for childrestraints fitted in the rear seat with the headrestraints removed.
BK0203201EN.book 16 ページ 2013年11月19日 火曜日 午前11時50分
Page 96 of 388
Child restraint
Seat and seat belts 5-17
5
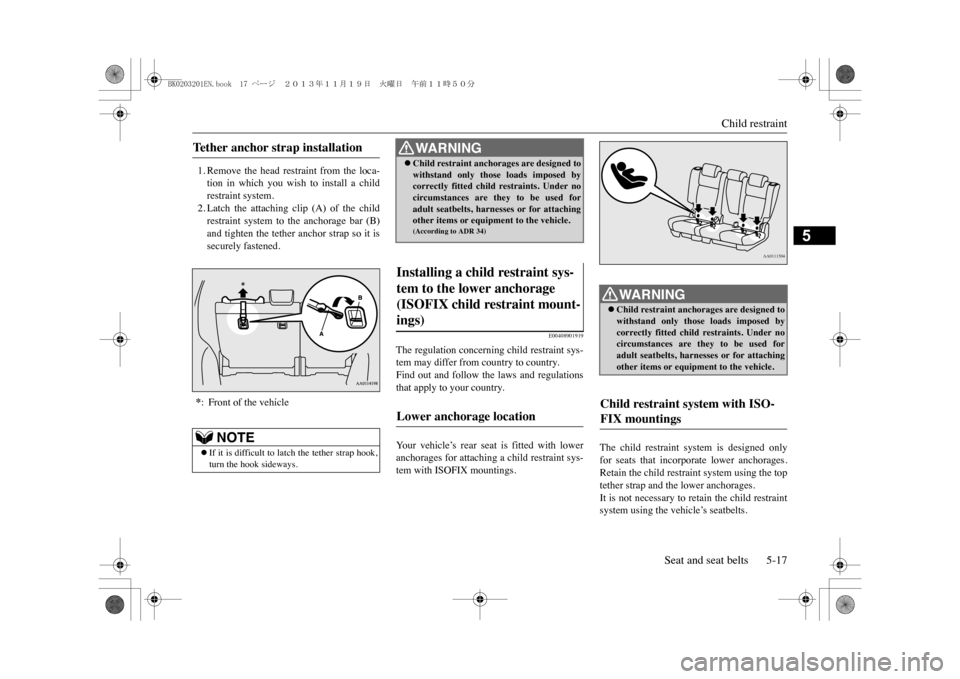
1. Remove the head restraint from the loca-tion in which you wish to install a childrestraint system.2. Latch the attaching clip (A) of the childrestraint system to the anchorage bar (B)and tighten the tether anchor strap so it issecurely fastened.
E00408901919
The regulation concerning child restraint sys-tem may differ from country to country.Find out and follow the laws and regulationsthat apply to your country.Yo u r v e h i c l e ’s r e a r s e a t i s f i t t e d w i t h l o w e ranchorages for attaching a child restraint sys-tem with ISOFIX mountings.
The child restraint system is designed onlyfor seats that incorporate lower anchorages.Retain the child restrain
t system using the top
tether strap and the lower anchorages.It is not necessary to retain the child restraintsystem using the vehicle’s seatbelts.
Te t h e r a n c h o r s t r a p i n s t a l l a t i o n *: Front of the vehicle
NOTE
�zIf it is difficult to latch the tether strap hook,turn the hook sideways.
WA R N I N G�zChild restraint anchorages are designed towithstand only those loads imposed bycorrectly fitted child restraints. Under nocircumstances are they to be used foradult seatbelts, harnesses or for attachingother items or equipment to the vehicle.(According to ADR 34)
Installing a child restraint sys-tem to the lower anchorage (ISOFIX child restraint mount-ings) Lower anchorage location
WA R N I N G�zChild restraint anchorages are designed towithstand only those loads imposed bycorrectly fitted child restraints. Under nocircumstances are they to be used foradult seatbelts, harnesses or for attachingother items or equipment to the vehicle.
Child restraint system with ISO-FIX mountings
AA0111504
BK0203201EN.book 17 ページ 2013年11月19日 火曜日 午前11時50分
Page 97 of 388
Child restraint5-18 Seat and seat belts
5
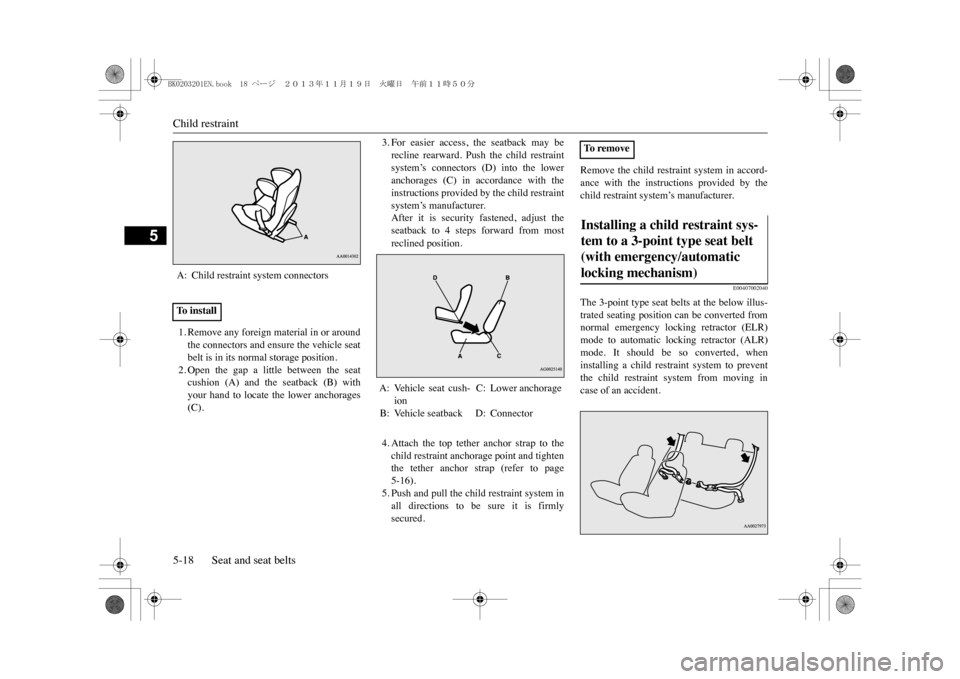
1. Remove any foreign material in or aroundthe connectors and ensure the vehicle seatbelt is in its normal storage position.2. Open the gap a little between the seatcushion (A) and the seatback (B) withyour hand to locate the lower anchorages(C).
3. For easier access, the seatback may berecline rearward. Push the child restraintsystem’s connectors (D) into the loweranchorages (C) in accordance with theinstructions provided by the child restraintsystem’s manufacturer.After it is security fastened, adjust theseatback to 4 steps forward from mostreclined position.4. Attach the top tether anchor strap to thechild restraint anchorage point and tightenthe tether anchor strap (refer to page5-16).5. Push and pull the child restraint system inall directions to be sure it is firmlysecured.
Remove the child restraint system in accord-ance with the instructions provided by thechild restraint system’s manufacturer.
E00407002040
The 3-point type seat belts at the below illus-trated seating position can be converted fromnormal emergency locking retractor (ELR)mode to automatic locking retractor (ALR)mode. It should be so converted, wheninstalling a child restraint system to preventthe child restraint system from moving incase of an accident.
A: Child restraint system connectorsTo install
A: Vehicle seat cush-
ion
C: Lower anchorage
B: Vehicle seatback D: Connector
To r e m o v eInstalling a child restraint sys-tem to a 3-point type seat belt (with emergency/automatic locking mechanism)
BK0203201EN.book 18 ページ 2013年11月19日 火曜日 午前11時50分
Page 98 of 388
Child restraint
Seat and seat belts 5-19
5
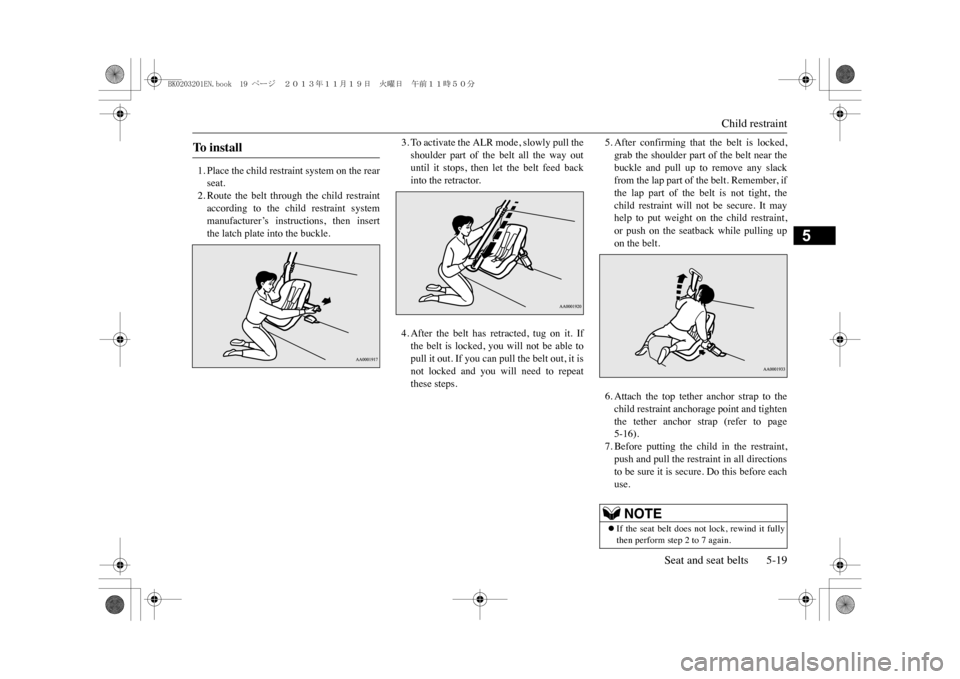
1. Place the child restraint system on the rearseat.2. Route the belt through the child restraintaccording to the child restraint systemmanufacturer’s instructions, then insertthe latch plate into the buckle.
3. To activate the ALR mode, slowly pull theshoulder part of the belt all the way outuntil it stops, then let the belt feed backinto the retractor. 4. After the belt has retracted, tug on it. Ifthe belt is locked, you will not be able topull it out. If you can pull the belt out, it isnot locked and you will need to repeatthese steps.
5. After confirming that the belt is locked,grab the shoulder part of the belt near thebuckle and pull up to remove any slackfrom the lap part of the belt. Remember, ifthe lap part of the belt is not tight, thechild restraint will not be secure. It mayhelp to put weight on the child restraint,or push on the seatback while pulling upon the belt.6. Attach the top tether anchor strap to thechild restraint anchorage point and tightenthe tether anchor strap (refer to page5-16).7. Before putting the child in the restraint,push and pull the restraint in all directionsto be sure it is secure. Do this before eachuse.
To i n s t a l l
NOTE
�zIf the seat belt does not lock, rewind it fullythen perform step 2 to 7 again.
BK0203201EN.book 19 ページ 2013年11月19日 火曜日 午前11時50分
Page 99 of 388
Child restraint5-20 Seat and seat belts
5
1. Remove the plate from the buckle, thenremove the seat belt from the childrestraint system.2. Fully rewind the seat belt to deactivate theALR mode.
E00407101712
For safety, you are advised to install the childrestraint system using a 3-point type seat beltwith emergency/automatic locking mecha-nism. If you cannot avoid installing it usinganother type of seat belt, follow the instruc-tions given below.1. Place the child restraint system on the rearseat.
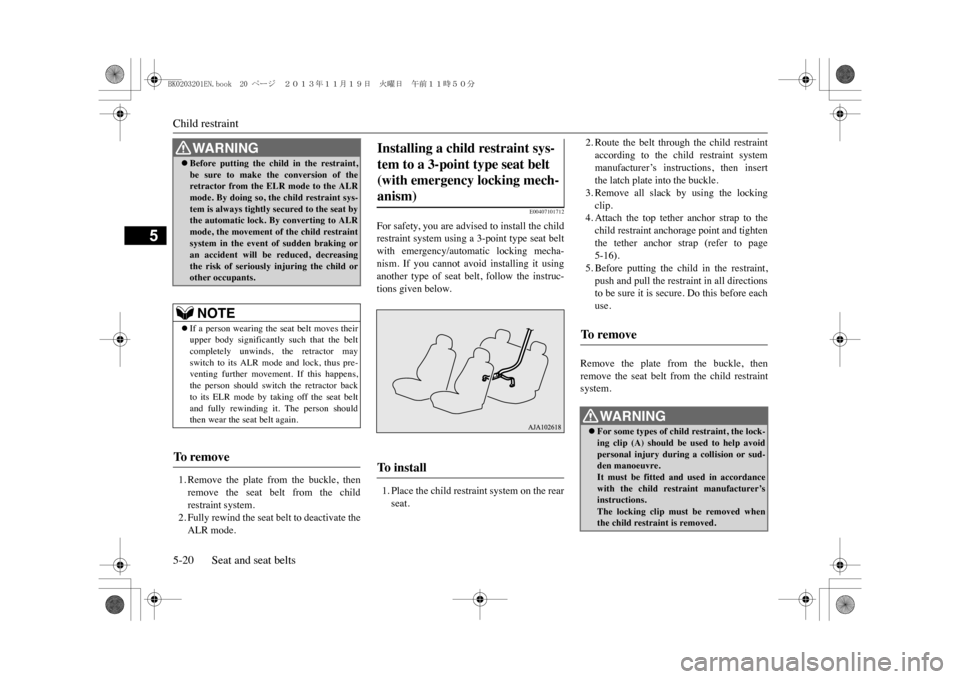
2. Route the belt through the child restraintaccording to the child restraint systemmanufacturer’s instructions, then insertthe latch plate into the buckle.3. Remove all slack by using the lockingclip.4. Attach the top tether anchor strap to thechild restraint anchorage point and tightenthe tether anchor strap (refer to page5-16).5. Before putting the child in the restraint,push and pull the restraint in all directionsto be sure it is secure. Do this before eachuse.
Remove the plate from the buckle, thenremove the seat belt from the child restraintsystem.
WA R N I N G�zBefore putting the child in the restraint,be sure to make the conversion of theretractor from the ELR mode to the ALRmode. By doing so, the child restraint sys-tem is always tightly secured to the seat bythe automatic lock. By converting to ALRmode, the movement of the child restraintsystem in the event of sudden braking oran accident will be reduced, decreasingthe risk of seriously injuring the child orother occupants.NOTE
�zIf a person wearing the seat belt moves theirupper body significantly such that the beltcompletely unwinds, the retractor mayswitch to its ALR mode and lock, thus pre-venting further movement. If this happens,the person should switch the retractor backto its ELR mode by taking off the seat beltand fully rewinding it. The person shouldthen wear the seat belt again.
To r e m o v e
Installing a child restraint sys-tem to a 3-point type seat belt (with emergency locking mech-anism) To i n s t a l l
To r e m o v e
WA R N I N G�zFor some types of child restraint, the lock-ing clip (A) should be used to help avoidpersonal injury during a collision or sud-den manoeuvre.It must be fitted and used in accordancewith the child restraint manufacturer’sinstructions.The locking clip must be removed whenthe child restraint is removed.
BK0203201EN.book 20 ページ 2013年11月19日 火曜日 午前11時50分
Page 100 of 388
Seat belt inspection
Seat and seat belts 5-21
5
E00406300576
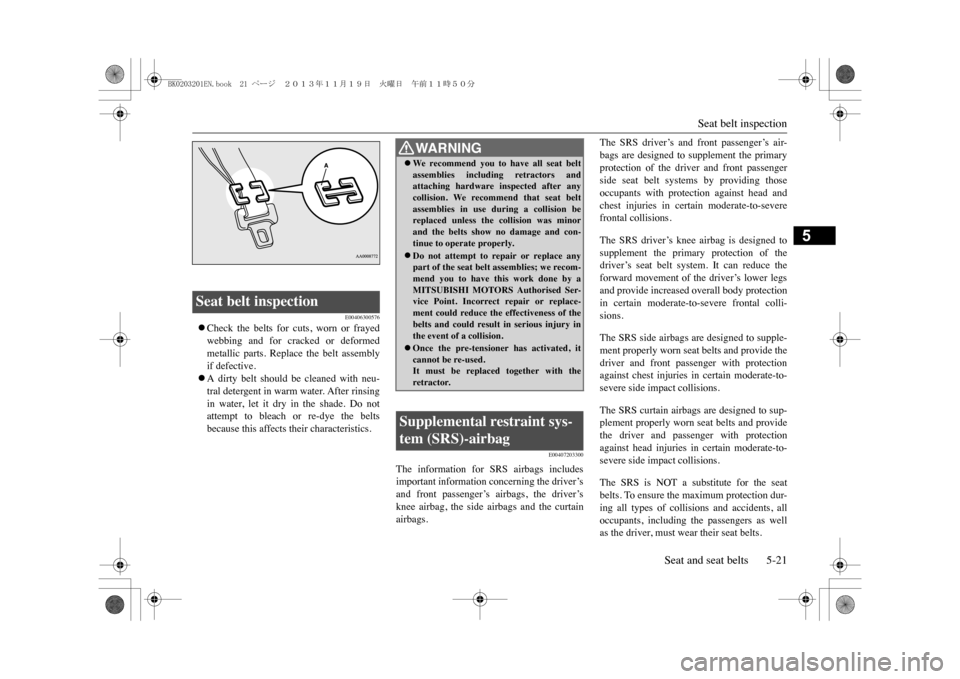
�zCheck the belts for cuts, worn or frayedwebbing and for cracked or deformedmetallic parts. Replace the belt assemblyif defective. �zA dirty belt should be cleaned with neu-tral detergent in warm water. After rinsingin water, let it dry in the shade. Do notattempt to bleach or re-dye the beltsbecause this affects their characteristics.
E00407203300
The information for SRS airbags includesimportant information concerning the driver’sand front passenger’s airbags, the driver’sknee airbag, the side airbags and the curtainairbags.
The SRS driver’s and front passenger’s air-bags are designed to supplement the primaryprotection of the driver and front passengerside seat belt systems by providing thoseoccupants with protection against head andchest injuries in certain moderate-to-severefrontal collisions.The SRS driver’s knee airbag is designed tosupplement the primary protection of thedriver’s seat belt system. It can reduce theforward movement of the driver’s lower legsand provide increased overall body protectionin certain moderate-to-severe frontal colli-sions.The SRS side airbags are designed to supple-ment properly worn seat belts and provide thedriver and front passenger with protectionagainst chest injuries in certain moderate-to-severe side impact collisions.The SRS curtain airbags are designed to sup-plement properly worn seat belts and providethe driver and passenger with protectionagainst head injuries in certain moderate-to-severe side impact collisions.The SRS is NOT a substitute for the seatbelts. To ensure the maximum protection dur-ing all types of collisions and accidents, alloccupants, including the passengers as wellas the driver, must wear their seat belts.
Seat belt inspection
WA R N I N G�zWe recomme nd you to have all seat bel tassemblies includin
g retractors and
attaching hardware inspected after anycollision. We recommend that seat beltassemblies in use during a collision bereplaced unless the collision was minorand the belts show no damage and con-tinue to operate properly. �zDo not attempt to repair or replace anypart of the seat belt assemblies; we recom-mend you to have this work done by aMITSUBISHI MOTORS Authorised Ser-vice Point. Incorrect repair or replace-ment could reduce the effectiveness of thebelts and could result in serious injury inthe event of a collision. �zOnce the pre-tensioner has activated, itcannot be re-used.It must be replaced together with theretractor.
Supplemental restraint sys-tem (SRS)-airbag
BK0203201EN.book 21 ページ 2013年11月19日 火曜日 午前11時50分