MITSUBISHI SHOGUN 2003 (in English) Workshop Manual
Manufacturer: MITSUBISHI, Model Year: 2003, Model line: SHOGUN, Model: MITSUBISHI SHOGUN 2003Pages: 392, PDF Size: 14.34 MB
Page 51 of 392
G23F041A
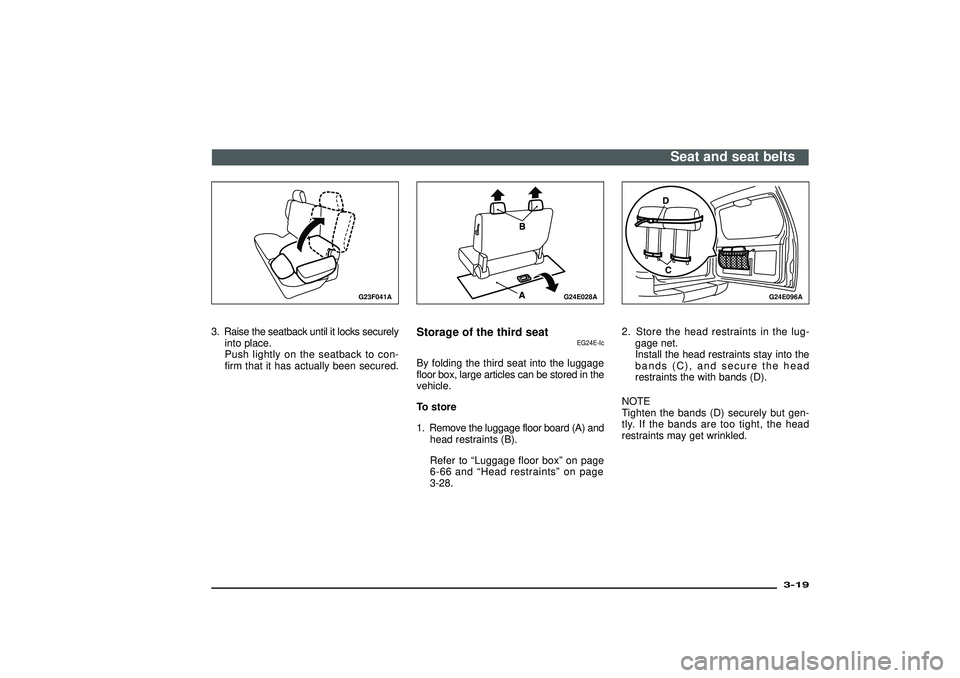
3. Raise the seatback until it locks securelyinto place.
Push lightly on the seatback to con-
firm that it has actually been secured.
G24E028A
Storage of the third seat
EG24E-Ic
By folding the third seat into the luggage
floor box, large articles can be stored in the
vehicle.
To store
1. Remove the luggage floor board (A) andhead restraints (B).
Refer to “Luggage floor box ”on page
6-66 an d“Hea drestraints ”on page
3-28.
G24E096A
2. Store the head restraints in the lug- gage net.
Install the head restraints stay into the
bands (C), and secure the head
restraints the with bands (D).
NOTE
Tighten the bands (D) securely but gen-
tly. If the bands are too tight, the head
restraints may get wrinkled.
Seat and seat belts
3-19
Div:
Out put date:
Page 52 of 392
G24E030A
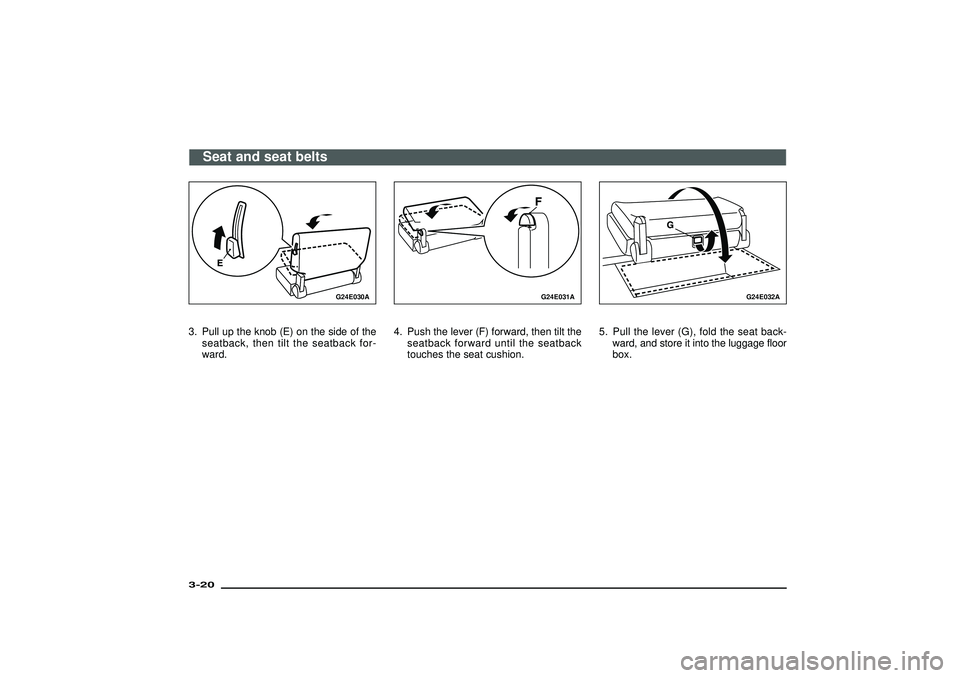
3. Pull up the knob (E) on the side of the
seatback, then tilt the seatback for-
ward.
G24E031A
4. Push the lever (F) forward, then tilt the
seatback forward until the seatback
touches the seat cushion.
G24E032A
5. Pull the lever (G), fold the seat back-
ward, and store it into the luggage floor
box.
Seat and seat belts
3-20Div:
Out put date:
Page 53 of 392
G24F014A
CAUTION
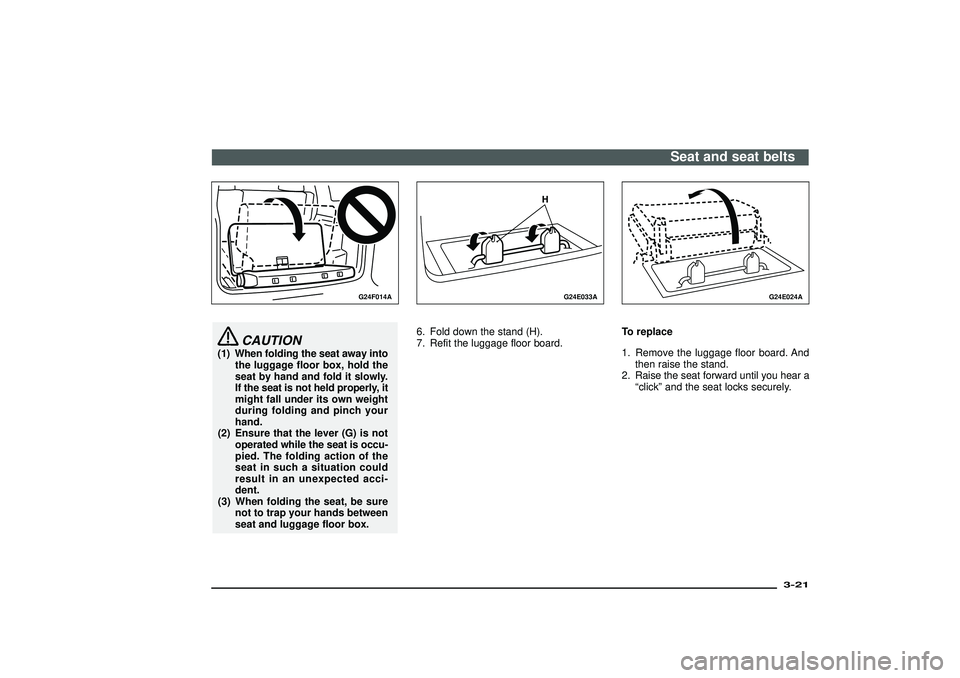
(1) When folding the seat away into
the luggage floor box, hold the
seat by hand and fold it slowly.
If the seat is not held properly, it
might fall under its own weight
during folding and pinch your
hand.
(2) Ensure that the lever (G) is not
operated while the seat is occu-
pied. The folding action of the
seat in such a situation could
result in an unexpected acci-
dent.
(3) When folding the seat, be sure
not to trap your hands between
seat and luggage floor box.
G24E033A
6. Fold down the stand (H).
7. Refit the luggage floor board.
G24E024A
To replace
1. Remove the luggage floor board. And
then raise the stand.
2. Raise the seat forward until you hear a
“click”and the seat locks securely.
Seat and seat belts
3-21
Div:
Out put date:
Page 54 of 392
G24E034A
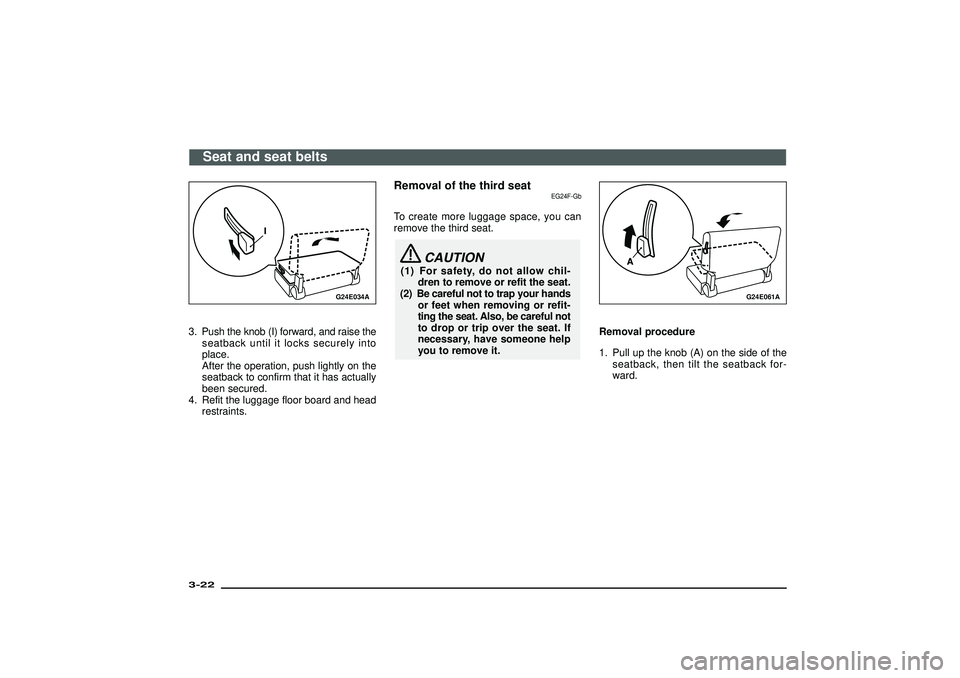
3. Push the knob (I) forward, and raise the
seatback until it locks securely into
place.
After the operation, push lightly on the
seatback to confirm that it has actually
been secured.
4. Refit the luggage floor board and head
restraints.
Removal of the third seat
EG24F-Gb
To create more luggage space, you can
remove the third seat.
CAUTION
(1) For safety, do not allow chil-
dren to remove or refit the seat.
(2) Be careful not to trap your hands
or feet when removing or refit-
ting the seat. Also, be careful not
to drop or trip over the seat. If
necessary, have someone help
you to remove it.
G24E061A
Removal procedure
1. Pull up the knob (A) on the side of the
seatback, then tilt the seatback for-
ward.
Seat and seat belts
3-22Div:
Out put date:
Page 55 of 392
G24F032A
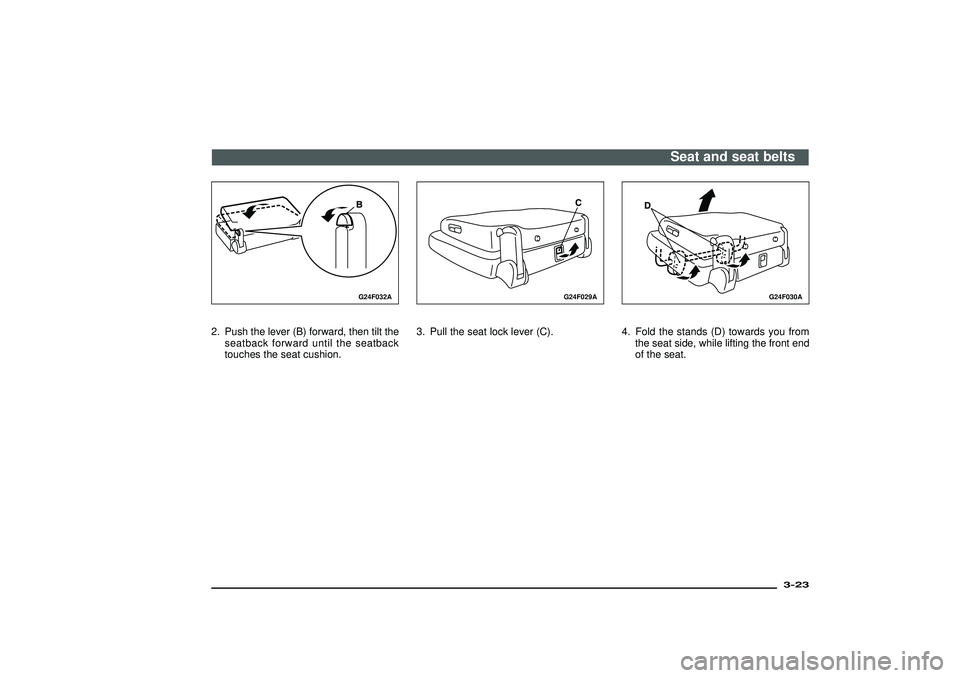
2. Push the lever (B) forward, then tilt the
seatback forward until the seatback
touches the seat cushion.
G24F029A
3. Pull the seat lock lever (C).
G24F030A
4. Fold the stands (D) towards you from
the seat side, while lifting the front end
of the seat.
Seat and seat belts
3-23
Div:
Out put date:
Page 56 of 392
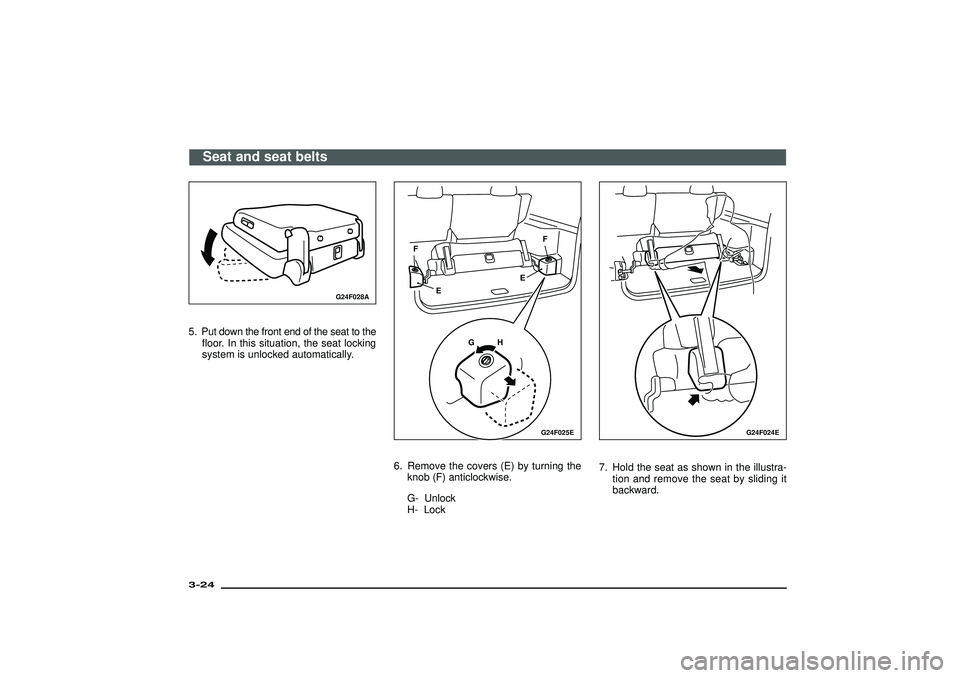
G24F028A
5. Put down the front end of the seat to the
floor. In this situation, the seat locking
system is unlocked automatically.
G24F025E
GH EE FF
6. Remove the covers (E) by turning the
knob (F) anticlockwise.
G- Unlock
H- Lock
G24F024E
7. Hold the seat as shown in the illustra-
tion and remove the seat by sliding it
backward.
Seat and seat belts
3-24Div:
Out put date:
Page 57 of 392
CAUTION
Do not sit or place luggage on the
removed seat. Any weight placed on
the folded seat could deform the seat
mountings, preventing the seat from
being locked securely onto the floor.
NOTE
During the removal procedure, ensure that
both ends of the seat are moved evenly
while the seat is being pulled out. If this
procedure is not followed, the seat could
catch on its securing fixtures, making it dif-
ficult to remove.
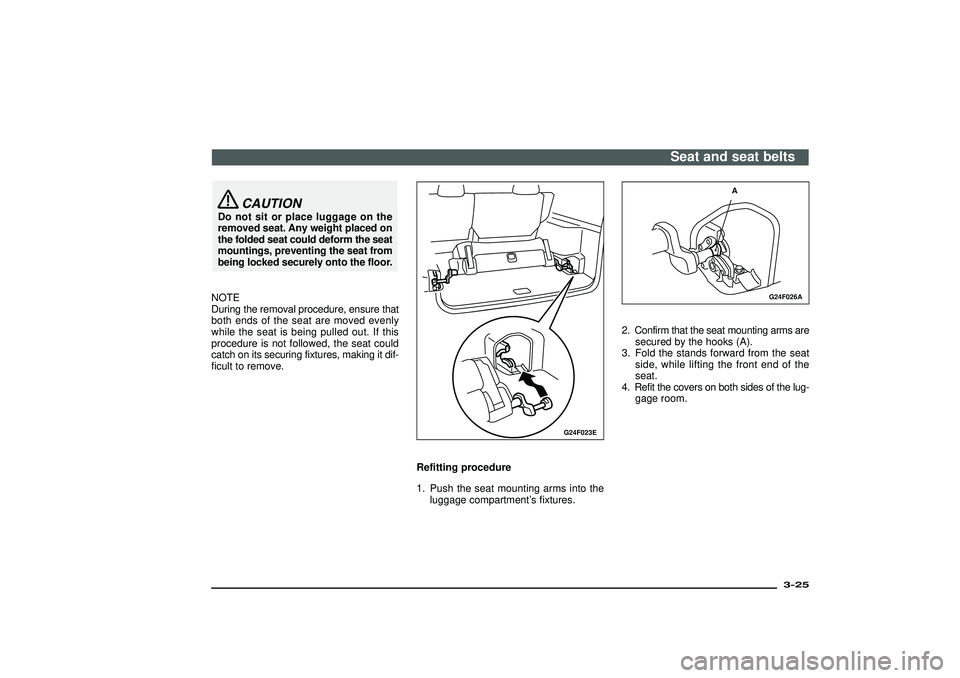
G24F023E
Refitting procedure
1. Push the seat mounting arms into the
luggage compartment’s fixtures.
G24F026A
A
2. Confirm that the seat mounting arms are
secured by the hooks (A).
3. Fold the stands forward from the seat
side, while lifting the front end of the
seat.
4. Refit the covers on both sides of the lug-
gage room.
Seat and seat belts
3-25
Div:
Out put date:
Page 58 of 392
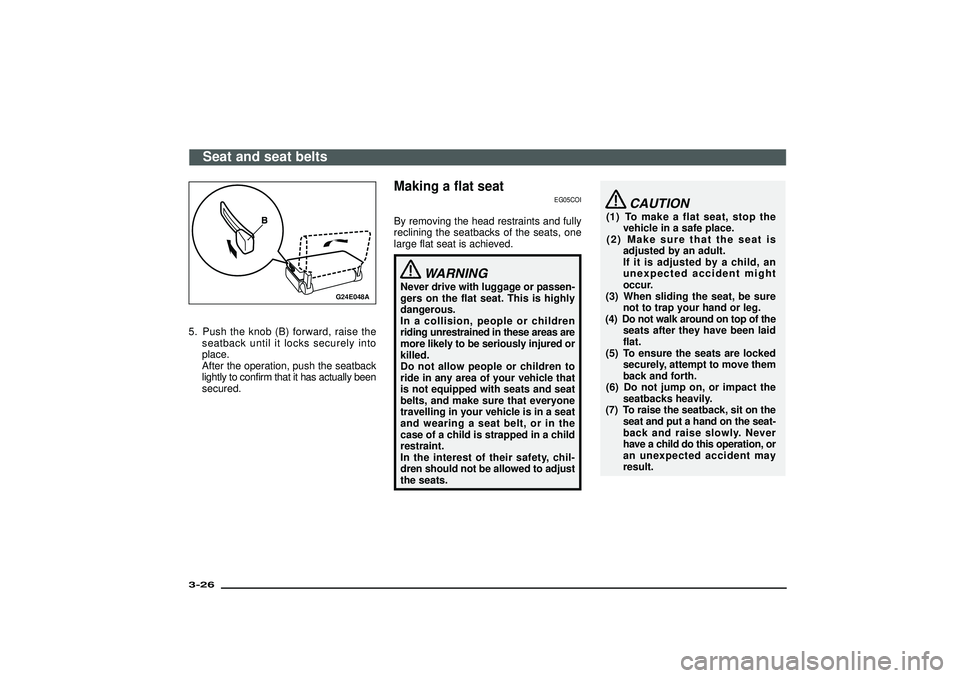
G24E048A
5. Push the knob (B) forward, raise the
seatback until it locks securely into
place.
After the operation, push the seatback
lightly to confirm that it has actually been
secured.
Making a flat seat
EG05COI
By removing the head restraints and fully
reclining the seatbacks of the seats, one
large flat seat is achieved.
WARNING
Never drive with luggage or passen-
gers on the flat seat. This is highly
dangerous.
In a collision, people or children
riding unrestrained in these areas are
more likely to be seriously injured or
killed.
Do not allow people or children to
ride in any area of your vehicle that
is not equipped with seats and seat
belts, and make sure that everyone
travelling in your vehicle is in a seat
and wearing a seat belt, or in the
case of a child is strapped in a child
restraint.
In the interest of their safety, chil-
dren should not be allowed to adjust
the seats.
CAUTION
(1) To make a flat seat, stop the
vehicle in a safe place.
(2) Make sure that the seat is
adjusted by an adult.
If it is adjusted by a child, an
unexpected accident might
occur.
(3) When sliding the seat, be sure
not to trap your hand or leg.
(4) Do not walk around on top of the
seats after they have been laid
flat.
(5) To ensure the seats are locked
securely, attempt to move them
back and forth.
(6) Do not jump on, or impact the
seatbacks heavily.
(7) To raise the seatback, sit on the
seat and put a hand on the seat-
back and raise slowly. Never
have a child do this operation, or
an unexpected accident may
result.
Seat and seat belts
3-26Div:
Out put date:
Page 59 of 392
G05C155A
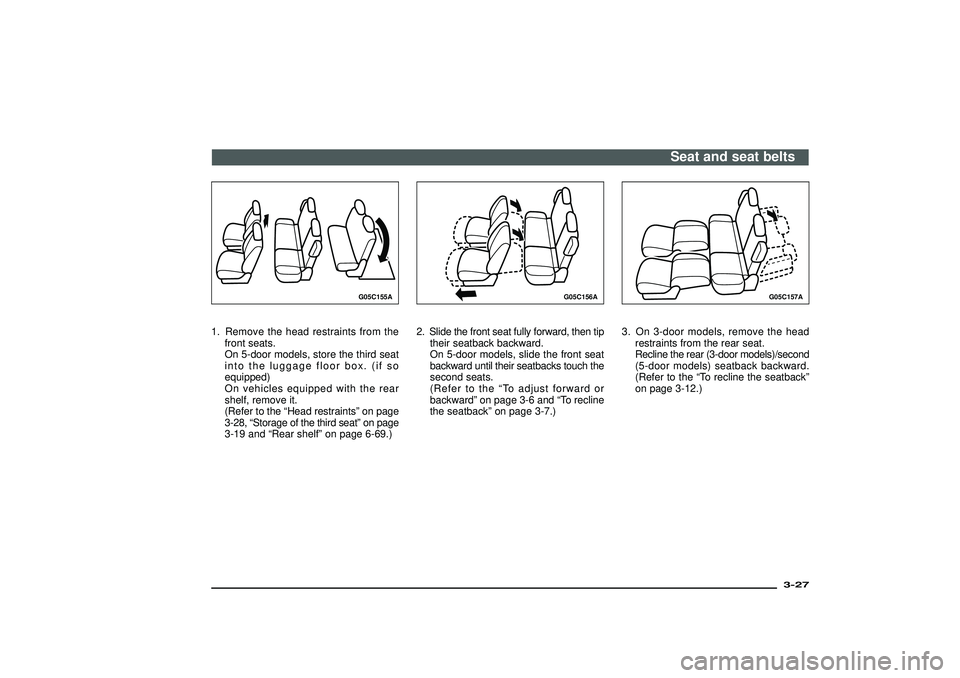
1. Remove the head restraints from the
front seats.
On 5-door models, store the third seat
into the luggage floor box. (if so
equipped)
On vehicles equipped with the rear
shelf, remove it.
(Refer to the“Head restraints”on page
3-28,“Storage of the third seat”on page
3-19 and“Rear shelf”on page 6-69.)
G05C156A
2. Slide the front seat fully forward, then tip
their seatback backward.
On 5-door models, slide the front seat
backward until their seatbacks touch the
second seats.
(Refer to the“To adjust forward or
backward”on page 3-6 and“To recline
the seatback”on page 3-7.)
G05C157A
3. On 3-door models, remove the head
restraints from the rear seat.
Recline the rear (3-door models)/second
(5-door models) seatback backward.
(Refer to the“To recline the seatback”
on page 3-12.)
Seat and seat belts
3-27
Div:
Out put date:
Page 60 of 392
G21C078A
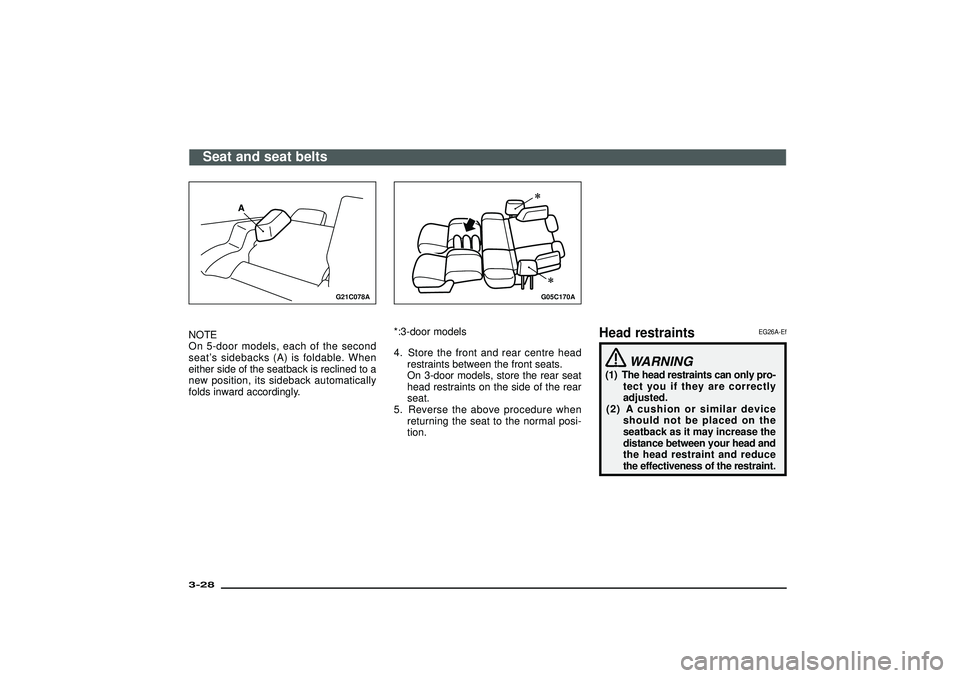
NOTE
On 5-door models, each of the second
seat’s sidebacks (A) is foldable. When
either side of the seatback is reclined to a
new position, its sideback automatically
folds inward accordingly.
G05C170A
*:3-door models
4. Store the front and rear centre head
restraints between the front seats.
On 3-door models, store the rear seat
head restraints on the side of the rear
seat.
5. Reverse the above procedure when
returning the seat to the normal posi-
tion.
Head restraints
EG26A-Ef
WARNING
(1) The head restraints can only pro-
tect you if they are correctly
adjusted.
(2) A cushion or similar device
should not be placed on the
seatback as it may increase the
distance between your head and
the head restraint and reduce
the effectiveness of the restraint.
Seat and seat belts
3-28Div:
Out put date: