SSANGYONG KORANDO 1997 Service Repair Manual
Manufacturer: SSANGYONG, Model Year: 1997, Model line: KORANDO, Model: SSANGYONG KORANDO 1997Pages: 2053, PDF Size: 88.33 MB
Page 341 of 2053

1B2 -- 48 M161 ENGINE MECHANICAL
D AEW OO M Y_2000
Removal & Installation Procedure
1. Unscrew the connecting rod bearing cap bolt and re-
move the bearing cap.
Installation Notice
Tightening Torque
40 NSm (30 lb-ft) + 90°
DMake sure that the upper and lower bearing shells
do not change each other.
DCoat the bearing shell with engine oil.
DInstall the bearing cap according to the consecu-
tive number.
Part No. : 601 030 00 62 2.15 mm
Part No. : 601 030 01 62 2.20 mm
Part No. : 601 030 02 62 2.25 mm
Part No. : 601 030 03 62 2.30 mm
Part No. : 601 030 04 62 2.40 mm
2. Unscrew the crankshaft bearing cap bolts and sepa-
rate the upper and lower bearing shells and thrust
washers.
Installation Notice
Tightening Torque
55 NSm (41 lb-ft) + 90°
DRemove the bearing cap from front (pulley side) to
rear.
DMake sure that the upper and lower bearing shells
do not change each other and coat with engine oil.
DThe oil grooves (arrows) in the thrust washers
must face outward and insert the thrust bearing
into the bearing cap.
DThere are five kinds of thrust washers by thick-
ness. Select the proper washer when repaired.
3. Remove the crankshaft.
4. Installation should follow the removal procedure in
the reverse order.
5. After completion of the installation, check for the ro-
tating condition of the crankshaft.
Installation Notice
DMake sure the crankshaft bearing cap properly
seated in place in the crankcase side. When perfectly
installed, the projected part (arrow) locates in the left
side (intake manifold side).
DAssemble so that the projected part of the cap and
crankcase face the same direction.
Page 342 of 2053

M161 ENGINE MECHANICAL 1B2 -- 49
D AEW OO M Y_2000
Inspection
1. If the length ‘L’ of the crankshaft bearing cap bolt ex-
ceeds 63.8mm, replace it.
2. Make sure the crankshaft bearing cap is properly
seated on the cylinder block (arrows).
3. Measure and record the inner diameter of the crank-
shaft bearing.
Notice
DMeasure at 2 points (1, 2).
DMeasure ‘A’, ‘B’ and ‘C’ as shown. If average value of
‘B’ and ‘C’ is less than value ‘A’, then the average val-
ue of ‘B’ and ‘C’ is actual average value. If average
value of ‘B’ and ‘C’ is more than value ‘A’ is actual av-
erage value.
4. Measure and record the diameter of the crankshaft
bearing journal.
Notice
DRecord the mean value when measured at 3 points
(A,B,C).
DMeasure the inner diameter of bearing and the diam-
eter of journal and if it is out of the standard data, re-
place the bearing shell.
Page 343 of 2053

1B2 -- 50 M161 ENGINE MECHANICAL
D AEW OO M Y_2000
Service Data Standard (Crankshaft Main Bearing Gap)
ItemMeasuring PositionGap (mm)
Main Bearing Journal
(NO.1,5,7)
Radial
Static condition : 0.015 -- 0.039
Dynamic condition: 0.031 -- 0.051
(Consider the expansion 0.011 -- 0.016)
(NO.1,5,7)
Axial0.010 -- 0.254
(Connecting Rod Bearing Gap)
ItemMeasuring PositionGap (mm)
Connecting Rod BearingRadial0.020 -- 0.065
Page 344 of 2053

M161 ENGINE MECHANICAL 1B2 -- 51
D AEW OO M Y_2000
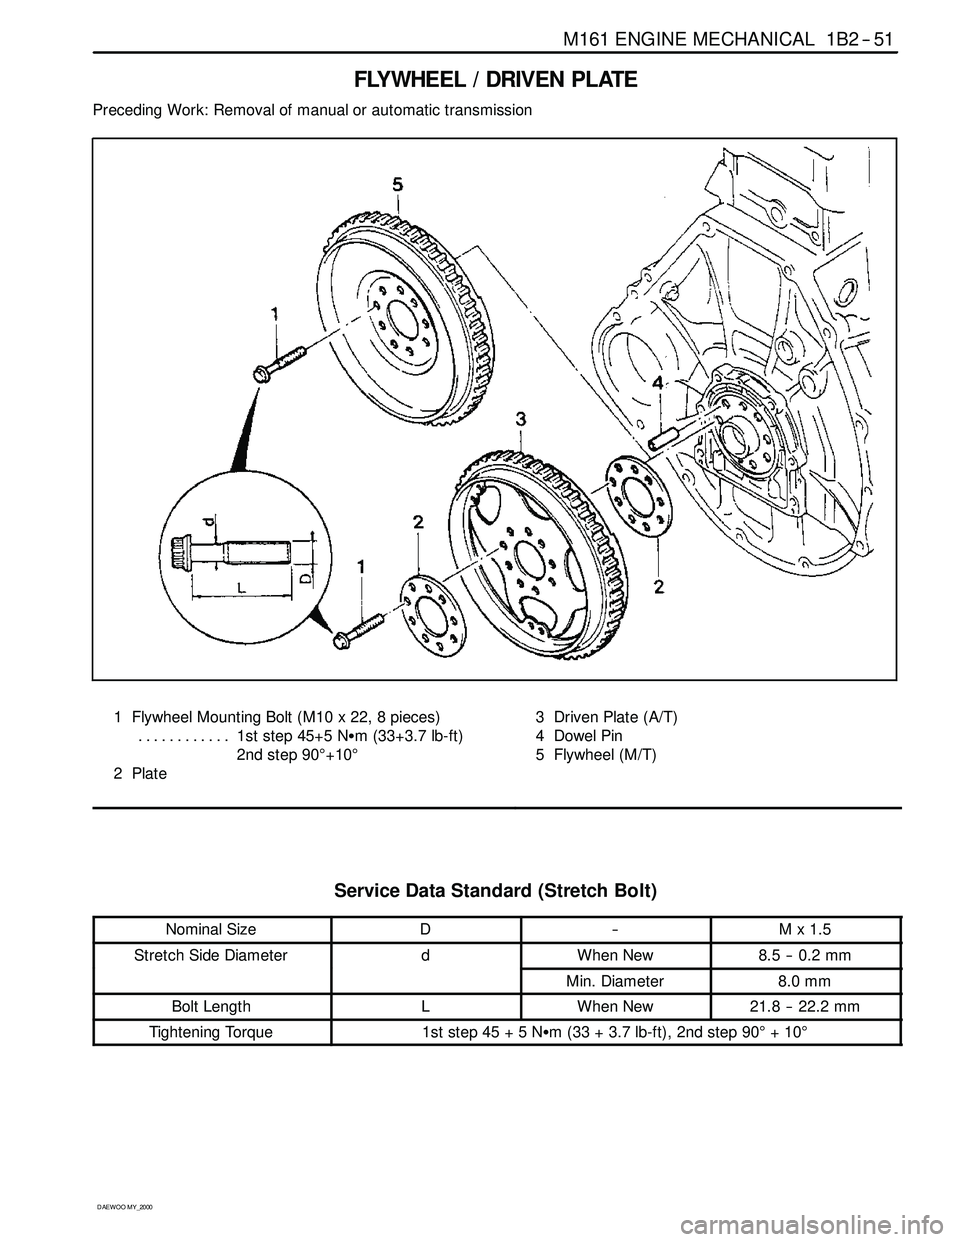
FLYWHEEL / DRIVEN PLATE
Preceding Work: Removal of manual or automatic transmission
1 Flywheel Mounting Bolt (M10 x 22, 8 pieces)
1st step 45+5 NSm (33+3.7 lb-ft) ............
2nd step 90°+10°
2Plate3 Driven Plate (A/T)
4 Dowel Pin
5 Flywheel (M/T)
Service Data Standard (Stretch Bolt)
Nominal SizeD--Mx1.5
Stretch Side DiameterdWhen New8.5 -- 0.2 mm
Min. Diameter8.0 mm
Bolt LengthLWhen New21.8 -- 22.2 mm
Tightening Torque1ststep45+5NSm (33 + 3.7 lb-ft), 2nd step 90°+10°
Page 345 of 2053

1B2 -- 52 M161 ENGINE MECHANICAL
D AEW OO M Y_2000
Removal & Installation Procedure
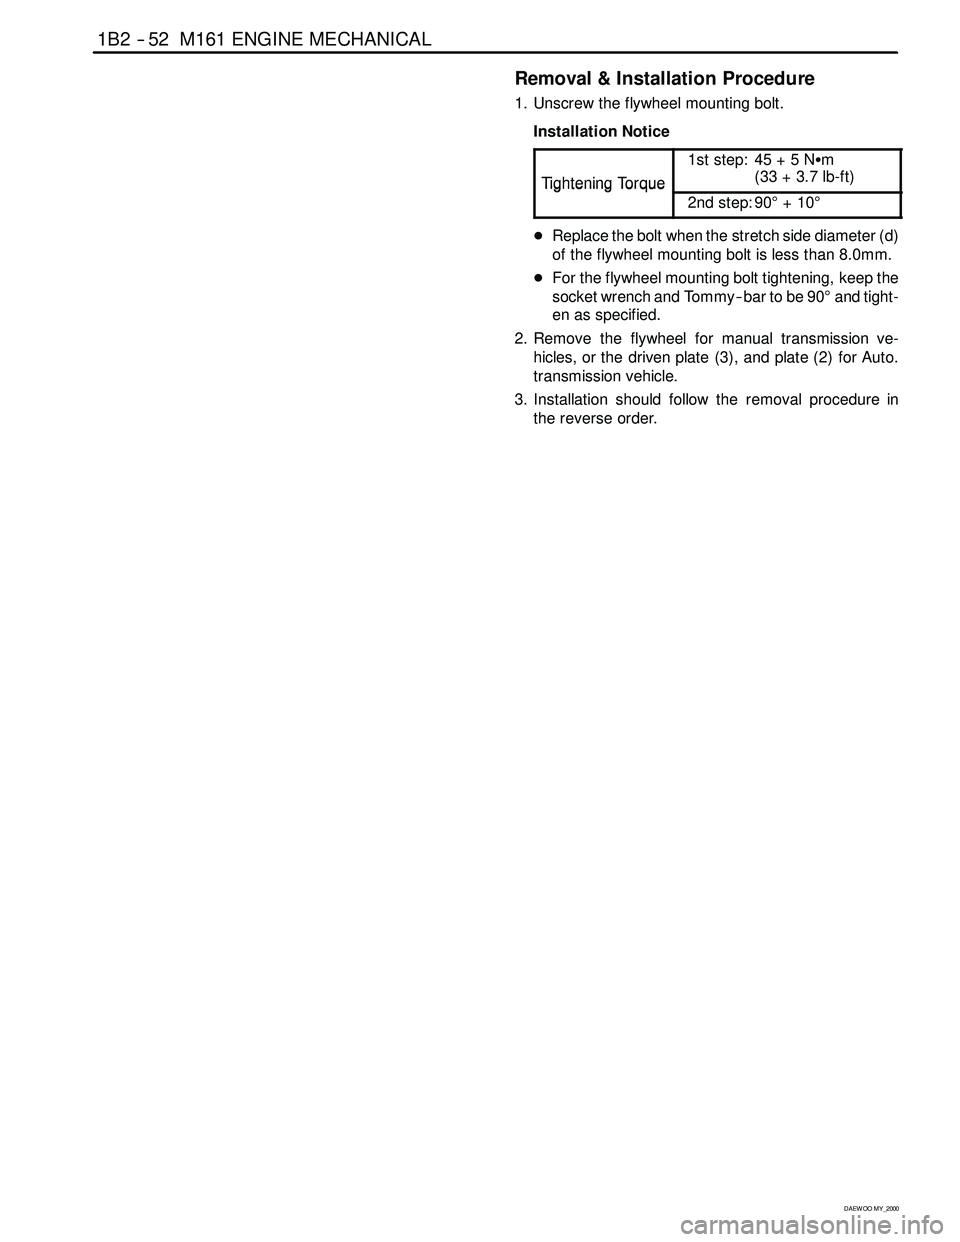
1. Unscrew the flywheel mounting bolt.
Installation Notice
Ti
ghteningTo rque
1st step: 45 + 5 NSm
(33+3.7lb-ft)
TighteningTorque
2nd step: 90°+10°
DReplace the bolt when the stretch side diameter (d)
of the flywheel mounting bolt is less than 8.0mm.
DFor the flywheel mounting bolt tightening, keep the
socket wrench and Tommy -- bar to be 90°and tight-
en as specified.
2. Remove the flywheel for manual transmission ve-
hicles, or the driven plate (3), and plate (2) for Auto.
transmission vehicle.
3. Installation should follow the removal procedure in
the reverse order.
Page 346 of 2053

M161 ENGINE MECHANICAL 1B2 -- 53
D AEW OO M Y_2000
Sectional View
1OilPan
2 Cover
3 Radial Seal
4Bolt
5 Crankshaft
6 Dowel Pin
7 Washer (Thickness : 3.5 mm)8Washer
9Bolt
10 Front Drive Plate
11 Rear Drive Plate
12 Rivet
13 Segment
14 Ring Gear
Page 347 of 2053

1B2 -- 54 M161 ENGINE MECHANICAL
D AEW OO M Y_2000
CAMSHAFT ADJUSTER
1 Bolt (M6 X 16, 3 pieces)
9--11 NSm (80-- 97 lb-in) ....................
2 Cylinder Head Front Cover
3Bolt 35NSm (26 lb-ft) ......................
4 Armature
5RollPin
6 Nut (M20 X 1.5) 60-- 70 NSm (44-- 52 lb-ft) .....
7 Seal Cover
8 Camshaft Sprocket
9 Adjust Piston
10 Conical Spring11 Flange Bolt (M7 X 13, 3 pieces)
1stStep18--22NSm (13--16 lb-ft) ...........
2nd Step 60°±5°Rotation Added
12 Flange Shaft
13 Compression Spring
14 Control Piston
15 Circlip
16 Oil Gallery
17 Straight Pin
18 Intake Camshaft
Y49 Magnetic Actuator (2-- pin connector)
Page 348 of 2053

M161 ENGINE MECHANICAL 1B2 -- 55
D AEW OO M Y_2000
Removal & Installation Procedure
1. Turn the crankshaft and position the no.1 cylinder pis-
ton at ATDC 20°.
Notice:Turn the crankshaft in the direction of engine
rotation.
2. Remove the cylinder head front cover.
3. Put the alignment marks (arrows) on the camshaft
sprocket and the timing chain.
4. Insert the holding pin 111 589 03 15 00 into the no.1
and no.6 bearing cap hole on camshaft to secure in-
take and exhaust camshaft.
5. Remove the chain tensioner.
6. Unscrew the exhaust sprocket bolt and remove the
exhaust camshaft sprocket.
Installation Notice
Ti
ghteningTo rque
1st step: 18 -- 22 NSm
(13 -- 16 lb-ft)
TighteningTorque
2nd step: 60°±5°
Notice:The flange bolt is designed to be used only
once, so always replace with new one.
Page 349 of 2053

1B2 -- 56 M161 ENGINE MECHANICAL
D AEW OO M Y_2000
7. Unscrew the bolt (3) from the armature (4) and re-
move the roll pin, and remove the armature.
Installation Notice
Tightening Torque
35 NSm (26 lb-ft)
8. Unscrew the nut (6) and remove the seal cover (7).
Installation Notice
Tightening Torque
60 -- 70 NSm (44 -- 52 lb-ft)
Notice:Put the locking slot of nut toward armarture.
9. Take off the timing chain from intake camshaft
sprocket.
10. Remove the adjuster piston (9) and conical spring
(10) from intake camshaft sprocket.
11. Unscrew the bolt (11) and remove the flange shaft.
Installation Notice
Ti
ghteningTo rque
1st step: 18 -- 22 NSm
(13 -- 16 lb-ft)
TighteningTorque
2nd step: 60°±5°
Notice:The flange bolt is designed to be used only
once, so always replace with new one.
12. Installation should follow the removal procedure in
the reverse order.
13. Check and adjust the camshaft timing.
Page 350 of 2053

M161 ENGINE MECHANICAL 1B2 -- 57
D AEW OO M Y_2000
CAMSHAFT SPROCKET BOLT
Intake Flange Shaft Bolt
TighteningTo rque
1st step: 18 -- 22 NSm
(13 -- 16 lb-ft)
TighteningTorque
2nd step: 60°±5°
Notice:The sprocket bolts are designed to be used only
once, so always replace with new one.
C. M7 x 13 Collar Bolt Torx -- T30
e. 6.8 mm
16. Flange Shaft
18. Control Piston
22. Intake Camshaft
Exhaust Camshaft Sprocket Bolt
TighteningTo rque
1st step: 18 -- 22 NSm
(13 -- 16 lb-ft)
TighteningTorque
2nd step: 60°±5°
Notice:The sprocket bolts are designed to be used only
once, so always replace with new one.
E. M7 x 13 Collar Bolt Torx -- T30
e. 6.8 mm
13a. Camshaft Sprocket
22a. Exhaust Camshaft