FIAT MULTIPLA 2004 1.G Connect NavPlus Manual
Manufacturer: FIAT, Model Year: 2004, Model line: MULTIPLA, Model: FIAT MULTIPLA 2004 1.GPages: 202, PDF Size: 2.22 MB
Page 161 of 202
160
CONNECT NAV
NAVIGATOR
Displaying stored messages
To display stored messages, proceed
as follows:
1)press
•(7) to display the Tar-
ga Infomobilityservice menu fig.
125;
2)turn the knob/button (11) to se-
lect INFOMOBILITY fig. 125;
3)press the knob/button (11) to
confirm
4)turn the knob/button (
11) to se-
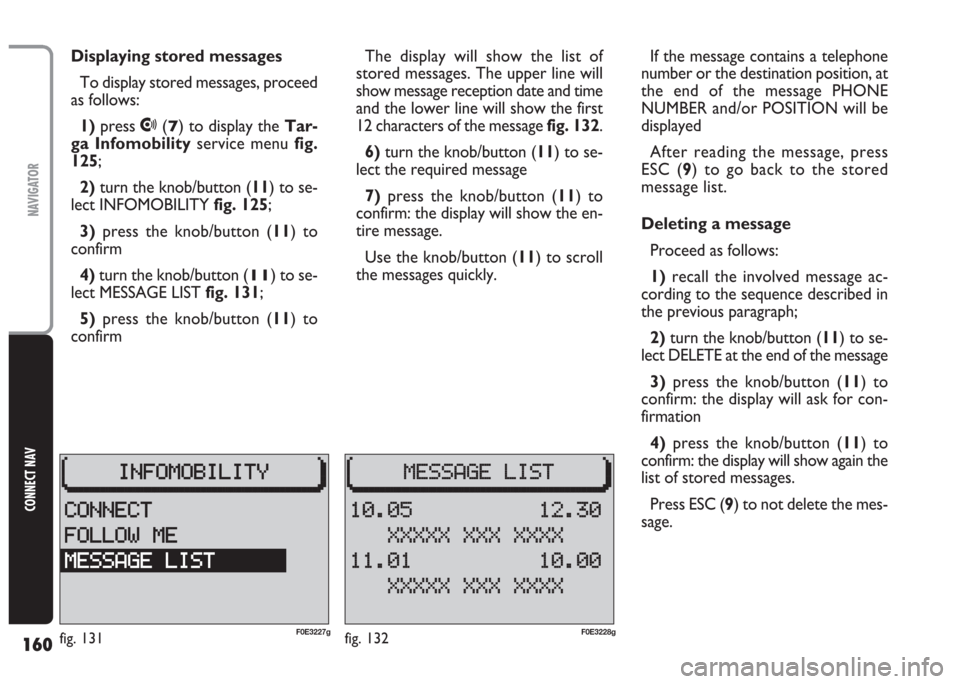
lect MESSAGE LIST fig. 131;
5)press the knob/button (11) to
confirmThe display will show the list of
stored messages. The upper line will
show message reception date and time
and the lower line will show the first
12 characters of the message fig. 132.
6) turn the knob/button (11) to se-
lect the required message
7)press the knob/button (11) to
confirm: the display will show the en-
tire message.
Use the knob/button (11) to scroll
the messages quickly.If the message contains a telephone
number or the destination position, at
the end of the message PHONE
NUMBER and/or POSITION will be
displayed
After reading the message, press
ESC (9) to go back to the stored
message list.
Deleting a message
Proceed as follows:
1)recall the involved message ac-
cording to the sequence described in
the previous paragraph;
2) turn the knob/button (11) to se-
lect DELETE at the end of the message
3)press the knob/button (11) to
confirm: the display will ask for con-
firmation
4)press the knob/button (11) to
confirm: the display will show again the
list of stored messages.
Press ESC (9) to not delete the mes-
sage.
fig. 132F0E3228gfig. 131F0E3227g
Page 162 of 202
161
CONNECT NAV
NAVIGATOR
How to call a telephone
number contained in a message
To call a phone number contained in
a message (e.g.: the number of a ho-
tel or a restaurant) proceed as follows:
1)recall the involved message ac-
cording to the sequence described in
paragraph “Displaying stored mes-
sages”
2) turn the knob/button (11) to se-
lect PHONE NUMBER at the end of
the message
3)press the knob/button (11) to
confirm: the display will ask for con-
firmation
4)press the knob/button (11) to
start the call, otherwise press ESC (9).Displaying the position of
the destination
contained in a message
To display the position of the desti-
nation contained in a message (e.g.: ho-
tel or restaurant), proceed as follows:
1)recall the involved message ac-
cording to the sequence described in
paragraph “Displaying stored mes-
sages” in this section
2)turn the knob/button (11) to se-
lect POSITION at the end of the mes-
sage
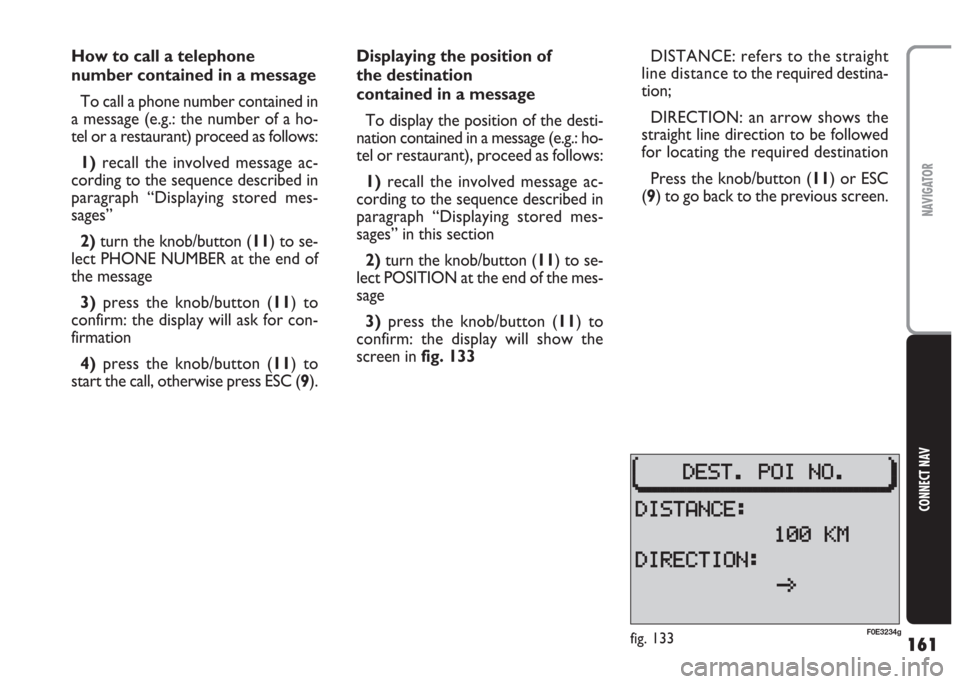
3) press the knob/button (11) to
confirm: the display will show the
screen in fig. 133DISTANCE: refers to the straight
line distance to the required destina-
tion;
DIRECTION: an arrow shows the
straight line direction to be followed
for locating the required destination
Press the knob/button (11) or ESC
(9) to go back to the previous screen.
fig. 133F0E3234g
Page 163 of 202
162
CONNECT NAV
NAVIGATOR
RECALLING THE PHONE
CODE NUMBER (serial
number)
The phone serial number is essen-
tial to do the following:
– activate the phone;
– enable the SIM card.
To display the serial number, pro-
ceed as follows:
1)press
•(7) to display the Tar-
ga Infomobilityservice menu
fig. 125
2) press ESC (
9) and then MEN (10)3)turn the knob/button (11) to se-
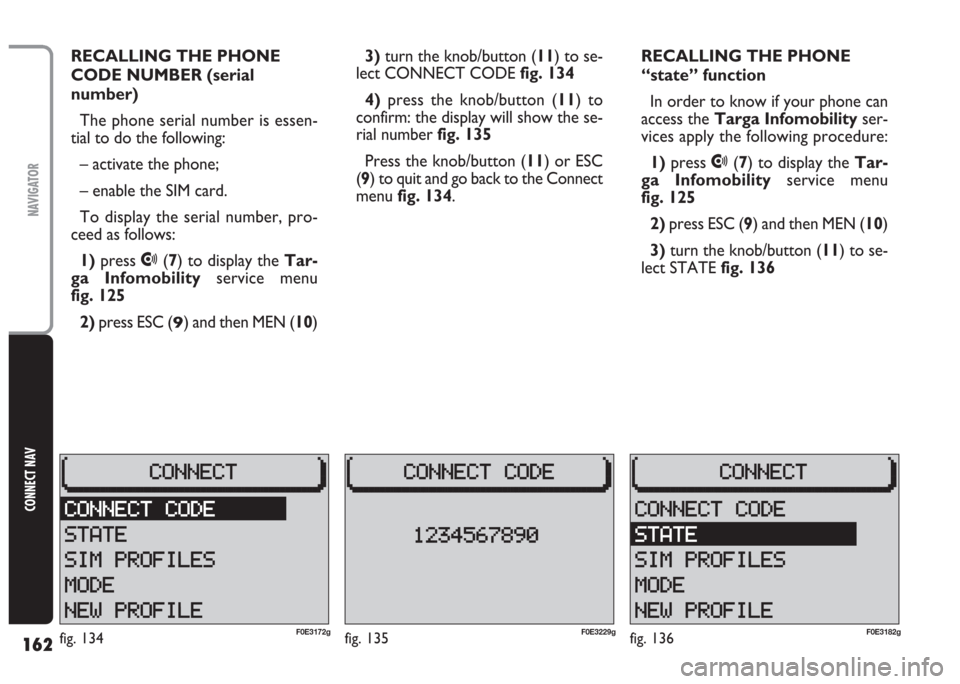
lect CONNECT CODE fig. 134
4)press the knob/button (11) to
confirm: the display will show the se-
rial number fig. 135
Press the knob/button (11) or ESC
(9) to quit and go back to the Connect
menu fig. 134.RECALLING THE PHONE
“state” function
In order to know if your phone can
access the Targa Infomobilityser-
vices apply the following procedure:
1)press
•(7) to display the Tar-
ga Infomobilityservice menu
fig. 125
2)press ESC (9) and then MEN (10)
3)turn the knob/button (11) to se-
lect STATE fig. 136
fig. 135F0E3229gfig. 136F0E3182gfig. 134F0E3172g
Page 164 of 202
163
CONNECT NAV
NAVIGATOR
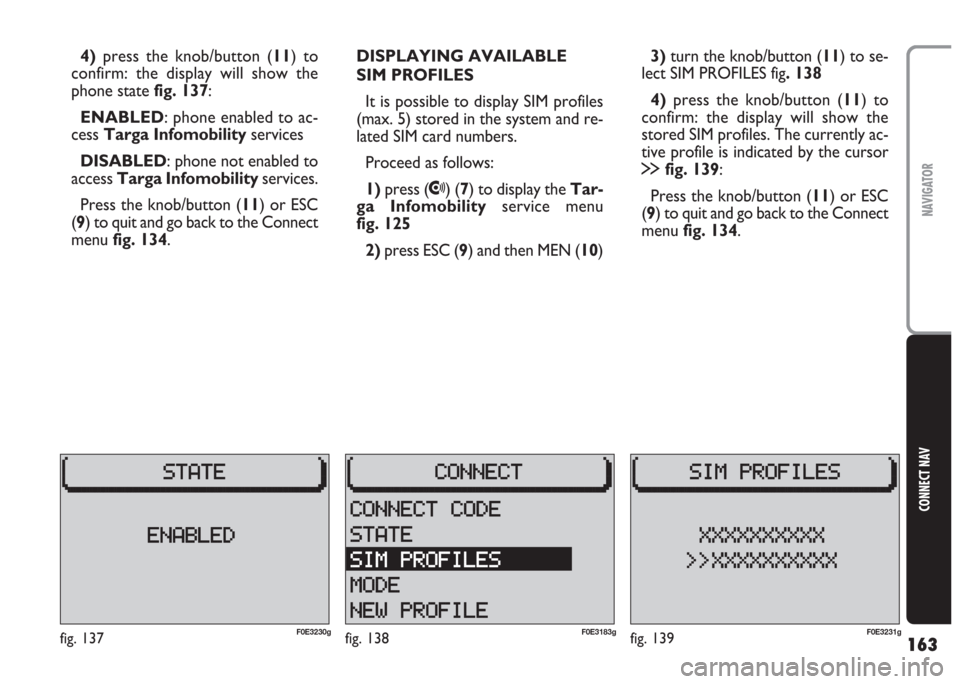
4) press the knob/button (11) to
confirm: the display will show the
phone state fig. 137:
ENABLED: phone enabled to ac-
cess Targa Infomobilityservices
DISABLED: phone not enabled to
access Targa Infomobilityservices.
Press the knob/button (11) or ESC
(9) to quit and go back to the Connect
menu fig. 134.DISPLAYING AVAILABLE
SIM PROFILES
It is possible to display SIM profiles
(max. 5) stored in the system and re-
lated SIM card numbers.
Proceed as follows:
1) press (
•) (7) to display the Tar-
ga Infomobilityservice menu
fig. 125
2)press ESC (9) and then MEN (10)3) turn the knob/button (11) to se-
lect SIM PROFILES fig. 138
4)press the knob/button (11) to
confirm: the display will show the
stored SIM profiles. The currently ac-
tive profile is indicated by the cursor
§fig. 139:
Press the knob/button (11) or ESC
(9) to quit and go back to the Connect
menu fig. 134.
fig. 139F0E3231gfig. 138F0E3183gfig. 137F0E3230g
Page 165 of 202
164
CONNECT NAV
NAVIGATOR
GENERAL INFORMATION
This telephone can be used to make
the same telephone connections of a
portable cellular phone. Therefore, to
make a telephone call you need a SIM
card and you must be in a place served
by the GSM 900/1800 network, with
enough signal intensity.
IMPORTANT The network ser-
vices described in this section (e.g. in-
coming call) are managed by the tele-
phone, but their availability depends
on the network and the type of con-
tract agreed with the network
provider.
IMPORTANT If power supply is
lower than the minimum preset
threshold, phone call quality is not as-
sured. For this reason, turning the en-
gine on during a telephone call might
interrupt it.TURNING THE phone on
To activate the phone, if a valid SIM
card has been inserted, press
£(15).
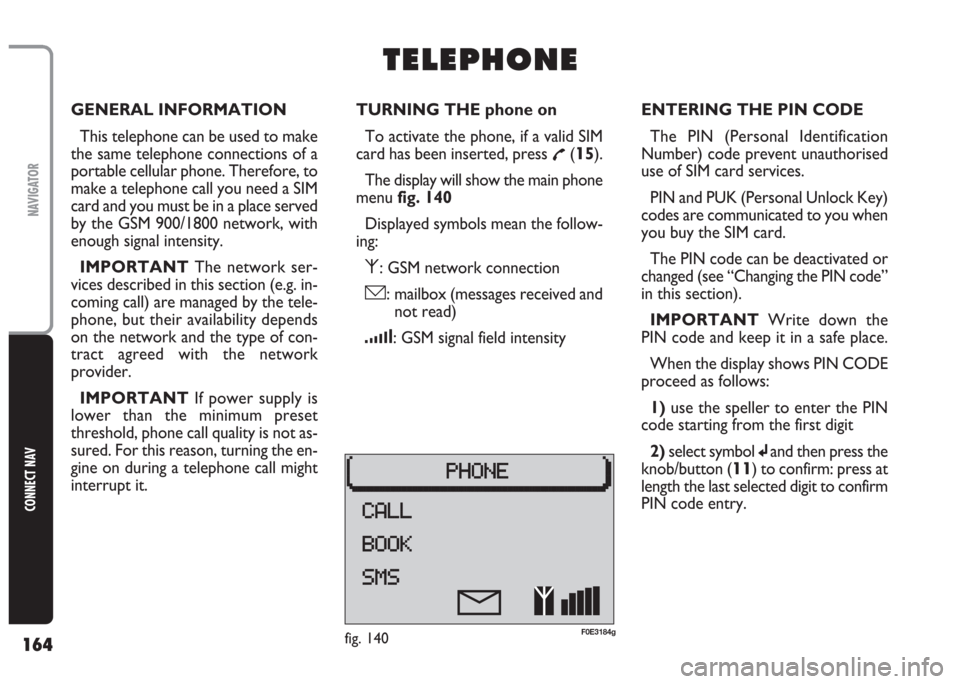
The display will show the main phone
menu fig. 140
Displayed symbols mean the follow-
ing:
⁄: GSM network connection
ó: mailbox (messages received and
not read)
¿: GSM signal field intensity
T T
E E
L L
E E
P P
H H
O O
N N
E E
ENTERING THE PIN CODE
The PIN (Personal Identification
Number) code prevent unauthorised
use of SIM card services.
PIN and PUK (Personal Unlock Key)
codes are communicated to you when
you buy the SIM card.
The PIN code can be deactivated or
changed (see “Changing the PIN code”
in this section).
IMPORTANT Write down the
PIN code and keep it in a safe place.
When the display shows PIN CODE
proceed as follows:
1) use the speller to enter the PIN
code starting from the first digit
2)select symbol
jand then press the
knob/button (
11) to confirm: press at
length the last selected digit to confirm
PIN code entry.
fig. 140F0E3184g
Page 166 of 202
165
CONNECT NAV
NAVIGATOR
IMPORTANT After three unsuc-
cessful PIN code entries, the SIM card
is locked. To unlock the SIM card, en-
ter the PUK code (see paragraph “SIM
card unlocking” in this section).
After entering the correct PIN code,
the system will turn on to the last
source selected (Radio, CD or CD-
Changer, where fitted) and the main
phone menu fig. 140will be displayed.Changing the PIN code
To change the PIN code, proceed as
follows:
1) press
£(15) to turn the phone
mode on
2) press MEN (10): the display will
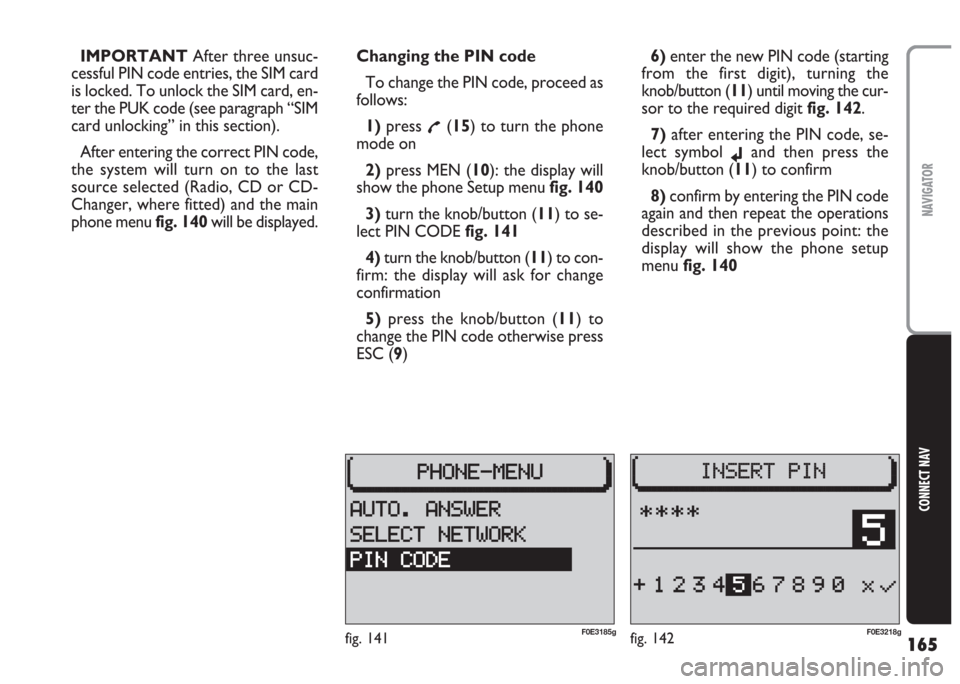
show the phone Setup menufig. 140
3) turn the knob/button (11) to se-
lect PIN CODE fig. 141
4)turn the knob/button (11) to con-
firm: the display will ask for change
confirmation
5)press the knob/button (11) to
change the PIN code otherwise press
ESC (9)6)enter the new PIN code (starting
from the first digit), turning the
knob/button (11) until moving the cur-
sor to the required digit fig. 142.
7) after entering the PIN code, se-
lect symbol
jand then press the
knob/button (11) to confirm
8) confirm by entering the PIN code
again and then repeat the operations
described in the previous point: the
display will show the phone setup
menu fig. 140
fig. 142F0E3218gfig. 141F0E3185g
Page 167 of 202
166
CONNECT NAV
NAVIGATOR
SIM CARD UNLOCKING
After three unsuccessful PIN code
entries, the SIM card is locked. To un-
lock the SIM card, enter the PUK code
(Personal Unlock Key).
The eight-digit PUK code is commu-
nicated when buying the SIM card.
IMPORTANT The PUK code can-
not be changed.
When inserting a locked SIM card in-
side the GSM module, the display will
show an error message and ask you to
enter the PUK code. To enter the
PUK code press the knob/ button
(11).Entering the PUK code
Proceed as follows:
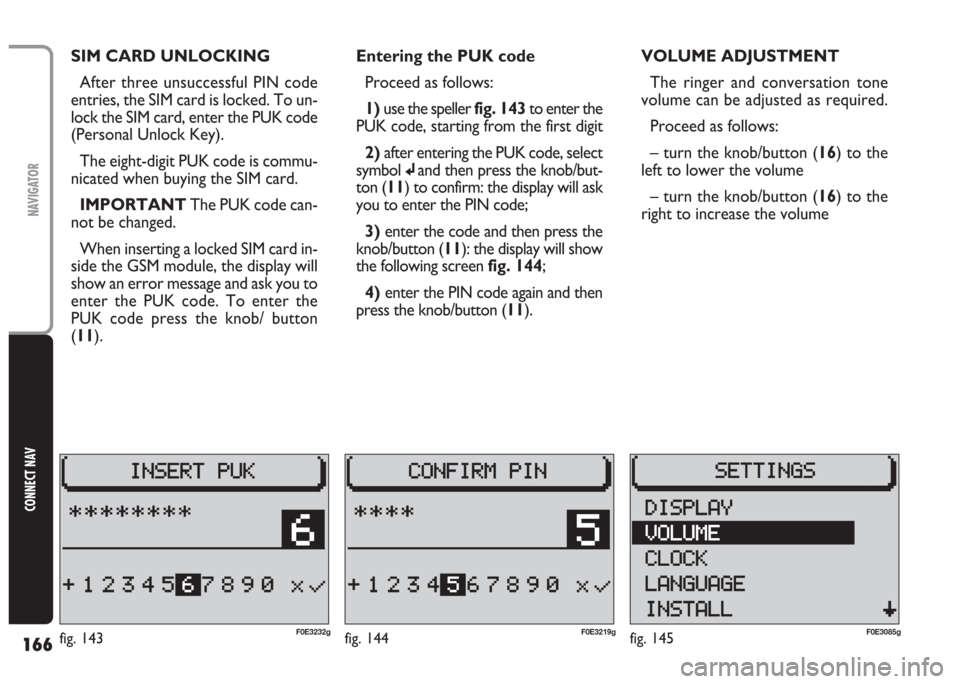
1) use the speller fig. 143to enter the
PUK code, starting from the first digit
2) after entering the PUK code, select
symbol
jand then press the knob/but-
ton (11) to confirm: the display will ask
you to enter the PIN code;
3)enter the code and then press the
knob/button (11): the display will show
the following screen fig. 144;
4) enter the PIN code again and then
press the knob/button (11).VOLUME ADJUSTMENT
The ringer and conversation tone
volume can be adjusted as required.
Proceed as follows:
– turn the knob/button (16) to the
left to lower the volume
– turn the knob/button (16) to the
right to increase the volume
fig. 144F0E3219gfig. 145F0E3085gfig. 143F0E3232g
Page 168 of 202
167
CONNECT NAV
NAVIGATOR
Adjusting the ringing tone
volume
Proceed as follows:
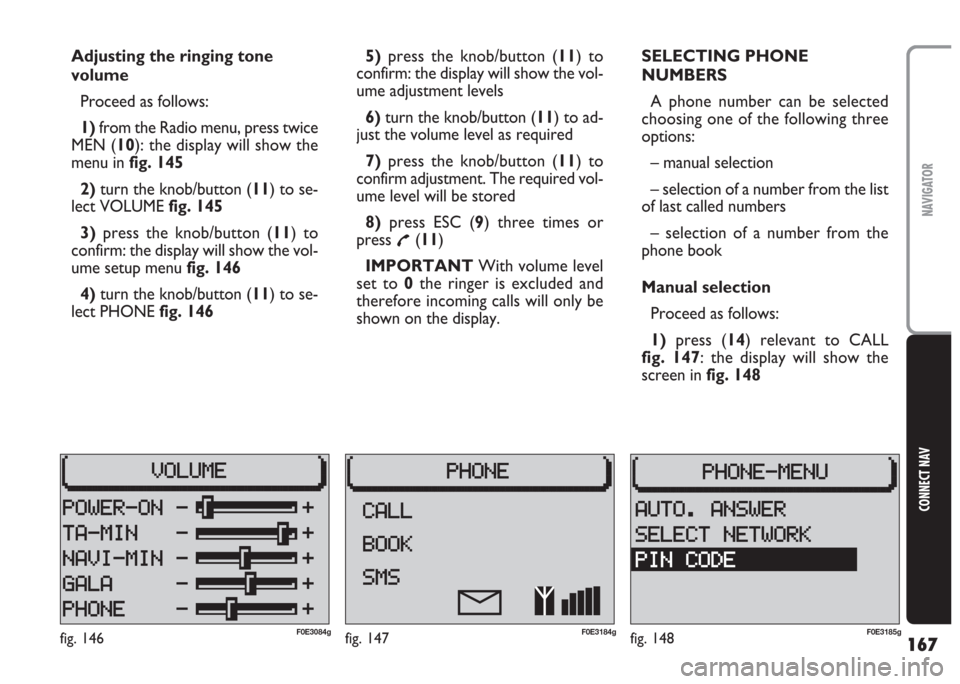
1) from the Radio menu, press twice
MEN (10): the display will show the
menu in fig. 145
2) turn the knob/button (11) to se-
lect VOLUME fig. 145
3)press the knob/button (11) to
confirm: the display will show the vol-
ume setup menu fig. 146
4)turn the knob/button (11) to se-
lect PHONE fig. 1465) press the knob/button (11) to
confirm: the display will show the vol-
ume adjustment levels
6)turn the knob/button (11) to ad-
just the volume level as required
7)press the knob/button (11) to
confirm adjustment. The required vol-
ume level will be stored
8) press ESC (9) three times or
press
£(11)
IMPORTANT With volume level
set to 0the ringer is excluded and
therefore incoming calls will only be
shown on the display.SELECTING PHONE
NUMBERS
A phone number can be selected
choosing one of the following three
options:
– manual selection
– selection of a number from the list
of last called numbers
– selection of a number from the
phone book
Manual selection
Proceed as follows:
1) press (14) relevant to CALL
fig. 147: the display will show the
screen in fig. 148
fig. 147F0E3184gfig. 146F0E3084gfig. 148F0E3185g
Page 169 of 202
168
CONNECT NAV
NAVIGATOR
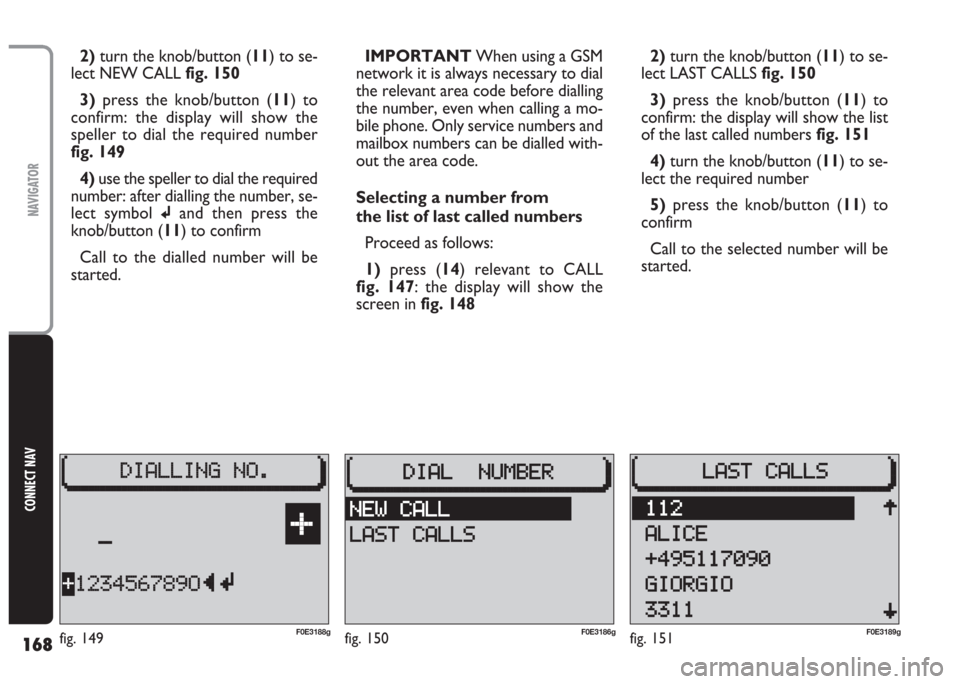
2)turn the knob/button (11) to se-
lect NEW CALL fig. 150
3) press the knob/button (11) to
confirm: the display will show the
speller to dial the required number
fig. 149
4) use the speller to dial the required
number: after dialling the number, se-
lect symbol
jand then press the
knob/button (11) to confirm
Call to the dialled number will be
started.IMPORTANT When using a GSM
network it is always necessary to dial
the relevant area code before dialling
the number, even when calling a mo-
bile phone. Only service numbers and
mailbox numbers can be dialled with-
out the area code.
Selecting a number from
the list of last called numbers
Proceed as follows:
1)press (14) relevant to CALL
fig. 147: the display will show the
screen in fig. 1482)turn the knob/button (11) to se-
lect LAST CALLS fig. 150
3) press the knob/button (11) to
confirm: the display will show the list
of the last called numbers fig. 151
4)turn the knob/button (11) to se-
lect the required number
5)press the knob/button (11) to
confirm
Call to the selected number will be
started.
fig. 150F0E3186gfig. 151F0E3189gF0E3188gfig. 149
Page 170 of 202
169
CONNECT NAV
NAVIGATOR
SELECTING A NUMBER
FROM THE PHONE BOOK
Applying the following procedure will
make it possible to call a number pre-
viously stored in the phone book.
Search name
Proceed as follows:
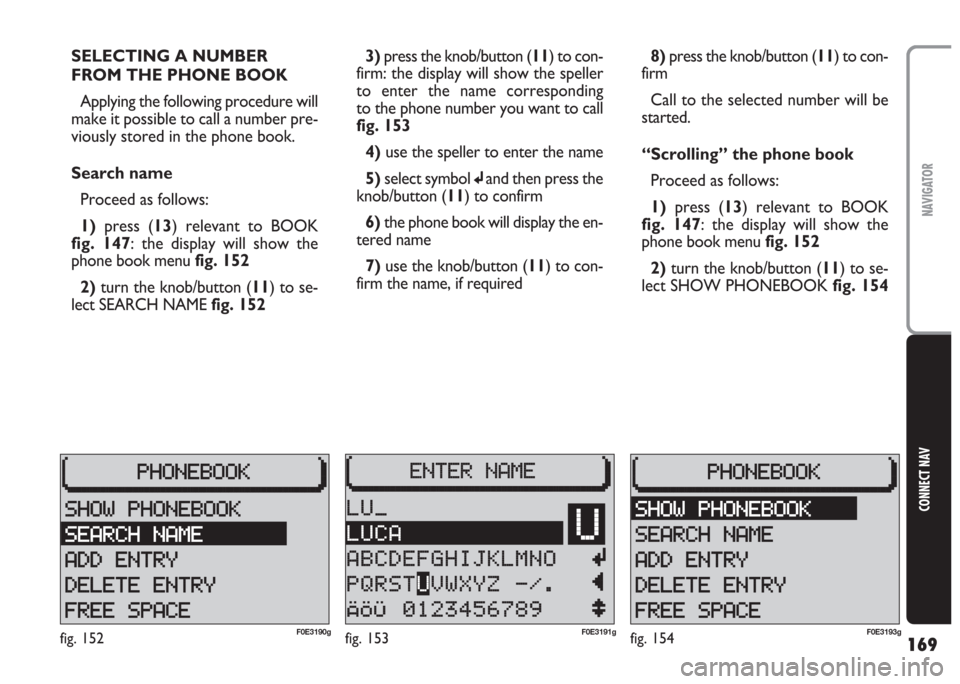
1)press (13) relevant to BOOK
fig. 147: the display will show the
phone book menu fig. 152
2)turn the knob/button (11) to se-
lect SEARCH NAME fig. 1523)press the knob/button (11) to con-
firm: the display will show the speller
to enter the name corresponding
to the phone number you want to call
fig. 153
4) use the speller to enter the name
5) select symbol
jand then press the
knob/button (11) to confirm
6) the phone book will display the en-
tered name
7)use the knob/button (11) to con-
firm the name, if required8) press the knob/button (11) to con-
firm
Call to the selected number will be
started.
“Scrolling” the phone book
Proceed as follows:
1) press (13) relevant to BOOK
fig. 147: the display will show the
phone book menu fig. 152
2)turn the knob/button (11) to se-
lect SHOW PHONEBOOK fig. 154
fig. 152F0E3190gfig. 153F0E3191gfig. 154F0E3193g