JAGUAR X308 1998 2.G Workshop Manual
X308 1998 2.G
JAGUAR
JAGUAR
https://www.carmanualsonline.info/img/21/7640/w960_7640-0.png
JAGUAR X308 1998 2.G Workshop Manual
Trending: oil filter, low beam, refilling coolant system, silencer, inlet manifold, Heater Hose Junction, washer fluid
Page 121 of 2490
10
.
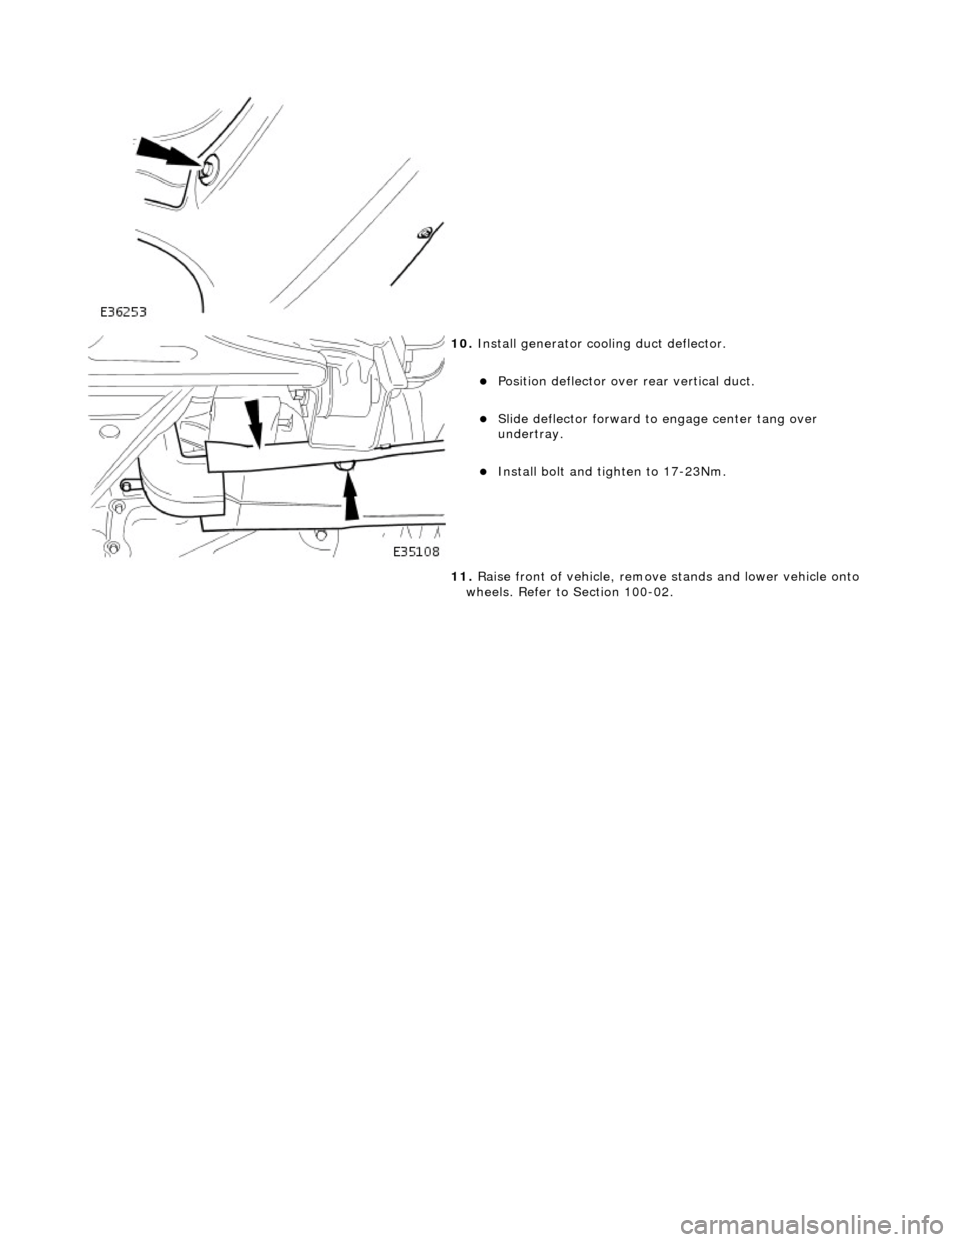
Install generator cool ing duct deflector.
Po
sition deflector over
rear vertical duct.
Sl
ide deflector forward to
engage center tang over
undertray.
Inst
all bolt and ti
ghten to 17-23Nm.
11. Raise front of vehicle, remove stands and lower vehicle onto
wheels. Refer to Section 100-02.
Page 122 of 2490
Front Suspension - Front Stabilizer B
ar Bushing
Re
mo
val and Installation
Materials
S p
ecification
Cas
t
rol NTR
Remov
a
l
Na
m
e
R
u
bber Suspension Insulator Lube
1. Raise front of vehicle and support on stands. Refer to Section
100-02.
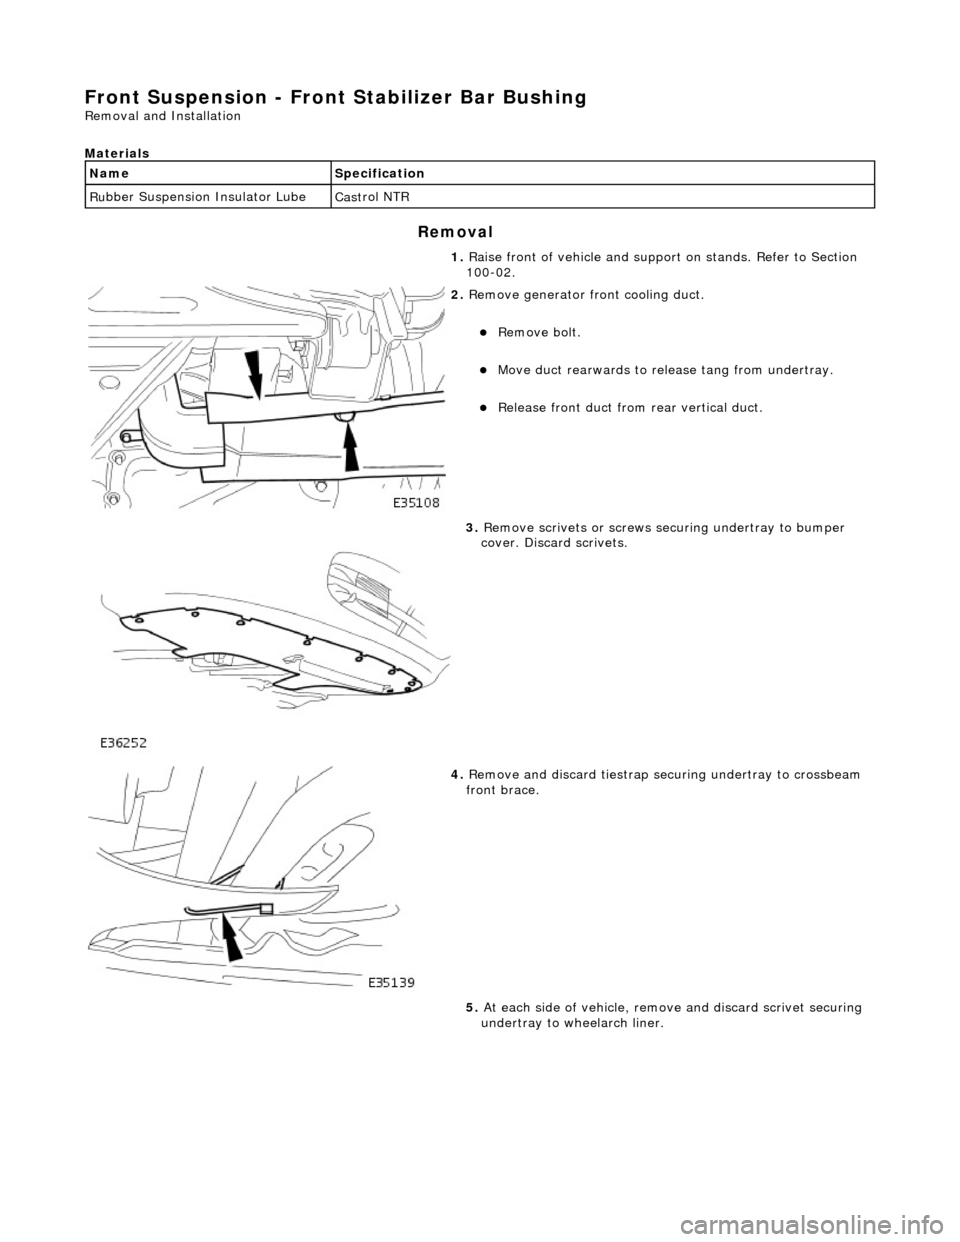
2. Re
move generator front cooling duct.
Re
mo
ve bolt.
Move duct rea
r
wards to rele
ase tang from undertray.
Re
lease front duct from rear vertical duct.
3. Re
move scrivets or screws se
curing undertray to bumper
cover. Discard scrivets.
4. Re
move and discard tiestrap securing undertray to crossbeam
front brace.
5. At each side of vehicle, remo ve and discard scrivet securing
undertray to wheelarch liner.
Page 123 of 2490
I
nstallation
6.
R
elease stabilizer bar from link arms.
R
emove nut securing stabilizer bar to link.
R
elease link arm from stabilizer bar.
Repeat operation
at opposite
end of stabilizer bar.
7. N
OTE: On vehicles fitted with an engine oil cooler, it may be
necessary to release the stabilizer bar from each ball joint in turn
to achieve the required cl earance from cooler pipes.
Remove stabilizer bar from crossbeam.
R
emove stabilizer bar securing bolts.
R
emove stabilizer bar mountin
g brackets and remove bar
from crossbeam.
8. Re
move mounting brackets and
rubbers from stabilizer bar.
1. CAUTION: Make sure the Ca strol NTR grease is only
applied to the inner surface of the mounting bushes. Failure to
follow this instruction may affect the retention of the bushes in
the retaining brackets.
Page 124 of 2490
Apply a thi
n film of Castrol NTR
grease to the inner surface of
the bushes.
2. Position mounti n
g rubbers on stabilizer bar.
3. NO
TE: Ensure mounti
ng rubbers seat correctly between
flanges.
Install and fully seat mounti ng brackets on rubbers.
4. Position stabil izer bar assembl
y
on link arms and install but do
not tighten nuts.
5. Ins t
all stabilizer bar mounting bolts.
Install but do not tighten
stabilizer bar LH mounting
bracket bolts.
Instal
l stabilizer bar RH
mounting bracket bolts and
tighten to 30-40Nm.
Tigh ten LH mountin
g bracke
t bolts to 30-40Nm.
6. Secure link arms to stabilizer bar.
Tight
en LH link arm to stabilizer bar nut to 60-80Nm.
Tighte
n RH link arm to stabilizer bar nut to 60-80Nm.
Page 125 of 2490
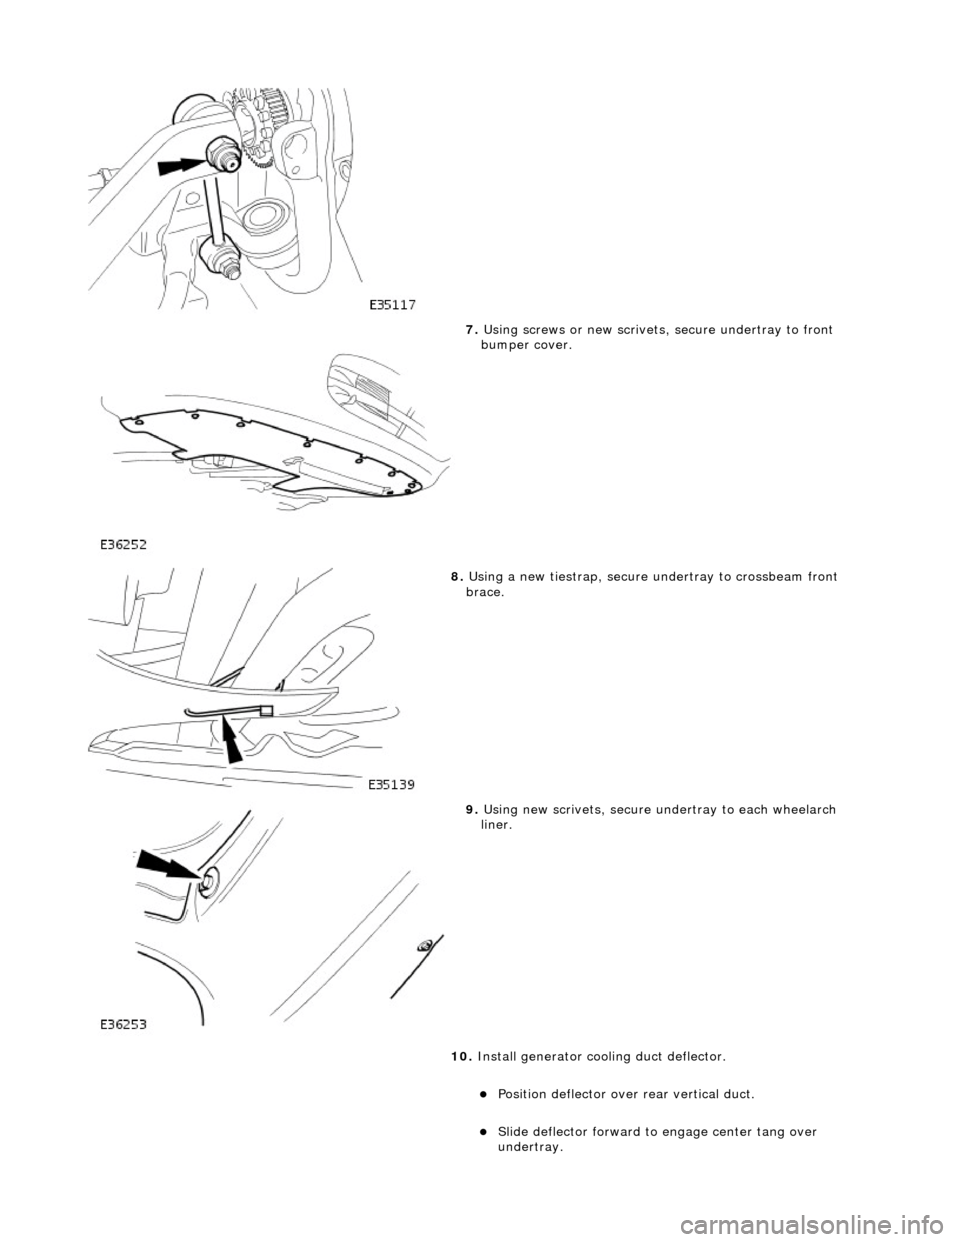
7. Using screws or new scrivets , secure undertray
to front
bumper cover.
8. Usi
ng a new tiestrap, secure undertray to crossbeam front
brace.
9. Usi
ng new scrivets, secure un
dertray to each wheelarch
liner.
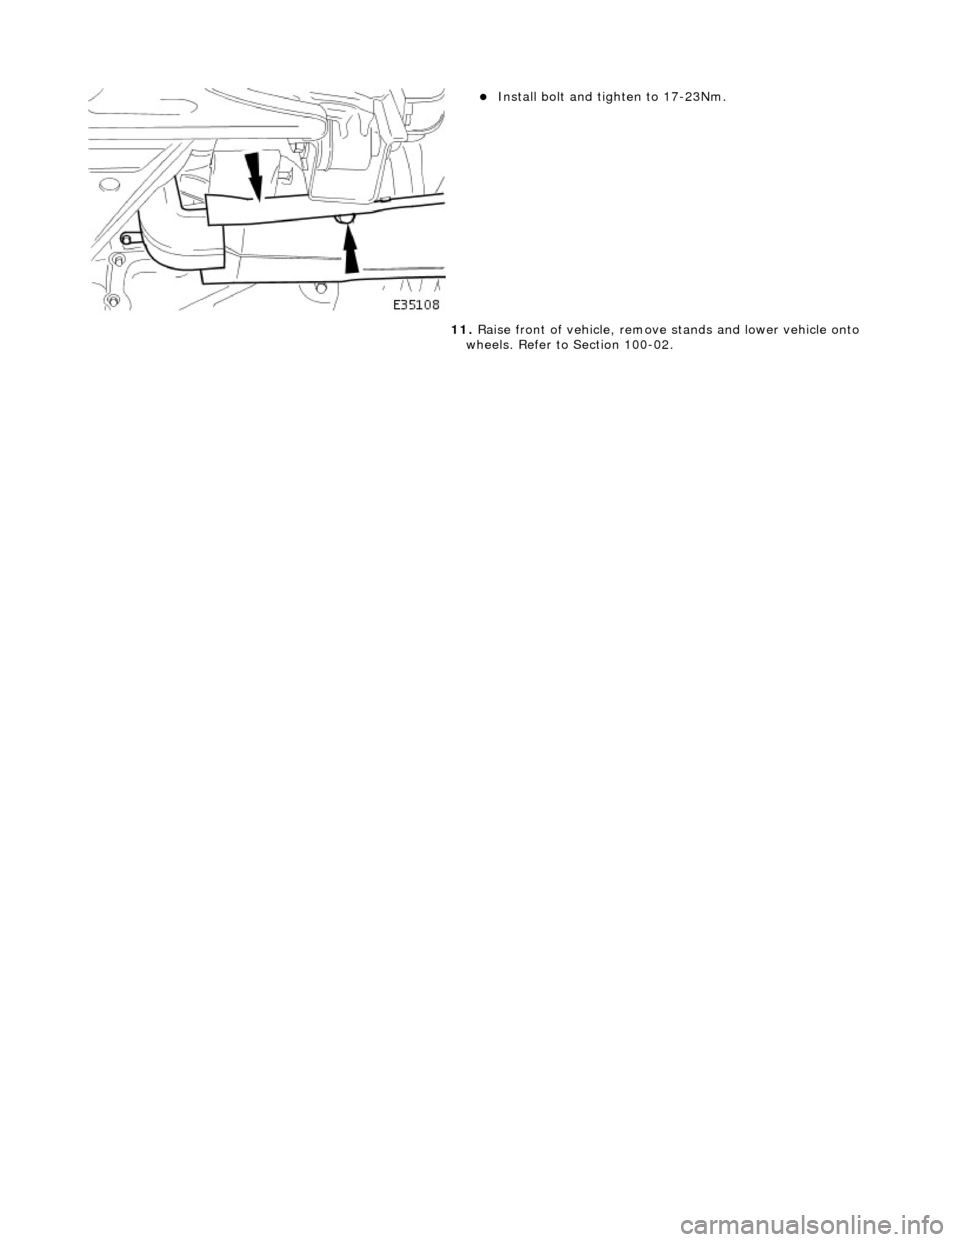
10. Install generator cool ing duct deflector.
Po
sition deflector over
rear vertical duct.
Sl
ide deflector forward to
engage center tang over
undertray.
Page 126 of 2490
Instal
l bolt and ti
ghten to 17-23Nm.
11. Raise front of vehicle, remove stands and lower vehicle onto
wheels. Refer to Section 100-02.
Page 127 of 2490
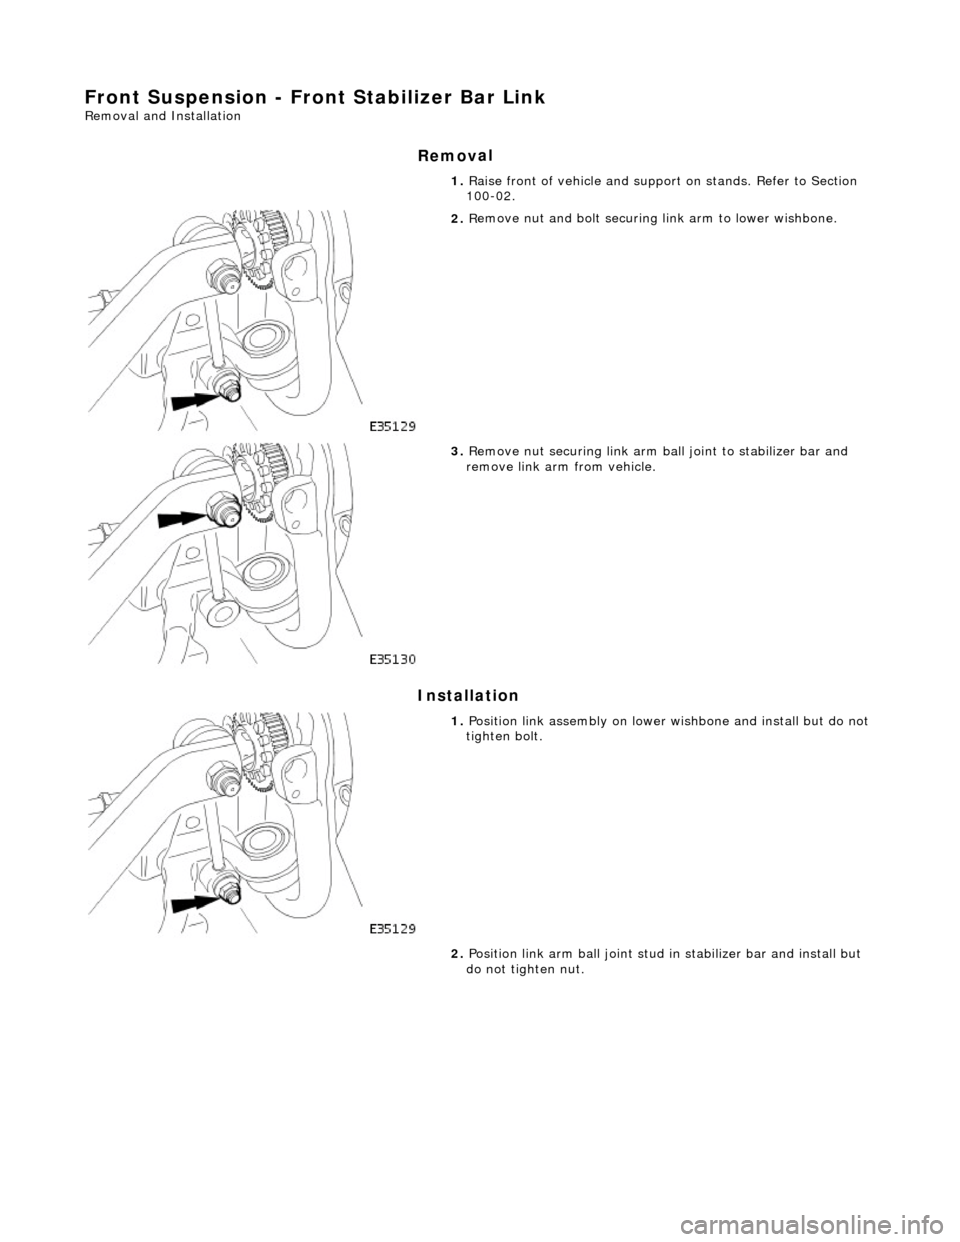
Front Suspension - Front Stabiliz
er Bar Link
Re
moval and Installation
Remov
al
Installation
1. R
aise front of vehicle and support on stands. Refer to Section
100-02.
2. R
emove nut and bolt securing
link arm to lower wishbone.
3. R
emove nut securing link arm ba
ll joint to stabilizer bar and
remove link arm from vehicle.
1. Position li
nk assembly on lower
wishbone and install but do not
tighten bolt.
2. Position link arm ball joint stud in stabilizer bar and install but
do not tighten nut.
Page 128 of 2490
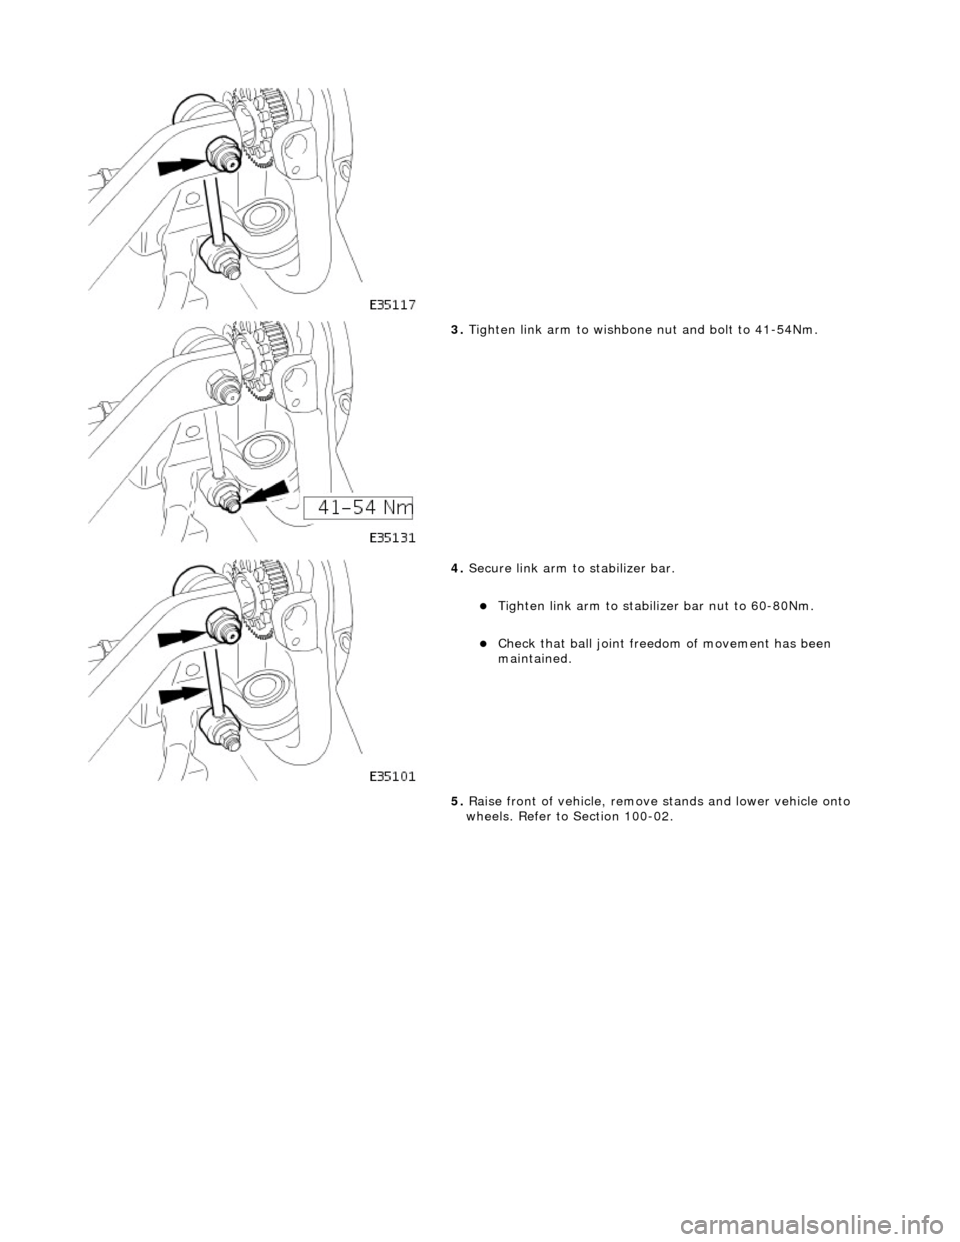
3.
Tighte
n link arm to wishbone
nut and bolt to 41-54Nm.
4. Secure li nk arm to stabil
izer bar.
Tigh
te
n link arm to stabilizer bar nut to 60-80Nm.
Check that ball
joi
nt freed
om of movement has been
maintained.
5. Raise front of vehicle, remove stands and lower vehicle onto
wheels. Refer to Section 100-02.
Page 129 of 2490

Front Suspension - Upper Arm Bushing
Re
moval and Installation
Remov
al
CAUTI
ON: Replacement of
nuts and bolts: Various thread-locking devices are used on nuts and bolts throughout the
vehicle. These devices restrict the number of times a nut or bolt can be used. See section 100-00 for information.
S
pecial Tool(s)
Ball
Joint Taper Separator
204-192 (JD 219)
Front Camber Tie-do
wn Link
204-114 (JD 133)
1. R
aise front of vehicle.
Refer to Section 100-02.
2. P
osition camber tie down spec
ial tool 204-114 on suspension.
Fully s
lacken tool adjuster nut.
Position too
l in road spring and pass upper dowel through
slot in suspen sion turret.
3. Lower front of vehicle.
4. R
otate stem of special tool 204-114 to locate dowel in
suspension turret slot.
5. WARNING: WHEN TIGHTENING TOOL NUT, USE LOWER
DOWEL AS A GUIDE TO ENSURE THAT THE TOOL STEM DOES
NOT ROTATE AND DISTURB POSITION OF DOWEL IN
SUSPENSION TURRET.
Fully tighten nut of special tool to achieve suspension mid-laden
Page 130 of 2490
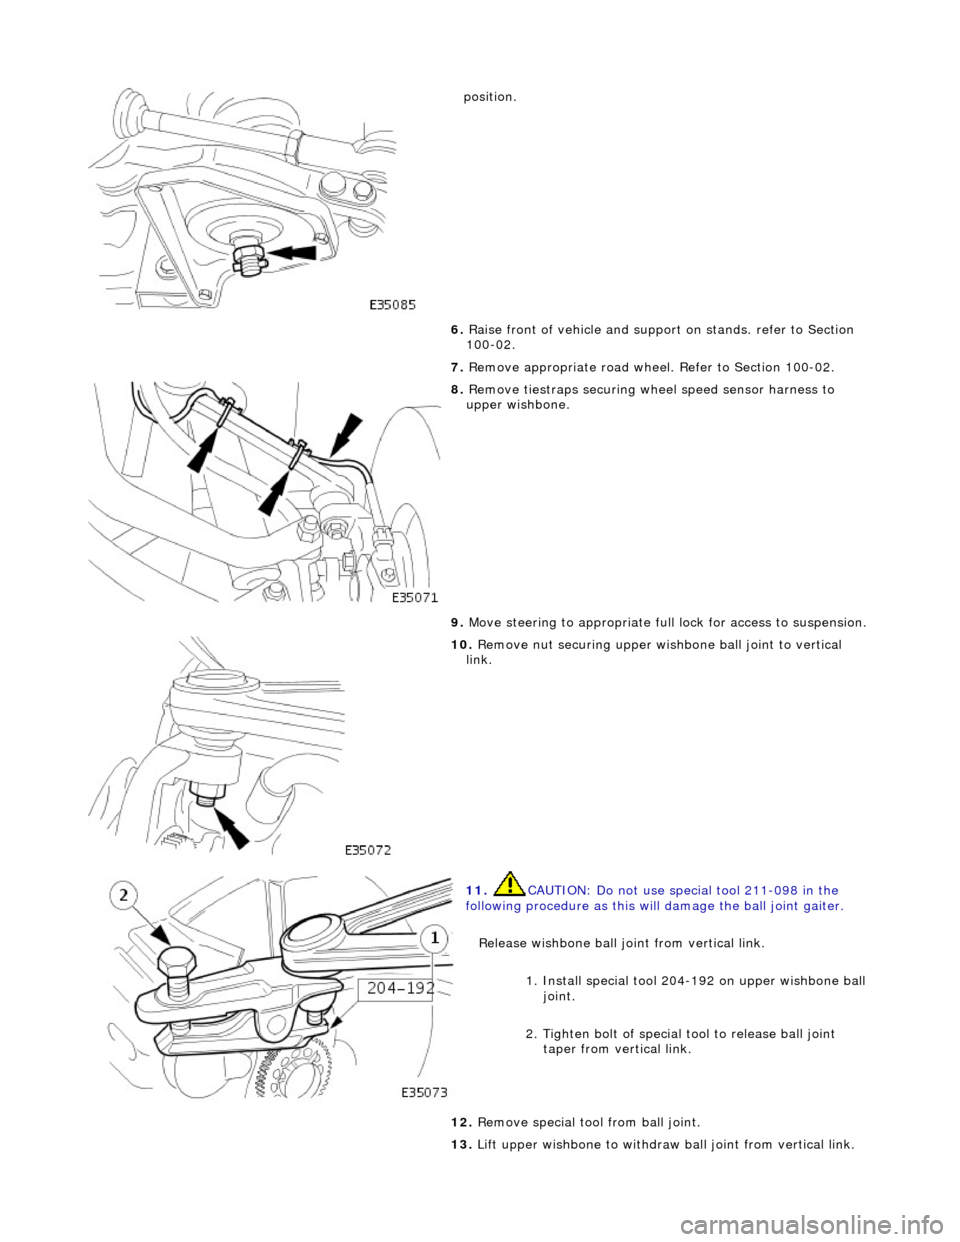
positio
n.
6. Raise front of vehicle and support on stands. refer to Section
100-02.
7. Remove appropriate road wheel. Refer to Section 100-02.
8. Remove t
iestraps securing wheel speed sensor harness to
upper wishbone.
9. Move steering to appropriate full lock for access to suspension.
10. R
emove nut securing upper wish
bone ball joint to vertical
link.
11 . CAUTI
ON: Do not use special tool 211-098 in the
following procedure as this will damage the ball joint gaiter.
Release wishbone ball joint from vertical link.
1. Install special tool 204-192 on upper wishbone ball joint.
2. Tighten bolt of special tool to release ball joint
taper from vertical link.
12 . Re
move special tool from ball joint.
13. Lift upper wishbone to withdraw ball joint from vertical link.
Trending: P0352, Airbag sensor, fuse diagram, warning light, Door remove, steering, aerial
