LAND ROVER FRELANDER 2 2006 Repair Manual
FRELANDER 2 2006
LAND ROVER
LAND ROVER
https://www.carmanualsonline.info/img/64/57251/w960_57251-0.png
LAND ROVER FRELANDER 2 2006 Repair Manual
Trending: child seat, ESP, parking sensors, warning light, engine, spare tire location, jump cable
Page 1561 of 3229
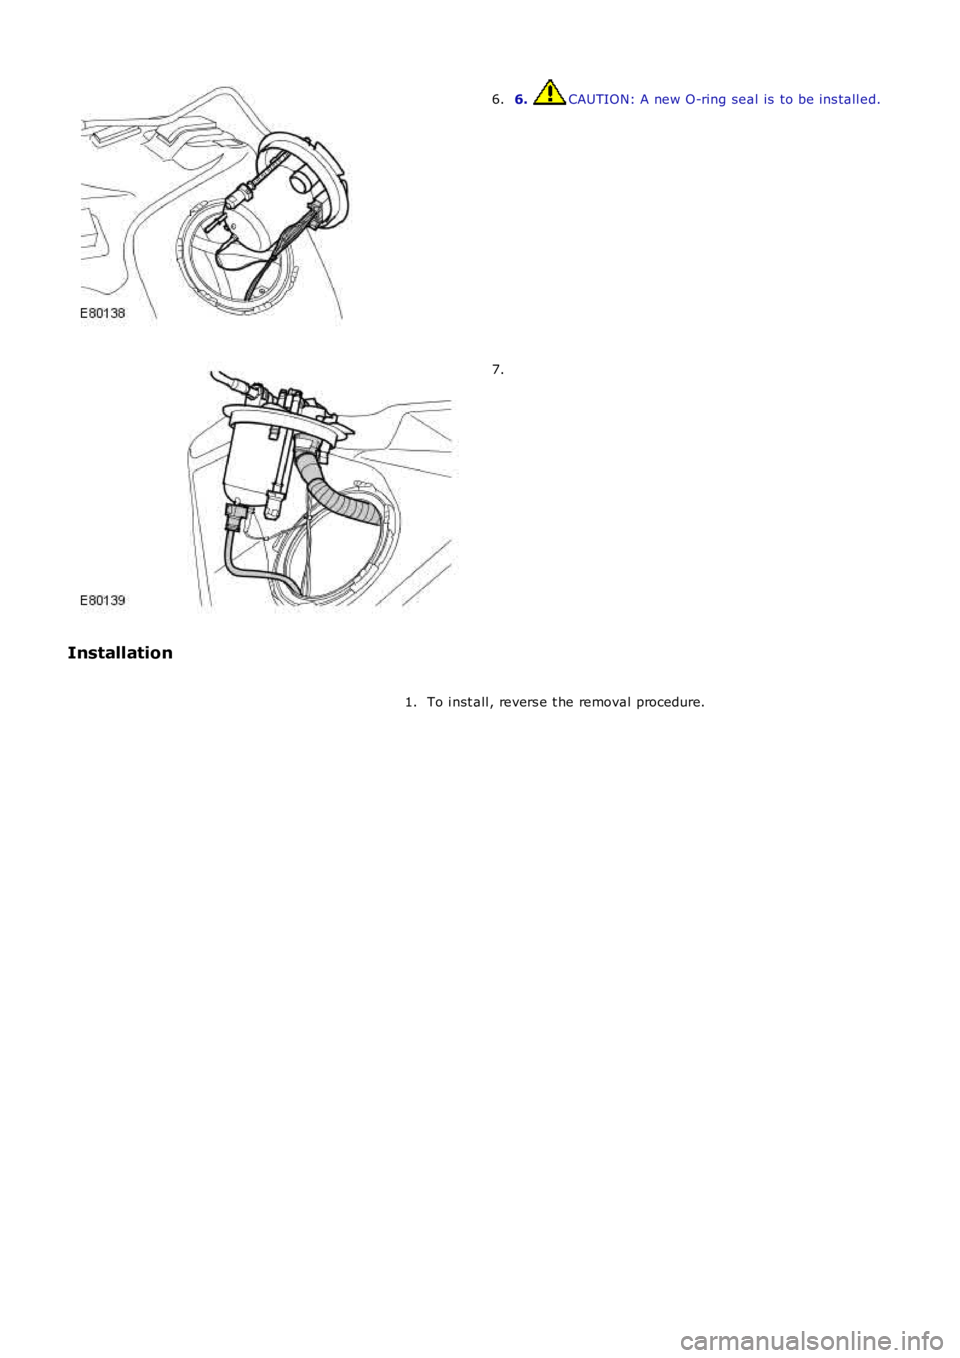
6. CAUTION: A new O-ring seal is to be ins tall ed.6.
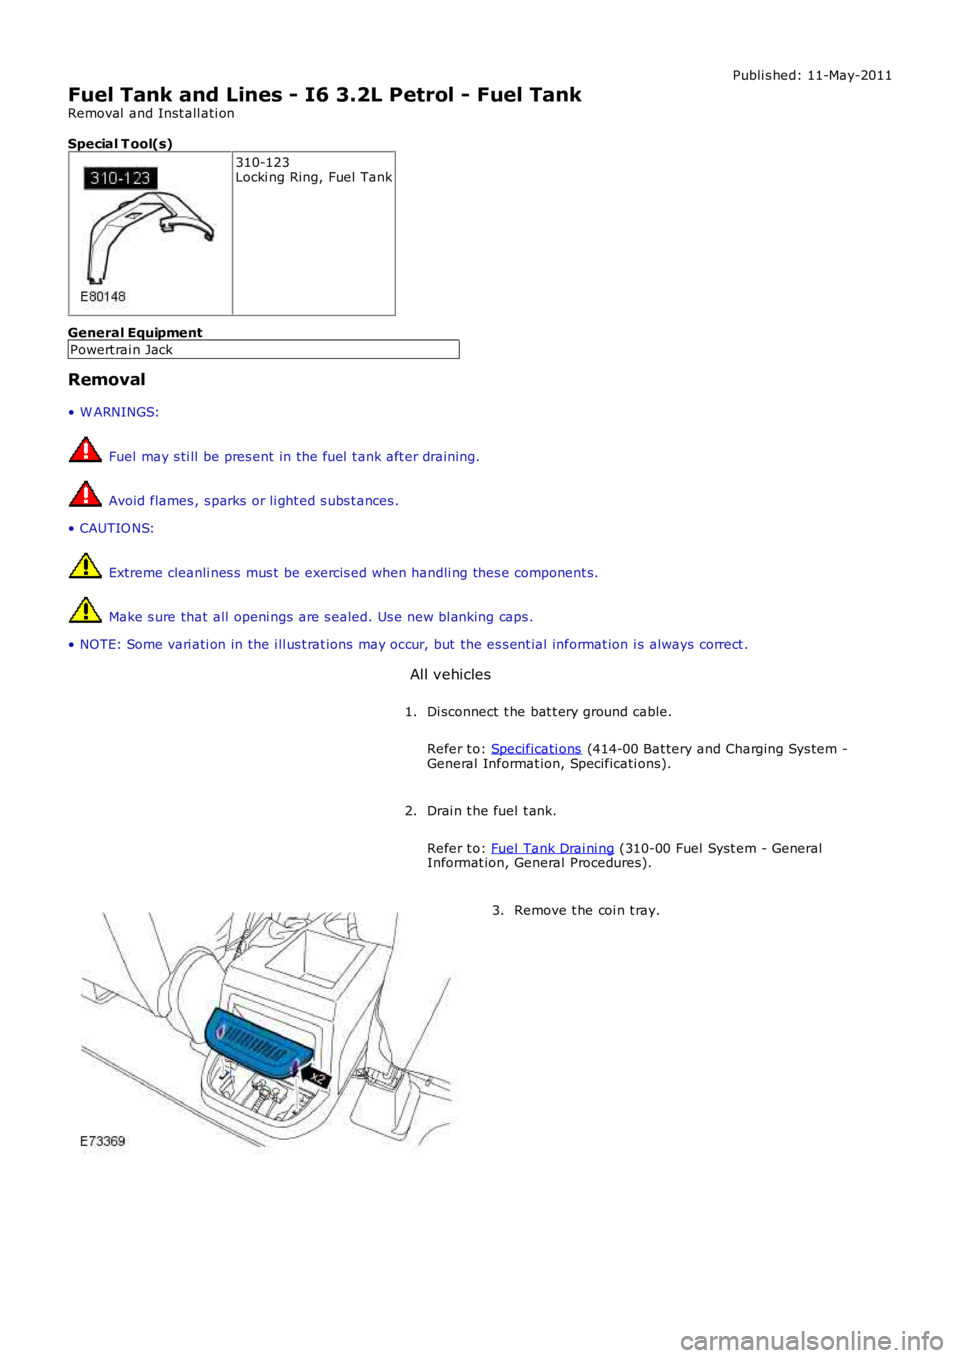
7.
Installation
To i nst all , revers e t he removal procedure.1.
Page 1562 of 3229
Publi s hed: 11-May-2011
Fuel Tank and Lines - I6 3.2L Petrol - Fuel Tank
Removal and Inst all ati on
Special T ool(s)
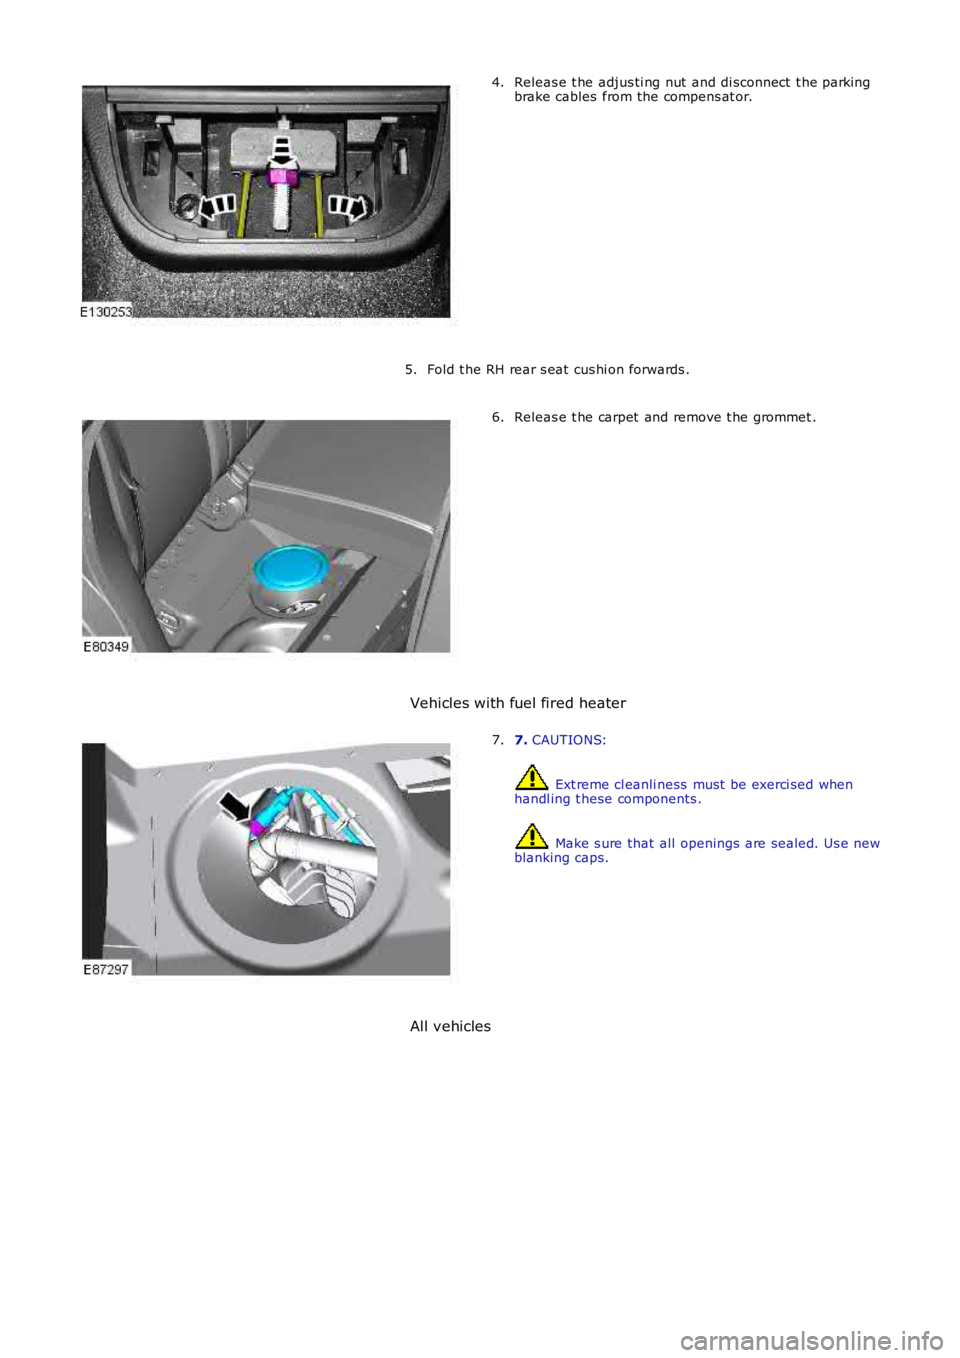
310-123Locki ng Ring, Fuel Tank
General Equipment
Powert rai n Jack
Removal
• W ARNINGS:
Fuel may s ti ll be pres ent in the fuel t ank aft er draining.
Avoid flames , s parks or li ght ed s ubs t ances .
• CAUTIO NS:
Extreme cleanli nes s mus t be exercis ed when handli ng thes e component s.
Make s ure that all openi ngs are s ealed. Us e new bl anking caps .
• NOTE: Some vari ati on in the i ll us t rat ions may occur, but the es s ent ial informat ion i s always correct .
All vehicles
Di sconnect t he bat t ery ground cable.
Refer t o: Specificati ons (414-00 Bat tery and Charging Sys tem -General Informat ion, Specificati ons).
1.
Drai n t he fuel t ank.
Refer t o: Fuel Tank Drai ni ng (310-00 Fuel Syst em - GeneralInformat ion, General Procedures).
2.
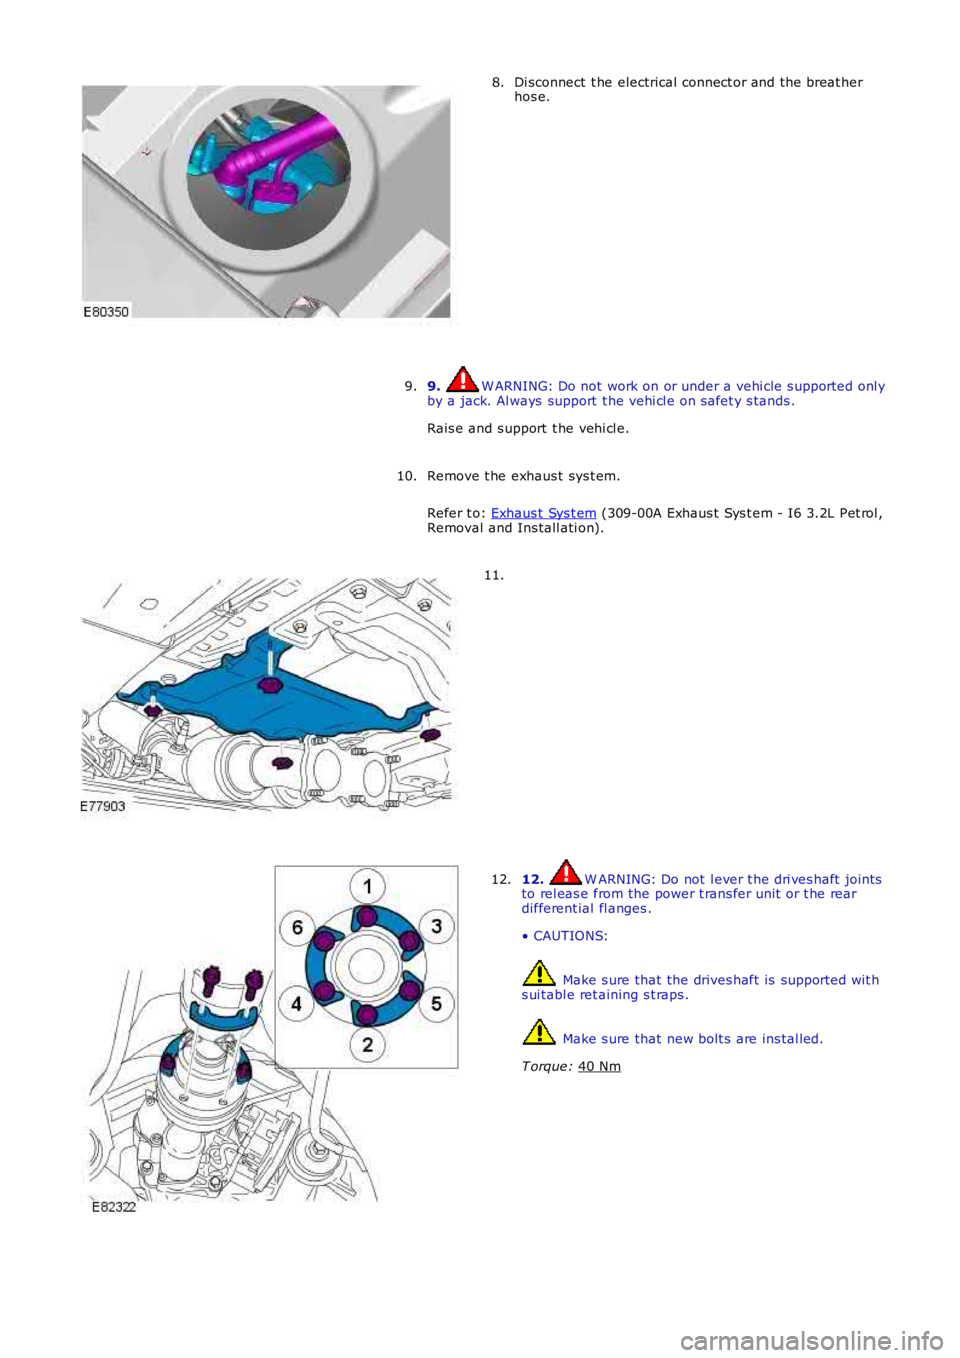
Remove t he coi n t ray.3.
Page 1563 of 3229
Releas e t he adjus ti ng nut and di sconnect t he parkingbrake cables from the compens at or.4.
Fold t he RH rear s eat cus hi on forwards .5.
Releas e t he carpet and remove t he grommet .6.
Vehicles with fuel fired heater
7. CAUTIONS:
Ext reme cl eanli ness must be exerci sed whenhandl ing t hese components .
Make s ure that all openings are sealed. Us e newblanking caps.
7.
All vehicles
Page 1564 of 3229
Di sconnect t he electrical connect or and the breat her
hos e.
8.
9. W ARNING: Do not work on or under a vehi cle s upported onl y
by a jack. Al ways support t he vehi cl e on s afet y s tands .
Rais e and s upport t he vehi cl e.
9.
Remove t he exhaus t sys t em.
Refer t o: Exhaus t Sys t em (309-00A Exhaus t Sys t em - I6 3.2L Pet rol ,
Removal and Ins tall ati on).
10. 11.
12. W ARNING: Do not l ever t he dri ves haft joints
to rel eas e from the power t rans fer unit or t he rear
different ial fl anges .
• CAUTIONS: Make s ure that the drives haft is support ed wit h
s ui tabl e ret aining s t raps . Make s ure that new bolt s are ins tal led.
T orque: 40 Nm 12.
Page 1565 of 3229
13.
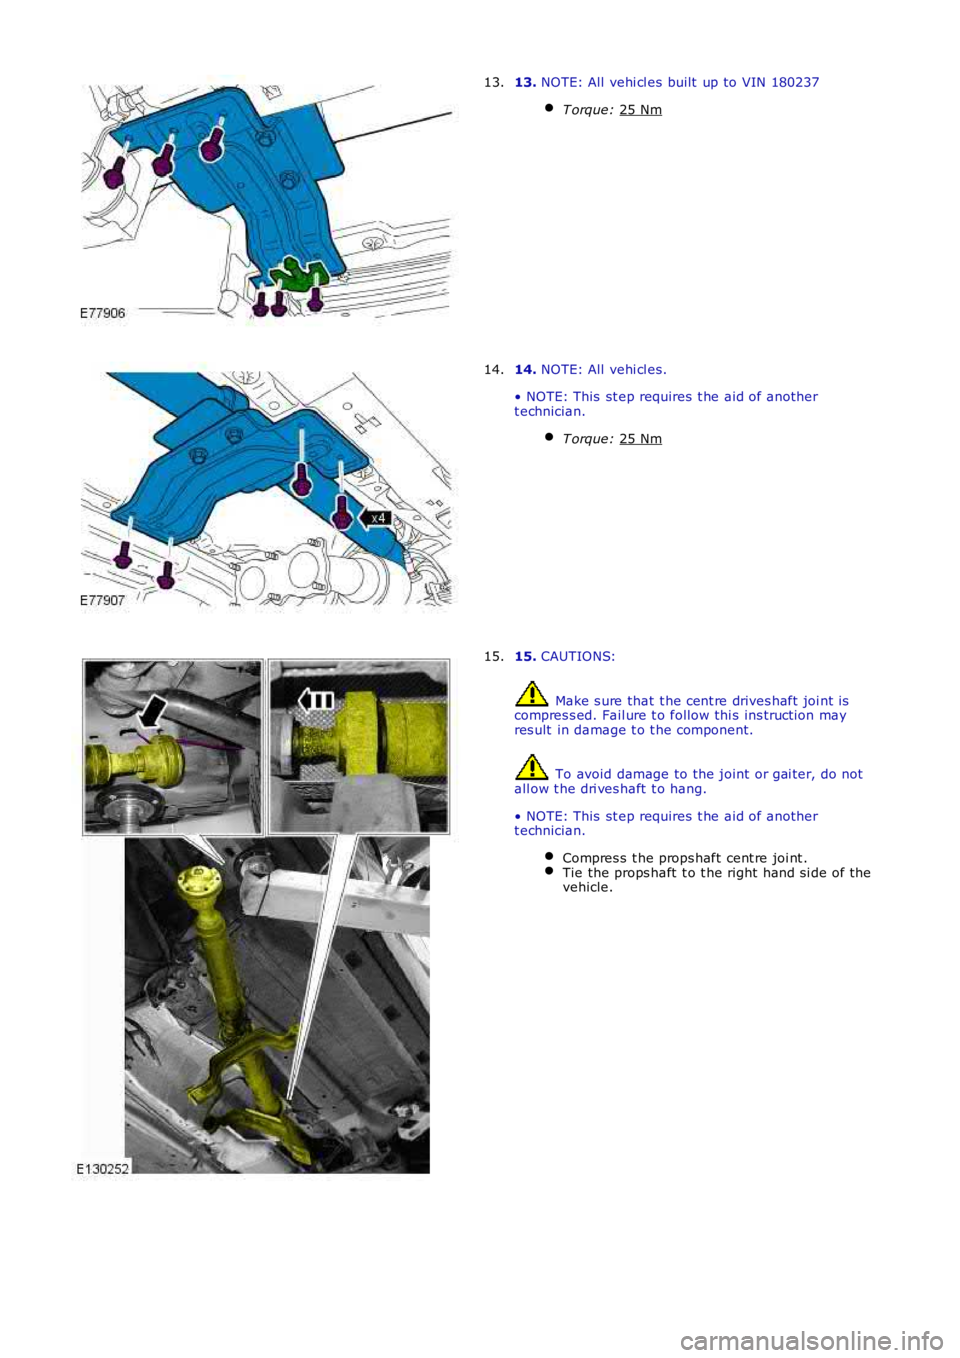
NOTE: All vehi cl es built up to VIN 180237
T orque: 25 Nm 13.
14.
NOTE: All vehi cl es.
• NOTE: This st ep requires t he aid of another
t echnician.
T orque: 25 Nm 14.
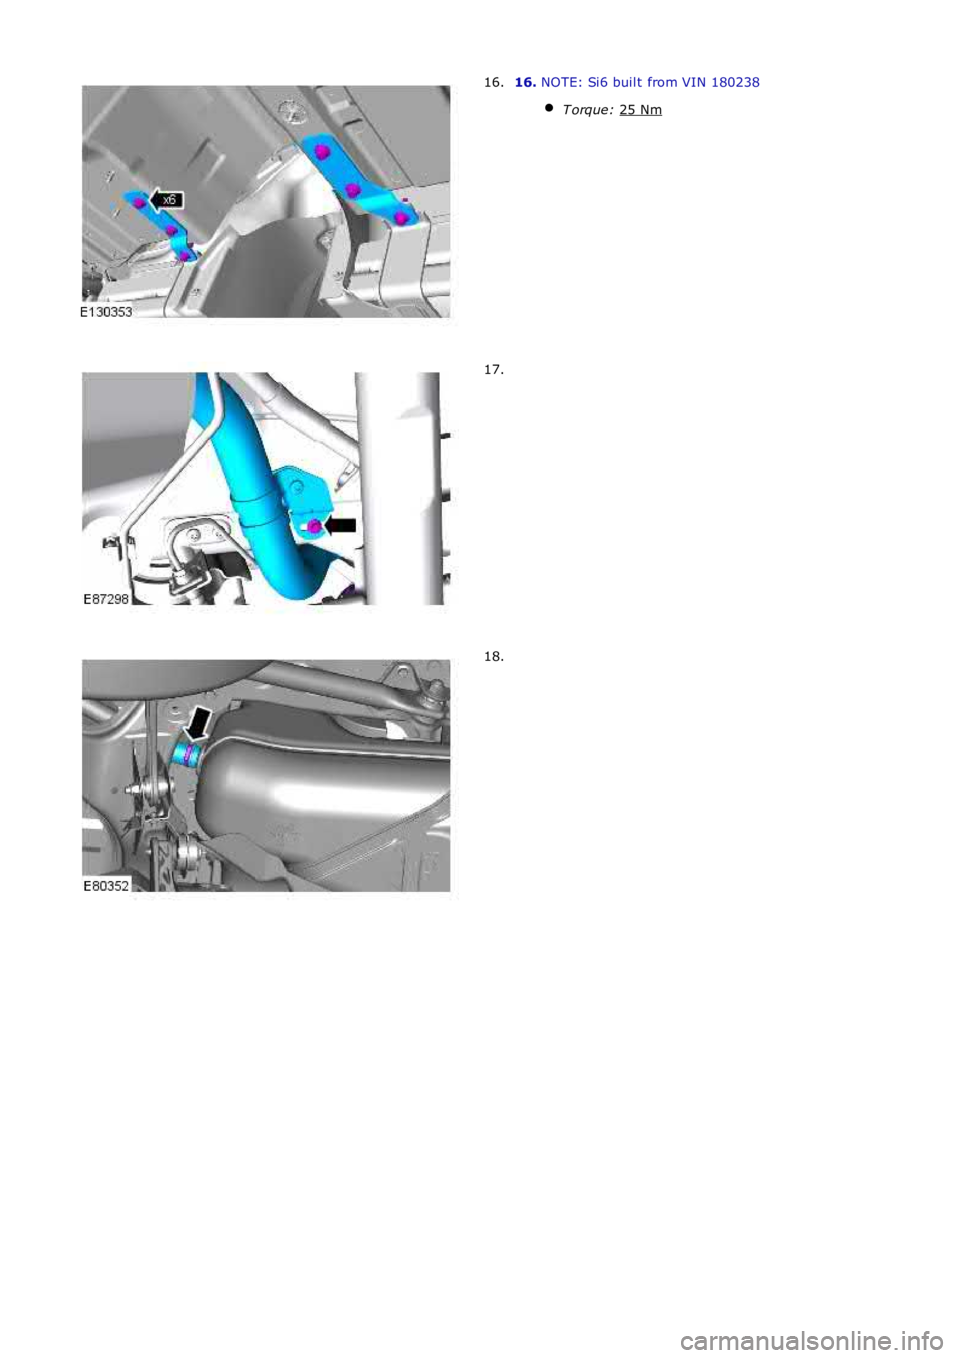
15.
CAUTIONS: Make s ure that t he cent re drives haft joi nt is
compres s ed. Fail ure t o follow thi s ins truct ion may
res ult in damage t o t he component. To avoid damage to the joint or gai ter, do not
all ow t he dri ves haft t o hang.
• NOTE: This st ep requires t he aid of another
t echnician.
Compres s t he props haft cent re joi nt . Tie the props haft t o t he right hand si de of the
vehicle. 15.
Page 1566 of 3229
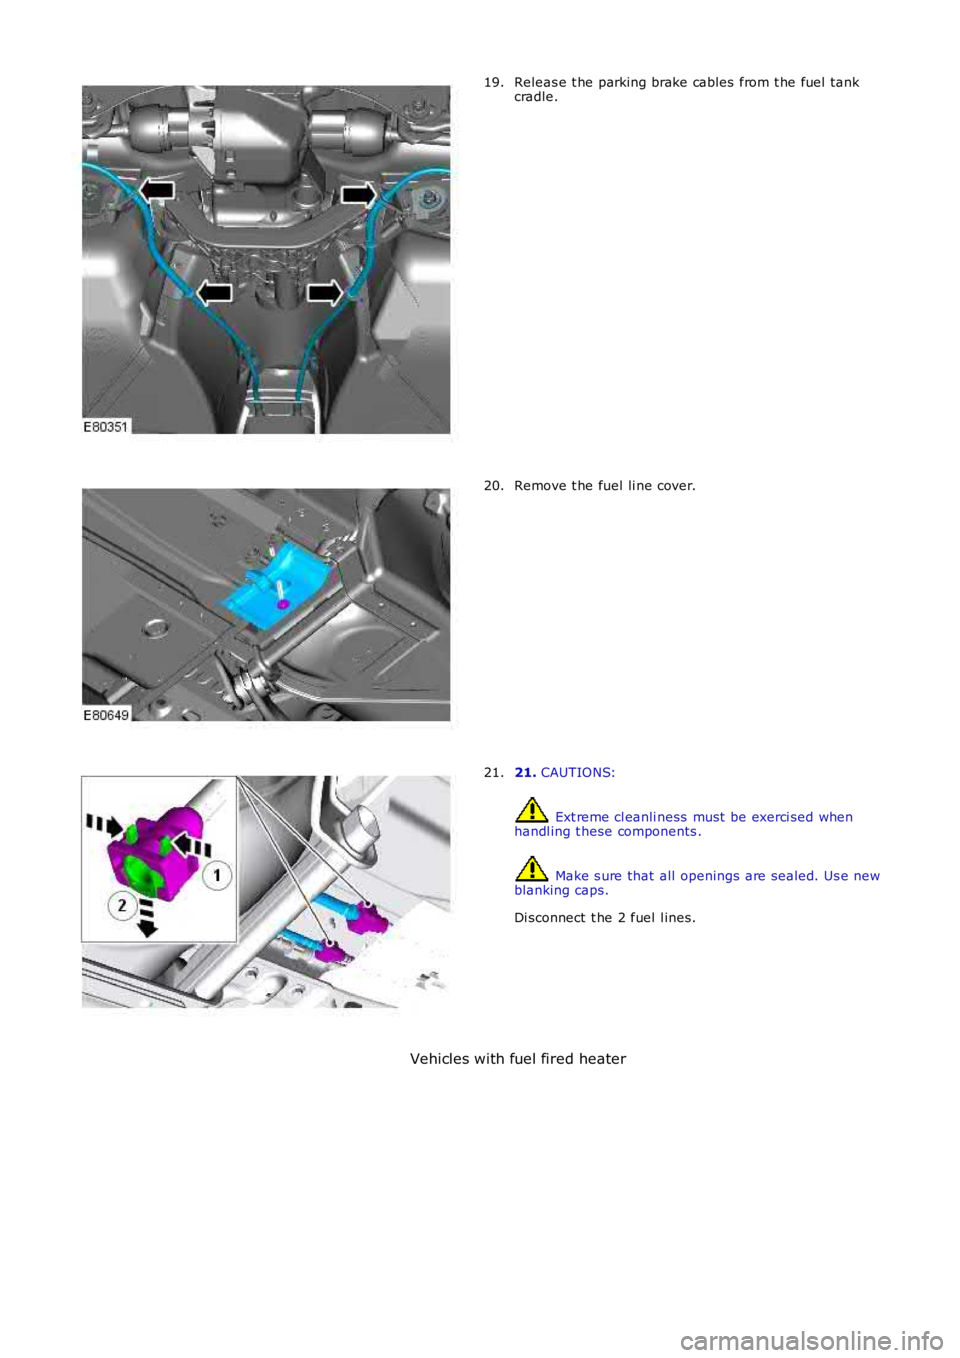
16.
NOTE: Si6 buil t from VIN 180238
T orque: 25 Nm 16.
17.
18.
Page 1567 of 3229
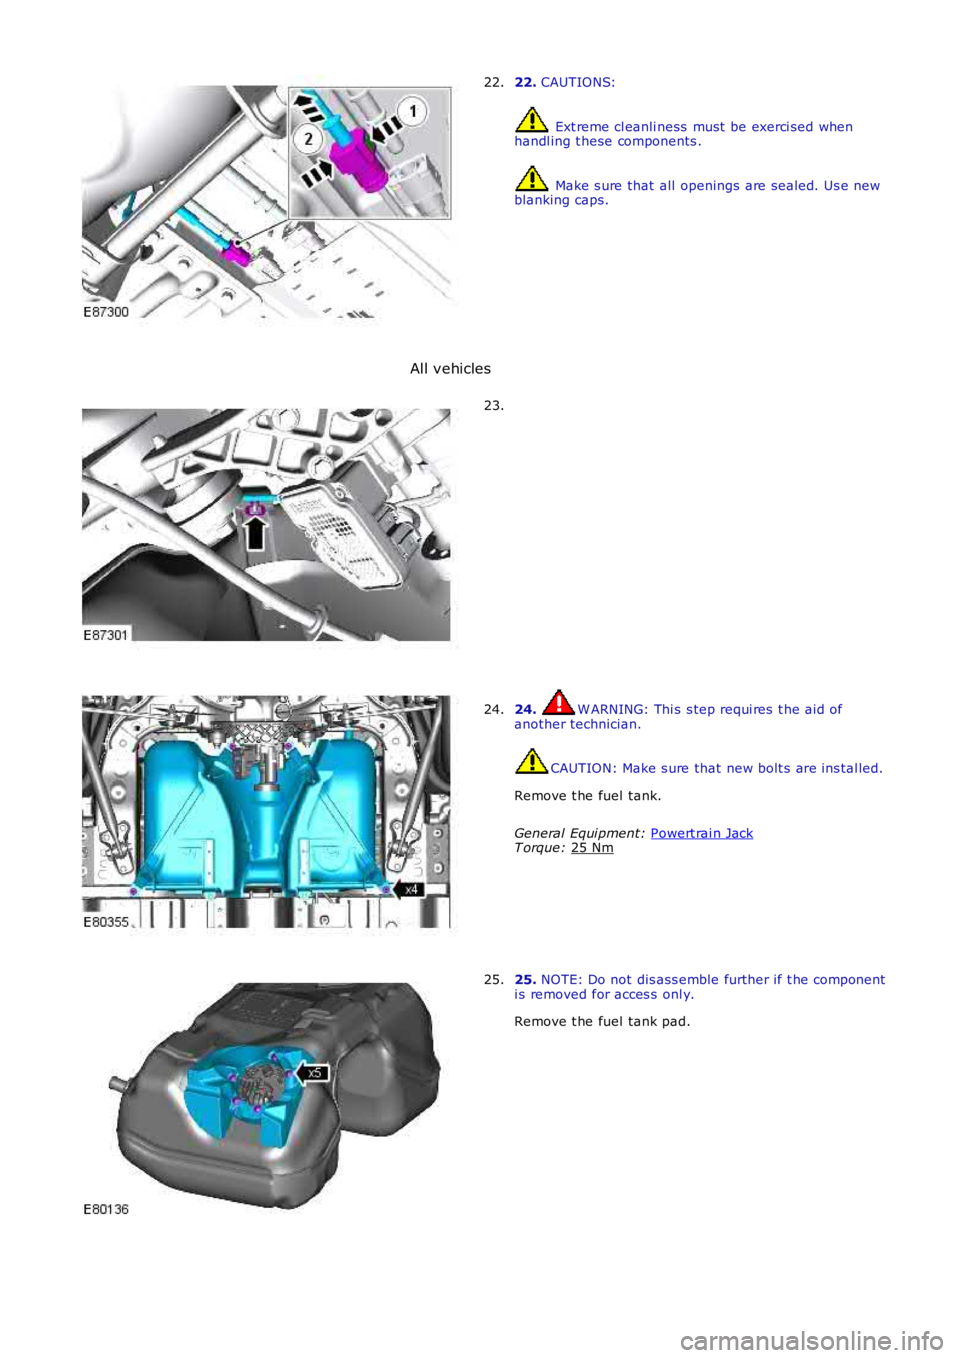
Releas e t he parking brake cables from t he fuel tankcradle.19.
Remove t he fuel li ne cover.20.
21. CAUTIONS:
Ext reme cl eanli ness must be exerci sed whenhandl ing t hese components .
Make s ure that all openings are sealed. Us e newblanking caps.
Di sconnect t he 2 fuel l ines.
21.
Vehicles with fuel fired heater
Page 1568 of 3229
22.
CAUTIONS: Ext reme cl eanli ness must be exerci sed when
handl ing t hese components . Make s ure that all openings are sealed. Us e new
blanking caps.
22.
All vehicles 23.
24. W ARNING: Thi s s tep requi res t he aid of
another technician. CAUTION: Make s ure that new bolt s are ins tal led.
Remove t he fuel tank.
General Equi pment: Powert rai n Jack T orque:
25 Nm 24.
25.
NOTE: Do not dis ass emble further if t he component
i s removed for acces s onl y.
Remove t he fuel tank pad.
25.
Page 1569 of 3229
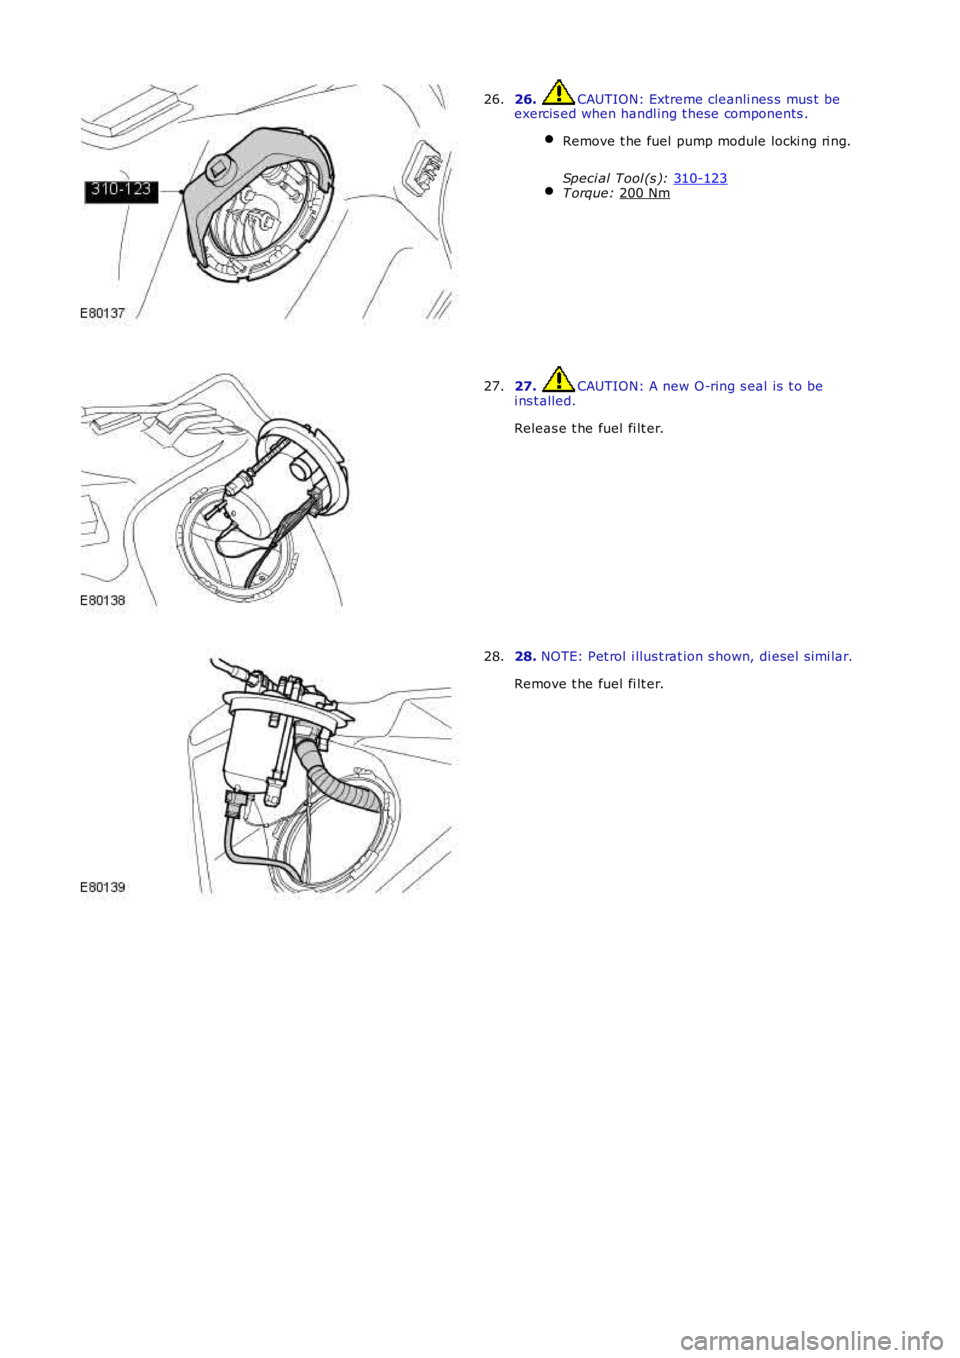
26. CAUTION: Extreme cleanli nes s mus t be
exercis ed when handl ing t hese components .
Remove t he fuel pump module locki ng ri ng.
Speci al Tool (s ): 310-123 T orque:
200 Nm 26.
27. CAUTION: A new O-ring s eal is t o be
i ns t alled.
Releas e t he fuel fi lt er.
27. 28.
NOTE: Pet rol i llus t rat ion s hown, di esel s imi lar.
Remove t he fuel fi lt er.
28.
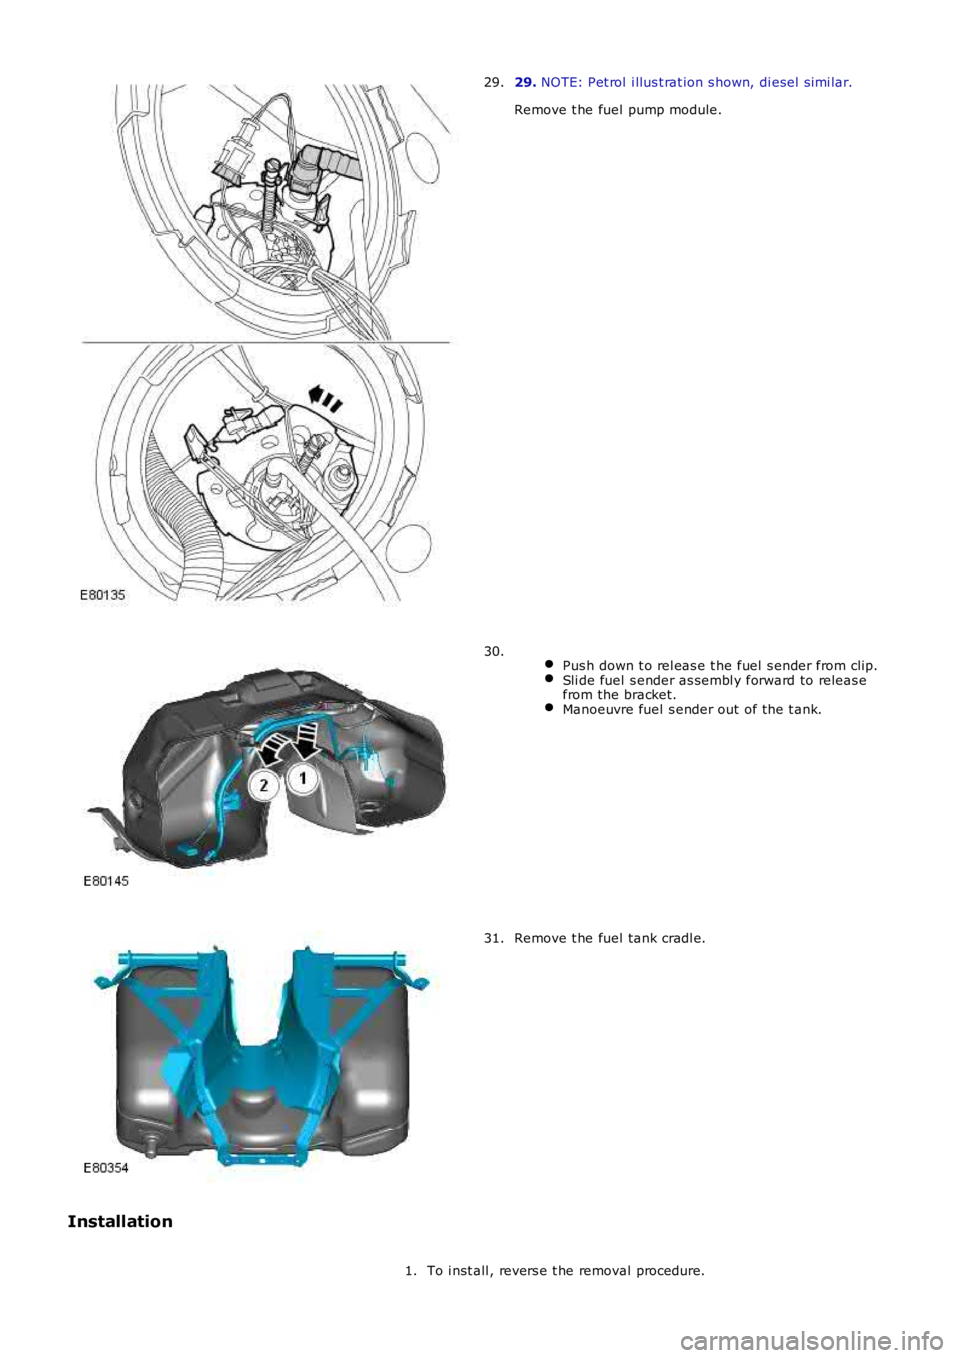
Page 1570 of 3229
29. NOTE: Pet rol i llus t rat ion s hown, di esel s imi lar.
Remove t he fuel pump module.
29.
Pus h down t o rel eas e t he fuel s ender from clip.Sli de fuel s ender as sembl y forward to releas efrom the bracket.Manoeuvre fuel s ender out of the t ank.
30.
Remove t he fuel tank cradl e.31.
Installation
To i nst all , revers e t he removal procedure.1.
Trending: tow bar, airbag off, service schedule, change key battery, run flat, refrigerant type, stop start
