LAND ROVER FRELANDER 2 2006 Repair Manual
FRELANDER 2 2006
LAND ROVER
LAND ROVER
https://www.carmanualsonline.info/img/64/57251/w960_57251-0.png
LAND ROVER FRELANDER 2 2006 Repair Manual
Trending: service interval, sat nav, remove seats, stop start, display, air conditioning, emergency key access
Page 711 of 3229
Publi s hed: 11-May-2011
Engine - I6 3.2L Petrol - Timing Components Housing
Removal and Inst all ati on
Special T ool(s)
303-1232Gui de Pins
Removal
• NOTE: Take ext ra care when ali gning and refit t ing t he ti mi ng hous ing , as the s eals can eas il y be damaged .
1. W ARNING: Make sure t o s upport the vehicle wit h axles tands .
Rais e and s upport t he vehi cl e.
1.
Remove t he cover and dis connect the bat tery ground cabl e.
Refer t o: Specificati ons (414-00 Bat tery and Charging Sys tem -General Informat ion, Specificati ons).
2.
Remove t he ti ming chain and sprockets .
Refer t o: Timi ng Chai n (303-01A Engi ne - I6 3.2L Pet rol, Removaland Inst all at ion).
3.
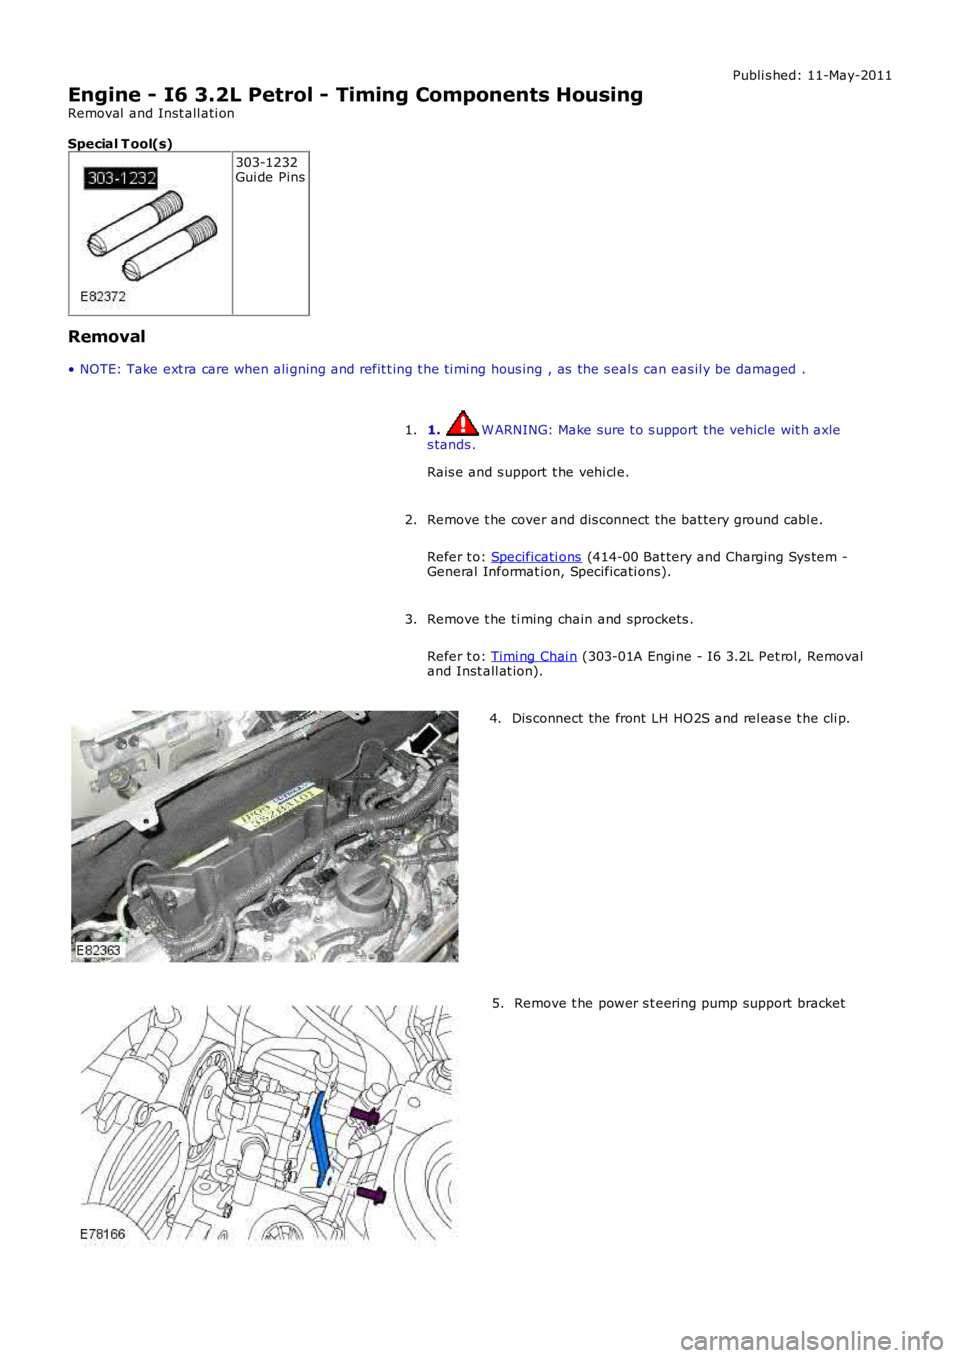
Dis connect the front LH HO2S and rel eas e t he cli p.4.
Remove t he power s t eering pump support bracket5.
Page 712 of 3229
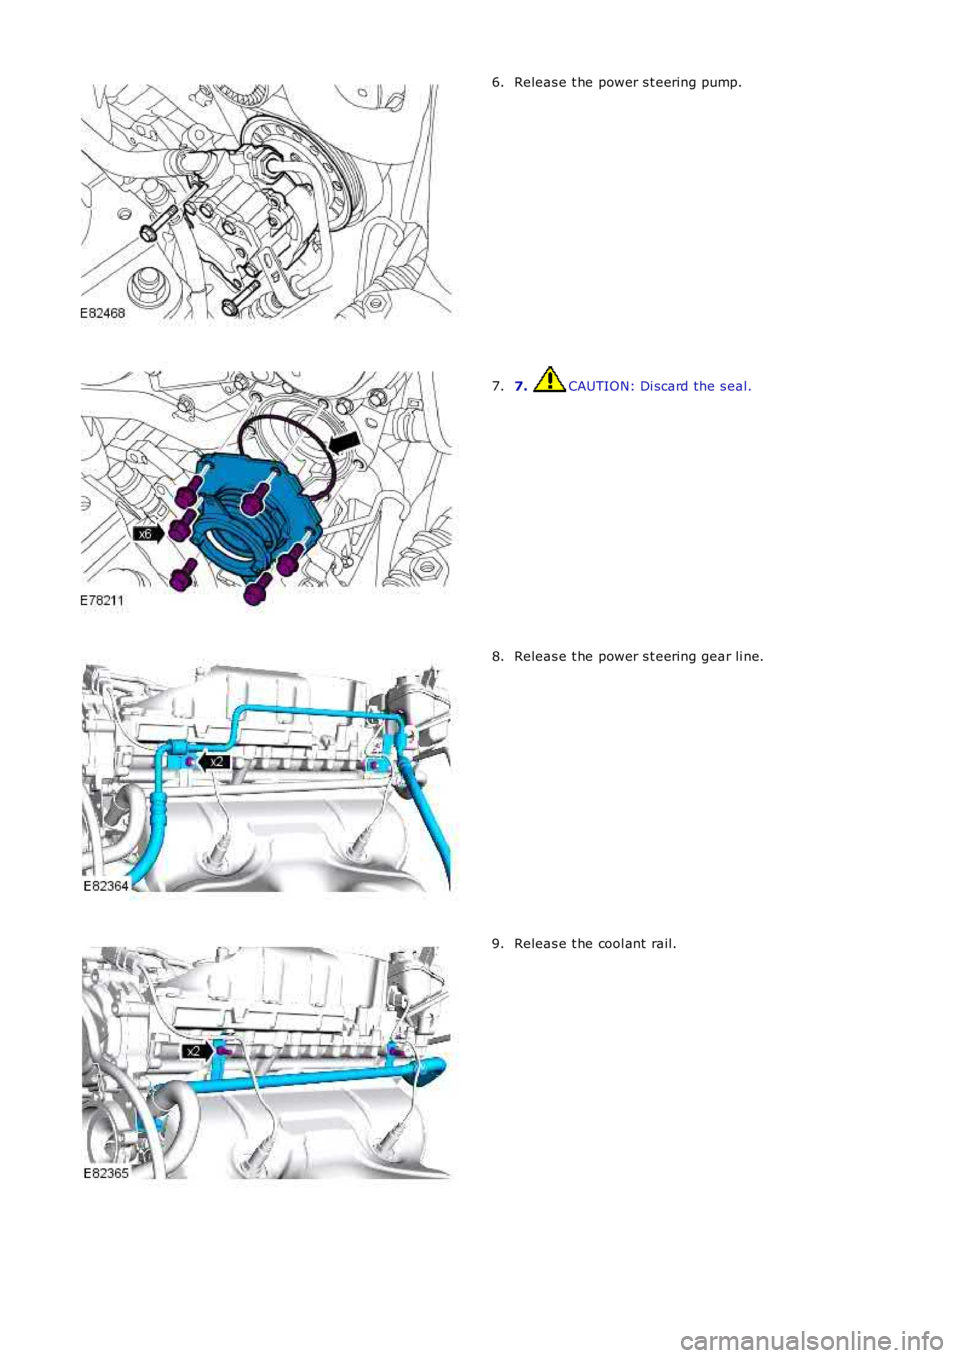
Releas e t he power s t eering pump.6.
7. CAUTION: Di scard the s eal.7.
Releas e t he power s t eering gear li ne.8.
Releas e t he cool ant rail.9.
Page 713 of 3229
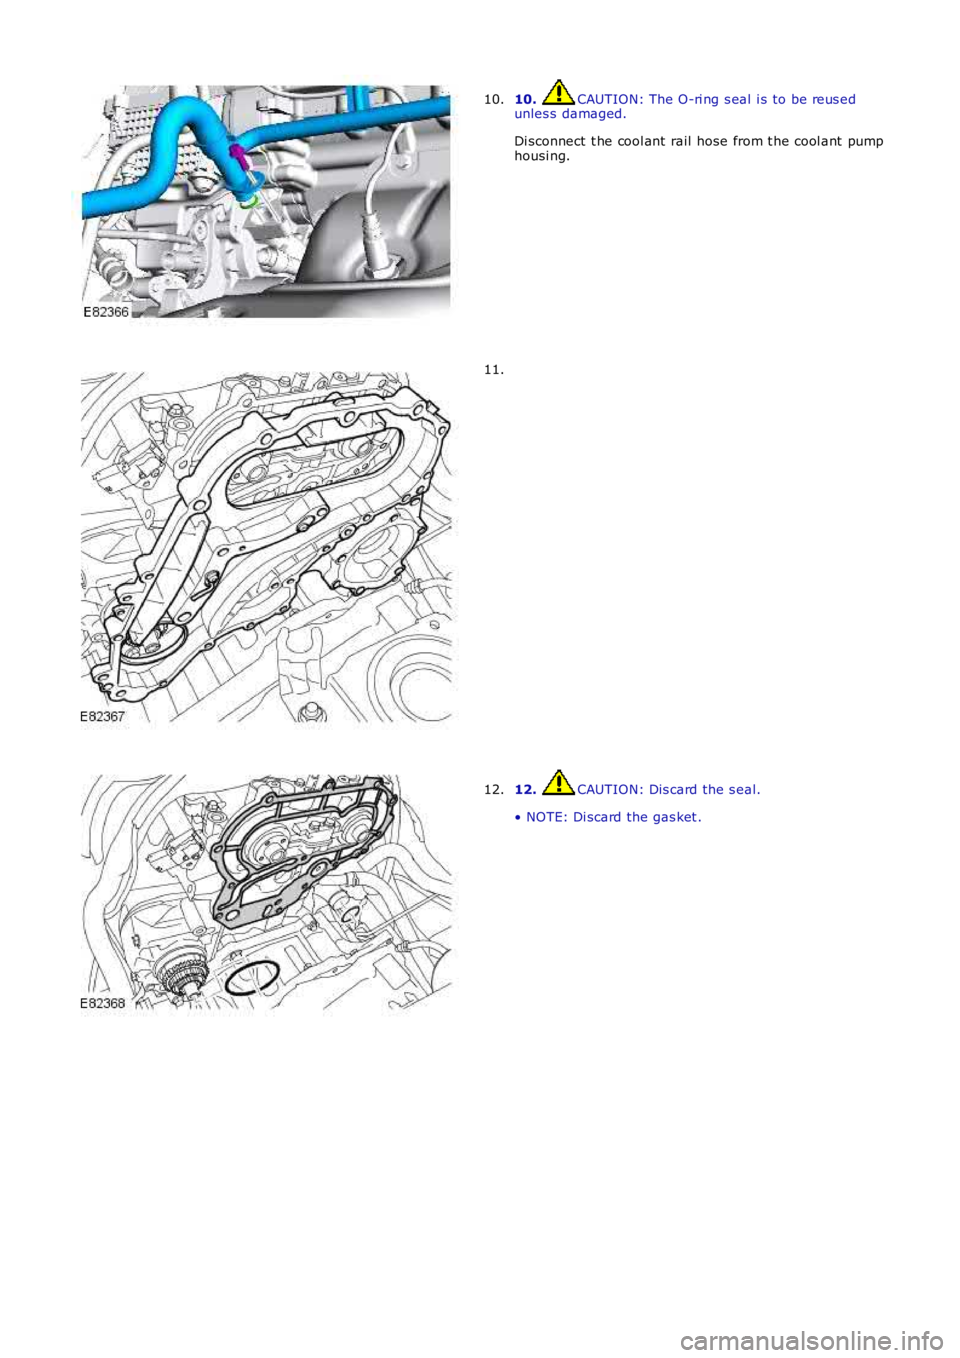
10. CAUTION: The O-ri ng s eal i s to be reus edunles s damaged.
Di sconnect t he cool ant rail hose from t he cool ant pumphousi ng.
10.
11.
12. CAUTION: Dis card the s eal.
• NOTE: Di scard the gas ket .
12.
Page 714 of 3229
13.
NOTE: Do not dis ass emble further if t he component
i s removed for acces s onl y.
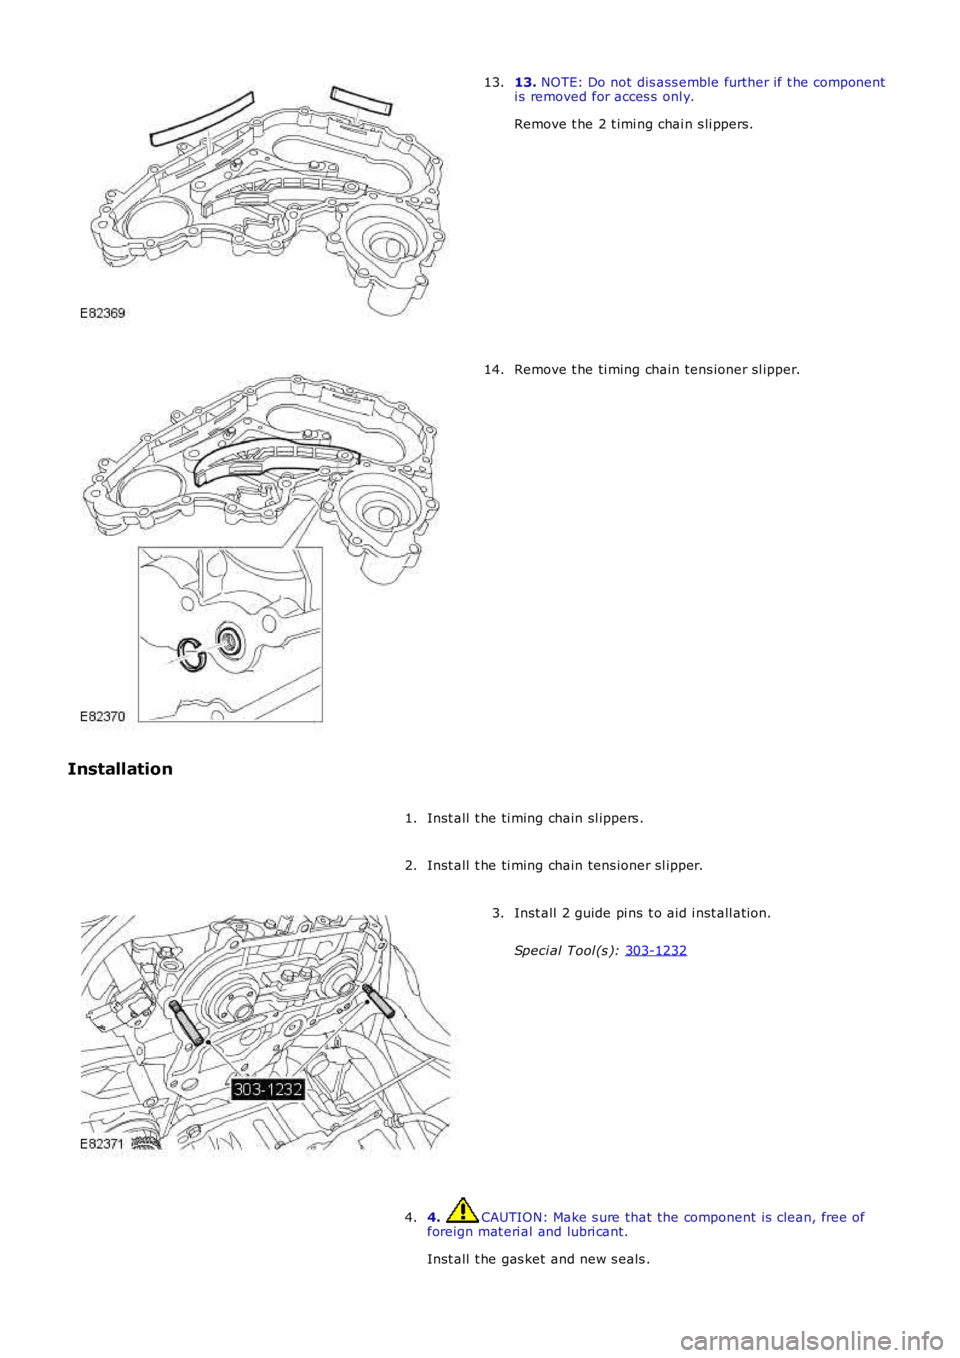
Remove t he 2 t imi ng chai n s li ppers.
13. Remove t he ti ming chain tens ioner sl ipper.
14.
Installation Inst all t he ti ming chain sl ippers .
1.
Inst all t he ti ming chain tens ioner sl ipper.
2. Inst all 2 guide pi ns t o aid i nst all ati on.
Speci al Tool (s ): 303-1232 3.
4. CAUTION: Make s ure that the component is clean, free of
foreign mat eri al and lubri cant.
Inst all t he gas ket and new s eals .
4.
Page 715 of 3229
5.
CAUTIONS: Make s ure that t he gaskets are correct ly locat ed.
Make s ure that t he mat ing faces are clean and free of
corros i on and forei gn mat erial . Take extra care not t o damage t he s eal .
Onl y t ighten t he bolt s finger-ti ght at t his s t age.
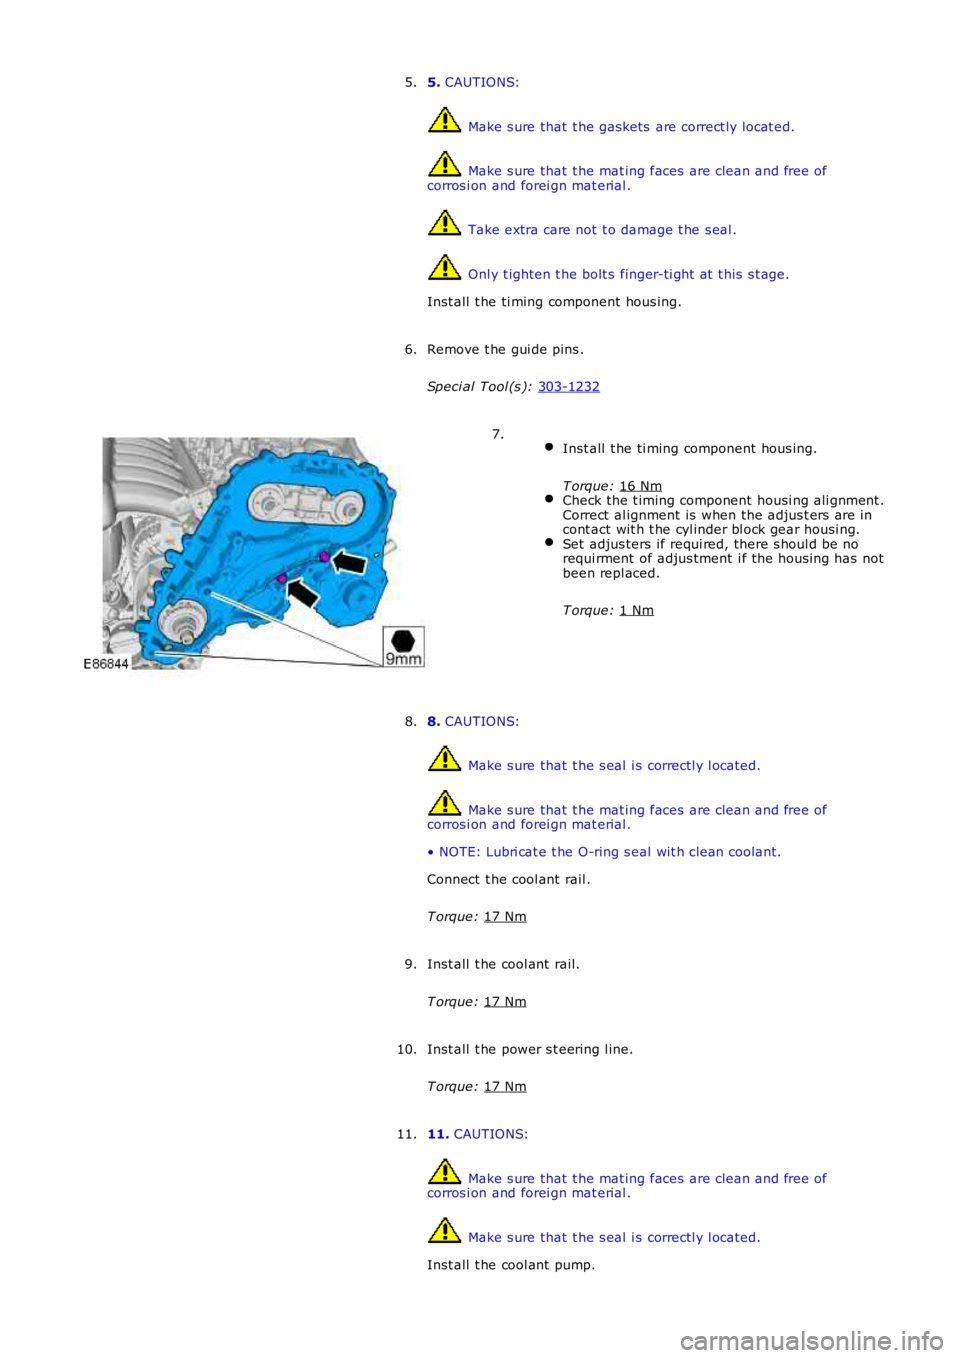
Inst all t he ti ming component hous ing.
5.
Remove t he gui de pins .
Speci al Tool (s ): 303-1232 6.
Inst all t he ti ming component hous ing.
T orque: 16 Nm Check the t iming component housi ng ali gnment .
Correct al ignment is when the adjus t ers are in
cont act wit h t he cyl inder bl ock gear housi ng. Set adjus ters if requi red, there s houl d be no
requi rment of adjus tment i f the hous ing has not
been repl aced.
T orque: 1 Nm 7.
8. CAUTIONS: Make s ure that t he s eal i s correctl y l ocated.
Make s ure that t he mat ing faces are clean and free of
corros i on and forei gn mat erial .
• NOTE: Lubri cat e t he O-ring s eal wit h clean coolant.
Connect t he cool ant rail .
T orque: 17 Nm 8.
Inst all t he cool ant rail.
T orque: 17 Nm 9.
Inst all t he power s t eering l ine.
T orque: 17 Nm 10.
11. CAUTIONS: Make s ure that t he mat ing faces are clean and free of
corros i on and forei gn mat erial . Make s ure that t he s eal i s correctl y l ocated.
Inst all t he cool ant pump.
11.
Page 716 of 3229
T orque:
17 Nm Inst all t he power s t eering pump.
T orque: 25 Nm 12.
Connect and s ecure t he HO2S electrical connect ors .
13.
Inst all t he power s t eering pump support bracket.
T orque: 25 Nm 14.
Inst all t he ti ming chain and sprockets .
Refer t o: Timi ng Chai n (303-01A Engi ne - I6 3.2L Pet rol, Removal
and Inst all at ion).
15.
Connect t he batt ery ground cable and ins tall t he cover.
Refer t o: Specificati ons (414-00 Bat tery and Charging Sys tem -
General Informat ion, Specificati ons).
16.
Page 717 of 3229
Publi s hed: 11-May-2011
Engine - I6 3.2L Petrol - Engine Front Seal
Removal and Inst all ati on
Removal
1. W ARNING: Do not work on or under a vehi cle s upported onl yby a jack. Al ways support t he vehi cl e on s afet y s tands .
Rais e and s upport t he vehi cl e.
1.
Remove t he front wheel .
Refer t o: W heel and Ti re (204-04 W heel s and Tires, Removal andInst all at ion).
2.
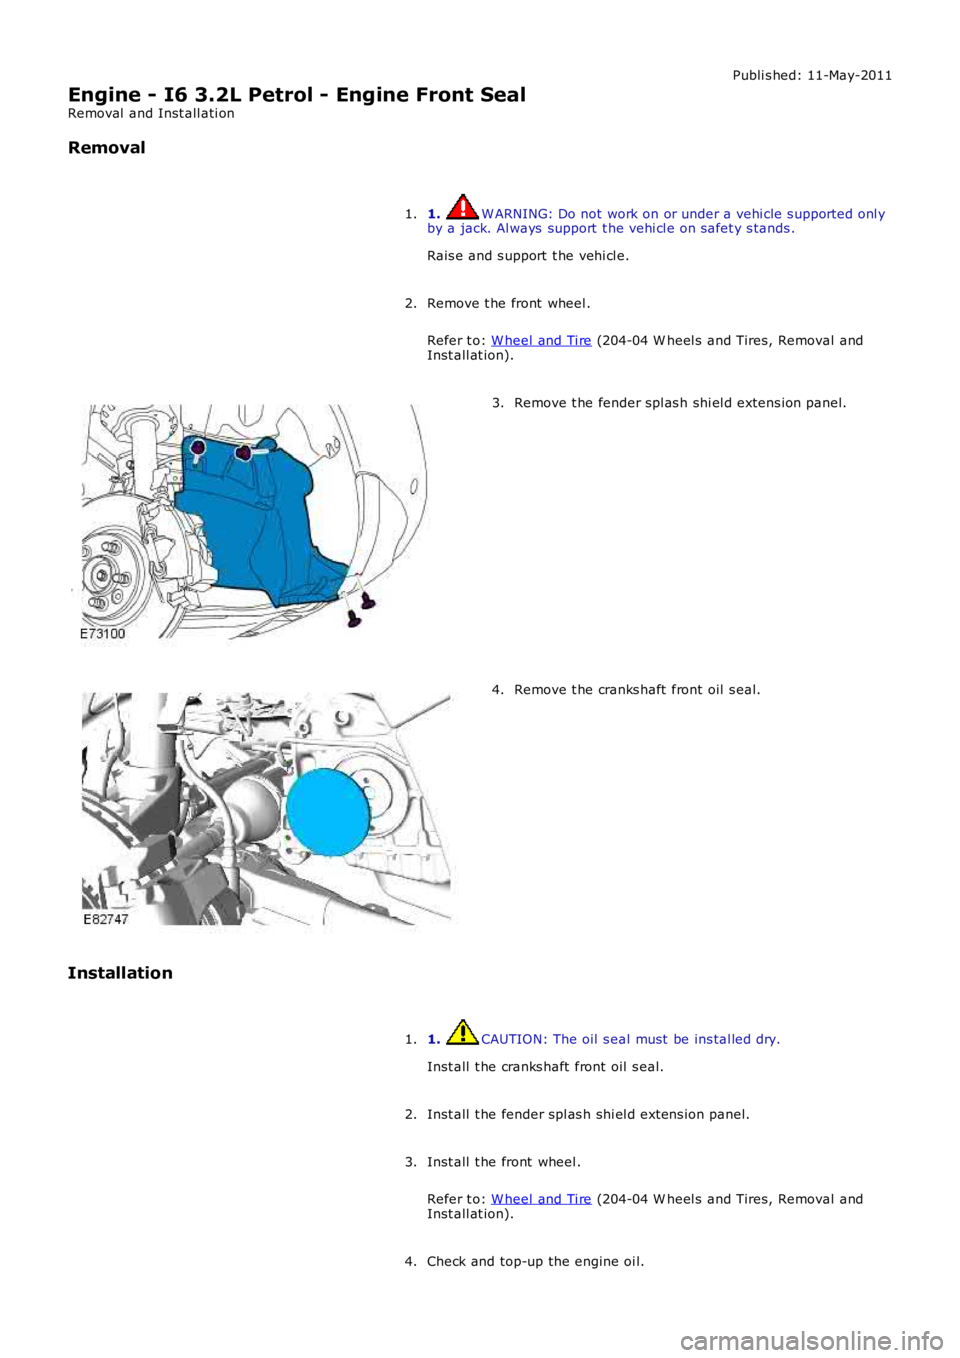
Remove t he fender spl as h shi el d extens ion panel.3.
Remove t he cranks haft front oil s eal.4.
Installation
1. CAUTION: The oil s eal must be ins tal led dry.
Inst all t he cranks haft front oil s eal.
1.
Inst all t he fender spl as h shi el d extens ion panel.2.
Inst all t he front wheel .
Refer t o: W heel and Ti re (204-04 W heel s and Tires, Removal andInst all at ion).
3.
Check and top-up the engine oi l.4.
Page 718 of 3229
Publi s hed: 11-May-2011
Engine - I6 3.2L Petrol - Crankshaft Rear Seal
Removal and Inst all ati on
Special T ool(s)
303-1291Inst all er, Cranks haft Rear Seal
Removal
Remove t he cover and dis connect the bat tery ground cabl e.
Refer t o: Specificati ons (414-00 Bat tery and Charging Sys tem -General Informat ion, Specificati ons).
1.
2. W ARNING: Make sure t o s upport the vehicle wit h axles tands .
Rais e and s upport t he vehi cl e.
2.
Remove t he fl expl at e.
Refer t o: Fl expl ate (303-01A Engine - I6 3.2L Pet rol , Removal andInst all at ion).
3.
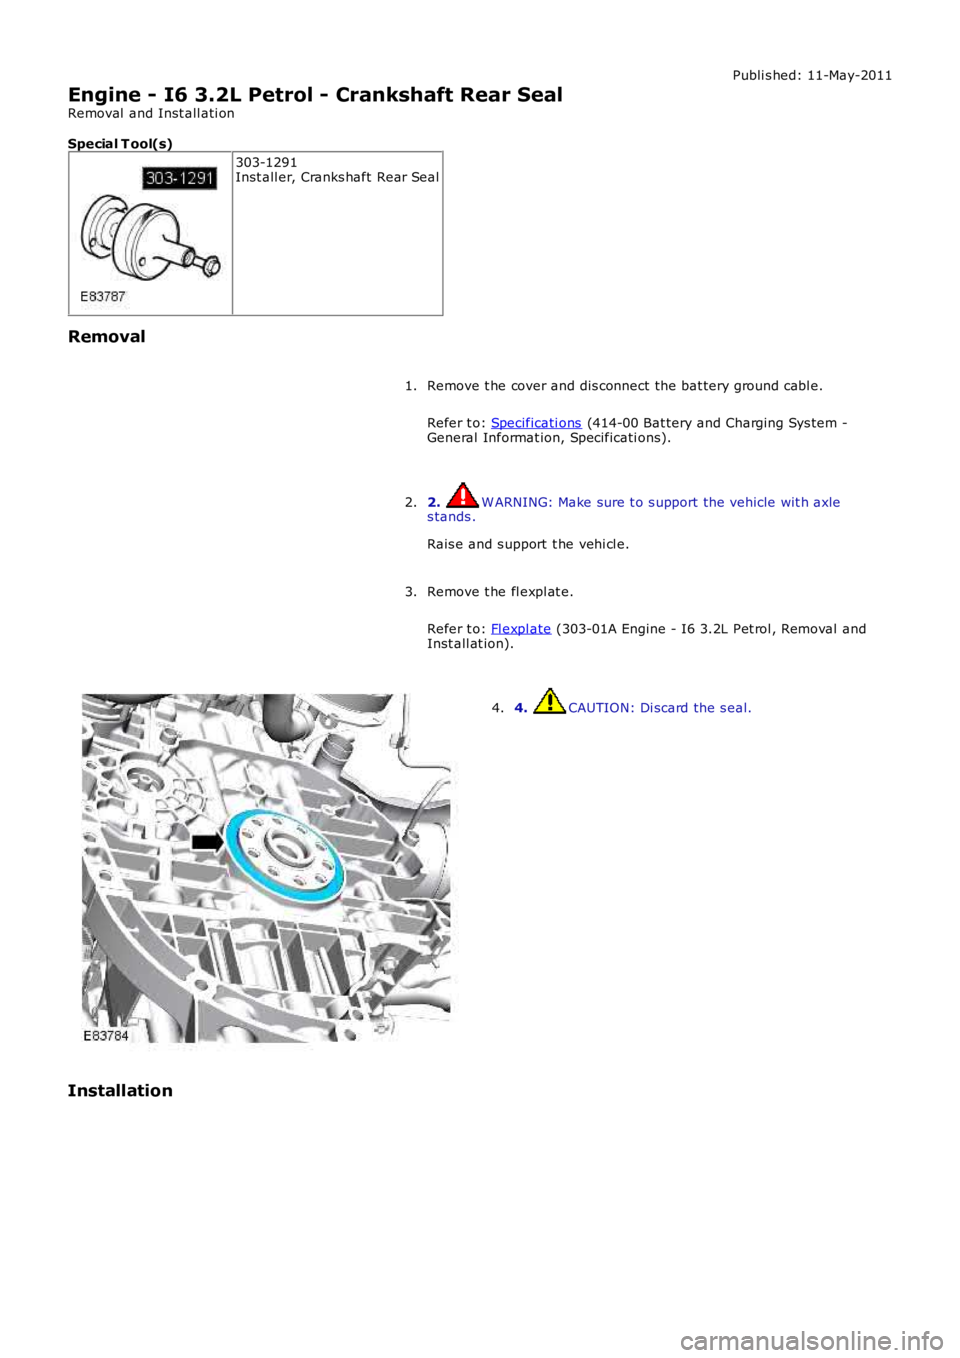
4. CAUTION: Di scard the s eal.4.
Installation
Page 719 of 3229
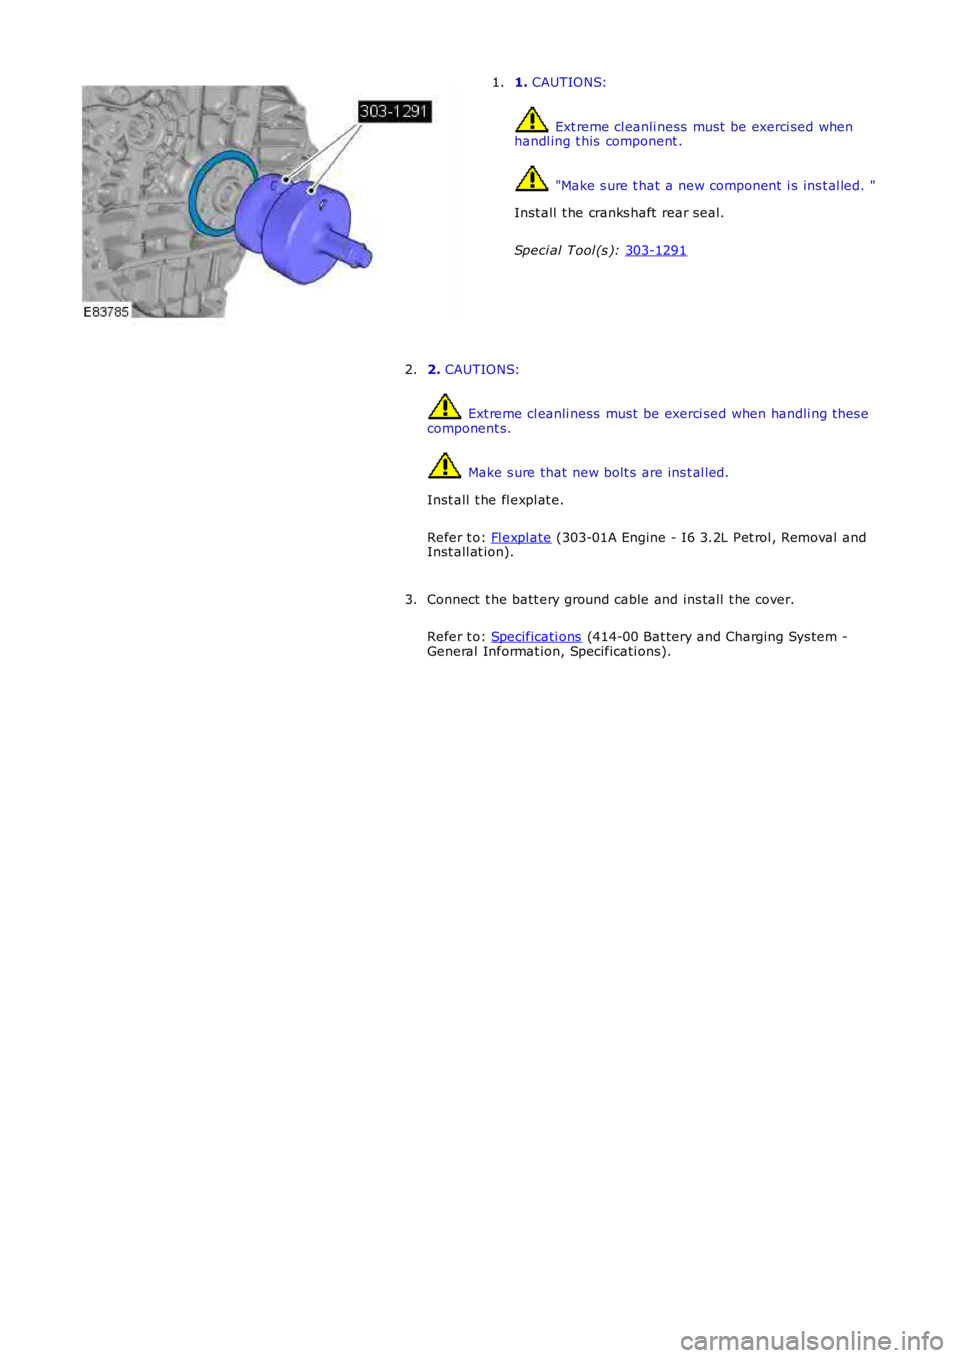
1.
CAUTIONS: Ext reme cl eanli ness must be exerci sed when
handl ing t his component . "Make s ure t hat a new component i s ins t al led. "
Inst all t he cranks haft rear seal.
Speci al Tool (s ): 303-1291 1.
2. CAUTIONS: Ext reme cl eanli ness must be exerci sed when handli ng t hes e
component s. Make s ure that new bolt s are ins t al led.
Inst all t he fl expl at e.
Refer t o: Fl expl ate (303-01A Engine - I6 3.2L Pet rol , Removal and
Inst all at ion).
2.
Connect t he batt ery ground cable and ins tall t he cover.
Refer t o: Specificati ons (414-00 Bat tery and Charging Sys tem -
General Informat ion, Specificati ons).
3.
Page 720 of 3229
Publi s hed: 11-May-2011
Engine - I6 3.2L Petrol - Flexplate
Removal and Inst all ati on
Removal
Remove t he cover and dis connect the bat tery ground cabl e.
Refer t o: Specificati ons (414-00 Bat tery and Charging Sys tem -General Informat ion, Specificati ons).
1.
2. W ARNING: Make sure t o s upport the vehicle wit h axles tands .
Rais e and s upport t he vehi cl e.
2.
Remove t he transmis si on and convert er.
Refer t o: Transmis s ion - I6 3.2L Pet rol (307-01 Automat icTrans mi ss ion/Transaxle, Removal).
3.
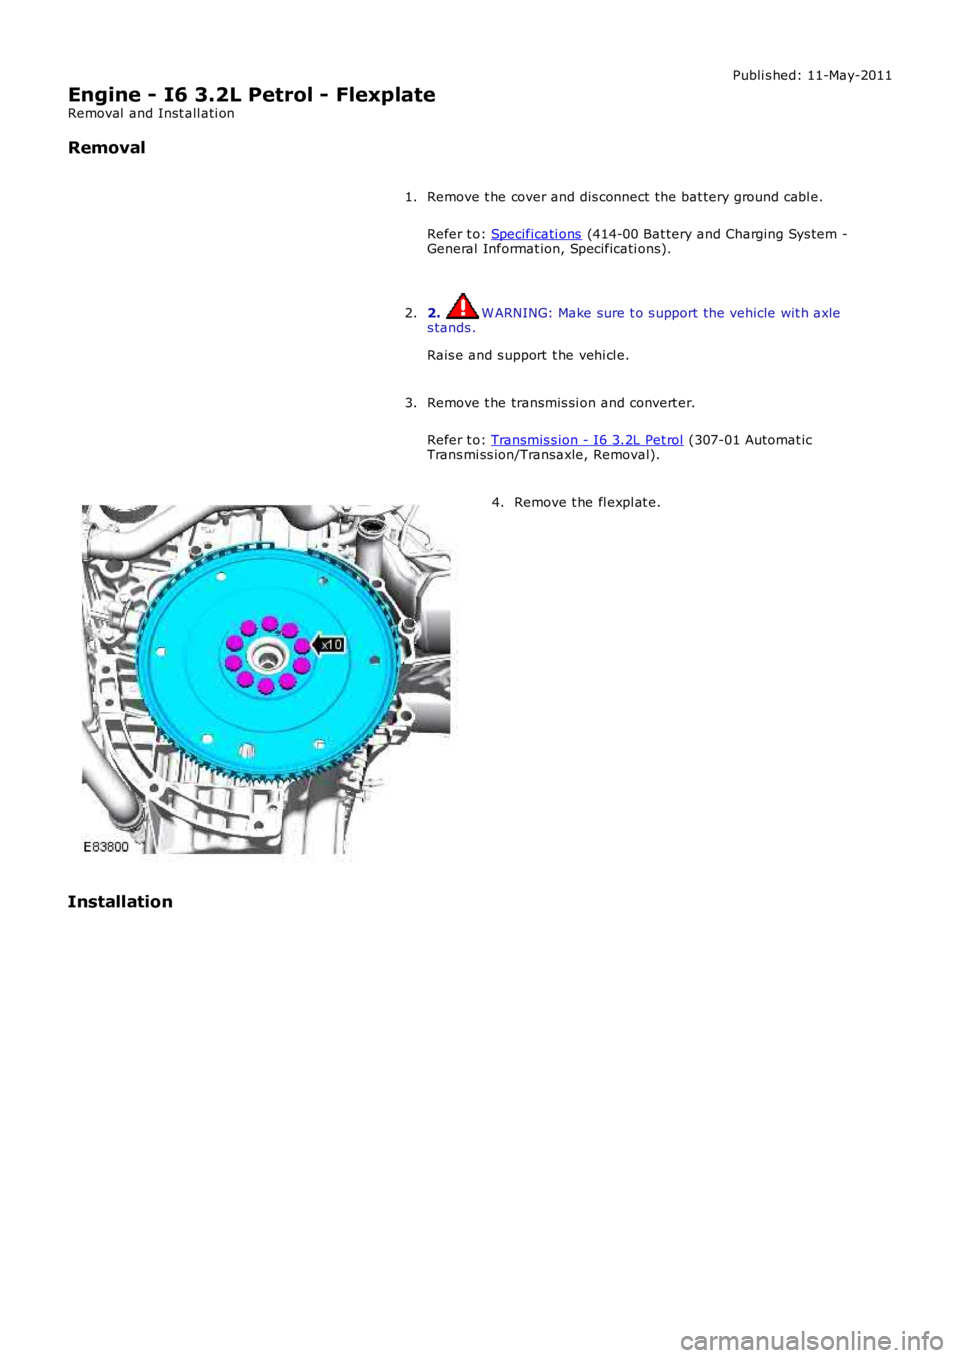
Remove t he fl expl at e.4.
Installation
Trending: refuelling, fuse diagram, trip computer, jack points, spare tire, buttons, gearbox
