LAND ROVER FRELANDER 2 2006 Repair Manual
FRELANDER 2 2006
LAND ROVER
LAND ROVER
https://www.carmanualsonline.info/img/64/57251/w960_57251-0.png
LAND ROVER FRELANDER 2 2006 Repair Manual
Trending: mirror, air filter, heater, instrument cluster, width, automatic transmission fluid, fuel type
Page 741 of 3229
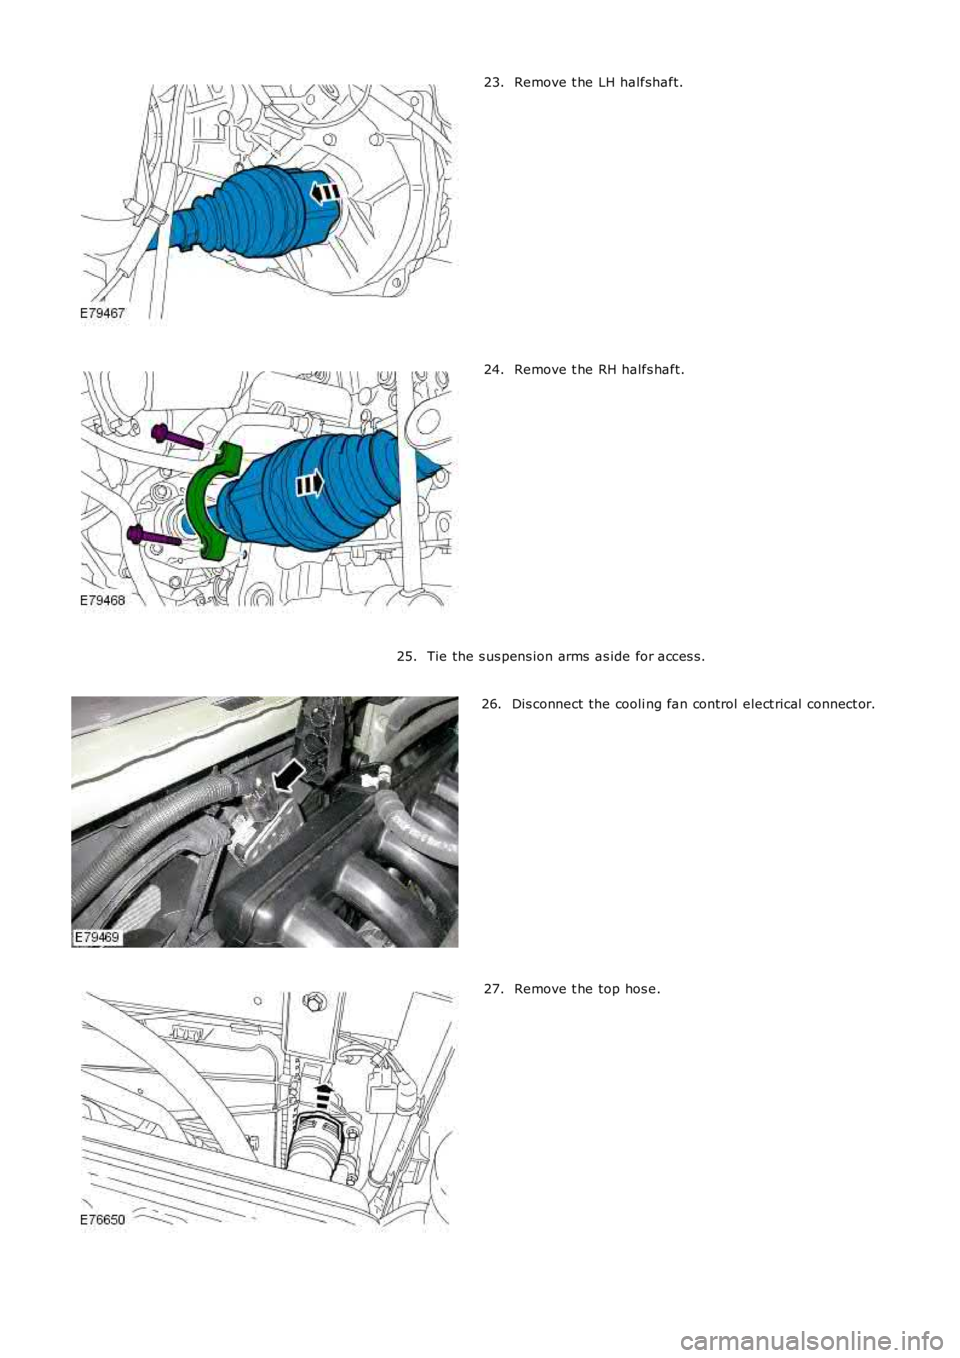
Remove t he LH halfshaft.23.
Remove t he RH halfs haft.24.
Tie the s us pens ion arms as ide for acces s.25.
Dis connect the cooli ng fan control elect rical connect or.26.
Remove t he top hos e.27.
Page 742 of 3229
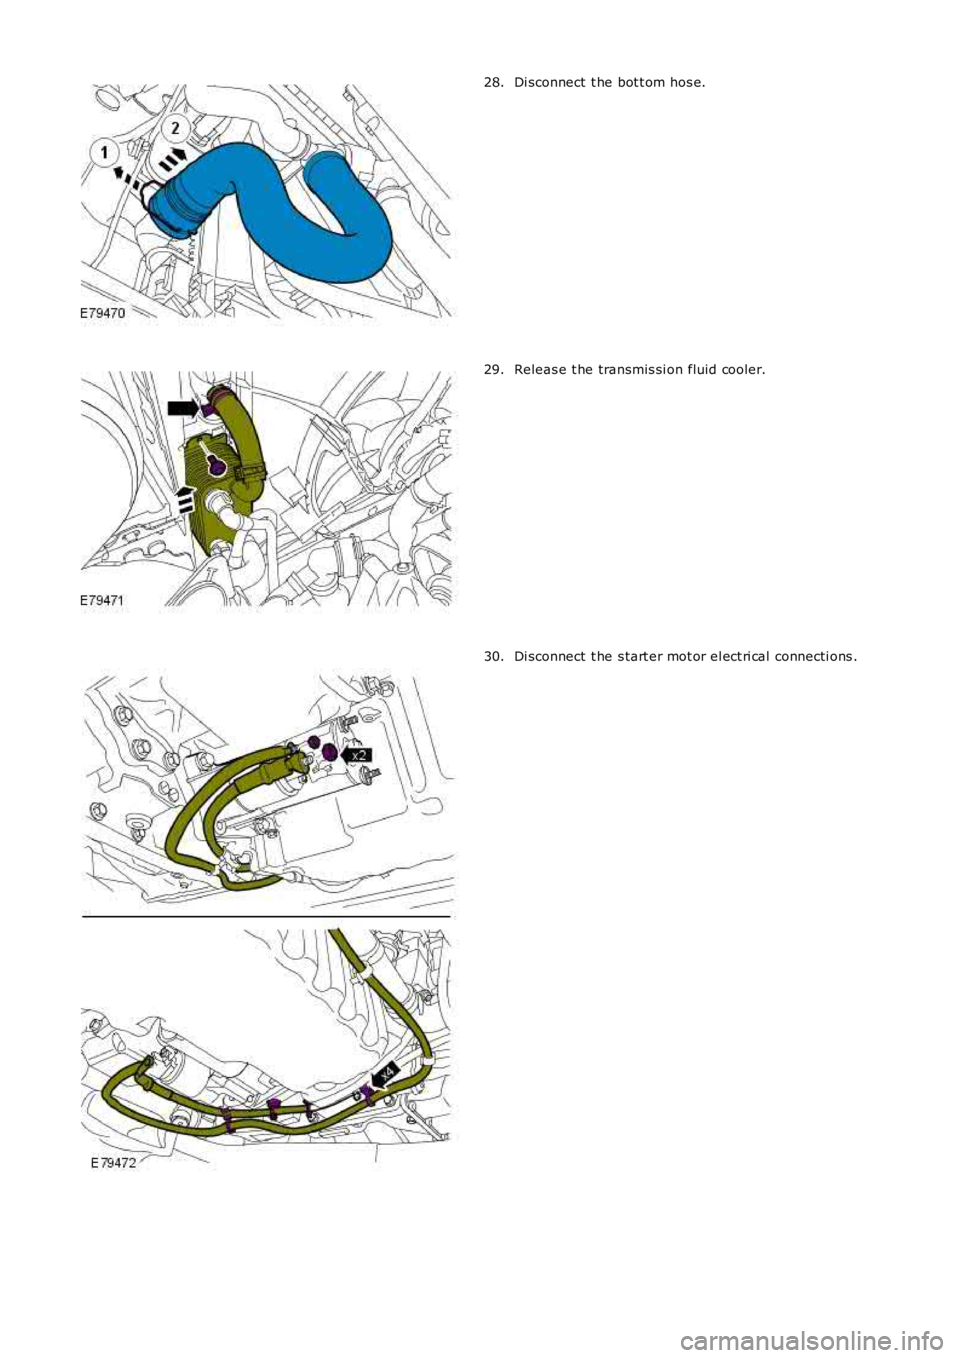
Di sconnect t he bot t om hos e.28.
Releas e t he transmis si on fluid cooler.29.
Di sconnect t he s tart er mot or el ect ri cal connecti ons .30.
Page 743 of 3229
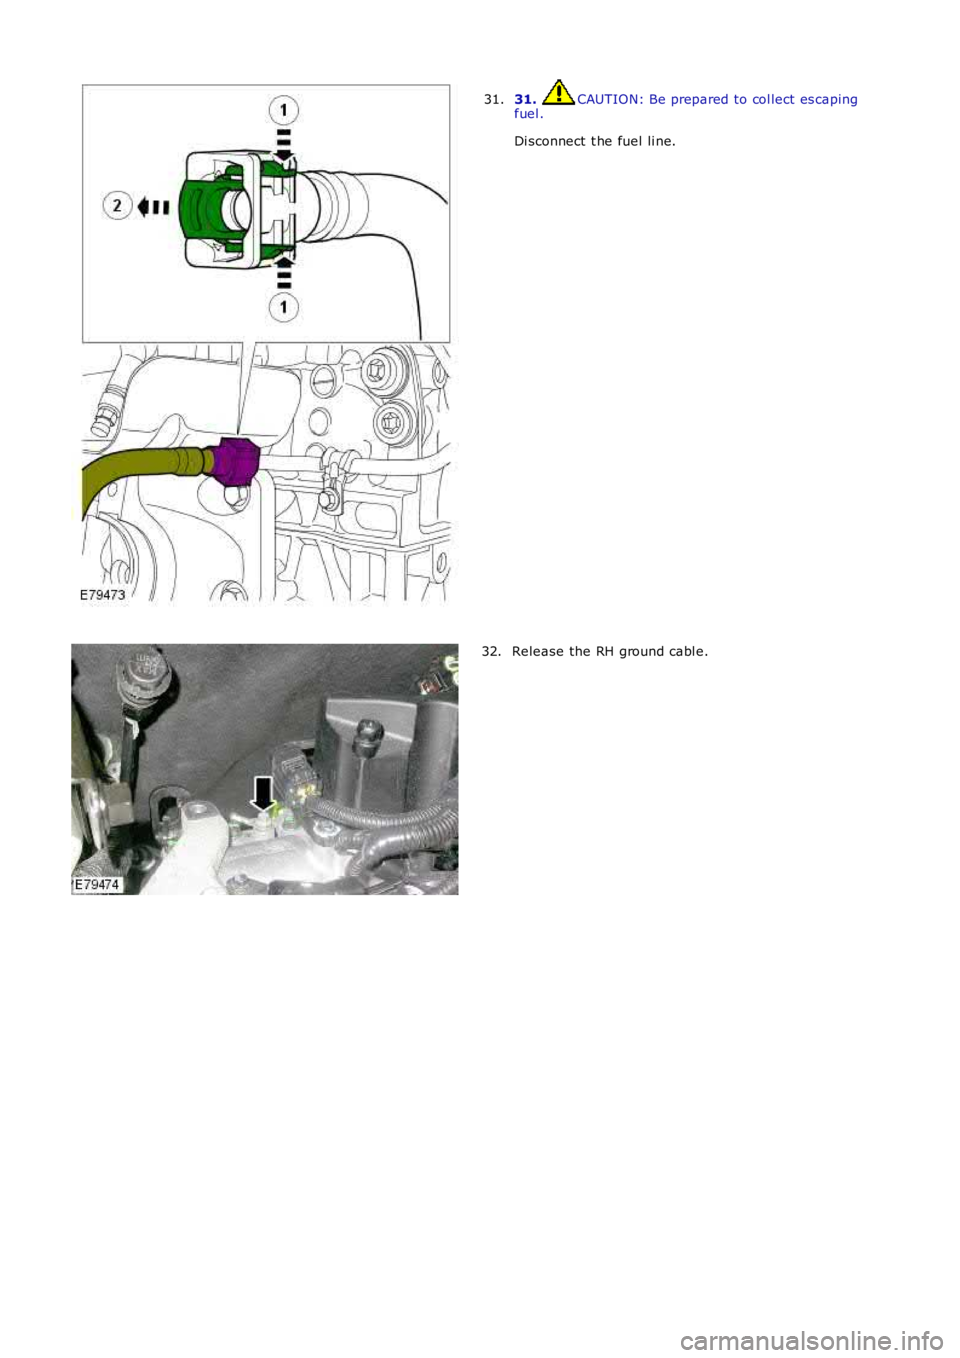
31. CAUTION: Be prepared to col lect es capingfuel .
Di sconnect t he fuel li ne.
31.
Release the RH ground cabl e.32.
Page 744 of 3229
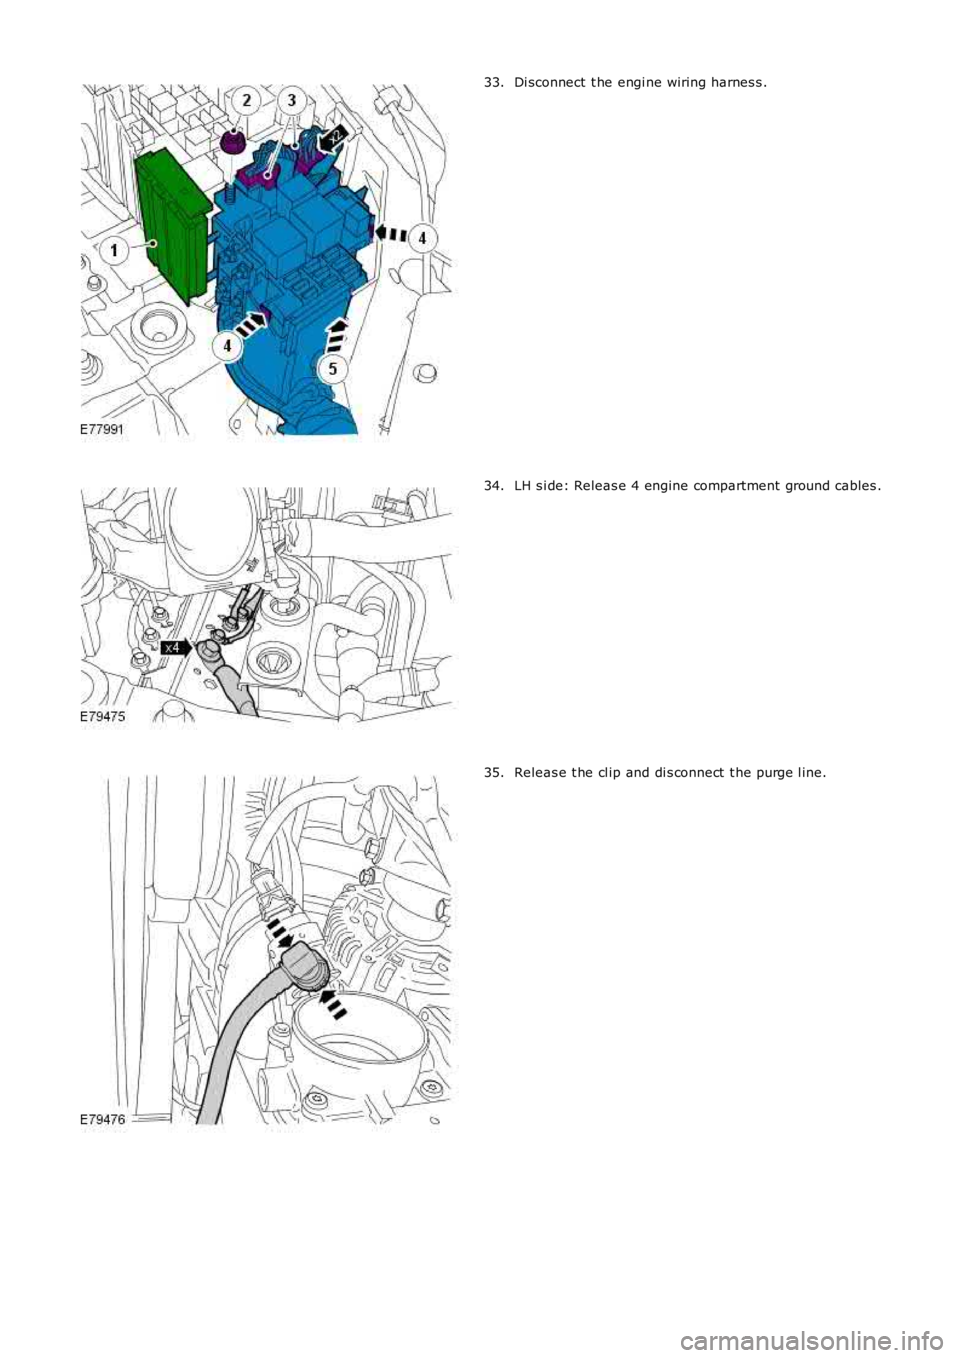
Di sconnect t he engi ne wiring harnes s .33.
LH s i de: Releas e 4 engine compartment ground cables .34.
Releas e t he cl ip and di s connect t he purge l ine.35.
Page 745 of 3229
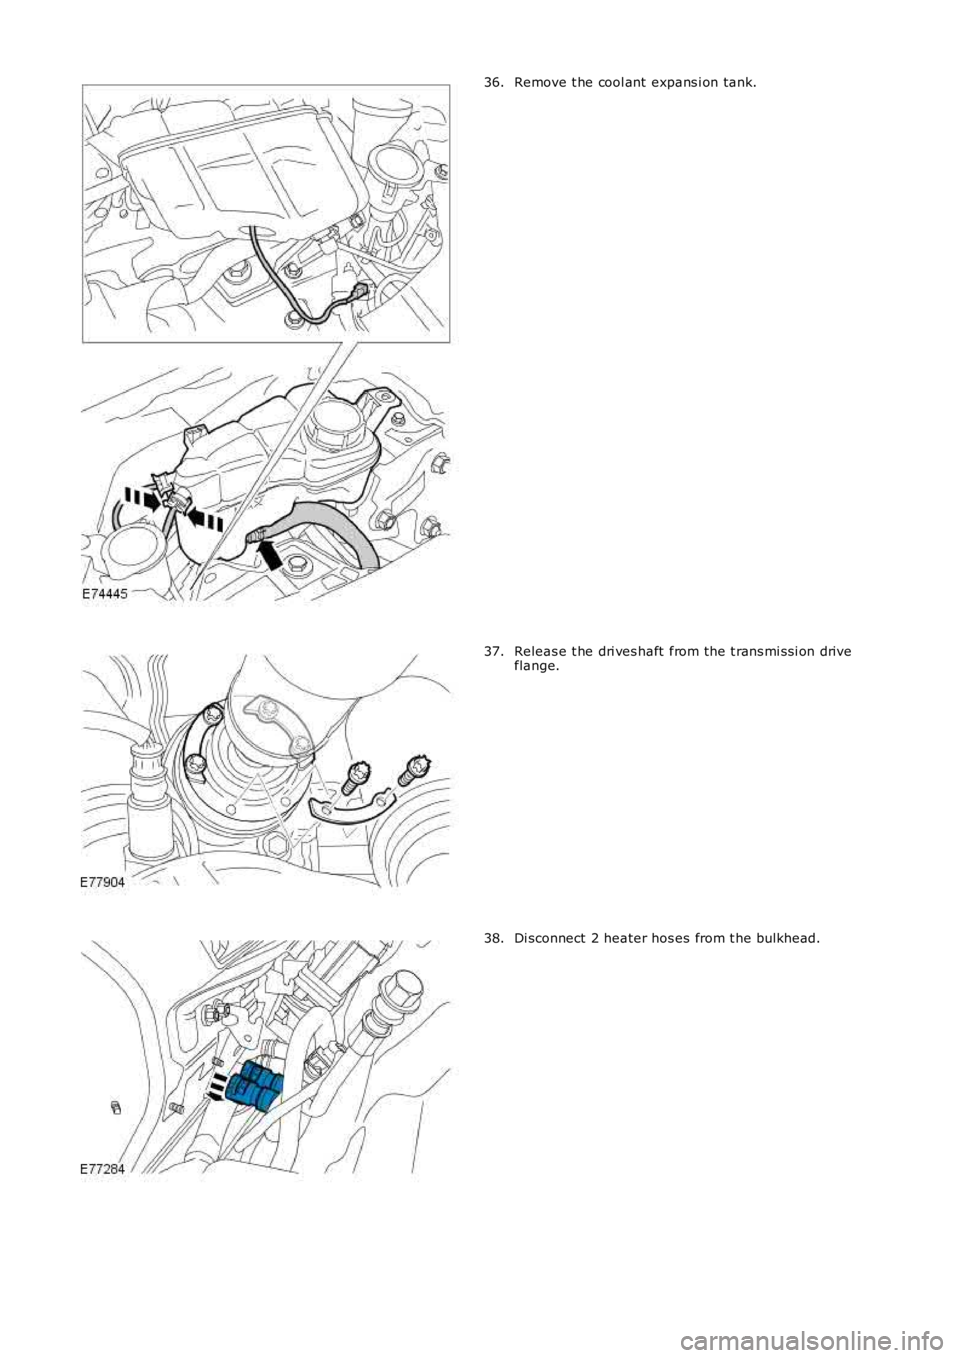
Remove t he cool ant expans i on tank.36.
Releas e t he dri ves haft from the t rans mi ss i on driveflange.37.
Di sconnect 2 heater hos es from t he bulkhead.38.
Page 746 of 3229
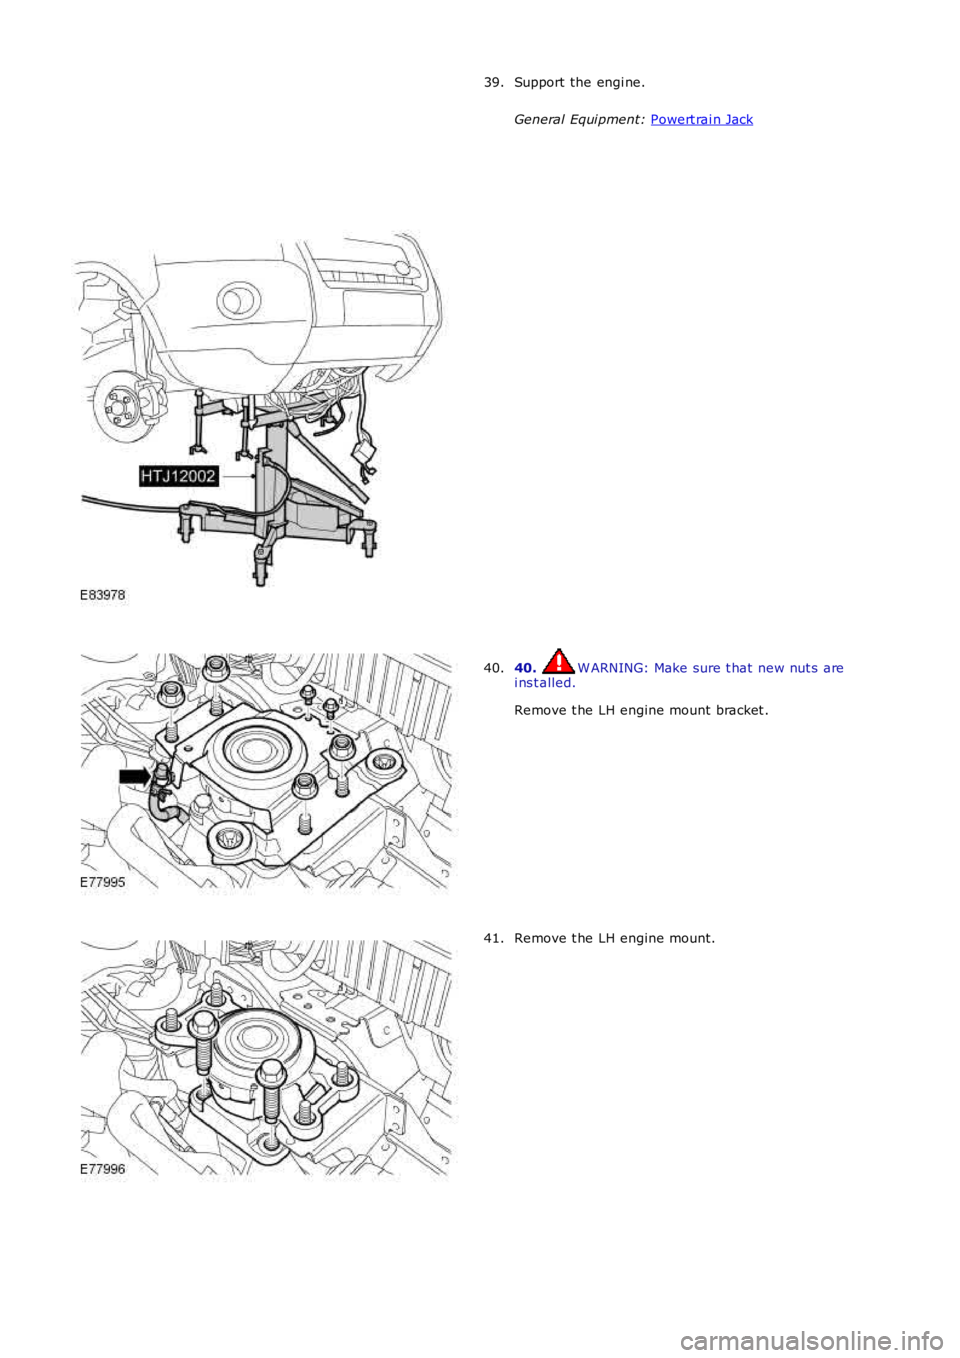
Support the engi ne.
General Equi pment: Powert rai n Jack
39.
40. W ARNING: Make sure t hat new nut s arei ns t alled.
Remove t he LH engine mount bracket .
40.
Remove t he LH engine mount.41.
Page 747 of 3229
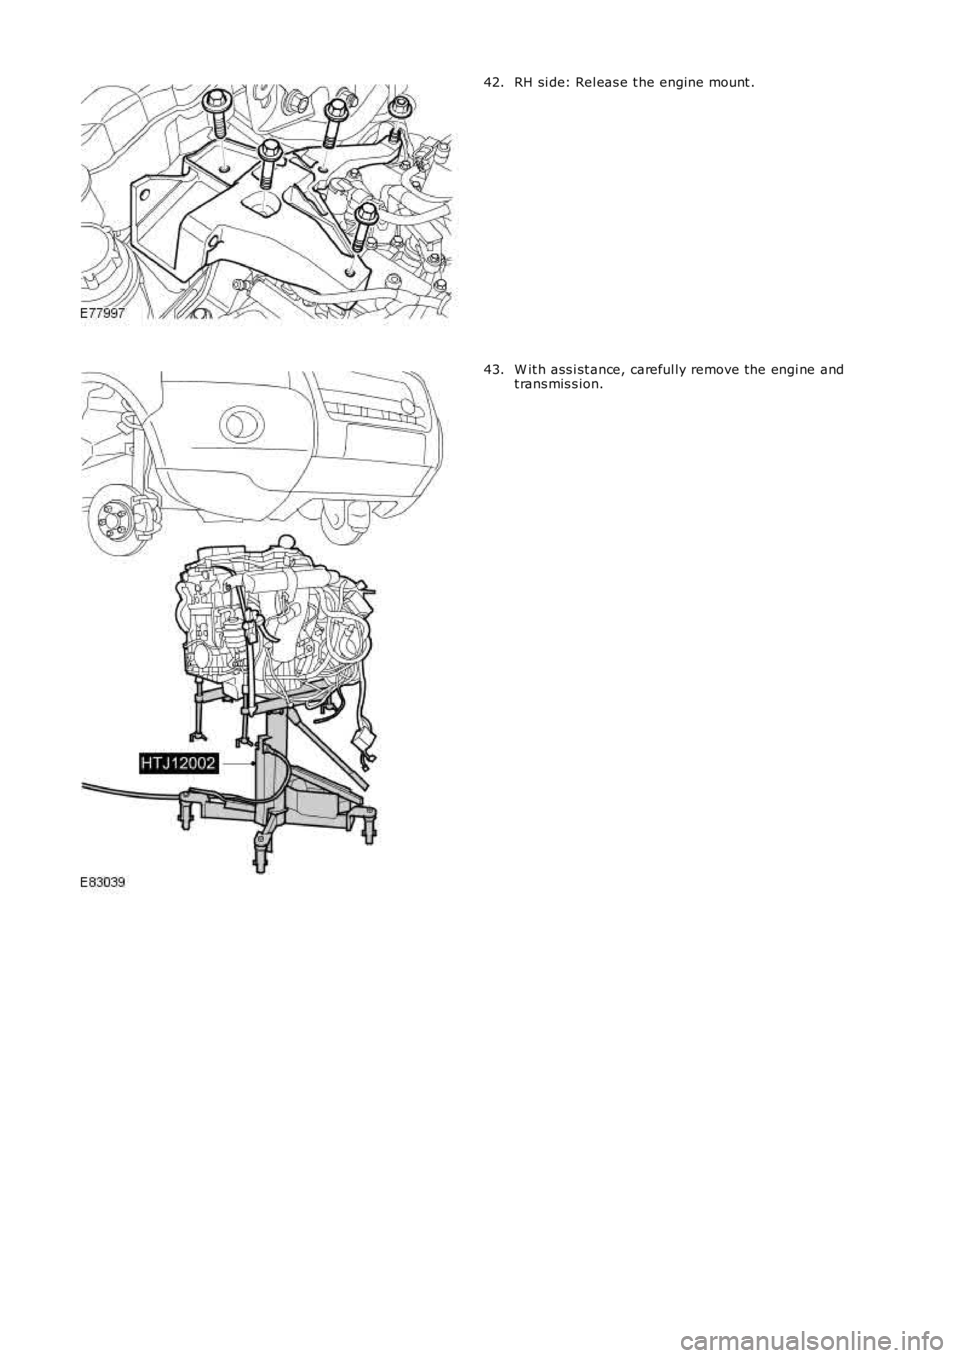
RH si de: Rel eas e t he engine mount .42.
W it h ass i st ance, careful ly remove the engi ne andt rans mis s ion.43.
Page 748 of 3229
Publi s hed: 11-May-2011
Engine - I6 3.2L Petrol - Engine
Installation
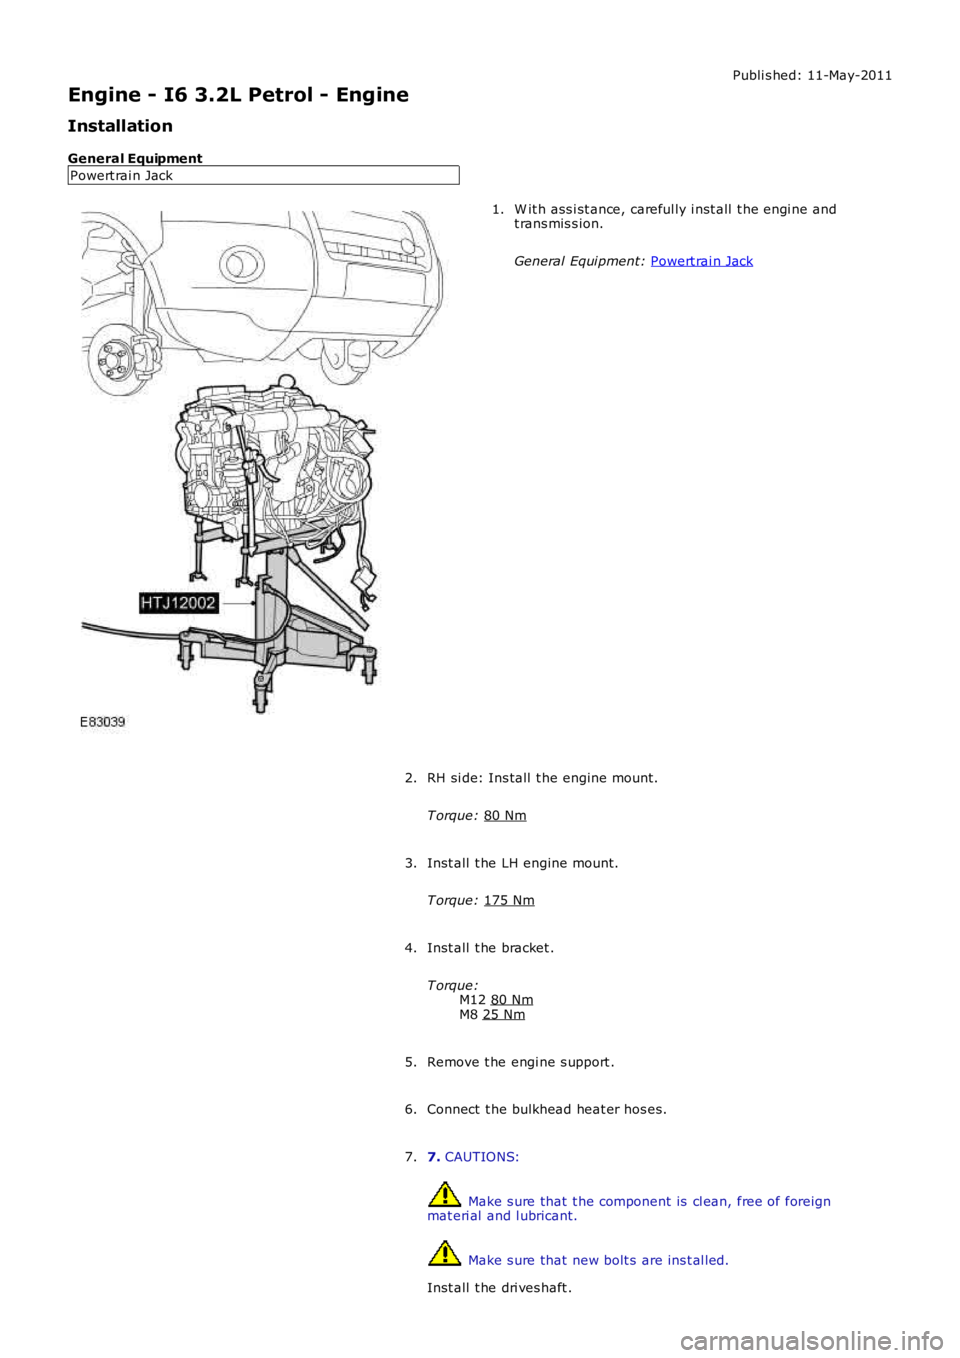
General Equipment Powert rai n Jack W it h ass i st ance, careful ly i nst all t he engi ne and
t rans mis s ion.
General Equi pment: Powert rai n Jack 1.
RH si de: Ins tall t he engine mount .
T orque: 80 Nm 2.
Inst all t he LH engine mount.
T orque: 175 Nm 3.
Inst all t he bracket .
T orque: M12 80 Nm M8
25 Nm 4.
Remove t he engi ne s upport .
5.
Connect t he bulkhead heat er hos es.
6.
7. CAUTIONS: Make s ure that t he component is cl ean, free of foreign
mat eri al and l ubricant. Make s ure that new bolt s are ins t al led.
Inst all t he dri ves haft .
7.
Page 749 of 3229
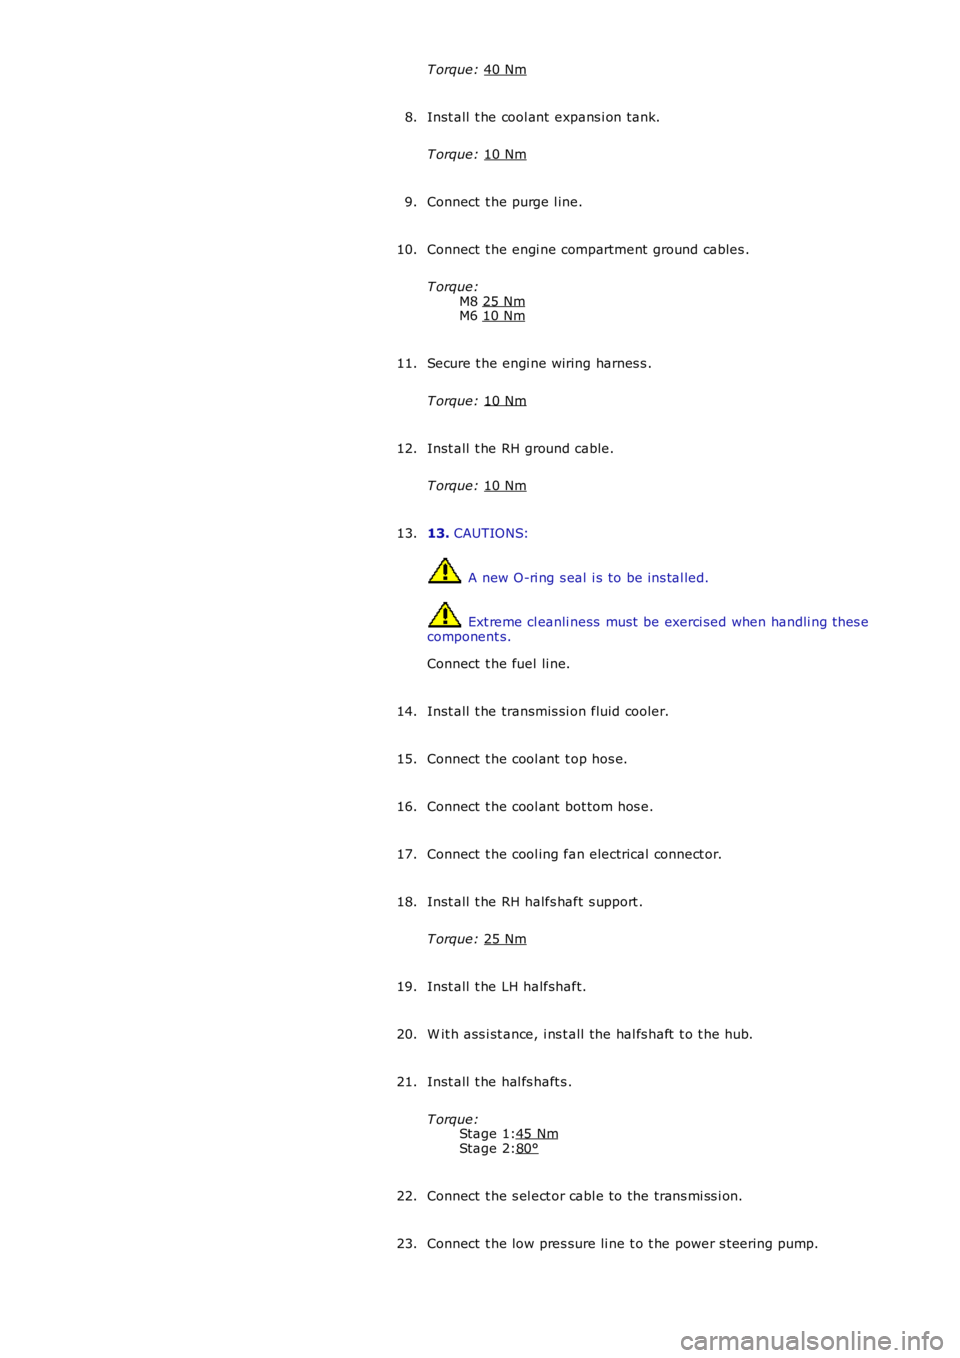
Stage 1:
Stage 2:
T orque:
40 Nm Inst all t he cool ant expans i on tank.
T orque: 10 Nm 8.
Connect t he purge l ine.
9.
Connect t he engi ne compartment ground cables .
T orque: M8 25 Nm M6
10 Nm 10.
Secure t he engi ne wiring harnes s .
T orque: 10 Nm 11.
Inst all t he RH ground cable.
T orque: 10 Nm 12.
13. CAUTIONS: A new O-ri ng s eal i s to be ins tal led.
Ext reme cl eanli ness must be exerci sed when handli ng t hes e
component s.
Connect t he fuel li ne.
13.
Inst all t he transmis si on fluid cooler.
14.
Connect t he cool ant t op hos e.
15.
Connect t he cool ant bot tom hos e.
16.
Connect t he cool ing fan electrical connect or.
17.
Inst all t he RH halfs haft s upport .
T orque: 25 Nm 18.
Inst all t he LH halfshaft.
19.
W it h ass i st ance, i ns t all the hal fs haft t o t he hub.
20.
Inst all t he hal fs haft s .
T orque: 45 Nm 80°21.
Connect t he s el ect or cabl e to the trans mi ss i on.
22.
Connect t he low pres sure li ne t o t he power s t eering pump.
23.
Page 750 of 3229
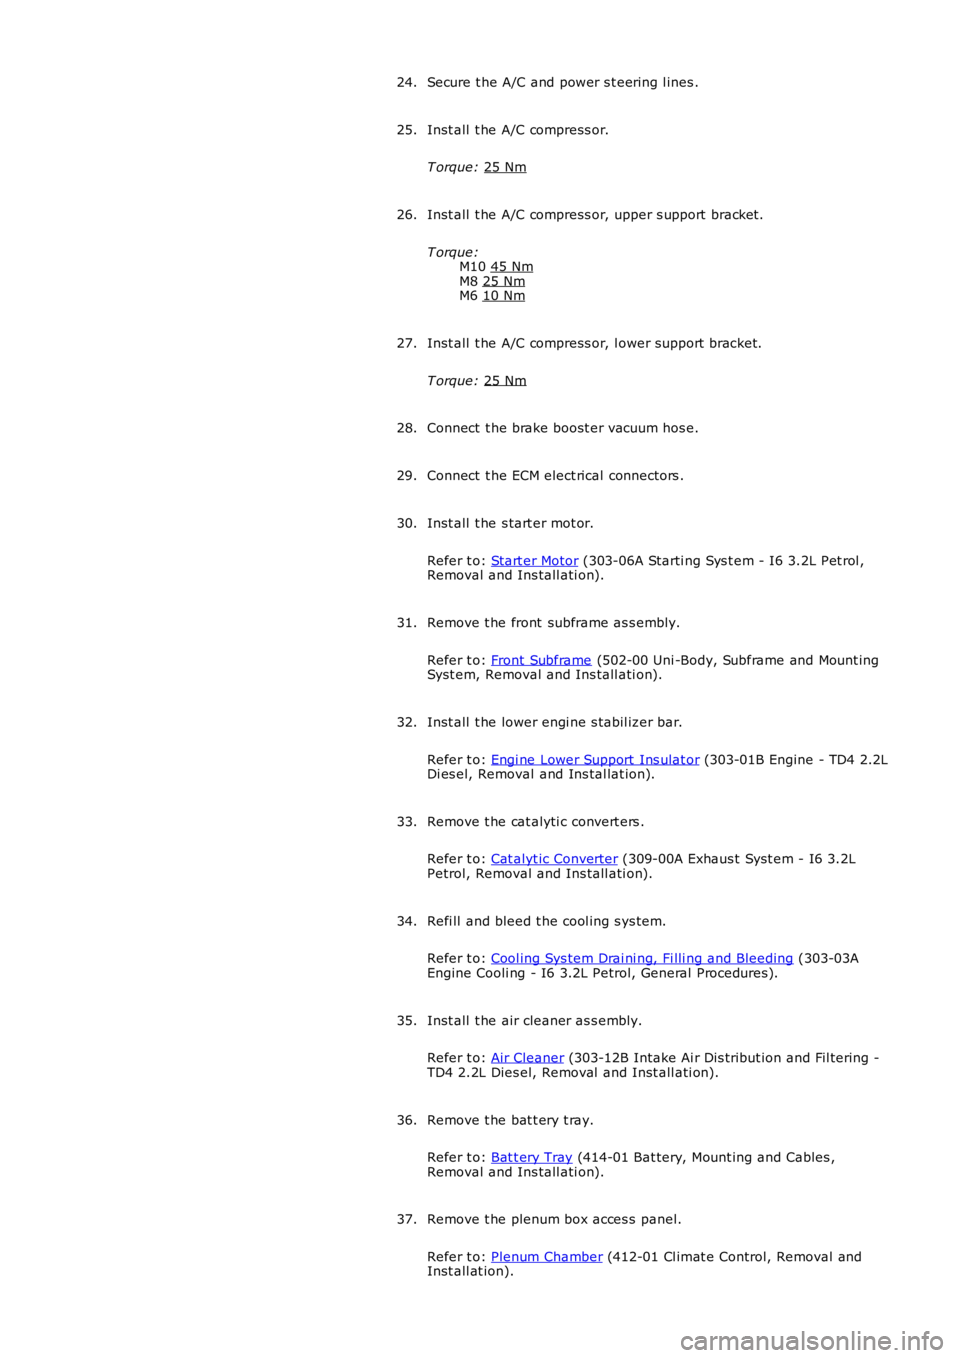
Secure t he A/C and power s t eering l ines .
24.
Inst all t he A/C compress or.
T orque: 25 Nm 25.
Inst all t he A/C compress or, upper s upport bracket.
T orque: M10 45 Nm M8
25 Nm M6
10 Nm 26.
Inst all t he A/C compress or, l ower support bracket.
T orque: 25 Nm 27.
Connect t he brake boost er vacuum hos e.
28.
Connect t he ECM elect rical connectors .
29.
Inst all t he s tart er mot or.
Refer t o: Start er Motor (303-06A Starti ng Sys t em - I6 3.2L Pet rol ,
Removal and Ins tall ati on).
30.
Remove t he front subframe as s embly.
Refer t o: Front Subframe (502-00 Uni -Body, Subframe and Mount ing
Syst em, Removal and Ins tall ati on).
31.
Inst all t he lower engi ne s tabil izer bar.
Refer t o: Engi ne Lower Support Ins ulat or (303-01B Engine - TD4 2.2L
Di es el, Removal and Ins tal lat ion).
32.
Remove t he cat alyti c convert ers .
Refer t o: Cat alyt ic Converter (309-00A Exhaus t Syst em - I6 3.2L
Petrol, Removal and Ins tall ati on).
33.
Refi ll and bleed t he cool ing s ys tem.
Refer t o: Cool ing Sys tem Drai ni ng, Fi lli ng and Bleeding (303-03A
Engine Cooli ng - I6 3.2L Petrol, General Procedures).
34.
Inst all t he air cleaner as s embly.
Refer t o: Air Cleaner (303-12B Intake Ai r Dis tribut ion and Fil tering -
TD4 2.2L Dies el, Removal and Inst all ati on).
35.
Remove t he bat t ery t ray.
Refer t o: Bat t ery Tray (414-01 Bat tery, Mount ing and Cables ,
Removal and Ins tall ati on).
36.
Remove t he plenum box acces s panel.
Refer t o: Plenum Chamber (412-01 Cl imat e Control, Removal and
Inst all at ion).
37.
Trending: heating, battery capacity, oil temperature, tow, flat tire, interior lights, suspension
