LEXUS LS430 2003 Factory Repair Manual
Manufacturer: LEXUS, Model Year: 2003,
Model line: LS430,
Model: LEXUS LS430 2003
Pages: 4500, PDF Size: 87.45 MB
LEXUS LS430 2003 Factory Repair Manual
LS430 2003
LEXUS
LEXUS
https://www.carmanualsonline.info/img/36/57050/w960_57050-0.png
LEXUS LS430 2003 Factory Repair Manual
Trending: roof rack, automatic transmission, heating, inter lock cable, parking brake, instrument panel, boot
Page 1891 of 4500
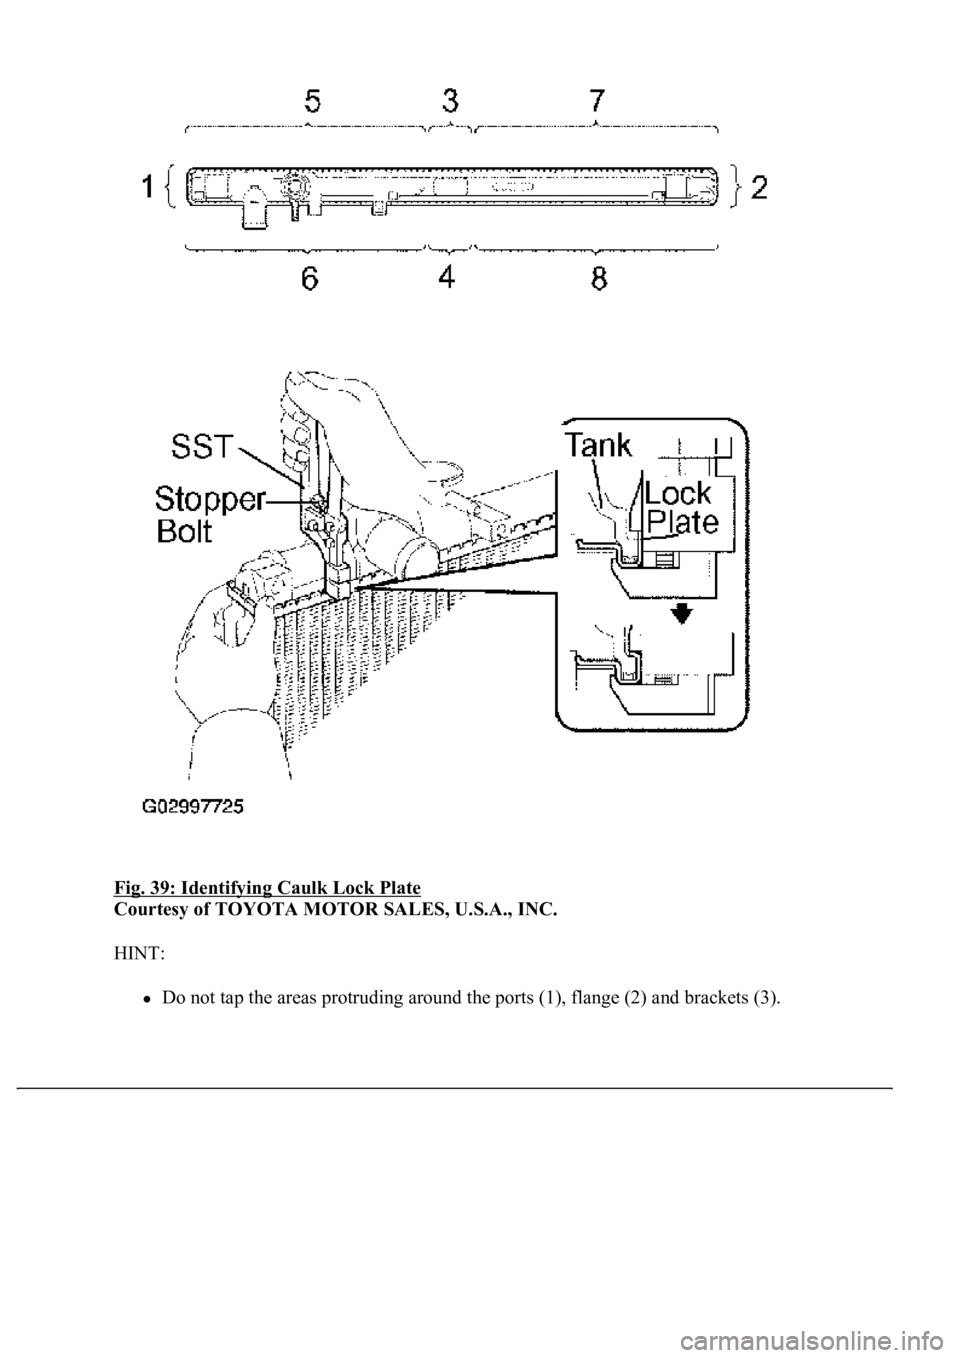
Fig. 39: Identifying Caulk Lock Plate
Courtesy of TOYOTA MOTOR SALES, U.S.A., INC.
HINT:
Do not tap the areas protruding around the ports (1), flange (2) and brackets (3).
Page 1892 of 4500
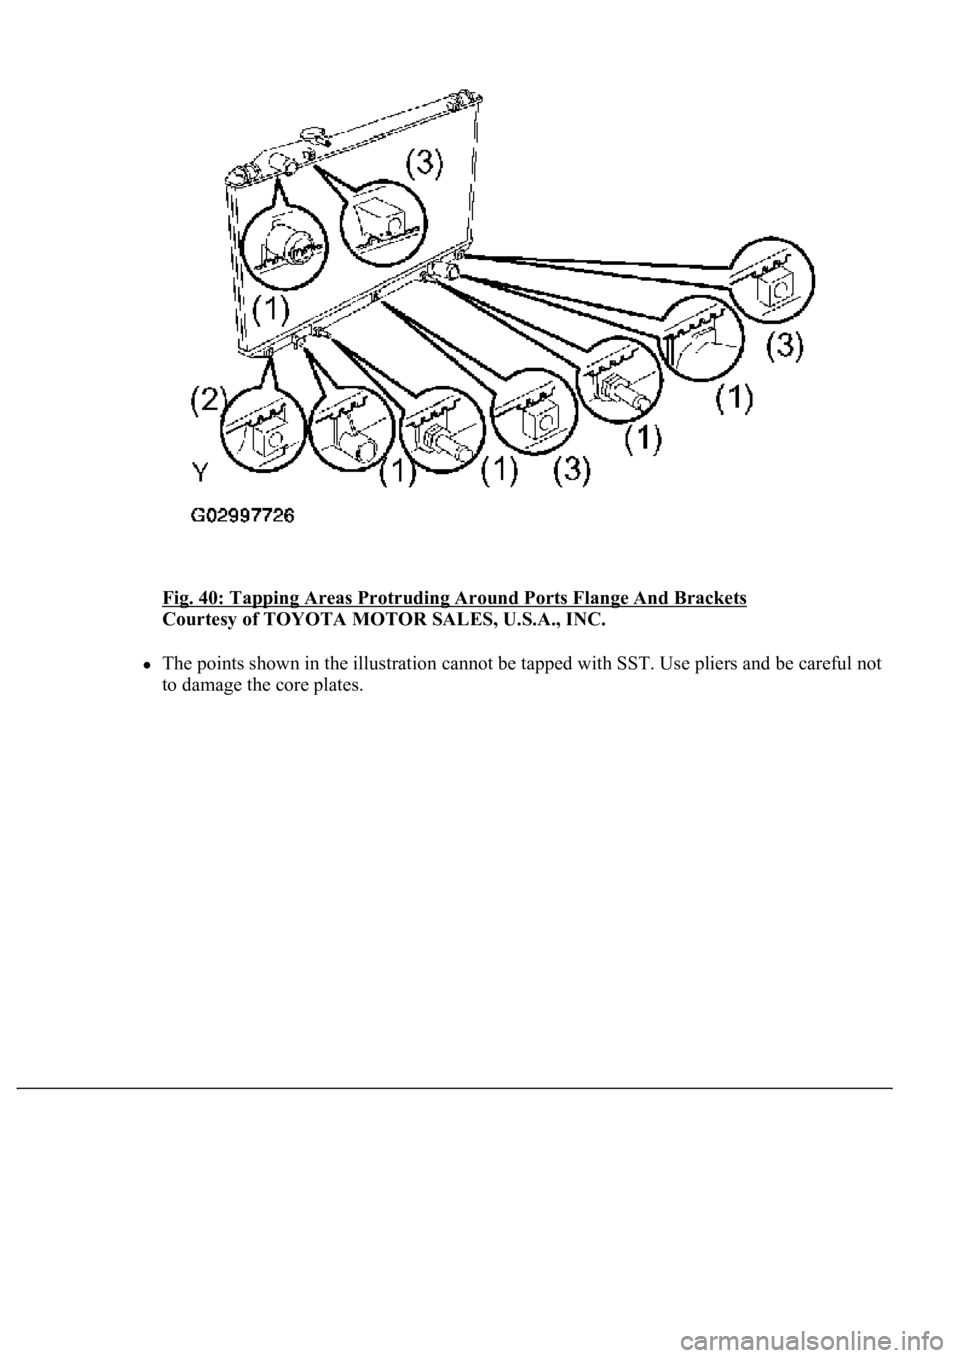
Fig. 40: Tapping Areas Protruding Around Ports Flange And Brackets
Courtesy of TOYOTA MOTOR SALES, U.S.A., INC.
The points shown in the illustration cannot be tapped with SST. Use pliers and be careful not
to damage the core plates.
Page 1893 of 4500
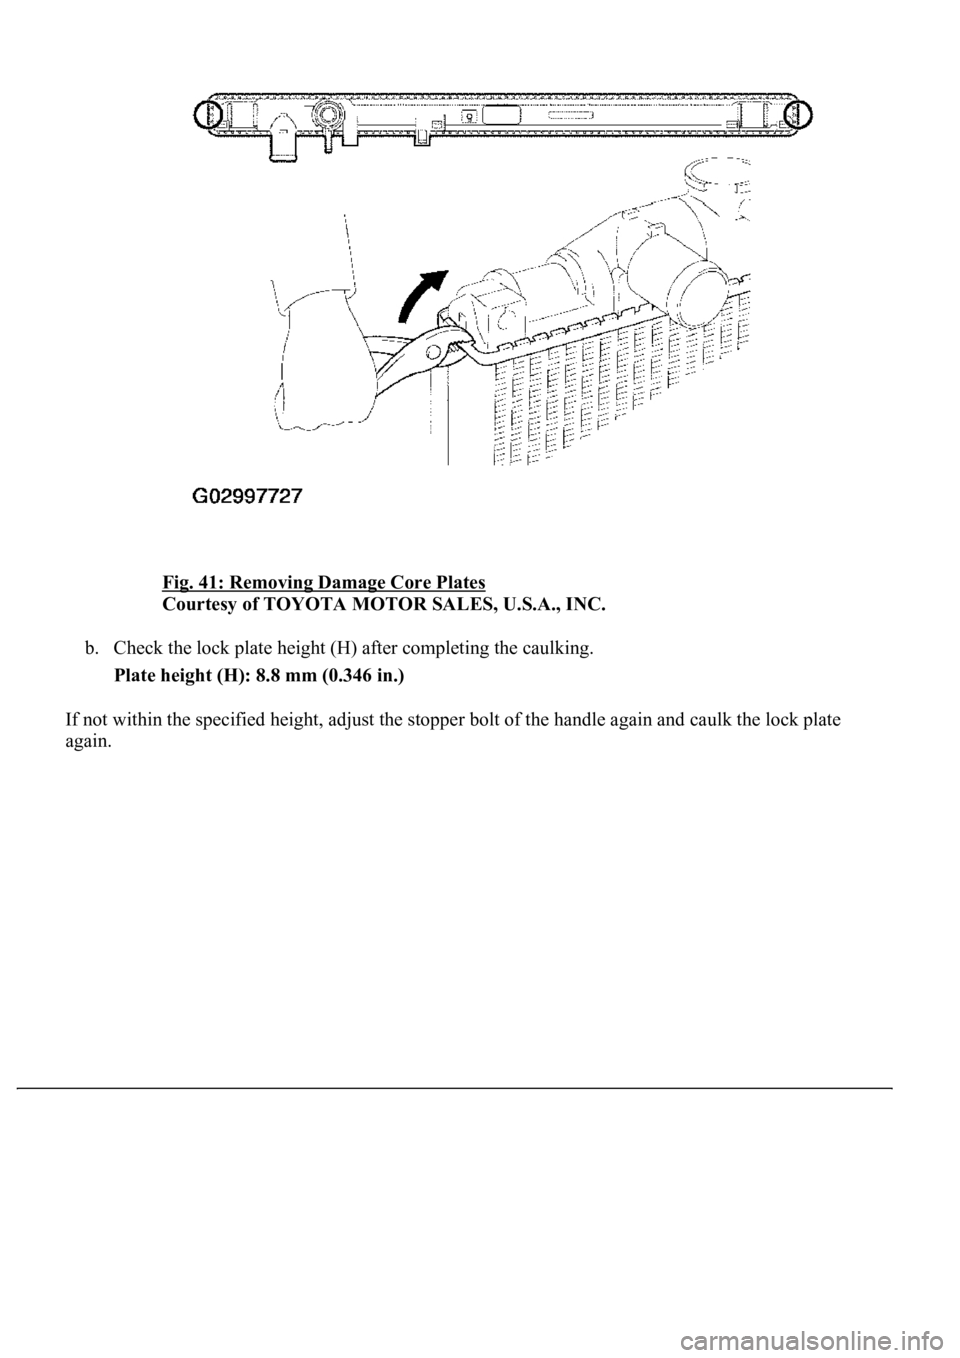
Fig. 41: Removing Damage Core Plates
Courtesy of TOYOTA MOTOR SALES, U.S.A., INC.
b. Check the lock plate height (H) after completing the caulking.
Plate height (H): 8.8 mm (0.346 in.)
If not within the specified height, adjust the stopper bolt of the handle again and caulk the lock plate
a
gain.
Page 1894 of 4500
Fig. 42: Checking Lock Plate Height (H) After Completing Caulking
Courtesy of TOYOTA MOTOR SALES, U.S.A., INC.
13.INSTALL DRAIN PLUG
a. Install a new O-ring to the drain plug.
b. Install the drain plug.
14.INSPECT FOR WATER LEAKS
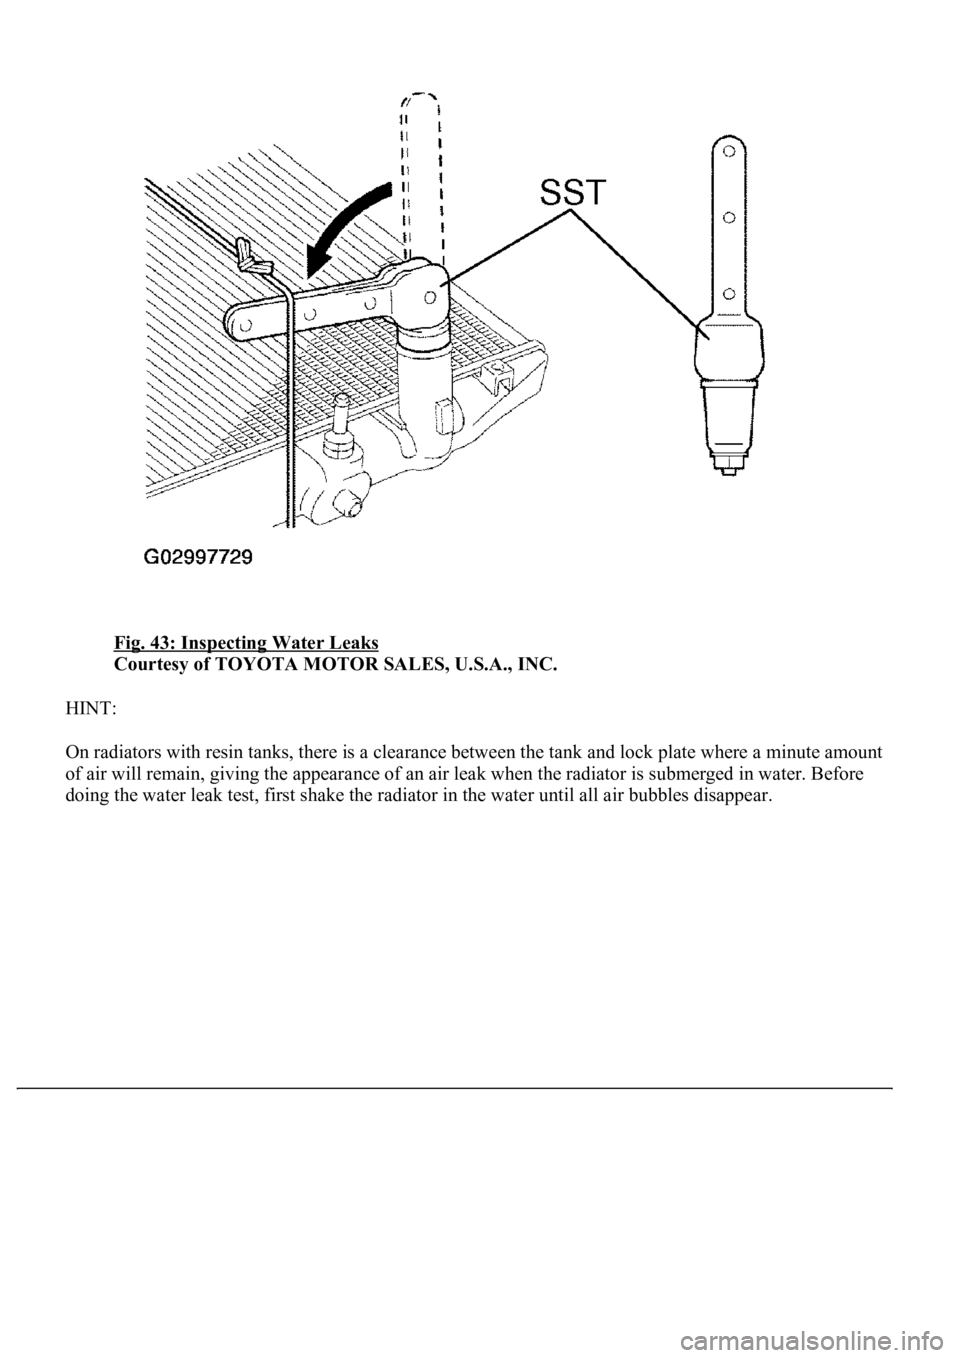
a. Plug the inlet and outlet pipes of the radiator with SST.
SST 09230-01010
b. Using a radiator cap tester, apply pressure to the radiator.
Test pressure: 177 kPa (1.8 kgf/cm
2 , 26 psi)
c. Submerge the radiator in water.
d. Inspect for leaks.
Page 1895 of 4500
Fig. 43: Inspecting Water Leaks
Courtesy of TOYOTA MOTOR SALES, U.S.A., INC.
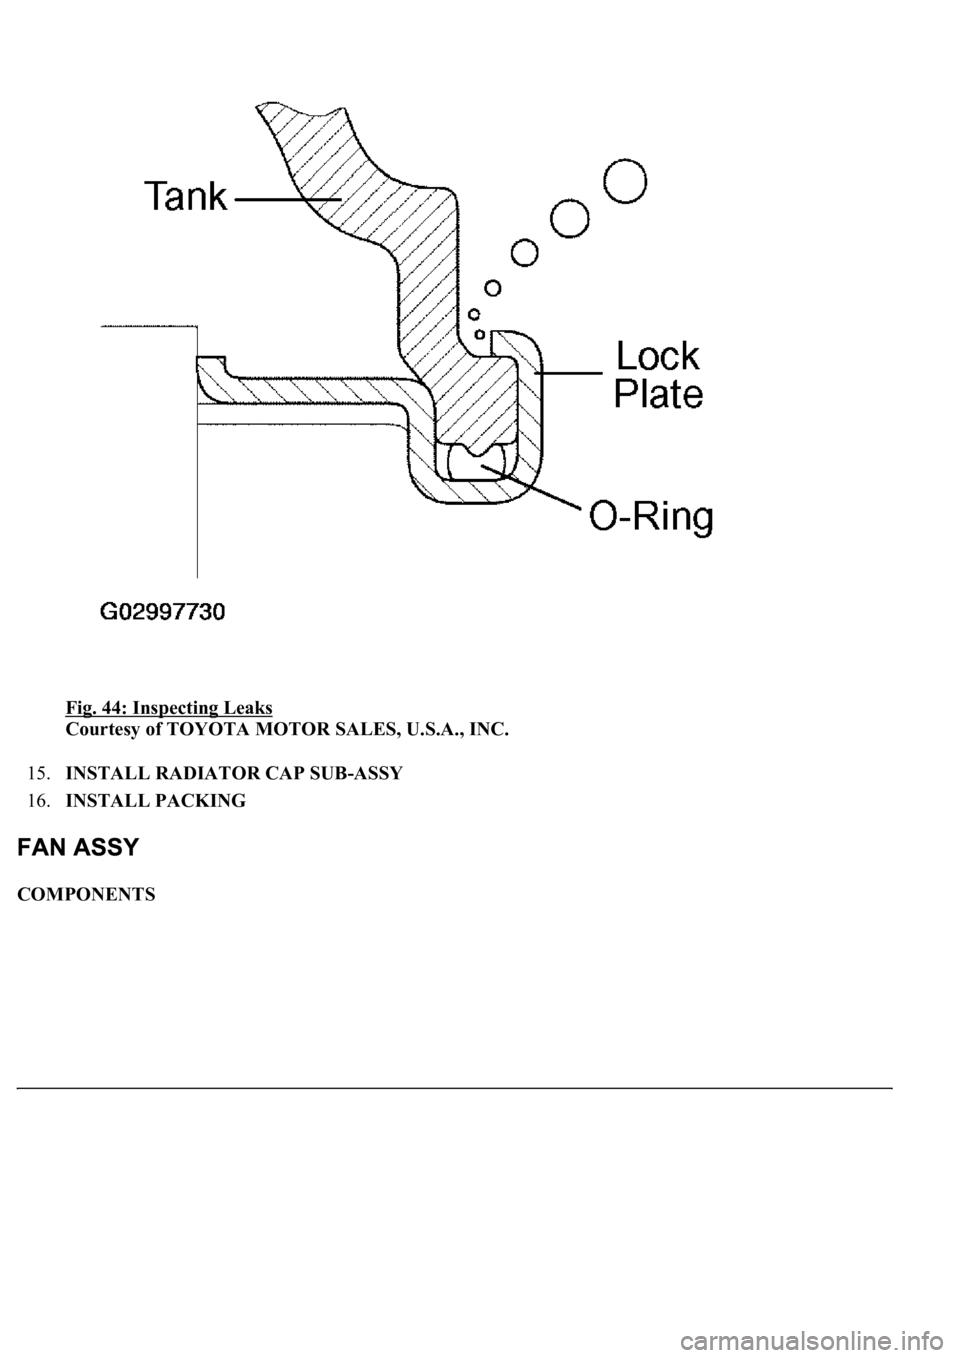
HINT:
On radiators with resin tanks, there is a clearance between the tank and lock plate where a minute amount
of air will remain, giving the appearance of an air leak when the radiator is submerged in water. Before
doin
g the water leak test, first shake the radiator in the water until all air bubbles disappear.
Page 1896 of 4500
Fig. 44: Inspecting Leaks
Courtesy of TOYOTA MOTOR SALES, U.S.A., INC.
15.INSTALL RADIATOR CAP SUB-ASSY
16.INSTALL PACKING
COMPONENTS
Page 1897 of 4500
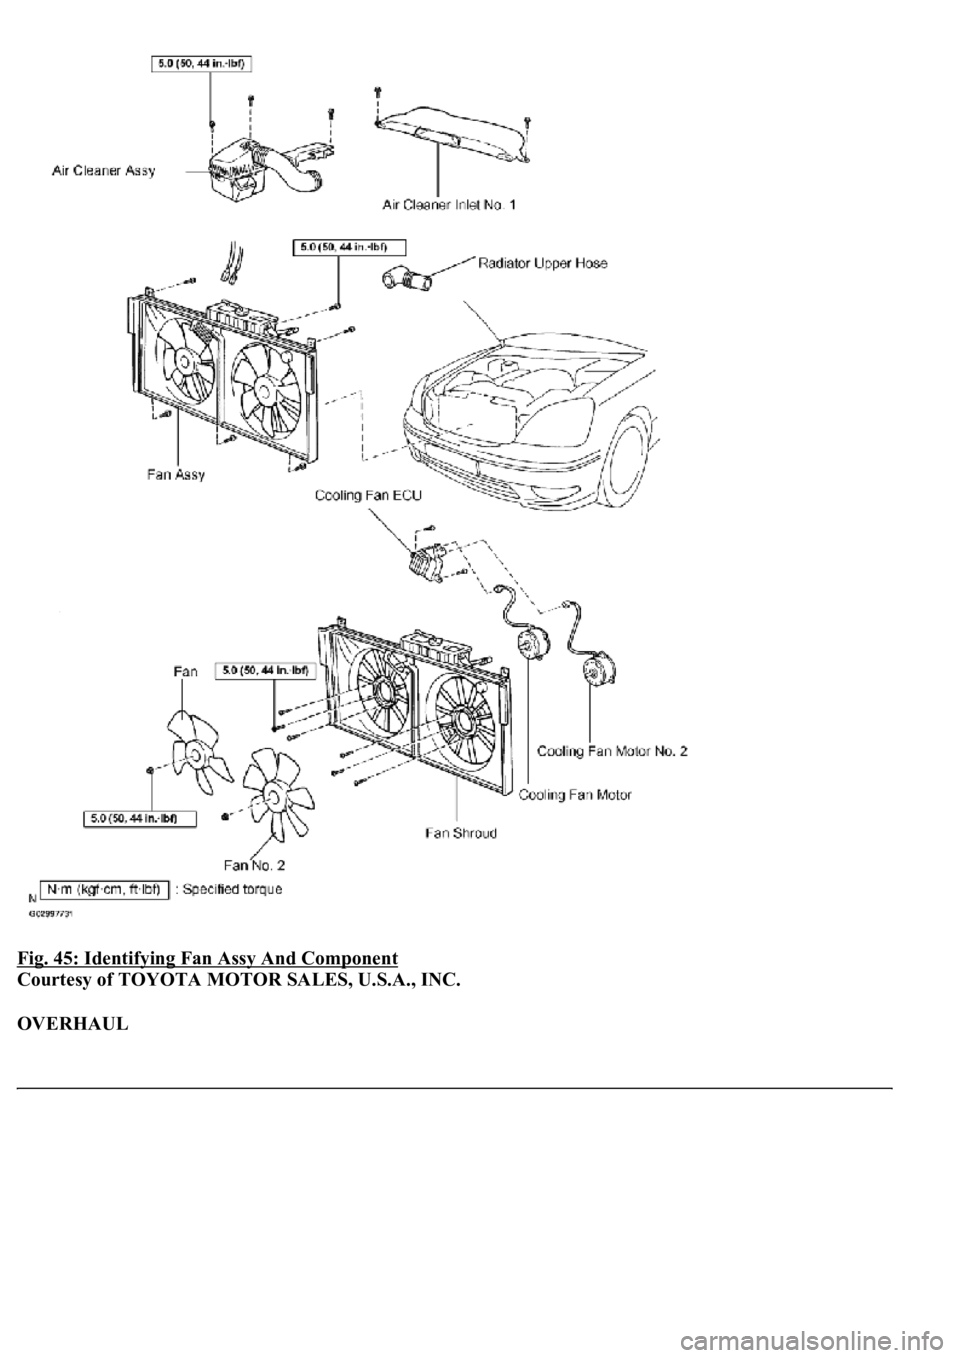
Fig. 45: Identifying Fan Assy And Component
Courtesy of TOYOTA MOTOR SALES, U.S.A., INC.
OVERHAUL
Page 1898 of 4500
HINT:
The installation procedures are the removal procedures in reverse order. However, only installation procedures
requiring additional information are included.
1.DRAIN ENGINE COOLANT FROM RADIATOR (See REPLACEMENT
)
2.REMOVE AIR CLEANER INLET NO.1
3.REMOVE AIR CLEANER ASSY (See REPLACEMENT
)
4.DISCONNECT RADIATOR HOSE NO.1
5.REMOVE FAN ASSY
a. Disconnect the connector.
b. Remove the 6 bolts and fan.
6.REMOVE COOLING FAN ECU
a. Disconnect the 2 connectors.
b. Remove the 2 screws and ECU.
7.REMOVE FAN
a. Remove the 2 nuts and 2 fans.
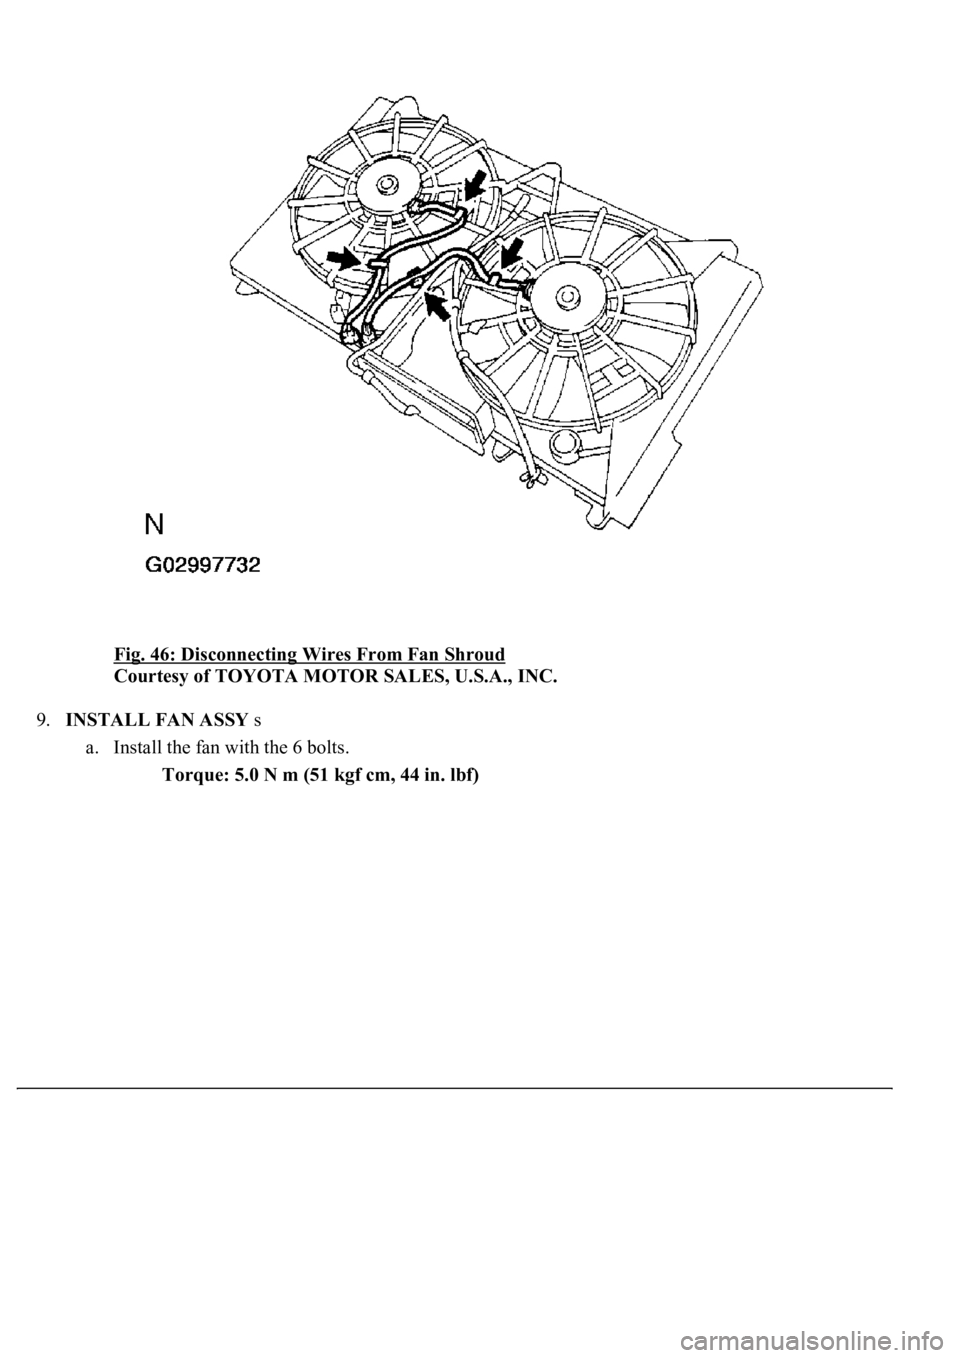
8.REMOVE COOLING FAN MOTOR
a. Disconnect the 2 wires from the fan shroud.
b. Remove the 6 screws and 2 cooling fan motors.
Page 1899 of 4500
Fig. 46: Disconnecting Wires From Fan Shroud
Courtesy of TOYOTA MOTOR SALES, U.S.A., INC.
9.INSTALL FAN ASSY s
a. Install the fan with the 6 bolts.
Torque: 5.0 N m (51 kgf cm, 44 in. lbf)
Page 1900 of 4500

SYSTEM NAME AND PAGE REFERENCE
1.Pay attention to the following points when inspecting the cruise control system.
a. Push the cruise control main switch ON-OFF button off when not using the cruise control.
b. Be careful of vehicle speed increase when driving downhill with the cruise control on.
c. RESUME/ACCEL operation, after canceling the cruise control, works as RESUME, and works as
ACCEL while the cruise control system is in operation.
d. Push the cruise control main switch ON-OFF button off and reset the cruise control if the CRUISE
main indicator light blinks while the cruise control system is in operation. When the cruise control
cannot be set by this procedure or cancelled immediately after setting, there may be a malfunction
in the system.
e. Do not use the cruise control system where the road conditions are as follows:
Heavy traffic
Steep downhill
Sharp turns
Icy or snowy roads
Slippery roads
System NameSee Procedure
Front Power Seat Control SystemINITIALIZATION
Trending: wheel bolts, light, fuse chart, garage door opener, spare tire, Lock actuator, warning
