LEXUS LS430 2003 Factory Repair Manual
Manufacturer: LEXUS, Model Year: 2003,
Model line: LS430,
Model: LEXUS LS430 2003
Pages: 4500, PDF Size: 87.45 MB
LEXUS LS430 2003 Factory Repair Manual
LS430 2003
LEXUS
LEXUS
https://www.carmanualsonline.info/img/36/57050/w960_57050-0.png
LEXUS LS430 2003 Factory Repair Manual
Trending: Air Conditioning Compressor, alternator, key battery, Soft hard, lights, CD changer, CD player
Page 2921 of 4500
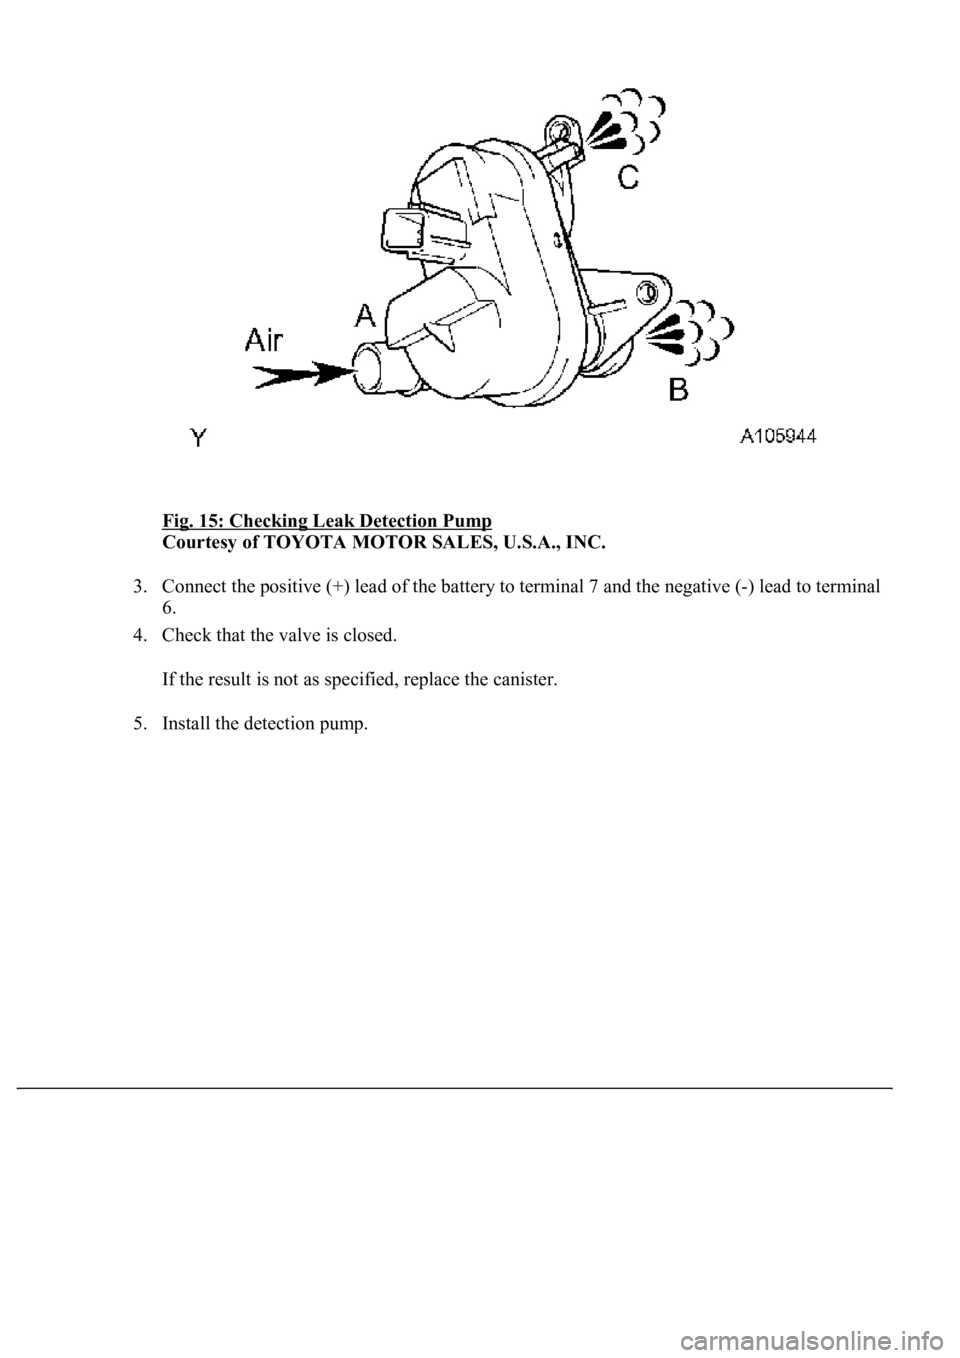
Fig. 15: Checking Leak Detection Pump
Courtesy of TOYOTA MOTOR SALES, U.S.A., INC.
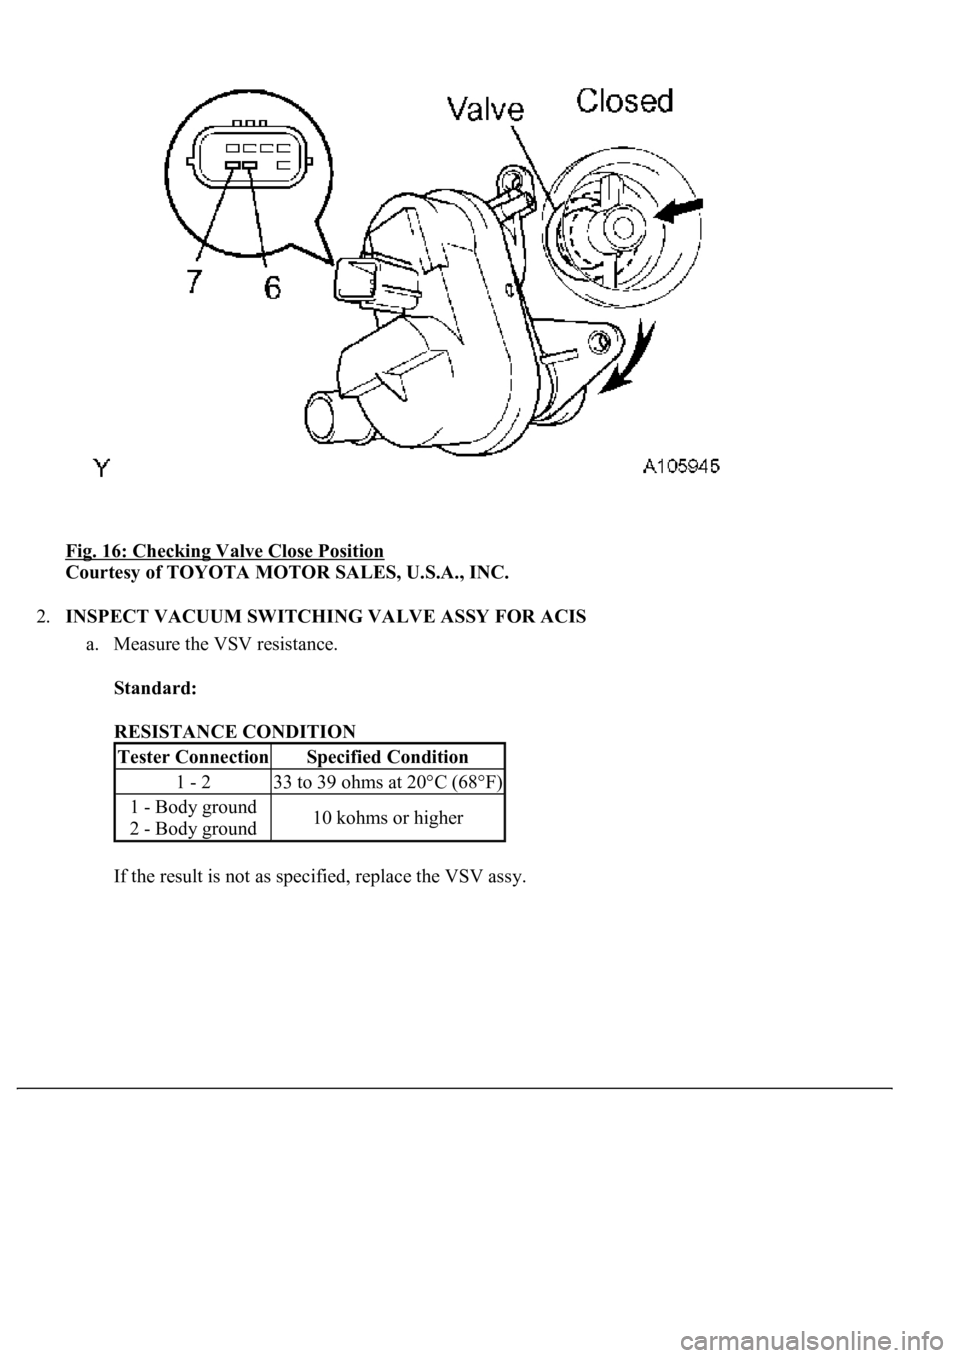
3. Connect the positive (+) lead of the battery to terminal 7 and the negative (-) lead to terminal
6.
4. Check that the valve is closed.
If the result is not as specified, replace the canister.
5. Install the detection pump.
Page 2922 of 4500
Fig. 16: Checking Valve Close Position
Courtesy of TOYOTA MOTOR SALES, U.S.A., INC.
2.INSPECT VACUUM SWITCHING VALVE ASSY FOR ACIS
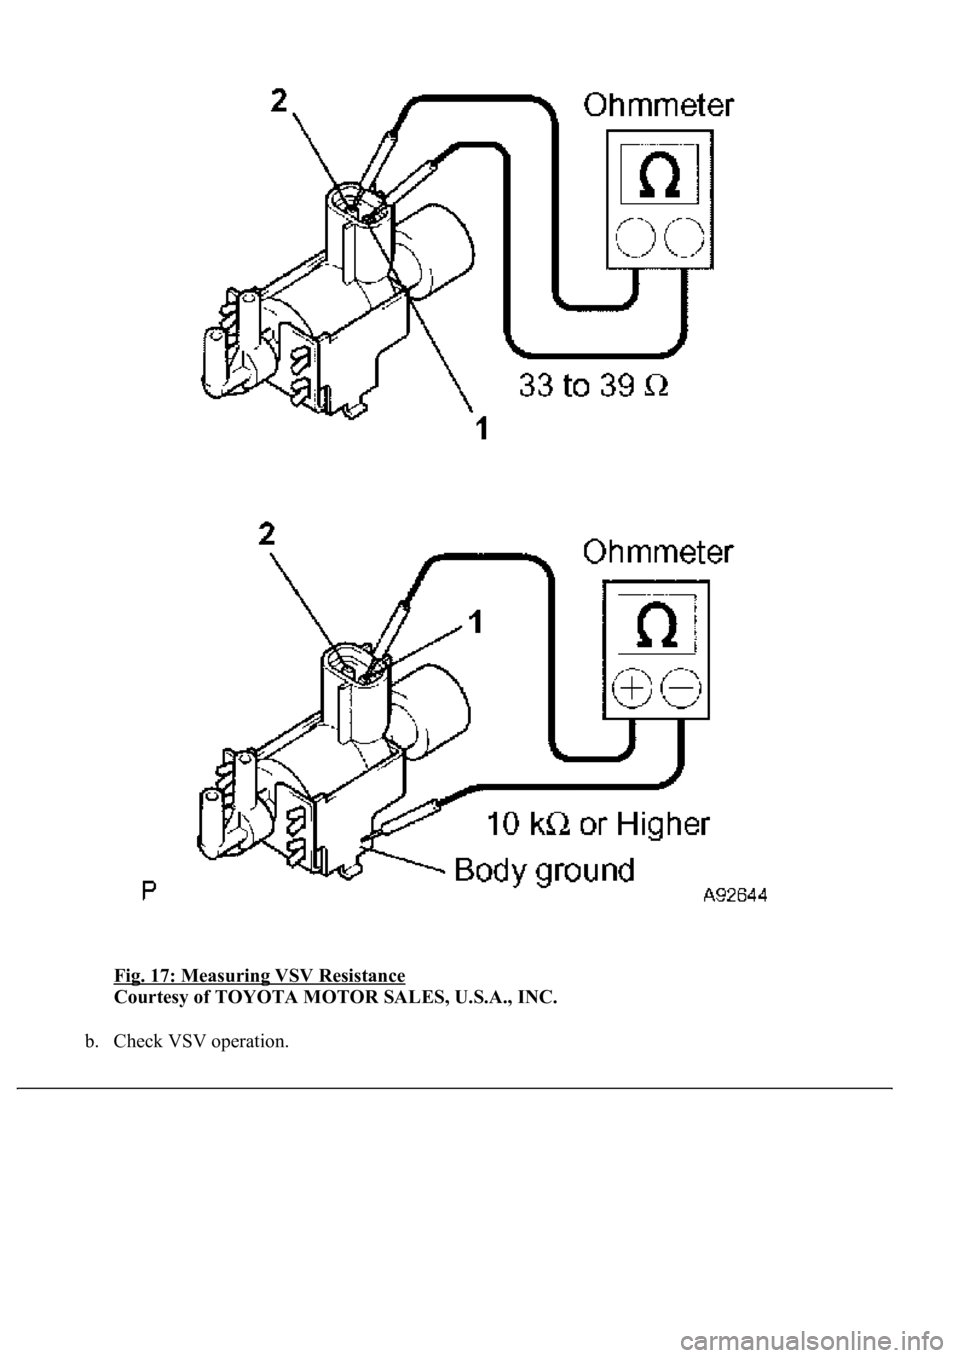
a. Measure the VSV resistance.
Standard:
RESISTANCE CONDITION
If the result is not as specified, replace the VSV ass
y.
Tester ConnectionSpecified Condition
1 - 233 to 39 ohms at 20°C (68°F)
1 - Body ground
2 - Body ground10 kohms or higher
Page 2923 of 4500
Fig. 17: Measuring VSV Resistance
Courtesy of TOYOTA MOTOR SALES, U.S.A., INC.
b. Check VSV operation.
Page 2924 of 4500
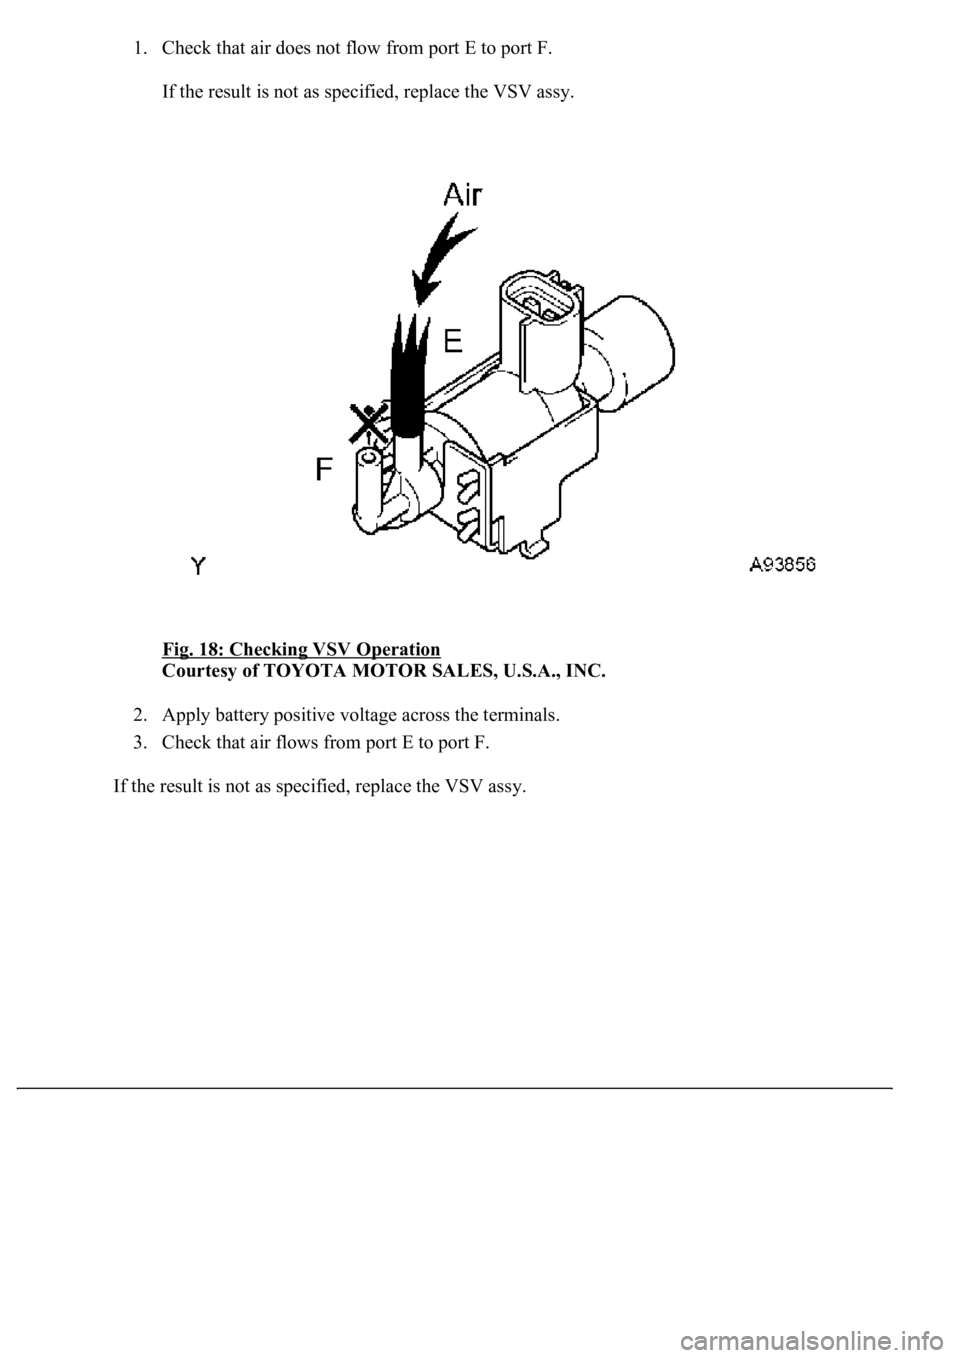
1. Check that air does not flow from port E to port F.
If the result is not as specified, replace the VSV assy.
Fig. 18: Checking VSV Operation
Courtesy of TOYOTA MOTOR SALES, U.S.A., INC.
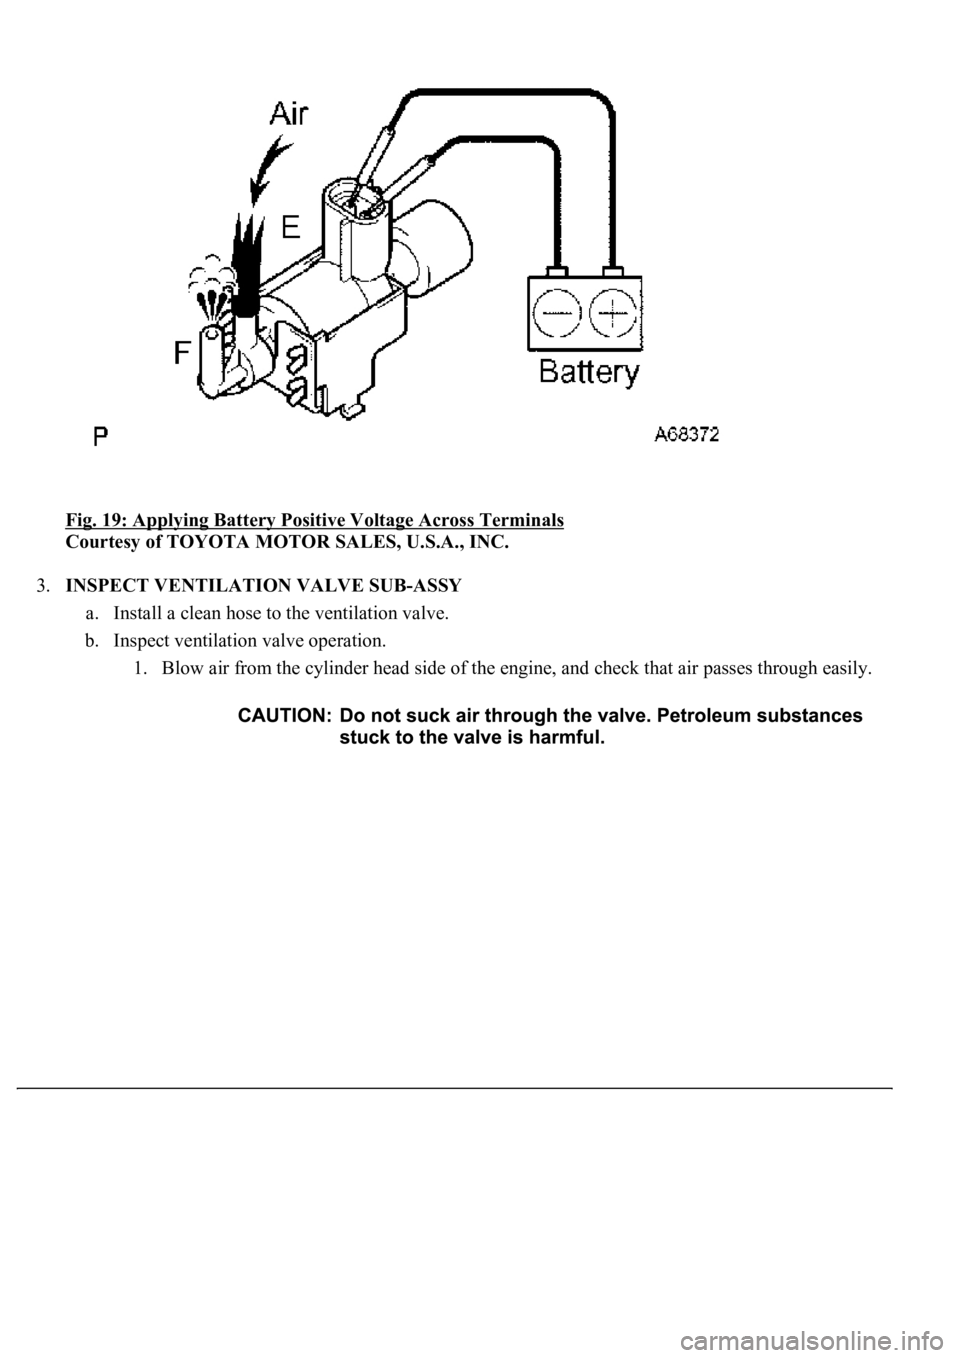
2. Apply battery positive voltage across the terminals.
3. Check that air flows from port E to port F.
If the result is not as specified, replace the VSV ass
y.
Page 2925 of 4500
Fig. 19: Applying Battery Positive Voltage Across Terminals
Courtesy of TOYOTA MOTOR SALES, U.S.A., INC.
3.INSPECT VENTILATION VALVE SUB-ASSY
a. Install a clean hose to the ventilation valve.
b. Inspect ventilation valve operation.
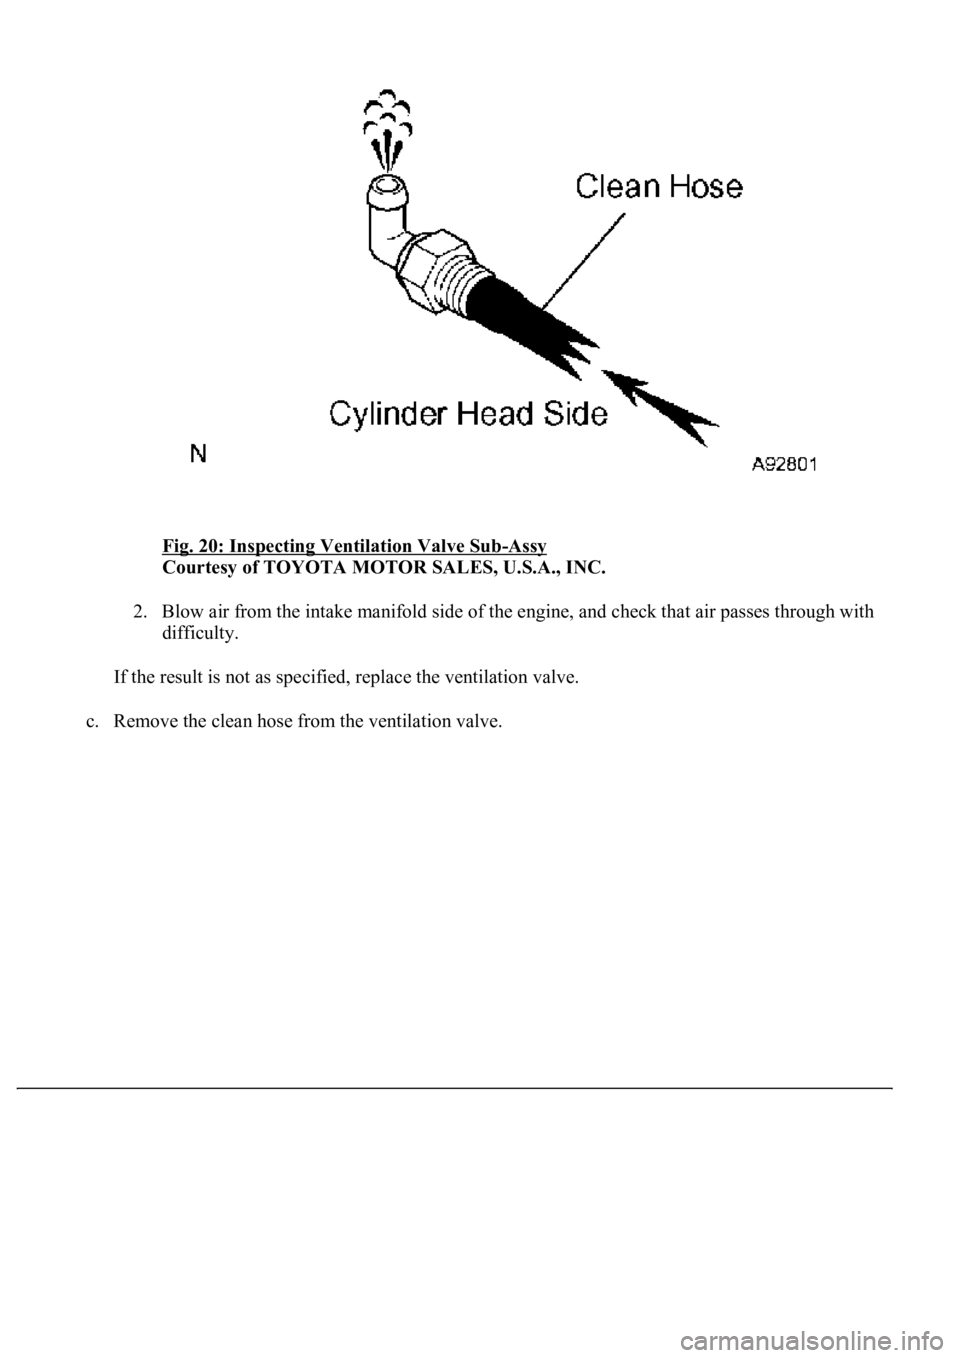
1. Blow air from the cylinder head side of the engine, and check that air passes through easily.
Page 2926 of 4500
Fig. 20: Inspecting Ventilation Valve Sub-Assy
Courtesy of TOYOTA MOTOR SALES, U.S.A., INC.
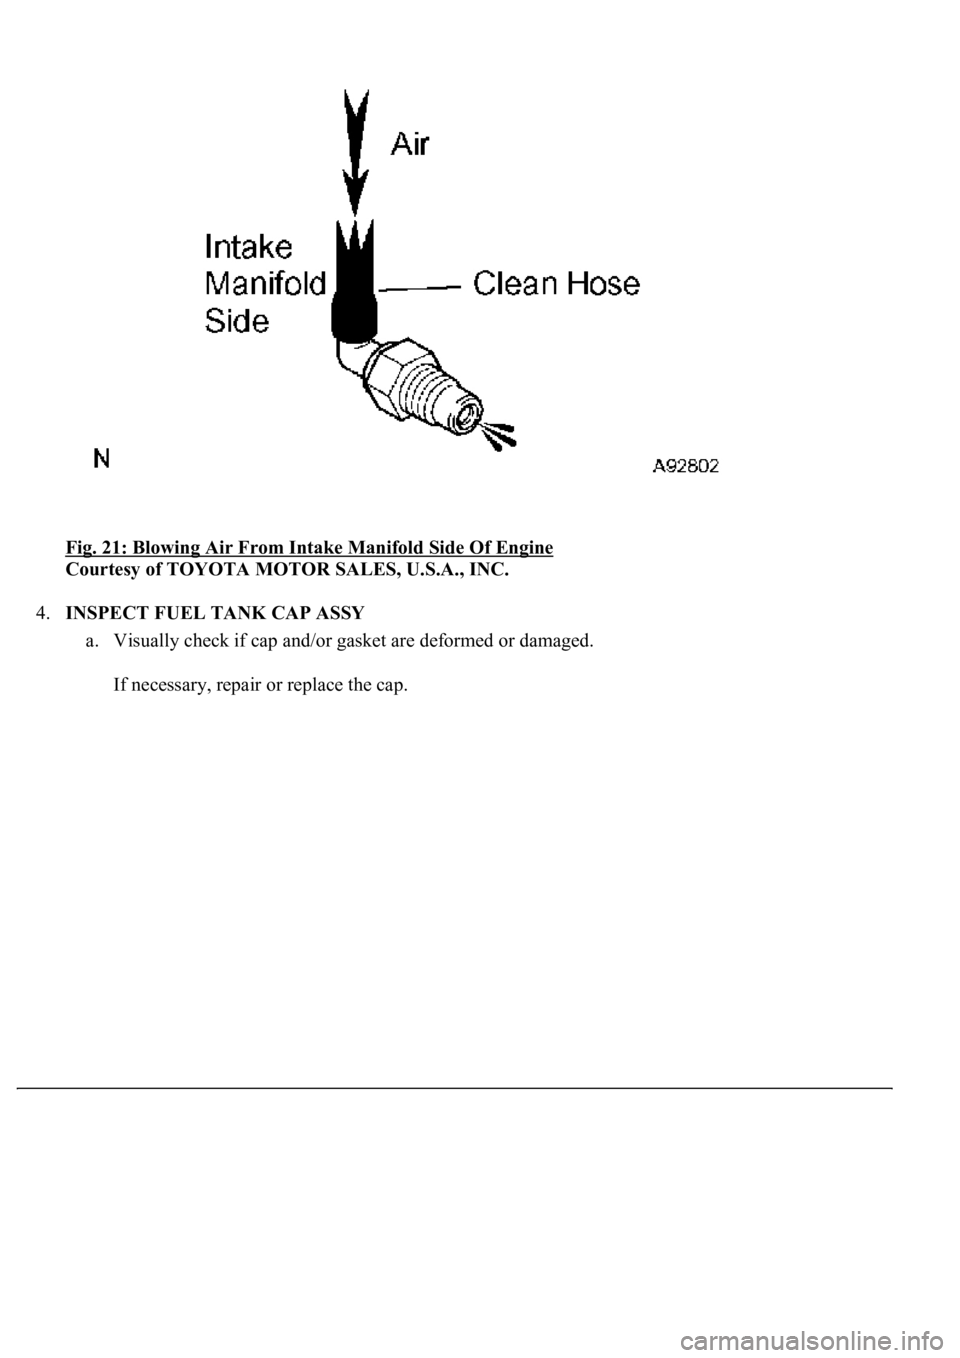
2. Blow air from the intake manifold side of the engine, and check that air passes through with
difficulty.
If the result is not as specified, replace the ventilation valve.
c. Remove the clean hose from the ventilation valve.
Page 2927 of 4500
Fig. 21: Blowing Air From Intake Manifold Side Of Engine
Courtesy of TOYOTA MOTOR SALES, U.S.A., INC.
4.INSPECT FUEL TANK CAP ASSY
a. Visually check if cap and/or gasket are deformed or damaged.
If necessar
y, repair or replace the cap.
Page 2928 of 4500
Fig. 22: Inspecting Fuel Tank Cap Assy
Courtesy of TOYOTA MOTOR SALES, U.S.A., INC.
5.INSPECT PURGE VSV
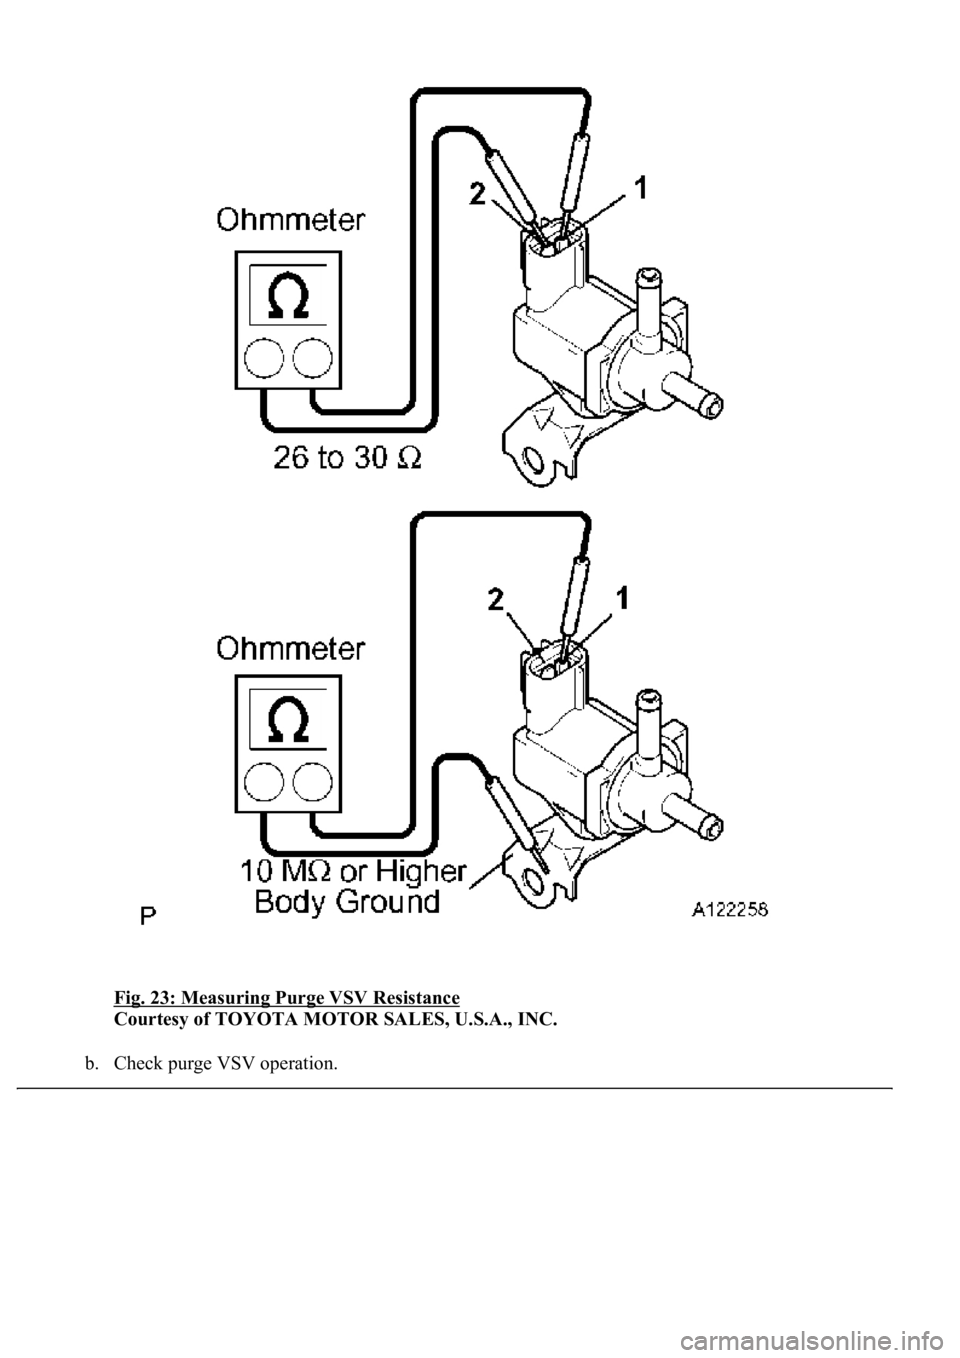
a. Measure the purge VSV resistance.
Standard:
RESISTANCE CONDITION
If the result is not as specified, replace the pur
ge VSV.
Tester ConnectionSpecified Condition
1 - 226 to 30 ohms at 20°C (68°F)
1 - Body ground
2 - Body ground10 Mohms or higher
Page 2929 of 4500
Fig. 23: Measuring Purge VSV Resistance
Courtesy of TOYOTA MOTOR SALES, U.S.A., INC.
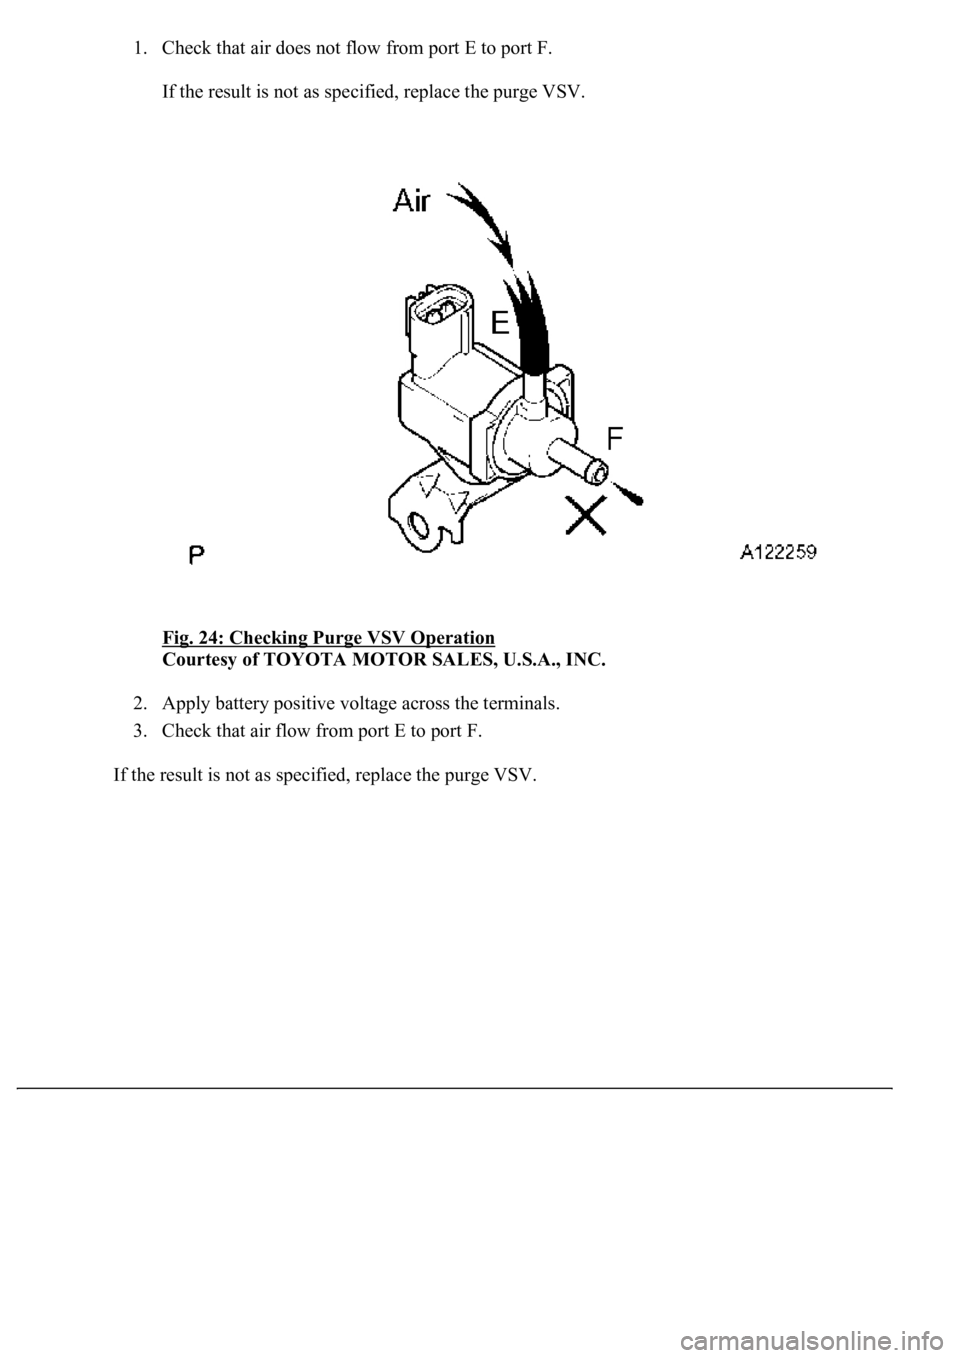
b. Check purge VSV operation.
Page 2930 of 4500
1. Check that air does not flow from port E to port F.
If the result is not as specified, replace the purge VSV.
Fig. 24: Checking Purge VSV Operation
Courtesy of TOYOTA MOTOR SALES, U.S.A., INC.
2. Apply battery positive voltage across the terminals.
3. Check that air flow from port E to port F.
If the result is not as specified, replace the pur
ge VSV.
Trending: diagnostic menu, audio, coolant level, c1725, evaporator, radiator cap, wheel bolt torque
