LEXUS LS430 2003 Factory Repair Manual
Manufacturer: LEXUS, Model Year: 2003,
Model line: LS430,
Model: LEXUS LS430 2003
Pages: 4500, PDF Size: 87.45 MB
LEXUS LS430 2003 Factory Repair Manual
LS430 2003
LEXUS
LEXUS
https://www.carmanualsonline.info/img/36/57050/w960_57050-0.png
LEXUS LS430 2003 Factory Repair Manual
Trending: navigation, lights, illumination, tire size, remote control, wiring diagram, air condition
Page 3661 of 4500
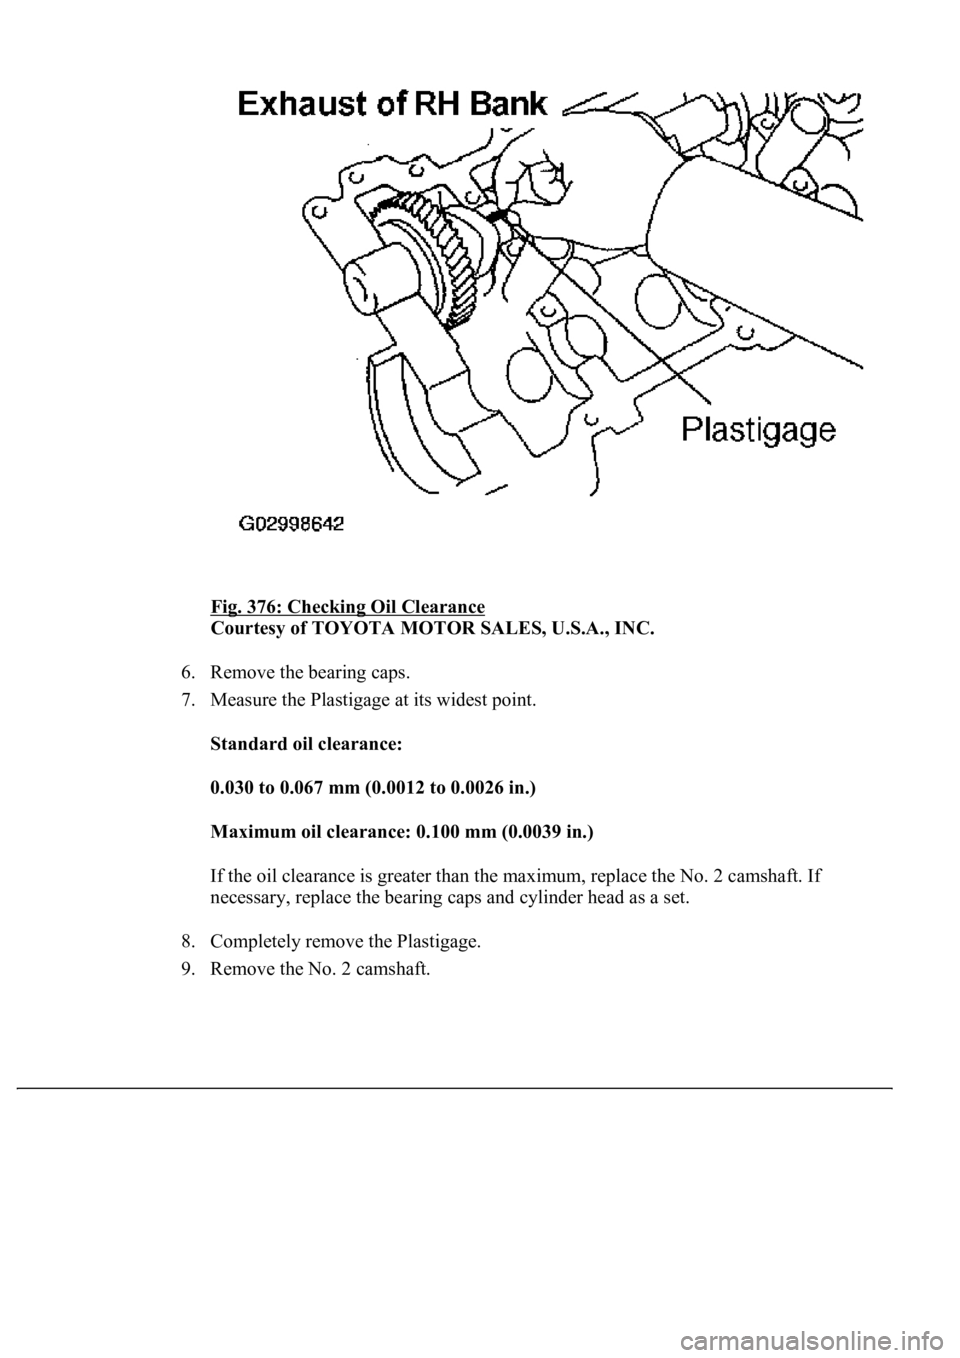
Fig. 376: Checking Oil Clearance
Courtesy of TOYOTA MOTOR SALES, U.S.A., INC.
6. Remove the bearing caps.
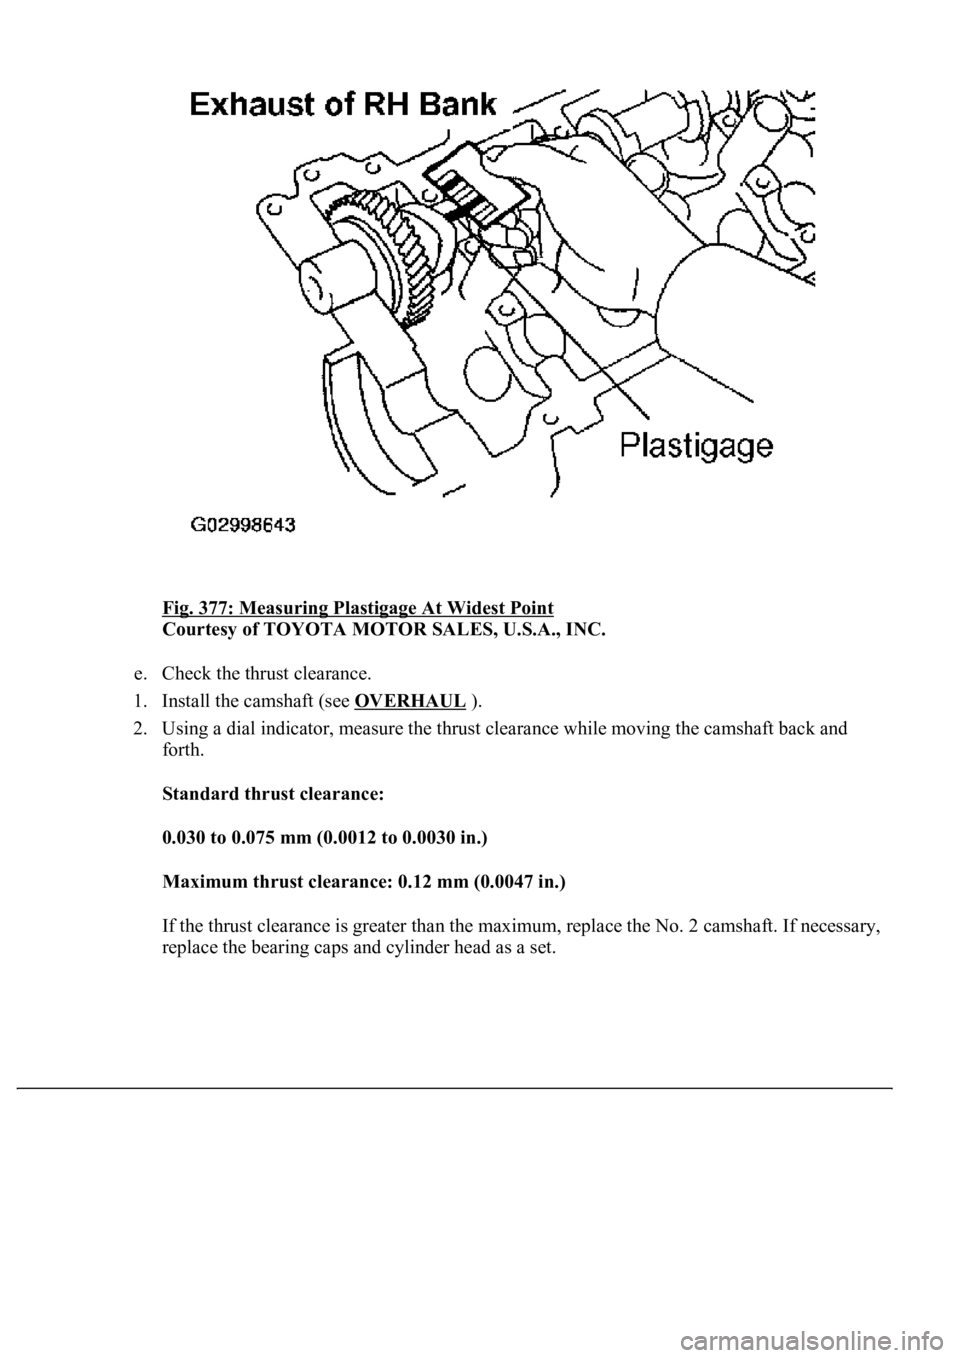
7. Measure the Plastigage at its widest point.
Standard oil clearance:
0.030 to 0.067 mm (0.0012 to 0.0026 in.)
Maximum oil clearance: 0.100 mm (0.0039 in.)
If the oil clearance is greater than the maximum, replace the No. 2 camshaft. If
necessary, replace the bearing caps and cylinder head as a set.
8. Completely remove the Plastigage.
9. Remove the No. 2 camshaft.
Page 3662 of 4500
Fig. 377: Measuring Plastigage At Widest Point
Courtesy of TOYOTA MOTOR SALES, U.S.A., INC.
e. Check the thrust clearance.
1. Install the camshaft (see OVERHAUL
).
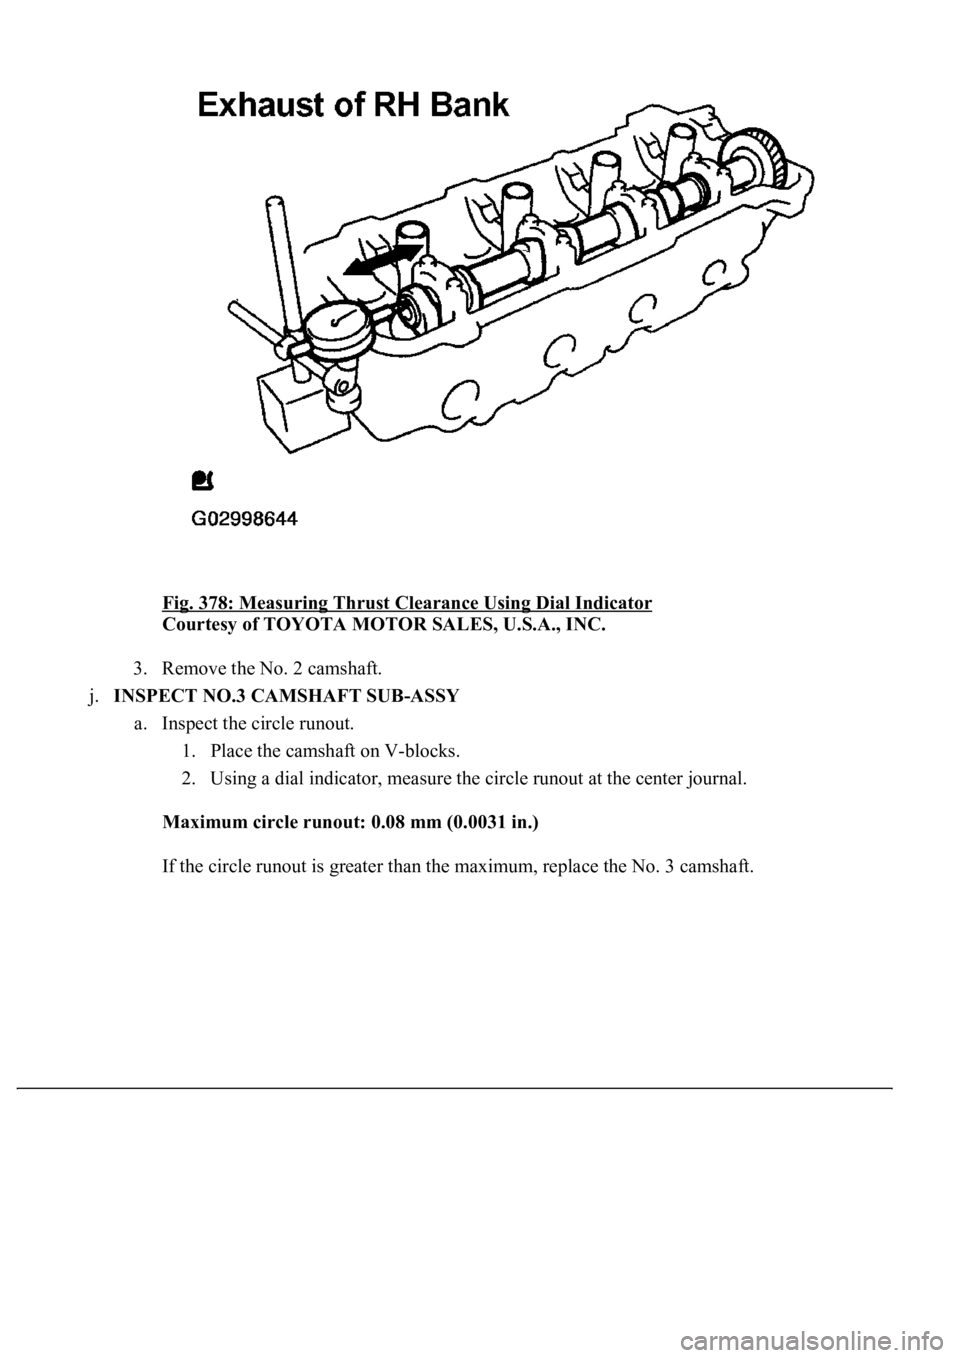
2. Using a dial indicator, measure the thrust clearance while moving the camshaft back and
forth.
Standard thrust clearance:
0.030 to 0.075 mm (0.0012 to 0.0030 in.)
Maximum thrust clearance: 0.12 mm (0.0047 in.)
If the thrust clearance is greater than the maximum, replace the No. 2 camshaft. If necessary,
<005500480053004f00440046004800030057004b004800030045004800440055004c0051004a00030046004400530056000300440051004700030046005c004f004c00510047004800550003004b0048004400470003004400560003004400030056004800
570011[
Page 3663 of 4500
Fig. 378: Measuring Thrust Clearance Using Dial Indicator
Courtesy of TOYOTA MOTOR SALES, U.S.A., INC.
3. Remove the No. 2 camshaft.
j.INSPECT NO.3 CAMSHAFT SUB-ASSY
a. Inspect the circle runout.
1. Place the camshaft on V-blocks.
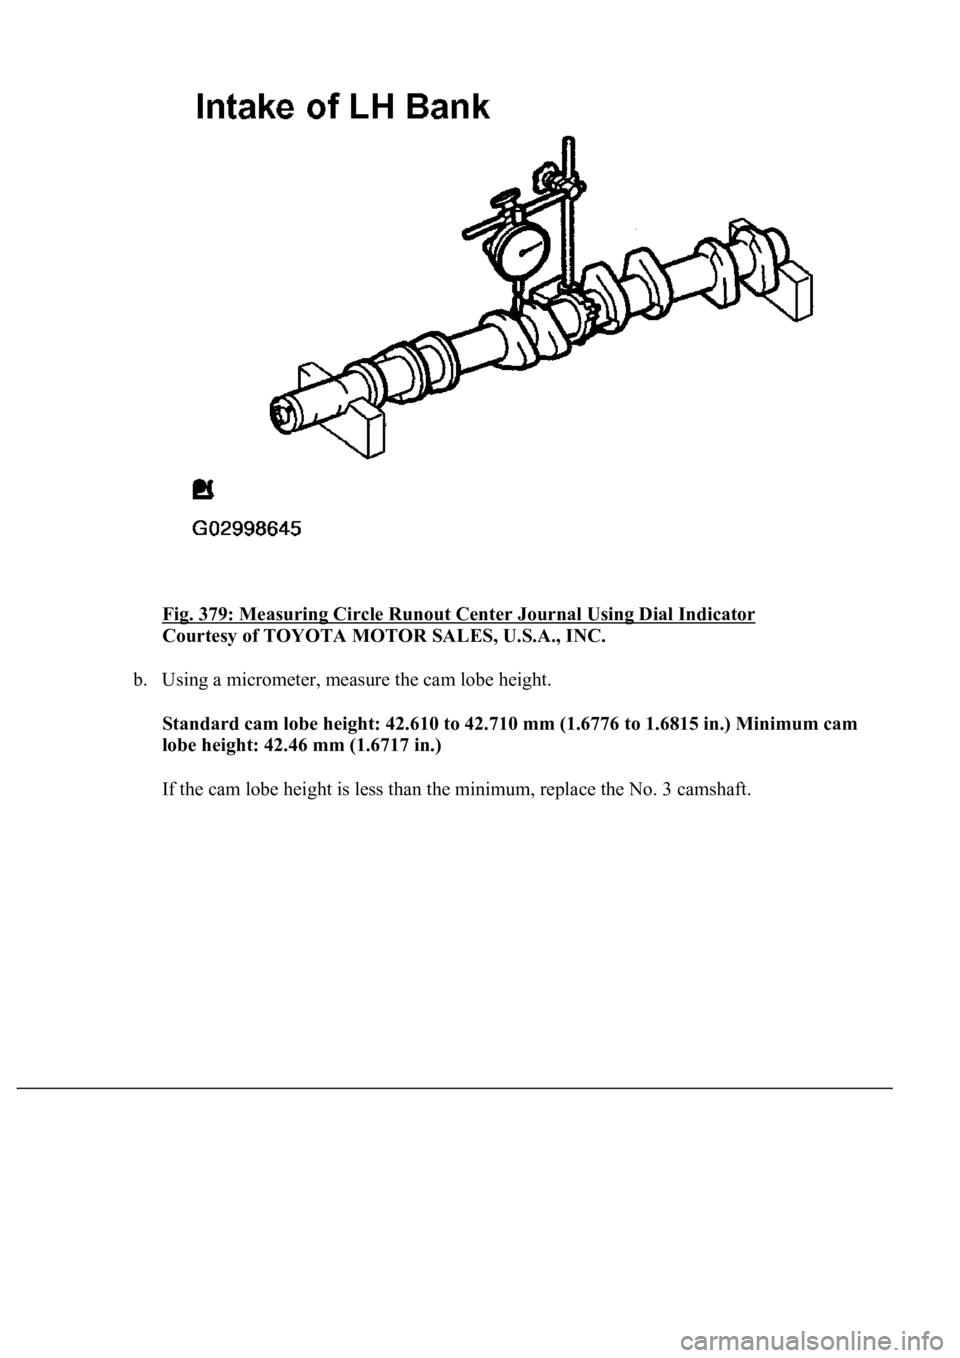
2. Using a dial indicator, measure the circle runout at the center journal.
Maximum circle runout: 0.08 mm (0.0031 in.)
If the circle runout is
greater than the maximum, replace the No. 3 camshaft.
Page 3664 of 4500
Fig. 379: Measuring Circle Runout Center Journal Using Dial Indicator
Courtesy of TOYOTA MOTOR SALES, U.S.A., INC.
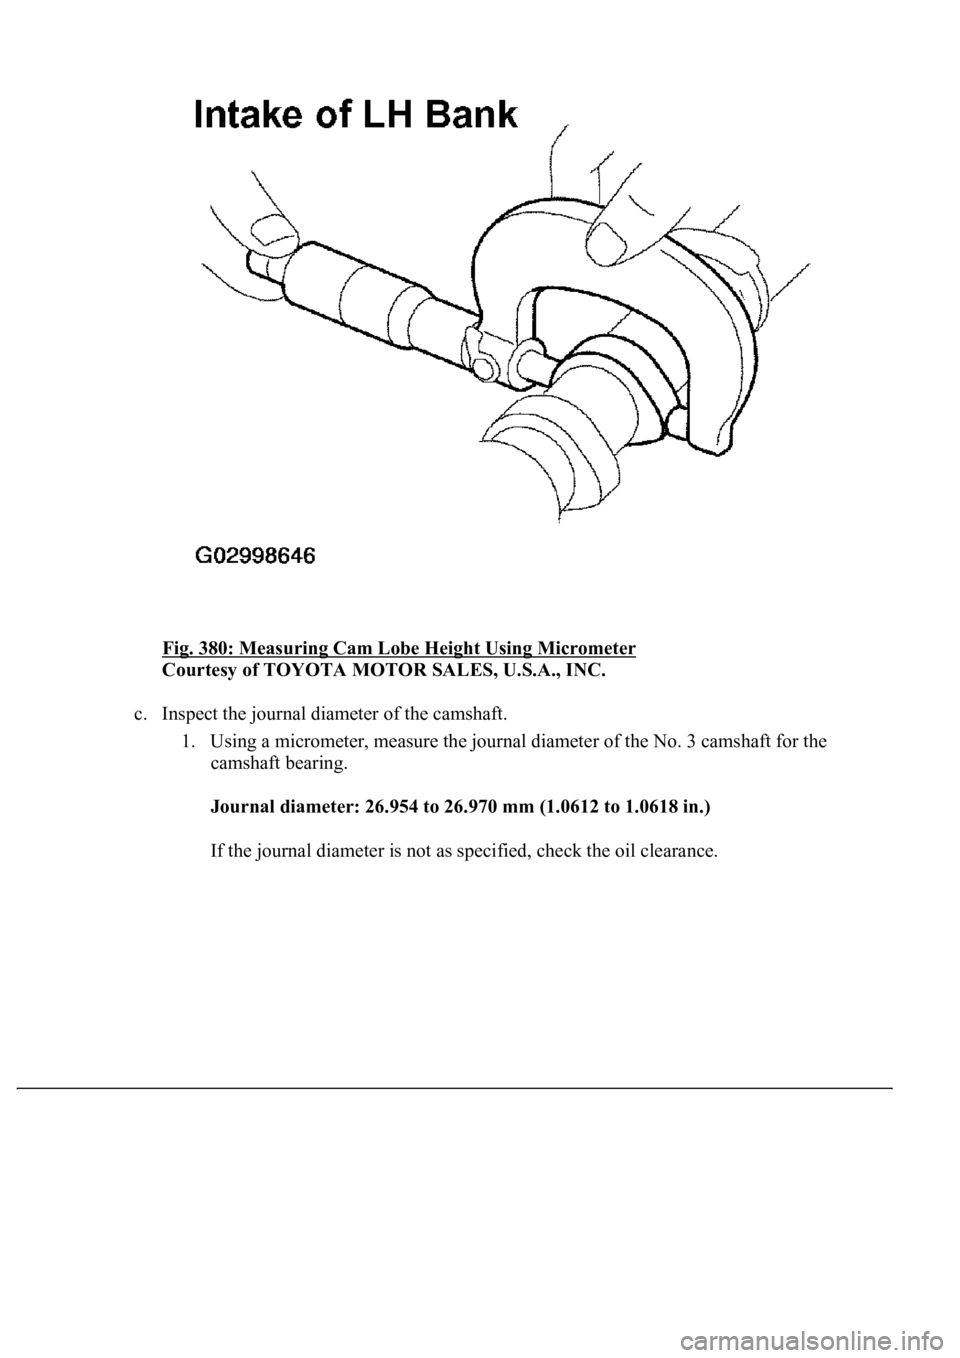
b. Using a micrometer, measure the cam lobe height.
<0036005700440051004700440055004700030046004400500003004f0052004500480003004b0048004c004a004b0057001d00030017001500110019001400130003005700520003001700150011001a001400130003005000500003000b00140011001900
1a001a00190003005700520003001400110019001b00140018[ in.) Minimum cam
lobe height: 42.46 mm (1.6717 in.)
If the cam lobe height is less than the minimum, replace the No. 3 camshaft.
Page 3665 of 4500
Fig. 380: Measuring Cam Lobe Height Using Micrometer
Courtesy of TOYOTA MOTOR SALES, U.S.A., INC.
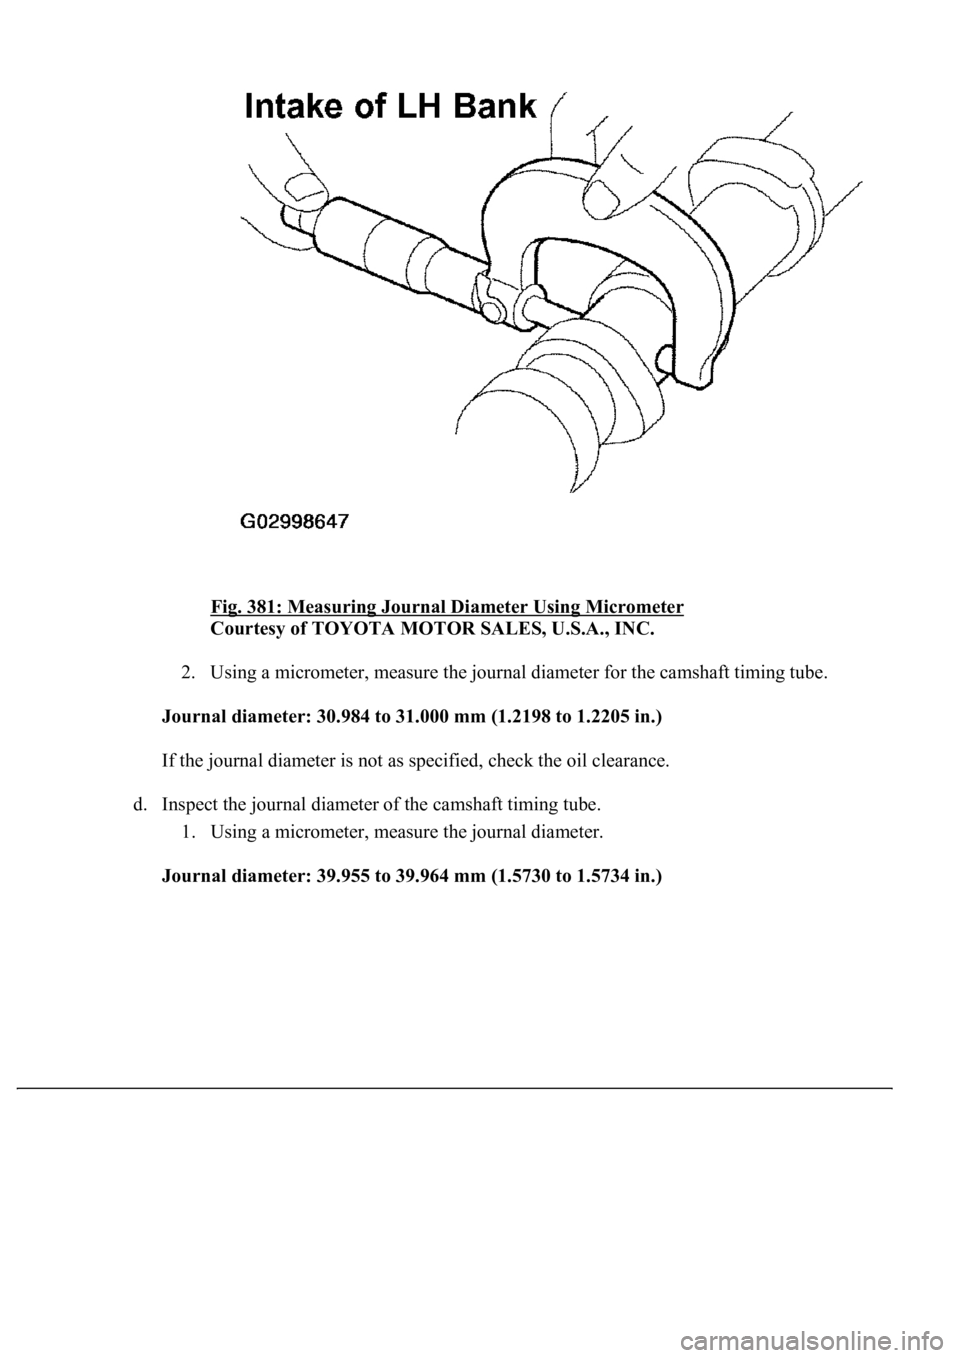
c. Inspect the journal diameter of the camshaft.
1. Using a micrometer, measure the journal diameter of the No. 3 camshaft for the
camshaft bearing.
Journal diameter: 26.954 to 26.970 mm (1.0612 to 1.0618 in.)
If the
journal diameter is not as specified, check the oil clearance.
Page 3666 of 4500
Fig. 381: Measuring Journal Diameter Using Micrometer
Courtesy of TOYOTA MOTOR SALES, U.S.A., INC.
2. Using a micrometer, measure the journal diameter for the camshaft timing tube.
Journal diameter: 30.984 to 31.000 mm (1.2198 to 1.2205 in.)
If the journal diameter is not as specified, check the oil clearance.
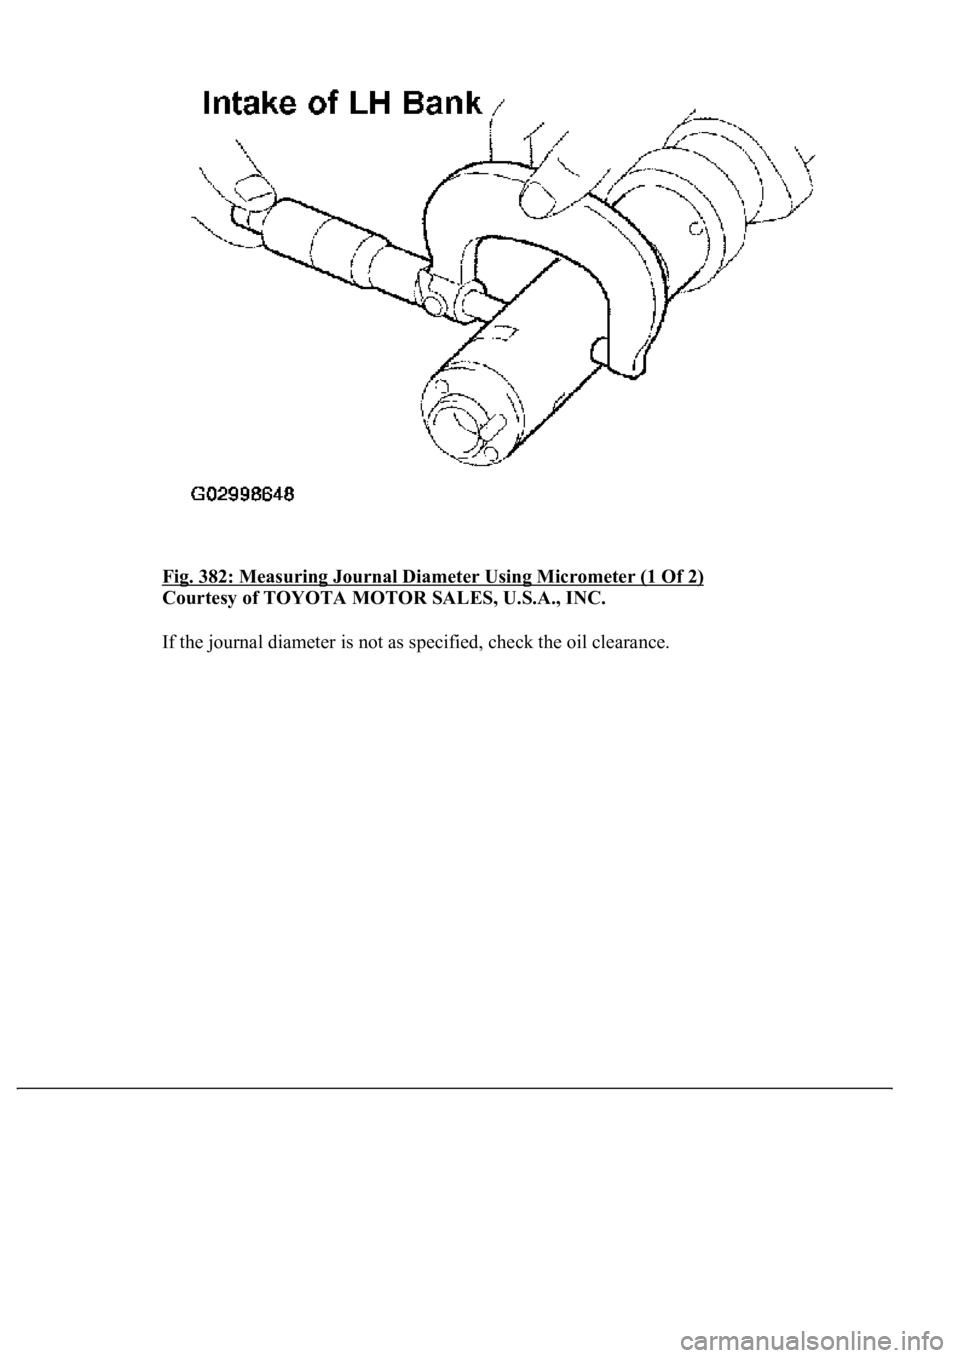
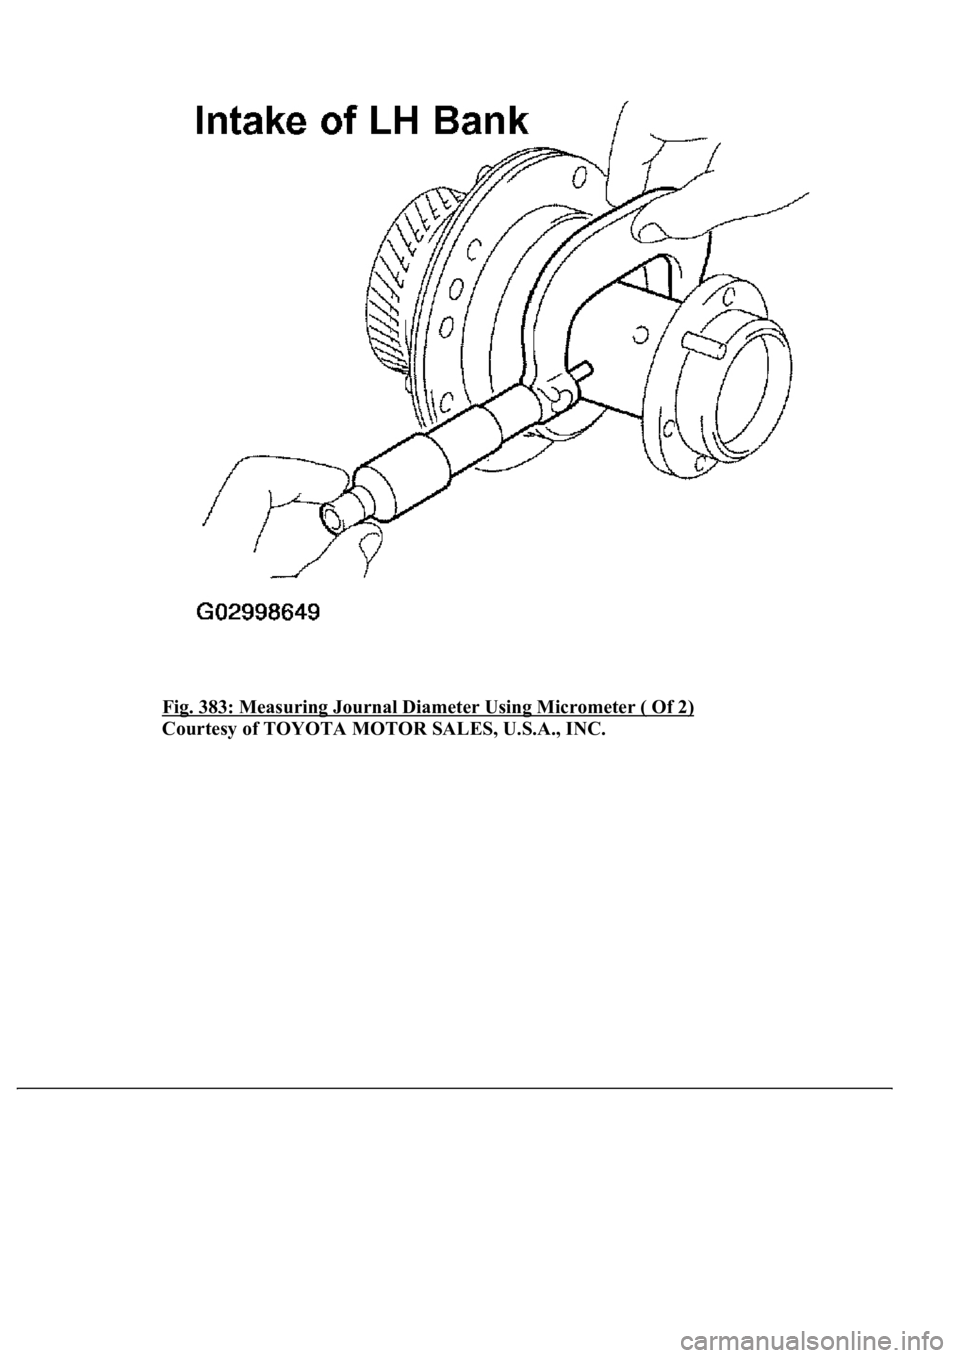
d. Inspect the journal diameter of the camshaft timing tube.
1. Using a micrometer, measure the journal diameter.
Journal diameter: 39.955 to 39.964 mm (1.5730 to 1.5734 in.)
Page 3667 of 4500
Fig. 382: Measuring Journal Diameter Using Micrometer (1 Of 2)
Courtesy of TOYOTA MOTOR SALES, U.S.A., INC.
If the
journal diameter is not as specified, check the oil clearance.
Page 3668 of 4500
Fig. 383: Measuring Journal Diameter Using Micrometer ( Of 2)
Courtesy of TOYOTA MOTOR SALES, U.S.A., INC.
Page 3669 of 4500
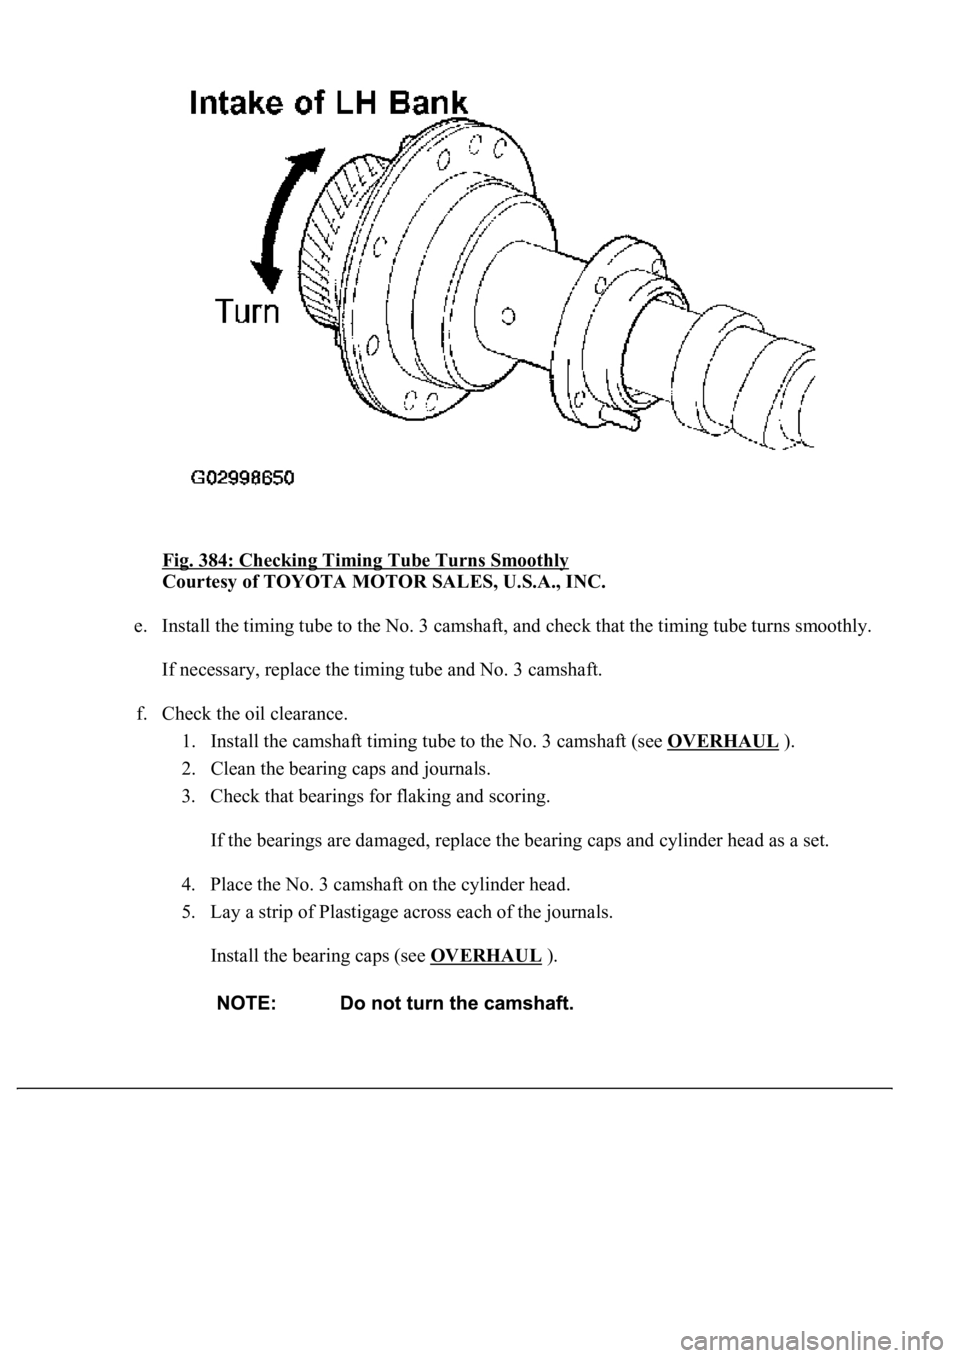
Fig. 384: Checking Timing Tube Turns Smoothly
Courtesy of TOYOTA MOTOR SALES, U.S.A., INC.
e. Install the timing tube to the No. 3 camshaft, and check that the timing tube turns smoothly.
If necessary, replace the timing tube and No. 3 camshaft.
f. Check the oil clearance.
1. Install the camshaft timing tube to the No. 3 camshaft (see OVERHAUL
).
2. Clean the bearing caps and journals.
3. Check that bearings for flaking and scoring.
If the bearings are damaged, replace the bearing caps and cylinder head as a set.
4. Place the No. 3 camshaft on the cylinder head.
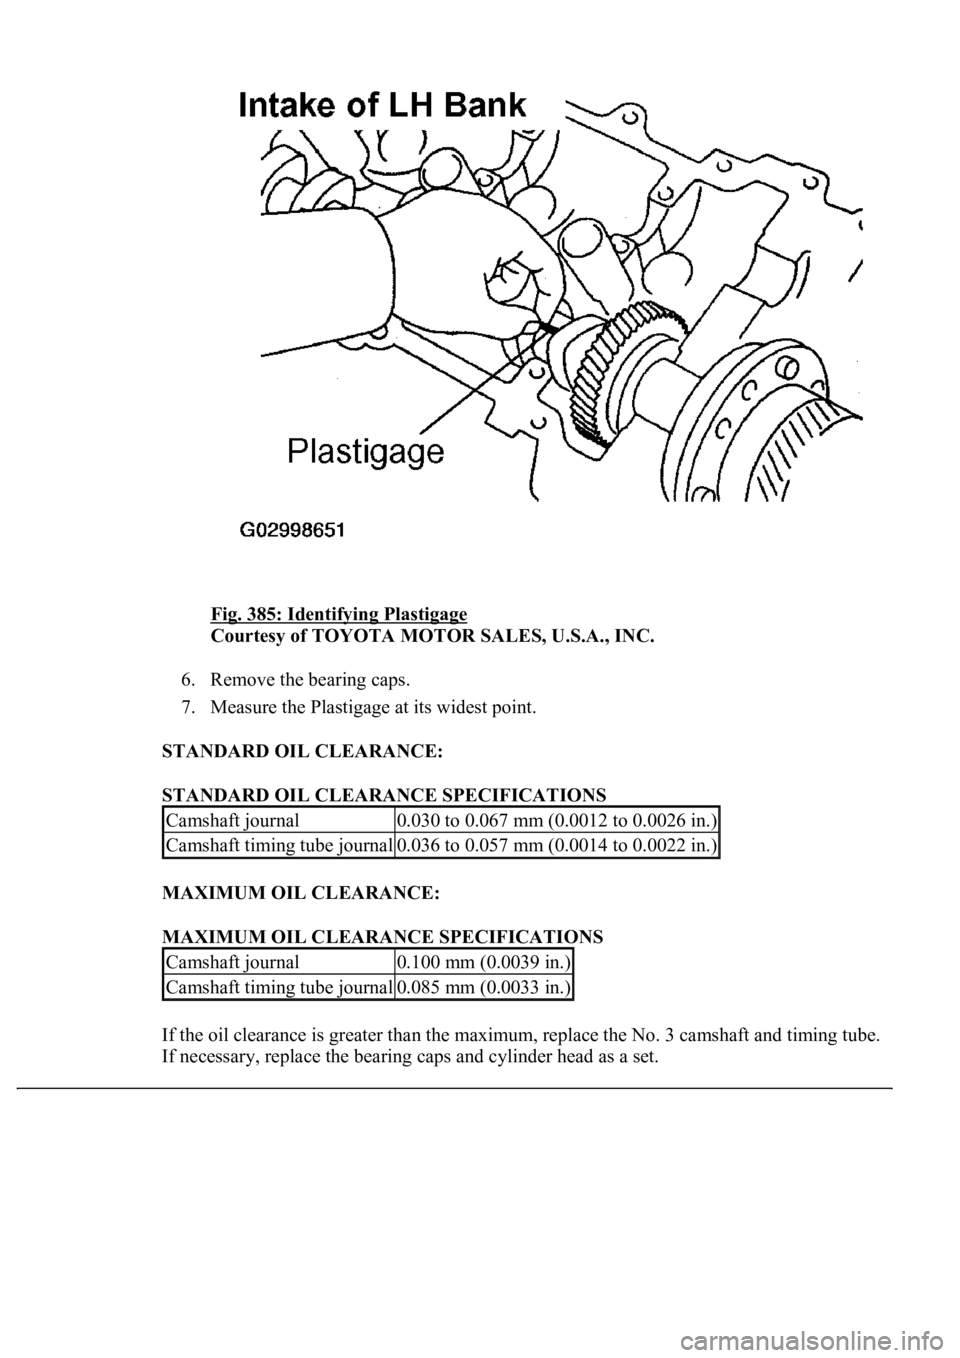
5. Lay a strip of Plastigage across each of the journals.
Install the bearing caps (see OVERHAUL
).
Page 3670 of 4500
Fig. 385: Identifying Plastigage
Courtesy of TOYOTA MOTOR SALES, U.S.A., INC.
6. Remove the bearing caps.
7. Measure the Plastigage at its widest point.
STANDARD OIL CLEARANCE:
STANDARD OIL CLEARANCE SPECIFICATIONS
MAXIMUM OIL CLEARANCE:
MAXIMUM OIL CLEARANCE SPECIFICATIONS
If the oil clearance is greater than the maximum, replace the No. 3 camshaft and timing tube.
If necessar
y, replace the bearing caps and cylinder head as a set.
Camshaft journal0.030 to 0.067 mm (0.0012 to 0.0026 in.)
Camshaft timing tube journal0.036 to 0.057 mm (0.0014 to 0.0022 in.)
Camshaft journal0.100 mm (0.0039 in.)
Camshaft timing tube journal0.085 mm (0.0033 in.)
Trending: transmission fluid, radiator cap, center console, radio, fuel, battery, hood release
