LEXUS LS430 2003 Factory Repair Manual
Manufacturer: LEXUS, Model Year: 2003,
Model line: LS430,
Model: LEXUS LS430 2003
Pages: 4500, PDF Size: 87.45 MB
LEXUS LS430 2003 Factory Repair Manual
LS430 2003
LEXUS
LEXUS
https://www.carmanualsonline.info/img/36/57050/w960_57050-0.png
LEXUS LS430 2003 Factory Repair Manual
Trending: spare tire, TPMS, immobilizer, heating, C1752, garage door opener, height adjustment
Page 3671 of 4500
g. Completely remove the Plastigage.
h. Remove the camshaft.
i. Remove the camshaft timing tube from the No. 3 camshaft.
Fig. 386: Measuring Plastigage At Widest Point
Courtesy of TOYOTA MOTOR SALES, U.S.A., INC.
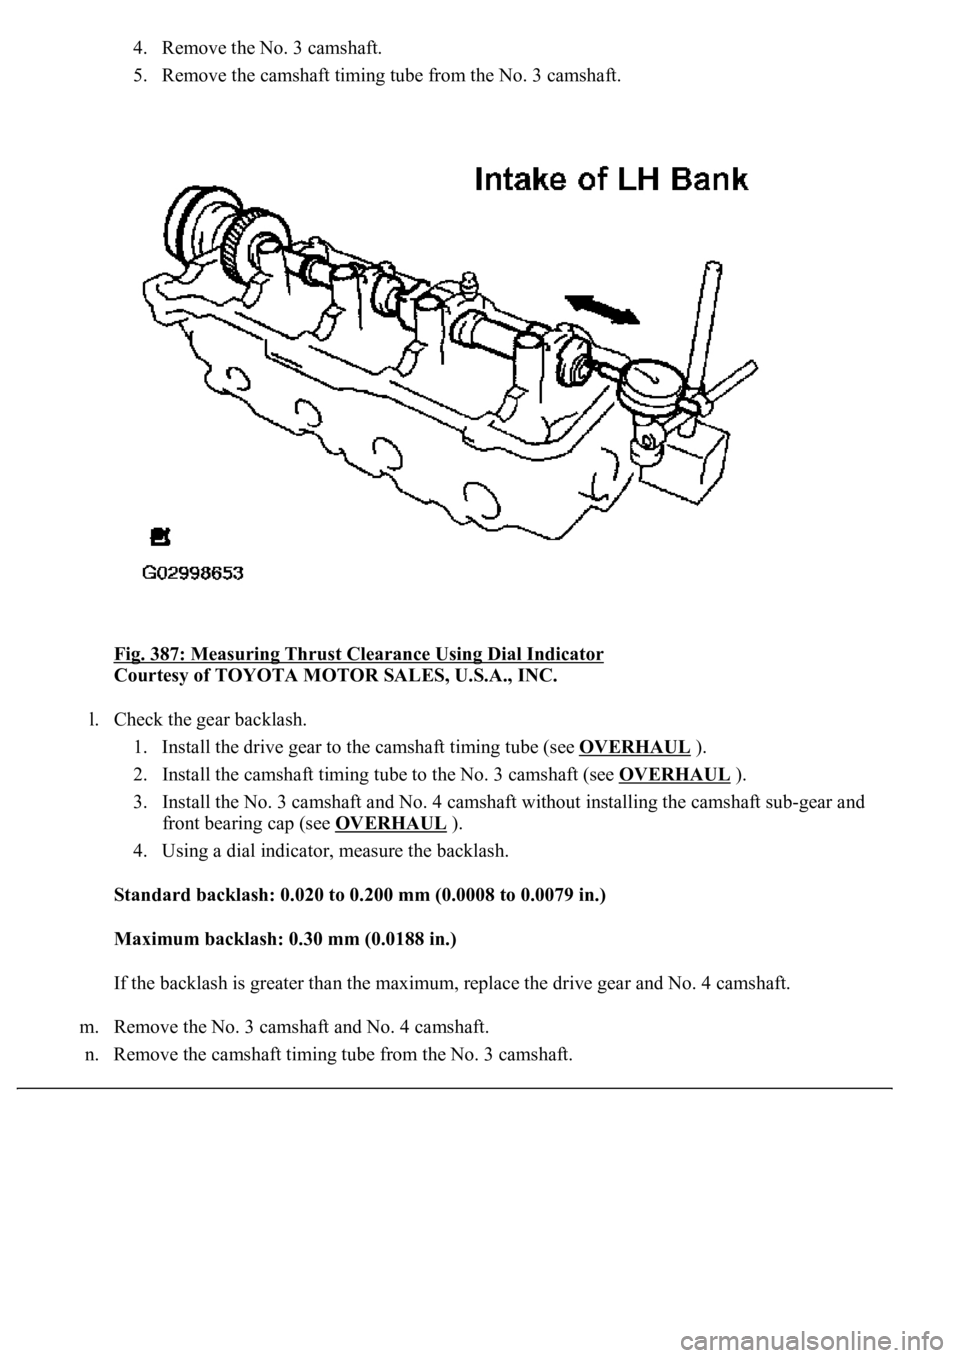
k. Check the thrust clearance.
1. Install the camshaft timing tube to the No. 3 camshaft (see OVERHAUL
).
2. Install the No. 3 camshaft (see OVERHAUL
).
3. Using a dial indicator, measure the thrust clearance while moving the No. 3 camshaft back
and forth.
Standard thrust clearance: 0.060 to 0.100 mm (0.0024 to 0.0039 in.) Maximum thrust
clearance: 0.13 mm (0.0051 in.)
If the thrust clearance is greater than the maximum, replace the No. 3 camshaft. If necessary,
<005500480053004f00440046004800030057004b004800030045004800440055004c0051004a00030046004400530056000300440051004700030046005c004f004c00510047004800550003004b0048004400470003004400560003004400030056004800
570011[
Page 3672 of 4500
4. Remove the No. 3 camshaft.
5. Remove the camshaft timing tube from the No. 3 camshaft.
Fig. 387: Measuring Thrust Clearance Using Dial Indicator
Courtesy of TOYOTA MOTOR SALES, U.S.A., INC.
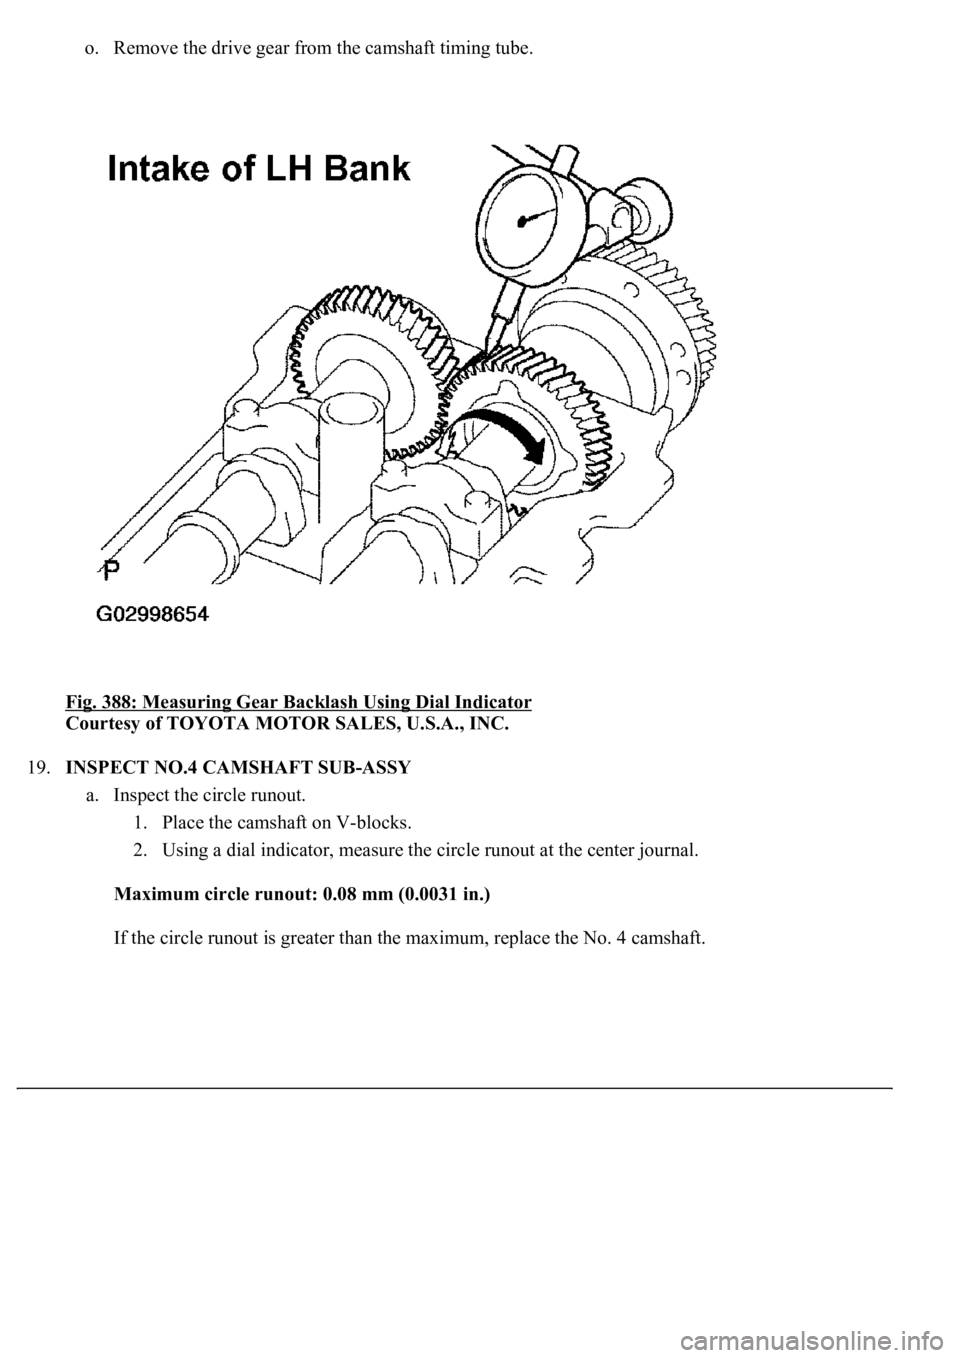
l. Check the gear backlash.
1. Install the drive gear to the camshaft timing tube (see OVERHAUL
).
2. Install the camshaft timing tube to the No. 3 camshaft (see OVERHAUL
).
3. Install the No. 3 camshaft and No. 4 camshaft without installing the camshaft sub-gear and
front bearing cap (see OVERHAUL
).
4. Using a dial indicator, measure the backlash.
Standard backlash: 0.020 to 0.200 mm (0.0008 to 0.0079 in.)
Maximum backlash: 0.30 mm (0.0188 in.)
If the backlash is greater than the maximum, replace the drive gear and No. 4 camshaft.
m. Remove the No. 3 camshaft and No. 4 camshaft.
n. Remove the camshaft timin
g tube from the No. 3 camshaft.
Page 3673 of 4500
o. Remove the drive gear from the camshaft timing tube.
Fig. 388: Measuring Gear Backlash Using Dial Indicator
Courtesy of TOYOTA MOTOR SALES, U.S.A., INC.
19.INSPECT NO.4 CAMSHAFT SUB-ASSY
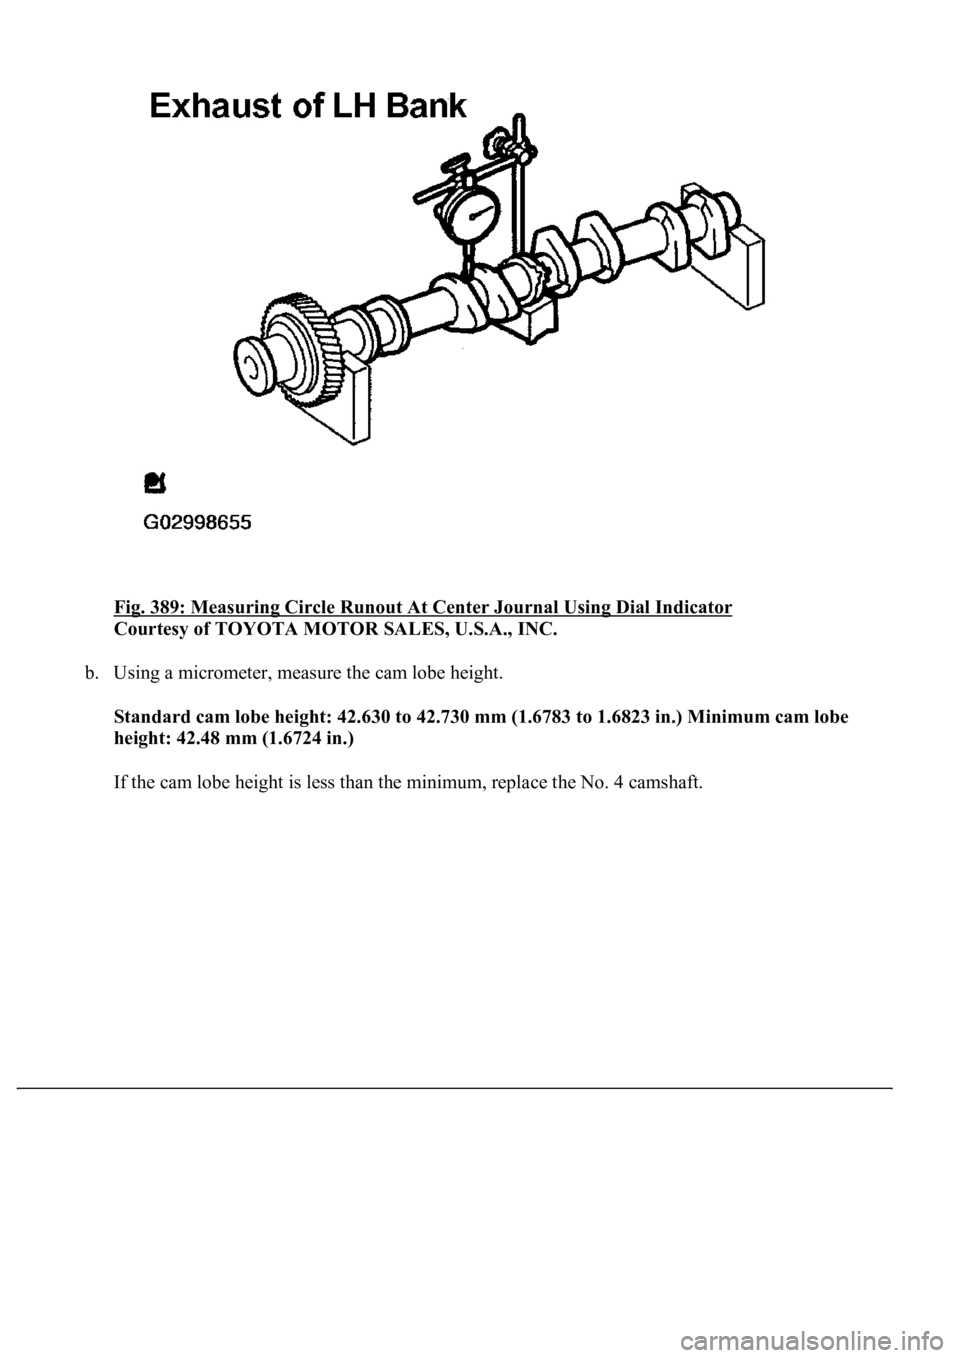
a. Inspect the circle runout.
1. Place the camshaft on V-blocks.
2. Using a dial indicator, measure the circle runout at the center journal.
Maximum circle runout: 0.08 mm (0.0031 in.)
If the circle runout is greater than the maximum, replace the No. 4 camshaft.
Page 3674 of 4500
Fig. 389: Measuring Circle Runout At Center Journal Using Dial Indicator
Courtesy of TOYOTA MOTOR SALES, U.S.A., INC.
b. Using a micrometer, measure the cam lobe height.
Standard cam lobe height: 42.630 to 42.730 mm (1.6783 to 1.6823 in.) Minimum cam lobe
height: 42.48 mm (1.6724 in.)
If the cam lobe height is less than the minimum, replace the No. 4 camshaft.
Page 3675 of 4500
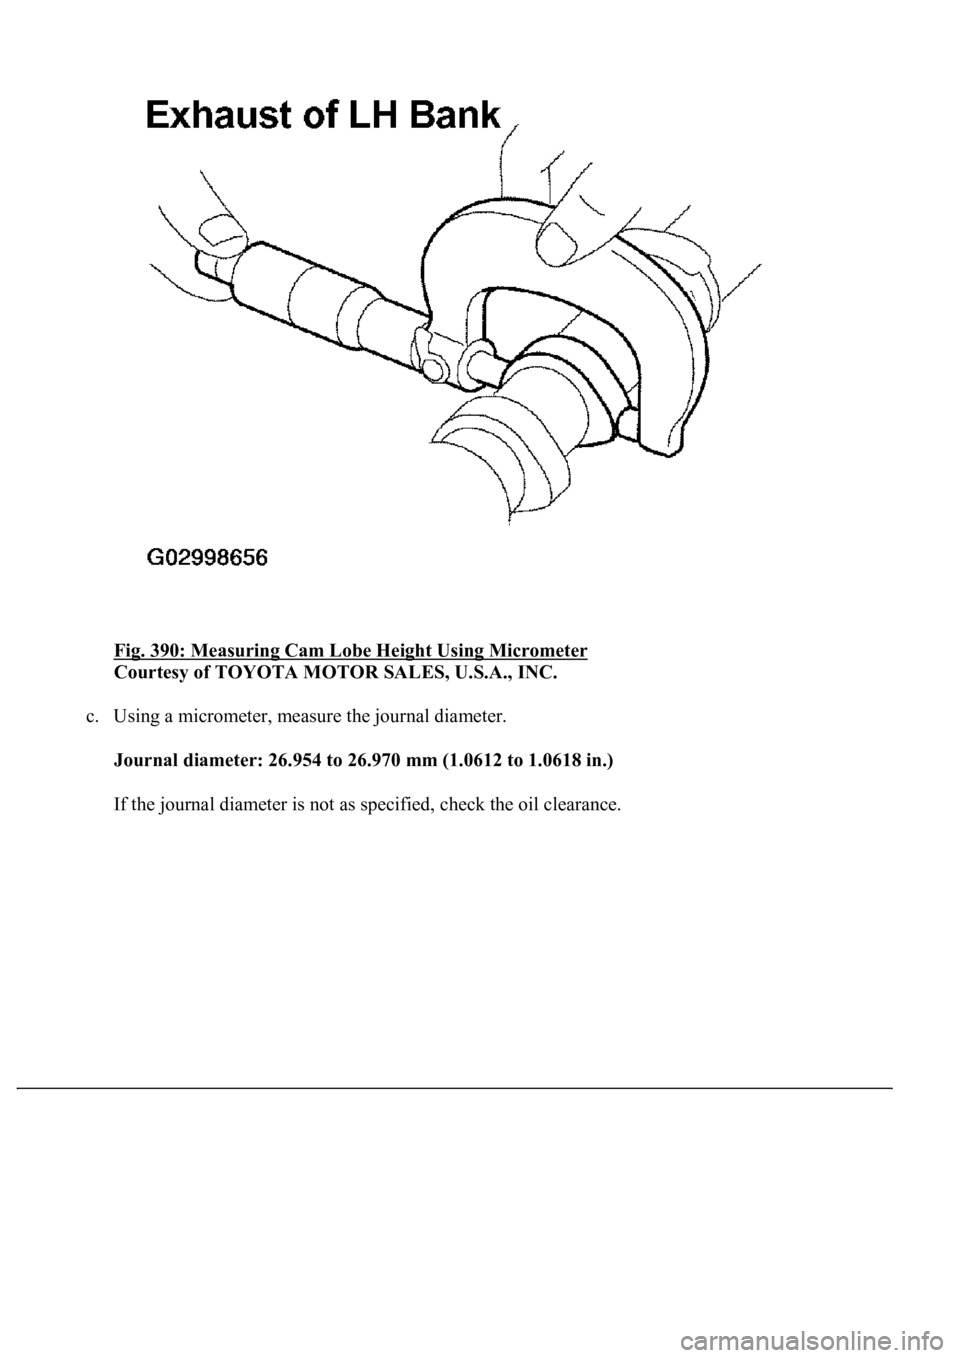
Fig. 390: Measuring Cam Lobe Height Using Micrometer
Courtesy of TOYOTA MOTOR SALES, U.S.A., INC.
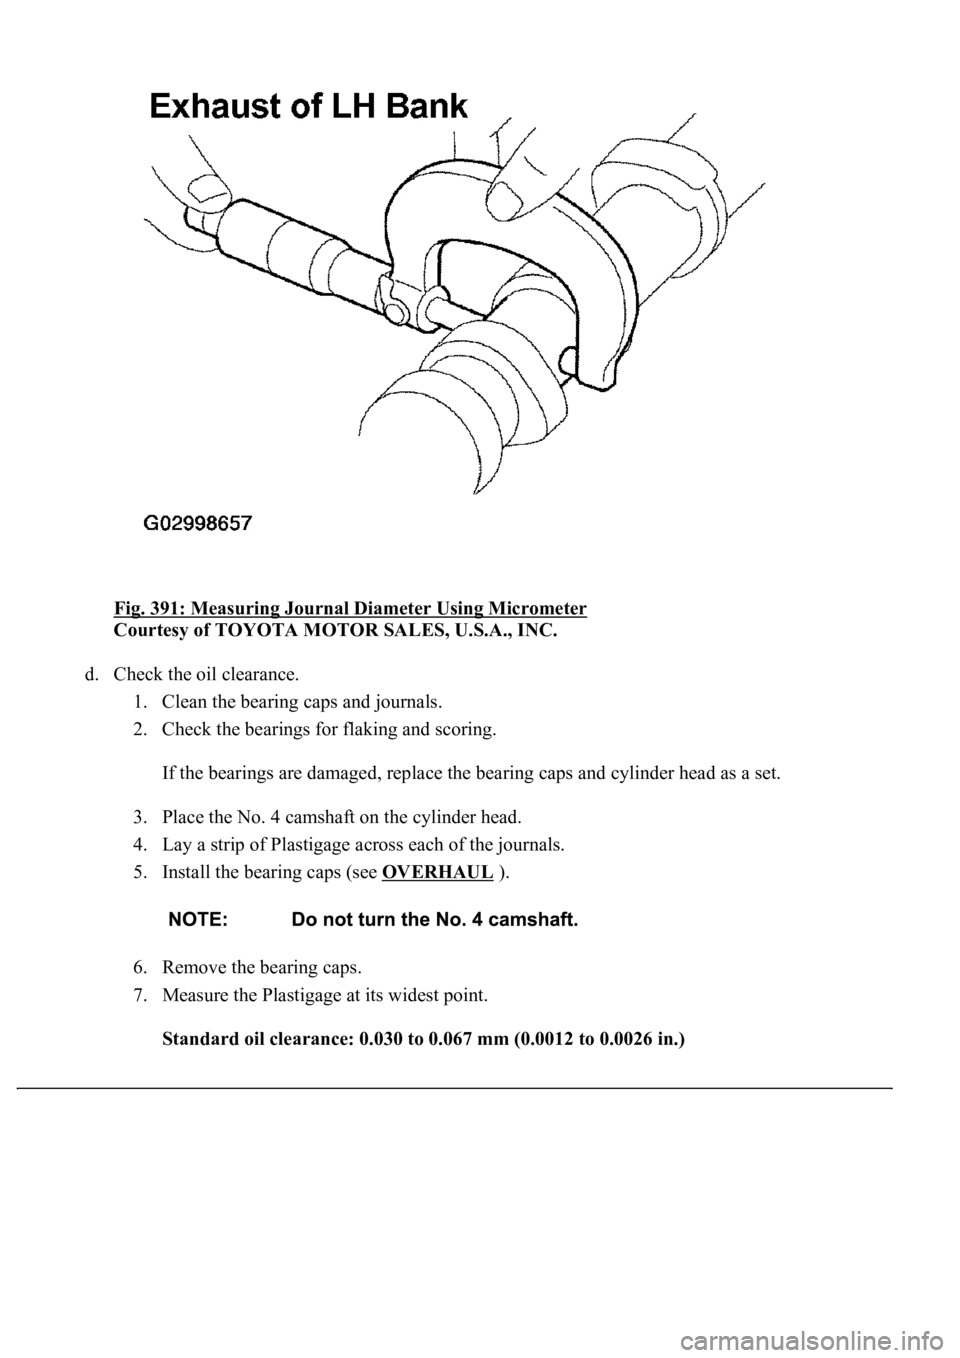
c. Using a micrometer, measure the journal diameter.
<002d00520058005500510044004f00030047004c004400500048005700480055001d0003001500190011001c001800170003005700520003001500190011001c001a00130003005000500003000b0014001100130019001400150003005700520003001400
11001300190014001b0003004c00510011000c[
If the
journal diameter is not as specified, check the oil clearance.
Page 3676 of 4500
Fig. 391: Measuring Journal Diameter Using Micrometer
Courtesy of TOYOTA MOTOR SALES, U.S.A., INC.
d. Check the oil clearance.
1. Clean the bearing caps and journals.
2. Check the bearings for flaking and scoring.
If the bearings are damaged, replace the bearing caps and cylinder head as a set.
3. Place the No. 4 camshaft on the cylinder head.
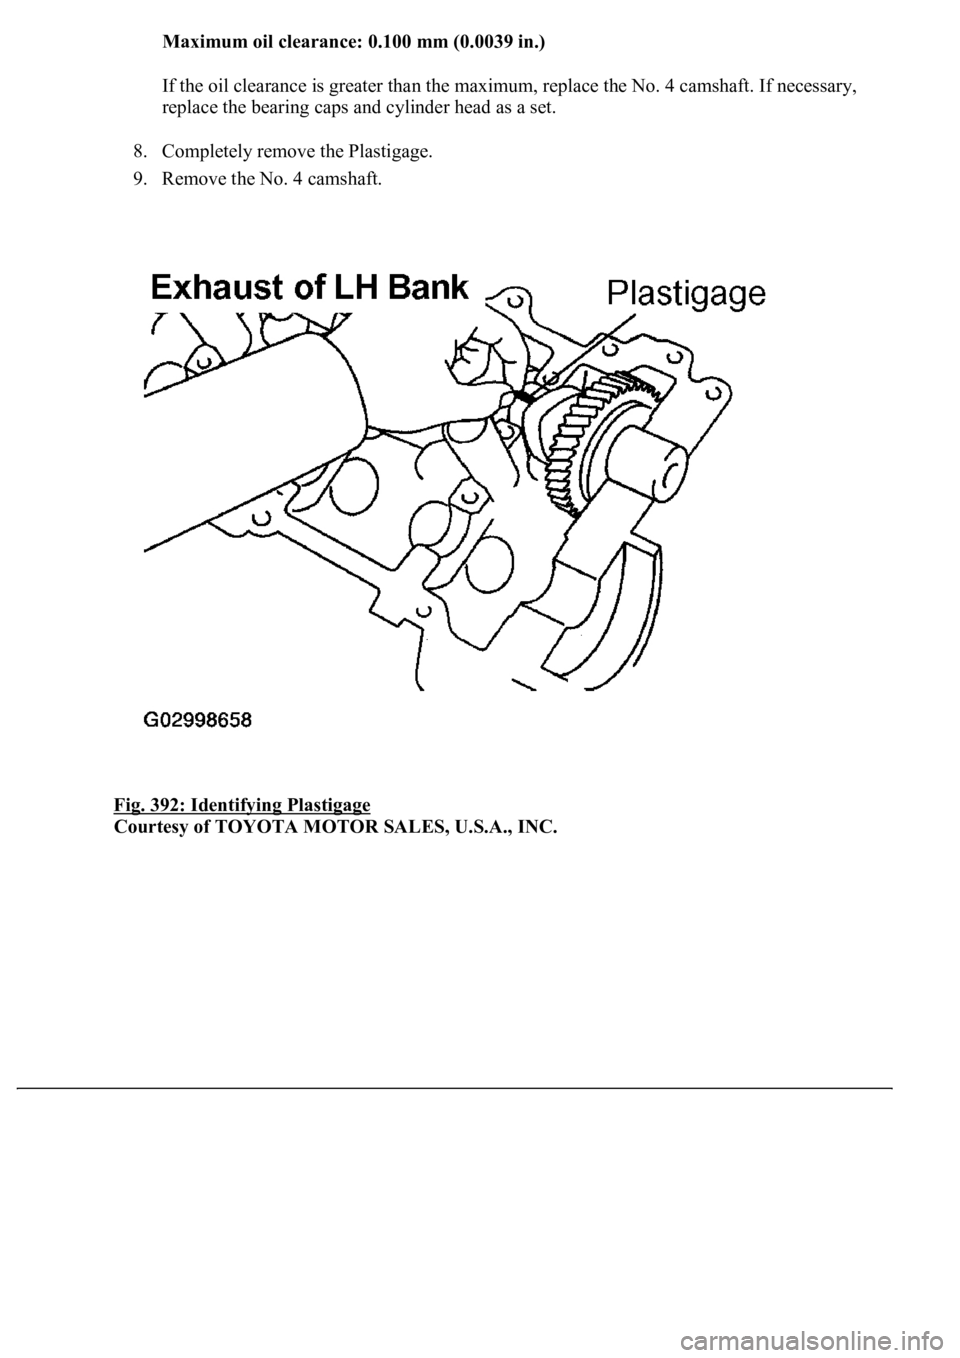
4. Lay a strip of Plastigage across each of the journals.
5. Install the bearing caps (see OVERHAUL
).
6. Remove the bearing caps.
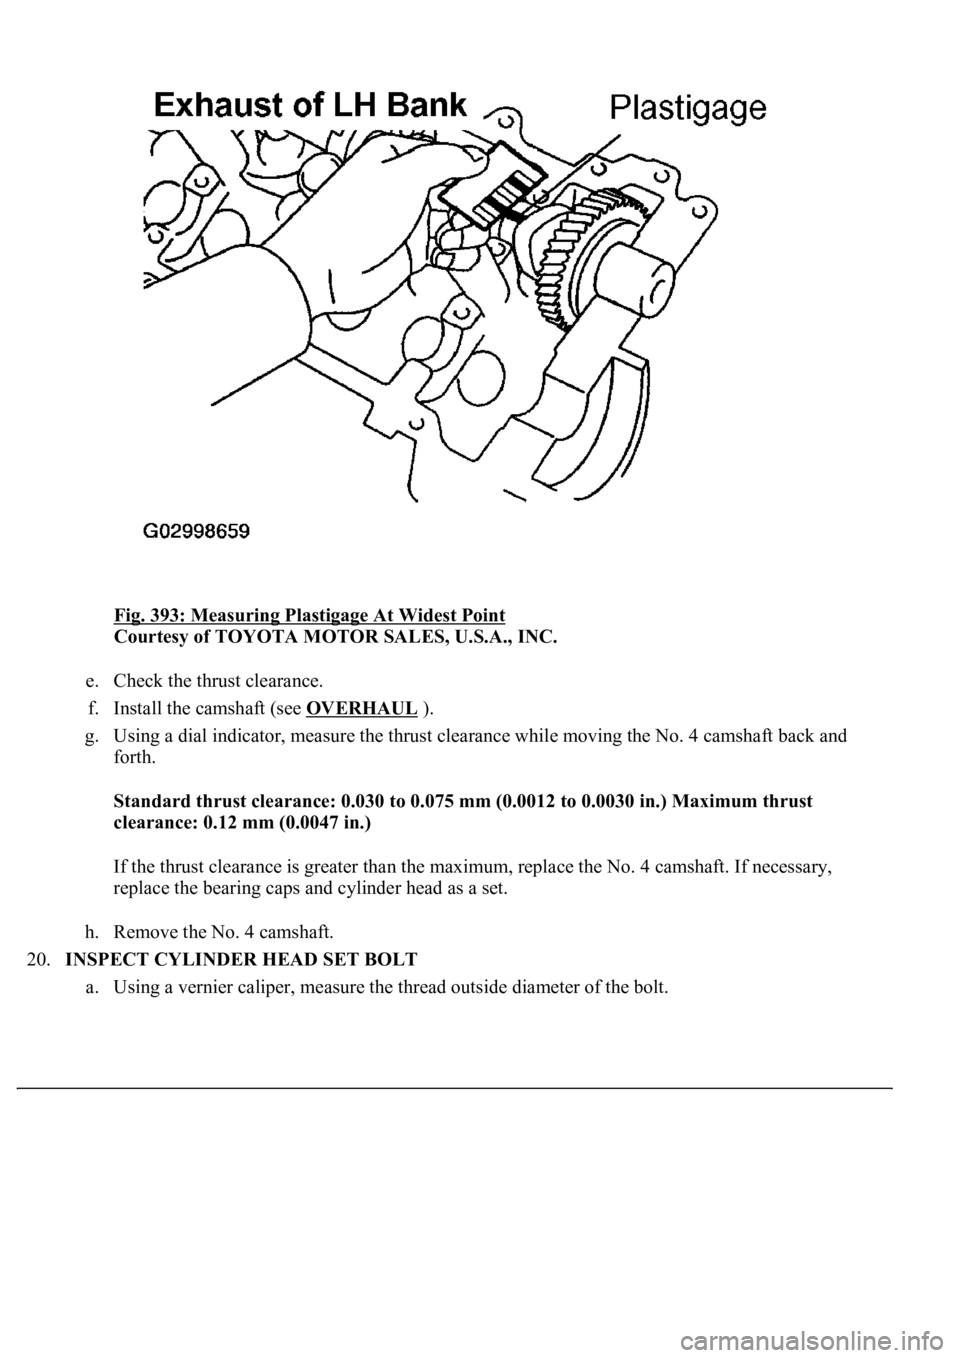
7. Measure the Plastigage at its widest point.
<0036005700440051004700440055004700030052004c004f00030046004f0048004400550044005100460048001d00030013001100130016001300030057005200030013001100130019001a0003005000500003000b001300110013001300140015000300
57005200030013001100130013001500190003004c00510011[)
Page 3677 of 4500
Maximum oil clearance: 0.100 mm (0.0039 in.)
If the oil clearance is greater than the maximum, replace the No. 4 camshaft. If necessary,
replace the bearing caps and cylinder head as a set.
8. Completely remove the Plastigage.
9. Remove the No. 4 camshaft.
Fig. 392: Identifying Plastigage
Courtesy of TOYOTA MOTOR SALES, U.S.A., INC.
Page 3678 of 4500
Fig. 393: Measuring Plastigage At Widest Point
Courtesy of TOYOTA MOTOR SALES, U.S.A., INC.
e. Check the thrust clearance.
f. Install the camshaft (see OVERHAUL
).
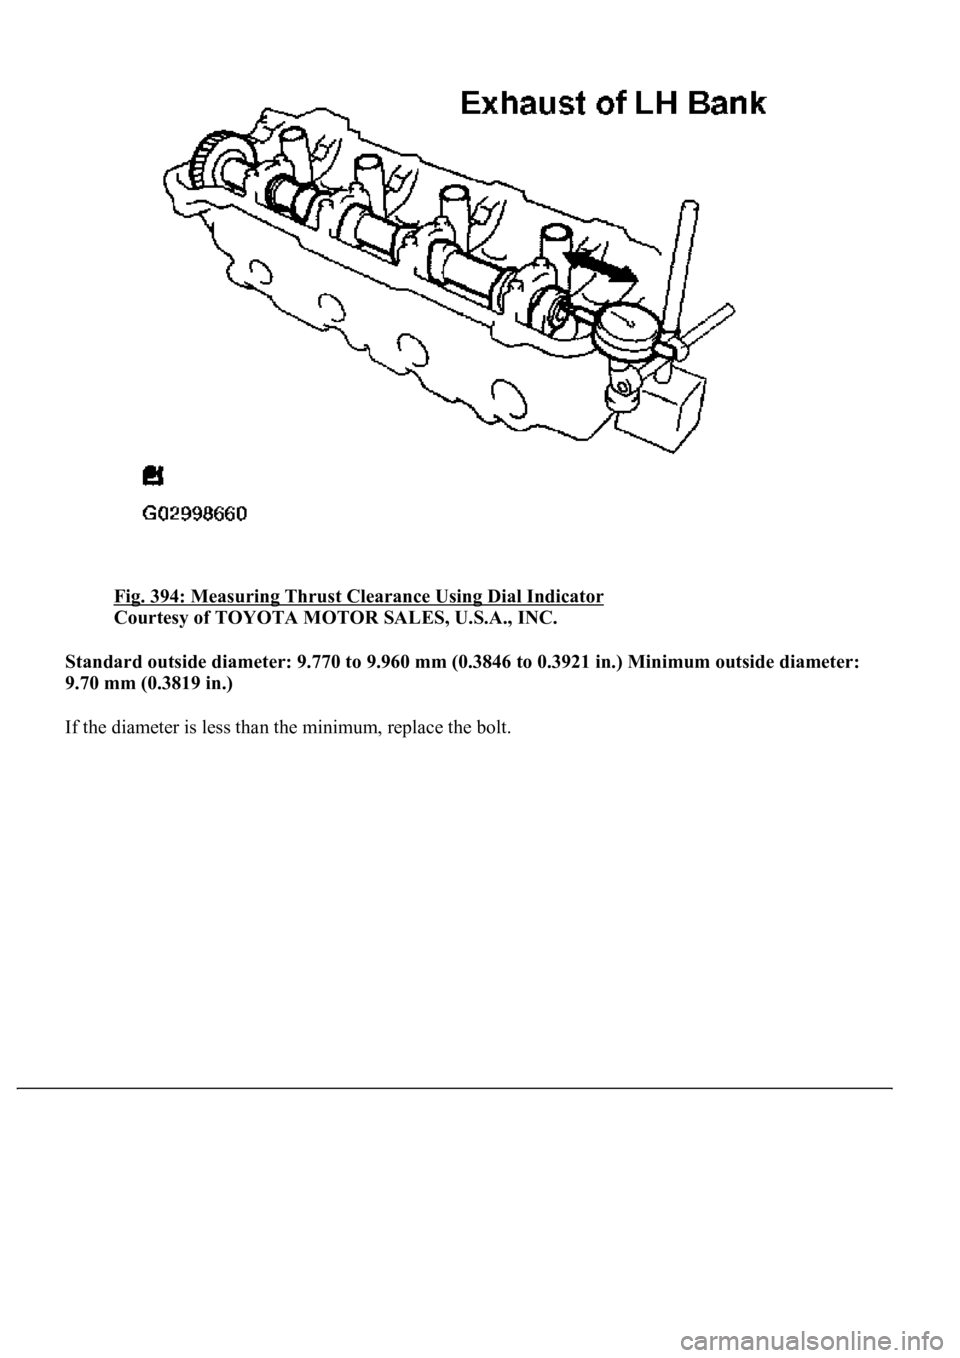
g. Using a dial indicator, measure the thrust clearance while moving the No. 4 camshaft back and
forth.
Standard thrust clearance: 0.030 to 0.075 mm (0.0012 to 0.0030 in.) Maximum thrust
clearance: 0.12 mm (0.0047 in.)
If the thrust clearance is greater than the maximum, replace the No. 4 camshaft. If necessary,
<005500480053004f00440046004800030057004b004800030045004800440055004c0051004a00030046004400530056000300440051004700030046005c004f004c00510047004800550003004b0048004400470003004400560003004400030056004800
5700110003[
h. Remove the No. 4 camshaft.
20.INSPECT CYLINDER HEAD SET BOLT
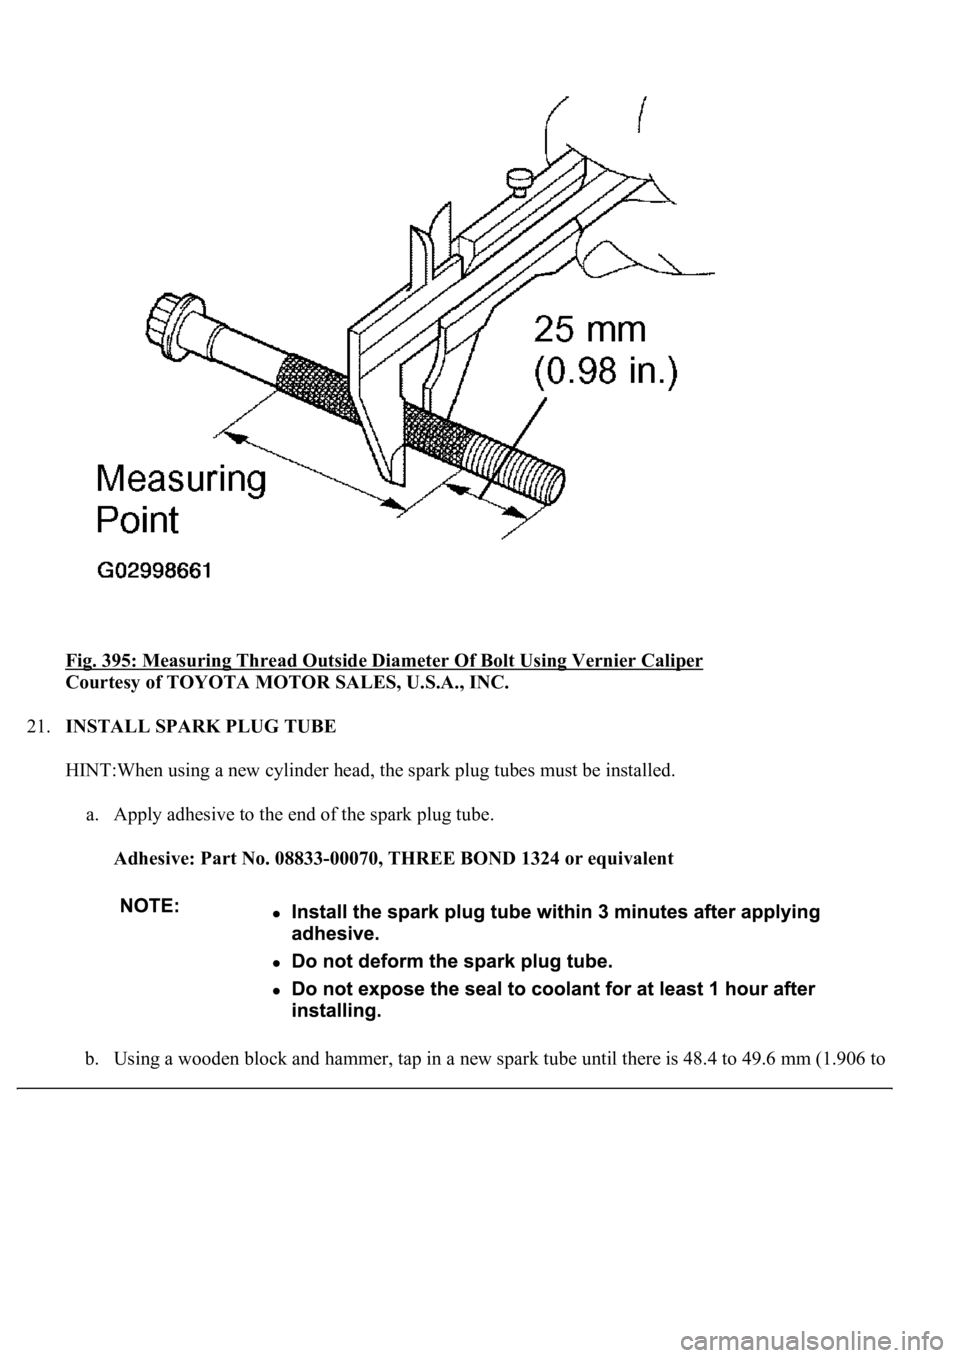
a. Usin
g a vernier caliper, measure the thread outside diameter of the bolt.
Page 3679 of 4500
Fig. 394: Measuring Thrust Clearance Using Dial Indicator
Courtesy of TOYOTA MOTOR SALES, U.S.A., INC.
Standard outside diameter: 9.770 to 9.960 mm (0.3846 to 0.3921 in.) Minimum outside diameter:
9.70 mm (0.3819 in.)
If the diameter is less than the minimum, replace the bolt.
Page 3680 of 4500
Fig. 395: Measuring Thread Outside Diameter Of Bolt Using Vernier Caliper
Courtesy of TOYOTA MOTOR SALES, U.S.A., INC.
21.INSTALL SPARK PLUG TUBE
HINT:When using a new cylinder head, the spark plug tubes must be installed.
a. Apply adhesive to the end of the spark plug tube.
Adhesive: Part No. 08833-00070, THREE BOND 1324 or equivalent
b. Using a wooden block and hammer, tap in a new spark tube until there is 48.4 to 49.6 mm (1.906 to
Trending: wiring diagram, alarm, cooling, fuel pump, instrument panel, rear seat back, intake manifold inlet
