LEXUS LS430 2003 Factory Repair Manual
Manufacturer: LEXUS, Model Year: 2003,
Model line: LS430,
Model: LEXUS LS430 2003
Pages: 4500, PDF Size: 87.45 MB
LEXUS LS430 2003 Factory Repair Manual
LS430 2003
LEXUS
LEXUS
https://www.carmanualsonline.info/img/36/57050/w960_57050-0.png
LEXUS LS430 2003 Factory Repair Manual
Trending: Spd, relay, coolant, actuator, Control actuator, key, headrest
Page 3681 of 4500
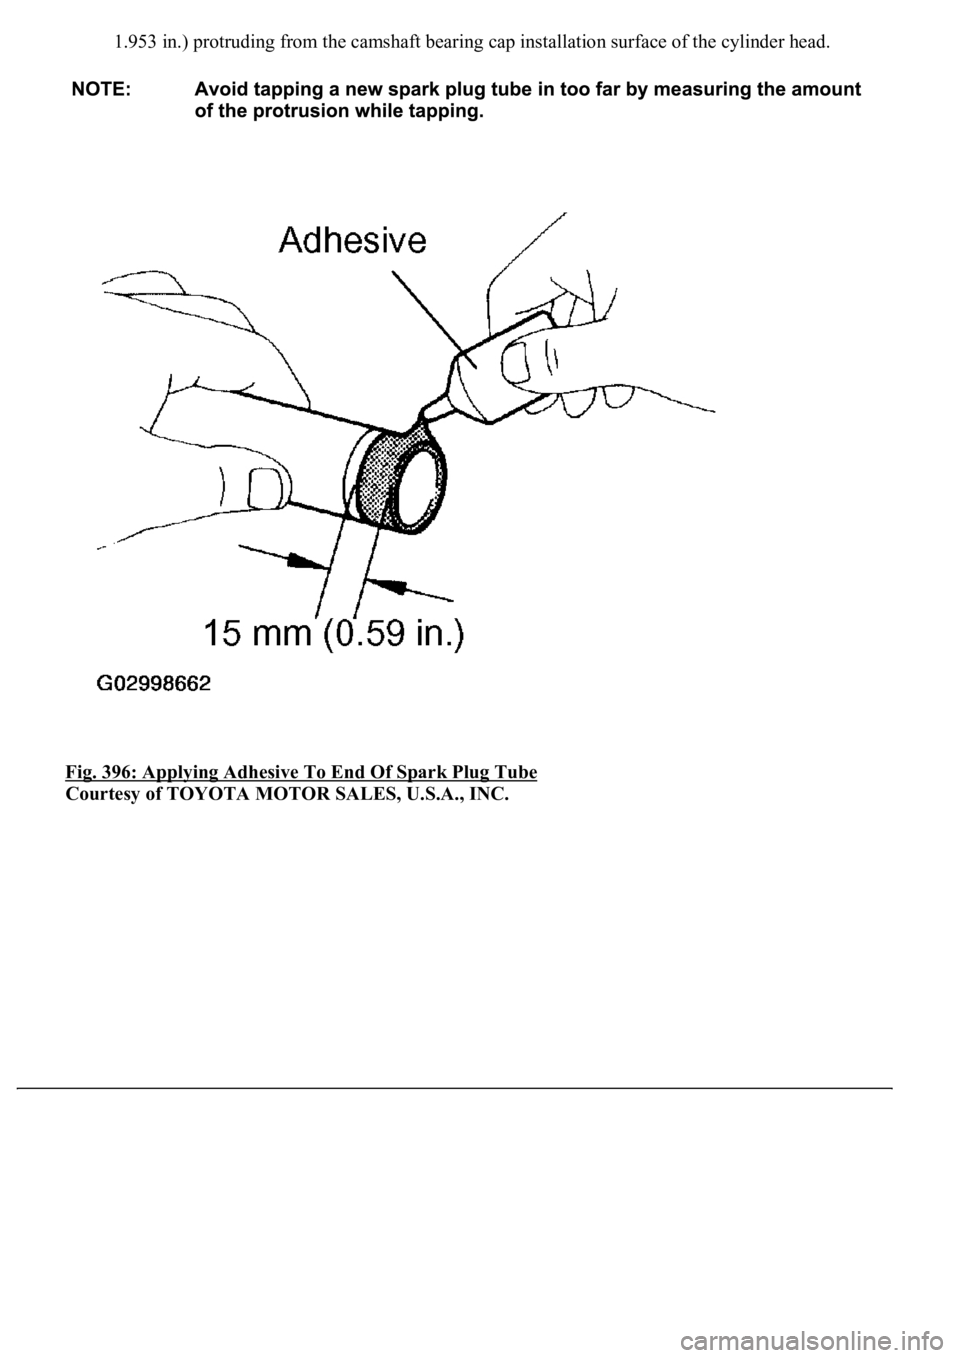
1.953 in.) protruding from the camshaft bearing cap installation surface of the cylinder head.
Fig. 396: Applying Adhesive To End Of Spark Plug Tube
Courtesy of TOYOTA MOTOR SALES, U.S.A., INC.
Page 3682 of 4500
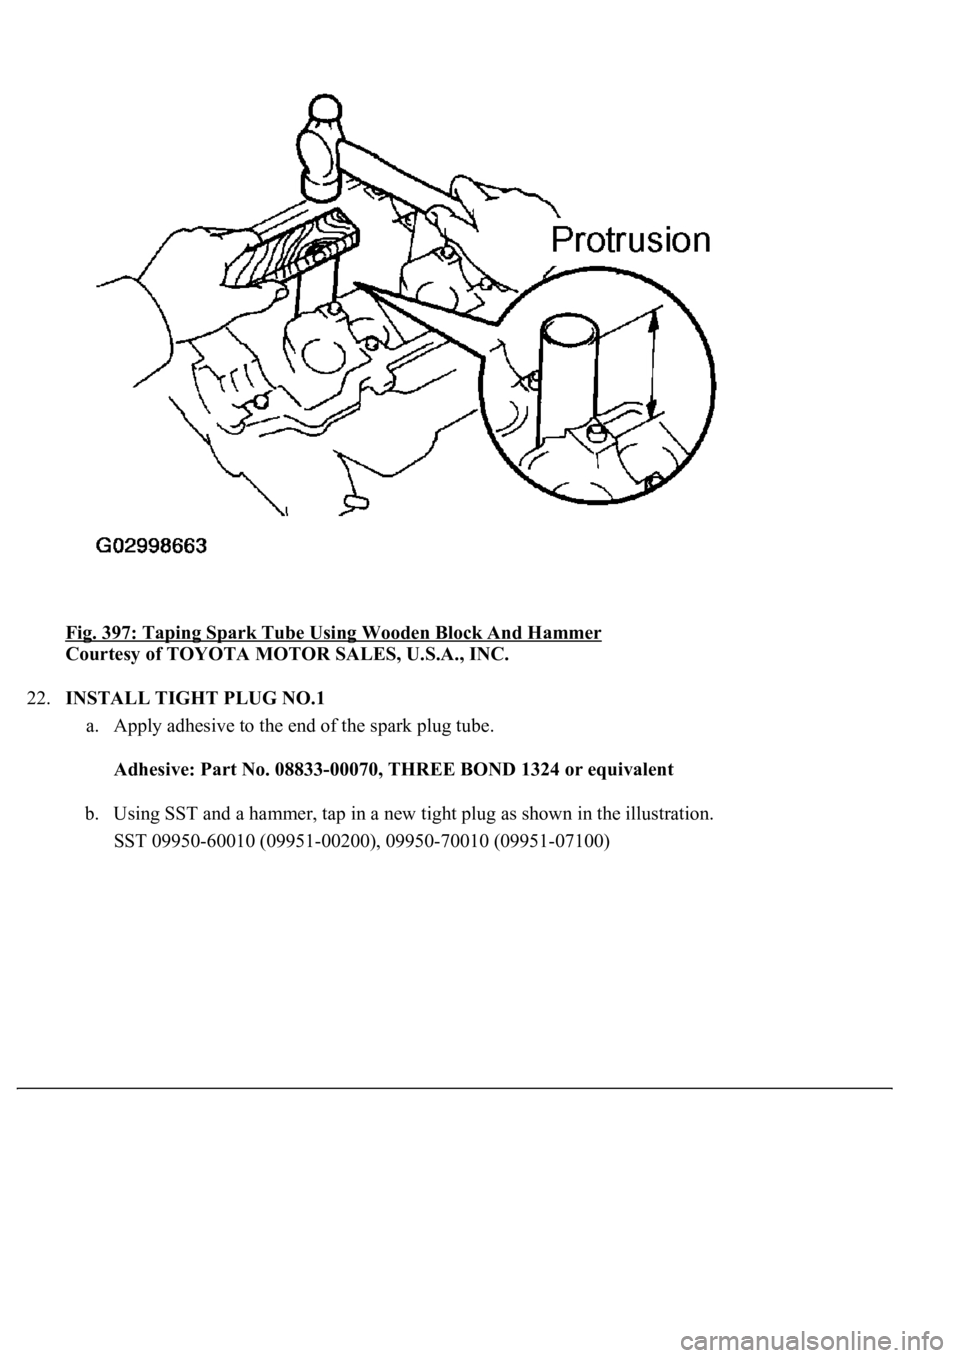
Fig. 397: Taping Spark Tube Using Wooden Block And Hammer
Courtesy of TOYOTA MOTOR SALES, U.S.A., INC.
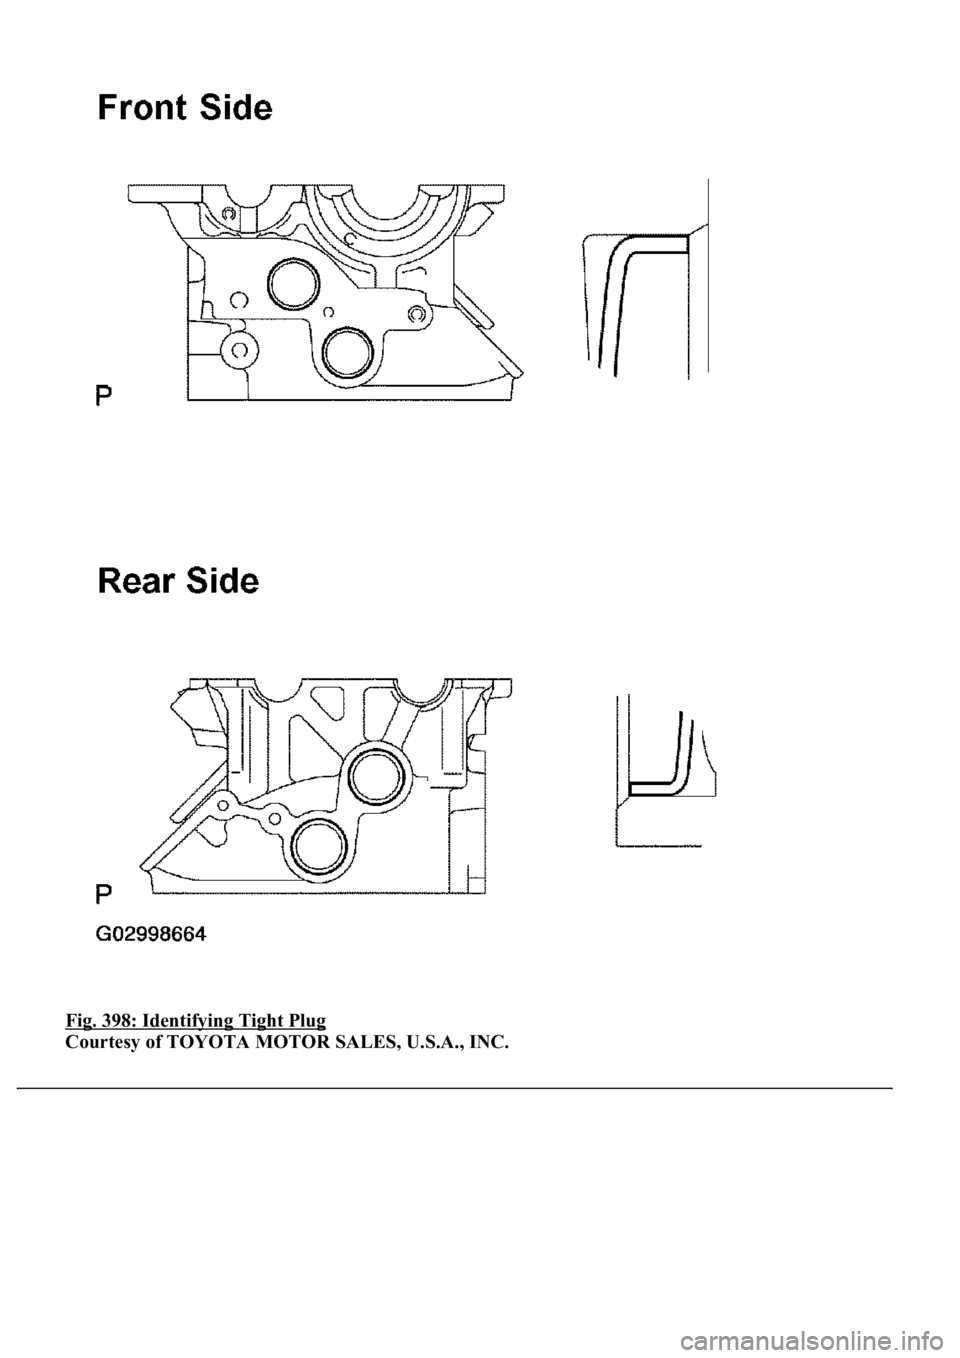
22.INSTALL TIGHT PLUG NO.1
a. Apply adhesive to the end of the spark plug tube.
Adhesive: Part No. 08833-00070, THREE BOND 1324 or equivalent
b. Using SST and a hammer, tap in a new tight plug as shown in the illustration.
SST 09950-60010 (09951-00200), 09950-70010 (09951-07100)
Page 3683 of 4500
Fig. 398: Identifying Tight Plug
Courtesy of TOYOTA MOTOR SALES, U.S.A., INC.
Page 3684 of 4500
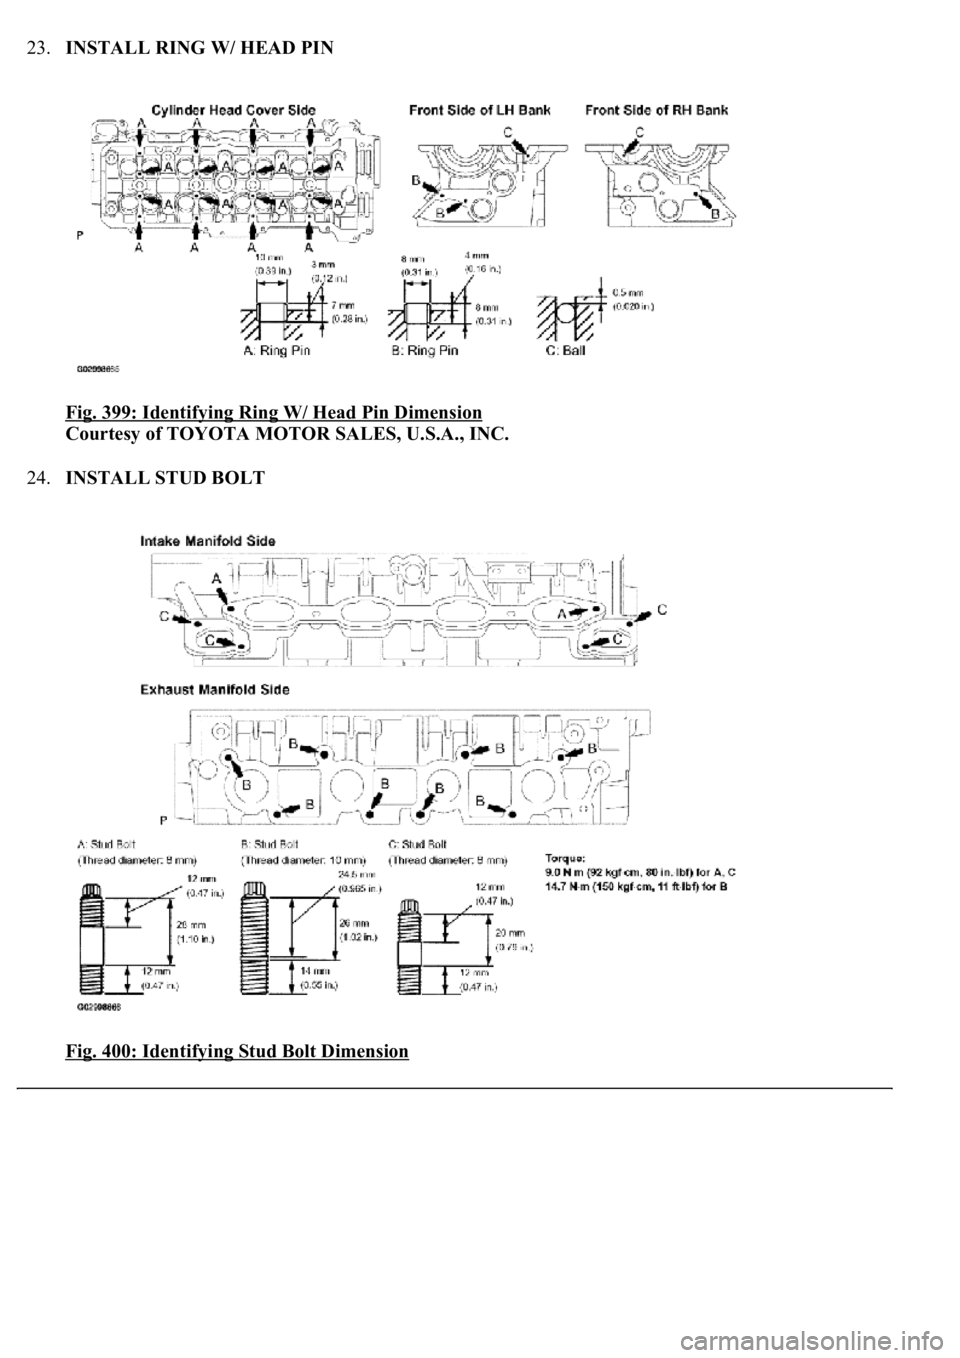
23.INSTALL RING W/ HEAD PIN
Fig. 399: Identifying Ring W/ Head Pin Dimension
Courtesy of TOYOTA MOTOR SALES, U.S.A., INC.
24.INSTALL STUD BOLT
Fig. 400: Identifying Stud Bolt Dimension
Page 3685 of 4500
Courtesy of TOYOTA MOTOR SALES, U.S.A., INC.
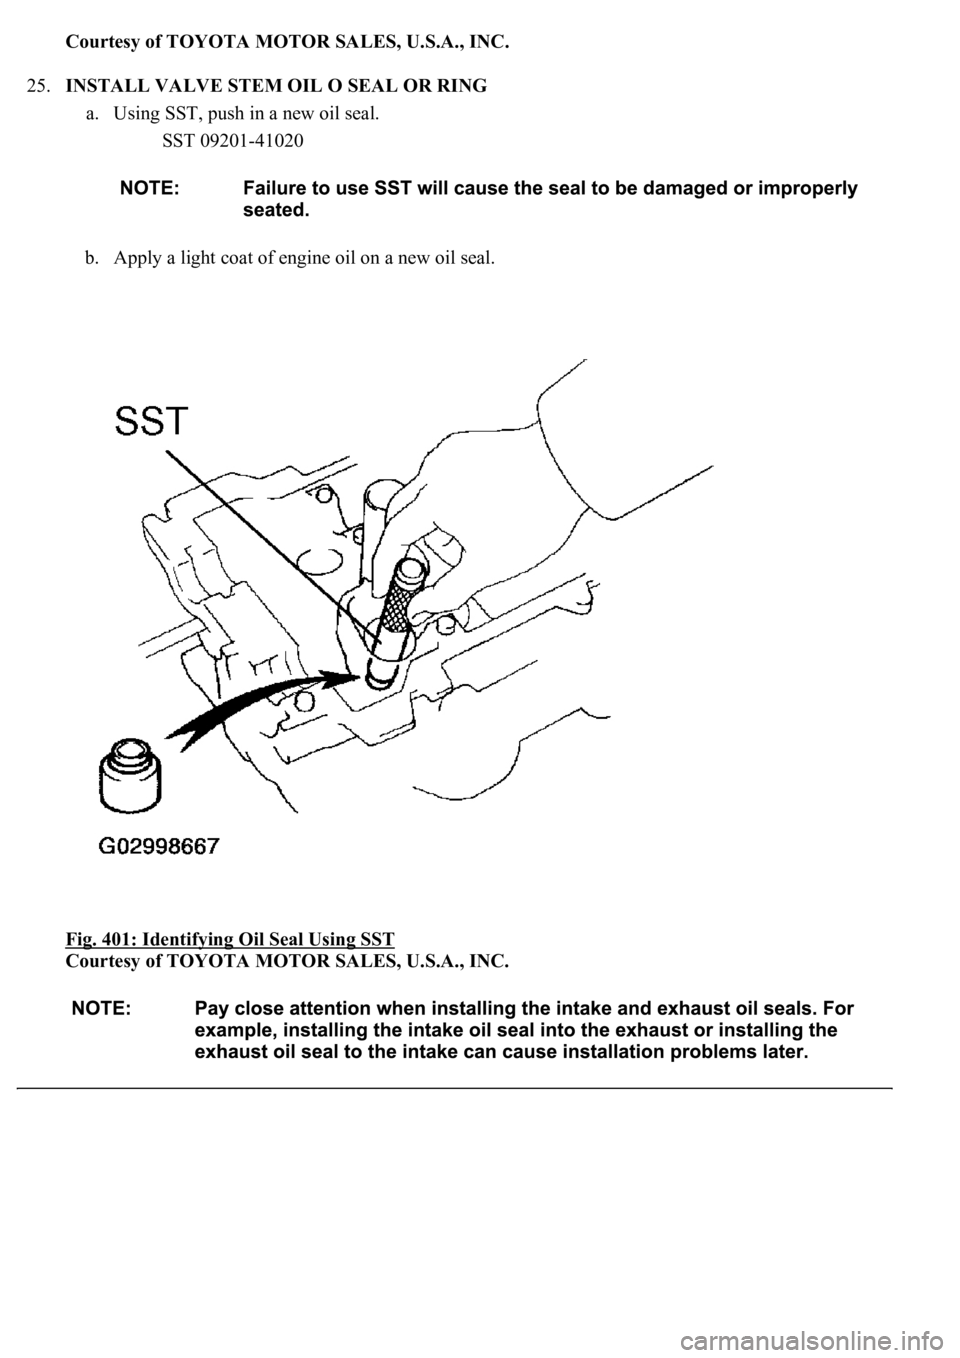
25.INSTALL VALVE STEM OIL O SEAL OR RING
a. Using SST, push in a new oil seal.
SST 09201-41020
b. Apply a light coat of engine oil on a new oil seal.
Fig. 401: Identifying Oil Seal Using SST
Courtesy of TOYOTA MOTOR SALES, U.S.A., INC.
Page 3686 of 4500
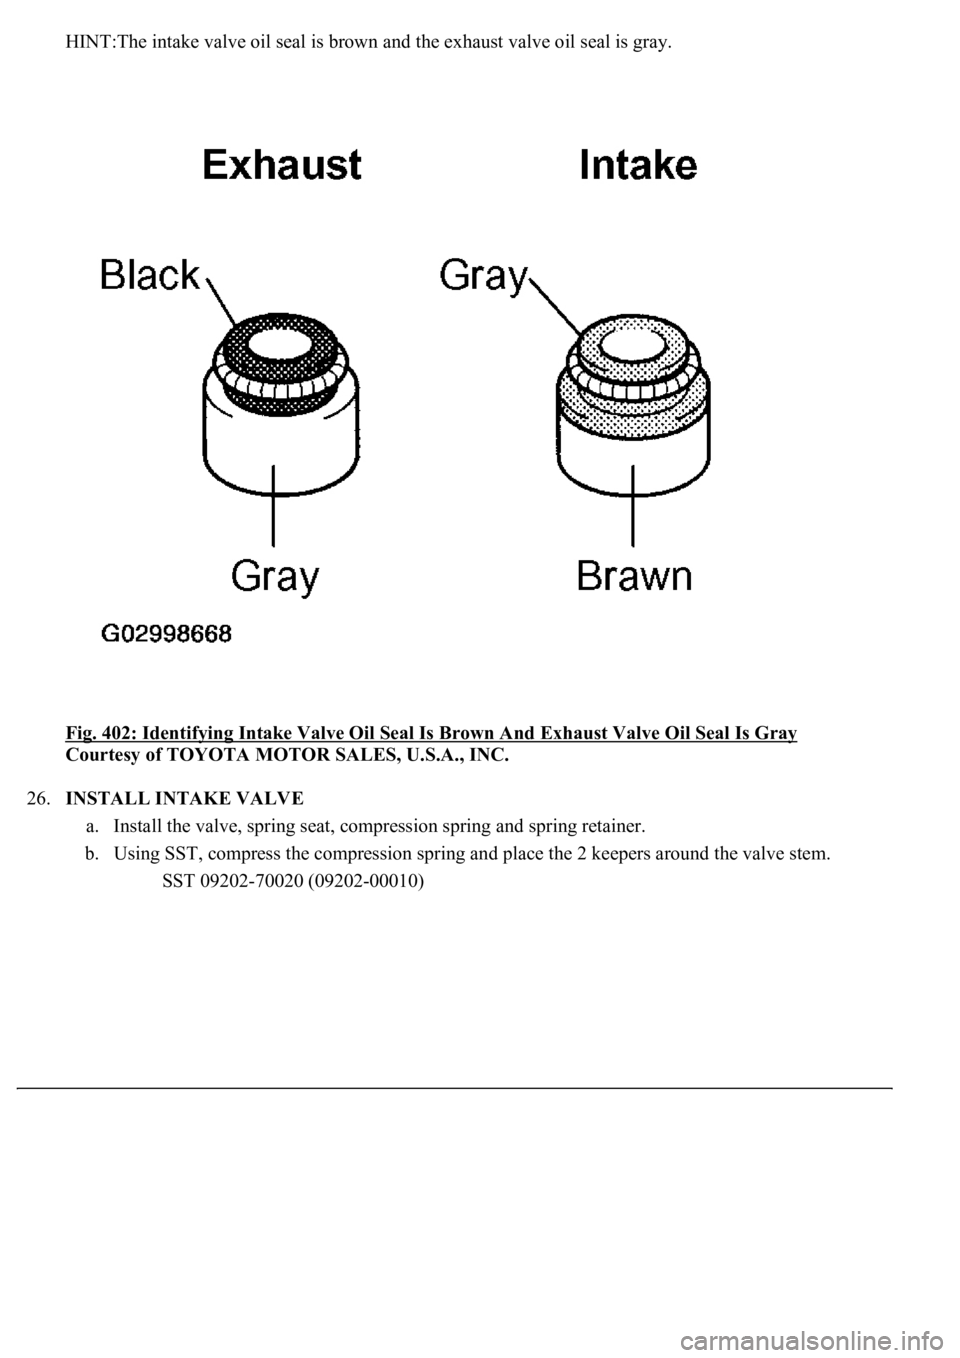
HINT:The intake valve oil seal is brown and the exhaust valve oil seal is gray.
Fig. 402: Identifying Intake Valve Oil Seal Is Brown And Exhaust Valve Oil Seal Is Gray
Courtesy of TOYOTA MOTOR SALES, U.S.A., INC.
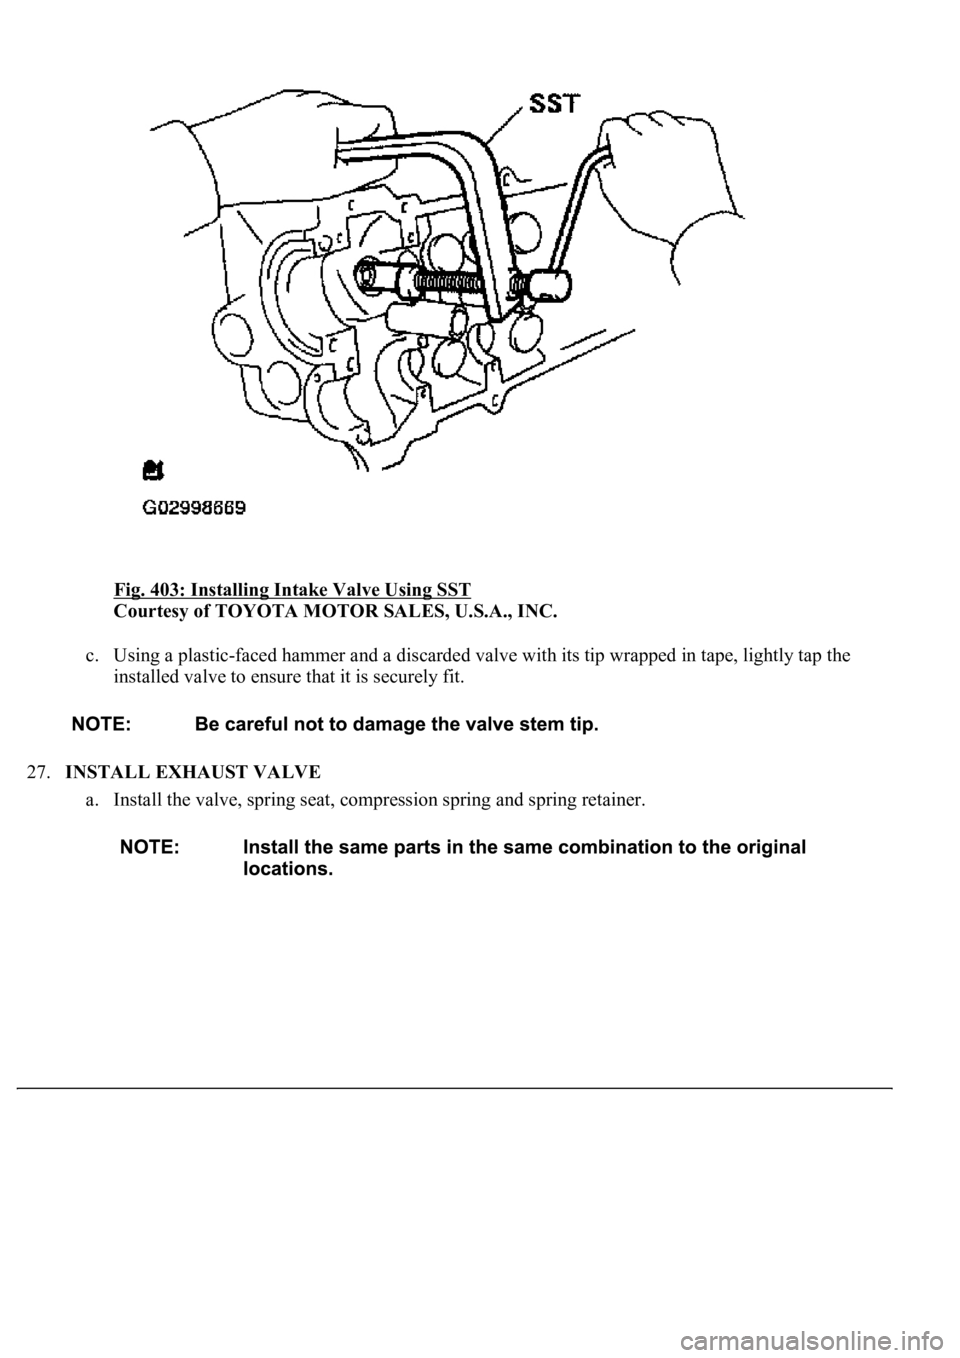
26.INSTALL INTAKE VALVE
a. Install the valve, spring seat, compression spring and spring retainer.
b. Using SST, compress the compression spring and place the 2 keepers around the valve stem.
SST 09202-70020 (09202-00010)
Page 3687 of 4500
Fig. 403: Installing Intake Valve Using SST
Courtesy of TOYOTA MOTOR SALES, U.S.A., INC.
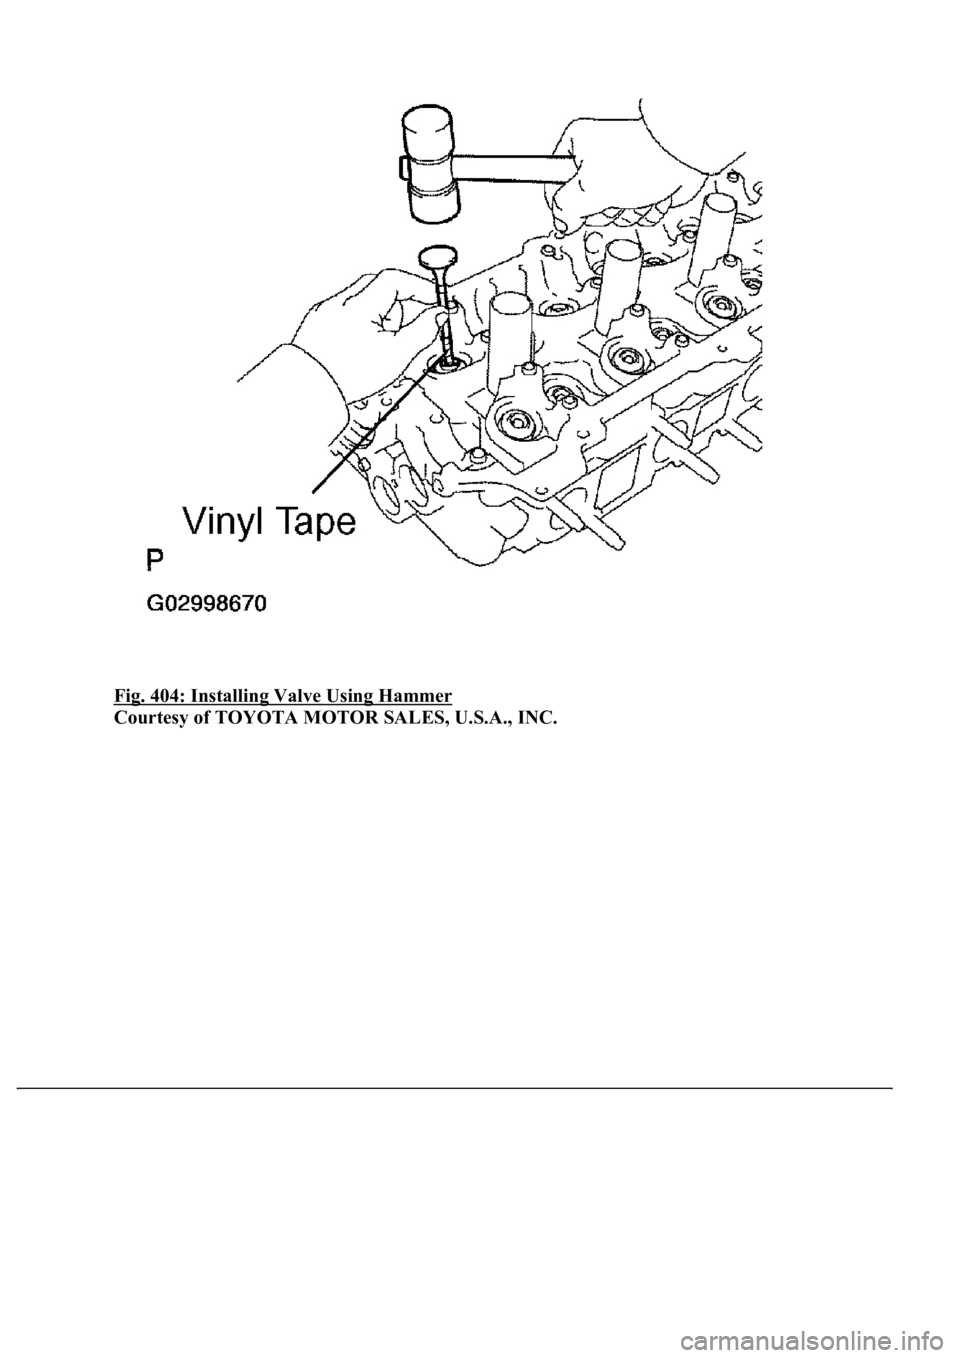
c. Using a plastic-faced hammer and a discarded valve with its tip wrapped in tape, lightly tap the
<004c0051005600570044004f004f00480047000300590044004f00590048000300570052000300480051005600580055004800030057004b004400570003004c00570003004c00560003005600480046005800550048004f005c00030049004c0057001100
030003[
27.INSTALL EXHAUST VALVE
a. Install the valve, spring seat, compression spring and spring retainer.
Page 3688 of 4500
Fig. 404: Installing Valve Using Hammer
Courtesy of TOYOTA MOTOR SALES, U.S.A., INC.
Page 3689 of 4500
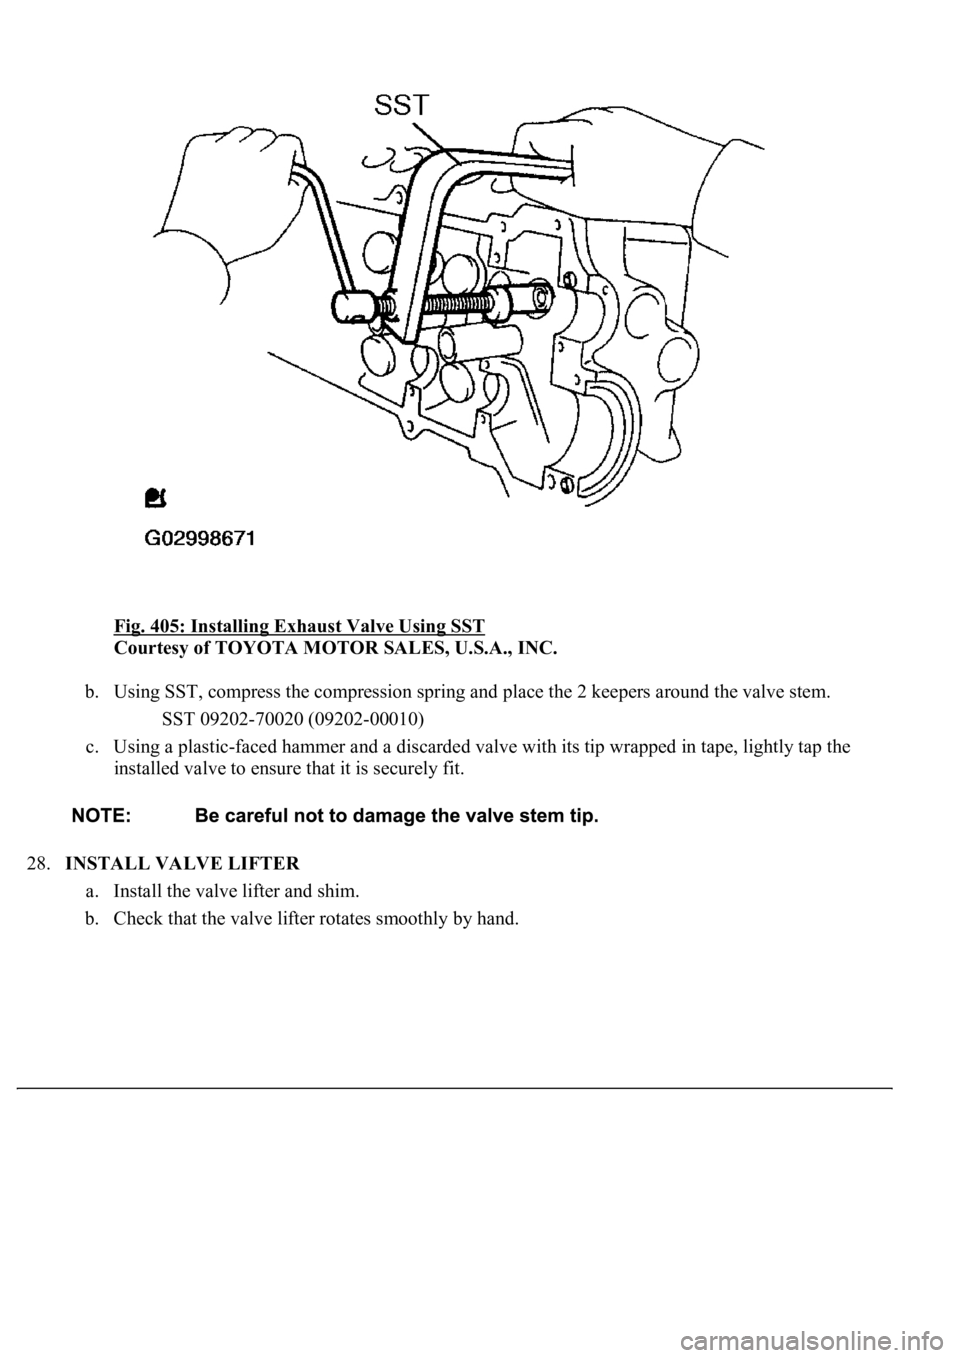
Fig. 405: Installing Exhaust Valve Using SST
Courtesy of TOYOTA MOTOR SALES, U.S.A., INC.
b. Using SST, compress the compression spring and place the 2 keepers around the valve stem.
SST 09202-70020 (09202-00010)
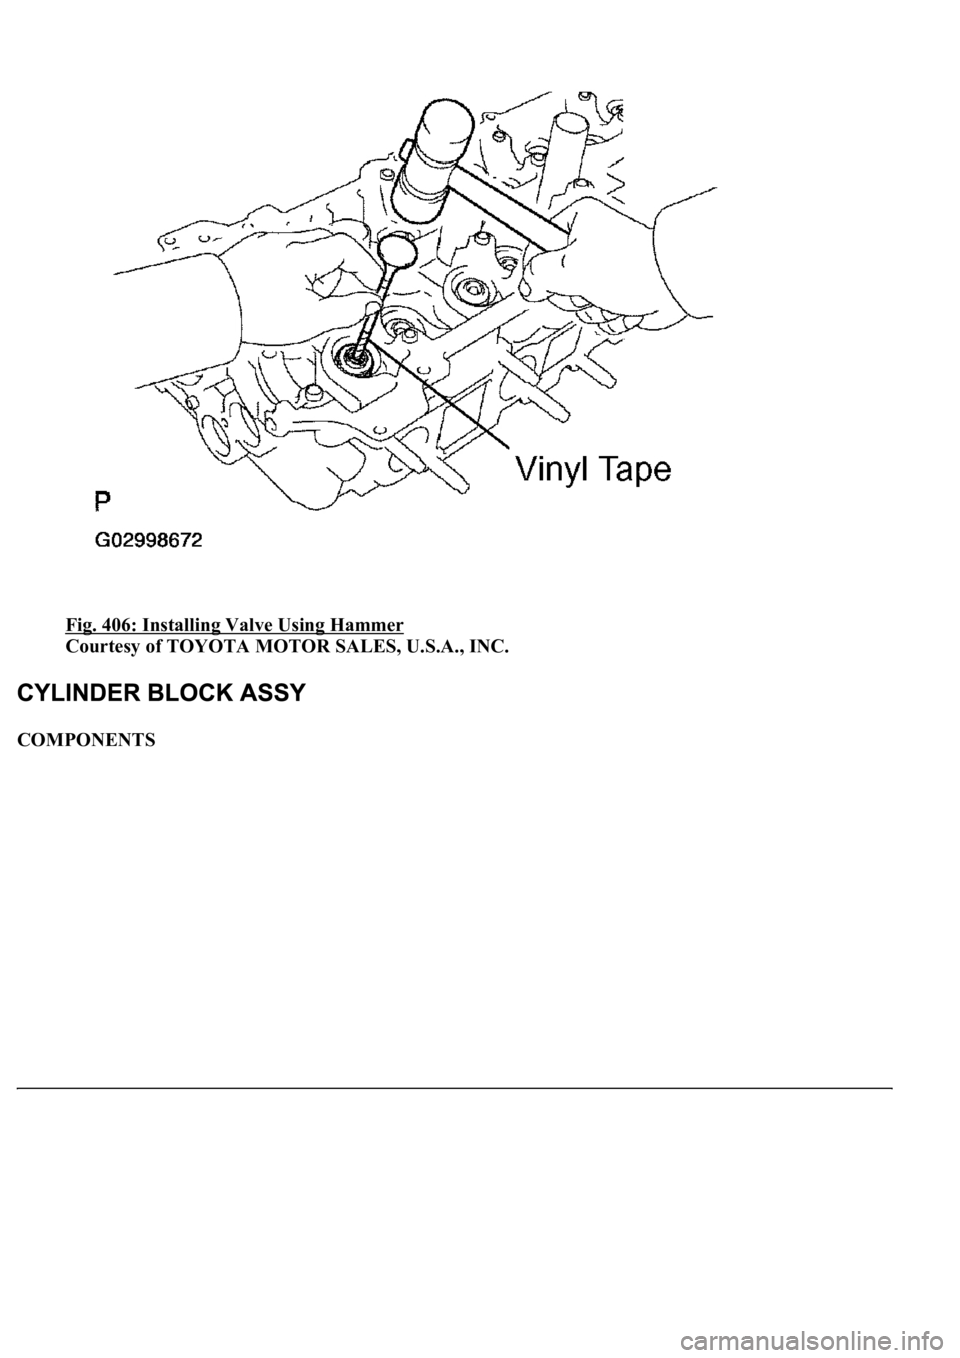
c. Using a plastic-faced hammer and a discarded valve with its tip wrapped in tape, lightly tap the
<004c0051005600570044004f004f00480047000300590044004f00590048000300570052000300480051005600580055004800030057004b004400570003004c00570003004c00560003005600480046005800550048004f005c00030049004c0057001100
030003[
28.INSTALL VALVE LIFTER
a. Install the valve lifter and shim.
b. Check that the valve lifter rotates smoothly by hand.
Page 3690 of 4500
Fig. 406: Installing Valve Using Hammer
Courtesy of TOYOTA MOTOR SALES, U.S.A., INC.
COMPONENTS
Trending: engine oil, Temperature sensor, catalytic converter, Max cool damper sensor, fuel, torque, Suspension Control actuator
