LEXUS LS430 2003 Factory Repair Manual
Manufacturer: LEXUS, Model Year: 2003,
Model line: LS430,
Model: LEXUS LS430 2003
Pages: 4500, PDF Size: 87.45 MB
LEXUS LS430 2003 Factory Repair Manual
LS430 2003
LEXUS
LEXUS
https://www.carmanualsonline.info/img/36/57050/w960_57050-0.png
LEXUS LS430 2003 Factory Repair Manual
Trending: belt, seat adjustment, Bean, Navi, Rear control Arm, CD changer, back seat removal
Page 4211 of 4500
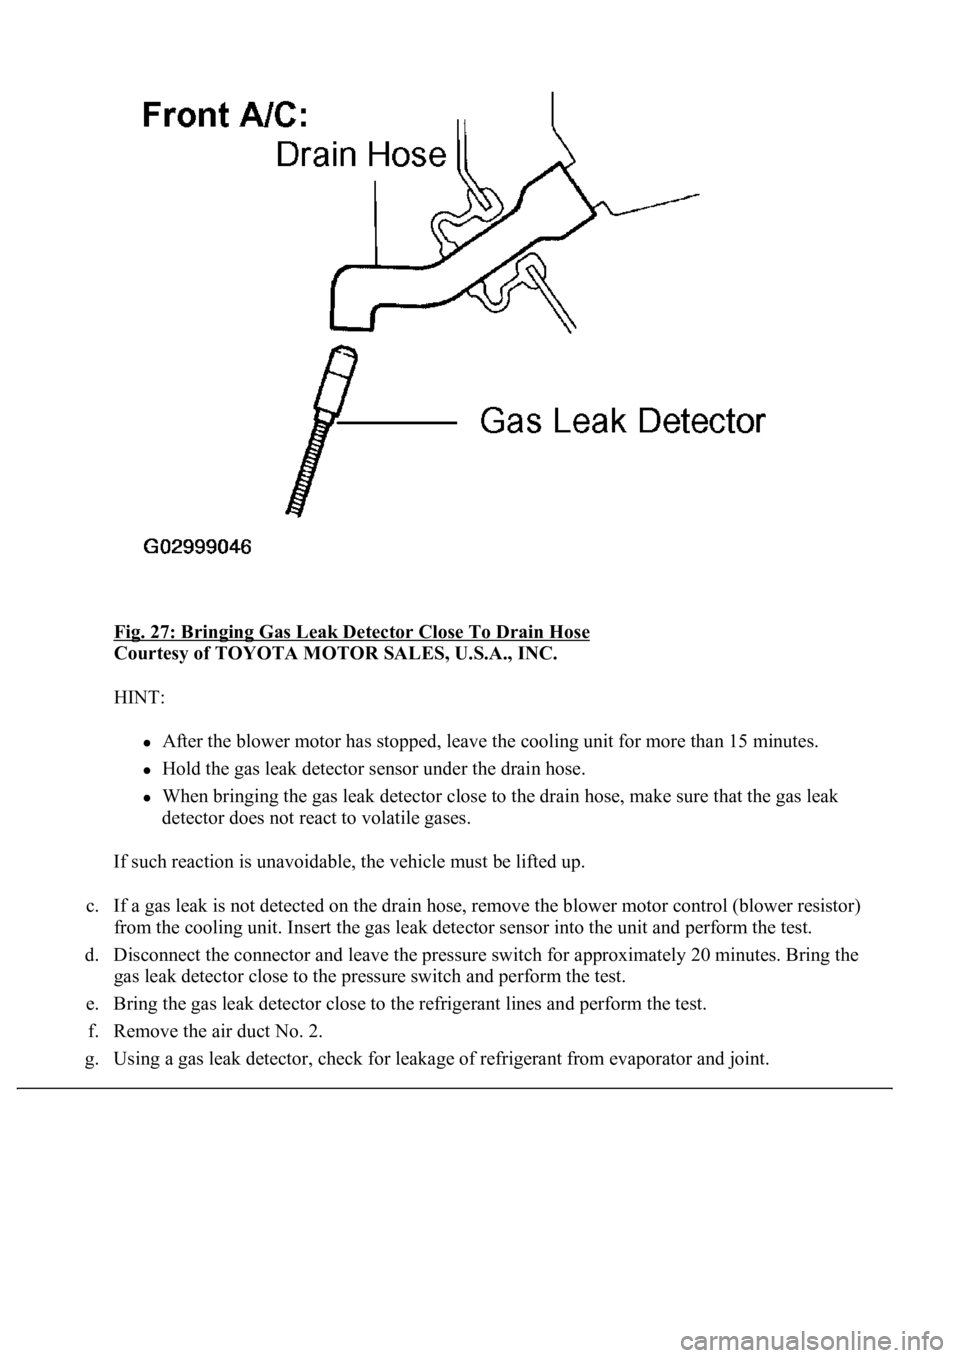
Fig. 27: Bringing Gas Leak Detector Close To Drain Hose
Courtesy of TOYOTA MOTOR SALES, U.S.A., INC.
HINT:
<0024004900570048005500030057004b004800030045004f0052005a004800550003005000520057005200550003004b0044005600030056005700520053005300480047000f0003004f004800440059004800030057004b00480003004600520052004f00
4c0051004a000300580051004c005700030049005200550003[more than 15 minutes.
Hold the gas leak detector sensor under the drain hose.
When bringing the gas leak detector close to the drain hose, make sure that the gas leak
detector does not react to volatile gases.
If such reaction is unavoidable, the vehicle must be lifted up.
c. If a gas leak is not detected on the drain hose, remove the blower motor control (blower resistor)
from the cooling unit. Insert the gas leak detector sensor into the unit and perform the test.
d. Disconnect the connector and leave the pressure switch for approximately 20 minutes. Bring the
gas leak detector close to the pressure switch and perform the test.
e. Bring the gas leak detector close to the refrigerant lines and perform the test.
f. Remove the air duct No. 2.
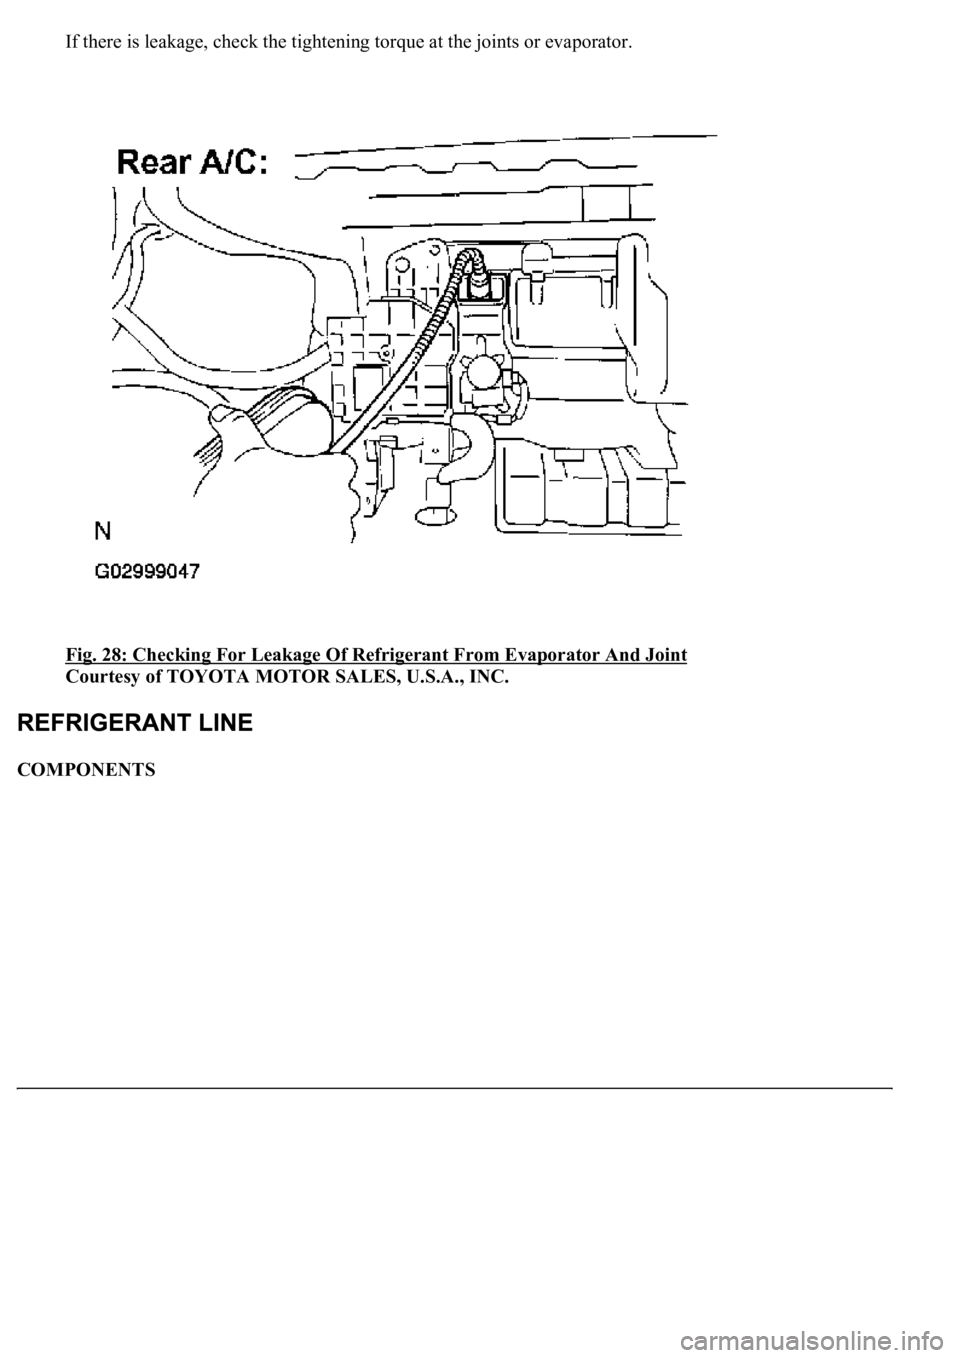
g.Using a gas leak detector, check for leakage of refrigerant from evaporator and joint.
Page 4212 of 4500
If there is leakage, check the tightening torque at the joints or evaporator.
Fig. 28: Checking For Leakage Of Refrigerant From Evaporator And Joint
Courtesy of TOYOTA MOTOR SALES, U.S.A., INC.
COMPONENTS
Page 4213 of 4500
Fig. 29: Identifying Refrigerant Line Components And Replacements (Single A/C)
Courtesy of TOYOTA MOTOR SALES, U.S.A., INC.
Page 4214 of 4500
Page 4215 of 4500
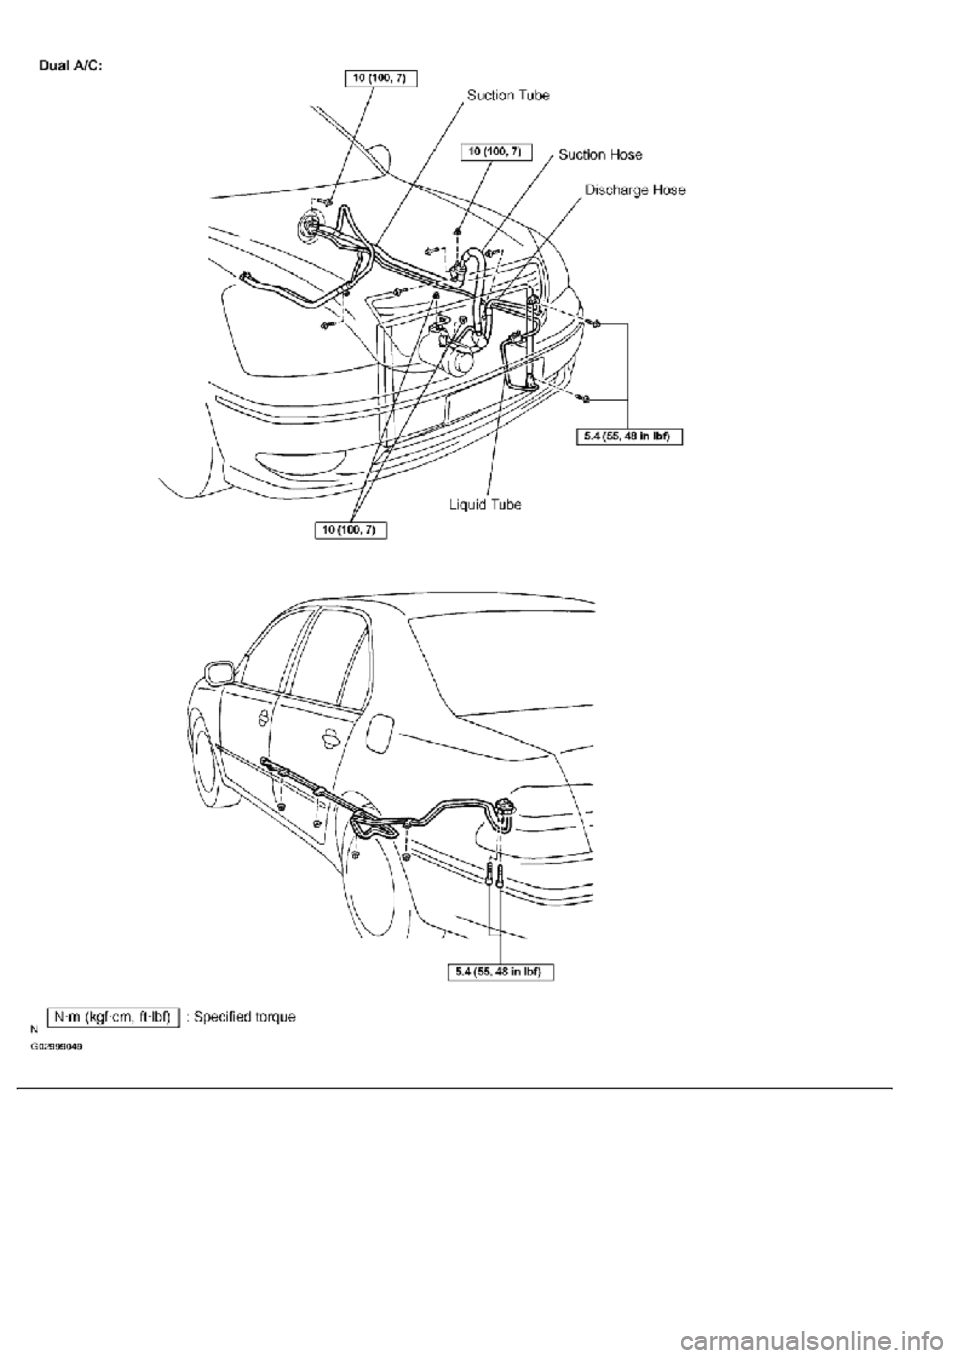
Fig. 30: Identifying Refrigerant Line Components And Replacements (Dual A/C)
Courtesy of TOYOTA MOTOR SALES, U.S.A., INC.
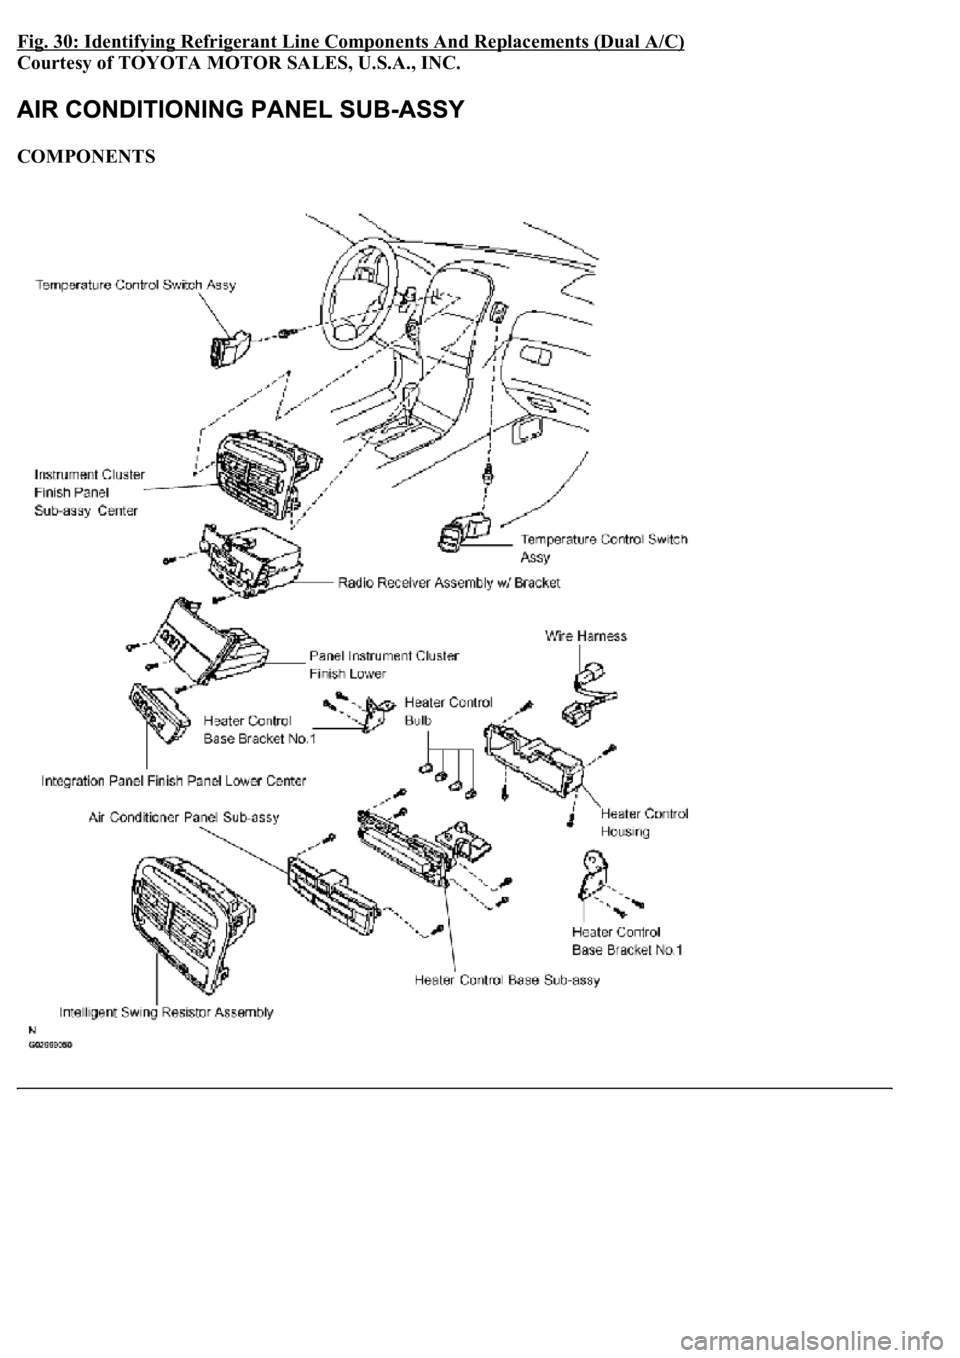
COMPONENTS
Page 4216 of 4500
Fig. 31: Identifying Air Conditioning Panel Sub-Assy Components And Replacements
Courtesy of TOYOTA MOTOR SALES, U.S.A., INC.
REPLACEMENT
HINT:
Installation is in the reverse order of removal.
See COMPONENTS .
1.RESTORE SHIP MODE SETTING (W/ CD CHANGER) (See PRECAUTION
)
2.REMOVE INSTRUMENT PANEL FINISH PANEL LOWER CENTER (See step 26 in
REPLACEMENT
)
3.REMOVE PANEL INSTRUMENT CLUSTER FINISH LOWER (See step 27 in
REPLACEMENT
)
4.REMOVE RADIO RECEIVER ASSEMBLY W/BRACKET (See step 4 in REPLACEMENT
)
5.CONFIRM SHIP MODE (W/ CD CHANGER) (See PRECAUTION
)
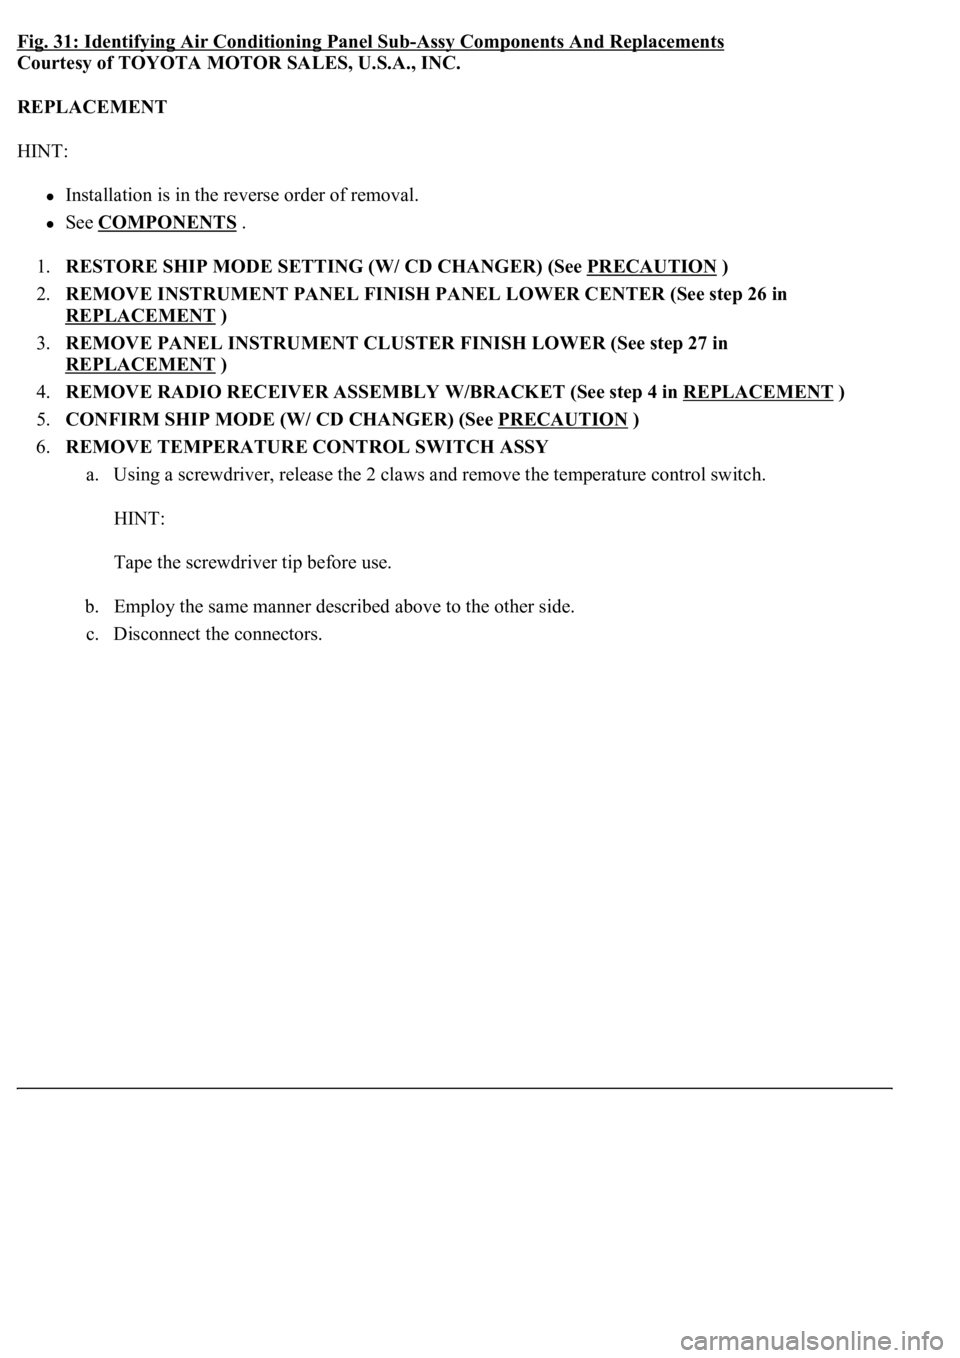
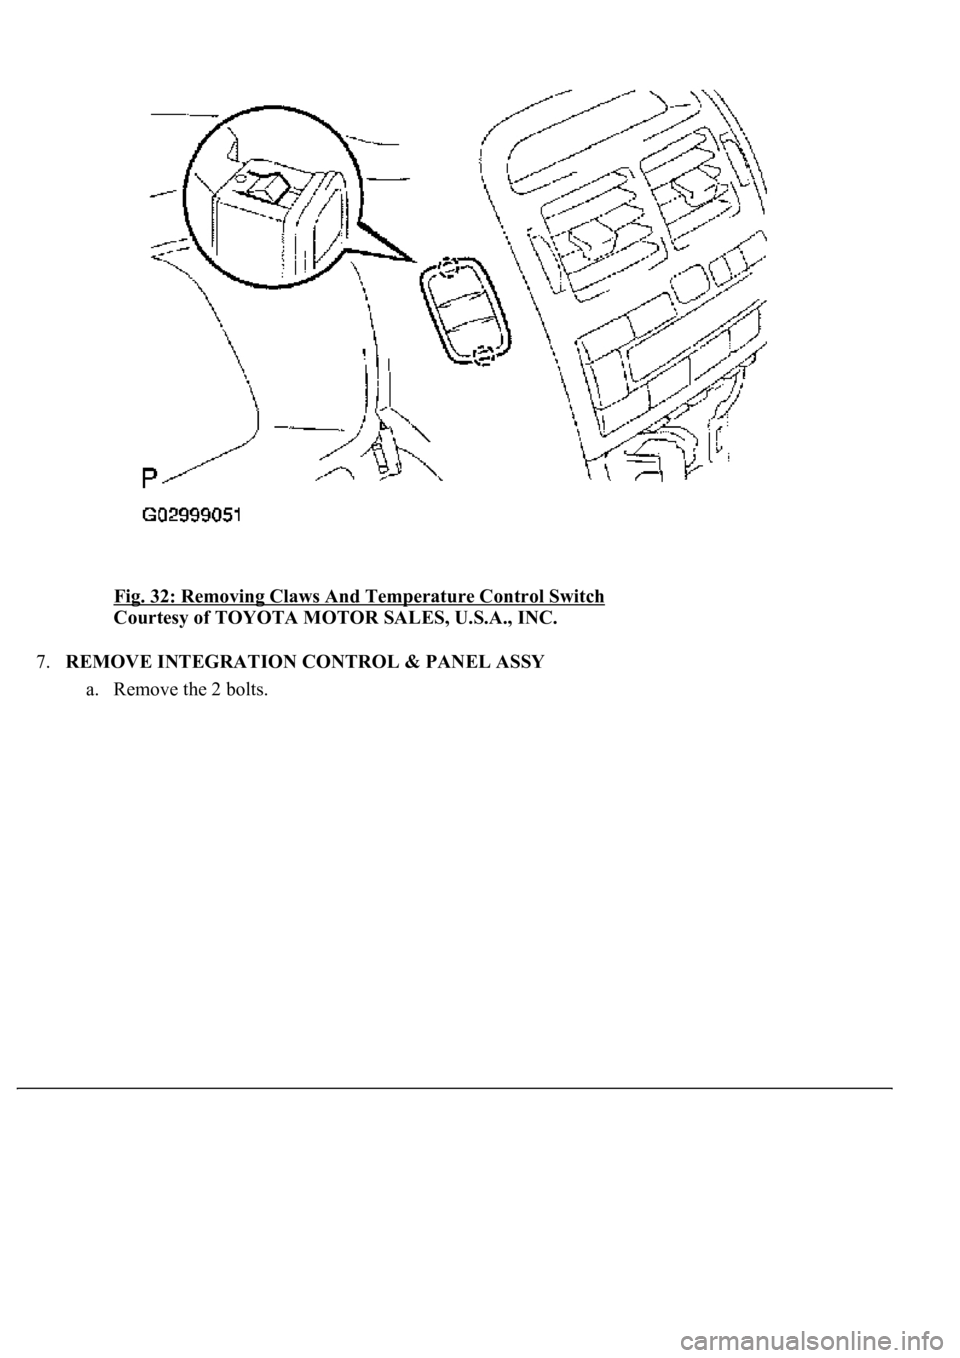
6.REMOVE TEMPERATURE CONTROL SWITCH ASSY
a. Using a screwdriver, release the 2 claws and remove the temperature control switch.
HINT:
Tape the screwdriver tip before use.
b. Employ the same manner described above to the other side.
c. Disconnect the connectors.
Page 4217 of 4500
Fig. 32: Removing Claws And Temperature Control Switch
Courtesy of TOYOTA MOTOR SALES, U.S.A., INC.
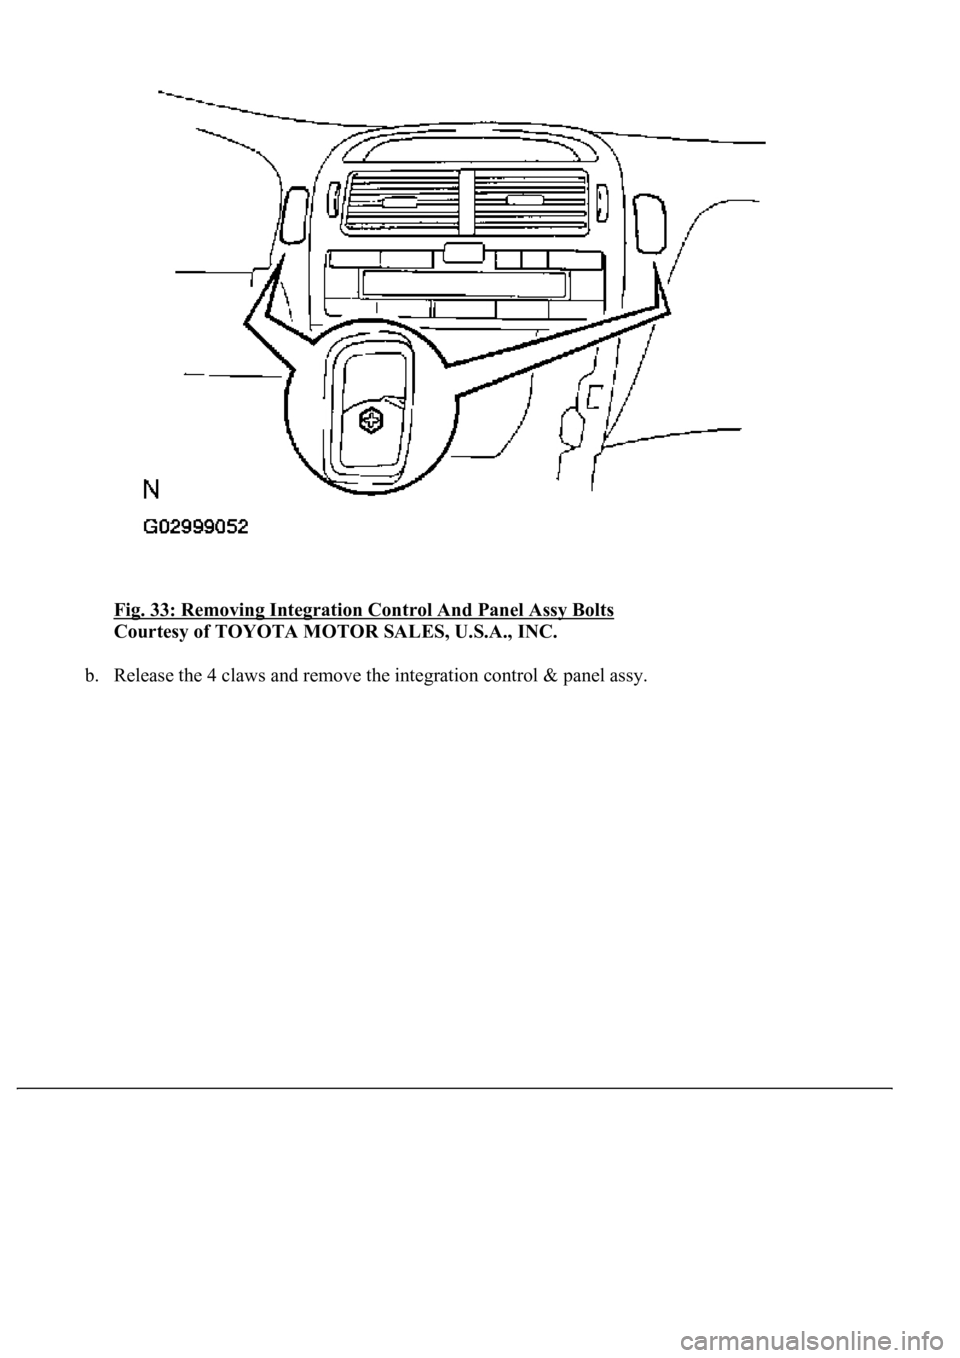
7.REMOVE INTEGRATION CONTROL & PANEL ASSY
a. Remove the 2 bolts.
Page 4218 of 4500
Fig. 33: Removing Integration Control And Panel Assy Bolts
Courtesy of TOYOTA MOTOR SALES, U.S.A., INC.
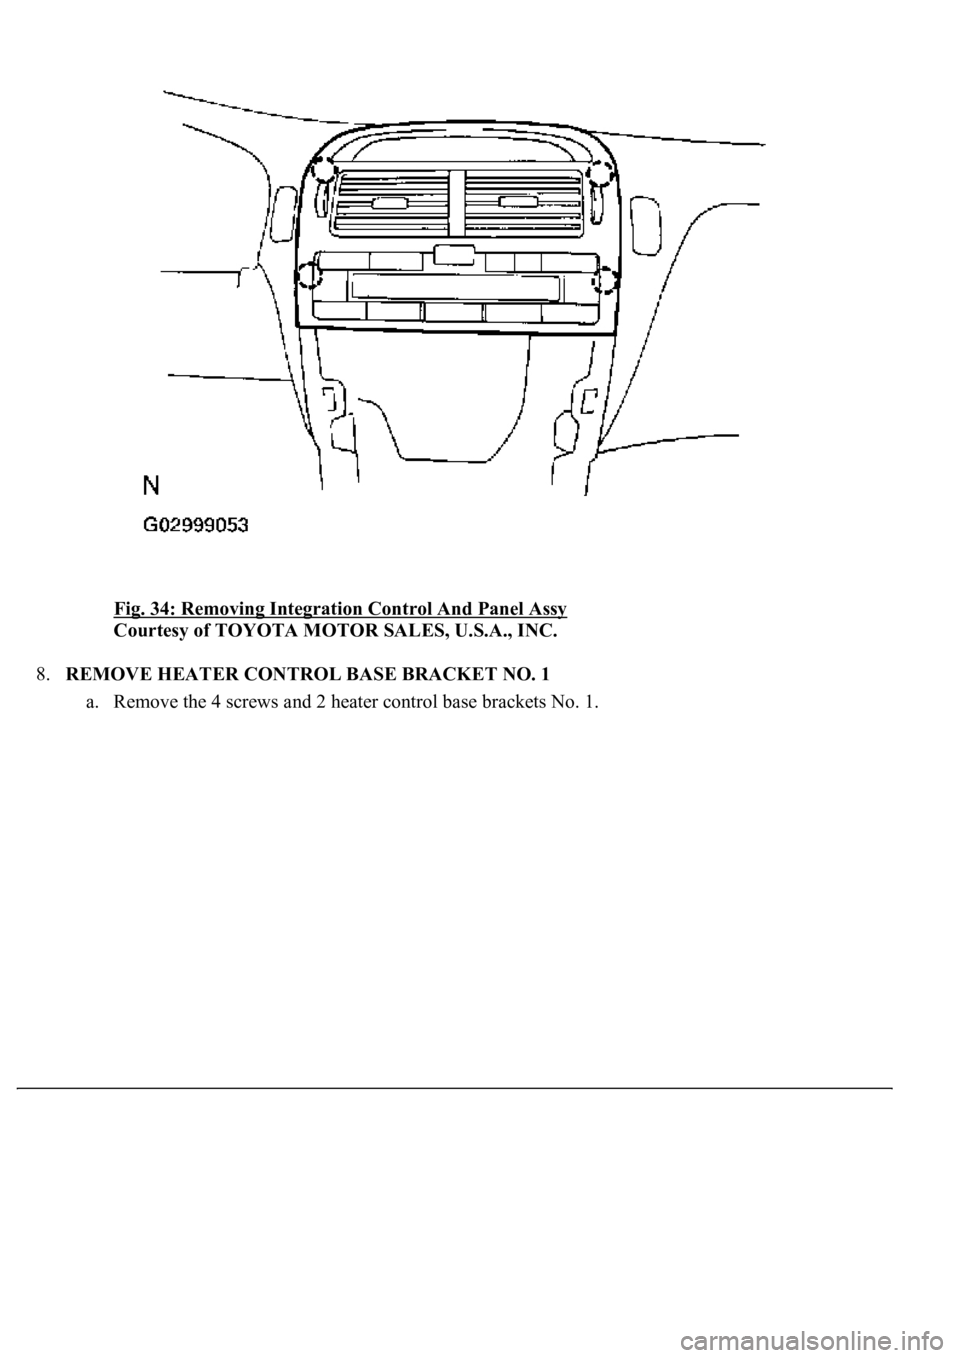
b. Release the 4 claws and remove the integration control & panel assy.
Page 4219 of 4500
<0029004c004a0011000300160017001d000300350048005000520059004c0051004a0003002c005100570048004a005500440057004c005200510003002600520051005700550052004f000300240051004700030033004400510048004f00030024005600
56005c[
Courtesy of TOYOTA MOTOR SALES, U.S.A., INC.
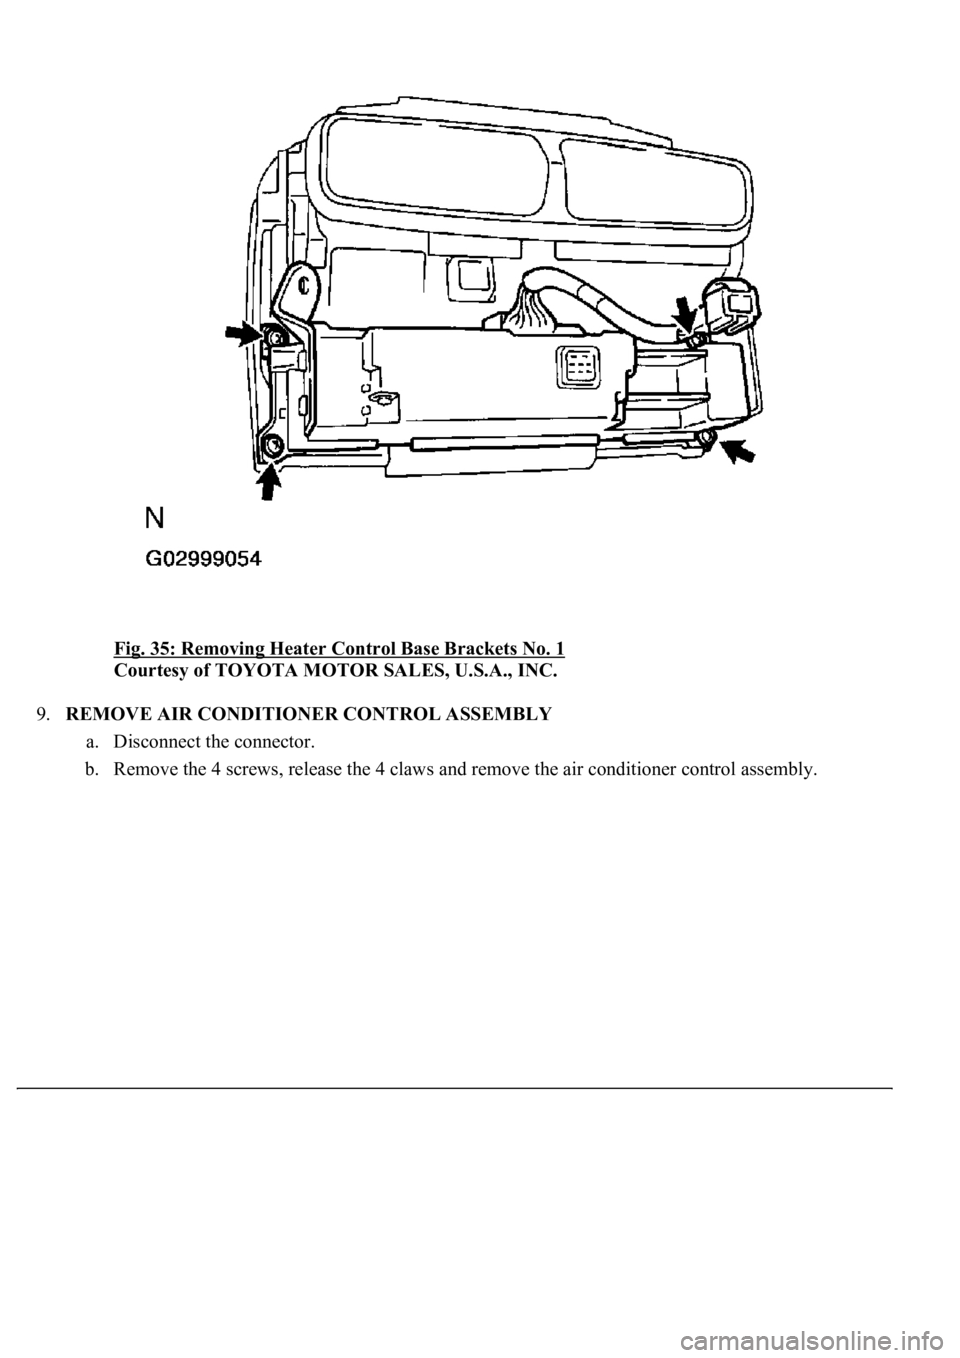
8.REMOVE HEATER CONTROL BASE BRACKET NO. 1
a. Remove the 4 screws and 2 heater control base brackets No. 1.
Page 4220 of 4500
Fig. 35: Removing Heater Control Base Brackets No. 1
Courtesy of TOYOTA MOTOR SALES, U.S.A., INC.
9.REMOVE AIR CONDITIONER CONTROL ASSEMBLY
a. Disconnect the connector.
b. Remove the 4 screws, release the 4 claws and remove the air conditioner control assembly.
Trending: park assist, change time, v belt tensioner pulley, manual transmission, brake sensor, charging, relay

