LEXUS LS430 2003 Factory Repair Manual
Manufacturer: LEXUS, Model Year: 2003,
Model line: LS430,
Model: LEXUS LS430 2003
Pages: 4500, PDF Size: 87.45 MB
LEXUS LS430 2003 Factory Repair Manual
LS430 2003
LEXUS
LEXUS
https://www.carmanualsonline.info/img/36/57050/w960_57050-0.png
LEXUS LS430 2003 Factory Repair Manual
Trending: change time, Ecm, parking brake, Compressor control valve, timing belt, heating, engine coolant
Page 4231 of 4500
Fig. 45: Separating Console Box Duct No. 1
Courtesy of TOYOTA MOTOR SALES, U.S.A., INC.
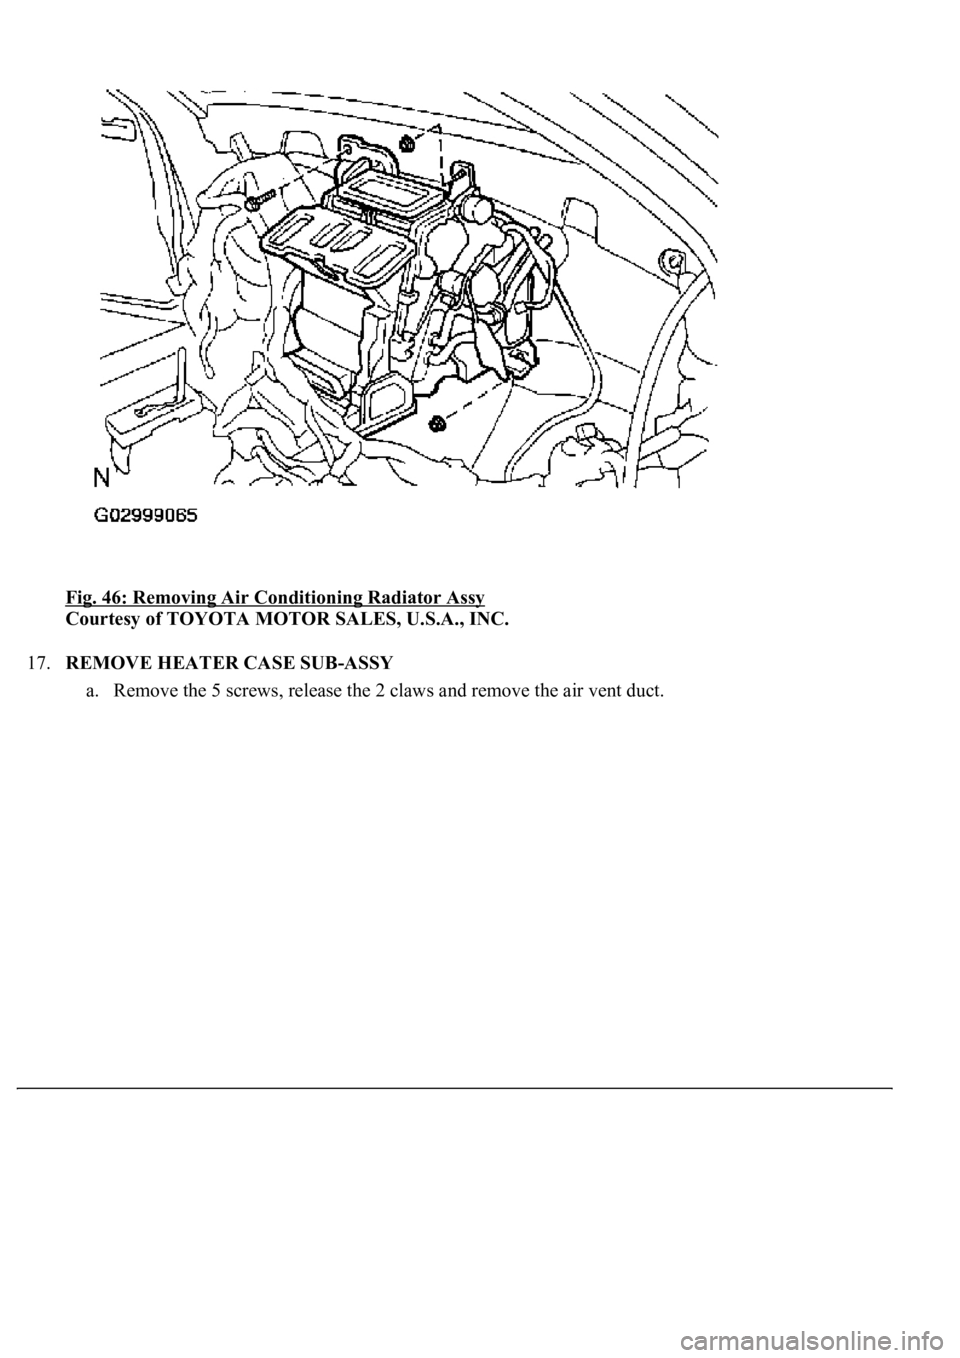
16.REMOVE AIR CONDITIONING RADIATOR ASSY
a. Disconnect the connectors and wire harness clamps.
b. Remove the 2 nuts, bolt and air conditioning radiator assy.
Page 4232 of 4500
Fig. 46: Removing Air Conditioning Radiator Assy
Courtesy of TOYOTA MOTOR SALES, U.S.A., INC.
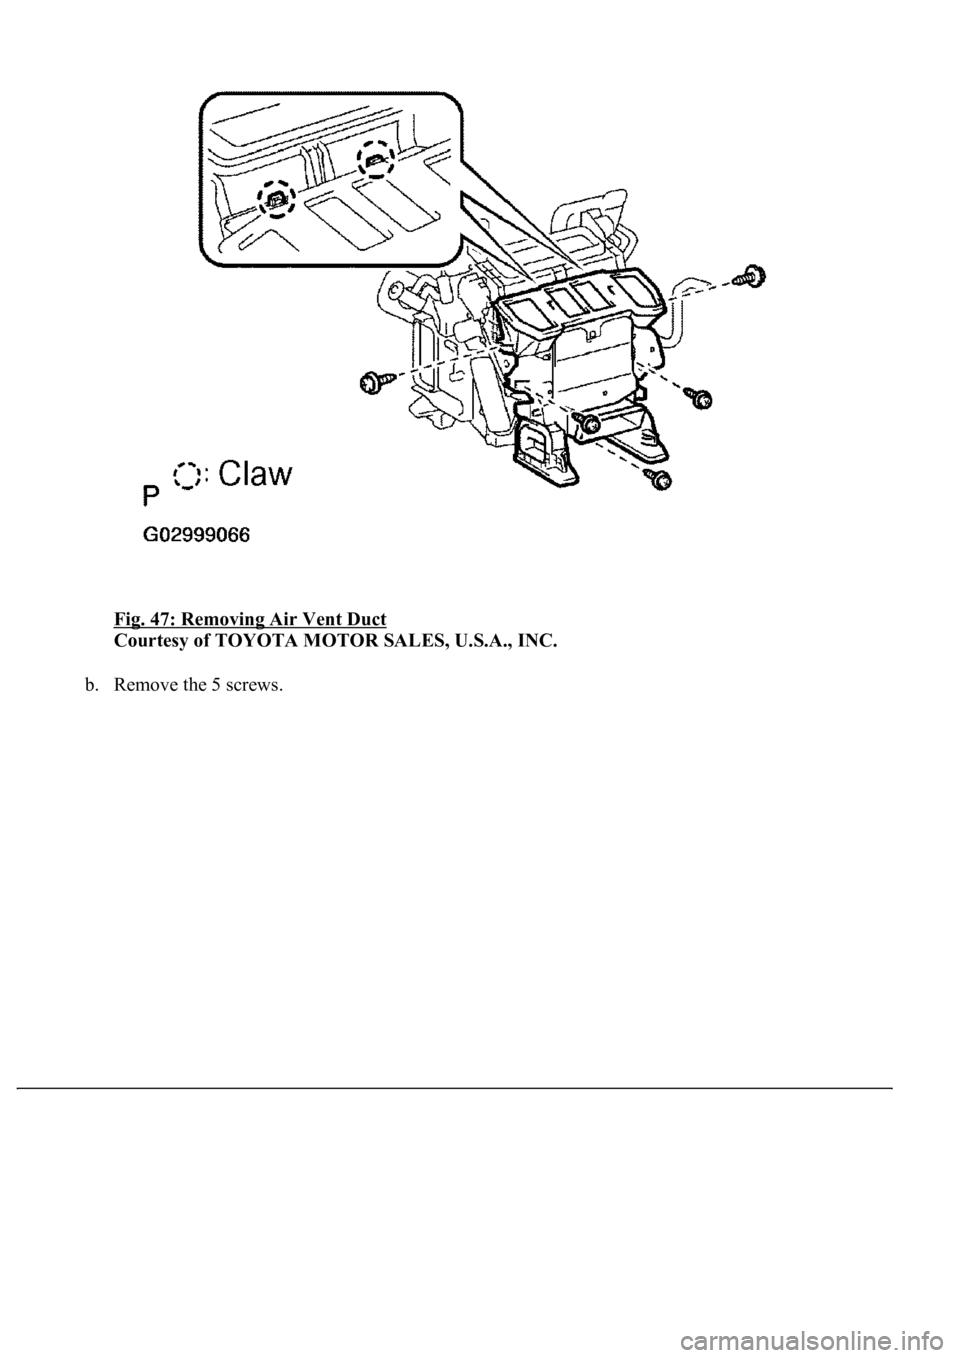
17.REMOVE HEATER CASE SUB-ASSY
a. Remove the 5 screws, release the 2 claws and remove the air vent duct.
Page 4233 of 4500
Fig. 47: Removing Air Vent Duct
Courtesy of TOYOTA MOTOR SALES, U.S.A., INC.
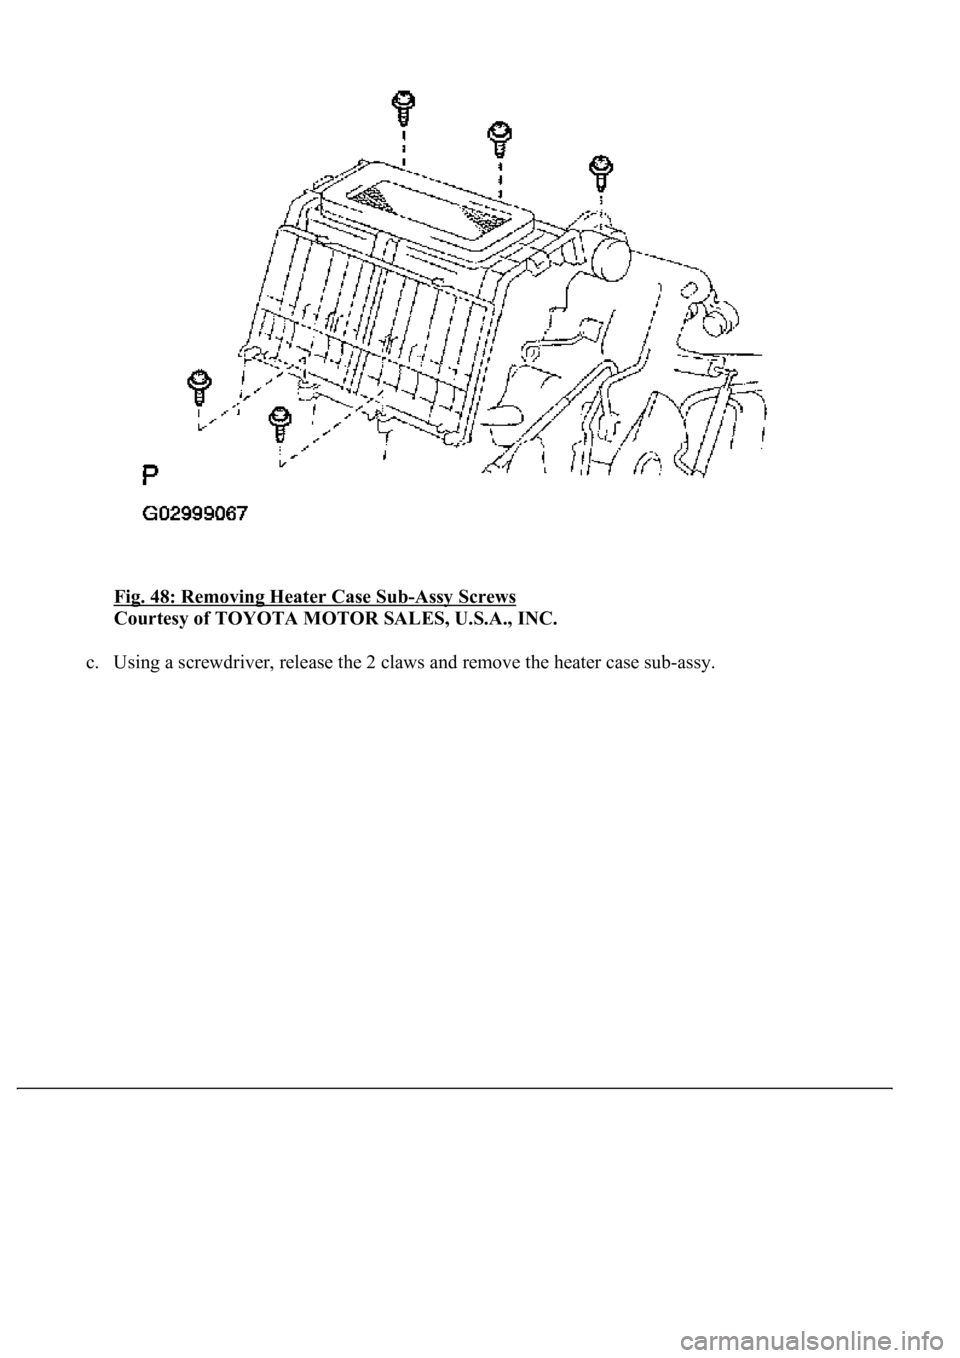
b. Remove the 5 screws.
Page 4234 of 4500
Fig. 48: Removing Heater Case Sub-Assy Screws
Courtesy of TOYOTA MOTOR SALES, U.S.A., INC.
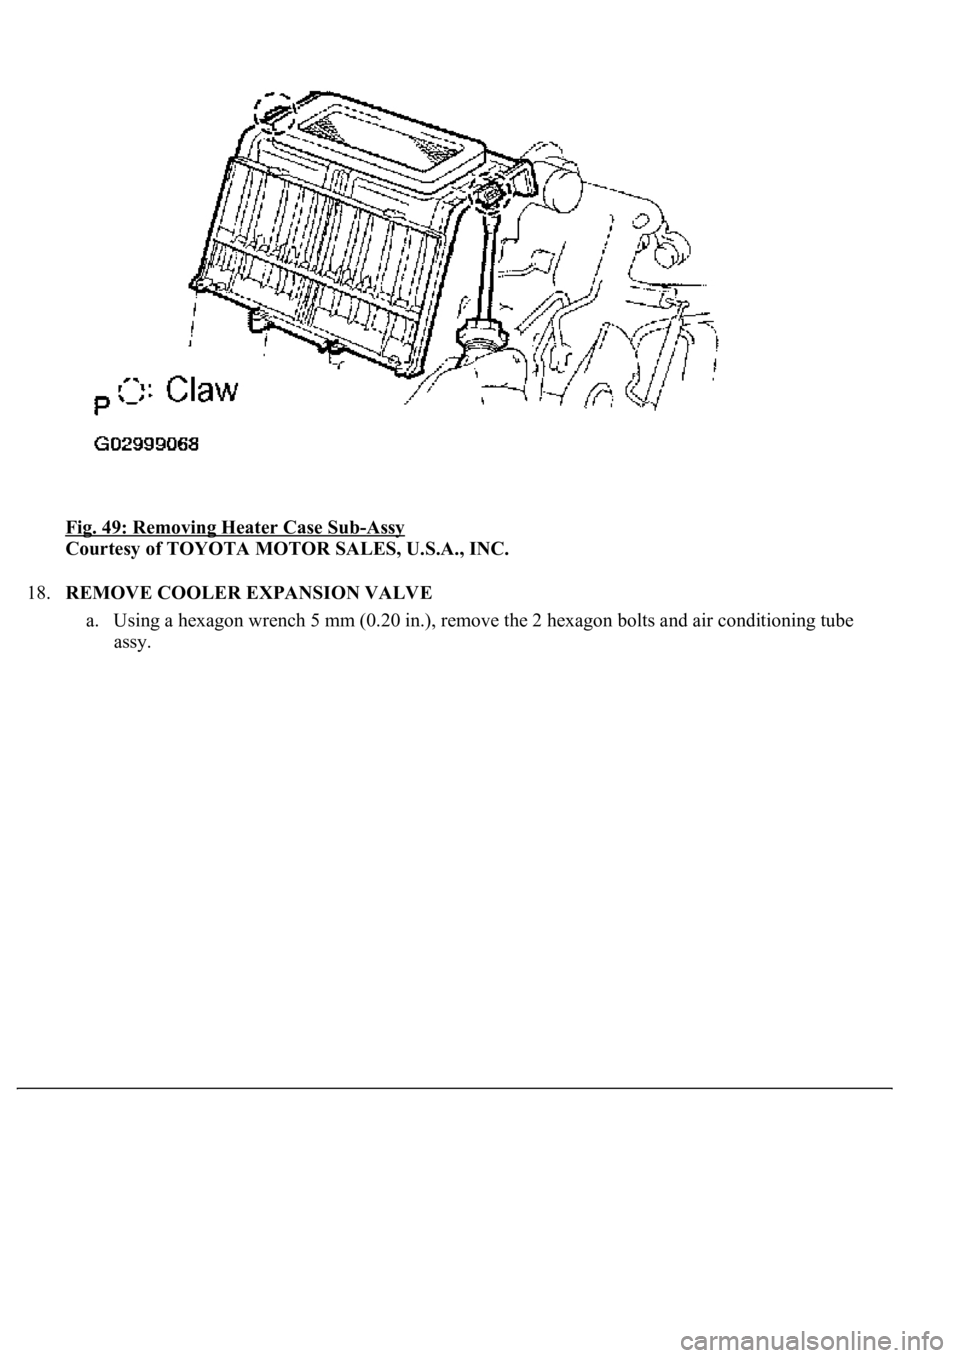
c. Usin
g a screwdriver, release the 2 claws and remove the heater case sub-assy.
Page 4235 of 4500
Fig. 49: Removing Heater Case Sub-Assy
Courtesy of TOYOTA MOTOR SALES, U.S.A., INC.
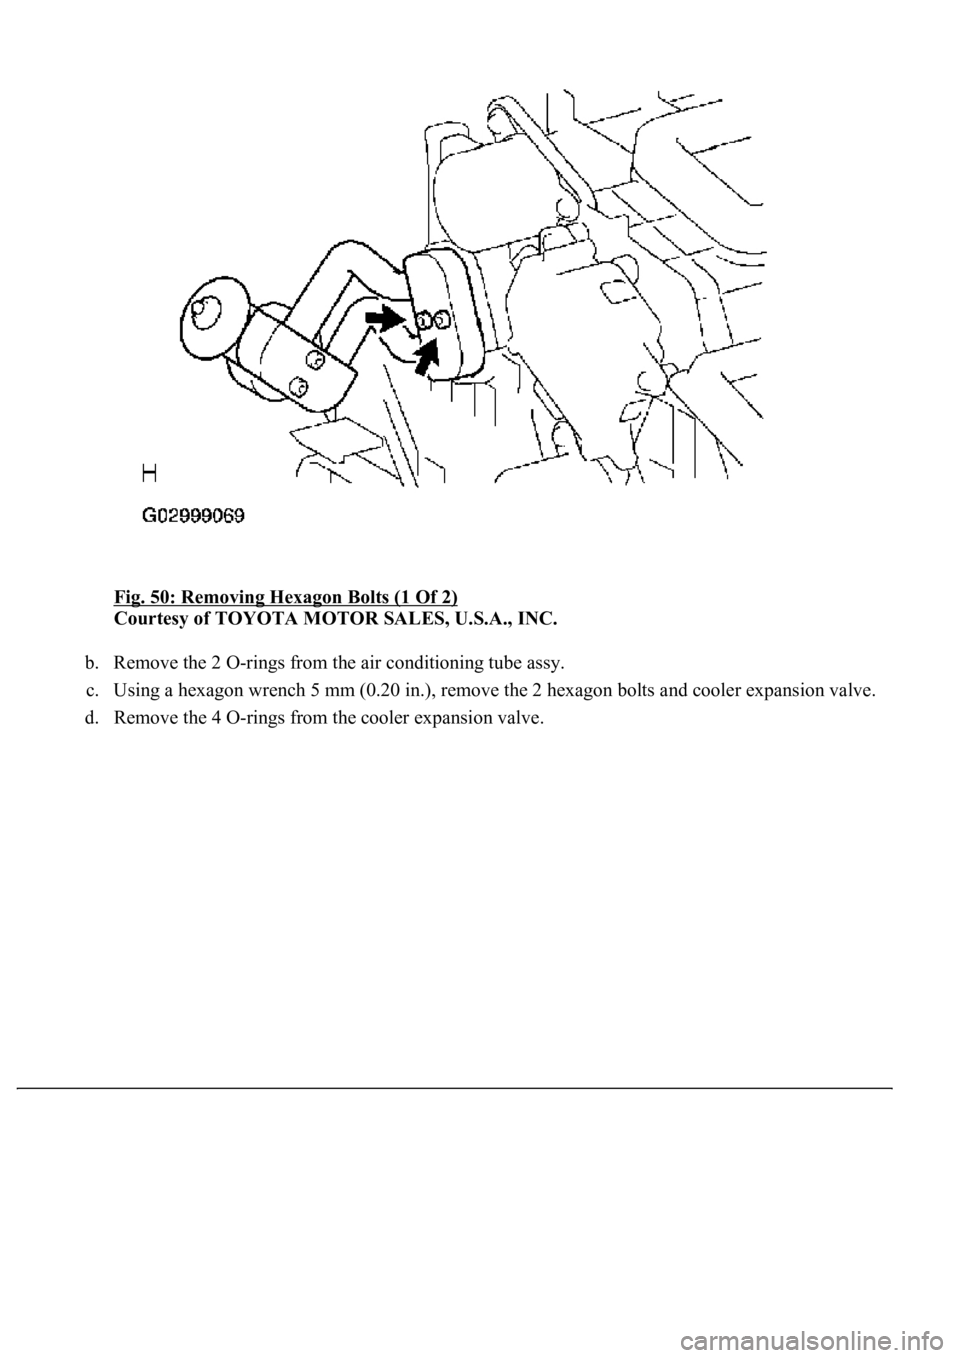
18.REMOVE COOLER EXPANSION VALVE
a. Using a hexagon wrench 5 mm (0.20 in.), remove the 2 hexagon bolts and air conditioning tube
assy.
Page 4236 of 4500
Fig. 50: Removing Hexagon Bolts (1 Of 2)
Courtesy of TOYOTA MOTOR SALES, U.S.A., INC.
b. Remove the 2 O-rings from the air conditioning tube assy.
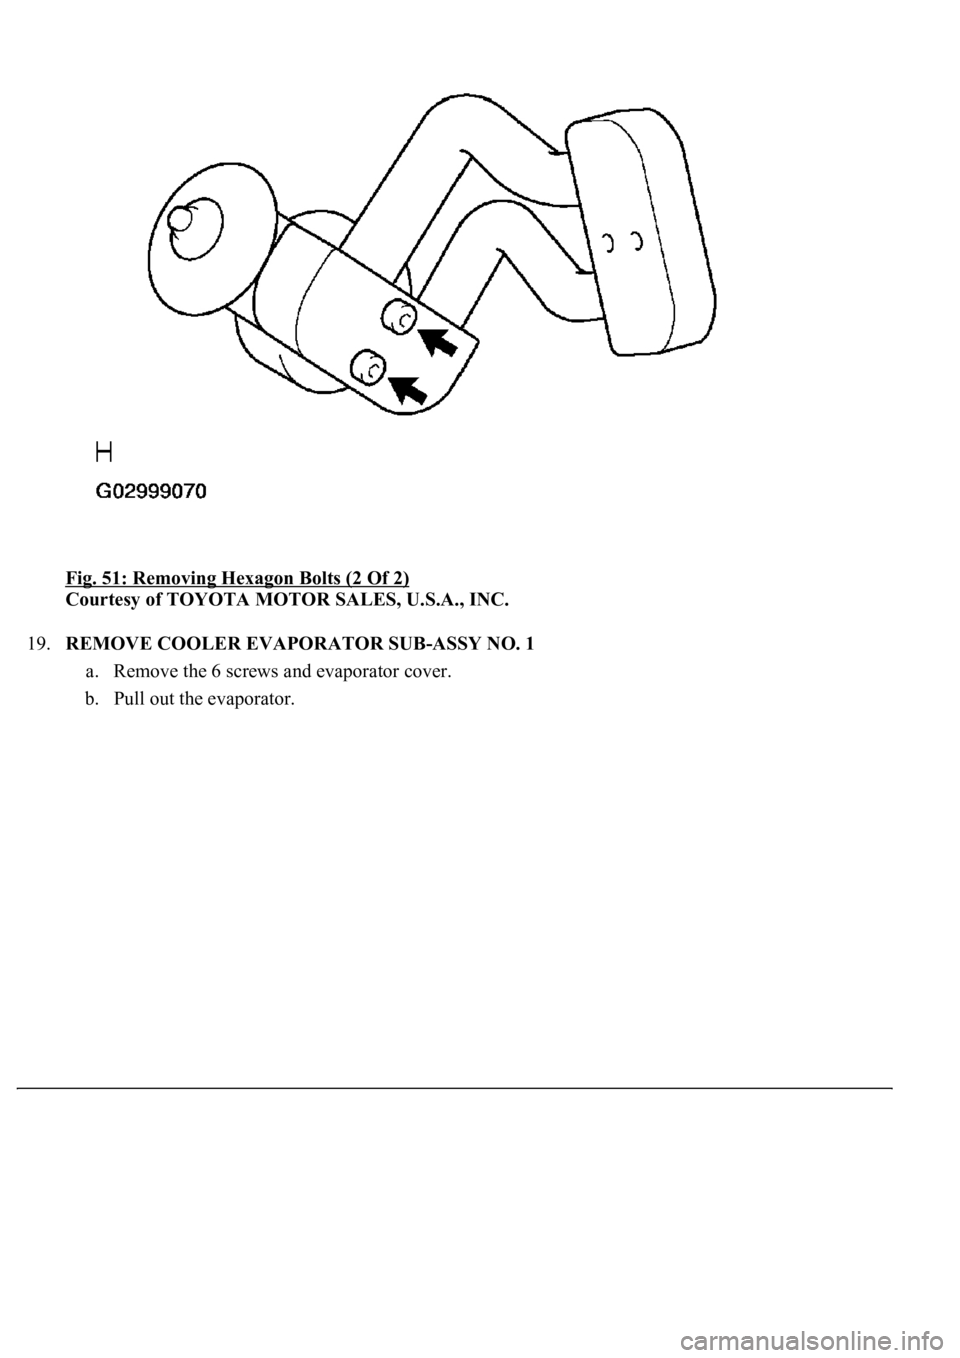
c. Using a hexagon wrench 5 mm (0.20 in.), remove the 2 hexagon bolts and cooler expansion valve.
d. Remove the 4 O-rin
gs from the cooler expansion valve.
Page 4237 of 4500
Fig. 51: Removing Hexagon Bolts (2 Of 2)
Courtesy of TOYOTA MOTOR SALES, U.S.A., INC.
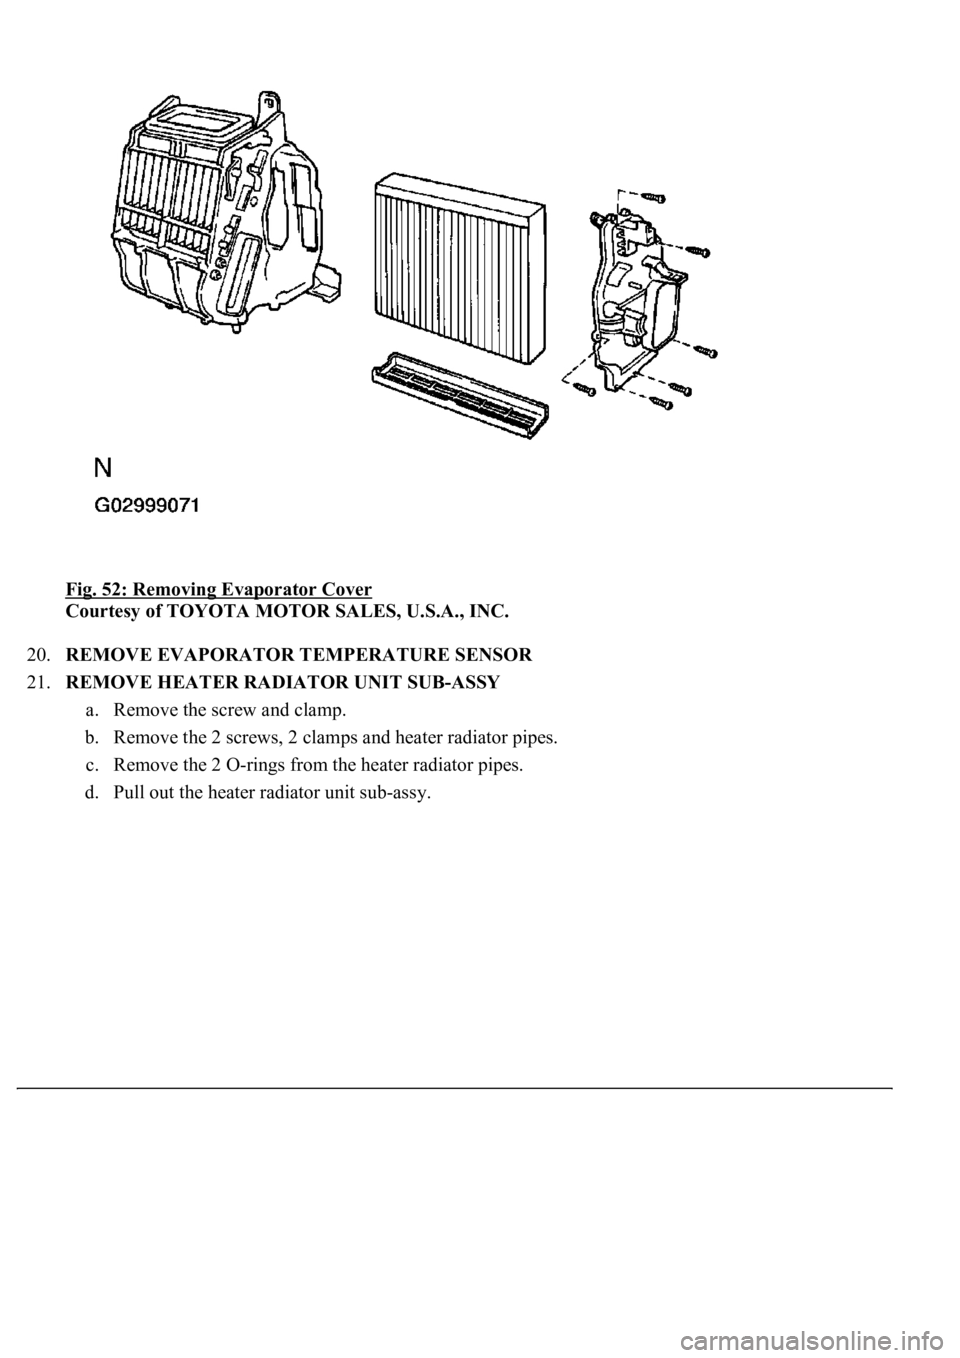
19.REMOVE COOLER EVAPORATOR SUB-ASSY NO. 1
a. Remove the 6 screws and evaporator cover.
b. Pull out the evaporator.
Page 4238 of 4500
Fig. 52: Removing Evaporator Cover
Courtesy of TOYOTA MOTOR SALES, U.S.A., INC.
20.REMOVE EVAPORATOR TEMPERATURE SENSOR
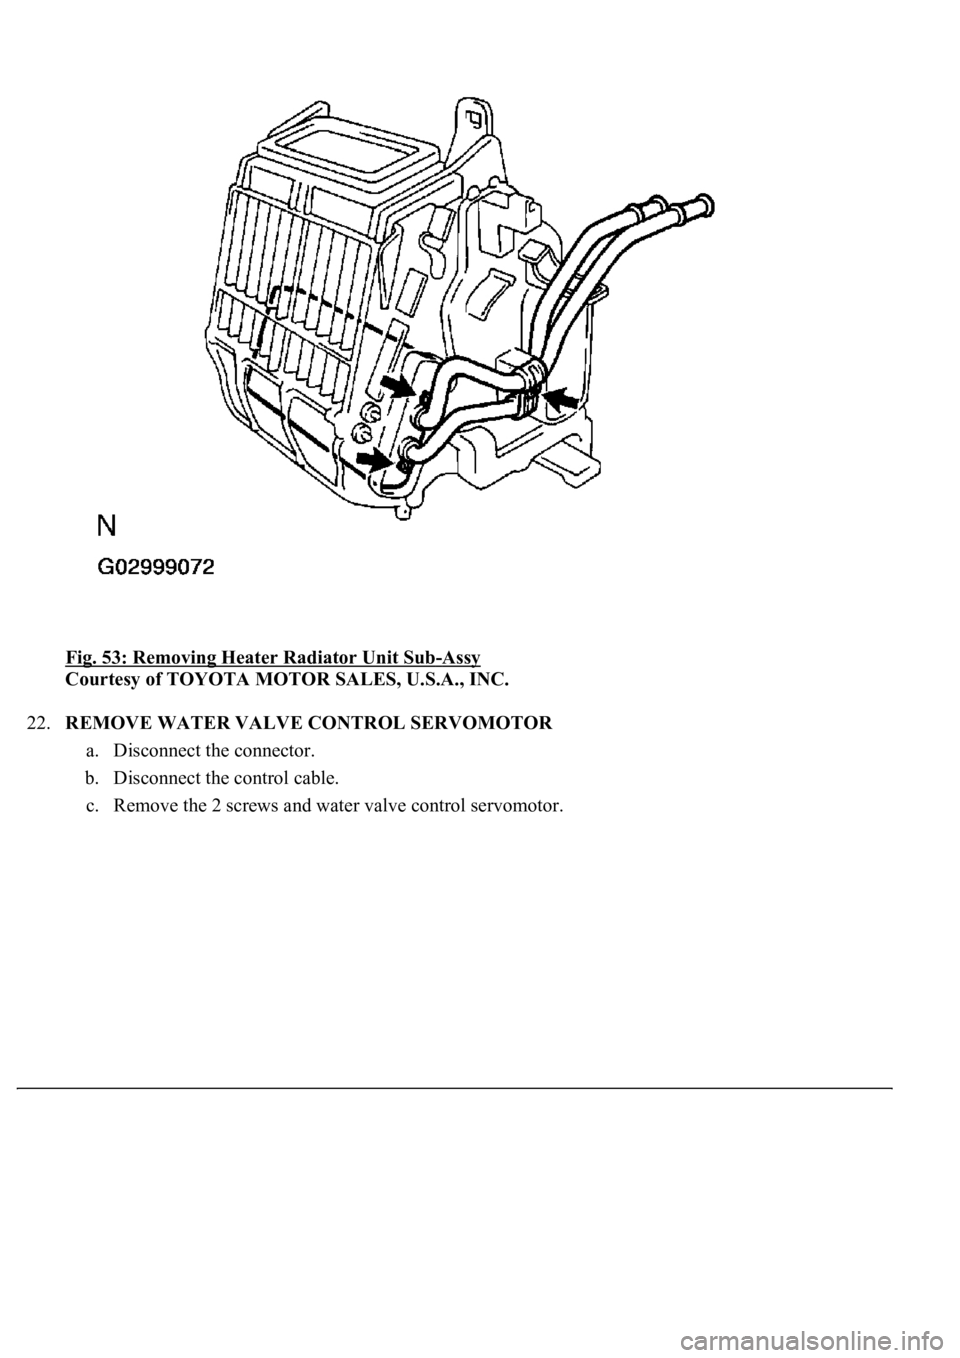
21.REMOVE HEATER RADIATOR UNIT SUB-ASSY
a. Remove the screw and clamp.
b. Remove the 2 screws, 2 clamps and heater radiator pipes.
c. Remove the 2 O-rings from the heater radiator pipes.
d. Pull out the heater radiator unit sub-assy.
Page 4239 of 4500
Fig. 53: Removing Heater Radiator Unit Sub-Assy
Courtesy of TOYOTA MOTOR SALES, U.S.A., INC.
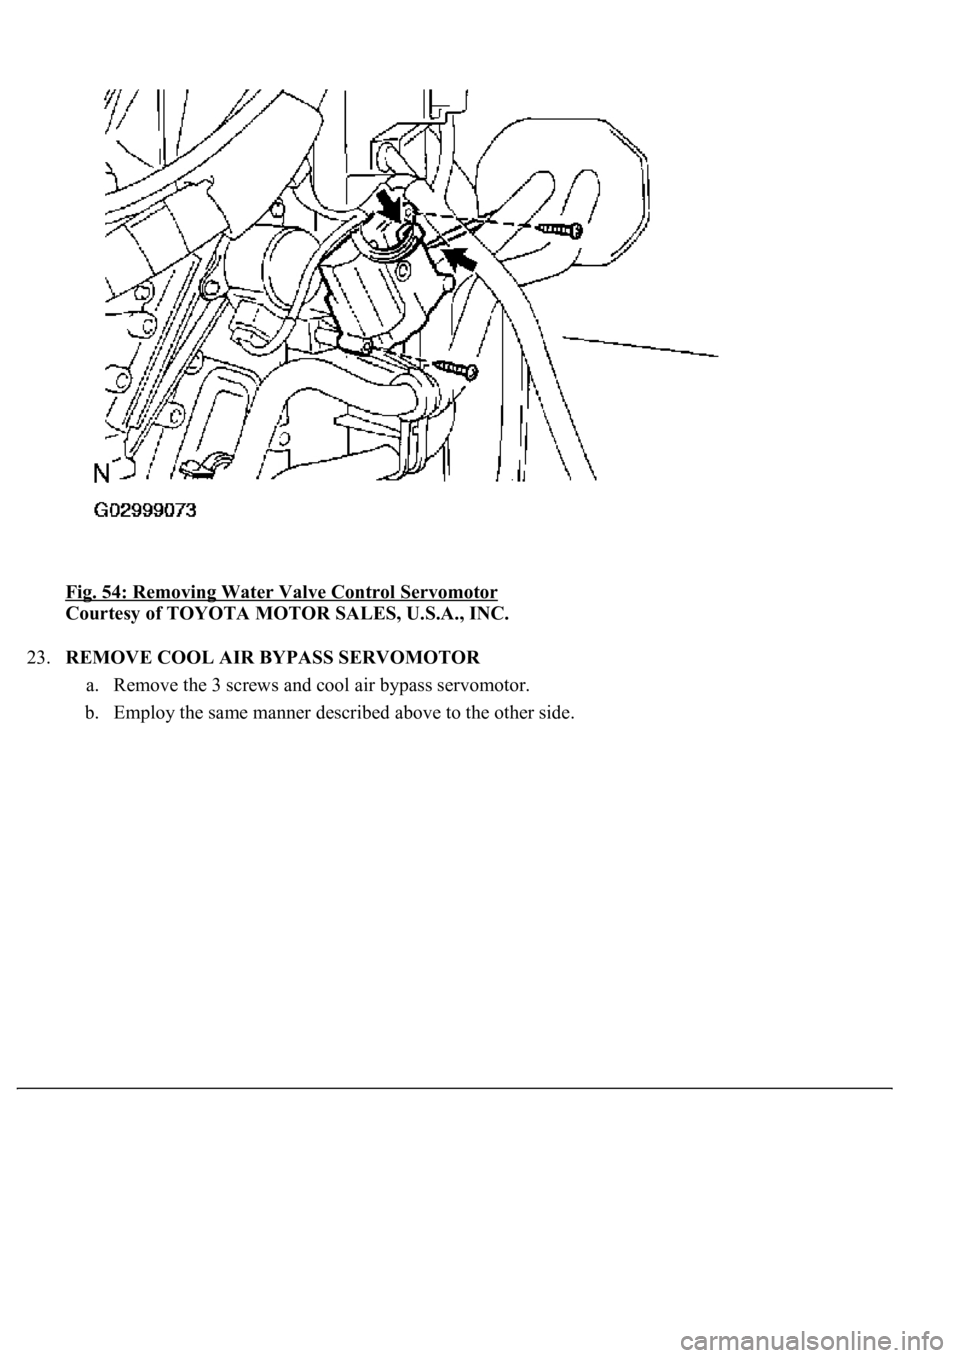
22.REMOVE WATER VALVE CONTROL SERVOMOTOR
a. Disconnect the connector.
b. Disconnect the control cable.
c. Remove the 2 screws and water valve control servomotor.
Page 4240 of 4500
Fig. 54: Removing Water Valve Control Servomotor
Courtesy of TOYOTA MOTOR SALES, U.S.A., INC.
23.REMOVE COOL AIR BYPASS SERVOMOTOR
a. Remove the 3 screws and cool air bypass servomotor.
b.Employ the same manner described above to the other side.
Trending: maintenance reset, Identifying condition, removing v belt tensioner, oil, Suspension Control actuator, TPMS, steering wheel adjustment

